If you want to invert but don’t know where to begin, you’ve come to the right place. You CAN do a headstand safely and without fear—even if you have no prior experience in gymnastics, dance or yoga. When I began my headstand practice about 14 months ago, I had absolutely NO background in any of these areas. I only started practicing inversions 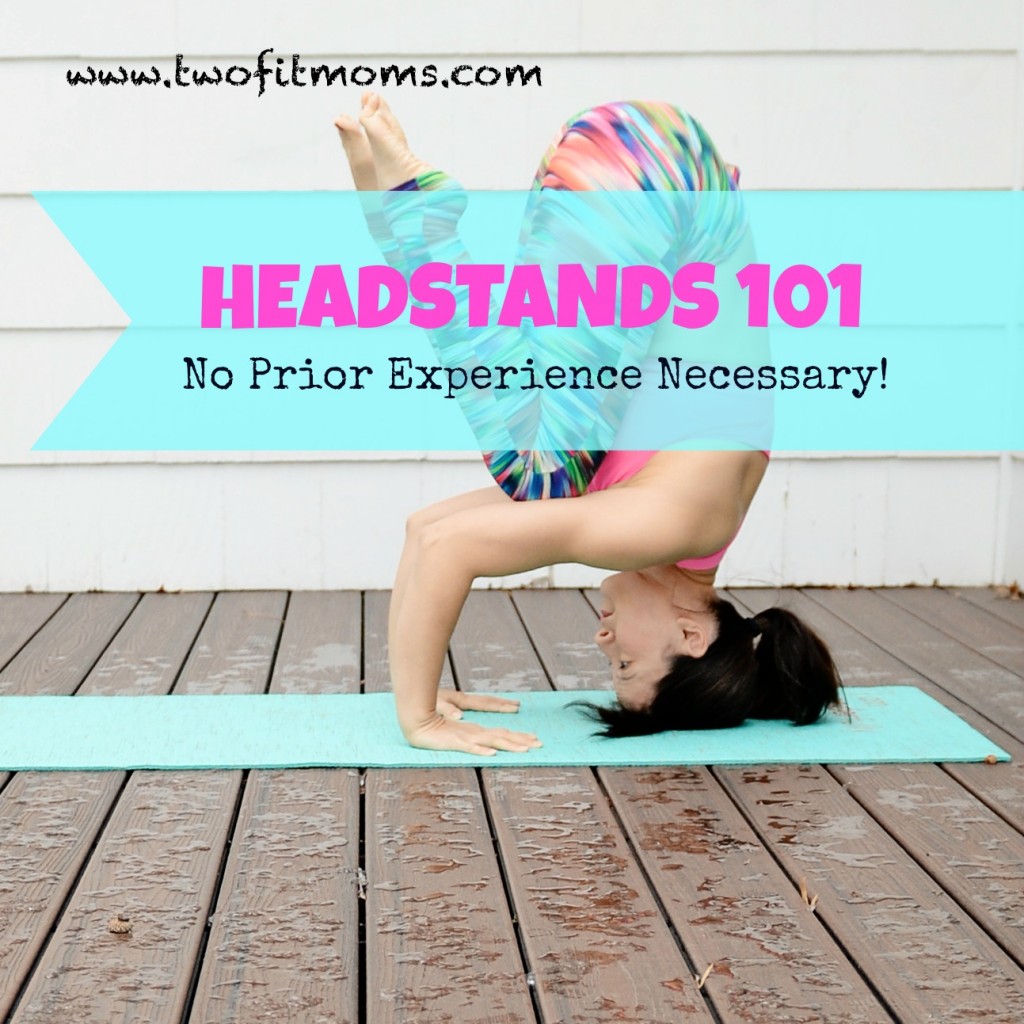 at the age of 36! It is never too late to learn a new hobby or skill. Just be patient, and remember to practice. It may not happen for you today, and that’s ok! There is no timetable for success. I will equip you with the tools and knowledge, and you will work at your own pace until you feel comfortable in the pose.
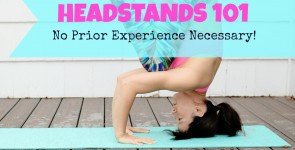
The inversion I want to introduce today is the tripod egg headstand. The “tripod” refers to the triangle shape produced by the placement of your hands and the top of your head. The “egg” refers to the tight oval tuck shape of your body in the final pose. Please approach this pose with a can-do attitude. You CAN, and you WILL.
Before attempting this pose, warm up your body with a bit of movement and stretching. Hamstring flexibility is very important in this pose.
Let’s get started:
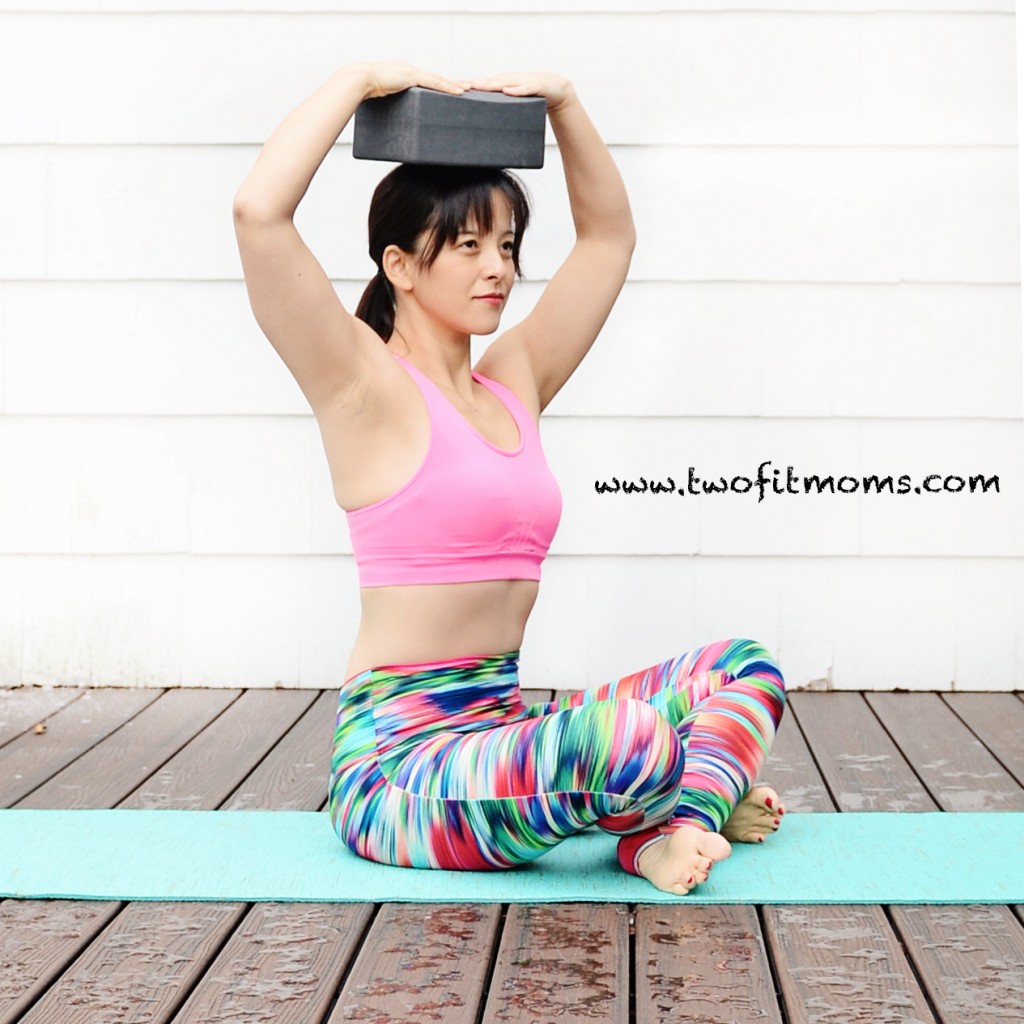
Step 1: Find a book (or yoga block), and place it on top of your head to find the balance point. Press the book firmly onto your head so that you can remember the feeling of that balance point. The balance point of the book will not necessarily be your balance point in a headstand, but it is a starting point, and you can adjust accordingly once you test that spot for comfort.
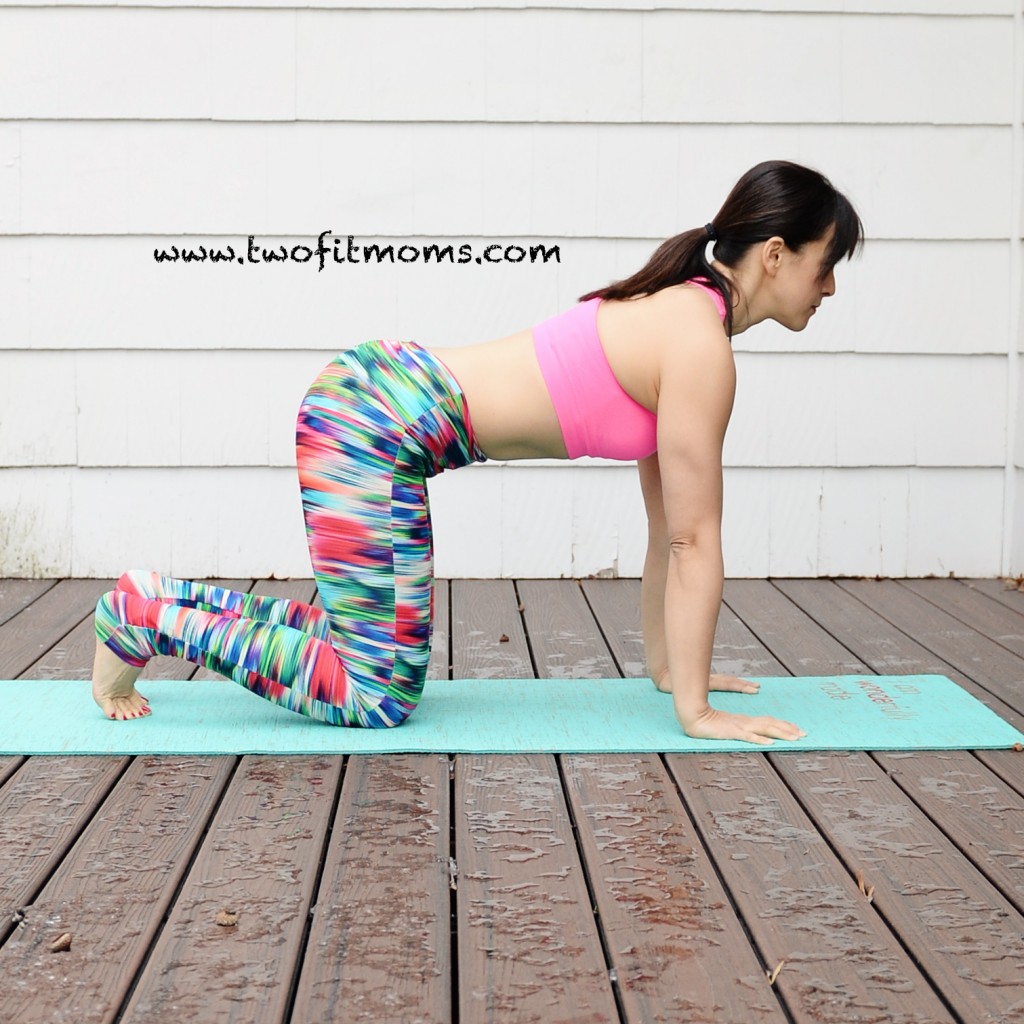
Step 2: Come onto your hands and knees into tabletop position. Check your form, and make sure that your shoulders are stacked directly above your wrists, and your hips are stacked above your knees.
Step 3: Bend your elbows to form 90-degree angles, and place the top of your head onto the floor in front of your hands. Make sure that you can see your fingertips at all times! Your hands should NOT be along side your ears. Your hands and head form a triangle rather than a straight line.
Step 4: Tuck your toes, and lift your knees from the floor. Walk your feet in towards your hands/head so that your hips are lifted high into the air. Assess how you feel. If your hamstrings are straining, stop and re-visit this pose after you feel 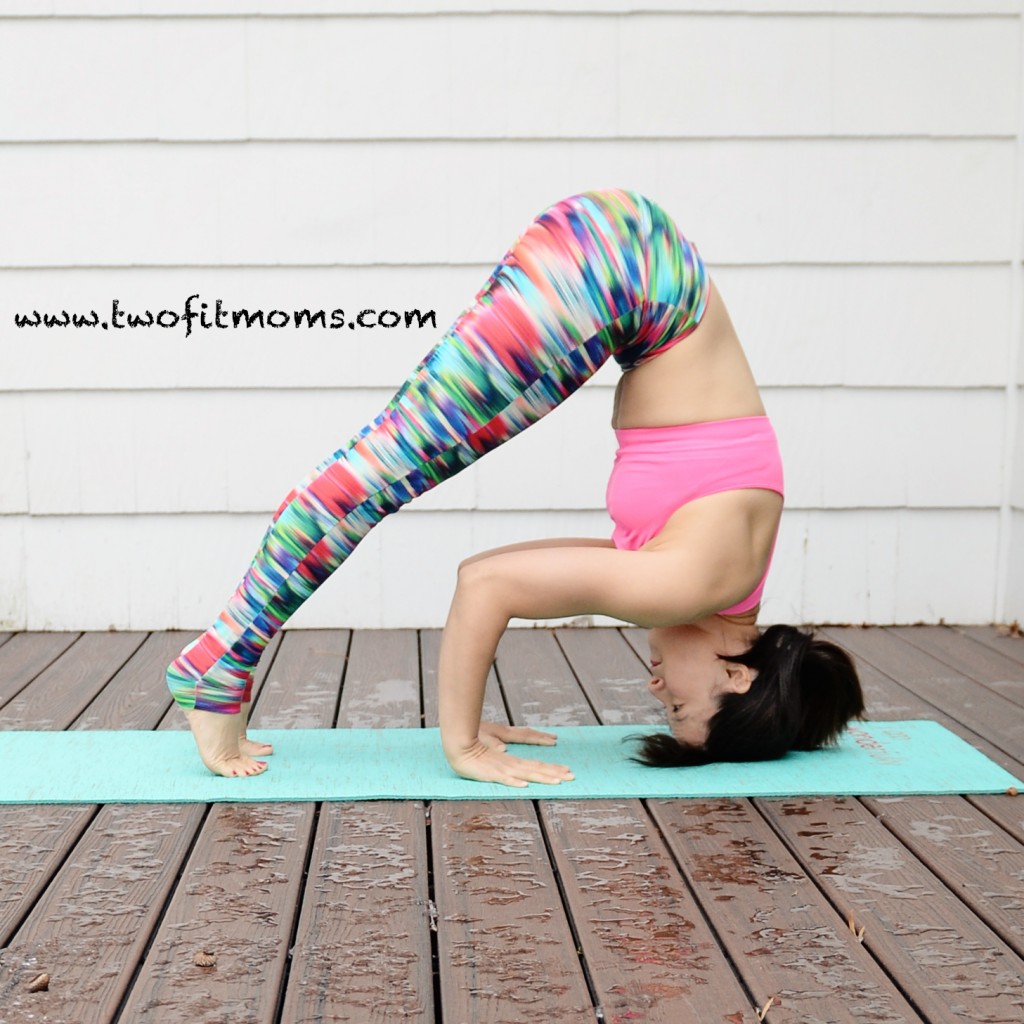 more limber. If your neck feels strained, focus on lengthening your neck so that your shoulders are drawn away from your ears. If the top of your head hurts, adjust your balance point a few inches. Personally, my own balance point in a headstand is not the same as the balance point with the book on my head. I usually balance a few inches closer to my forehead. This is an exploration. Find the right spot for your own body.
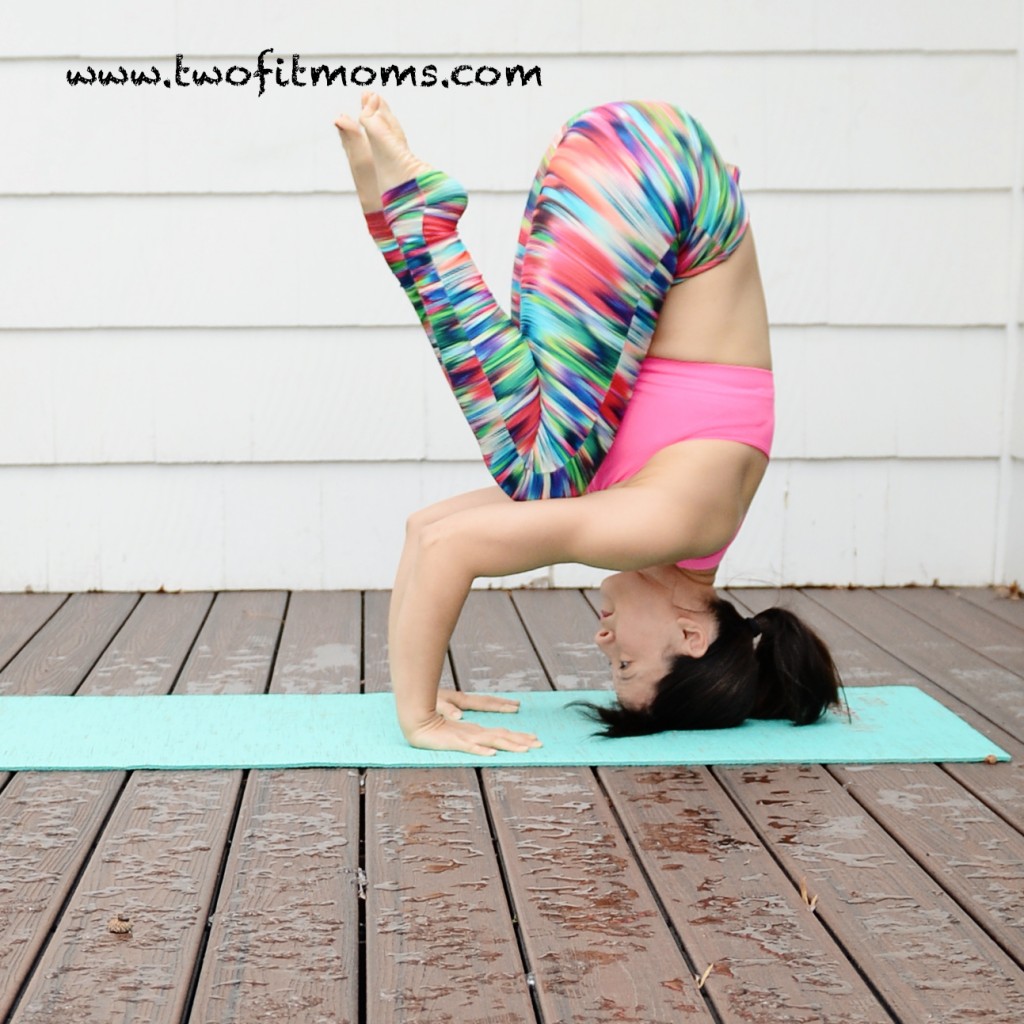
Step 5: Make sure that your elbows do not splay to the sides. Your elbows should continue to point in the SAME direction that you are facing! If you feel comfortable, lift one knee onto one tricep.

Step 6: If you still feel comfortable, slowly lift your other foot from the floor and place it on the back of your other tricep. Remember to keep your neck long, and breathe! Congratulations on your very first headstand.
One important point to mention—if you lose your balance, tuck your chin to your chest, round your back, and somersault out of the pose. You might even want to practice your forward rolling skills PRIOR to starting this tutorial. It’s no fun to fall, but if you somersault out of the pose, you technically aren’t falling. It is a controlled and safe way to exit the tripod egg headstand.
Wherever you may be in your yoga practice today, I assure you that it is perfect. Honor yourself and your body. Namaste.
Leave a Reply to Corinne Cancel reply