Tag: yoga

  • Kids Yoga Product Spotlight: Gaiam Kids Classic Balance Ball Chair

    Kids Yoga Product Spotlight: Gaiam Kids Classic Balance Ball Chair

    As you know, we love getting our kids involved in our yoga practices, and our kids are always eager to participate.  But, what they like even better is their own gear. So, you can imagine how excited they were to receive the Gaiam Kids Classic Balance Ball Chair!

    This chair was created to help kids maintain healthy posture, but it also happens to help strengthen the core. Additionally, studies show that because children have to constantly move their bodies to maintain their balance, they are able to focus more easily. The chair is chocked full of benefits, but most importantly it is fun.

    We found our kids were eager to try out the chairs, and they happened to work perfectly for homework time.  They also happened to be the seat of choice while watching television.  They even made their way outside!

    Who wouldn’t want to sit in one of these chairs?
    img_1681

    The chairs are recommended for ages 5-7 or children 42″-51″ tall.  They have a weight limit of 175 lbs.

    For more information or to purchase your very own Gaiam Classic Balance Ball Chair click here.


    This is a sponsored post, and Two Fit Moms is a brand ambassador for Gaiam. 


  • 5 Steps Towards Making Your Dream a Reality

    5 Steps Towards Making Your Dream a Reality

    Four years ago, we began sharing our love of yoga on Instagram by posting snapshots and picture tutorials of some of our favorite poses. With young kids at home, we rarely made it out to attend classes at yoga studios, but we loved to practice at home. We had a passion for connecting with others and sharing whatever we learned on our mats, so we posted photos often and helped build a virtual yoga community. We hoped to be able to reach a larger audience one day, and seeing that dream come true through our relationship with Gaiam has been a surreal experience.
    TFM-74_IG
    Last month, we realized another one of our dreams as we launched the Two Fit Moms apparel line with Gaiam.

    We want YOU to dream big too! So, in keeping with this theme, here are five things that we believe have helped us, and will help you, as you set on your path towards making your dreams a reality.

    Think Positively: You need to believe it in order to achieve it, so the first thing on your list should be to create a positive affirmation. If you don’t believe in you, no one else will.  Create your own personal mantra that you come back to time and again – especially when your faith in you falters. Consider starting and ending your day with this mantra. “I am strong, I am confident, I can achieve my dreams.”

    Fake It, Until You Make It: You need to walk the walk and talk the talk – even if you don’t believe it at first. If your goal is to run a marathon one day, start playing the part of an athlete! Even if you are out of shape, you can start eating well, drinking water instead of sweetened beverages and committing to a daily walk. You need to believe in your dream, in your ability to achieve it, and you may need to adjust your mind and your actions in order to realize it. Live your mantra.

    Be Resilient: Recognize that your dreams may change, they may take longer to achieve, they may require more work, or a partner or more resources. Being open to change and able to adapt to it will be important. Things don’t always work out the way we would like, so being able to land on your feet is key.

    Ask for Help: Much of achieving a dream rests on you, but don’t be foolish. Ask for help. Look for guidance from others who may have insight or experience that would be helpful and valuable to you.

    Return the Favor: Don’t take your opportunities for granted. Remember where you came from, be modest, be thankful and give back. Be a source of inspiration, and share your experience so that you can encourage others to start on their path to achieving their own dreams.

  • Working for the Dream:  Hanumanasana

    Working for the Dream: Hanumanasana

    Even though you know that yoga is never about reaching a final destination, it’s natural to have goals for your practice.  The trick is to be able to set yoga goals without becoming attached to an expectation for any particular outcome.  Go ahead and practice those inversions, but don’t get caught up in negative self-talk if you don’t achieve those goals according to some pre-set schedule.  Go ahead and practice each day with the goal of increasing your flexibility, but don’t get frustrated by the length of time that it’s all taking to see any progress.  Set your intentions, but never forget to enjoy the journey!

    Monkey Pose (Hanumanasa), where the legs are split from forward to back, is a challenging posture that falls into the category of “Dream Poses” for many yoga practitioners. Not only does this pose require flexibility in the hamstrings (front leg), but it also requires flexibility in the hip flexors (back leg). Whether or not you ever find yourself in the full expression of Hanumanasana, you can still enjoy the journey with these very effective, preparatory poses. Before beginning this sequence, be sure to warm up your body with multiple rounds of sun salutations.

    Head-to-Knee Seated Forward Bend

    JanuSirsasanaTake a seat on your mat with your legs extended straight in front of you. Bend your left knee and bring the sole of your left foot to the inside of your right thigh. Sit up tall, and flex your right foot to engage the hamstrings. Rotate your torso slightly to the right to align your belly button with the center of your right thigh. If your hamstrings are quite tight, sitting up tall might be enough of a stretch for you. Stay here and take deep breaths. For a deeper stretch, fold over your extended right leg, being mindful to find extension in the spine and avoid rounding the upper back. Hold this pose for 5-10 breaths before releasing the stretch.

    Seated Forward Bend

    ForwardFold

    A seated forward fold is an intense stretch that simultaneously stretches the hamstrings on both legs. Sit on your mat with your legs extended straight in front of you. Flex both feet to energize the legs and to engage the hamstrings. Sweep your arms up over your head, find length in the spine, and hinge forward from the hips as you reach for your feet. Rather than focusing on bringing the forehead to the shins, focus on pulling your chest forward to lengthen the spine. Beginners can use a strap around the soles of the feet and hold the strap with both hands. Hold this pose for 5-10 breaths.

    Low Lunge

    LowLunge copy

    Low lunge is a great front-body stretch that targets the hip flexors. Begin in Downward Facing Dog and step your right foot in between your hands. Lower your back knee to the ground, and untuck the toes. Bring both hands to the top of your right thigh, and begin to bend deeply into the front leg. Be sure to keep the torso upright to get the most effective stretch in the hip flexors. Feel free to keep your hands on your front thigh for support, or extend your arms and lift your chest toward the sky for a backbend. Take 5 deep breaths before releasing the stretch.

    Twisted Monkey

    TwistedMonkey copy

    From Downward Facing Dog, step the right foot to the outside of the right hand, lower the back knee to the ground, and lift the back foot up so that the toes point up toward the sky. Sweep your right arm back, and grab the outside edge of the lifted foot. Begin to pull the foot in toward the body to stretch the quadriceps. If you are unable to reach your foot with your hand, feel free to use a strap around your foot to make the stretch accessible. Next, begin to roll onto the outside edge of the front foot and allow the right knee to fall to the side for a hip stretch. Hold this pose for 5 full breaths before slowly releasing your back foot and rolling back down onto the sole of your front foot.

    Pigeon (upright)

    Pigeon

    Pigeon pose is an effective hip opener that not only stretches the outer hip of the front leg, but it also stretches the hip flexors with the extension of the back leg. To come into the pose, begin on hands and knees in Tabletop position. Bring your right knee onto the mat behind your right wrist. Tuck the toes on your left foot, and begin to extend the left leg straight back. Sink the pelvis toward the floor. If you find that you are rolling to the right, place a block under right hip. Rather than folding forward over your bent leg, walk your fingertips back and practice sitting upright to effectively stretch the hip flexors. Hold this pose for 10 breaths before moving on to the next pose.

    Half Split

    HalfSplit

    From Downward Facing Dog, step your right foot in between your hands. Lower your back knee to the ground, and rise onto your fingertips. Draw both hips back in space while straightening the right leg, until the left hip is aligned directly over the left knee. Flex the right foot to energize throughout the length of the extended leg. Begin to walk the fingertips forward. Fold over the straightened leg, while maintaining length in the spine. Focus on pulling the chest forward, rather than bringing your forehead to your shin. Hold this pose for 5-10 deep breaths before moving on.

    Split with blocks

    SplitBlocks

    Begin in a half split, and slowly extend your back leg by pressing into the floor with your hands while scooting back on your knee a few inches at a time. Use a block (or two) under the hip of the front leg to support the body.  The extra height from the block effectively lifts the floor by several inches and allows you to practice the full expression of the pose at any stage of flexibility.  Sit up tall to get the most effective stretch in the hip flexors, and keep the toes of your back foot tucked to help keep both hips equidistant to the top of the mat. Breathe deeply, and hold this posture for 5-10 breaths. If your body feels ready, and you happen to be using two blocks under your front hip, try removing one of the blocks and holding the posture for another 5-10 breaths.


    Split (full expression of the pose)

    Split

    If and when your body is ready, you will find that the full expression of Monkey Pose is a natural extension of practicing with the support of blocks. Remove the block from under the right hip. Keep your legs active by hugging the inner thighs in toward each other and flexing your right foot so that the toes point upward. You have the option of keeping the toes of your back foot tucked to help keep your hips aligned properly. Leave your fingertips on the floor for support or for a deeper variation, bring your palms together in front of your heart or extend your arms toward the sky. Hold this pose for 5 full breaths before releasing the stretch and repeating the entire sequence on the opposite side of your body.

  • Dream Big in March!

    Dream Big in March!

    Hello to our online community!

    Tonight, we kick off our March yoga challenge on Instagram by posting instructions for the first pose.  The theme this month is “Dream Big”.  We are gearing up for the launch of our new clothing line with Gaiam in April, and honestly, it wouldn’t be happening if we didn’t start with a dream.  DreamBigWithTFM

    We want you to DREAM BIG, too, and develop a yoga practice that you love.  The goal of the challenge is to commit to your practice and to participate in some way, every day.  Can’t do all of the poses shown?  No problem.  Show us what you CAN do.  Modify. Get creative.  Have fun, and realize that you can be your own source of inspiration!

    For complete details about this challenge, follow @twofitmoms on Instagram, and find the full list of instructions for the challenge.

  • 4 Ways to Challenge & Enhance Your Practice with Yoga Blocks

    4 Ways to Challenge & Enhance Your Practice with Yoga Blocks

    If you think yoga blocks are just for beginners that can’t touch their toes or for injured yoga practitioners that can’t sit between their heels in hero pose, think again. There are plenty of ways to get creative and use your blocks to deepen your practice in a challenging, fun way. Here are four suggestions:

    Twist & Tap
    Fire up your core in boat pose by holding a yoga block. Slowly twist from the lower belly to the right, tap the block on the ground to the right, and untwist your torso, coming back to center. Begin to twist to the left, tap the block on the ground to the left, and come back to center. Consider that to be one repetition. Keep your core engaged, your chest lifted, and avoid collapsing into your belly and rounding the back. The shins can remain parallel to the ground throughout the exercise, or you can extend your legs straight for a more intense variation. Work up to 12-15 repetitions.TwistAndTap

    Chest & Tricep Opener
    Place two yoga blocks on the ground, shoulder width apart. Kneel on the mat, and rest your elbows and triceps on the blocks. Keep your hips stacked over the knees, and begin to sink your chest toward the ground as you bring your hands together in prayer over your head. This pose is very much like puppy pose with the added benefit of a deep tricep stretch. Hold this pose for 5 to 10 breaths, sinking your chest lower with each breath.ChestTricepOpener

    Squeeze a Block in Inversions
    If your eyes glaze over when you hear your yoga teacher talking about internally rotating the thighs and hips while performing inversions, no need to worry. This exercise will solidify the concept in your mind, and you won’t forget anytime soon. By squeezing a yoga block between your feet as you slowly lift into an inversion, not only will you train your core muscles, but you will also automatically create a slight internal rotation in your legs that will help you stabilize and build strength. Go ahead and try this exercise with any inversion of your choice.HeadstandCollage

    Relaxing, Deep Backbend
    In my own personal practice, I’ve found this to be the single most effective stretch for the upper back and chest. If you are looking to deepen your backbend practice, it’s so important to stretch in various ways to help create an even backbend through your lower, middle and upper back. Place a block underneath your shoulder blades as you lie on the ground. If you tend to be very tight across the chest and back, start out by placing the block on shortest height. Breathe for 5-10 breaths before turning the block so that it’s resting in its next tallest orientation. Again, breathe for 5-10 breaths, and allow the chest and back to open up bit by bit. Finally, if your flexibility allows, turn the block to its highest orientation, and lie across the block for another 5-10 breaths. Try placing a second block under your head like a pillow for more support.UpperBackOpener

  • Small Space Yoga

    Small Space Yoga

    When you’re confined to a small space, you don’t have to give up on your yoga practice! These eight standing poses can be your go-to postures when space is limited, and there’s no yoga mat in sight.

    Most of you know that I’ve spent a lot of time in the children’s hospital this past year. I never brought my yoga mat into the hospital, but I always managed to stand up and stretch regularly. (You can get really stiff sitting/standing/hovering at a bedside.) I’m a major germaphobe, so I never wanted my hands to touch the dirty hospital floor. Instead of touching the floor, I managed to get creative and effectively stretch each body part in a standing position with very limited space. It’s this experience of no-mat yoga that inspired these poses below. This is a set of poses that can be done while on vacation in a tiny hotel room or even in the airport. I hope you give them a try and add them to your regular practice. Enjoy!

    Dangle Pose
    Separate your feet hip-width’s distance apart, bend your knees, and bring your chest to your thighs. Fold forward, grab opposite elbows, and settle into this pose for two to three minutes. While this pose may resemble Uttanasana, which is an active stretch of the hamstrings, the goal in this yin pose is to dangle the upper body for a longer period of time to help release the lower back.  Remember to relax your head and neck, unclench your jaw, and release any tension that you might be holding in your face.Dangle

    Garland Pose (Malasana)
    From Dangle pose, bend your knees and lower your hips into Garland Pose.  Rotate your feet outwards by 45 degrees, and bring the palms of your hands together.  Press your inner thighs back in space with your triceps as you keep your chest lifted.  Hold this pose for five breaths before slowing rising to a standing position.Garland

    Flying Pigeon Prep (Eka Pada Galavasana Prep)
    Cross your right ankle over your left thigh, and flex your right foot to activate the your leg muscles and protect the knee. Begin to sink your hips down into a squat, and extend your arms in front of you to help you balance.  You should feel a stretch in your outer right hip as you sink further into the pose.  Hold this hip-opening pose for five breaths before rising back up and repeating on the opposite leg.FlyingPigeonPrep

    Lord of the Dance Pose (Natarajasana)
    Stretch your entire front body while strengthening your legs and ankles in this standing balance pose. Focus on a stationary point a few feet in front of you to help find your balance, and kick your foot firmly into your hand to create the tension required to lift the leg higher and hold this posture. Maintain your balance for five breaths, and then practice on the opposite side.LordofDance

    Standing Backbend (Anuvittasana)
    Choose either of these standing backbends to stretch the chest and reverse the hunching that many of us do throughout the day. In the supported version of this pose, the hands are on the lower back, and in the deeper variation, the hands are actively reaching overhead.  Remember to keep your biceps alongside your ears in the deeper version of this pose to avoid neck strain. Both versions of the backbend will stretch the chest and lengthen the spine to relieve tension.
    StandingBackbend

    Revolved Chair Pose (Parivrtta Utkatasana)
    Yoga twists are thought to massage the internal organs, tone the belly and flush toxins from the body. With the possibility of such amazing benefits, we had to include one strengthening twist in the sequence. Press your palms firmly together to gain leverage for a deeper twist. Lift and lengthen your spine with each inhalation and twist deeper with each exhalation. Both knees should be aligned with one another, and your weight should be over your heels, rather than the balls of your feet. Hold this pose for five breaths before twisting to the opposite side.RevolvedChair

    Eagle Pose (Garudasana)
    This standing balance pose will stretch the upper back and shoulders while challenging your balance and stretching the hips, thighs and ankles. If you have a knee injury or would like a modification, just cross your thighs without adding the element of hooking the raised foot behind the standing-leg calf.  Quick tip:  Remember that your arms and legs are folded in opposite directions!  If your right leg is crossed over your left leg, your left arm is crossed over your right arm.  Hold this pose for five breaths and then practice balancing on the other leg.Eagle

    Wide-Legged Forward Bend (Prasarita Padottanasana C)
    In this variation of a wide-legged forward fold, not only will you stretch your hamstrings, but you will also get a great stretch across your shoulders and chest. Keep your feet parallel as you hinge from the hips, and allow your clasped hands to fall forward for the deepest shoulder and chest stretch. Hold for five breaths before releasing the pose.Prasarita

  • Yoga Challenge with Shape Magazine

    Yoga Challenge with Shape Magazine

    For the month of August, we are teaming up with Shape Magazine to bring you a daily yoga challenge that is accessible to all levels.  We encourage you to join us and build strength and flexibility. By practicing a single pose each day, you will develop the discipline to hit your mat on a regular basis.YogaChallenge

    Each week, we will be presenting a different theme:

    Week 1:  Basics

    Week 2:  Core

    Week 3:  Flexibility

    Week 4:  Strength

    At the end of each week, you will have six poses that can be pulled together for a short flow that you can practice at home.  For full details, check out the Shape website.  To connect with others, who are also participating in the challenge, post your daily pose on Instagram and use the hashtag #PostYourPose.

    If you are looking for other opportunities to flow with us, download our Yoga Rising classes from Gaiam.  This month, the classes are offered at a special discounted rate!
    Yoga_Challenge_Calendar


  • The Key to Getting Kids Involved in Yoga (or any activity)!

    The Key to Getting Kids Involved in Yoga (or any activity)!

    If you are a parent of young children, you may have noticed that kids are naturally inclined to want to try any activity that you are participating in — whether it be an every day household task or your exercise routine.

    KidsyogabannerTheir attention span varies, however, and, oftentimes, it’s very short.  So, what’s the best way to keep them engaged in an activity?  Give them ownership — their own part/role in the process, their own gear/tools.  If you make them feel like they own the activity, they will be more interested in not only participating, but completing the activity.

    Case in point. . . Recently we received a delivery of some nifty kids yoga gear.  All three sets of kids (seven in total . . .) were very interested.  However, speaking for myself, my daughters completely flipped over this gear — there were mats, headbands, water bottles, yoga grippy socks — all specially made for kids.

    The mats were rolled out in my living room.  The girls’ headbands were on and they were ready to get their yoga on – or at least pretend to teach yoga to each other.  It was very cute.  While they were not actually practicing “yoga” it showed me that if you give them their own gear — their own ownership over the process — they are more likely to get involved and stay involved in the activity.

    So, while purchasing kids yoga gear may not be a priority for you and your family’s budget, it may be something to consider if you are trying to get your kids involved in some physical activity.  You don’t necessarily have to purchase new — you can hand down your gear.

    This concept holds true for any activity. For example, if you are trying to get them to cook, give them their own apron or kitchen tools.  If you are trying to get them to clean, buy them a vacuum – okay, well, this may not work LOL . . .

    The super cool yoga kids mat and gear in the photo above is from Gaiam

  • Why Naked is Better

    Why Naked is Better

    A few years ago, I had a fabulous pink bikini that fit well and felt great. Yesterday, I put that same bathing suit on, and I noticed that my skin bulged around the elastic. I felt lumpy and bumpy and became quite critical of myself as I stared at my reflection in the bathroom mirror.

    Here’s an interesting point— I don’t remember the last time I passed judgment on my naked body. I only began judging my body yesterday afternoon when it was clothed in a swimsuit. Without the constraints of clothing, there was no pinching or squeezing or reason to doubt myself. It was only when I shifted the framework and added the constraint of clothing that my thoughts became negative.

    This got me thinking—How freeing it would be to just enjoy the stripped down version of EVERYTHING in life—without a framework for comparison.

    Think about it: You feel good about your accomplishments…until you shift your framework and begin comparing those accomplishments to someone else’s. You feel great about your morning run…until you realize that it took you four minutes longer to run the same route that you ran last week. You feel great about your body until you try to squeeze it into skinny jeans. If only we could always just enjoy life as it hits us, in its raw, naked form, without judgment, WE WOULD BE FREE!

    Here are some tips to free yourself:

    -Life is too short for ill-fitting clothes that make you feel like crap. Have you gained a few pounds? Fine. It happens, and you’ll deal with it, but there’s no reason to walk around feeling self-conscious. You should feel confident because you are worthy. Buy a few items that fit well and make you feel like the rock star that you are.

    -Try going for a run, going for a bike ride, or doing whatever it is that you like to do as part of your fitness regimen, and do it without timing yourself. Jog until you don’t feel like it anymore. Slow down if you want to. Speed up if that feels good. Lift some weights without counting reps. Elevate your heart rate for as long as it feels invigorating, and then stop. Of course you should challenge yourself and set goals, but once in a while, strip it down to the basics: Enjoy moving your body just because you can.

    “Keep your eyes on your own paper.” Did every elementary school teacher say that before a test? At the end of the day, when you glance at someone else’s work, you just end up cheating yourself. Stop comparing. Your life experience is yours and no one else’s. Don’t take the joy and pride out of your accomplishments because the guy next to you seems to have done more.

    Practice yoga in solitude. This idea is an extension of the “keep-your-eyes-on-your-own-paper” theme. The energy of a yoga class is amazing, and you shouldn’t give it up, but too often, we are distracted by the abilities of those around us. We begin to judge our own yoga skills and wonder if we are strong enough or flexible enough to keep up. By practicing alone, you will learn to keep your eyes on your own mat and build a practice that you love, without negative judgement.


  • Overcoming Perfectionism

    Overcoming Perfectionism

    Today, I looked out the window and decided that it was going to rain. And then the sun came out, and I decided that it wasn’t going to rain anymore. And then it rained again. And then it stopped. And then it started again. (It’s actually a bit humorous, now that I’m re-reading what I’ve typed here.)

    I stuck my head out the front door to check the temperature. It was hot and humid…typical summer weather in New Jersey, and perfect for stretching and yoga. I briefly considered going outside to practice in the heat, but I changed my mind when I looked up at the sky and saw dark clouds. Conditions weren’t perfect, and I could imagine slipping on my mat in the rain, and hurting myself. Who needs an injury on top of the searing pain that I already have in multiple joints?OvercomingPerfectionism

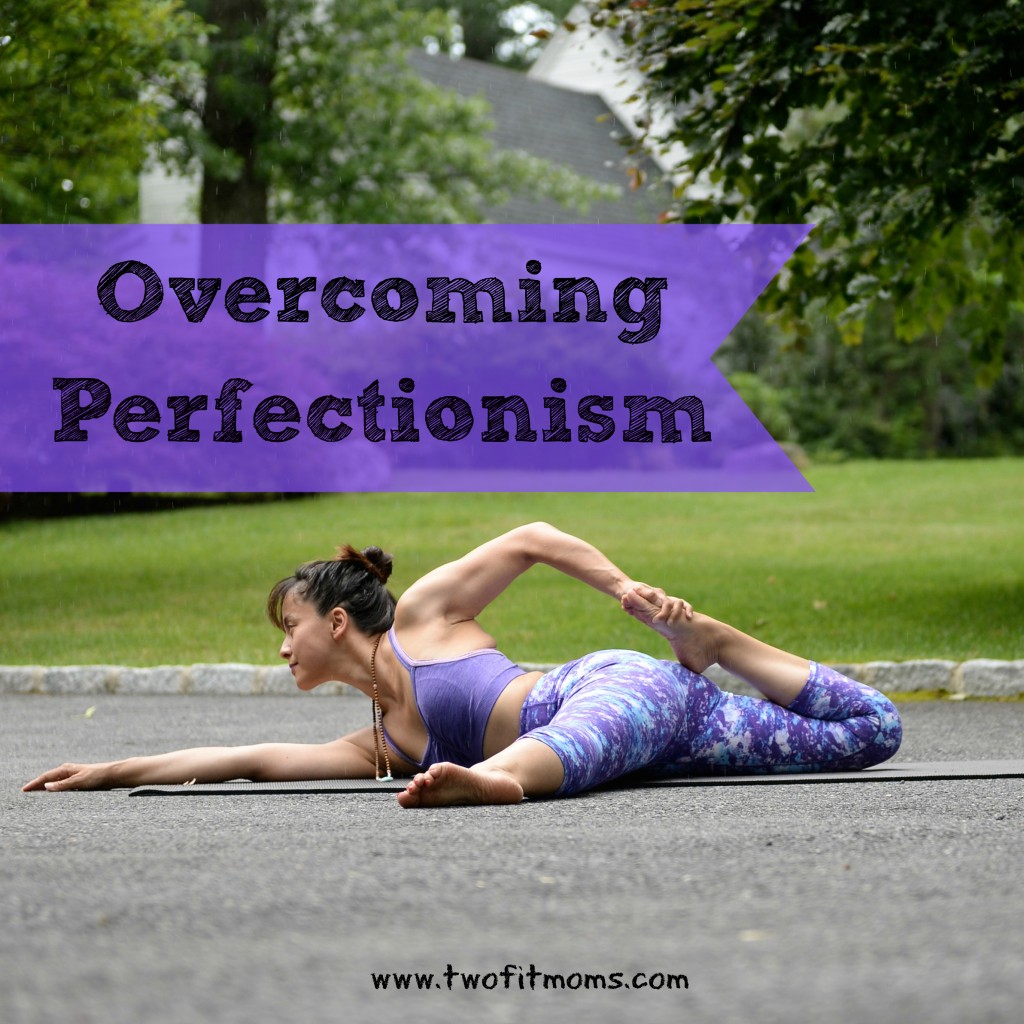
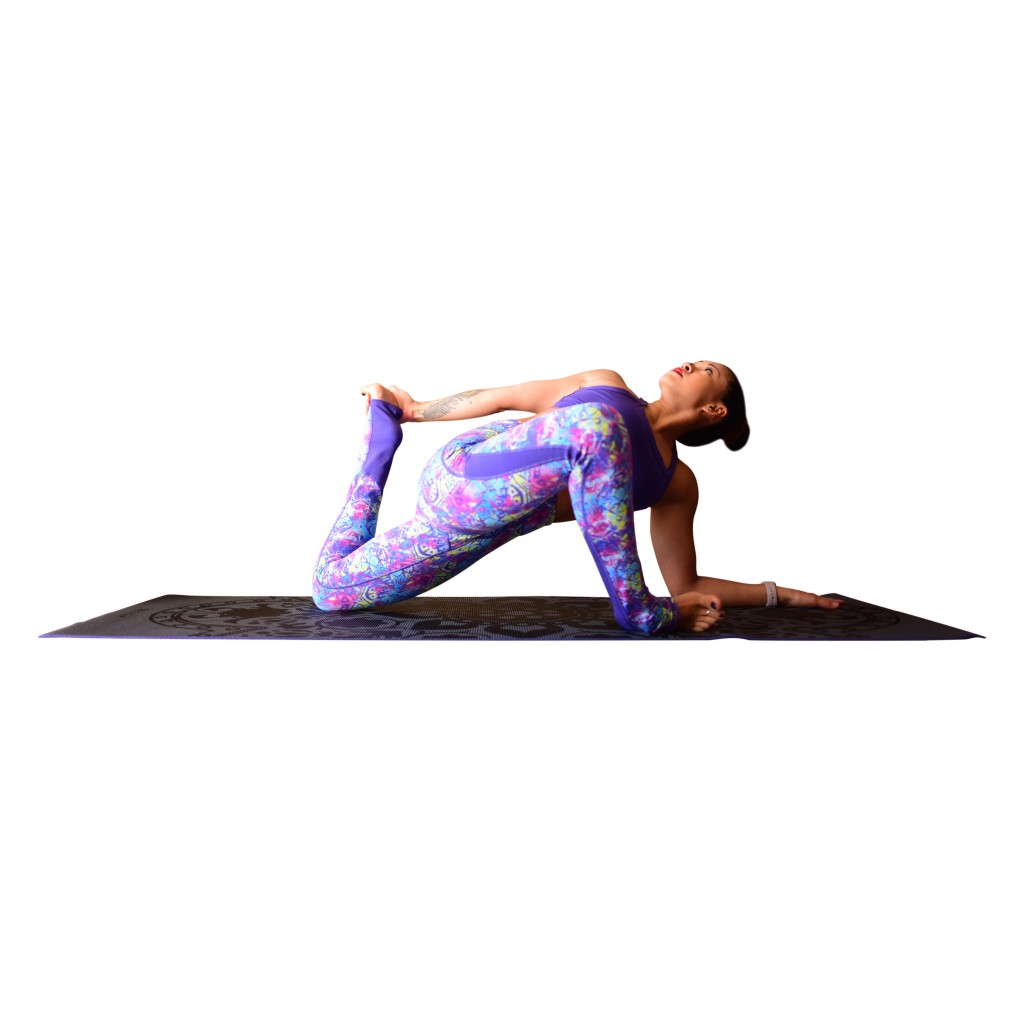
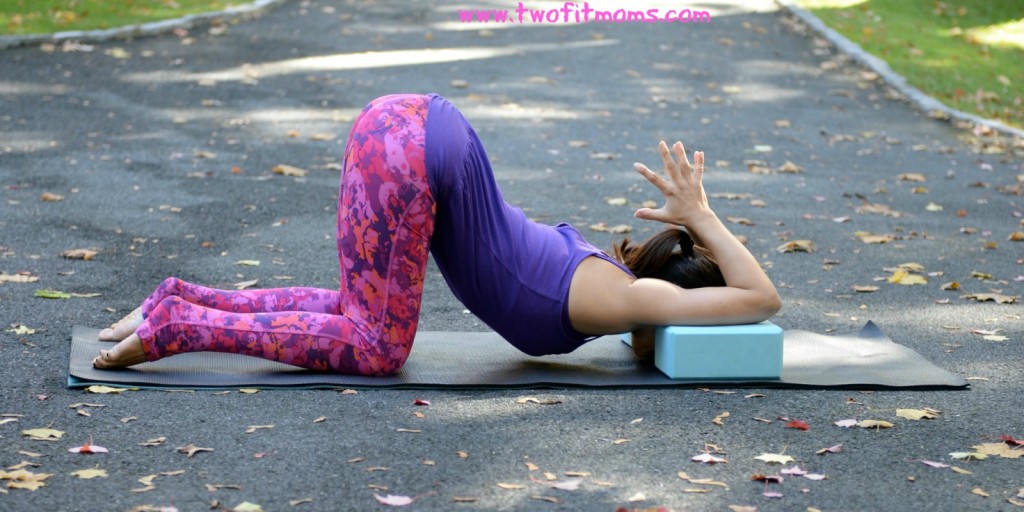
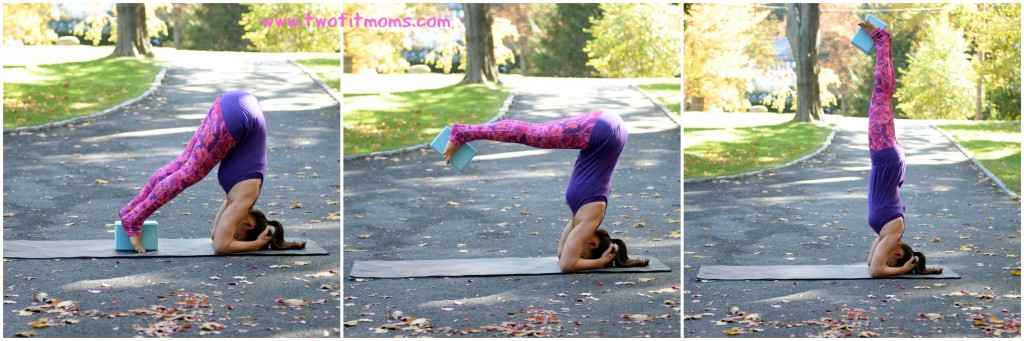
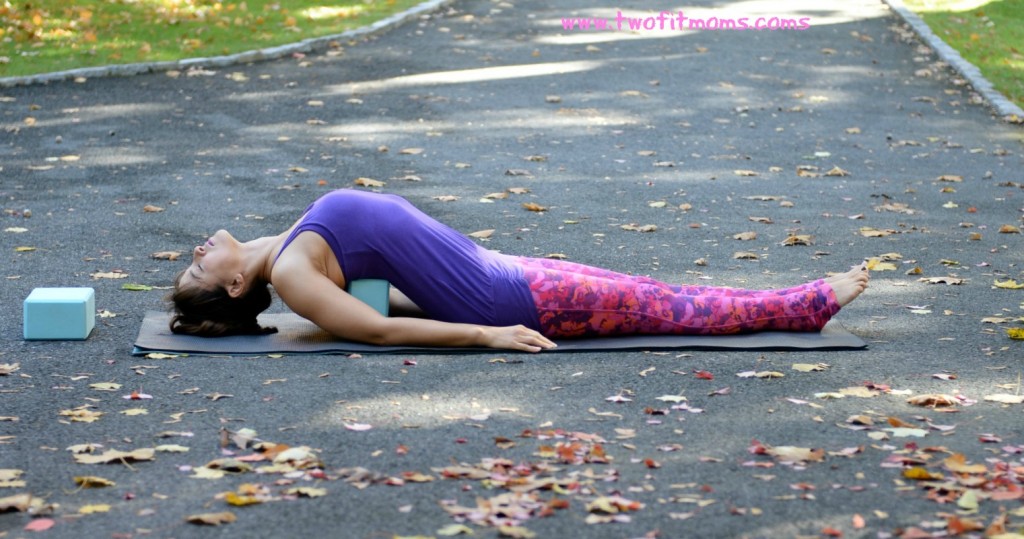
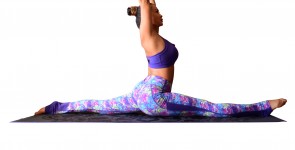
    I looked outside again. The sun was shining and the rain stopped. This was getting absurd. This time, I decided to head out to my driveway to practice. I started with a few rounds of sun salutations, some hamstring openers, a quick flow, and then I rolled onto my side, and got into one of my favorite yin yoga poses (Cat Pulling its Tail Pose), and I settled in for four minutes. Not even 30-seconds into the pose, the sky opened up, and it started to rain. I lifted my head (as you can see in the photo) and looked around. Yes…yes, it was raining. And that was really all I had to say about that. I put my head back down onto my upper arm and continued to stretch. The world was not ending, and I got through my practice in the rain.

    So, what does this story have to do with you? Well, I’m guessing that I can’t be alone in this— I waste vast amounts of time, waiting for conditions to be perfect before taking action. I am reminded today that conditions don’t have to be perfect to take action. It’s so easy to get bogged down and remain stagnant while waiting for all of the right circumstances to fall into place.

    Stop waiting for conditions to be perfect!

    Stop placing expectations on how things SHOULD be.

    Learn to act today, embracing what IS.

    You can thrive in the current environment, and you don’t have to wait another minute, waiting for the stars to align.

    Today, I expended unnecessary mental energy, trying to decide whether I should practice outside. All along, the answer was yes, I should practice outside, and once I’m out there, I’ll know how to adjust my plan if necessary. No, it wasn’t perfect, but I got something done.

    Ask yourself if you’re holding yourself back in some part of your life because you are waiting for perfection.


    -When it comes to your diet, are you giving up on healthy eating for the rest of the day because you “messed up” at breakfast and ate three doughnuts? Are you waiting for tomorrow to start over because you need a clean slate? Why do you need to wait for conditions to be perfect? Can you overcome your desire for perfection and just get started right now?

    -When it comes to exercise, are you skipping it altogether because you only have 15 minutes? Have you convinced yourself that a full hour is the ideal workout length, and 15 minutes isn’t worth your while? Ask yourself why you need this perfect amount of time to workout. Can’t you begin to make a difference in your life with 15 minutes a day?


    Life is rarely perfect. Usually, I allocate a solid block of time to write for this website. I don’t whip up my articles in 30 minutes, so if I happen to be very busy or traveling, the articles don’t happen. I spend a ridiculous amount of time trying to convey my thoughts with the right words. The perfect words.

    Today, I don’t have that kind of time to spend on the website, but in the spirit of overcoming my own issues with perfectionism, I’m going to go ahead and post this piece in its rough, unedited form.

    I had two choices when I came inside out of the rain: I could quickly type up these thoughts and share them with you (even though the article is far from perfect), or I could skip writing altogether. In the end, I’m glad I chose to write.
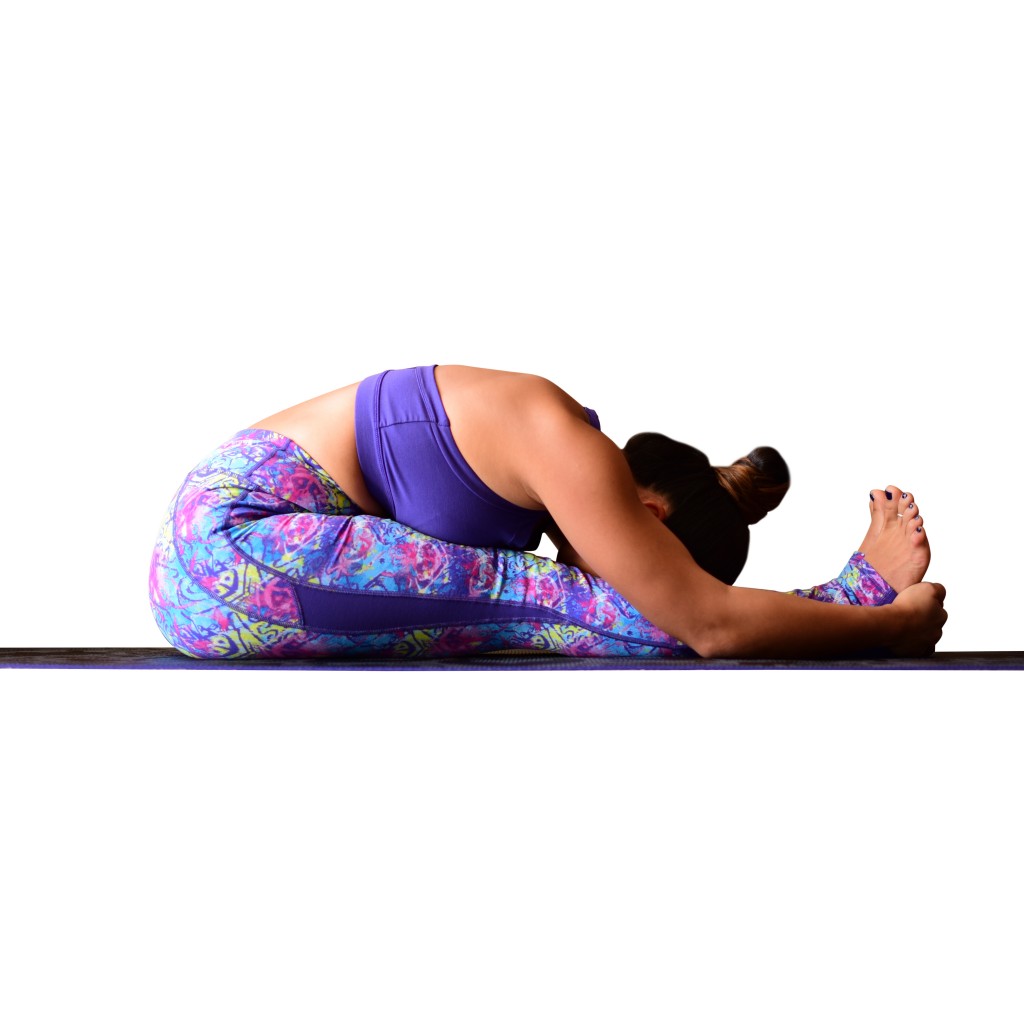
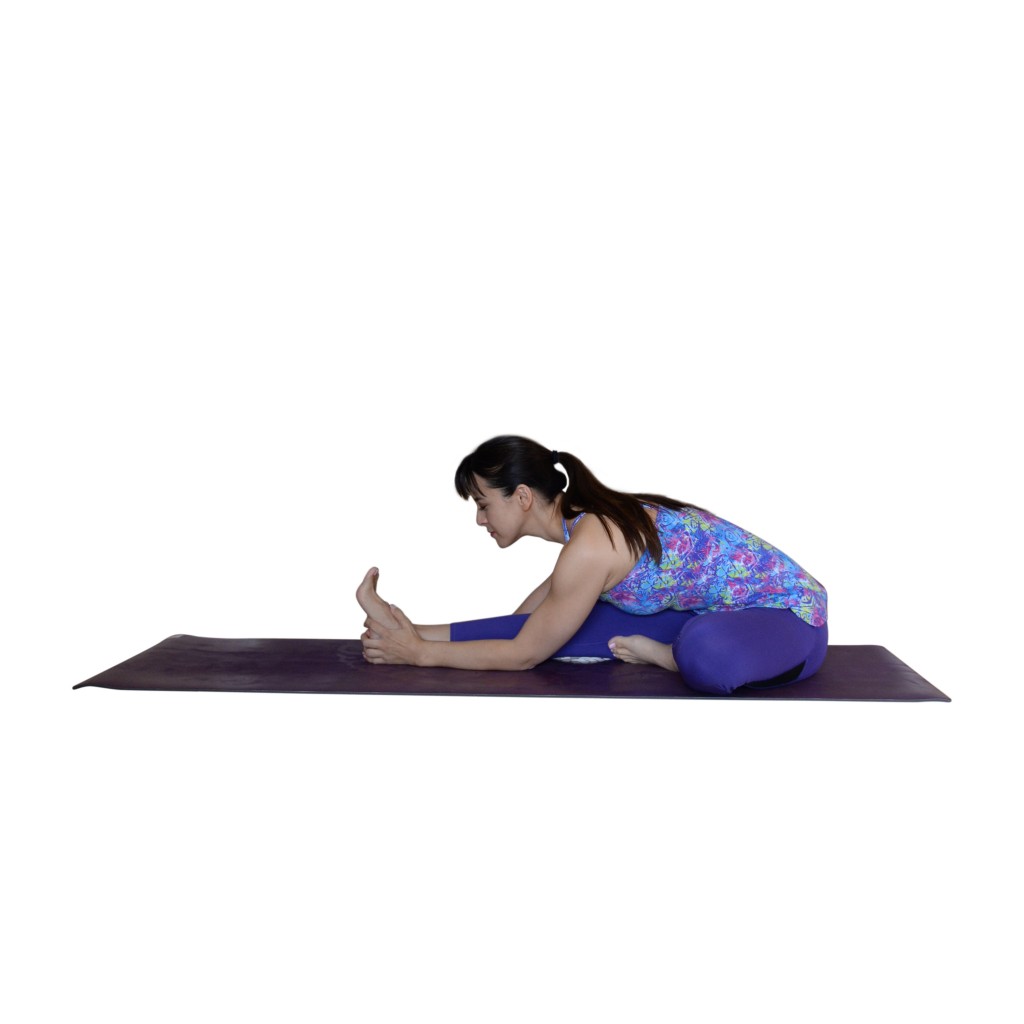