Author: Masumi Goldman

  • Instagram Quick Tip:  Color Splash

    Instagram Quick Tip: Color Splash

    Here’s another fun and simple app that I like to use from time to time:  Color Splash.  This app converts your color photo into a black and white photo, and then allows you to manually add splashes of color back into your image.ColorSplash

    When would you use such an app?  I find it most effective in two cases.  First, your image contains a bright pop of color that you want to accentuate.  Second, the bright pop of color in the full color version of your photograph is getting lost amongst many other colors in the photo.
    OriginalTake a look at my original photo.  It’s fine as is, but the bright pink color of my top is competing with the green grass in the background.  By converting the entire image to black and white, I can remove the background noise and focus on my clothing.

    The app itself is quite easy to use.  Once your photo is loaded into the program, it automatically becomes a black and white image.  Click on the “color” button, as shown on the bottom of each photo below.  Enlarge the image and begin adding color to the photo with swipes of your finger.  If you make a mistake, click on the “gray” button to erase the misplaced color.  The final effect is a dramatic image with a bright splash of color exactly where you want it.

    photo 1

  • Demystifying Produce Codes

    Demystifying Produce Codes

    PLUCodesOne day not so long ago, I was shopping for produce in my local supermarket.  I looked down at the apple that I was holding, and I noticed a label stuck onto the skin.  The label had a 5-digit code on it.  I looked around and noticed that just about all of the loose fruits and vegetables had these stickers.  I started wondering about the significance of the numbers on the labels, and after going home to do a little Internet research, I decided to turn my findings into an article, just for you!

    It turns out that the numbers on the labels attached to individual vegetables or pieces of fruit are called Price Look-up (PLU) codes. PLU codes are four and five digit numbers that have been used in supermarkets since 1990 to make check-out and inventory control easier and more accurate.  For example, by using these codes, cashiers can quickly determine if they are looking at conventional apples or organic apples in your shopping basket and charge you accordingly.   Although the International Federation for Produce Standards (IFPS) created these codes for use by retailers, perhaps we can glean a bit of information from these numbers to help us become more informed consumers.

    Here is what I have been able to gather from the IFPS Users’ Guide.  If you would like to read directly from the primary source, please CLICK HERE.  If you would rather read my summary and thoughts, please continue to read below:

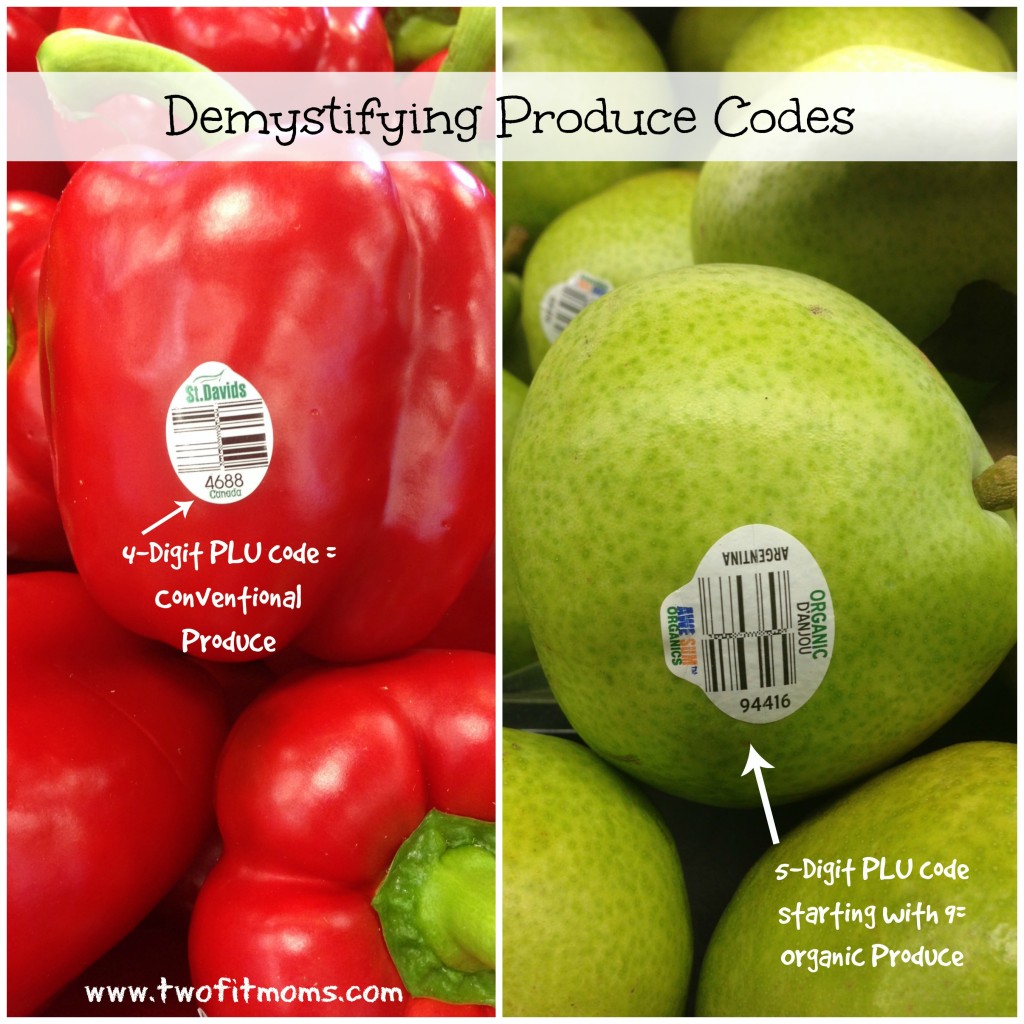
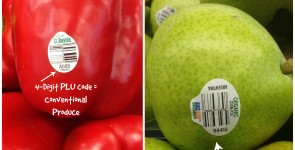
    All four-digit produce codes are assigned to conventionally grown produce.  Therefore, when you see a red bell pepper with a sticker that reads “4688,” you know immediately that this vegetable has been grown conventionally, and most likely has been treated with synthetic pesticides.ConventionalPepper

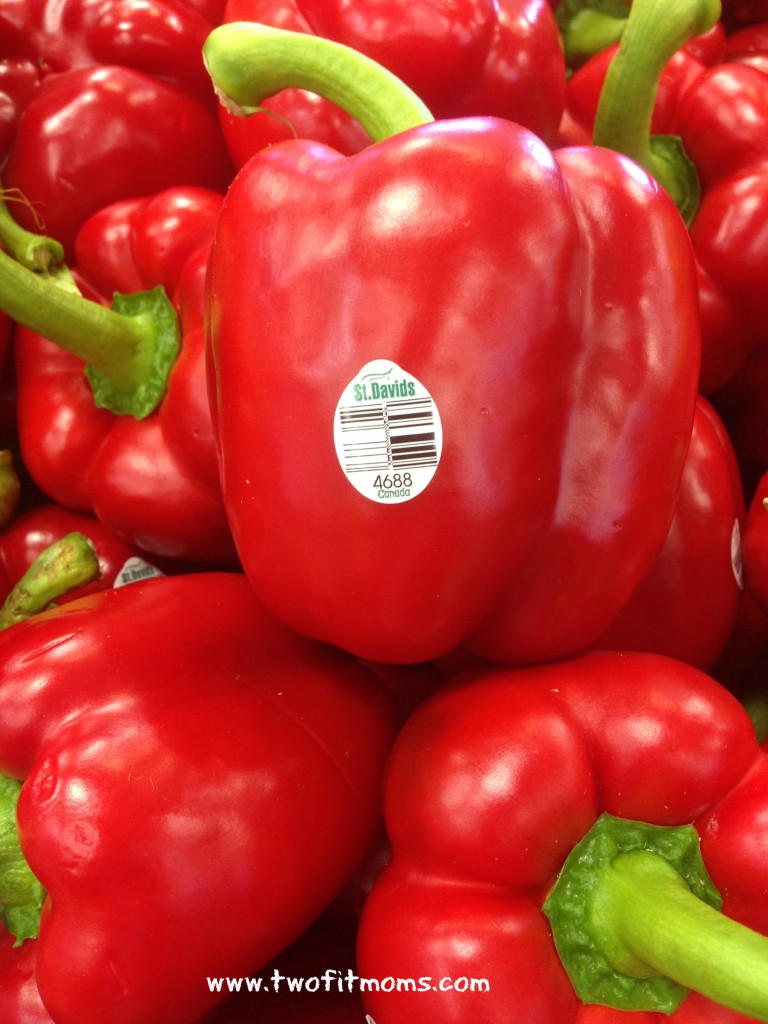
    All four-digit produce codes will be numbers in the 3000s or 4000s.  These numbers are randomly assigned and have no significance.  All that matters for your shopping purposes is the fact that the number is four digits, indicating conventional growing standards.

    A five digit produce code beginning with the number “9” indicates that the produce has been grown organically.  This means that the produce was grown without conventional pesticides, fertilizers made with synthetic ingredients or sewage sludge.  Genetic engineering or growth from genetically modified seeds is also prohibited for organic produce.organicpear

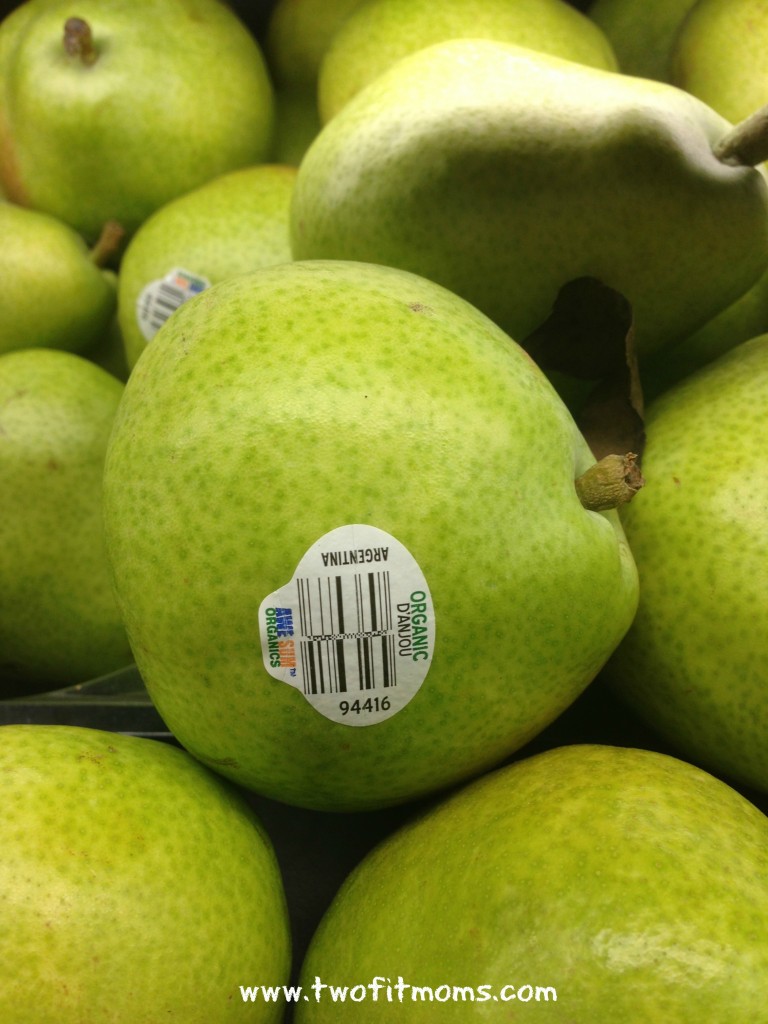
    A five digit produce code beginning with the number “8” indicates that the produce has been genetically modified.  HOWEVER, and this is a BIG however—this seems to be a completely theoretical concept.  From my own personal experience of looking through bulk produce bins at various supermarkets, I have yet to find a single fruit or vegetable marked with a sticker beginning with the number “8”.  This makes sense, as the use of PLU codes is not mandatory.  If the use of such labels is not required, why would a grower/retailer ever stick a label identifying its fruits or vegetables as genetically modified?  Would anyone ever buy such produce if genetically modified fruits and vegetables were readily recognizable?  I know I certainly wouldn’t.

    If genetically modified fresh produce is not labeled as such, what can we as consumers do?  In my opinion, the best we can do is to be well aware of the most commonly genetically modified produce, and specifically seek out the organic versions of these fruits and vegetables.  Fortunately, the list of commercially available genetically modified produce is short.

    The three major genetically engineered crops in the United States are corn, soybeans, and cotton. More than 90% of all corn, soybeans and cotton grown in the US in 2013 was genetically engineered, and these three GMO crops account for HALF of the total land used to grow crops in the US.

    Knowing that you will most likely never see a PLU code starting with the number 8 on each of your ears of corn, just go ahead and make the assumption that it is genetically modified.  As you shop, just be sure to look for corn that is labeled as organic, if you would like to stay away from genetically modified produce.  Likewise, make sure that you always buy organic soybeans and tofu.

    Other genetically engineered crops in the US include canola, sugarbeets, alfalfa, papaya and squash.  GMO crops such as cotton and canola are not classified as “produce”, but it is good to be aware, as cottonseed and canola are typically used in the production of shelf-stable products, such as oils and margarine.
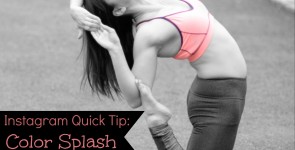
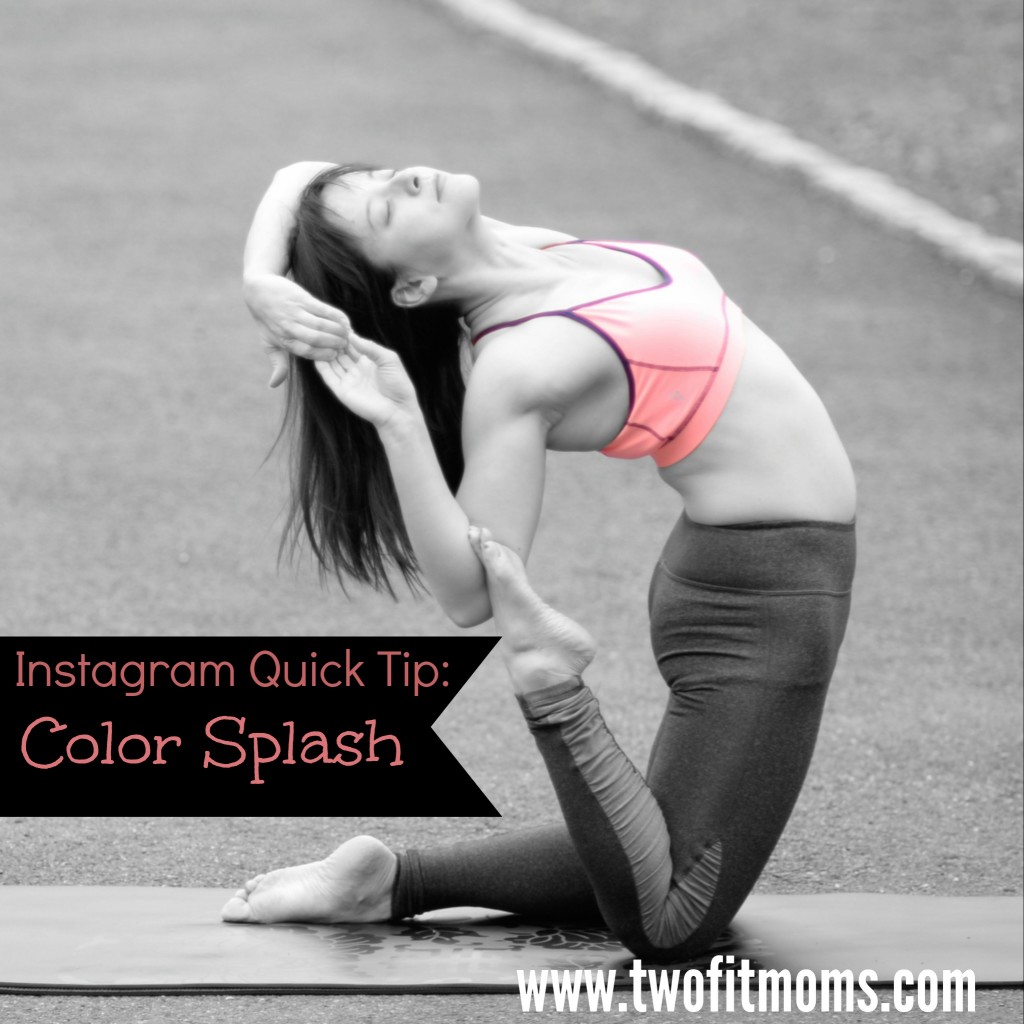
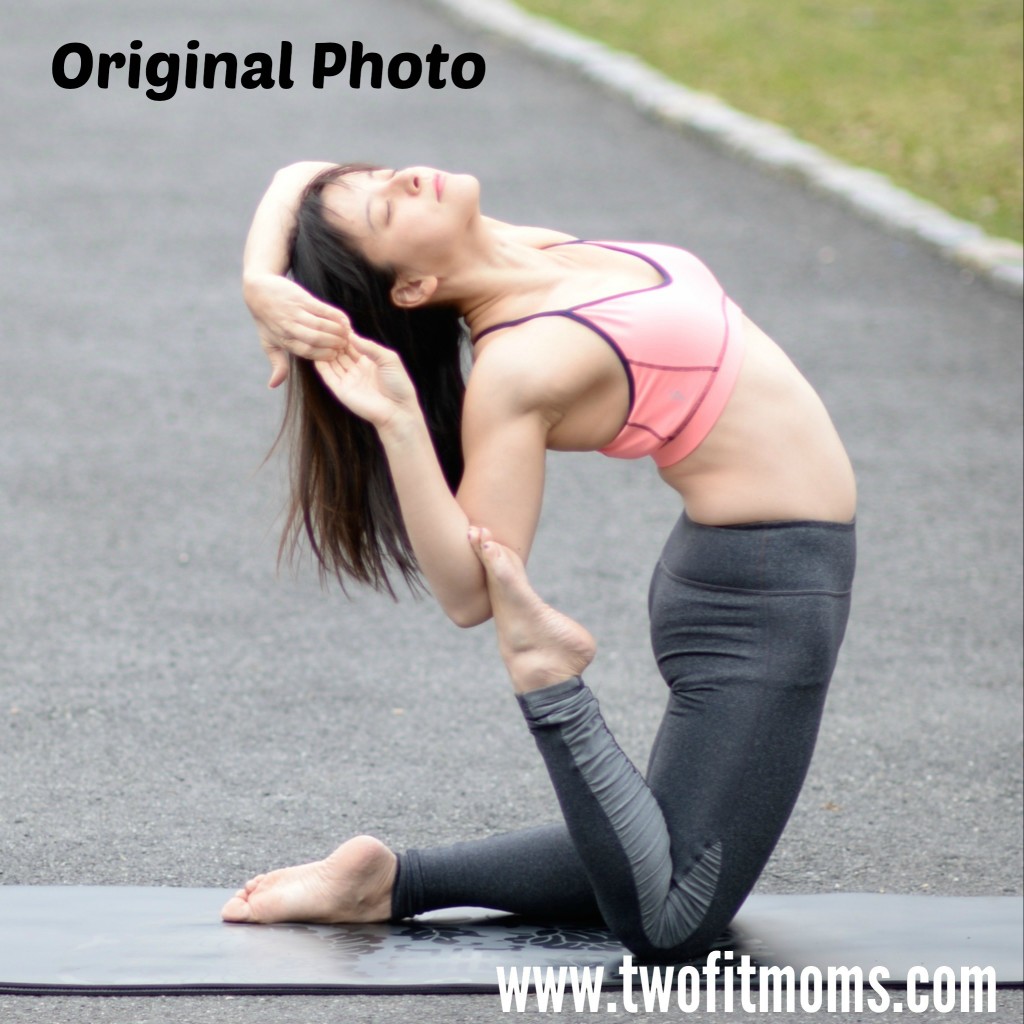
  • You Can Be a Mermaid!

    You Can Be a Mermaid!

    YouCanBeAMermaid
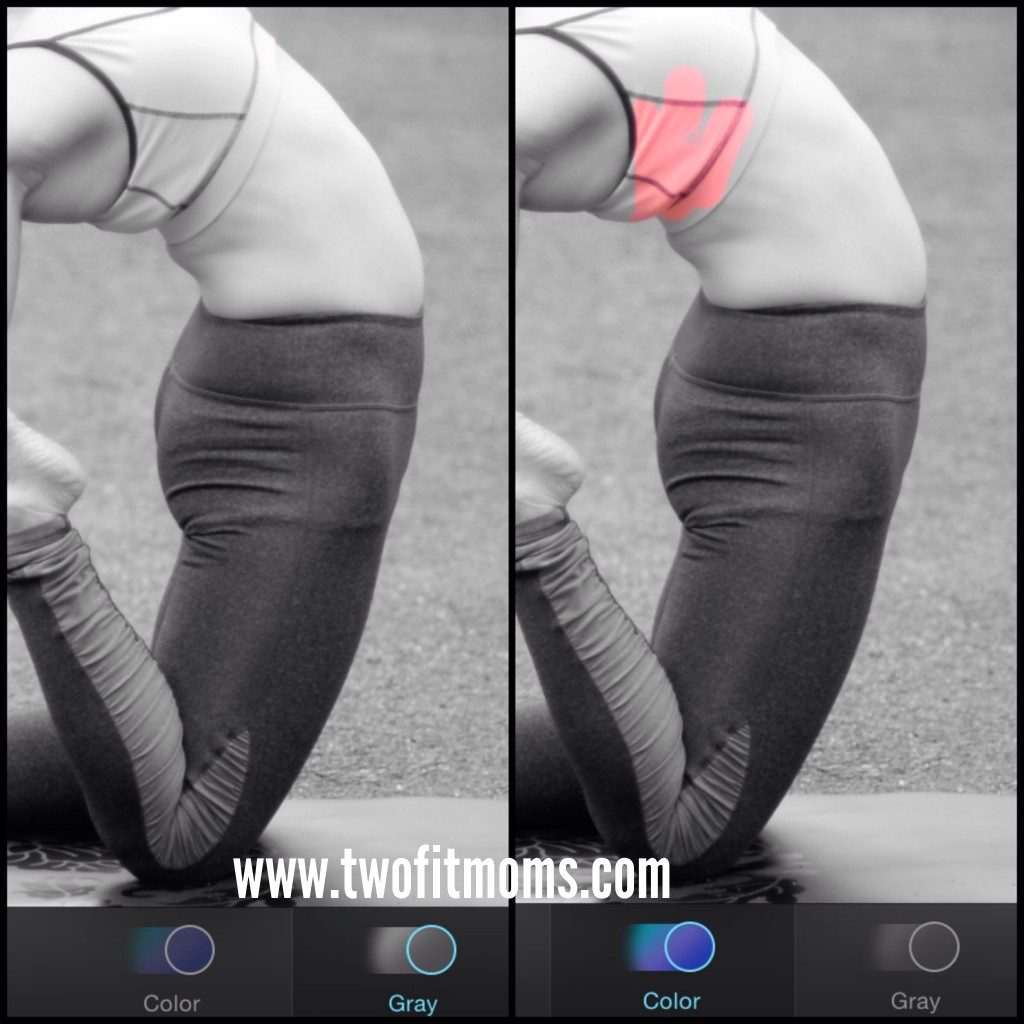
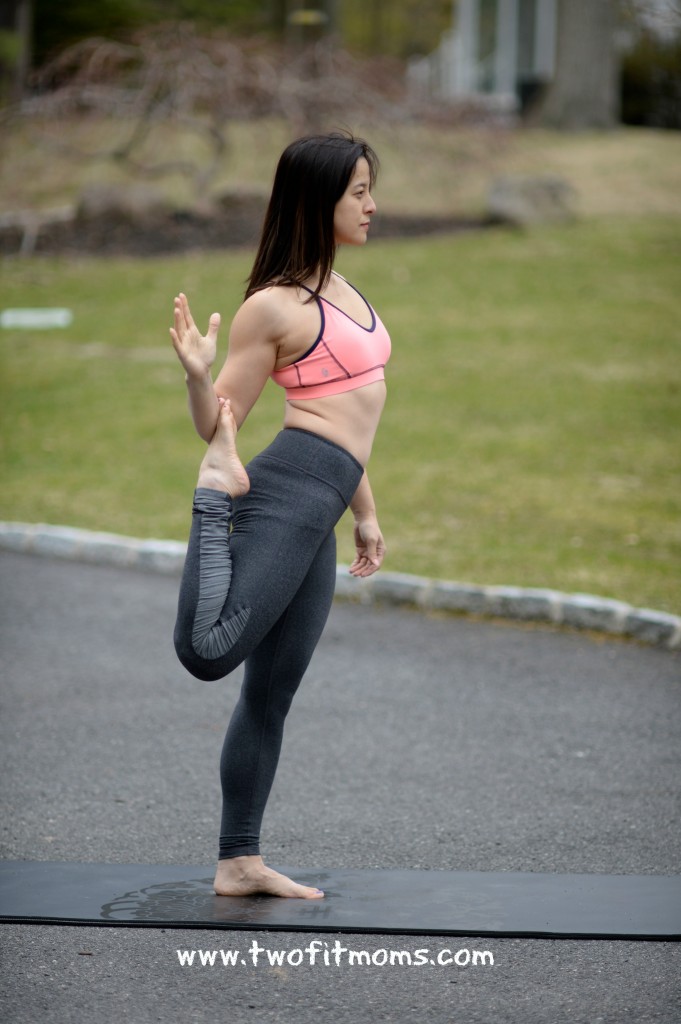
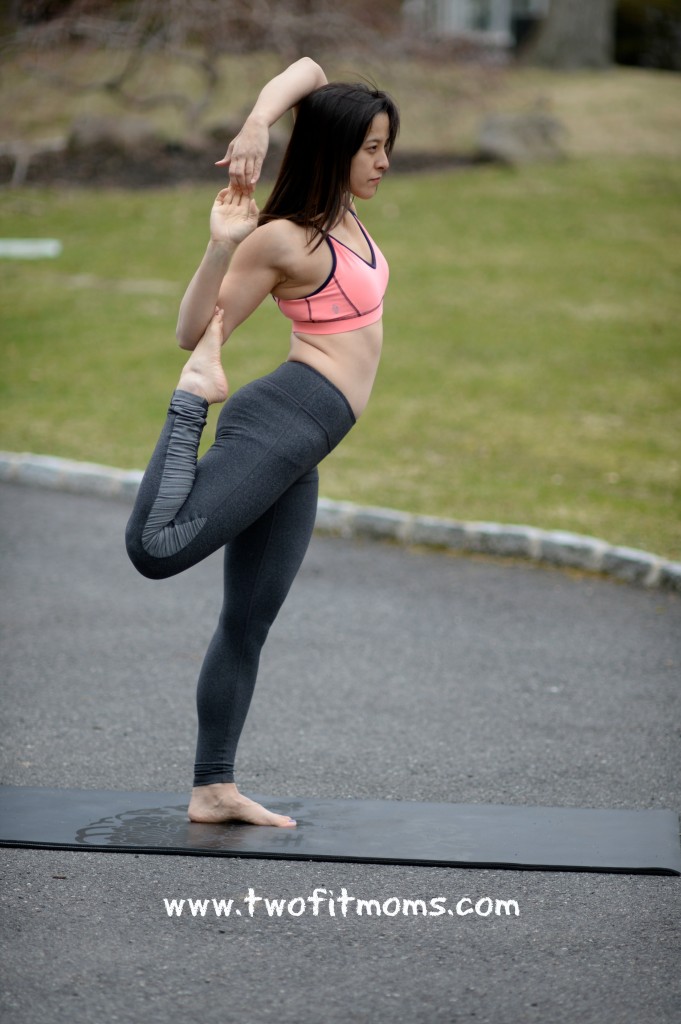
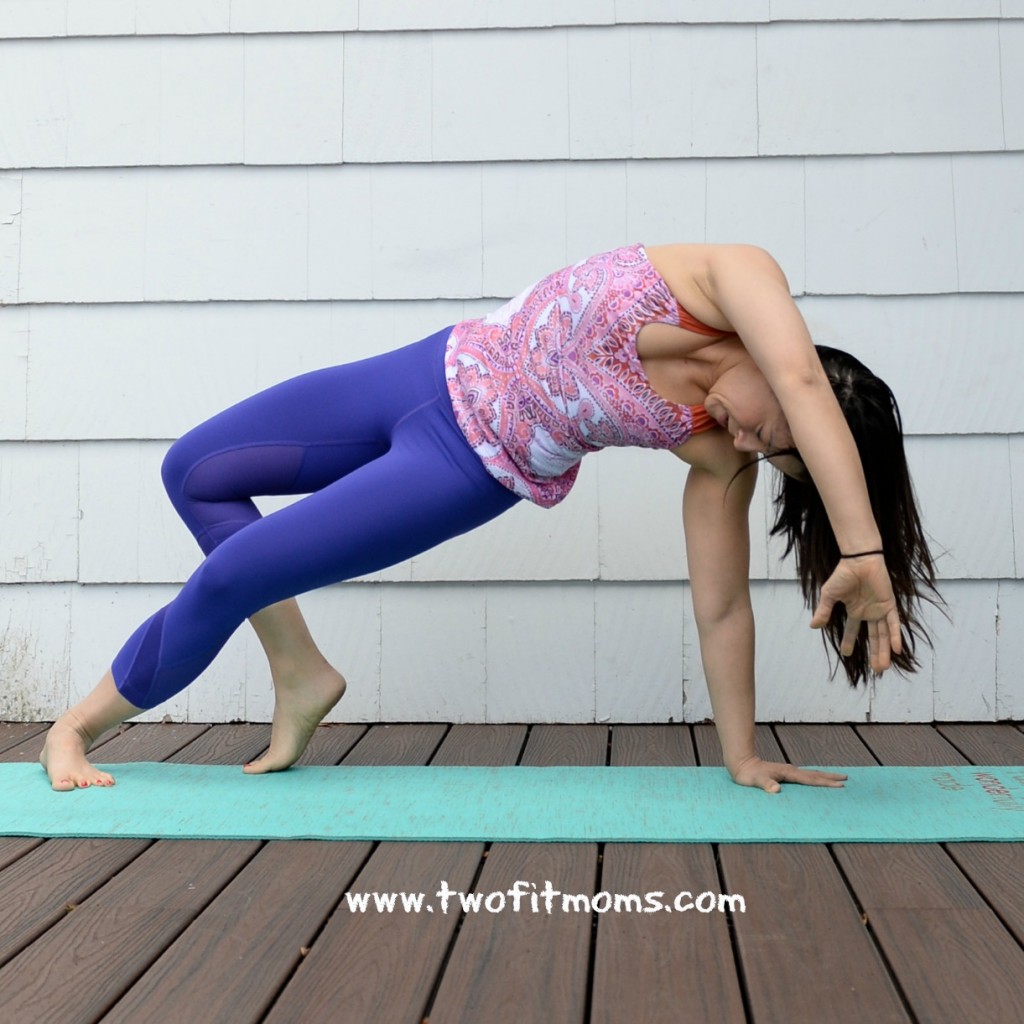
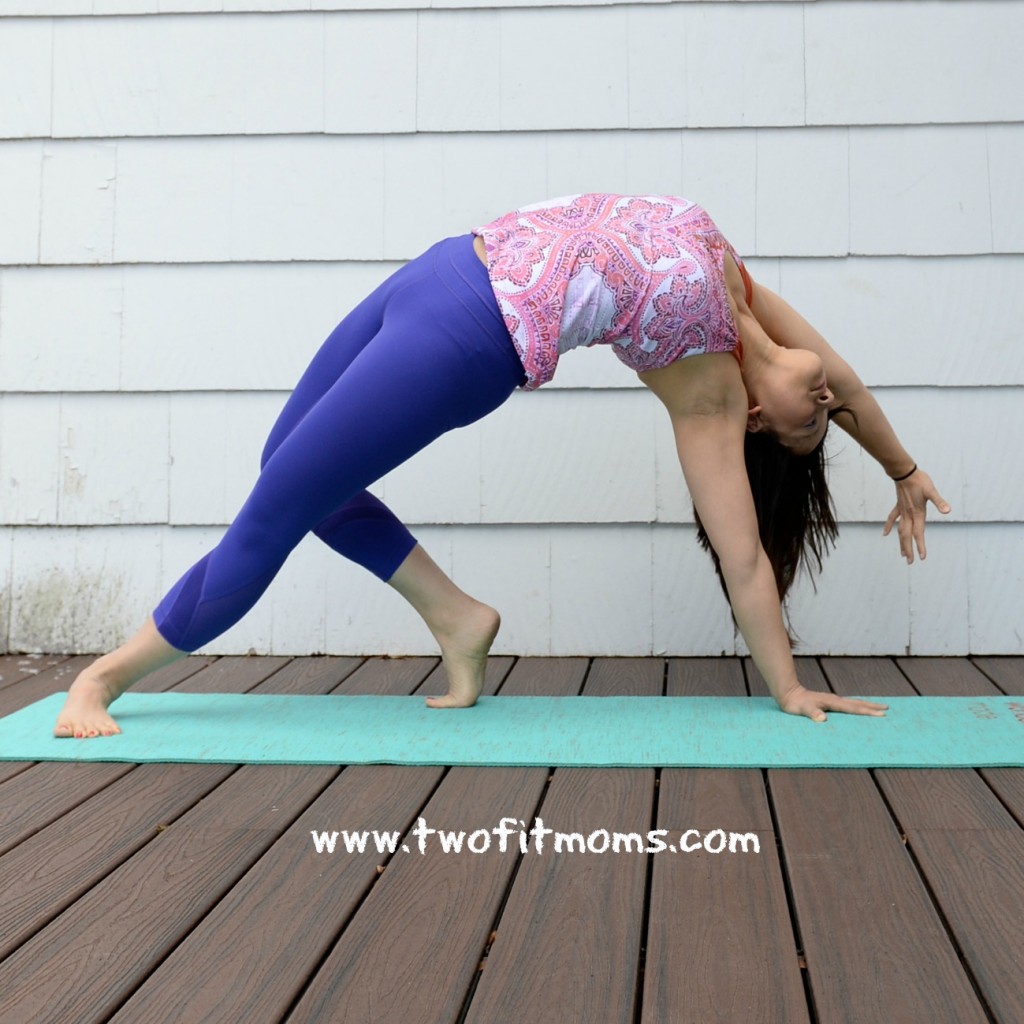
I still remember the first time I saw a photo of standing mermaid pose. I was scrolling through my Instagram feed, and I paused to look at this interesting posture. It appeared to be some kind of dancer pose variation, but I had never seen anything like it before. I had to try it!

    If only I had a video of what followed. What a disaster. Without any instruction, I had absolutely no idea how to get my foot lifted into the air and into the inner elbow crease of my arm. I tied a strap around my foot and did all sorts of crazy moves to see if I could raise my foot into the proper position. Ultimately, I gave up on my strap and realized that it was a much simpler process than I thought. In order to save you some time and aggravation, I will walk you through each step of getting into standing mermaid pose.

    Please keep in mind that mermaid poses of any kind are binding poses. The fingertips of both hands clasp (or bind) together, resulting in a deeper stretch than if the hands remained apart. The purpose of a bind is to intensify a stretch and deepen a posture. In a mermaid bind, your chest, back and shoulders will feel the intensity of the stretch. If you do not have a strong backbend practice, you should consider modifying your mermaid pose by skipping the bind altogether and focusing on keeping the top of your foot pressed into the crook of your arm. Once you improve your flexibility and notice some progression in your backbends, you can re-visit the bind.

    Step 1
    Begin to shift your weight into your left foot. Bend your right knee, and reach back with your right hand, palm facing up. Place the top of your foot into the palm of your hand.
    Step1
    Step 2
    Begin to slide the top of your foot down the length of your forearm until the top of your foot is sitting in the inner elbow crease of your arm.
    Step2
    Step 3
    Extend your left arm up toward the sky, bend your elbow, and see if your fingertips can clasp. If you feel any discomfort in your back, stop at this point.
    Step3
    Step 4
    Begin to press the top of your foot into the crease of your arm and lift your leg higher as you lean your torso forward to maintain your balance.
    Step4

  • Instagram Quick Tip:  Self-Timers for Everyone!

    Instagram Quick Tip: Self-Timers for Everyone!

    When I wrote my first Instagram Quick Tip article, I assumed that everyone was taking their own yoga photos with a self-timer. It has come to my attention that my assumption was incorrect, and it’s probably worthwhile to start at the beginning for any newcomers to Instagram.

    SelfTimerPic
    If you are wondering who takes my yoga photos, the answer is me.

    I take the vast majority of my photos using the interval timer function on my Nikon DSLR camera. I set my timer to automatically take a photograph every one to two seconds while I get into various poses on my mat. While it is wonderful to have a Nikon with a self-timer, it is unnecessary! Even if the only camera you own is the one that is part of your smart phone, you can take your own yoga self-portraits with an interval timer that you can download from the App Store.

    On my iPhone, I use a free app called “Camera Timer”. I’m sure there are multiple interval timer apps available for either iPhone or android, so if you cannot find the specific app called “Camera Timer”, don’t panic.

    Once you download the Camera Timer app, you will see that you have a single shot option or a multi shot option. I use the multi shot option every time. Why would you ever take one photo when you can take five?

    2014-04-04 13.45.44
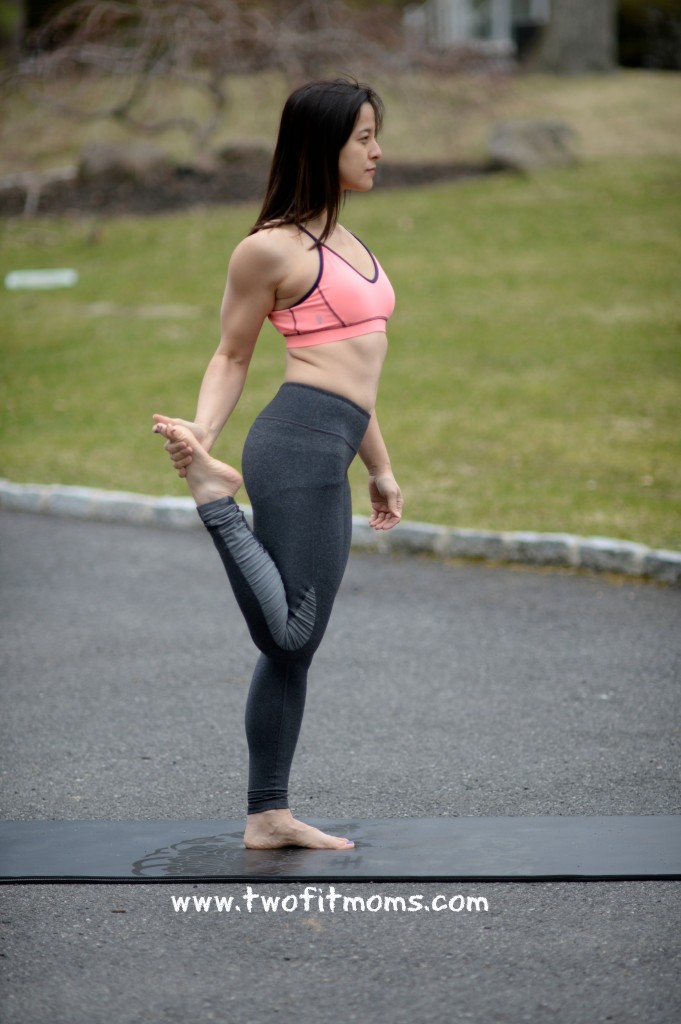
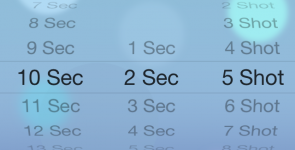
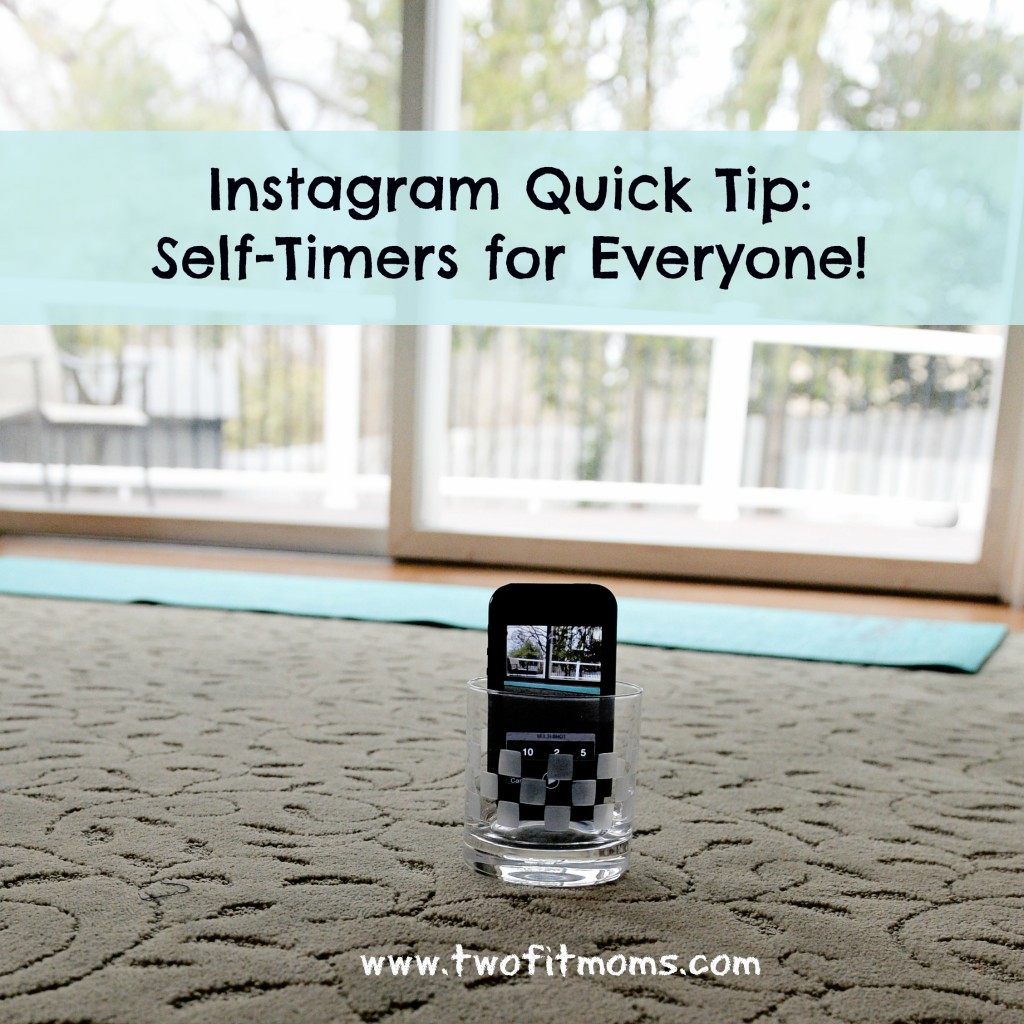
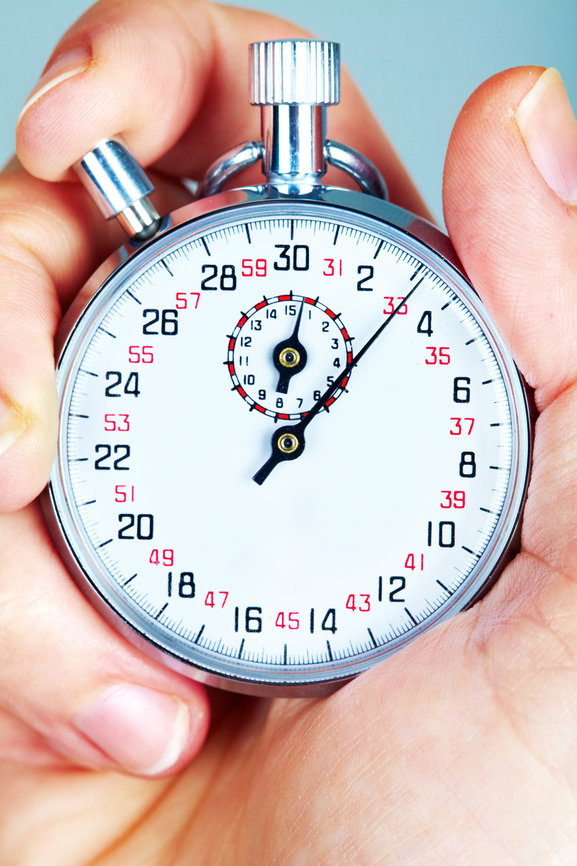
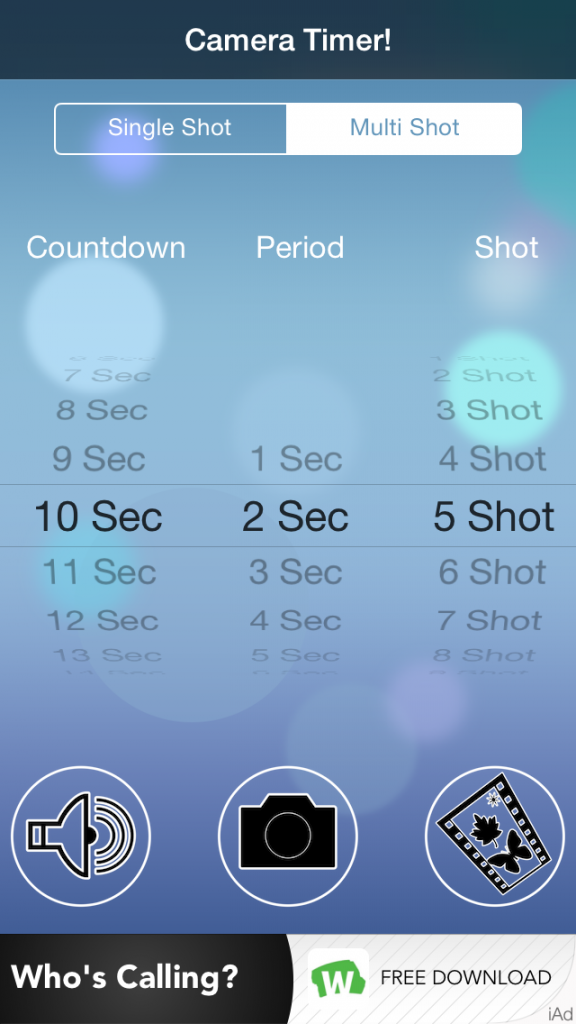
First, set your “countdown”, which is the amount of time that you think you need to get from your phone to your yoga mat and get into your first pose. You might need anywhere between 10 and 20 seconds. Play around with this number. You can also set your “period”, which is the length of time between photos. I prefer two seconds between shots. Finally, you can decide on how many photos you’d like the camera to take. Five photos always seems like a good number to me. Once you set your “countdown”, “period” and “shot”, you are ready to go. Place your phone into a short glass (as explained in my first Instagram Quick Tip article) , and start your timer!

  • How to Roast Veggies

    How to Roast Veggies

    If you think you are too busy to cook and prepare vegetables for yourself each day, I have the perfect solution for you.  Embrace your cookie sheet.  My cookie sheet allows me to prepare larger HowToRoastVeggies
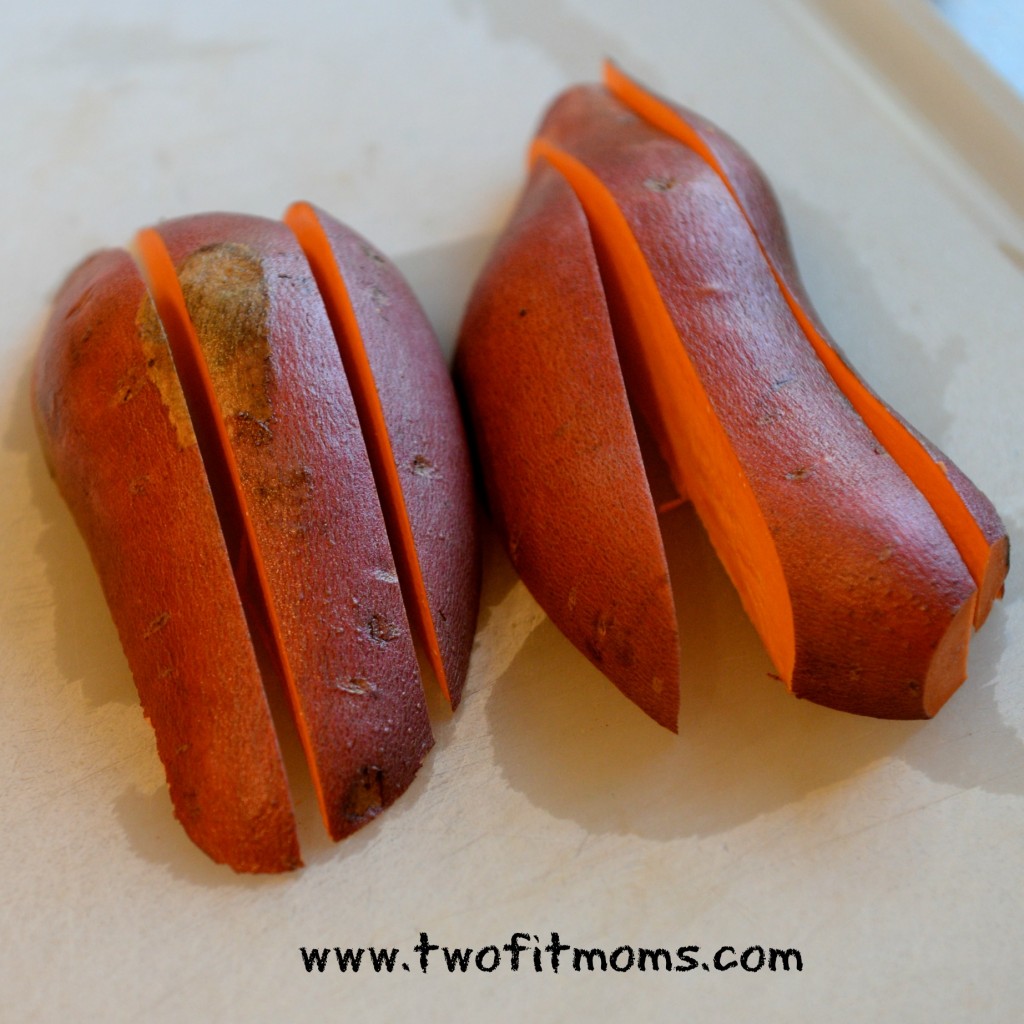
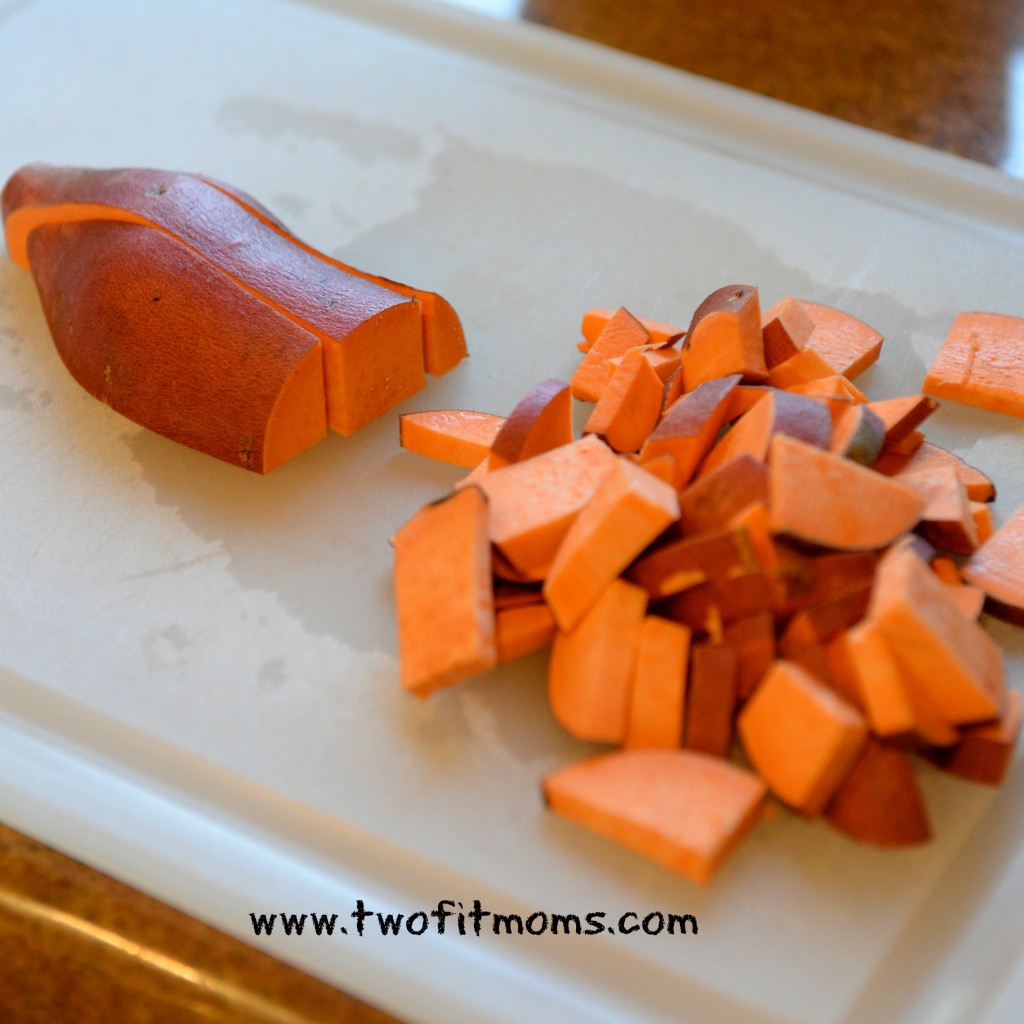
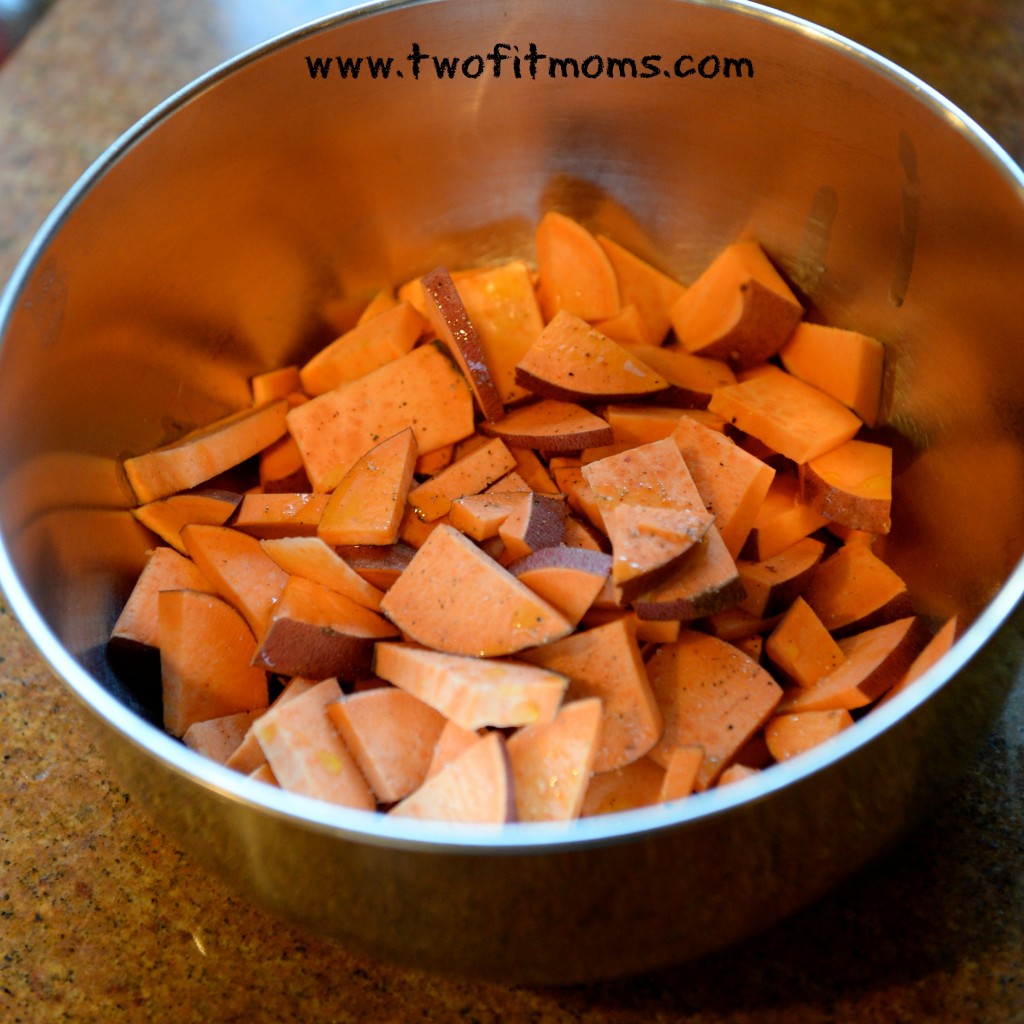
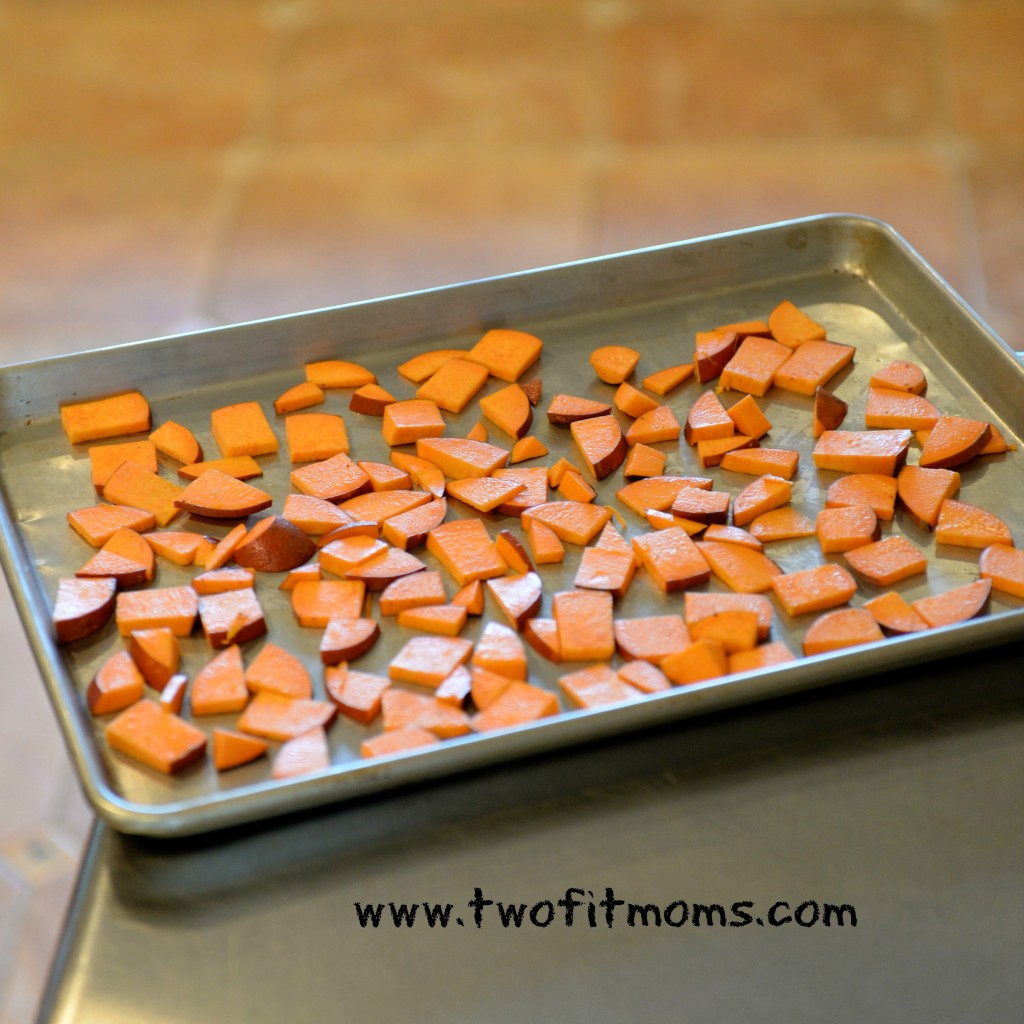
quantities of vegetables at one time.  Instead of cooking for just one meal, I roast enough veggies for two or three meals.  Unlike boiled or steamed vegetables, which may feel soggy and limp on day two or three, roasted vegetables maintain a delicious flavor and can be chopped into omelettes, pureed into soups or layered onto a sandwich with a balsamic glaze.  Let me show you a basic technique.

    I happen to be working with yams in this tutorial, but I highly recommend using this method for all sorts of vegetables.  Broccoli, cauliflower, carrots and different types of squash are all good choices.

     Step 1
    Pre-heat your oven to 375 degrees.  If you are working with yams, buy organic so you can just scrub the skin and keep it on.  Cut the yam in half lengthwise.

    CutinHalf
    Step 2
    Place each half, face down onto your cutting board.  Slice each half into thirds, lengthwise.
    InThirds

    Step 3
    Now that each yam is cut in half and then into long strips, cut these strips into smaller bite-sized pieces (about ¼ inch or ½ inch thick).
    BiteSize

     Step 4
    Toss the bite-sized yam pieces into a bowl with olive oil.  My rule of thumb is to use about 1 tablespoon of oil for each yam in my recipe.  The yams should not be dripping with oil but have a slight sheen.  Season with salt and pepper.

    InBowl

    Step 5
    Spread the oil-coated vegetables in a single layer onto a cookie sheet.  Bake in the oven for 20-25 minutes.
    CookieSheet

    Use this method to prepare all of your vegetables when you are short on time!  Enjoy your roasted yams/vegetables as a side dish or as an ingredient in a completely new dish!


  • An Announcement…

    An Announcement…

    Hello everyone!

    Just a quick note to thank you all for the tremendous support.  In the two months that we’ve been up and running with the Two Fit Moms website, we’ve been working hard to create an online space where we can expand upon all of the yoga, fitness and nutrition love that we express so briefly in captions on Instagram.  We hope you are enjoying all of our tutorials, tips, recipes, and weekly giveaways.

    In an effort to provide more content, and in order to manage the Two Fit Moms website more effectively, we have added a new member to our team.  We are excited to introduce you to Kate Alexander, who has been in our lives since high school!

    GroupPic
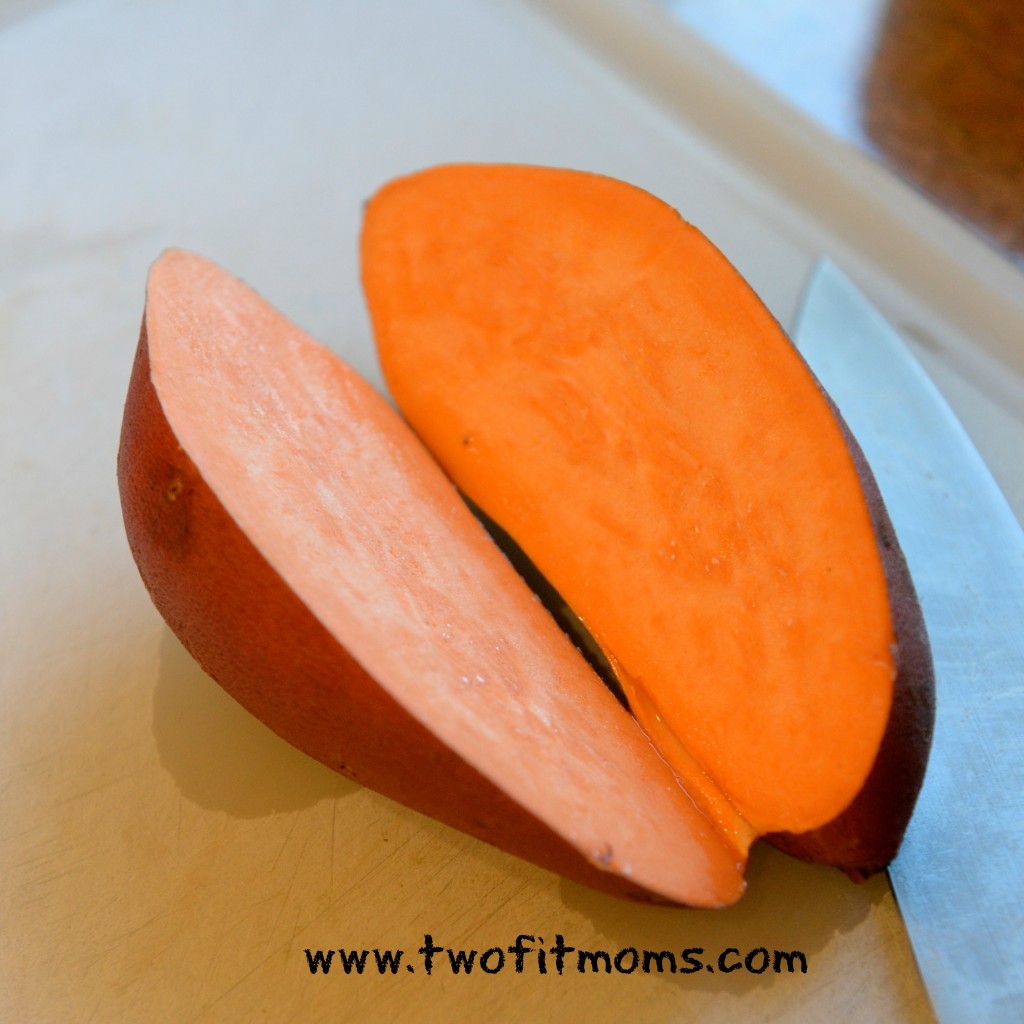
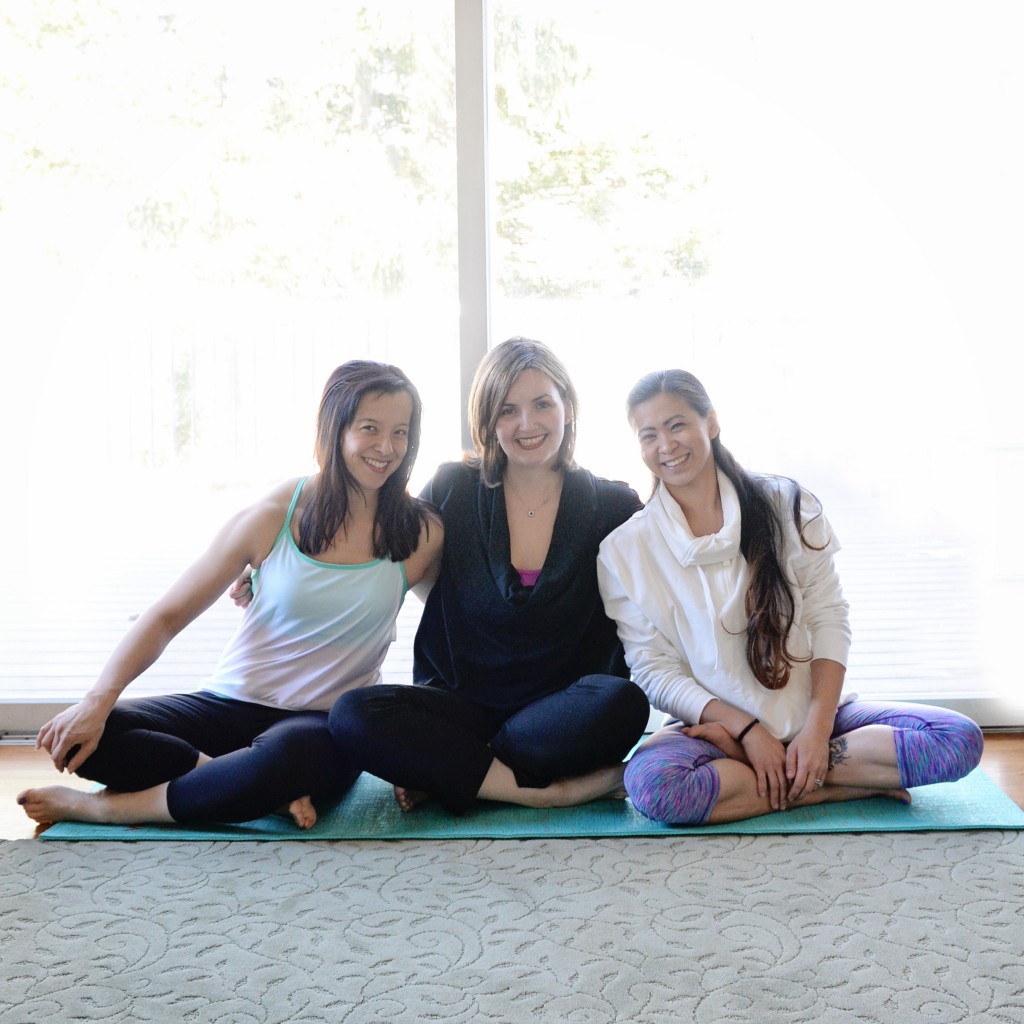
Kate will take on the role of creative and editorial director for Two Fit Moms.  With more than 15 years of experience in public relations, she will also be responsible for all things related to marketing and branding of the website.  Kate will be a great addition to our team, as she shares her tips on how she balances her life as a professional consultant, a wife, and a mother to three young children.  Please look out for her future posts on nutrition and wellness.

    Much love to you all—


    Masumi & Laura


  • Transition into Wild Thing

    Transition into Wild Thing

    One of my favorite backbending poses in yoga is Wild Thing, or Camatkarasana. The reason why I love it so much is that in order to get into the pose, you transition through a couple of my favorite stretches: downward facing dog and three-legged dog with an open hip. Not only do you reap the benefits of stretching out the entire front body with the backbend, but you also get a great hamstring stretch and hip-opener on your way into wild thing.

    Step 1
    Begin in downward facing dog. If you are unsure about the placement of your hands and feet for downward facing dog, start out in plank pose (top of a push-up). Make sure that your hands are directly stacked under your shoulders, and your feet are about hip width apart. The term “hip-width” refers to the distance between your two hip bones, and NOT the distance between the outer edges of your hips. From plank pose, lift your hips back and up into the air so that your body looks like an upside down V. Take 3 to 5 deep breaths in this pose, enjoying the stretch in your hamstrings, chest and shoulders.
    Step1

    Step 2
    Raise your right leg high into the air, stack your right hip over your left hip, and bend your right knee. Be mindful to keep an even amount of weight in both hands, and do not allow your weight to collapse into your left shoulder. Shoulders should be even. Take 3 to 5 deep breaths in this pose, and enjoy the hip stretch.
    Step2

    Step 3
    Slowly lower the ball of your right foot to the ground behind your left leg. Your right hand will simultaneously begin to lift from the mat.
    Step3

    Step 4
    Push firmly into the mat with both feet, as you lift your hips toward the sky and reach back behind you with your right hand. Keep your chest and hips lifted, and remember to breathe evenly through your nose. Hold this pose for 5 breaths (about 30 seconds), and repeat on the other side.
    Step4

  • A Fresh Look at Fitness

    A Fresh Look at Fitness

    I went for a run today and had an unexpected realization. Within 30 seconds of putting my headphones on, zipping up my hooded sweatshirt, and starting my stopwatch, I had a series of thoughts and flashbacks that stopped me in my tracks. For some odd reason, I was momentarily transported back in time to the summer that I spent at my grandmother’s house in Japan when I was Mechanical stopwatcheight years old. I suddenly remembered the voice that I heard over a megaphone every morning, announcing the daily exercises that would soon begin at the park. And then I remembered the steady stream of neighbors, young and old, stepping out of their little homes and walking toward the field. No one was wearing a stopwatch. No one was displaying strong, “go get ‘em” attitudes. This was just a way of life, and there was no competition or sense of urgency associated with participating in this routine. If you were well, you got yourself up out of bed and went to exercise with everyone else.

    As I stood on the pavement in the present moment, I longed for that incredible feeling of wanting to exercise as a way of life, not as a means to an end. I just wanted to jog because it felt good. I didn’t want to look at my stopwatch. I didn’t care how quickly I could cover the same distance repeatedly.

    We live in a culture of 30-day weight loss plans, 60-day intense training programs, road races, timed obstacle courses and 7-day jumpstart programs. All of these things are wonderful fitness tools, but maybe it would be enjoyable to just get back to the mindset of moving our bodies for the sake of wellness.

    In this game called life, none of us are getting out alive. The goal is to make our time here on Earth healthy and enjoyable—to balance our life activities so that we spend the vast majority of our time LIVING rather than dying.

    What’s the point of making exercise such a painful, dreadful experience? For most of us, the goal is not to become an elite level athlete. We just want to feel good, look good and maintain a healthy lifestyle. Can’t we just achieve all of that with moderation?

    This week, I challenge you to approach your exercise routine with a different mindset. Exercise only because it feels good. When it stops feeling good, go do something else. Jog until it isn’t fun. When jogging isn’t fun anymore, grab a jump rope. When jumping rope isn’t fun, walk. When walking isn’t fun, go stretch, lift, tumble or balance. Do something! And do it only for as long as you perceive it to be fun. The second it stops being fun, it stops being sustainable. Practice moving for fun so that exercise can become a natural part of life. Remove the stress and the competition for one week, and see how you feel.

  • Instagram Quick Tip:  AfterFocus App

    Instagram Quick Tip: AfterFocus App

    One of my yoga students recently asked me if I had an app that would clean her house.  I laughed, but then I realized that for Instagram purposes, I had an app that virtually accomplished the same thing.  Do you find that many of your Instagram yoga poses are plagued by cluttered backgrounds or distracting details?  If so, look no further.  I have the perfect app for you:  AfterFocus.

    With a few swipes of your finger, you can keep the subject of your photo in perfect focus while blurring the background.  This is a great app for removing the focus from other people or objects that happen to make it into the frame of your photo and detract from your fabulous yoga pose.

    AfterFocus
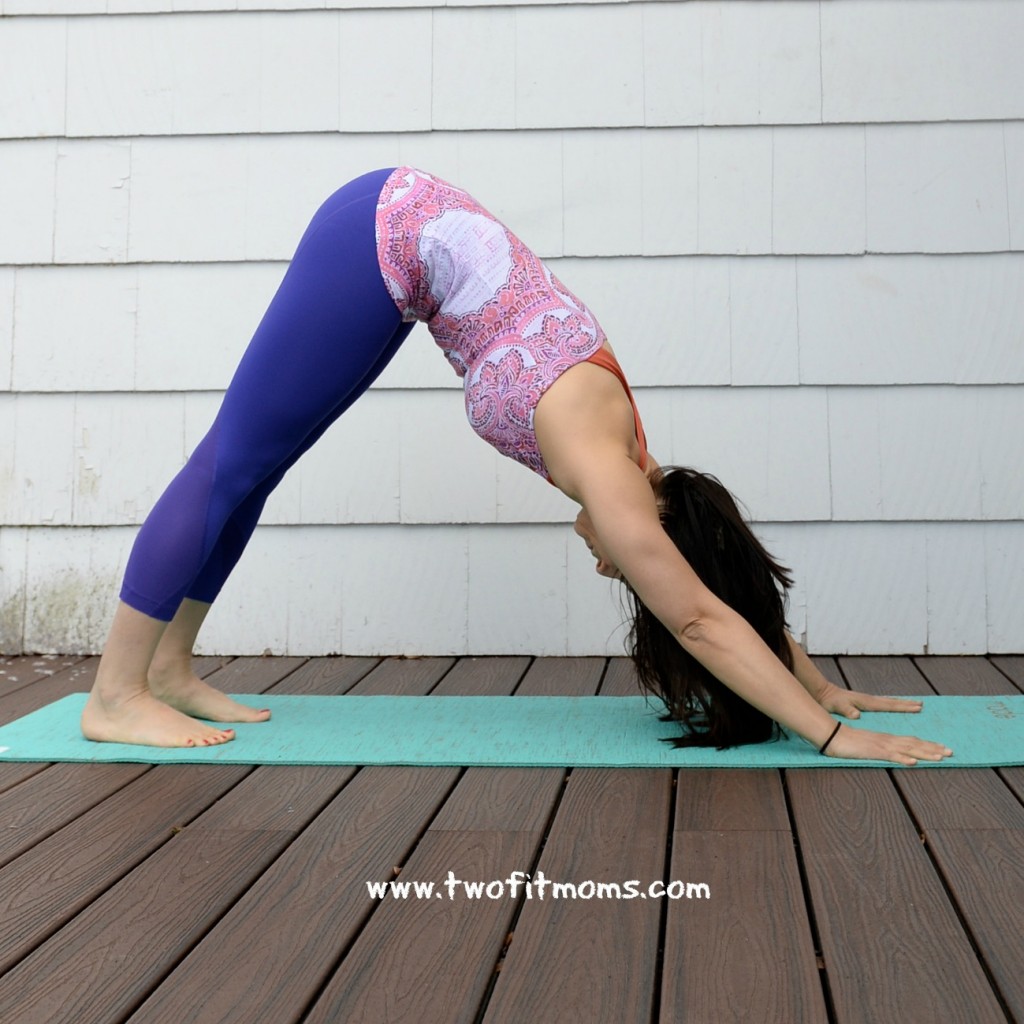
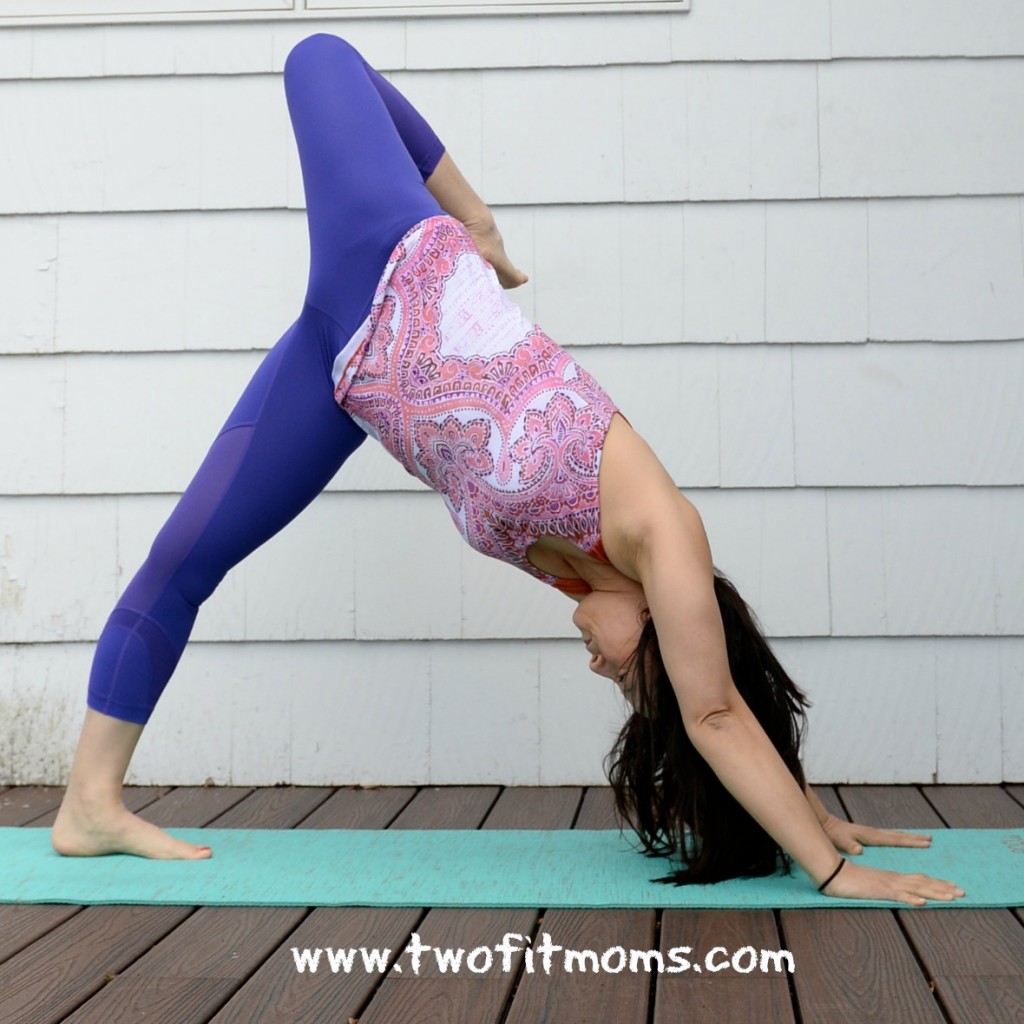
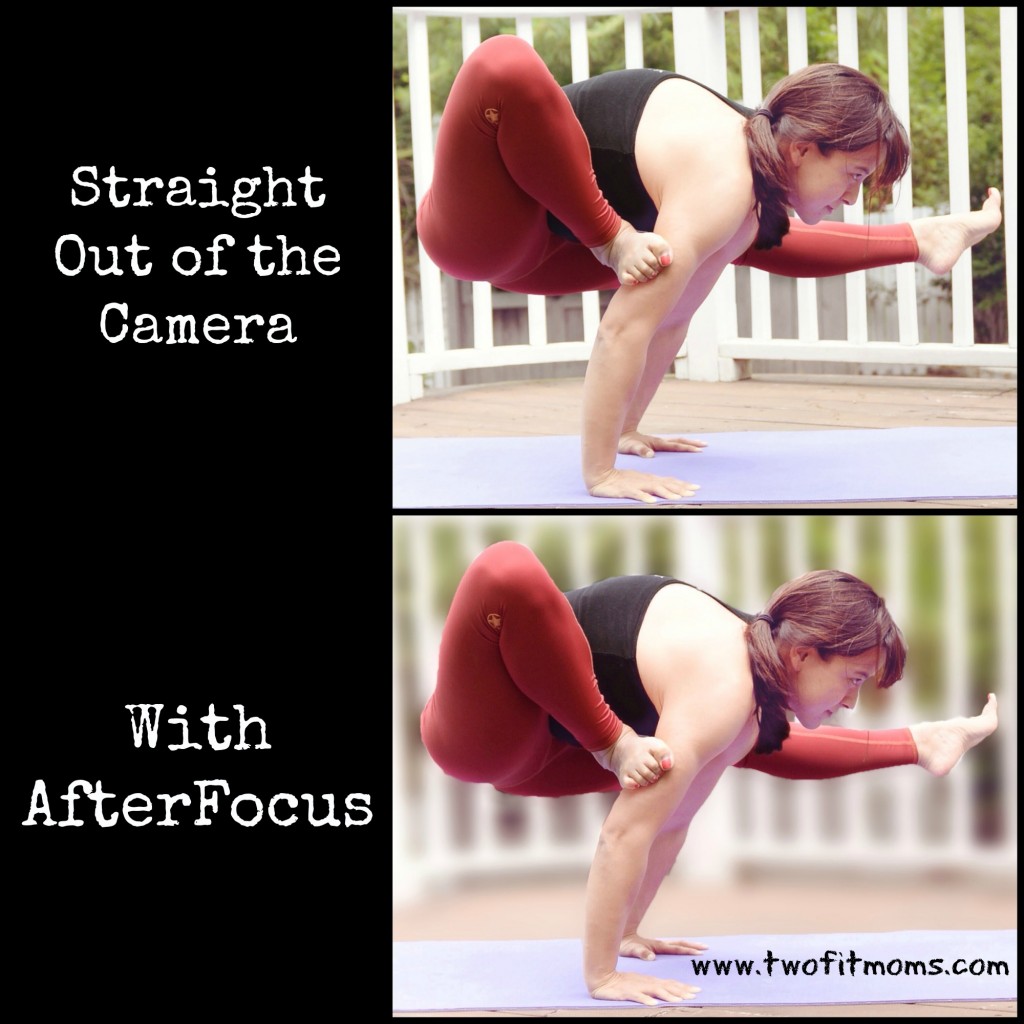
Take a look at my two photos.  In the top picture, the white fence in the background isn’t an eyesore, but it is receiving the same amount of attention as the yoga pose.  By running the photo through the AfterFocus app, I can blur the fence into the background. This app will automatically recognize your focus object and blur the background, just by drawing a few lines with your finger inside the object of focus.

    Give this app a try, and allow some of the visual clutter and distractions to blend away into a soft haze. Enjoy this Instagram quick tip, and please let us know if there are specific topics that you would like to see addressed in this series!

  • Simple Broccoli Rabe Pesto

    Simple Broccoli Rabe Pesto

    broc rab pesto up close with banner with tfm squareDo you ever get sick and tired of the taste of your own recipes?  Some days, I feel like all of my meals taste the same, even if I change most of the ingredients.  When I fall into this kind of cooking funk, I call up my childhood friend, Kate, for inspiration. I know that Kate will have a delicious recipe for me that can be modified to fit my diet, even on its strictest days.  She also has an amazing knack for creating meals that my children find just as delicious as I do.  This recipe is no exception and will become a staple in your house, as it is in mine.

    Today, I want to introduce you to a versatile, easy-to-make sauce:  broccoli rabe pesto.  In the summer, we generally turn to herbs like basil and parsley for pesto, but this time of year, let’s work with a cold weather green like broccoli rabe.

    Broccoli rabe is known to be a little bitter, however, blanching it takes away the bitterness and makes it perfect for blending into a tasty pesto.

    Traditionally, pignoli nuts (and sometimes walnuts) appear in pesto recipes. This recipe, however, is nut free.  Feel free to experiment and make this recipe your own!  Throw a handful of toasted nuts into the food processor along with the rest of the ingredients.

    This pesto can also be used as a condiment on sandwiches, a marinade for fish and poultry, or a sauce to toss with pasta.  While Kate’s original recipe was made with cheese and wheat pasta, we were able to modify it so that it was both gluten and dairy free.

    Enjoy!

    Broccoli Rabe Pesto

    1 large bunch of broccoli rabe (stems removed)

    3 cloves of garlic, crushed

    ¼ cup of olive oil

    Salt

    Pepper

    1 lb of cooked pasta of your choice

    Cook broccoli rabe in a large pot of salted boiling water for 3-5 minutes – until just tender.  Drain and rinse with cold water to stop cooking.  Pat dry with a towel/paper towel.  Add broccoli rabe to the bowl of a food processor, add crushed garlic, olive oil and salt and pepper.  Pulse until emulsified.

    If you would like to add cheese, feel free to mix in ¼ cup of parmigiano reggiano cheese after the mixture has been pureed.

    Serve over pasta — or any other way you would like!

    Yields 1 healthy cup of pesto (enough to top approximately a pound and a half of pasta)