Category: Uncategorized

  • Q&A with Laura: Part 1

    Q&A with Laura: Part 1

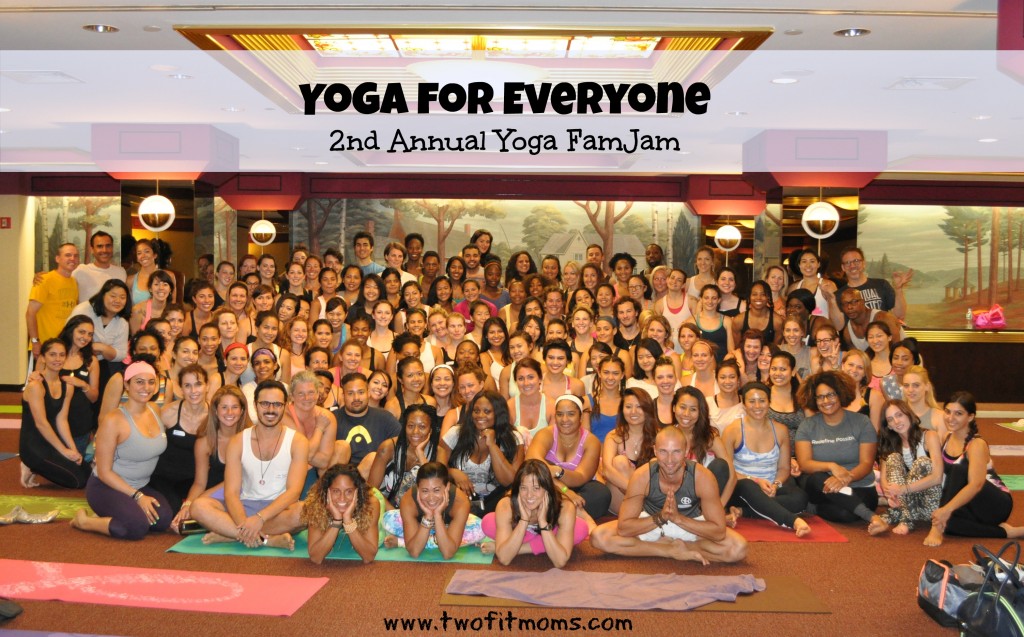
    Sometimes it is quite hard to keep up with all of the questions and emails I receive on a daily basis. I always try my hardest, but I know a lot slips by or that most of you won’t see my answers. Last week I asked you to leave a comment with one or two questions that you wanted to know about me. Here are the questions and answers in the order in which they were asked!

    Q&A001


    @evohoh: What led you to yoga?

    Boredom!  I know you probably expected some enlightened or inspirational answer to this one, but it was complete and utter boredom that led me to try yoga.  I was 19 at the time and babysitting my nieces and nephew.  After putting them to bed, I went downstairs to watch TV. My sister had a Baron Baptiste Power Yoga VHS tape. (What’s a DVD? LOL) I popped it into the VCR, and that was my first ever yoga class. I remember it being quite challenging, and I got hooked.

    @so_captiffating: How long did it take you to start noticing growth in your flexibility?

    This is a tough one…I’ve always been somewhat flexible. The most improvement I’ve seen has been in the past two years when I decided to give up my other workouts and focus on yoga…EVERY day.

    @joma1991: What type of yoga do you practice? What is your daytime job?

    I practice Vinyasa Flow yoga the most…mainly because I like to change things up every day and flow freely on my mat.

    I currently still work part-time for a software company doing customer support and project management.

    @carey_j_: Do you practice daily?  If so, for how many hours?

    Yes, I practice daily. On average, it’s for about an hour — sometimes shorter, sometimes longer.

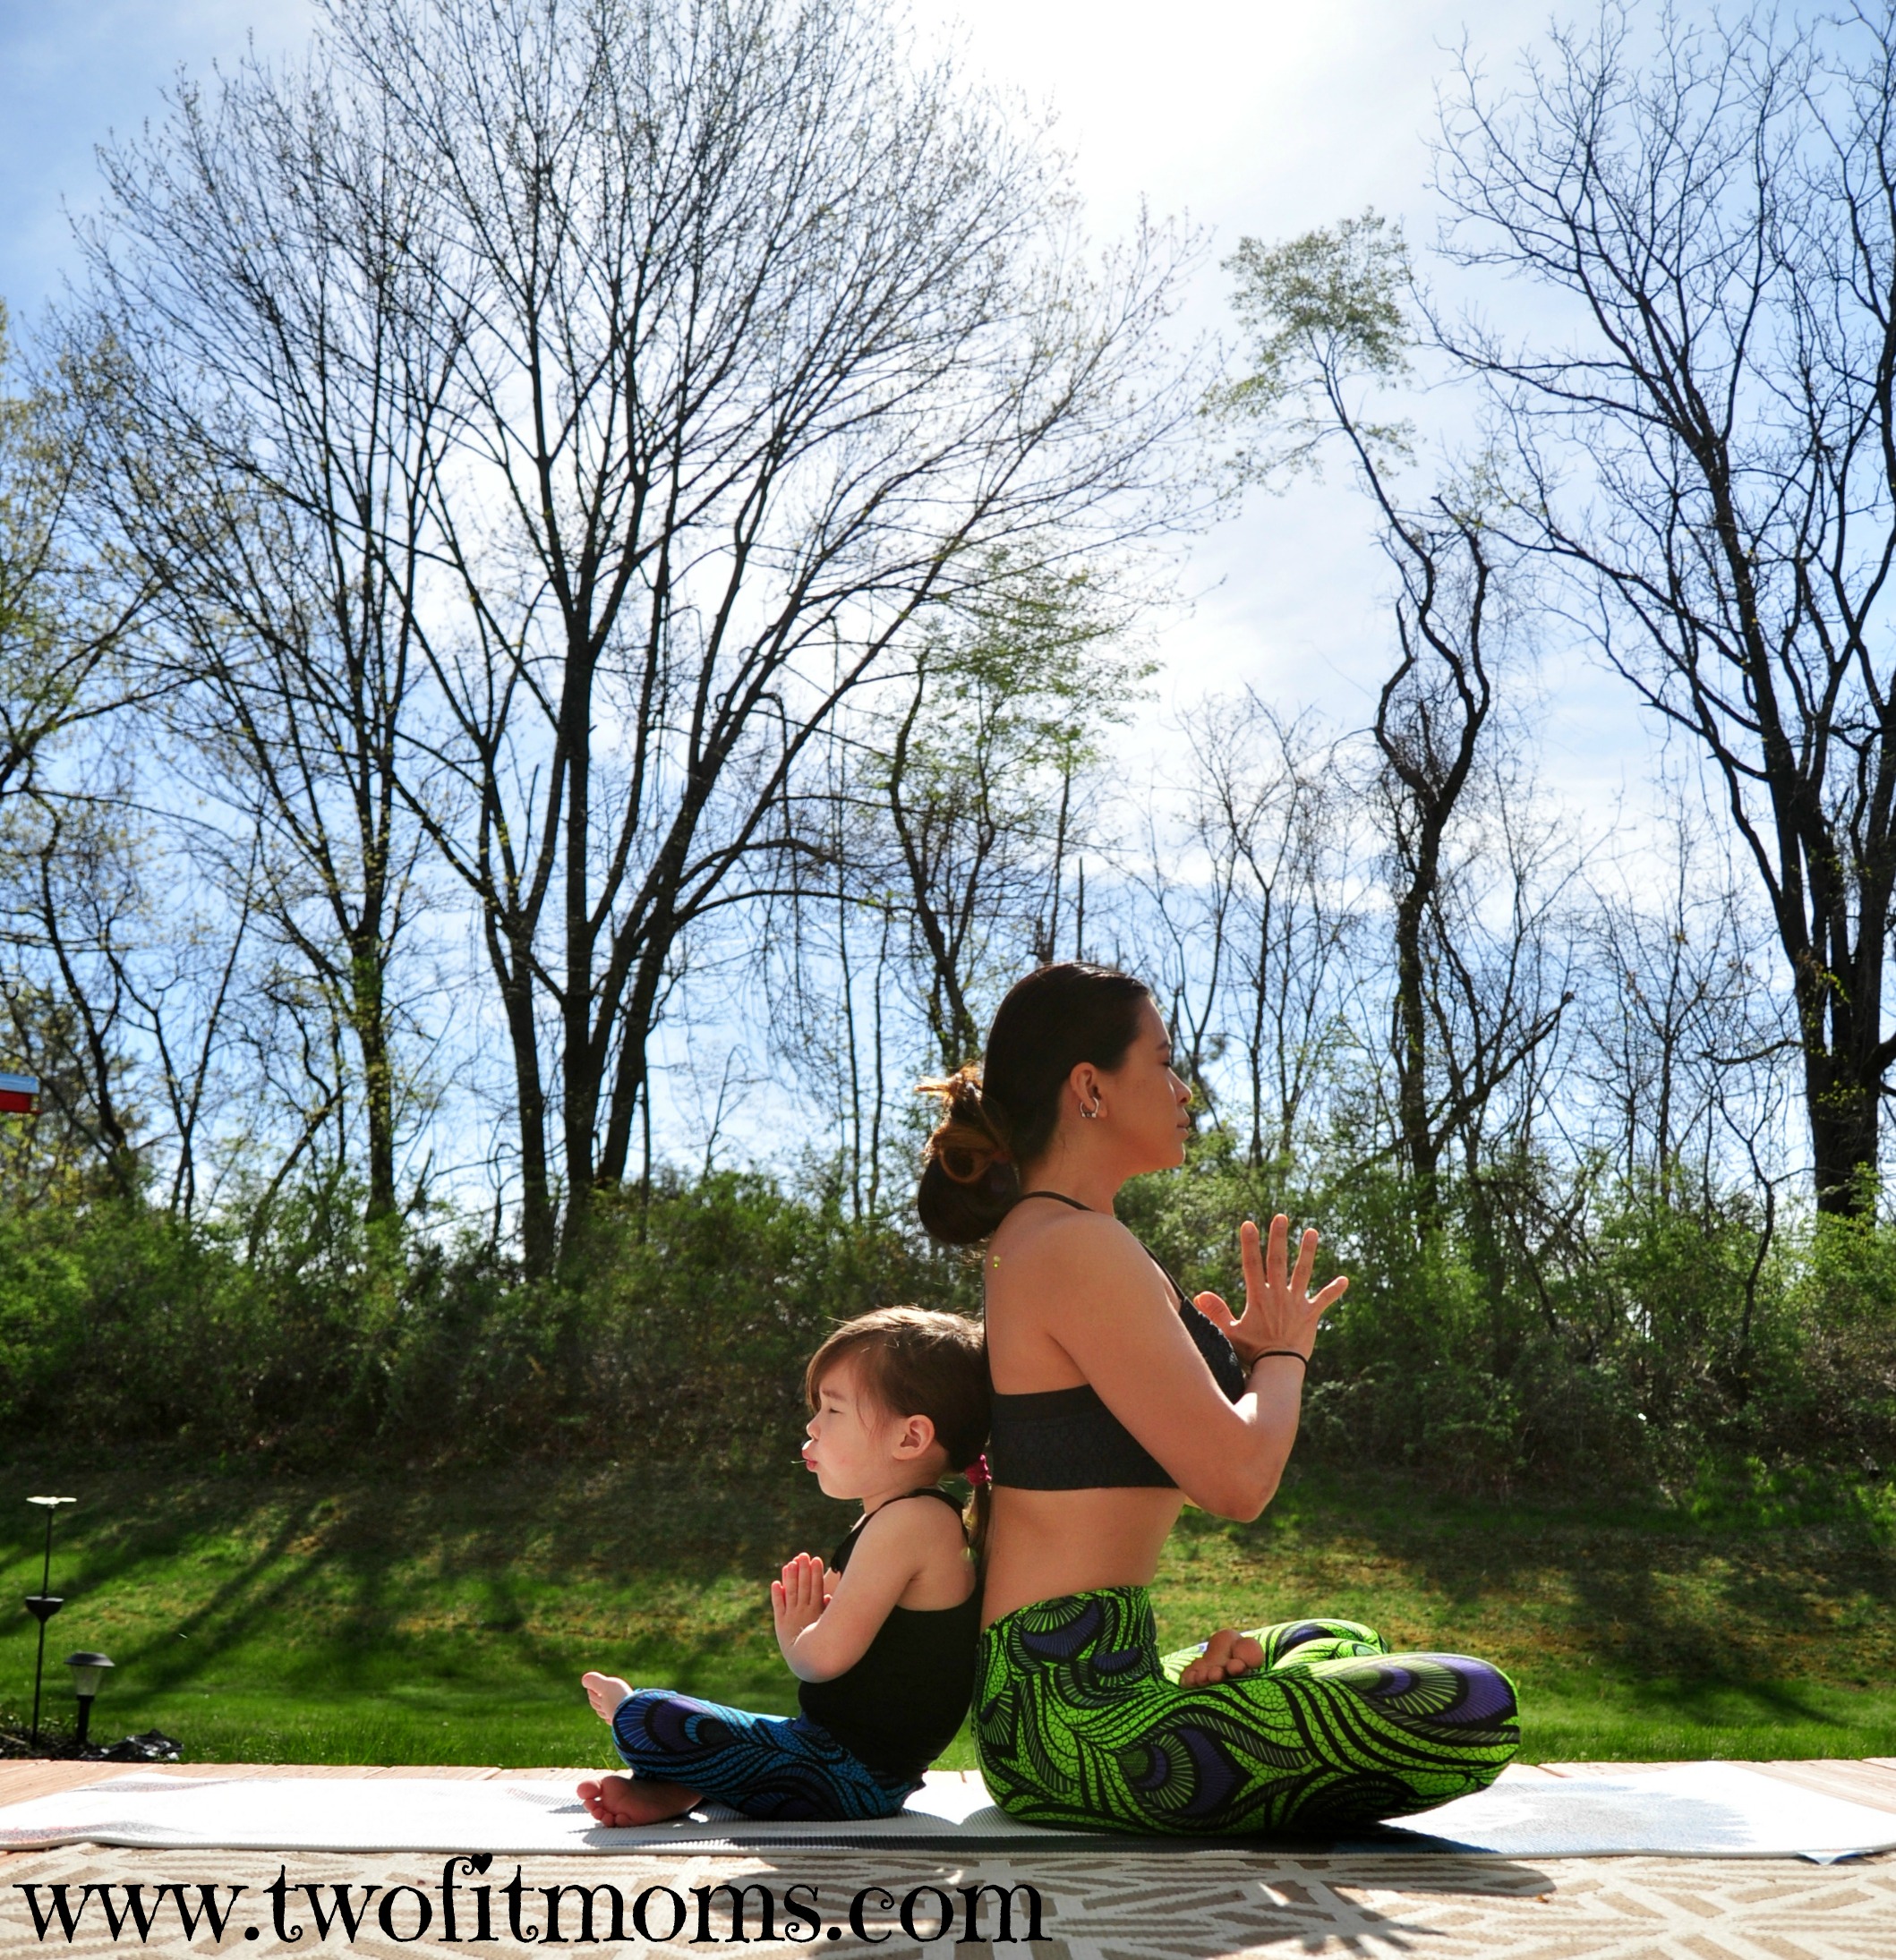
    @jasminenaamou: What has been the hardest part of your practice? How did you manage to get your family so involved?

    The hardest part of my practice has been to let go of my ego. There were definitely points in my practice where I was forcing postures because my ego wanted to achieve something. It led to some injuries and some negativity towards myself.  I thought I was a failure because I couldn’t do something. That has slowly left my practice. Of course I still get frustrated some days, but I no longer try to force anything for the sake of it. I just work a little harder on the mat and leave the outcome there.

    Getting my family involved is something I am ecstatic about! My minis would just jump onto my mat when I practiced and try to copy me. I have to coax my son a little bit more these days, but my daughter is usually quick to jump in. Same with my hubby…He was reluctant at first and would base me for acro-yoga because I asked. Nowadays, he has his own yoga practice and really enjoys the acro portion.

    Q&A003

    @kikimecheche: Can you come to Puerto Rico and teach us some yoga?

    Sign me up!

    @sowindy: Where do you recommend starting?

    Start with the basics flows and postures. Try to find a local studio that offers beginner classes or find some online. Learning the basics will help build a solid foundation and allow you to grow from there. You don’t learn to run before you can walk.

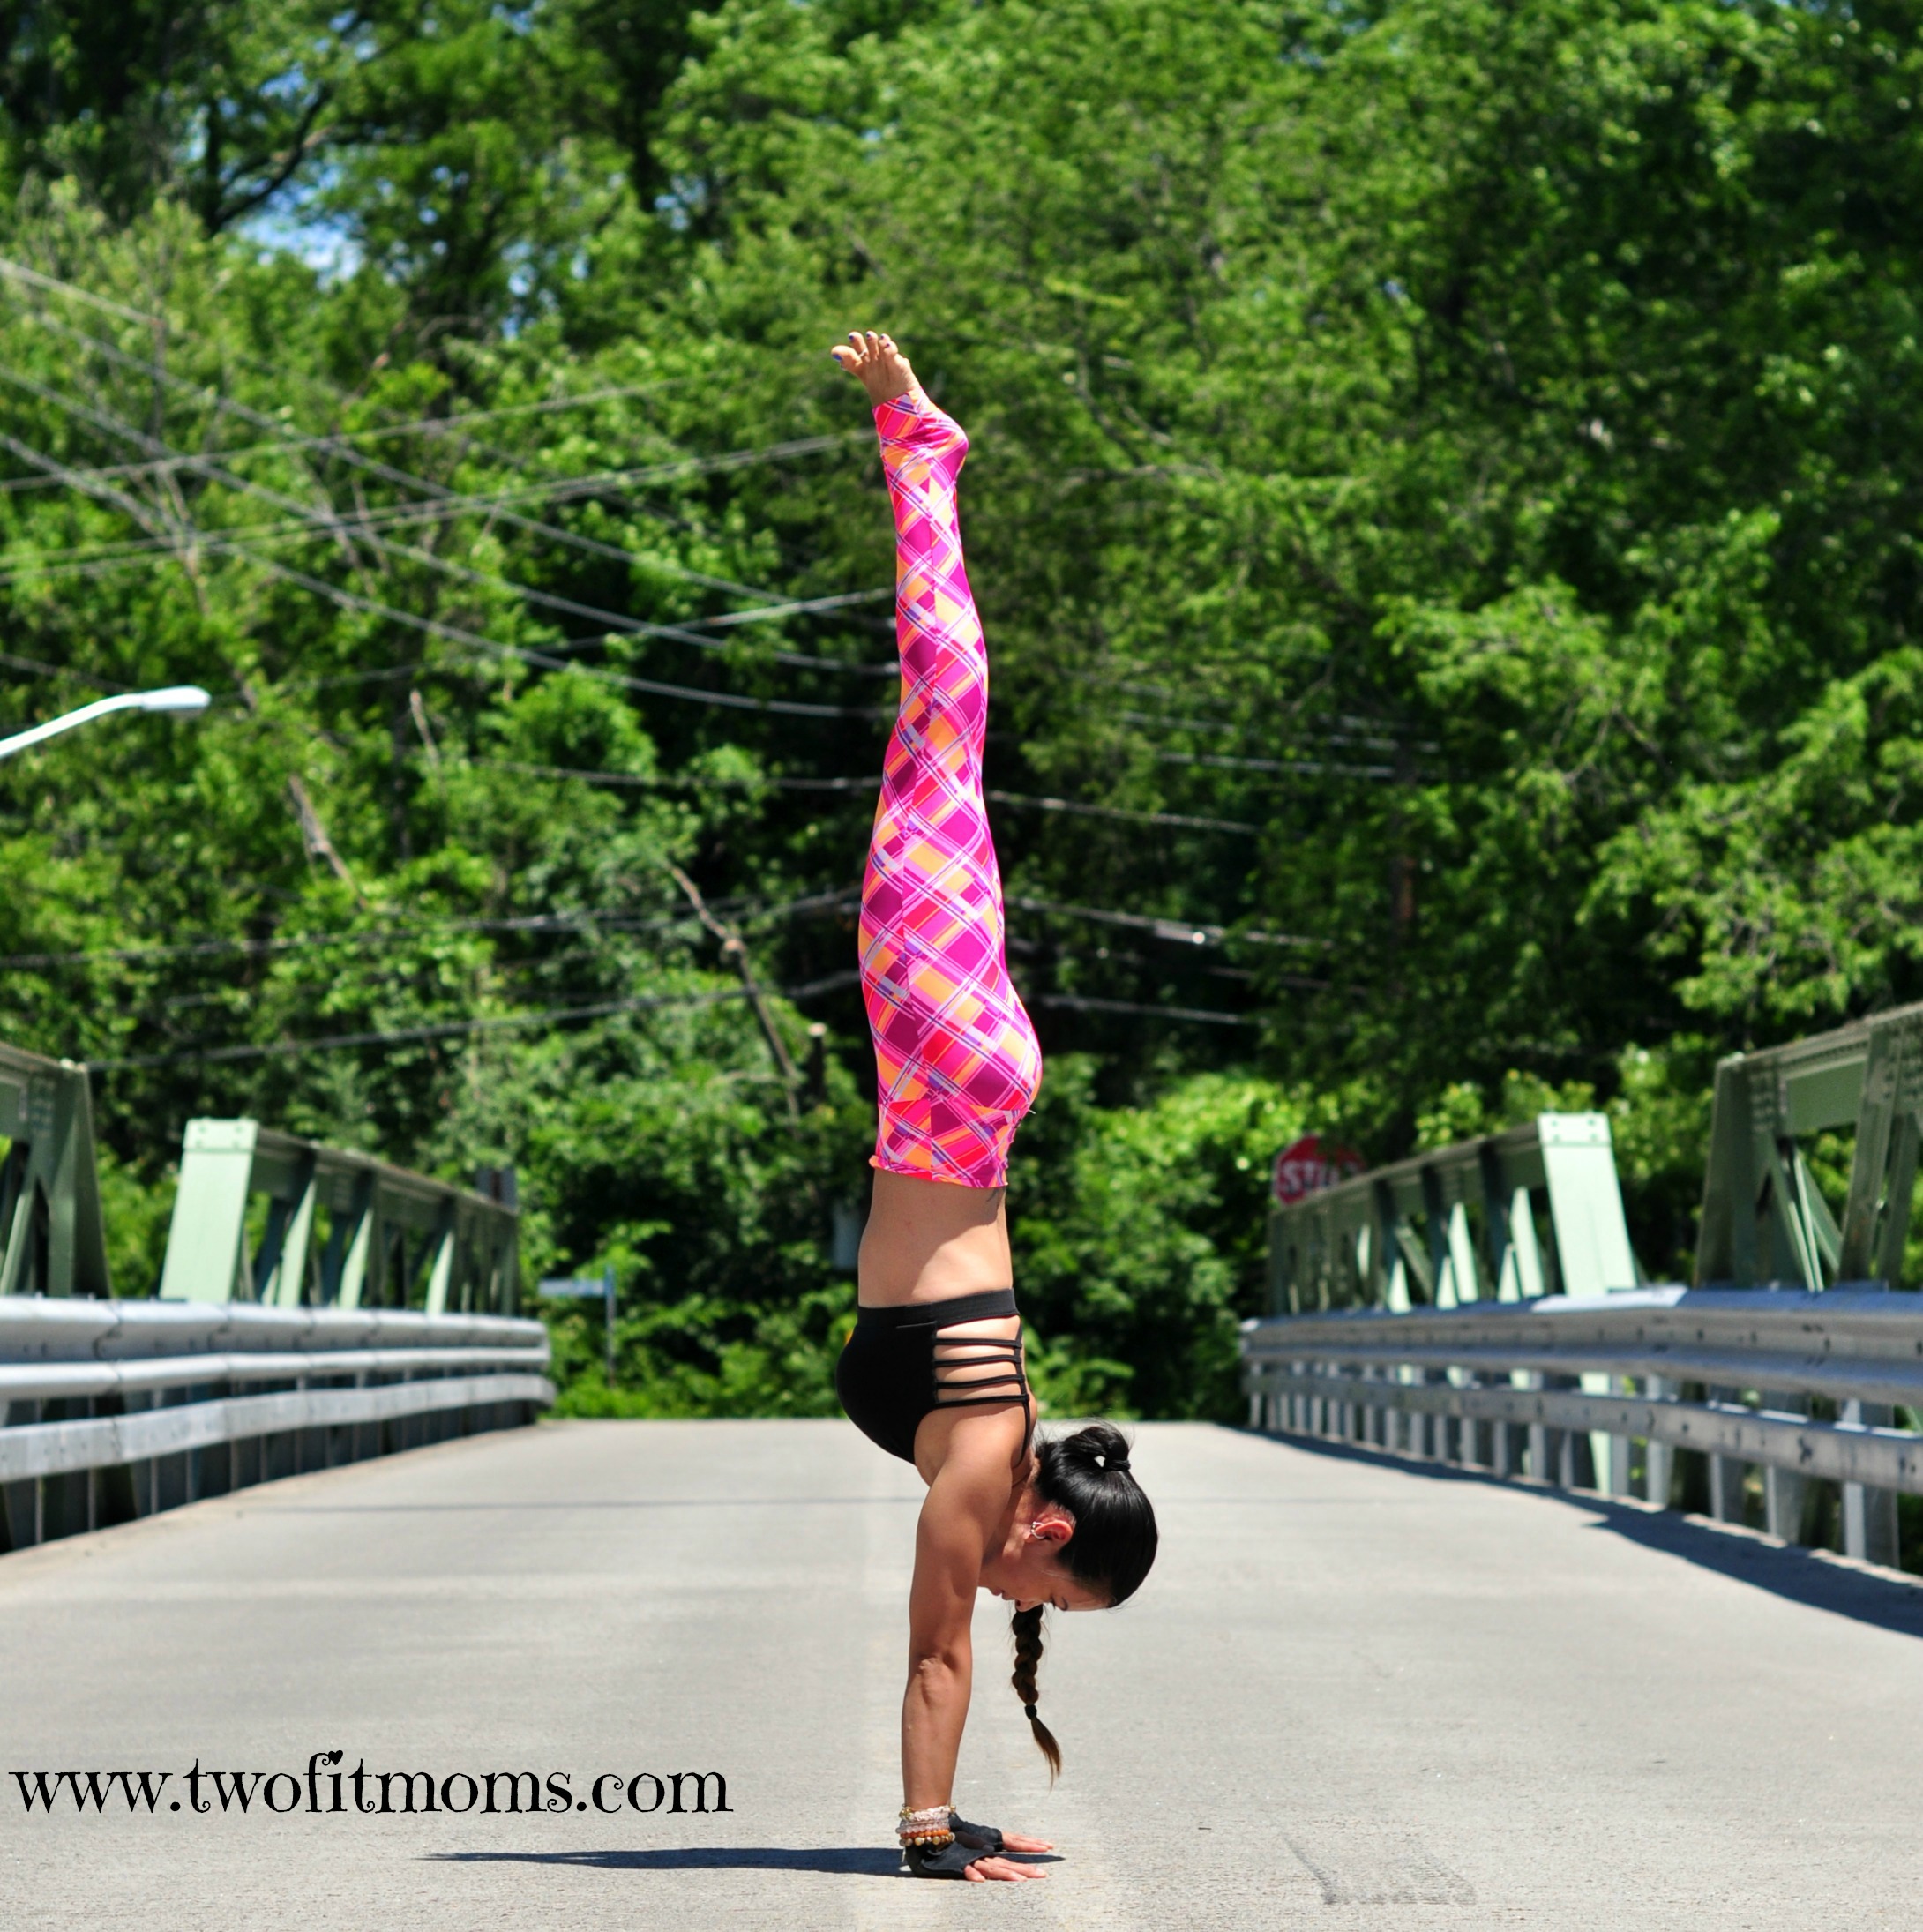
    @_kozette_: What is your favorite pose?

    Handstands! There is nothing more empowering to me than balancing on my hands.

    Q&A004

    @imajill: How tall are you?

    5’3″…I’m rounding up! 😉

    @sydneyecollier: Where do you travel?

    Right now, mainly in North America, but that will be changing by next year!

    @wastelandwanderer: What’s the best way to work on yoga teacher training while having a full-time job?

    Honestly, I lucked out with this.  I found teachers that were willing to meet around my schedule. It was more of a private YTT training. I would recommend finding a school that either does private YTT or one that meets once a month over a weekend.  It may take longer to graduate, but it won’t take up too much time over the month to do it.

    @shelss: Where do you get your mini’s yoga clothes?

    Some of my faves are from Pepper & Penny (www.pepperandpenny.com). Some of the matching leggings were custom made.  K.Deer Haute Yoga Wear (www.kdeerhauteyogawear.com) will be launching mini leggings this fall though!

    @nycfittyogi: How do you get into Lotus upside down without using your hands?

    Concentrate on opening up your hips for a solid month. Check my article on hip openers for ideas. I’ll put this on my list of tutorials to write up!.

    @myshelby: When did you stop being afraid in handstand?

    I honestly never really had a fear.  I did gymnastics when I was younger. When I started my handstand practice again after starting yoga, I already knew how to fall. I think that’s why people have so much fear when they start. Falling is some scary shit. My advice to you is to just keep at it…The more you practice, the more relaxed you’ll become at being upside down. Also I recommend finding a local class that will offer some guidance from a teacher. Hope that helps!

    @missbhaven613: What is your favorite pose?

    Already answered this!  LOL.  Handstand, of course!

    @susan_escalante: What is the best yoga class for beginners?

    One that focuses on the basic postures with correct alignment. One that builds a solid foundation for the student’s practice.

    @theirmama22238: What is your day to day diet like?

    OY…Knew this one was coming.  I am not vegetarian/vegan.  I pretty much eat everything in moderation.

    @yarahijazi1: Would you consider giving a workshop in the middle east? In particular Lebanon?

    I’m not opposed to it, but I’m not sure my husband would let me go.

    @bubblybug23: What is the trickiest trick you have ever done?

    I don’t know about “trickiest” trick…but one that I’m most proud of is being able to grab my big toe in a Forearm-Hollowback.  It took me almost a year to do.

    Q&A002

    @astrid_natalia26: How long did it take you to support your own weight and how many times did you practice?

    I’ve always been active and fit…so I honestly don’t remember a time where I couldn’t. My advice to anyone looking to become stronger is to keep a consistent practice or fitness routine.  Little by little, you become stronger as long as you stick with it and make it a daily practice!

    @peskyesk: Do you do other forms of regular exercise other than yoga?

    Nope!

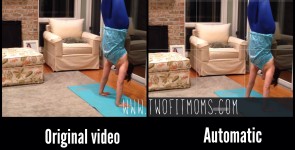
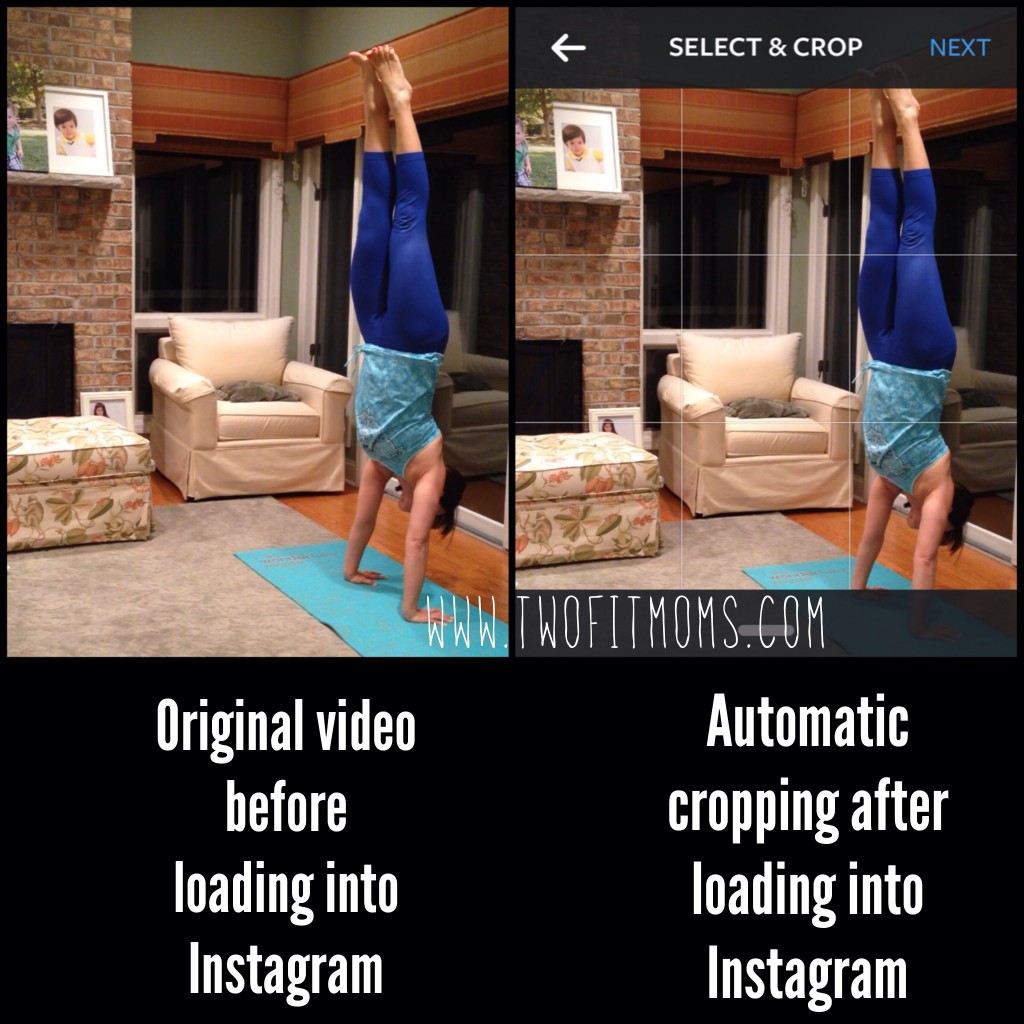
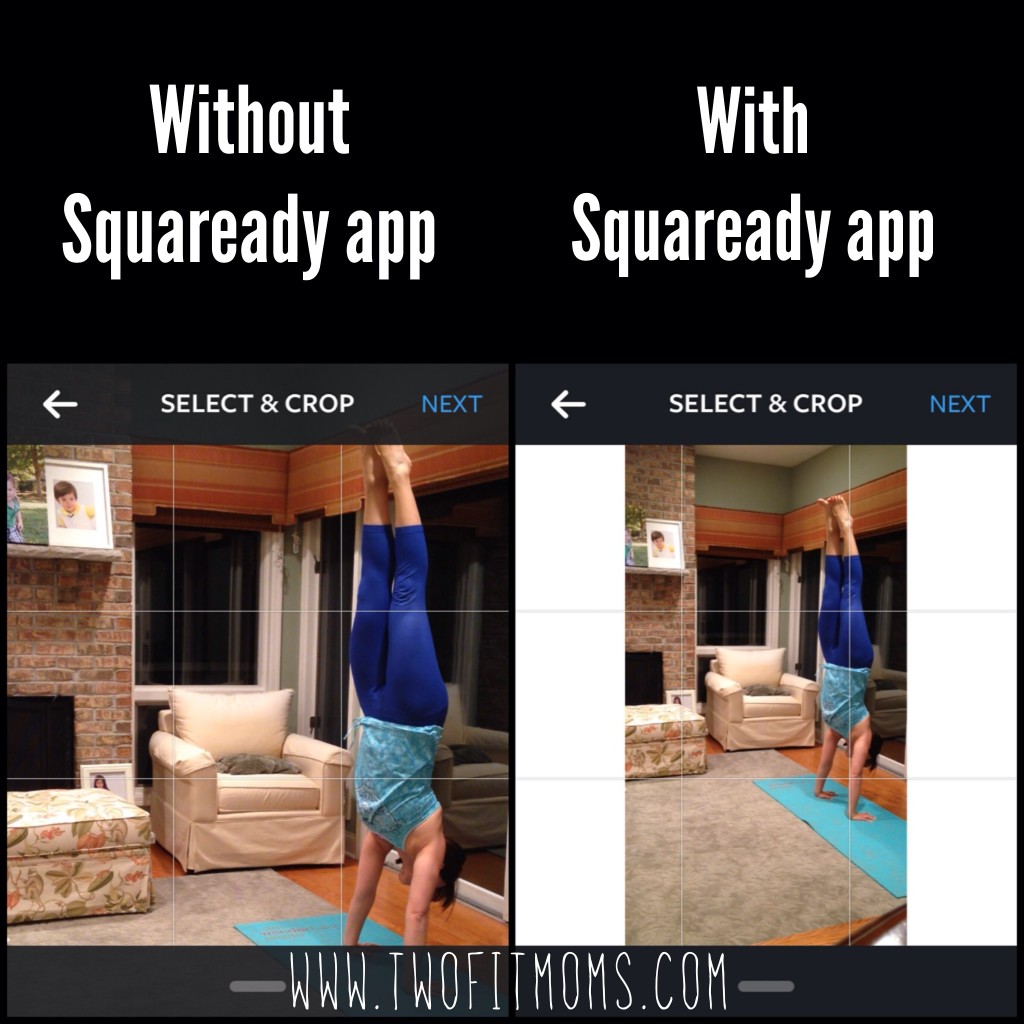
    @jolienej: What are your favorite apps for editing your photos and videos? How often and how long do you practice per week?

    My fave photo apps are PS Express and Snapseed. My favorite video editing app is iMovie.

    On average, I practice for about an hour a day…so anywhere from 7-10 hours a week.

    @jess11__: How do you get over your fear of lifting off into a handstand?

    A lot of guided practice and confidence that YOU CAN DO THIS! I would definitely recommend finding a local studio and teacher that is knowledgeable that can help you overcome your fears!

    @yogafanatic: What app do you use to edit your photos?

    LOL…Love how everyone wants to know this! For the most part, my pictures are pretty untouched because I shoot with a DSLR Nikon. However, I love PS Express and Snapseed.

    @t_jane_insta: How much practice (years and how often a week) did it take you to get this far in yoga?

    Once I decided to go strictly yoga (about two years ago), my progress increased pretty quickly.  I practice about an hour each and every day.

    XOXO

    Blog Signature

  • Zucchini and Summer Squash Pappardelle

    Zucchini and Summer Squash Pappardelle

    zucchini bannerThis dish is amazing.  It looks like pasta, and you want to believe you are eating pasta, but it doesn’t taste like pasta.  It just tastes really good.

    I think it’s the combination of textures — the thinly cut — almost twirl-able squash — the carmelized garlic, the nutty cheese and the herbs.  Whatever it is, it’s divine.

    You have probably noticed all of these nifty gadgets that cut the zucchini and other vegetables into spiral shapes that resemble spaghetti. I don’t have any of these tools, but I do have a mandolin which I used in our Shaved Fennel Salad.

    In fact, this recipe is a play on one that my brother recently concocted — what he calls “Zucchini Pappardelle” — which is a flat and wide pasta shape — and totally achievable with a mandolin. I made a garlic and olive oil based sauce with some red pepper flakes and fresh herbs. If you eat dairy, you must add parmigiano-reggiano cheese to this dish.

    You can also top the blanched squash with other sauces — including a fresh tomato sauce. However, I think you will really enjoy this recipe — it’s a surprisingly delicious and healthy dish that can be served alone, as an entree (along with a salad), or as a side dish with chicken or fish or anything else you may have on your table this summer. Aside from tasting great, it just looks gorgeous!

    If you can’t eat pasta, or if you are looking for a new recipe for all that squash in your garden, this recipe is for you.

    Enjoy!

    Zucchini and Summer Squash Pappardelle with Garlic & Olive Oil
    Serves 4 people

    3 medium sized zucchini
    3 medium sized summer squash
    1/4 cup olive oil
    4 large cloves of garlic
    1/4 teaspoon red pepper flakes
    1/4 cup of shaved parmigiano-reggiano cheese
    1 tablespoon chopped basil
    1 tablespoon chopped parsley
    salt to taste

    Bring a large pot of salted water to a boil.

    In the meantime, with a mandolin, slice the zucchini and summer squash about 1/16th of an inch thick. Blanch the zucchini for approximately one minute, or until the squash is tender. Remove the squash and submerge into ice water to stop the cooking. Drain the squash and set aside in a large serving bowl.zucchini collage

    In a pan over medium-low heat, add the olive oil, sliced garlic and crushed red pepper.  Allow the garlic to brown slowly, and once it does, turn off the heat.

    Add the olive oil mixture, the chopped basil, parsley and parmigiano-reggiano over the blanched zucchini. Toss and serve.

    Helpful hint: Do NOT overcook the squash during the blanching stage. It will fall completely apart when you toss it! And, do NOT burn the garlic.  If you do, start over!

  • Banana Maple Walnut “Ice Cream” (Dairy- and Gluten-Free!)

    Banana Maple Walnut “Ice Cream” (Dairy- and Gluten-Free!)

    I had heard you could make mock-ice cream out of frozen bananas.  I was skeptical, but I had a few spotted bananas on my counter, and I figured why not try! So, I peeled them, sliced them, wrapped them up and popped them into the freezer.
    rotten bananas
    While they were freezing, I contemplated what type of ice cream I would make.  You could easily make one-ingredient ice cream with just the frozen bananas, but I wanted to jazz it up a bit.  While the ripened bananas are sweet on their own, I wanted to add a little more sweetness.  I’m particularly fond of using maple syrup as a sweetener.  I thought I’d also throw in some nuts — walnuts to be exact.  Maple Walnut ice cream sounded pretty good to me — plus I figured the flavors would complement the bananas (think banana walnut muffin!).

    I threw the chopped, frozen bananas into the food processor along with the maple syrup and pulsed it until it was smooth — like a softened ice cream texture. I then mixed in (by hand) the chopped walnuts.

    The texture is definitely looser than ice cream, so you may want to put it in the freezer to set up a bit.  If so, a loaf pan covered with plastic wrap works out nicely.

    This is a great mock-ice cream.  It’s creamy and delicious, and it is a perfect ice cream substitute.  It’s also ideal for those who follow a dairy- or gluten-free diet.

    As far as my family goes, they really enjoyed it — in fact, they were asking for more!

    banana ice cream headerWhile an ice cream aficionado might turn their nose up, a health-conscious ice cream-loving mom will love this recipe — not only will she get rid of the spotted bananas in the house, but she will reap a healthy frozen dessert in return!

    Banana Maple Walnut “Ice Cream”
    Serves 4 people

    4 ripe bananas cut into 1 inch slices and frozen
    3-4 tablespoons maple syrup ( I use grade B for thickness)
    1/4 cup of chopped walnuts

    In the bowl of a food processor add your bananas and maple syrup (you can adjust the amount of syrup based on your desired level of sweetness). Pulse until the bananas break down, resembling a smooth creamy consistency.  Remove mixture and add to a bowl.  Mix in the chopped walnuts.  Serve immediately or pop back into the freezer for a more solid consistency.

  • Grilled Peach Salad With Balsamic Glaze

    Grilled Peach Salad With Balsamic Glaze

    peach saladNow that summer is in full swing, you will notice peaches, plums and other stone fruits aplenty at the market.

    In addition to eating these fruits on their own, there are so many wonderful ways to incorporate them into your cooking.

    Desserts immediately come to mind, but why not use them in a salad?

    I thought grilled peaches would be a great addition to a salad, so I fired up the grill.

    I split the peaches in half, removed the pit, coated them with olive oil, salt and pepper and grilled them! I easily could have gone the dessert route at this point and topped them with ice cream, but I didn’t! I stayed on course and continued to focus on my salad.

    I chose arugula as my salad green — it’s peppery and delicious.  I also wanted to incorporate balsamic vinegar.  I thought it would complement the peaches.  Lastly, I needed a crunch factor, so I topped the salad with crushed pistachios.  The combination of the warm peaches, the crisp greens, the crunchy nuts and the sweet balsamic glaze made this salad soar! It’s quite delicious if I do say so myself.  And, a testament to it’s deliciousness was the empty bowl left at the end of dinner!

    So, here’s my recipe.  I hope you like this recipe as much as my family and I did!

    Grilled Peach Salad with Balsamic Glaze
    Serves 4 people

    Grilled Peaches:
    2 ripe peaches
    olive oil
    salt and pepper to taste

    Balsamic glaze:
    1 cup of balsamic vinegar

    Salad:
    4 cups of arugula
    3 tablespoons olive oil
    salt and pepper to taste
    1/4 cup of chopped pistachios

    Before we get started on the salad, let’s make the balsamic glaze.   Put 1 cup of balsamic vinegar in a small saucepan.  Let it come to a boil over medium-high heat.  Let it simmer until it thickens and reduces in size.  It’s ready when it coats the back of a spoon (or a spatula! see picture below).  This will take roughly 15 minutes.  The balsamic vinegar will cook down to about 1/4 cup of balsamic glaze.  Let the glaze cool and set it aside.
    balsamic

    Now it’s time to grill the peaches. Cut the peaches in half, remove the pit and slather each side with olive oil.  Season with salt and pepper to taste.  Grill the peaches approximately 5 minutes on each side, on a very hot grill (mine was set to high).  The peaches are done when the skin starts to lift.  They should also have some lovely grill marks. Remove the peaches from the grill and set aside.
    peaches

    Add the arugula to a large serving bowl.  Add the 3 tablespoons of olive oil and salt and pepper to taste.  Toss the greens.  Add the peaches to the salad and sprinkle the pistachios pieces on top.  Drizzle 1-2 tablespoons of balsamic glaze over salad.

    Enjoy!

  • Tropical Thai Coconut Smoothie

    Tropical Thai Coconut Smoothie

    coconut smoothiePiña coladas are my summer-time splurge.  I love the combination of coconut and pineapple — it’s just so delicious.  Even if I’m not on a tropical island or on vacation, this drink helps me pretend that I am!

    I thought I’d try my hand at a piña colada-like smoothie — or what I like to call my Tropical Thai Coconut Smoothie!

    I recently discovered young Thai coconuts, and I thought they would be perfect for my concoction.  In addition to the Thai coconut water and pulp, I incorporated frozen pineapple, some honey (for sweetness), vanilla extract (to mimic the flavor of vanilla ice cream) and a hint of lime.   And, voila, my version of a piña colada (a healthier version) was born!

    You can modify the recipe by adding half of a frozen banana or one cup of kale.  You can also add some rum! (which REALLY made it taste like a piña colada).

    We used a Coco Jack opener to help us dismantle our Thai coconut. If you don’t have a Coco Jack opener, you can certainly use coconut water.  In fact our favorite brand of coconut water can be found in our shop!

    Check out the photos below for more details on how we managed to open our Thai coconut.
    open coconut
    Tropical Thai Coconut Smoothie
    Yields between 4 and 5 cups

    2 cups of fresh Thai coconut water (which seems to be the standard yield from a fresh Thai coconut), plus the pulp of one Thai coconut
    1 cup of frozen pineapple
    1 cup of ice
    1/2 lime, juiced
    1 tablespoon of honey
    1/2 teaspoon of vanilla extract

    Some optional ingredients:
    1/2 frozen banana (please note, bananas are very sweet and potent, so use sparingly)
    1 cup of fresh kale

    Add all of the ingredients to the base of a blender (I used a Vitamix) and blend until smooth.  Portion into glasses, or back into the Thai coconut, and enjoy!

  • Daily Practice: Warrior I

    Daily Practice: Warrior I

    As much as I love to be upside every day, there isn’t a day that goes by where there is not a Warrior Pose included in my practice. Just like any inversion, these postures work your entire body and build muscle. Over the next few weeks, I will break down all of the different Warrior Poses you can add to your daily flows. Not convinced yoga is a workout? Your challenge this week will be to hold Warrior I, or Virabhadrasana I, for a full minute on each side.

    Warrior 001

    From Downward Facing Dog, step your right foot in between your hands and spin the left heel down. Your right heel should line up with your left heel. Bend deeply into the right knee, making sure your right knee stacks directly over your right ankle. Right thigh becomes parallel to your mat. You should be able to look down and see your right big toe.  If you cannot, make sure your right knee isn’t collapsing in. Take your hands to your hips and try to square your hips off to the top of the mat.

    Warrior 002

    Don’t worry if your hips aren’t completely square…my hips tend to be tight so this posture is always a work in progress for me!  Remember, yoga is a practice.

    Once your hips are as square as you can get them, extend your arms up toward the sky. Activate your fingers as you reach up.  Your upper arm bones will plug into their sockets and your shoulder blades will draw down your back. Engage your abdominal muscles and stand strong! Press actively into the mat, applying equal pressure. Remember to keep bending into that front leg!  No lazy warriors allowed!

    XOXO

    Blog Signature

  • Blueberry Crisp (No White Sugar, No Dairy, No Gluten)

    Blueberry Crisp (No White Sugar, No Dairy, No Gluten)

    blueberry crispI love dessert. I love butter, sugar and cream — and all of the other sinful ingredients that go into a decadent dessert.  However, I’ve been on a quest to lighten up my desserts, to reduce my sugar intake and to substitute more “healthy” ingredients into my recipes.

    I thought I would start with a crisp.  I made a light version of a strawberry rhubarb crisp a few months ago.  It was delicious.  But, now blueberries are in season, so I thought I would try my hand at a healthy blueberry crisp. I swapped out white sugar for maple syrup — a natural sugar.  I included orange juice to add some natural sweetness as well as the zest of orange and lemon which pairs perfectly with the blueberries. Instead of butter, I used safflower oil as the “fat” in the topping.  I added walnuts and oats for texture.

    I’m really pleased with how it turned out.  In fact, my whole family thoroughly enjoyed this crisp — even my mother (who can see right through my healthy dessert recipes) raved about it!

    The beauty of this recipe is that you can swap the blueberries for other berries of your choice.  You can eat it just as it is, or you can top it with ice cream, a dollop of cream or greek yogurt. I bet this would work out great with apples.  I can’t wait for apple season . . . .

    Blueberry Crisp
    Serves 8-10 people

    8 cups of blueberries
    1/4 cup of freshly squeezed orange juice
    1/4 cup of freshly squeezed lemon juice
    zest of one orange
    zest of one lemon
    3/4 cup of maple syrup (grade B)
    1.5 tablespoons of cornstarch

    For the topping:

    3/4 cup of brown rice flour
    3/4 cup of almond meal
    1 cup of quick cooking oats
    1/2 teaspoon of salt
    1/2 cup of safflower oil
    3/4 cup of maple syrup
    1/3 cup of chopped walnuts

    Preheat oven to 350 degrees.

    In a large bowl, combine blueberries orange juice, lemon juice, zest, maple syrup and cornstarch.  Mix to combine.  Pour blueberry mixture into a 9 by 13 inch baker.

    In a separate bowl, add brown rice flour, almond meal, oatmeal, salt, safflower oil, maple syrup and chopped walnuts.  Mix to combine. The topping will be loose. It will not be crumbly like a more traditional crumb topping made with butter. I’ve included a picture below so you can see the consistency.crumb topping

    Spoon topping over blueberry mixture.  Bake for 1 hour at 350 degrees. Crisp is done when berries burst open and bubble.cooked crisp

    Helpful hint: Don’t serve the crisp right from the oven.  Let it sit a bit so that it sets up — it will be easier to dish out.

  • Instagram Quick Tip:  Video Cropping

    Instagram Quick Tip: Video Cropping

    About a year ago, Instagram moved into the realm of video sharing. Now, not only can you share your favorite photos with the world, but you can also share your favorite 15-second video clips. If you are already familiar with Instagram, you know that the format of this photo/video-sharing app allows you to post a square-shaped image. This sounds reasonable enough, until one day, you load an amazing panoramic or vertical video onto Instagram and discover that the automatic square-shaped cropping results in some of your body parts or some of your amazing view being cropped out of sight.AutomaticCropHandstand

    The image on the left is a screenshot of a video that I took on my iphone. Looks great, right? The image on the right is a screenshot of the automatic cropping that occurs as soon as the video is loaded into Instagram. My legs and hands are cut off!!

    No need to panic.  Gone are the days of having to re-shoot your video to adjust your distance from the camera.  Here are two of our favorite video cropping apps to help you navigate the Instagram world of square cropping.

    Video App 1: Squaready for Video App
    Download the free “Squaready for Video” app onto your phone. Upload your video into the app, and it will automatically put your full video into a square shape by adding borders in the color of your choice. This is a great option if the subject of your video occupies a large portion of the frame, as shown in my example. This app allows you to maintain the entire image without any square cropping at all. When you upload your video after using the Squaready app, your video will appear in Instagram as shown below.  As you can see, I’ve chosen white borders to fill in the empty portions of the Instagram square.

    SquarereadyHandstand

    Video App 2: Video Crop & Zoom
    The second video app that we love is the “Video Crop & Zoom” app. This app allows you to zoom in on any portion of a video and crop it into a square shape for Instagram as shown below. By having the capability to zoom in on the subject, you can eliminate unwanted background/foreground.

    CropandZoom

    Although this process is a bit more time consuming than just loading the video directly onto Instagram, I prefer having a video that fills the full square frame.


    Download one or both of these apps!  You may find that both of these apps are helpful in different situations.

    If you would like to see any other Instagram Quick Tip topic covered, please leave us a message!

  • Herb Marinated Grilled Vegetables

    Herb Marinated Grilled Vegetables

    grilled veg bannerGrilled veggies are a mainstay summer side dish at our house, and the recipe that I’m sharing with you is not just any grilled vegetable recipe — it’s the best grilled vegetable recipe!

    It’s based on Giada De Laurentiis’ recipe which I’ve modified.  To be honest, the marinade is what really sets it apart.  It’s an olive oil and balsamic vinegar dressing infused with garlic, rosemary, basil and parsley.  The dressing brings your grilled veggies to a whole new level!

    Cutting the vegetables is a little time intensive, but I promise you will not regret the effort you put into making these veggies.  In fact, you will likely get more than one meal out of them — and the longer they marinate, the better they taste.

    I generally serve these veggies as a side dish, but they are delicious on a sandwich (with hummus or goat cheese). You can also chop up the leftover veggies and serve over salad greens or mix them into quinoa or farro.

    You can modify the recipe based on the veggies you have on hand (e.g., substituting summer squash for zucchini), and you can adjust the quantity of marinade depending on whether you want to make more or less veggies.

    Herb Marinated Grilled Vegetables

    3 zucchini
    3 Japanese eggplant
    3 red, yellow or orange bell peppers
    12 baby portobello mushrooms (e.g., cremini or baby bella mushrooms)
    1 bunch of asparagus
    2-3 bunches of scallions
    Olive oil (approximately 6-8 tablespoons — but don’t be afraid to use more, if necessary)
    Salt and pepper to taste

    For the marinade:

    1/2 cup of olive oil
    4 tablespoons balsamic vinegar
    2 cloves of garlic, crushed
    1 tablespoon fresh basil, chopped
    1 tablespoon fresh parsley, chopped
    1 tsp fresh rosemary, chopped

    Turn on your grill, and set it to high.  In the meantime, prep your veggies.  You want thick cuts in order to survive the grilling process.  Cut zucchini and eggplant in 1/4 inch thick slices (long ways).  Seed the bell peppers and cut into quarters (the larger slices will be easier to grill vs. smaller strips).  Trim the asparagus (check out our article on how to properly prep asparagus!), and wash and remove the bottom stems of the mushrooms.  Trim bottoms and tops of scallions.

    Arrange cut and prepped veggies on a large baking sheet.  Drizzle with a few tablespoons of olive oil — not a thick coating, but a light coating on all the veggies so that they don’t stick to the grill.  Season with salt and pepper to taste.

    While grill is heating, make the marinade.

    In a small bowl, add olive oil, balsamic vinegar, garlic and chopped herbs. Whisk until incorporated.  Set aside.

    When the grill comes to temperature, arrange vegetables and cook until they are tender and have grill marks.  You will likely need to grill the veggies in batches.  Once they are cooked, place them on a large cookie sheet and keep adding to the pan as additional veggies are ready.
    veggie collage

    While the grilled vegetables are warm, pour the marinade over them.  Seal the pan with foil and let them sit until they come to room temperature.  You can serve the veggies at room temperature or you can place them in the refrigerator for use at a later date.  The longer they marinate, the better they taste!

    Helpful tips: Make sure your grill is very hot and the grates are clean.  Grilled veggies don’t taste good with leftover charred bits on them! Additionally, if you don’t use all of the marinade, use the extra to dress your salad!


  • Yoga For Everyone

    Yoga For Everyone

    When you gather nearly 200 people for a free yoga event in New  York City, you realize that the concept of “yoga for everyone” is possible.  In fact, it’s happening.  We see this message unfold on Instagram daily.  People of all ages, sizes, ethnicities — all walks of life — have embraced yoga.  But being able to see this in real life is truly amazing.

    As we debriefed after the event, the first topic of discussion was the amazing demographic of our yoga community.  It really made us feel proud that we have helped bring so many different people together for the same purpose — yoga!banner for article

    The event was intended for all levels of yoga experience—Inversions were optional!  Whether you were a beginner or a more seasoned yogi, you were welcomed.  Many attendees tried AcroYoga for the first time or attempted their very first headstand!  It was amazing to see so many people take a leap of faith and soar.

    We created this event to help inspire, to build confidence, and to build an even greater comradery.  We think we achieved this — and maybe more.

    As we sort through all of the pictures we took during FamJam, we see lots of smiles beaming back at us.  Pure happiness exudes from everyone in attendance.  Meeting the yogis we’ve been following on Instagram, achieving a yoga posture we never thought was possible, learning to trust others to the extent that you’d let them balance you on their feet — all of this was achieved on Saturday.

    Thank you to Gaiam, our gracious event sponsor. Thank you to our partners, Claudine and Honza, of YogaBeyond. And, most importantly, thank YOU for making it such a memorable day!

    To see the full album of photos from Yoga FamJam, please visit our Facebook page.

    Namaste.

    bottom famjam collage