Category: Uncategorized

  • Banana Bread French Toast

    Banana Bread French Toast

    Brunch and Mother’s Day seems to go hand-in-hand, so what better way to celebrate mom than with a delicious, homemade breakfast?
    BBFrenchToast

    We have teamed up with our local Whole Foods again this month to not only bring you this amazing recipe, but to launch a Mother’s Day Instagram giveaway for a $250 Whole Foods gift card AND a re-useable tote filled with all of the ingredients to make this recipe. So visit the @twofitmoms Instagram page for more details!

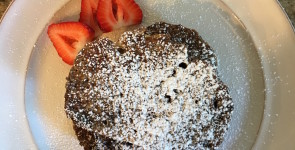
    Since Mother’s Day is generally a day for pampering and splurging our goal was to create a decadent brunch dish. As you know, the vast majority of our recipes are healthy, so while healthy and decadent don’t always go together, we managed to merge the two to bring you Banana Bread French Toast! How amazing does that sound??!!

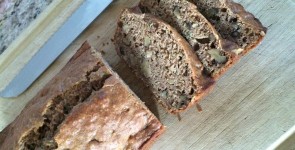
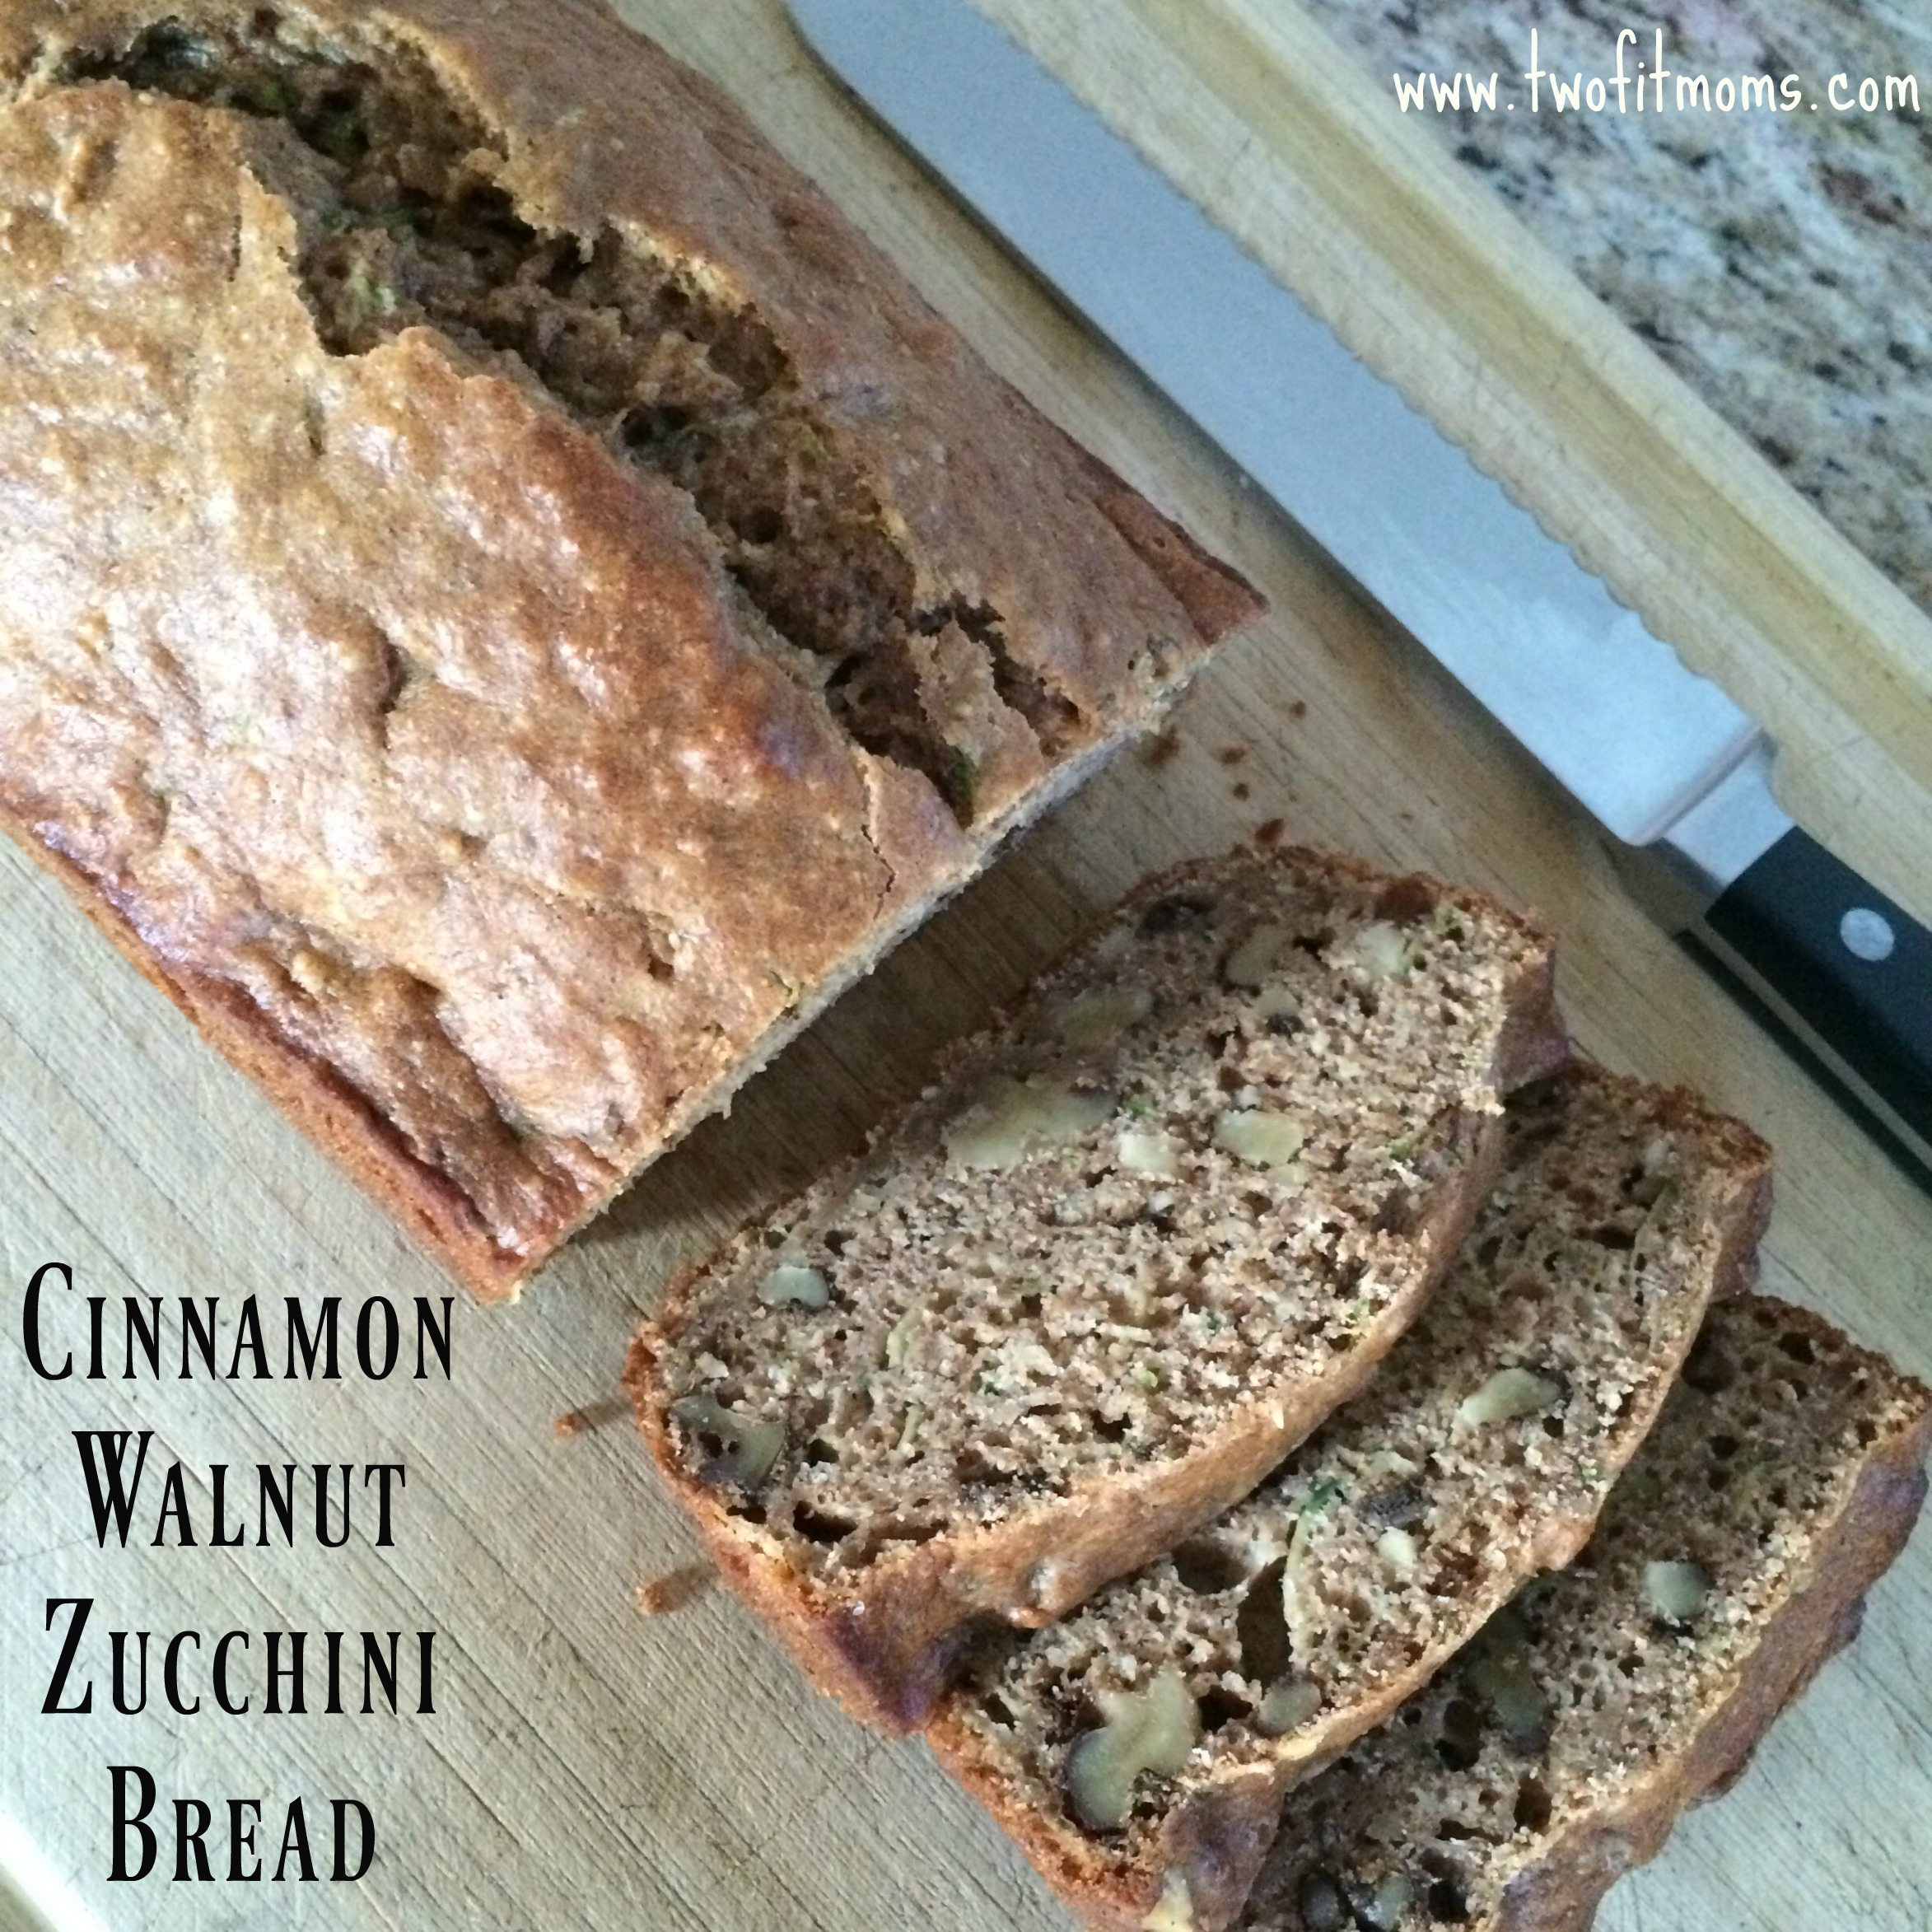
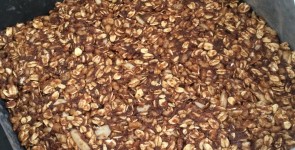
    We took our traditional Banana Bread recipe (which happens to be gluten free!), sliced it, soaked it in an egg batter and pan fried it to create a delectable dish that any mom would love. The beauty of this recipe is that you can make the banana bread a day or two in advance and leave the frying for Mother’s Day morning.

    You can serve it as is, with a dusting of powdered sugar (as shown) or topped with a bit of maple syrup (you don’t need much at all)!.

    Banana Bread French Toast
    Yields 12 slices (feeds approximately, 4-5 people)

    1 loaf of banana bread, sliced into 12, 1/2 inch slices (find recipe here)
    3 eggs, beaten
    1/2 cup of milk (your choice)
    1 teaspoon vanilla extract
    2-3 tablespoons of butter
    powdered sugar for dusting
    maple syrup (optional)

    Directions: Set a griddle or a large frying pan, over medium heat, melt 1 tablespoon of butter. While the butter is melting, beat eggs, milk and vanilla in a shallow bowl. Dip both sides of banana bread into egg mixture and place on hot griddle/pan (We were able to fit 2-3 pieces of banana bread in our pan). Let the banana bread cook about one to one and a half minutes on each side — until nice and golden brown.  Turn the banana bread onto a baking sheet and keep warm in a 300 degree oven while making the rest of the bread. You will use the rest of the butter once you work through the remaining slices of bread.

    Serve warm, top with powdered sugar or maple syrup – fresh fruit, whatever you desire.

    The Instagram giveaway is sponsored by Whole Foods.

    Whole Foods Market®
    “Mother’s Day Giveaway”
    Official Rules
    No payment or purchase is necessary to enter.
    Dates: This promotion begins at 12:00 p.m. Eastern Time (ET) on 05/06/17, and ends at 12:00 p.m. ET on 05/13/17 (the “Promotion Period”).
    Eligibility: Entrants must be a legal US resident, and at least 18 years of age or older, to participate. Officers and employees of Whole Foods Market (the “Sponsor”), and its respective subsidiaries, affiliates, advertising and promotion agencies, their vendors and agents, and the immediate family members of the foregoing, are not eligible to win.
    To Enter – Instagram: To participate using Instagram, participants must have a valid, public Instagram Account and be a follower of both @wholefoodsbergennj and @twofitmoms Instagram accounts. Participants are asked to comment on the Post telling us their favorite Mother’s Day tradition, share by tagging @wholefoodsbergennj and @twofitmoms, and include the hashtag #SweepstakesEntry for an entry. By using the hashtag, participant indicates his/her agreement to these Official Rules. Entrant’s Instagram settings must be public. Entries uploaded from “private” Instagram accounts will not be eligible. Entrants must follow and continue to follow @wholefoodsbergennj and @twofitmoms through at least 05/13/17 in order to be notified in the event he/she is a potential winner. By submitting an Instagram Entry, Entrants agree to Instagram’s Terms of Use. This Sweepstakes is in no way sponsored, endorsed or administered by, or associated with, Instagram LLC. IMPORTANT: MESSAGE AND DATA RATES MAY APPLY TO USE OF MOBILE PHONE/DEVICE TO PARTICIPATE IN SWEEPSTAKES. INSTAGRAM IS FREE TO DOWNLOAD AND AVAILABLE FOR iPHONE FROM THE APPLE APPLICATION STORE AND FOR ANDROID FROM THE GOOGLE PLAY STORE.
    Limit: One (1) Entry per person per day.
    Drawing/Prize: At approximately 1:00 p.m. ET on 05/13/17 one (1) winner will be selected in a random drawing, under the supervision of the Sponsor, from among all eligible entries received. Winner will receive a $250 WFM Gift Card and a re-useable tote filled with all the ingredients (and the recipe) to make decadent Banana Bread French Toast. Approximate retail value of prize is $350. Odds of winning will depend on the total number of eligible entries received.
    General Terms & Conditions: Potential Winner will be notified by a tag/direct message to the Potential Winner’s Instagram Account, and will have 3 days within which to claim their prize, or an alternate winner may be selected, at the sole discretion of the Sponsor. No substitution or exchange of prize will be allowed, except at the sole discretion of the Sponsor. Entry also constitutes permission, where allowable, for Sponsor to use the name, photograph and likeness of the winner for promotional purposes, without further compensation. Sponsor reserves the right in their sole discretion to disqualify any Entry at any time in the event it is determined that the Entry is offensive, inappropriate, not in keeping with Sponsors’ images or if it is determined that the entrant has not otherwise complied with these Official Rules. Entrants agree to be bound by these Official Rules and the decisions of the Sponsor, which shall be final and binding in all respects. All taxes on prizes, if applicable, are the sole responsibility of the winner. All federal, state and local rules and regulations apply. Entrants/winner agree to “hold harmless” the Sponsor, Instagram, and agents affiliated with this promotion for any and all damages that may result from acceptance of the prize offered, and/or participation in the promotion. Void where prohibited or restricted by law.
    iPhone is a registered trademark of Apple, Inc. This promotion is in no way sponsored, endorsed or administered by Apple, Inc.
    Instagram is a registered trademark of Instagram, Inc. This promotion is in no way sponsored, endorsed or administered by Instagram, Inc.
  • Women’s Health Spotlight: Get in the Know about Endometriosis

    Women’s Health Spotlight: Get in the Know about Endometriosis

    As we get older, we’ve come to realize that so many of our friends, our peers are suffering with pain. Oftentimes, they are suffering silently. Their symptoms are misunderstood by their friends, family and, in many instances, their doctors. Not feeling well is frustrating, and even more frustrating is not being able to pinpoint why you don’t feel well.

    So, while uncharacteristic, this month we wanted to offer some insight and education on a commonly misunderstood disease — endometriosis. It happens to be perfect timing as March is Endometriosis Awareness Month.

    Endometriosis affects approximately one in ten women in the United States.  Yet, according to a recent survey conducted by HealthyWomen – the nation’s leading independent health source for women, less than a third of women correctly recognize all the painful symptoms of endometriosis, including: painful urination, painful bowel movements, and pain during sex. In addition to the general lack of awareness around symptoms, there’s a lack of conversation among those impacted by the disease and clear miscommunication around the illness amongst the medical community.

    The survey shows that two-thirds of women respondents know someone who has endometriosis, but the majority say they rarely speak to friends or family about pelvic pain. However, the most disturbing finding was the general dismissiveness of the healthcare community as nearly half of women respondents who identified themselves as diagnosed with endometriosis were told by healthcare professionals that their pain was simply “part of being a woman,” or had their symptoms described as “normal.”

    So, today we want to start a conversation about endometriosis and raise awareness of the disease to arm you with the information you need to determine if you may be suffering from this illness.

    What is Endometriosis? 

    Endometriosis occurs when tissue similar to that normally found in the uterus begins to grow outside of the uterus, leading to long-term pelvic pain (during or between periods), pain with intercourse and other painful symptoms. These growths are called lesions and can develop on the ovaries, the fallopian tubes or other areas near the uterus, such as the bowel or bladder.

    What are the symptoms? 

    Here are some of the leading symptoms:

    • Painful menstrual cramps, which may get worse over time
    • Pain during or after sex
    • Painful bowel movements or painful urination during menstrual periods
    • Pain in the intestine or lower abdomen
    • Heavy menstrual periods
    • Premenstrual spotting or bleeding between periods

    For a more complete list of symptoms visit: MEinEndo.com

    Is there a cure? 

    There is no cure for endometriosis and the associated pain is currently managed with oral contraceptives, progestins, danazol, nonsteroidal anti-inflammatory drugs, opioids and GnRH agonists. In more extensive cases surgical treatments, like laparotomy or laparoscopy, are often pursued but may be not curative for all individuals

    I think I have Endometriosis, what do I do now? 

    We are not doctors, so we can only recommend that you consult your OBGYN.

    However, before your visit make sure to do your homework. Rely on trusted resources like MEinEndo.com and endometriosis.org.

    Conducting your own thorough research and arming yourself with questions is the first step towards diagnosis.

    And, don’t forget, you are your own best advocate when it comes to maintaining your health and wellness, so make sure your voice is heard.

  • Vegetarian Shepherd’s Pie (and a lucky Whole Foods giveaway!)

    Vegetarian Shepherd’s Pie (and a lucky Whole Foods giveaway!)

    Are you in luck this month! Not only do we have a healthy and delicious recipe for you, but we have another fantastic giveaway from Whole Foods! So check out the recipe below and follow us on Instagram (@twofitmoms) for your chance to win a $250 gift card from Whole Foods (giveaway runs from noon EST on March 3 until noon EST on March 10). Good luck! 


    With St. Patrick’s Day around the corner, what better way to celebrate than with a hearty Shepherd’s Pie. I’ve updated this classic dish by making it vegetarian – which is a nice alternative for non-meat eaters and those trying to limit their meat intake. This recipe can also be easily modified to appeal to the vegans out there!

    shepherdspiecollageWhat I love about this recipe is that it yields a delicious and hearty dish without being heavy or fatty. It’s made with fresh (and flash frozen) organic veggies, herbs and seasonings that, when paired together, offer big flavor.

    Instead of using ground beef or lamb, I use baby portobello mushrooms (aka cremini) which have a taste and texture similar to meat. They are also rich in vitamins and minerals such as selenium, niacin, copper and pantothenic acid (vitamin B-5) — so they are good for you!

    All of the other ingredients are pretty traditional — with the exception of the topping. I used mashed cauliflower instead of mashed potato. I did this because I happen to love cauliflower mash — but I thought it would be great for those trying to limit their carb intake.  Whether you use cauliflower or potatoes it will be equally delicious though — so modify away!

    As I mentioned, the recipe, as it stands, is not vegan – the topping includes egg yolk and grated parmigiano-reggiano cheese. However, if you swap those ingredients out and replace with some veggie stock the recipe is vegan – voila!

    Ultimately, I think you will love this fresh take on Shepherd’s Pie. It will be perfect for your St. Patty’s Day-inspired meal – and any meal, any day of the week.

    Vegetarian Shepherd’s Pie
    Serves four

    For the filling:

    2 tablespoons olive oil
    16 ounces of baby portobello mushrooms (chopped — approximately 4 cups)
    1 large carrot grated (approximately 1 cup)
    1 large onion grated (approximated 1 cup)
    2 cloves of garlic, crushed
    2 tablespoons of tomato paste
    1/2 cup of red wine
    1/2 cup of chicken or veggie stock
    1/2 cup of frozen peas
    2 tablespoons of Worcestershire sauce (Vegan version available)
    1/2 teaspoon of dried thyme (or fresh, but add a bit more)
    1/2 teaspoon of dried rosemary (or fresh, but add a bit more)
    1/2 teaspoon of salt
    1/8 teaspoon of pepper

    Topping:

    2 cups of Cauliflower Mash
    2 egg yolks
    1/2 cup of grated parmigiano-reggiano cheese

    Preheat oven to 400 degrees.

    Add two tablespoons of olive oil to a deep skillet over medium heat.  Once it comes to temperature, add the chopped mushrooms.  Let them begin to cook down a few minutes and then add the grated carrot, onion, garlic, salt and pepper.  Cook the veggies until the water evaporates, approximately 10 minutes.  Then add the tomato paste and mix until incorporated.  Deglaze the pan with the wine and the stock.  Add the Worcestershire sauce, thyme, rosemary and the frozen peas.  Mix until combined. Test the mixture to see if you need more salt/pepper.  Pour the mixture into a baker — I used an 8 inch by 11 inch baker.

    Add two beaten egg yolks to your Cauliflower Mash along with 1/2 cup of grated cheese.  Spoon cauliflower mixture over the mushroom mixture and spread evenly across the top.  You can also add some extra grated cheese to the top to help brown the pie.  Cook for 18-20 minutes and serve hot.

    Helpful Hint: The cauliflower topping does not brown as easily as a potato topping — even after broiling for a bit.  So, don’t be discouraged — it’s equally delicious!


    Product samples were received for this post. All opinions expressed are solely mine. 

  • Decadent Double Chocolate “Ice Cream” (and a Sweet Whole Foods Giveaway!)

    Decadent Double Chocolate “Ice Cream” (and a Sweet Whole Foods Giveaway!)

    This month we are working with Whole Foods to share some healthy and delicious recipes – and a sweet giveaway for you, our followers! Since Valentine’s Day is around the corner, we are starting with a dessert recipe – Decadent Double Chocolate “Ice Cream.” So, scroll down for this delectable recipe, and be sure to visit us on Instagram (@twofitmoms) where you can “like” and “comment” under this recipe post for a chance to win a $250 Whole Foods gift card! This giveaway runs from noon EST on February 3 to noon EST on February 10. 


    Chocolate. Isn’t this the first thing that comes to mind when you think of Valentine’s Day? Well, for a foodie like me, it’s definitely top of mind, and it’s the first thing I turn to when making a Valentine’s Day dessert.
    WFNiceCreamCollage
    This year I’ll be making my Decadent Double Chocolate “Ice Cream” which is actually nice cream – no dairy involved — it’s made with frozen organic bananas along with a handful of other all natural ingredients, including: cocoa powder, dark chocolate, coconut oil and a touch of maple syrup.  It’s decadent and healthy all at the same time!

    It’s also a super easy recipe. No ice cream maker is necessary – all you need is a food processor and a loaf pan to make, store and freeze the “ice cream.”

    I used dark chocolate, but you can certainly change up the chocolate — or use a dark chocolate bar with other flavors and additions (I was eyeing a bar of dark mint chocolate at Whole Foods that I think would be amazing!). I also suggest jazzing it up with toppings such as fresh berries, chopped nuts or shredded coconut.

    What’s really nice about this dessert is that because it’s made with all natural, healthy ingredients you won’t mind indulging in an extra scoop!

    Decadent Double Dark Chocolate “Ice Cream”
    Serves 4 

    4 bananas, sliced and frozen
    1/4 cup of cocoa powder
    2-3 tablespoons maple syrup
    1 tablespoon coconut oil (in solid form)
    1/3 cup of shaved dark chocolate
    fresh berries, chopped nuts, shredded coconut for toppings (optional)

    In the bowl of a food processor add the frozen bananas, cocoa powder, maple syrup, coconut oil and pulse until the bananas break down into a smooth, ice cream-y texture.  Add the dark chocolate shavings and mix until incorporated (depending on what you add, you can either pulse in the food processor, or transfer the ice cream into a bowl and mix the ingredients). Pour the mixture into a loaf pan and pop into the freezer until it hardens.  The mixture, right out of the food processor, will likely be too loose to serve. Once the ice cream sets, scoop, serve and top as you desire!


    Product samples were received for this post. All opinions expressed are solely mine. 

  • Roasted Butternut Squash Soup with Sage Croutons

    Roasted Butternut Squash Soup with Sage Croutons

    When I think of fall cooking, I think of pumpkins and apples and butternut squash! In the past few weeks, I’ve given you a pumpkin and an apple recipe, so I owe you a butternut squash one.

    butternut squash with headerThis recipe is particularly easy and especially delicious.  It’s for Roasted Butternut Squash soup! It’s also hearty and perfect for the crisp weather.  It can be eaten alone — a meal in and of itself — or you can enjoy it alongside a sandwich or a salad.  Actually, it’s a perfect starter for your Thanksgiving dinner!

    It requires only a handful of ingredients which you likely have on hand — with the exception of the fresh sage . . . And, the fresh sage is really what sets it apart.

    I think sage is particularly comforting. Or maybe it’s just that the smell reminds me of the holidays, specifically Thanksgiving.  In fact, sage makes an appearance in many traditional Thanksgiving dishes — from the seasoning on the turkey to the gravy to the stuffing (or dressing, depending on where you are from!).  In the instance of this soup, the sage really complements the roasted, caramelized squash.  It also tastes great infused in some croutons.

    Speaking of croutons . . . this soups begs for a few.  So, I included a recipe for those too!

    Enjoy!

    Roasted Butternut Squash Soup
    Yields 6 cups, enough for a family of four

    1, 3lb butternut squash, cut into 1 inch cubes
    5 tablespoons olive oil
    1 onion, chopped
    2 stalks of celery, chopped
    8-10 fresh sage leaves, chopped (approximately 1 tablespoon)
    6 cups of chicken stock (or non-tomato based vegetable stock)
    salt and pepper to taste

    Preheat the oven to 400 degrees. In the meantime, arrange the butternut squash cubes on a large baking sheet, drizzle with approximately 3 tablespoons of olive oil. Season with salt and pepper and roast in the oven until caramelized, approximately 20-30 minutes. Please keep in mind that the squash will not be fork tender when you remove it from the oven.

    In a large pot over medium to low heat, add the remaining olive oil. Once the oil comes to temperature, add the chopped onion and celery and cook until translucent, approximately 5-7 minutes. Then add the chopped sage, salt and pepper to taste.  Let the sage cook with the onions and celery for a few minutes so it infuses the vegetables.  Then, add the roasted butternut squash and the chicken stock. Bring the pot to a boil, then reduce the heat and let the vegetables simmer on low until everything is fork tender, approximately 20 minutes. Then, in two batches, add the soup mixture to the base of a blender and blend until smooth. Serve hot or refrigerate for a later date. Croutons make an excellent accompaniment. See the recipe below!

    Homemade Sage Croutons

    2-3 cups of day old bread (I used leftover ciabatta bread)
    2-3 tablespoons of olive oil
    salt and pepper to taste
    4-5 fresh sage leaves, chopped

    Preheat the oven to 400 degrees.  Add bread, olive oil, salt, pepper and fresh sage to a baking sheet.  Toss the bread so that it’s lightly coated with olive oil.  Toast in the oven until the bread browns lightly, approximately 10 minutes.

    Helpful Hint: If your soup is too thick, add a little extra stock to thin it out.  This may happen if you boil the soup longer than you should and too much of the stock evaporates.  It’s an easy fix provided you have some extra stock on hand — and worse case, you can always add some water.


  • Kids Yoga Product Spotlight: Gaiam Kids Classic Balance Ball Chair

    Kids Yoga Product Spotlight: Gaiam Kids Classic Balance Ball Chair

    As you know, we love getting our kids involved in our yoga practices, and our kids are always eager to participate.  But, what they like even better is their own gear. So, you can imagine how excited they were to receive the Gaiam Kids Classic Balance Ball Chair!

    This chair was created to help kids maintain healthy posture, but it also happens to help strengthen the core. Additionally, studies show that because children have to constantly move their bodies to maintain their balance, they are able to focus more easily. The chair is chocked full of benefits, but most importantly it is fun.

    We found our kids were eager to try out the chairs, and they happened to work perfectly for homework time.  They also happened to be the seat of choice while watching television.  They even made their way outside!

    Who wouldn’t want to sit in one of these chairs?
    img_1681

    The chairs are recommended for ages 5-7 or children 42″-51″ tall.  They have a weight limit of 175 lbs.

    For more information or to purchase your very own Gaiam Classic Balance Ball Chair click here.


    This is a sponsored post, and Two Fit Moms is a brand ambassador for Gaiam. 


  • Cinnamon Walnut Zucchini Bread

    Cinnamon Walnut Zucchini Bread

    I always find myself googling zucchini recipes this time of year when I have lots of it growing in my garden, but I always come back to the same-old, tried and true recipes, which include  Zucchini Bread.  I like Zucchini Bread because it’s a good way to get my kids to ingest zucchini which they would otherwise turn their noses up at (unless it was in quiche or frittata form! — but that’s another article . . . . ).  I also like it because I love cake, and in my book, this sweetened bread falls into the cake category – similar to my Banana Bread.

    And, in my forever quest to lighten up my traditional recipes, I decided to make some healthy substitutions including replacing white sugar with maple syrup, cutting the oil (which is generally 1 cup!) and substituting whole wheat flour.  I also added mashed bananas for additional sweetness and included applesauce to not only moisten the cake, but to compensate for the reduced amount of oil.

    I had my reservations, however.  My main concern was that the batter would be way too dense. I feared the two loaves this recipe yields would be massive dry bricks, but to my surprise they ended up moist and delicious. Hooray!

    zucchini bread header2
    Given my success, I can share my recipe with you, and you can share the recipe with your friends and delight in knowing that it’s a healthy bread. Not only does it contain zucchini, but it cuts out a lot of unnecessary processed ingredients.  It also happens to be sweet enough to eat for breakfast or dessert — but not so sweet that you couldn’t serve it alongside lunch or dinner — so it’s versatile.

    I hope you enjoy it!

    Cinnamon Walnut Zucchini Bread

    Yield: Two loaves

    2 cups zucchini (shredded and drained)
    3 eggs
    3/4 cup maple syrup
    1/2 cup applesauce
    1/2 cup oil (I used grapeseed, but you can use safflower or any other light oil)
    2 over-ripe bananas, mashed (approximately 1 cup)
    2 teaspoons vanilla extract
    2 1/2 cups whole wheat flour
    1/2 cup almond meal
    1 teaspoon baking powder
    1 teaspoon baking soda
    2 teaspoons cinnamon
    1/2 teaspoon salt
    1 cup walnuts, chopped (optional)

    Directions: 

    Preheat the oven to 350 degrees.

    Grease two loaf pans and set aside.

    Grate zucchini and drain the excess water out of it with a paper towel or a clean dish towel. Set the zucchini aside.

    In a large bowl, combine the wet ingredients (eggs, maple syrup, applesauce, oil, bananas and vanilla extract).  Mix to combine. Add the dry ingredients (whole wheat flour, almond meal, baking powder, baking soda, cinnamon and salt) and, once incorporated, add the zucchini and walnuts (which are optional). Stir until all of the ingredients come together nicely.  Remember, the batter is quite thick, so don’t panic.

    Divide the batter evenly amongst the two loaf pans.  Bake, on the middle rack for 40-50 minutes, until a toothpick inserted into the center of the cake, comes out clean (no residual batter).  Let cool and serve.

    Helpful Hint: If you don’t like walnuts, add another nut of choice, or skip the nuts altogether and add semi-sweet chocolate chips! 


  • Eggplant “Meatballs” with Marinara Sauce

    Eggplant “Meatballs” with Marinara Sauce

    A few weeks ago I had watched a cooking show in which the chef prepared eggplant meatballs.  I was intrigued, one, because I love eggplant; two, because I also love meatballs; and three, because I happen to have a garden full of eggplant.  So, I decided I would try making them for my family — who also happens to love eggplant – especially eggplant parmigiana – so how could they not love these?

    I studied a few different recipes, and I ended up with my own hybrid.  I wanted them to include traditional meatball flavors, but I knew that replacing the meat with the eggplant would pose a texture issue. The meatball mixture needed just the right consistency to hold its form and to mimic a meatball.  White beans offered extra texture — along with the other usual meatball suspects, e.g., bread crumbs, cheese, onion, garlic, egg, parsley, salt, pepper, etc. The key is not to over process the ingredients.  You don’t want the mixture to look like baby food — you need to see pieces of eggplant in it.
    eggplant food processorclose
    Everything essentially goes into the food processor in its current form, with the exception of the the eggplant, onions and garlic which were cooked down until tender.  In my opinion, one of the worse things is finding a hard piece of onion in a meatball — yuck!

    I used a small ice cream scoop to make evenly sized eggplant meatballs, and I baked the on a greased baking sheet (you could certainly fry the meatballs — but that would defeat the health factor I’m trying to go for here).  These must be served in a bath of marinara sauce, you can find my Weeknight Marinara recipe here. I would serve these along with a nice salad or with pasta or on a crusty roll — these meatballs would make a mean sub (or hero – which is what we call them in NJ!)
    eggplant meatballs with cheeselogo
    If you like eggplant, you will love these.  Even if you don’t like eggplant, I suggest you try them.  Or perhaps replace the eggplant with another vegetable.  It’s really exciting when you can take a traditional recipe and make it healthier, make it yours.

    Eggplant “Meatballs” with Marinara Sauce
    Yields approximately 24 meatballs

    3-4 tablespoons olive oil
    1/4 cup of water
    1 lb eggplant, cut into one inch pieces (approximately 4 cups)
    salt and pepper to taste
    1 cup of white beans (if canned, rinsed)
    1 medium onion chopped, (approximately 1 cup)
    2 large cloves of garlic, crushed (approximately 1 tablespoon)
    1/4 cup of flat leaf parsley
    1 cup of breadcrumbs
    1/2 cup of grated parmigiano-reggiano cheese

    Directions:

    Preheat the oven to 375 degrees. Grease a large baking sheet.

    Add three tablespoons of olive oil to a sauté pan, add the diced eggplant, water and salt and pepper, to taste; cook down until softened — approximately 10 minutes.  Pour eggplant into the food processor.  Sauté the onion and garlic in the same pan — add a bit more olive oil if necessary. Add the onions and garlic to the food processor along with the white beans.  Begin to pulse the mixture while you add the rest of the ingredients — parsley, bread crumbs, cheese and a pinch of red pepper flakes.  Season again with salt and pepper, to taste.

    Using an ice cream scoop, form the eggplant mixture into balls — mine were about 1 inch in diameter, which yielded about 24 meatballs, but you can certainly make them larger you will just end up with fewer. Place the eggplant meatballs on the greased baking sheet. Drizzle or spray olive oil on top of the meatballs in order to give them some extra moisture. Place them in the oven and bake for 25-30 minutes — until they are firm.  Do not mess with them while they are cooking. They DO NOT need to be turned.

    Remove from the oven, place in a pan and cover with Weeknight Marinara.  The eggplant meatballs will be softer than a regular meatball — so be careful not to let them cook too long – and gently move them in the sauce.  Otherwise, they will break apart. Once the sauce is heated through and the eggplant is well coated, you can enjoy them as you see fit!

  • Kate’s No-Bake Granola Chewies

    Kate’s No-Bake Granola Chewies

    If you attended our Yoga & Wellness Retreat in Englewood, NJ earlier this month you would have experienced my first live cooking demonstration — and these delicious No-Bake Granola Chewies!

    I’m always looking for quick, easy and healthy snacks for my kids, so a no-bake granola bar was a no-brainer.  I just had to figure out how to achieve a granola bar consistency without baking.
    granola bar header
    Dates.  Pitted dates are the answer.  I have to tell you, and I shared this with the retreat participants, that I think dry pitted dates look just awful — they are in no way appetizing. HOWEVER, when you break them down in a food processor, they turn into a lovely, delicious paste that you can use to sweeten your baked goods.  They are the glue — or one of the glues — holding these tasty granola bars together.  They not only add sweetness and gooeyness, but they add lots of fiber and are chocked full of lots of good vitamins and minerals including calcium, folate, iron, vitamin A and vitamin K!

    Peanut butter also helped to bind the bars and maple syrup added some additional sweetness.  I personally like mini chocolate chips in mine, but you could certainly substitute the chips for dried fruit or coconut.

    Wrap them up for school lunch or work lunch – or pop them into your gym back for a pre- or post-workout snack.

    Enjoy!

    Kate’s No-Bake Granola Chewies
    Yields one 8×8 pan

    1 cup of pitted dates, pulsed in a food processor
    1/4 cup maple syrup
    1/4 cup peanut butter
    1 1/2 cups of rolled oats (*I prefer toasted)
    1/2 cup brown rice crisp cereal
    1/3 cup almonds, whole or blanched, any kind you like — or another nut if you prefer
    1/3 cup mini chocolate chips (feel free to replace the chocolate chips with dried fruit or unsweetened coconut or anything else you’d like!)

    Directions:

    Line an 8×8 pan with parchment paper or plastic wrap and set aside. You can always spray the bottom and sides of the pan with coconut oil if you find the paper or wrap is not adhering nicely to the pan.

    Add the dates to the bowl of a food processor and pulse for about a minute, until the dates form a paste. I added a drop of water to help the process — but literally only a drop!

    In a separate bowl, add the maple syrup and peanut butter.  Mix to combine.  If you find that your peanut butter is not loose enough, you can pop it into the microwave for 30 seconds.

    Add the dates, oats, rice cereal, almonds and mini chocolate chips and mix until well combined.

    Transfer the mixture to the prepared pan and evenly distribute.  I used a drinking glass to help flatten the mixture.

    Cover the pan with plastic wrap and let them firm up in the refrigerator for 15-20 minutes – or until very firm.  Remove them from the refrigerator and invert the pan onto a cutting board and slice into any size that you like.  I ended up cutting 24 small bars from mine.

    *Helpful Hint: Try toasting your oatmeal for a nuttier flavor! Let them toast in the oven, on a baking sheet, for about 15 minutes at 350 degrees, just until very lightly browned!

  • 5 Steps Towards Making Your Dream a Reality

    5 Steps Towards Making Your Dream a Reality

    Four years ago, we began sharing our love of yoga on Instagram by posting snapshots and picture tutorials of some of our favorite poses. With young kids at home, we rarely made it out to attend classes at yoga studios, but we loved to practice at home. We had a passion for connecting with others and sharing whatever we learned on our mats, so we posted photos often and helped build a virtual yoga community. We hoped to be able to reach a larger audience one day, and seeing that dream come true through our relationship with Gaiam has been a surreal experience.
    TFM-74_IG
    Last month, we realized another one of our dreams as we launched the Two Fit Moms apparel line with Gaiam.

    We want YOU to dream big too! So, in keeping with this theme, here are five things that we believe have helped us, and will help you, as you set on your path towards making your dreams a reality.

    Think Positively: You need to believe it in order to achieve it, so the first thing on your list should be to create a positive affirmation. If you don’t believe in you, no one else will.  Create your own personal mantra that you come back to time and again – especially when your faith in you falters. Consider starting and ending your day with this mantra. “I am strong, I am confident, I can achieve my dreams.”

    Fake It, Until You Make It: You need to walk the walk and talk the talk – even if you don’t believe it at first. If your goal is to run a marathon one day, start playing the part of an athlete! Even if you are out of shape, you can start eating well, drinking water instead of sweetened beverages and committing to a daily walk. You need to believe in your dream, in your ability to achieve it, and you may need to adjust your mind and your actions in order to realize it. Live your mantra.

    Be Resilient: Recognize that your dreams may change, they may take longer to achieve, they may require more work, or a partner or more resources. Being open to change and able to adapt to it will be important. Things don’t always work out the way we would like, so being able to land on your feet is key.

    Ask for Help: Much of achieving a dream rests on you, but don’t be foolish. Ask for help. Look for guidance from others who may have insight or experience that would be helpful and valuable to you.

    Return the Favor: Don’t take your opportunities for granted. Remember where you came from, be modest, be thankful and give back. Be a source of inspiration, and share your experience so that you can encourage others to start on their path to achieving their own dreams.