Category: Recipes

  • Tomato, Peach & Watermelon Panzanella Salad

    Tomato, Peach & Watermelon Panzanella Salad

    panzanella bannerEarlier this summer my husband and I had a delicious panzanella salad at a local restaurant. Most panzanella salads incorporate tomatoes and bread; however, this version was interesting.  It featured not only tomatoes but also peaches and watermelon.

    It was really an unexpected combination — but so delicious. I thought I would try to re-create the salad, and I was inspired by the over-abundance of peaches in my house (from a recent peach picking trip).  Panzanella salad is also a recipe I’ve been meaning to make, so I was excited to finally try my hand at it!

    What I love about this salad is that it allows you to use day-old crusty bread – which I always seem to have lying around my kitchen. It also offers the chance to incorporate seasonal fruit in a new and innovative way. It’s not your typical salad — it’s like a savory fruit salad.

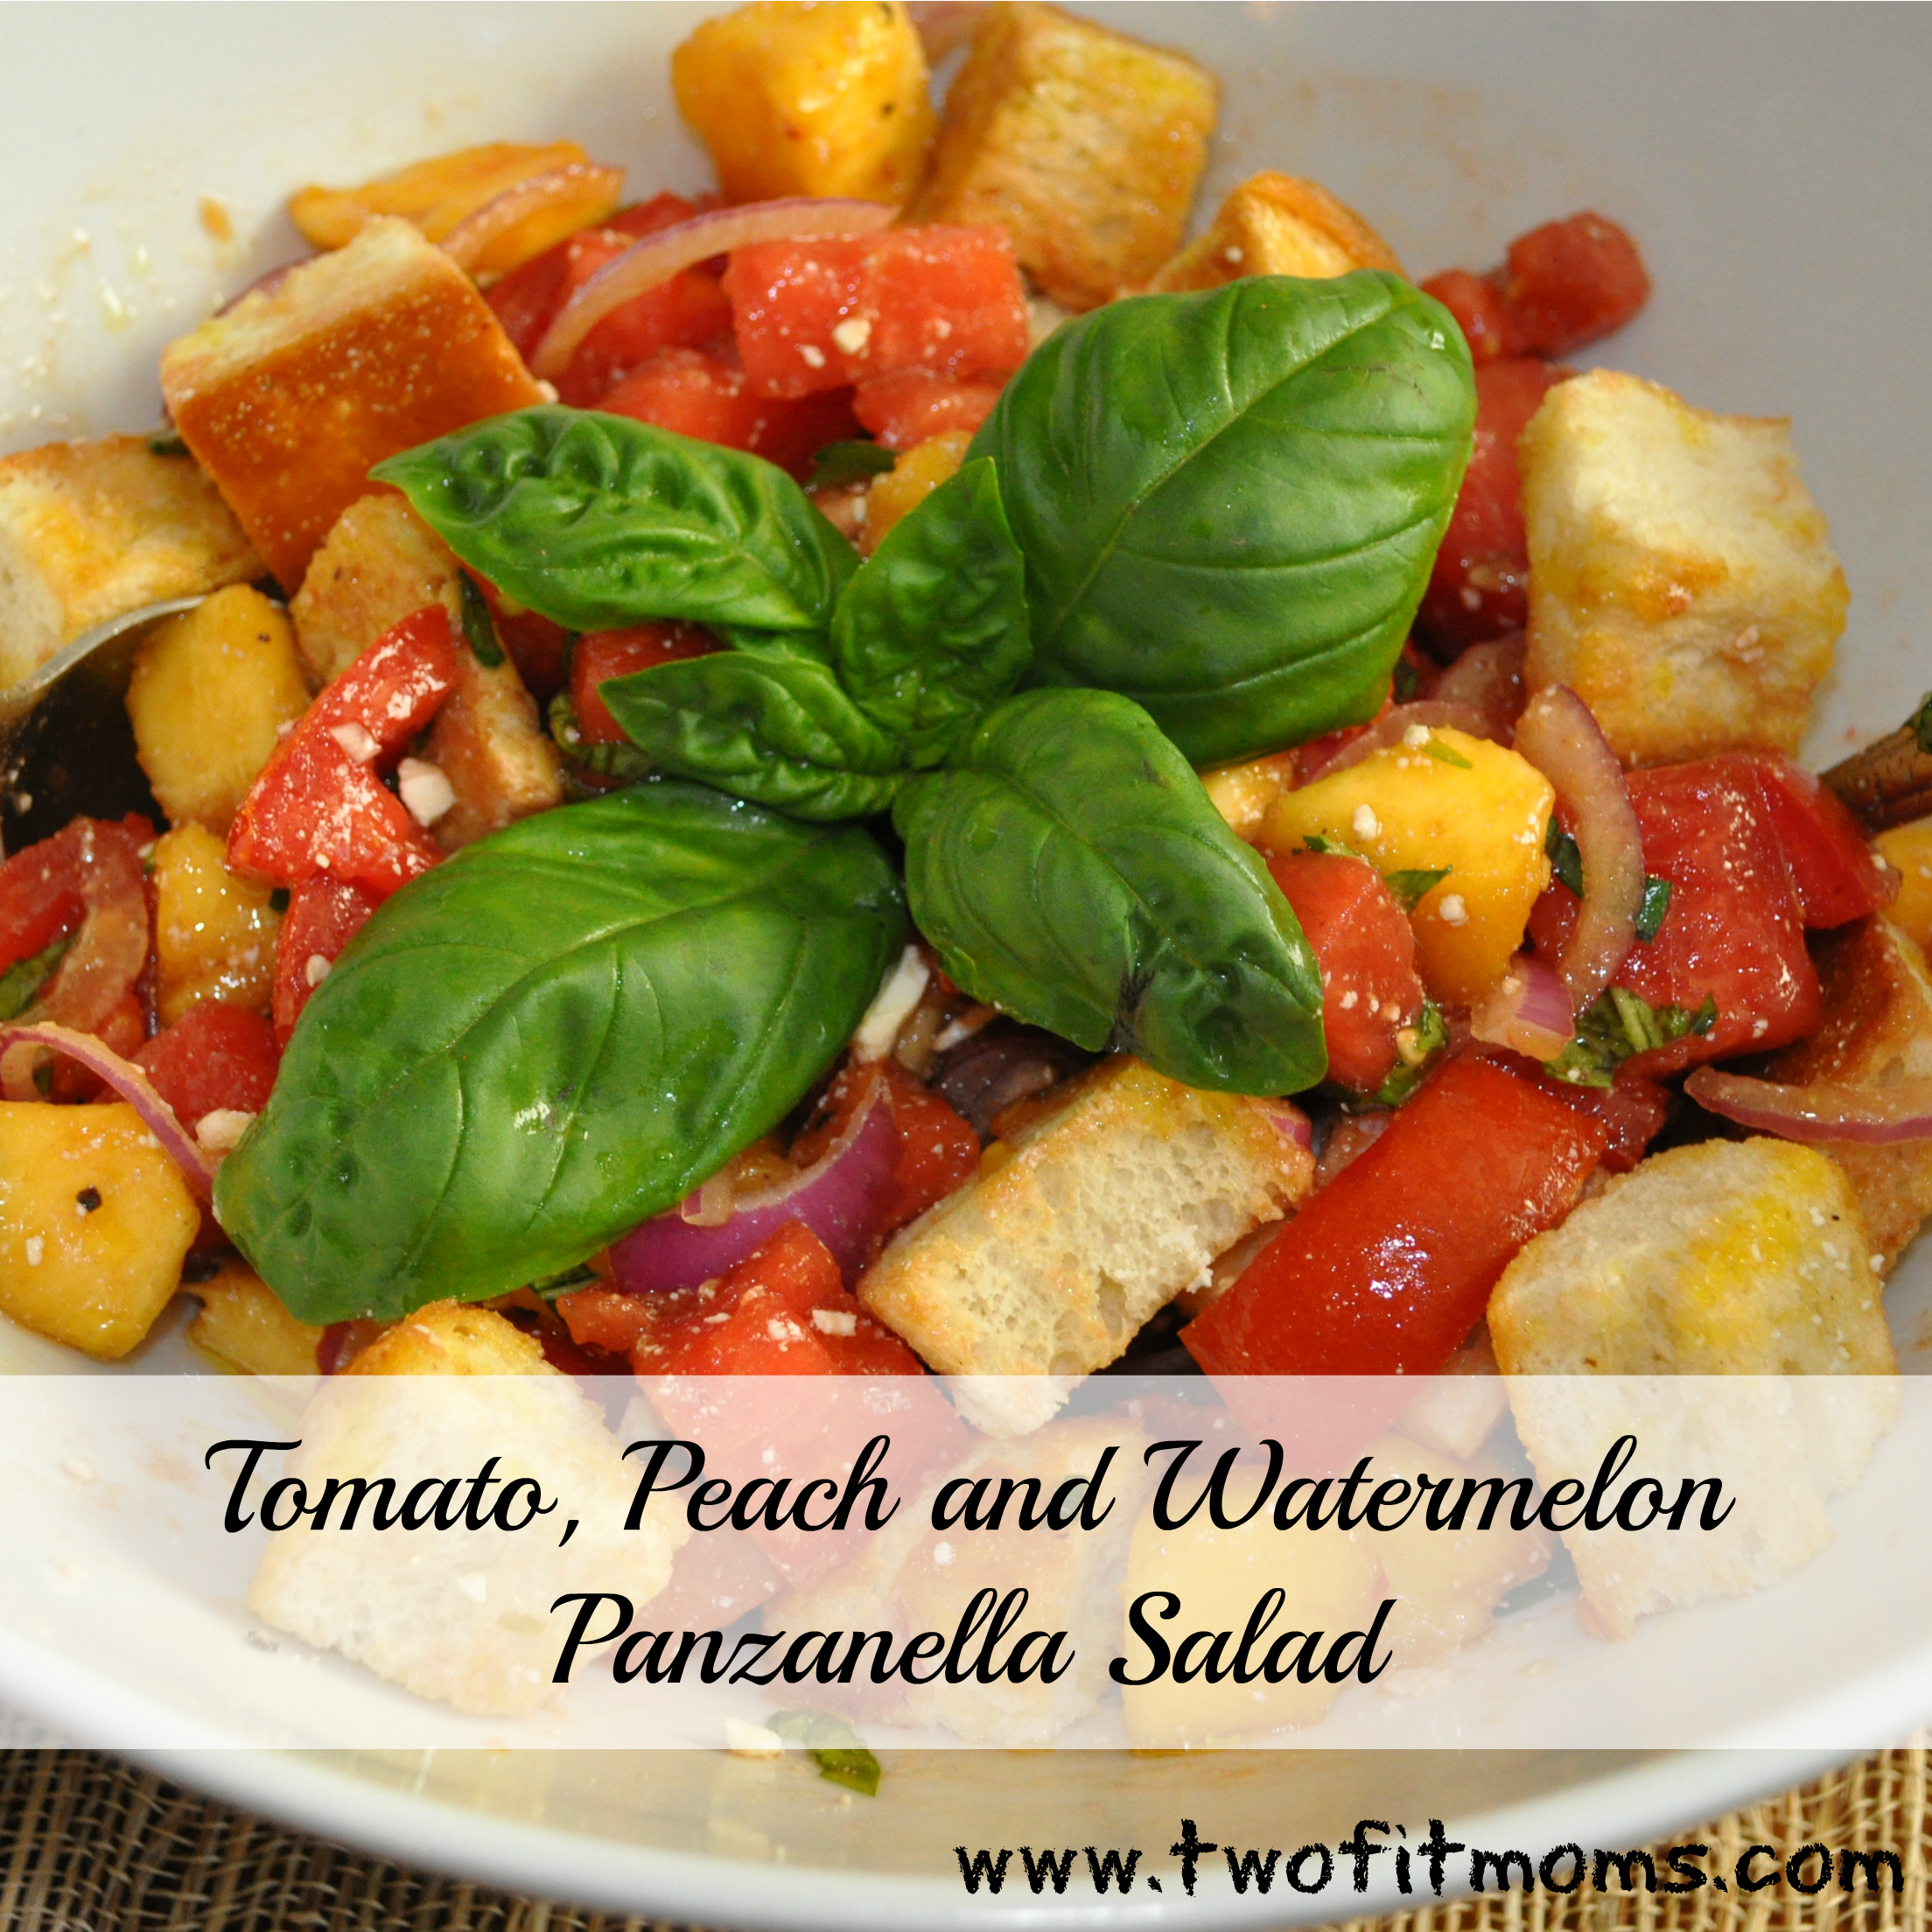
    In addition to the fruit, it features thinly sliced red onion, tangy feta cheese, fresh basil and crisp croutons.  It’s simply dressed with olive oil and balsamic vinegar.  The croutons eventually soak up the juices from the fruit creating a nice combination of textures which really helps set this salad apart!

    It can also easily be modified. If you follow a gluten or dairy-free diet you can omit the croutons and the feta cheese. You can throw some veggies into the salad as well — perhaps cucumbers or peppers.  Whatever fruit or vegetables you add, try to keep it roughly the same size.

    Enjoy!

    Tomato, Peach and Watermelon Panzanella Salad
    Serves 4-6 people

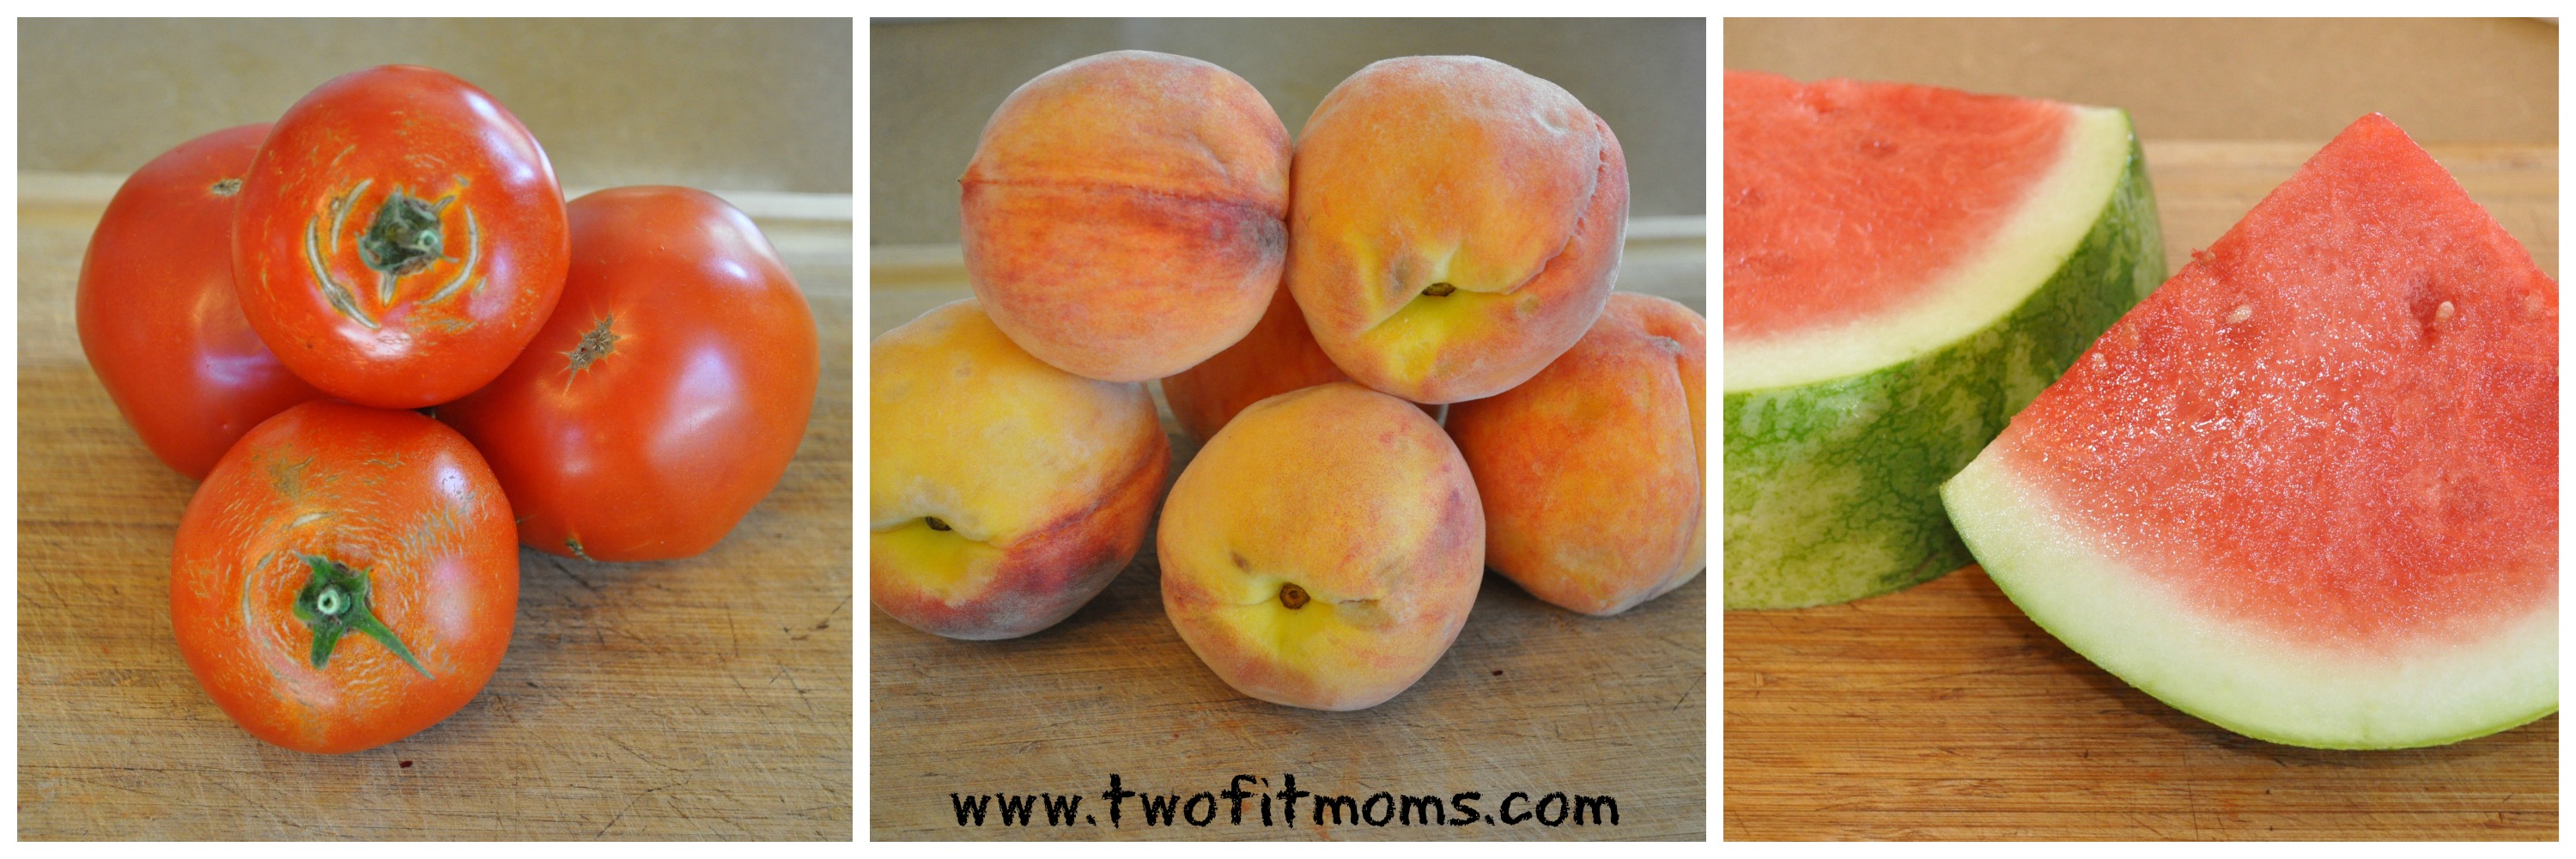
    2 large tomatoes, cut into 1-inch cubes
    2 peaches, cut into 1-inch pieces
    1-1 1/2 cups of watermelon, cut into 1-inch cubes
    1/2 small red onion, sliced thinly (in half moon-shaped slices)
    1/4 cup of crumbled feta cheese
    15 basil leaves, cut finely
    3 tablespoons olive oil
    1 tablespoon balsamic vinegar
    15 large croutons (see recipe below)
    salt and pepper to taste

    Add tomatoes, peaches, watermelon, red onion, feta cheese and basil to a large bowl. Mix the olive oil and vinegar in a separate, small bowl and pour over the salad. Incorporate croutons and toss. Season with salt and pepper to taste.
    panzanella collage
    Helpful hint: You can make your own bread croutons with day old bread. Cut the bread into cubes and arrange in a single layer on a baking sheet. Drizzle with olive oil, salt and pepper, toss and bake at 400 degrees until crisp and slightly browned. The croutons will harden as they cool.

  • Zucchini and Summer Squash Pappardelle

    Zucchini and Summer Squash Pappardelle

    zucchini bannerThis dish is amazing.  It looks like pasta, and you want to believe you are eating pasta, but it doesn’t taste like pasta.  It just tastes really good.

    I think it’s the combination of textures — the thinly cut — almost twirl-able squash — the carmelized garlic, the nutty cheese and the herbs.  Whatever it is, it’s divine.

    You have probably noticed all of these nifty gadgets that cut the zucchini and other vegetables into spiral shapes that resemble spaghetti. I don’t have any of these tools, but I do have a mandolin which I used in our Shaved Fennel Salad.

    In fact, this recipe is a play on one that my brother recently concocted — what he calls “Zucchini Pappardelle” — which is a flat and wide pasta shape — and totally achievable with a mandolin. I made a garlic and olive oil based sauce with some red pepper flakes and fresh herbs. If you eat dairy, you must add parmigiano-reggiano cheese to this dish.

    You can also top the blanched squash with other sauces — including a fresh tomato sauce. However, I think you will really enjoy this recipe — it’s a surprisingly delicious and healthy dish that can be served alone, as an entree (along with a salad), or as a side dish with chicken or fish or anything else you may have on your table this summer. Aside from tasting great, it just looks gorgeous!

    If you can’t eat pasta, or if you are looking for a new recipe for all that squash in your garden, this recipe is for you.

    Enjoy!

    Zucchini and Summer Squash Pappardelle with Garlic & Olive Oil
    Serves 4 people

    3 medium sized zucchini
    3 medium sized summer squash
    1/4 cup olive oil
    4 large cloves of garlic
    1/4 teaspoon red pepper flakes
    1/4 cup of shaved parmigiano-reggiano cheese
    1 tablespoon chopped basil
    1 tablespoon chopped parsley
    salt to taste

    Bring a large pot of salted water to a boil.

    In the meantime, with a mandolin, slice the zucchini and summer squash about 1/16th of an inch thick. Blanch the zucchini for approximately one minute, or until the squash is tender. Remove the squash and submerge into ice water to stop the cooking. Drain the squash and set aside in a large serving bowl.zucchini collage

    In a pan over medium-low heat, add the olive oil, sliced garlic and crushed red pepper.  Allow the garlic to brown slowly, and once it does, turn off the heat.

    Add the olive oil mixture, the chopped basil, parsley and parmigiano-reggiano over the blanched zucchini. Toss and serve.

    Helpful hint: Do NOT overcook the squash during the blanching stage. It will fall completely apart when you toss it! And, do NOT burn the garlic.  If you do, start over!

  • Banana Maple Walnut “Ice Cream” (Dairy- and Gluten-Free!)

    Banana Maple Walnut “Ice Cream” (Dairy- and Gluten-Free!)

    I had heard you could make mock-ice cream out of frozen bananas.  I was skeptical, but I had a few spotted bananas on my counter, and I figured why not try! So, I peeled them, sliced them, wrapped them up and popped them into the freezer.
    rotten bananas
    While they were freezing, I contemplated what type of ice cream I would make.  You could easily make one-ingredient ice cream with just the frozen bananas, but I wanted to jazz it up a bit.  While the ripened bananas are sweet on their own, I wanted to add a little more sweetness.  I’m particularly fond of using maple syrup as a sweetener.  I thought I’d also throw in some nuts — walnuts to be exact.  Maple Walnut ice cream sounded pretty good to me — plus I figured the flavors would complement the bananas (think banana walnut muffin!).

    I threw the chopped, frozen bananas into the food processor along with the maple syrup and pulsed it until it was smooth — like a softened ice cream texture. I then mixed in (by hand) the chopped walnuts.

    The texture is definitely looser than ice cream, so you may want to put it in the freezer to set up a bit.  If so, a loaf pan covered with plastic wrap works out nicely.

    This is a great mock-ice cream.  It’s creamy and delicious, and it is a perfect ice cream substitute.  It’s also ideal for those who follow a dairy- or gluten-free diet.

    As far as my family goes, they really enjoyed it — in fact, they were asking for more!

    banana ice cream headerWhile an ice cream aficionado might turn their nose up, a health-conscious ice cream-loving mom will love this recipe — not only will she get rid of the spotted bananas in the house, but she will reap a healthy frozen dessert in return!

    Banana Maple Walnut “Ice Cream”
    Serves 4 people

    4 ripe bananas cut into 1 inch slices and frozen
    3-4 tablespoons maple syrup ( I use grade B for thickness)
    1/4 cup of chopped walnuts

    In the bowl of a food processor add your bananas and maple syrup (you can adjust the amount of syrup based on your desired level of sweetness). Pulse until the bananas break down, resembling a smooth creamy consistency.  Remove mixture and add to a bowl.  Mix in the chopped walnuts.  Serve immediately or pop back into the freezer for a more solid consistency.

  • Grilled Peach Salad With Balsamic Glaze

    Grilled Peach Salad With Balsamic Glaze

    peach saladNow that summer is in full swing, you will notice peaches, plums and other stone fruits aplenty at the market.

    In addition to eating these fruits on their own, there are so many wonderful ways to incorporate them into your cooking.

    Desserts immediately come to mind, but why not use them in a salad?

    I thought grilled peaches would be a great addition to a salad, so I fired up the grill.

    I split the peaches in half, removed the pit, coated them with olive oil, salt and pepper and grilled them! I easily could have gone the dessert route at this point and topped them with ice cream, but I didn’t! I stayed on course and continued to focus on my salad.

    I chose arugula as my salad green — it’s peppery and delicious.  I also wanted to incorporate balsamic vinegar.  I thought it would complement the peaches.  Lastly, I needed a crunch factor, so I topped the salad with crushed pistachios.  The combination of the warm peaches, the crisp greens, the crunchy nuts and the sweet balsamic glaze made this salad soar! It’s quite delicious if I do say so myself.  And, a testament to it’s deliciousness was the empty bowl left at the end of dinner!

    So, here’s my recipe.  I hope you like this recipe as much as my family and I did!

    Grilled Peach Salad with Balsamic Glaze
    Serves 4 people

    Grilled Peaches:
    2 ripe peaches
    olive oil
    salt and pepper to taste

    Balsamic glaze:
    1 cup of balsamic vinegar

    Salad:
    4 cups of arugula
    3 tablespoons olive oil
    salt and pepper to taste
    1/4 cup of chopped pistachios

    Before we get started on the salad, let’s make the balsamic glaze.   Put 1 cup of balsamic vinegar in a small saucepan.  Let it come to a boil over medium-high heat.  Let it simmer until it thickens and reduces in size.  It’s ready when it coats the back of a spoon (or a spatula! see picture below).  This will take roughly 15 minutes.  The balsamic vinegar will cook down to about 1/4 cup of balsamic glaze.  Let the glaze cool and set it aside.
    balsamic

    Now it’s time to grill the peaches. Cut the peaches in half, remove the pit and slather each side with olive oil.  Season with salt and pepper to taste.  Grill the peaches approximately 5 minutes on each side, on a very hot grill (mine was set to high).  The peaches are done when the skin starts to lift.  They should also have some lovely grill marks. Remove the peaches from the grill and set aside.
    peaches

    Add the arugula to a large serving bowl.  Add the 3 tablespoons of olive oil and salt and pepper to taste.  Toss the greens.  Add the peaches to the salad and sprinkle the pistachios pieces on top.  Drizzle 1-2 tablespoons of balsamic glaze over salad.

    Enjoy!

  • Tropical Thai Coconut Smoothie

    Tropical Thai Coconut Smoothie

    coconut smoothiePiña coladas are my summer-time splurge.  I love the combination of coconut and pineapple — it’s just so delicious.  Even if I’m not on a tropical island or on vacation, this drink helps me pretend that I am!

    I thought I’d try my hand at a piña colada-like smoothie — or what I like to call my Tropical Thai Coconut Smoothie!

    I recently discovered young Thai coconuts, and I thought they would be perfect for my concoction.  In addition to the Thai coconut water and pulp, I incorporated frozen pineapple, some honey (for sweetness), vanilla extract (to mimic the flavor of vanilla ice cream) and a hint of lime.   And, voila, my version of a piña colada (a healthier version) was born!

    You can modify the recipe by adding half of a frozen banana or one cup of kale.  You can also add some rum! (which REALLY made it taste like a piña colada).

    We used a Coco Jack opener to help us dismantle our Thai coconut. If you don’t have a Coco Jack opener, you can certainly use coconut water.  In fact our favorite brand of coconut water can be found in our shop!

    Check out the photos below for more details on how we managed to open our Thai coconut.
    open coconut
    Tropical Thai Coconut Smoothie
    Yields between 4 and 5 cups

    2 cups of fresh Thai coconut water (which seems to be the standard yield from a fresh Thai coconut), plus the pulp of one Thai coconut
    1 cup of frozen pineapple
    1 cup of ice
    1/2 lime, juiced
    1 tablespoon of honey
    1/2 teaspoon of vanilla extract

    Some optional ingredients:
    1/2 frozen banana (please note, bananas are very sweet and potent, so use sparingly)
    1 cup of fresh kale

    Add all of the ingredients to the base of a blender (I used a Vitamix) and blend until smooth.  Portion into glasses, or back into the Thai coconut, and enjoy!

  • Blueberry Crisp (No White Sugar, No Dairy, No Gluten)

    Blueberry Crisp (No White Sugar, No Dairy, No Gluten)

    blueberry crispI love dessert. I love butter, sugar and cream — and all of the other sinful ingredients that go into a decadent dessert.  However, I’ve been on a quest to lighten up my desserts, to reduce my sugar intake and to substitute more “healthy” ingredients into my recipes.

    I thought I would start with a crisp.  I made a light version of a strawberry rhubarb crisp a few months ago.  It was delicious.  But, now blueberries are in season, so I thought I would try my hand at a healthy blueberry crisp. I swapped out white sugar for maple syrup — a natural sugar.  I included orange juice to add some natural sweetness as well as the zest of orange and lemon which pairs perfectly with the blueberries. Instead of butter, I used safflower oil as the “fat” in the topping.  I added walnuts and oats for texture.

    I’m really pleased with how it turned out.  In fact, my whole family thoroughly enjoyed this crisp — even my mother (who can see right through my healthy dessert recipes) raved about it!

    The beauty of this recipe is that you can swap the blueberries for other berries of your choice.  You can eat it just as it is, or you can top it with ice cream, a dollop of cream or greek yogurt. I bet this would work out great with apples.  I can’t wait for apple season . . . .

    Blueberry Crisp
    Serves 8-10 people

    8 cups of blueberries
    1/4 cup of freshly squeezed orange juice
    1/4 cup of freshly squeezed lemon juice
    zest of one orange
    zest of one lemon
    3/4 cup of maple syrup (grade B)
    1.5 tablespoons of cornstarch

    For the topping:

    3/4 cup of brown rice flour
    3/4 cup of almond meal
    1 cup of quick cooking oats
    1/2 teaspoon of salt
    1/2 cup of safflower oil
    3/4 cup of maple syrup
    1/3 cup of chopped walnuts

    Preheat oven to 350 degrees.

    In a large bowl, combine blueberries orange juice, lemon juice, zest, maple syrup and cornstarch.  Mix to combine.  Pour blueberry mixture into a 9 by 13 inch baker.

    In a separate bowl, add brown rice flour, almond meal, oatmeal, salt, safflower oil, maple syrup and chopped walnuts.  Mix to combine. The topping will be loose. It will not be crumbly like a more traditional crumb topping made with butter. I’ve included a picture below so you can see the consistency.crumb topping

    Spoon topping over blueberry mixture.  Bake for 1 hour at 350 degrees. Crisp is done when berries burst open and bubble.cooked crisp

    Helpful hint: Don’t serve the crisp right from the oven.  Let it sit a bit so that it sets up — it will be easier to dish out.

  • Herb Marinated Grilled Vegetables

    Herb Marinated Grilled Vegetables

    grilled veg bannerGrilled veggies are a mainstay summer side dish at our house, and the recipe that I’m sharing with you is not just any grilled vegetable recipe — it’s the best grilled vegetable recipe!

    It’s based on Giada De Laurentiis’ recipe which I’ve modified.  To be honest, the marinade is what really sets it apart.  It’s an olive oil and balsamic vinegar dressing infused with garlic, rosemary, basil and parsley.  The dressing brings your grilled veggies to a whole new level!

    Cutting the vegetables is a little time intensive, but I promise you will not regret the effort you put into making these veggies.  In fact, you will likely get more than one meal out of them — and the longer they marinate, the better they taste.

    I generally serve these veggies as a side dish, but they are delicious on a sandwich (with hummus or goat cheese). You can also chop up the leftover veggies and serve over salad greens or mix them into quinoa or farro.

    You can modify the recipe based on the veggies you have on hand (e.g., substituting summer squash for zucchini), and you can adjust the quantity of marinade depending on whether you want to make more or less veggies.

    Herb Marinated Grilled Vegetables

    3 zucchini
    3 Japanese eggplant
    3 red, yellow or orange bell peppers
    12 baby portobello mushrooms (e.g., cremini or baby bella mushrooms)
    1 bunch of asparagus
    2-3 bunches of scallions
    Olive oil (approximately 6-8 tablespoons — but don’t be afraid to use more, if necessary)
    Salt and pepper to taste

    For the marinade:

    1/2 cup of olive oil
    4 tablespoons balsamic vinegar
    2 cloves of garlic, crushed
    1 tablespoon fresh basil, chopped
    1 tablespoon fresh parsley, chopped
    1 tsp fresh rosemary, chopped

    Turn on your grill, and set it to high.  In the meantime, prep your veggies.  You want thick cuts in order to survive the grilling process.  Cut zucchini and eggplant in 1/4 inch thick slices (long ways).  Seed the bell peppers and cut into quarters (the larger slices will be easier to grill vs. smaller strips).  Trim the asparagus (check out our article on how to properly prep asparagus!), and wash and remove the bottom stems of the mushrooms.  Trim bottoms and tops of scallions.

    Arrange cut and prepped veggies on a large baking sheet.  Drizzle with a few tablespoons of olive oil — not a thick coating, but a light coating on all the veggies so that they don’t stick to the grill.  Season with salt and pepper to taste.

    While grill is heating, make the marinade.

    In a small bowl, add olive oil, balsamic vinegar, garlic and chopped herbs. Whisk until incorporated.  Set aside.

    When the grill comes to temperature, arrange vegetables and cook until they are tender and have grill marks.  You will likely need to grill the veggies in batches.  Once they are cooked, place them on a large cookie sheet and keep adding to the pan as additional veggies are ready.
    veggie collage

    While the grilled vegetables are warm, pour the marinade over them.  Seal the pan with foil and let them sit until they come to room temperature.  You can serve the veggies at room temperature or you can place them in the refrigerator for use at a later date.  The longer they marinate, the better they taste!

    Helpful tips: Make sure your grill is very hot and the grates are clean.  Grilled veggies don’t taste good with leftover charred bits on them! Additionally, if you don’t use all of the marinade, use the extra to dress your salad!


  • Orange Dreamsicle Smoothie

    Orange Dreamsicle Smoothie

    When I was a kid in summer camp, I remember being offered an Orange Creamsicle bar every afternoon. It was such a cold, sweet treat after a long day in the sun. The creamy orange flavor will always remind me of the carefree days of summer. Although I no longer sit around eating Creamsicles every afternoon, I love recreating the delicious flavor of my favorite childhood ice cream treat by blending orange smoothies! It’s a great, healthy alternative to store-bought frozen desserts.  Enjoy!OrangeSmoothie

    Ingredients
    -Zest from 1 orange
    -1 peeled orange
    -1 frozen banana (sliced before freezing)
    -1 tsp vanilla extract
    -2 pitted dates
    -½ cup soy milk (or milk of your choice)
    -Handful of ice cubes

    Directions
    If possible, use a washed, organic orange for this recipe, as we will include the outer skin in the smoothie.

    Orange zest is the top layer of an orange peel and is the source of essential oils, which adds great orangey flavor to your food. In order to zest an orange, use a fine grater and scrape only the orange coloring from the peel. Avoid grating the orange down to the white pith, which tastes bitter.

    Add the zest to your blender, along with the peeled orange, 1 frozen banana, 1 tsp vanilla extract, 2 pitted dates, ½ cup of soy milk, and a handful of ice cubes. Blend all of the ingredients until you have a creamy consistency.

  • Summer Pasta with Fresh Tomato & Arugula

    Summer Pasta with Fresh Tomato & Arugula

    arugula pasta bannerNo one wants to turn on the stove to make tomato sauce in the summer.  And, while the tomatoes are ripe, it’s the best time to try your hand at a fresh, uncooked tomato sauce.  All of the ingredients in this sauce are raw.  The only thing you need to cook is the pasta — the heat of which will help bring these raw ingredients to life and create a “sauce”!

    The beauty of this dish is that it can be made in less than 30 minutes.  And, you can decide what type of pasta works for your diet.  I used a multi-grain pasta, but you can use  any type of pasta that meets your family’s needs (just be mindful that not all pastas will translate well once cooled, such as corn pasta which may get gummy).

    That being said, you can serve this pasta hot or cold — although I prefer eating it warm.

    Summer Pasta with Fresh Tomato & Arugula

    Serves 4-6 people, dinner portion

    3 cups of chopped tomatoes (I used three medium-sized vine tomatoes)
    2 cups of arugula, chopped
    10 basil leaves, chopped
    1/2 cup of olive oil
    2 tablespoons of balsamic vinegar
    2 cloves of garlic, crushed
    salt and pepper, to taste
    1, 1 lb box of penne pasta  (my box was just under 1 lb and it worked perfectly fine!)

    Bring a large pot of well-salted water to a boil.

    In the meantime, chop the tomatoes, arugula and basil and add to a large serving bowl.  Whisk together the olive oil, vinegar and crushed garlic in a separate small bowl, creating a dressing.

    Cook pasta according to directions, remove once it is cooked al dente and drain in a colander.  Add cooked pasta, while still warm, to large serving bowl with tomatoes, arugula and basil.  Top with dressing and toss to combine.  Add salt and pepper to taste, and serve.

    Enjoy!

  • Asian Peanut Kale Salad

    Asian Peanut Kale Salad

    kale with headerKale is so mainstream now, you can find it anywhere and on most menus.  In fact, my brother raved about a kale salad he had recently at an upscale chain restaurant, and since we are all about kale, I decided to re-create it.  If you search the Internet you will see that others have tried their hand at re-creating this salad.  But, with some educated-guessing, we came up with our own version!

    Personally, I think all salads should be chopped.  I think they just taste better and the flavors meld together better.  And, when eating Kale raw, cutting it every-so-finely makes a big difference! It creates a much lighter consistency to what can be a tough green.  All of the vegetables in this salad are sliced finely — what we call chiffonade.  In fact, earlier this year we offered tips on preparing your greens which showed you this chopping method.

    This is a great summer salad, and I bet it will convert your non-kale-eating friends into kale-eating junkies.

    Enjoy!

    Asian Peanut Kale Salad

    This is a hefty size salad and will feed a crowd.

    For the salad:

    1 bunch of kale, washed, ribs removed and cut chiffonade (approximately 7 cups)
    1 medium sized Napa Cabbage, bottom removed and cut finely (approximately 4 cups)
    1/2 bunch of cilantro, finely chopped (approximately 1 cup)
    1 bunch of scallions, finely chopped (approximately 1 cup)
    20 leaves of mint, finely chopped (approximately 1/2 cup)
    3/4 cup chopped roasted peanuts

    For the dressing:

    3/4 cup of roasted peanut oil
    1/4 cup of rice wine vinegar
    juice of 1 lemon
    2 tablespoons of honey
    1 tablespoon of Dijon mustard
    1 tablespoon of soy sauce
    1/4 teaspoon of garlic powder
    salt and pepper to taste

    Finely chop (chiffonade) the kale, cabbage, cilantro, scallions and mint (see picture below for desired consistency).
    kale chop logo
    Add greens to a very large bowl and set aside.

    In a separate bowl combine the peanut oil, rice wine vinegar, lemon juice, honey, mustard, soy sauce, garlic powder, salt and pepper, to taste.  Whisk the ingredients until they form a dressing consistency.

    Pour the majority of the salad dressing over the greens and top with the majority of the roasted peanuts.  Toss the salad.  Garnish with reserved chopped peanuts.

    Helpful hint: Check to see whether or not the salad is dressed enough for you.  The cabbage in the salad will break down, releasing water, so you might not find the salad is “wet” enough at first.  If you have the time, let it sit about 30 minutes, before adding the rest of the dressing.