Creating a healthy lifestyle does not have to be an overwhelming experience. I’m not sure when “all or nothing” became the mantra for healthy living, but it really does not have to be that way. You can build a healthy life, step 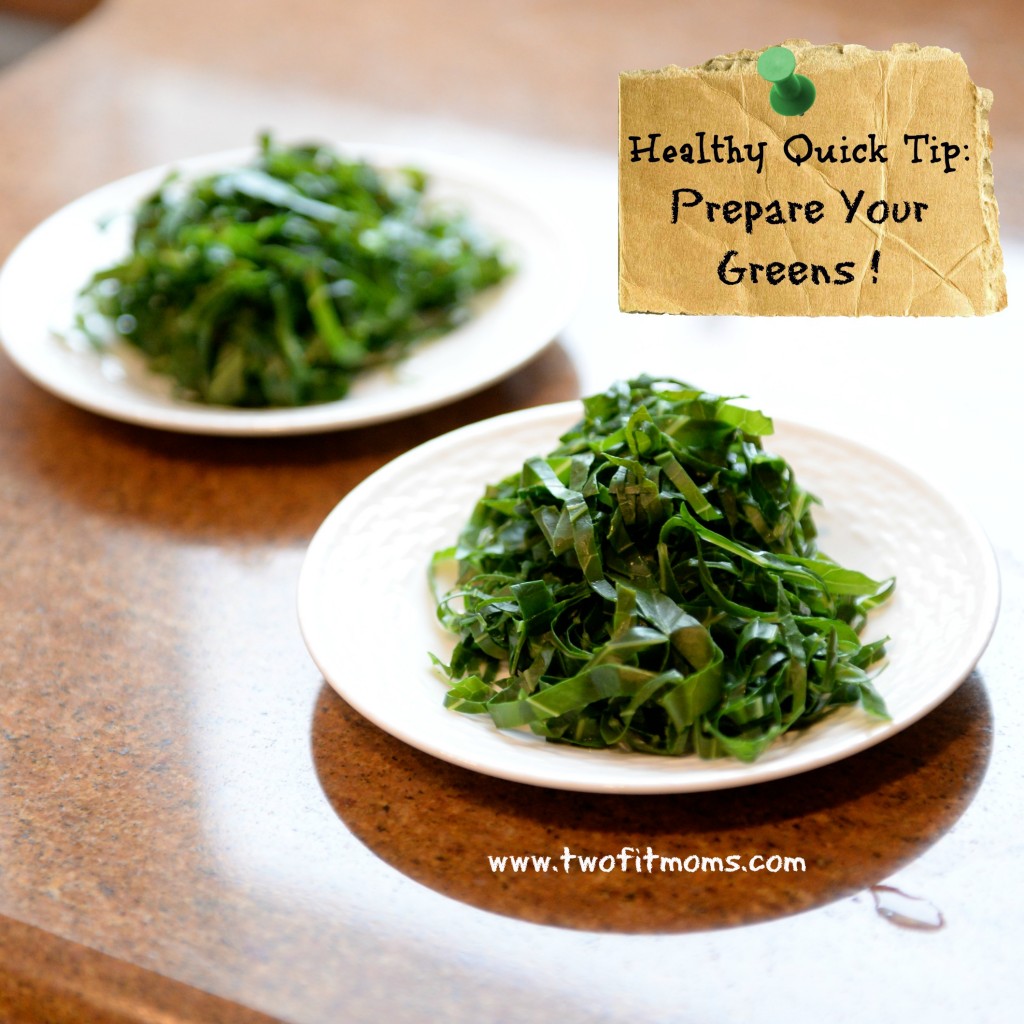 by step. Simply start by incorporating one small, healthy change into your routine. My favorite quick tip for better health is to steam leafy green vegetables on a daily basis. This is such an easy way to kickstart your healthy eating plan. In the time it takes to boil a few inches of water in a pot, your greens will be washed and ready to cook.
I do this every single day. Let me tell you why.
Finding Inspiration
When I was diagnosed with an autoimmune illness, I went to a natural healing facility to learn how to balance my body and health. I was in tremendous pain, but I did not want to start taking the very harsh drugs that are the usual course of treatment for illnesses similar to mine.
While I was at this healing center, I met a number of individuals with various types of catastrophic illnesses. They turned to this healing facility as a last resort. Many of them were given death dates and told that there was nothing else left to be done medically, and many were told to go see the world and say their last goodbyes. It was only under these dire circumstances that these individuals turned to macrobiotics, a lifestyle and diet to balance the body and mind.
As I spoke to some of these individuals with cancer and tumors all over their body, I learned that some of them were just beginning their macrobiotic journey, but many of them had been living macrobiotically for years and had long since surpassed their so-called death dates. How were these people recovering and healing from illnesses that were deemed terminal?!! It was amazing to witness, and I knew that if they could find healing with these horrific diseases, then I certainly could find healing, too.
I will not go into macrobiotic theory in this article, but I WILL tell you one thing that EVERY one of these sick people did at EVERY meal. They ate large quantities of cooked, leafy green vegetables—leafy green vegetables that are low in oxalic acid (not spinach or swiss chard). Yes, they ate many other very important healing foods, but this is such an easy one for anyone to do! Imagine the health benefits of eating greens three times a day! (Or even once or twice a day.) Who knows what kind of weirdo illness you can help ward off with this very simple habit!
The knowledge that I gained at this healing center was invaluable, and with this knowledge, I have been able to stay out of the hospital and manage my illness without drugs. I have incorporated greens into my daily routine, and I’m here to tell you that it’s easy, and you can do it, too.
Let me show you how.
Step 1:
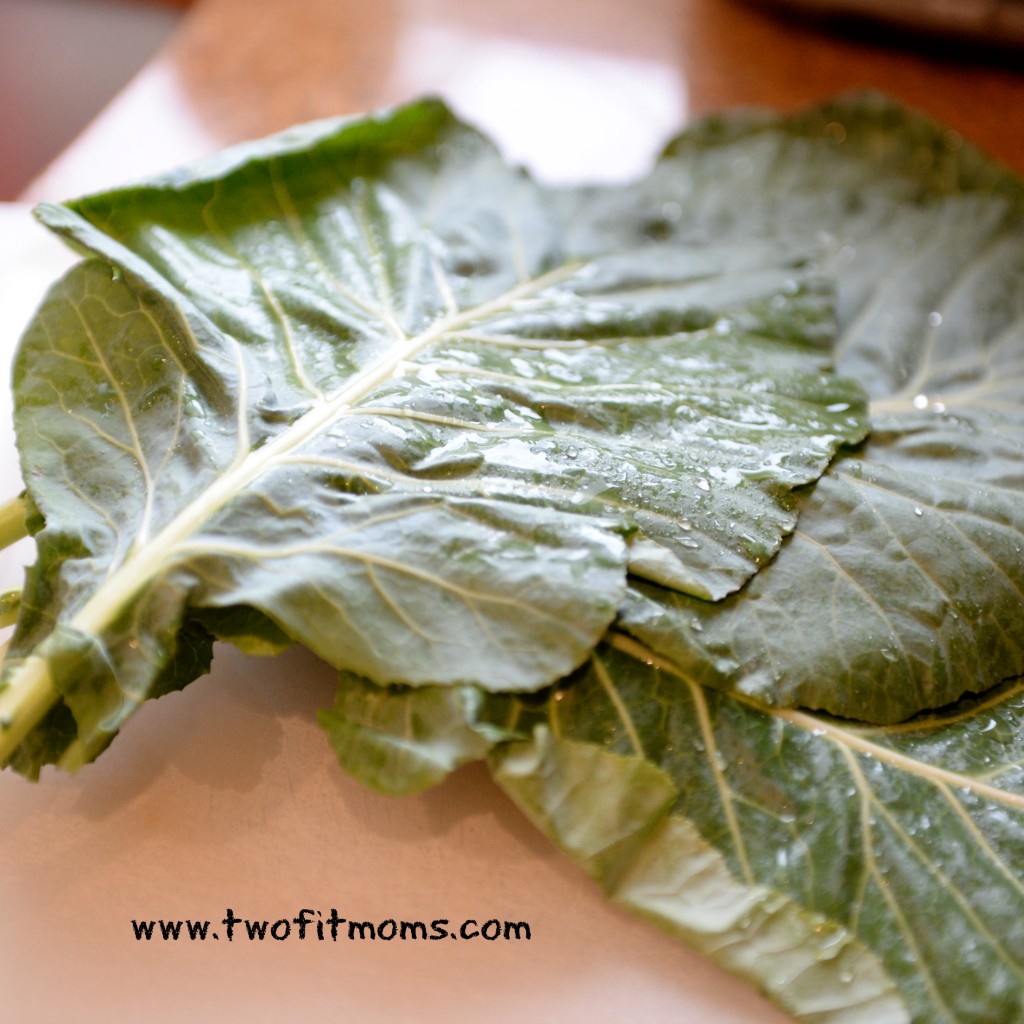
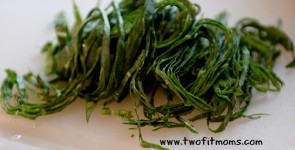
Boil water in your steamer pot, or if you do not have a steamer, boil about 1-2 inches of water in the bottom of a pot. While your water is boiling, wash your green leafy vegetables in cool water. (Ideally, you will have access to organically grown produce.) In the photo below, I’m working with collard greens.
Step 2:
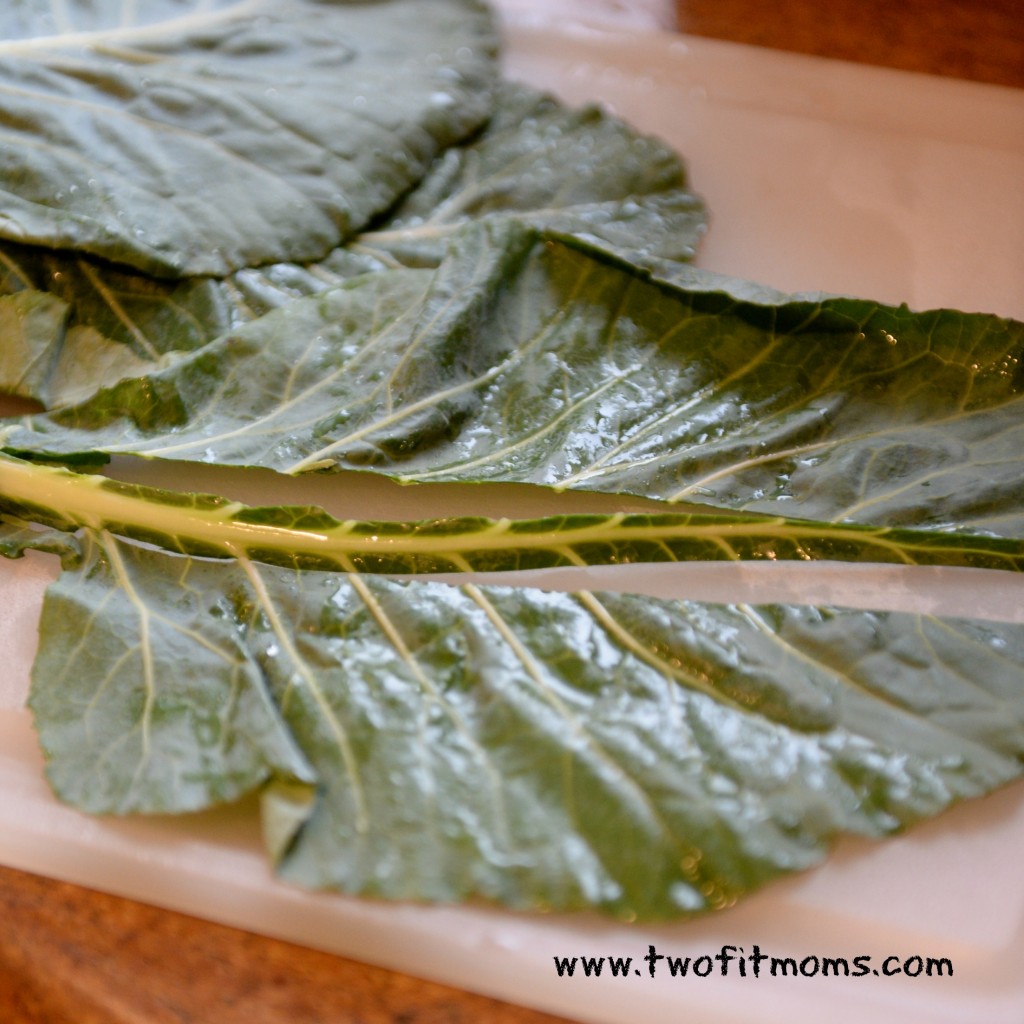
Slice the leaf along either side of the hard stem, but do not discard the stems! Organic vegetables are expensive, so you will want to use every part of the plant. Dry the stems and save them in your refrigerator for another day. I will post another article and tell you how I use up my collard stems.
Step 3:
Make a pile of the leaf halves.

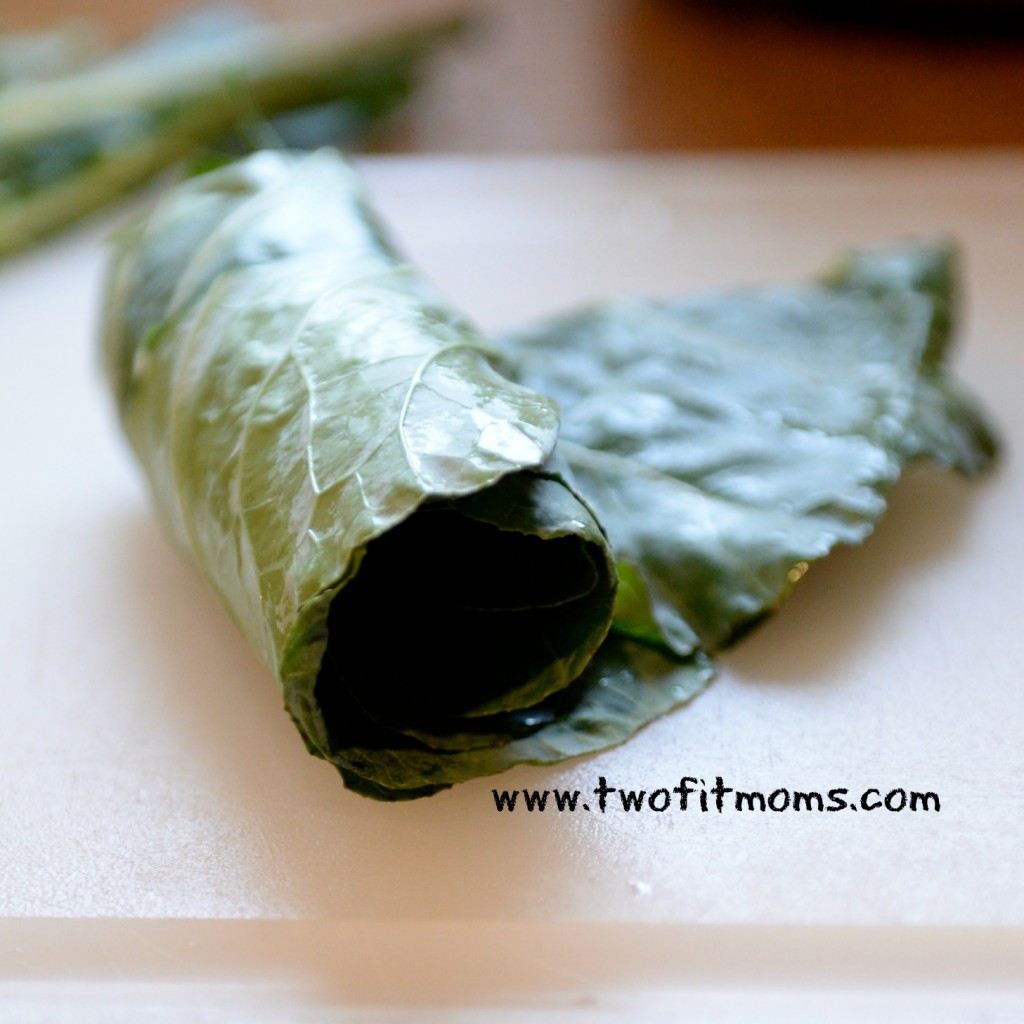
Step 4:
Start at one end, and begin to roll your stack of greens into a tube.
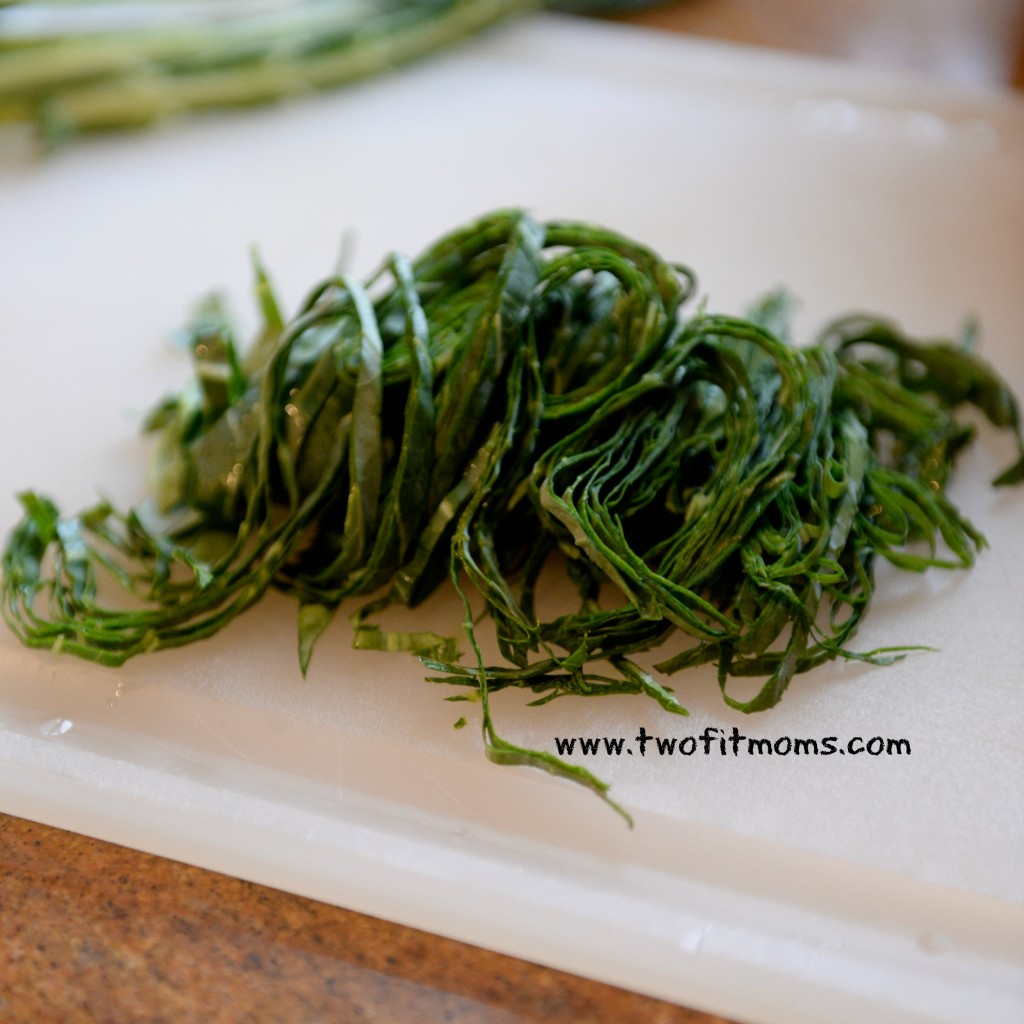
Step 5:
Hold your tubes of collard greens on one end, and begin to slice your greens from the other end into thin shreds. By slicing the collards into thin shreds, a typically very tough green can be steamed and softened quickly.
Step 6:
Drop your shredded greens into your steamer or into your boiling water. Cover the pot for two minutes. After two minutes, your greens are ready to eat.
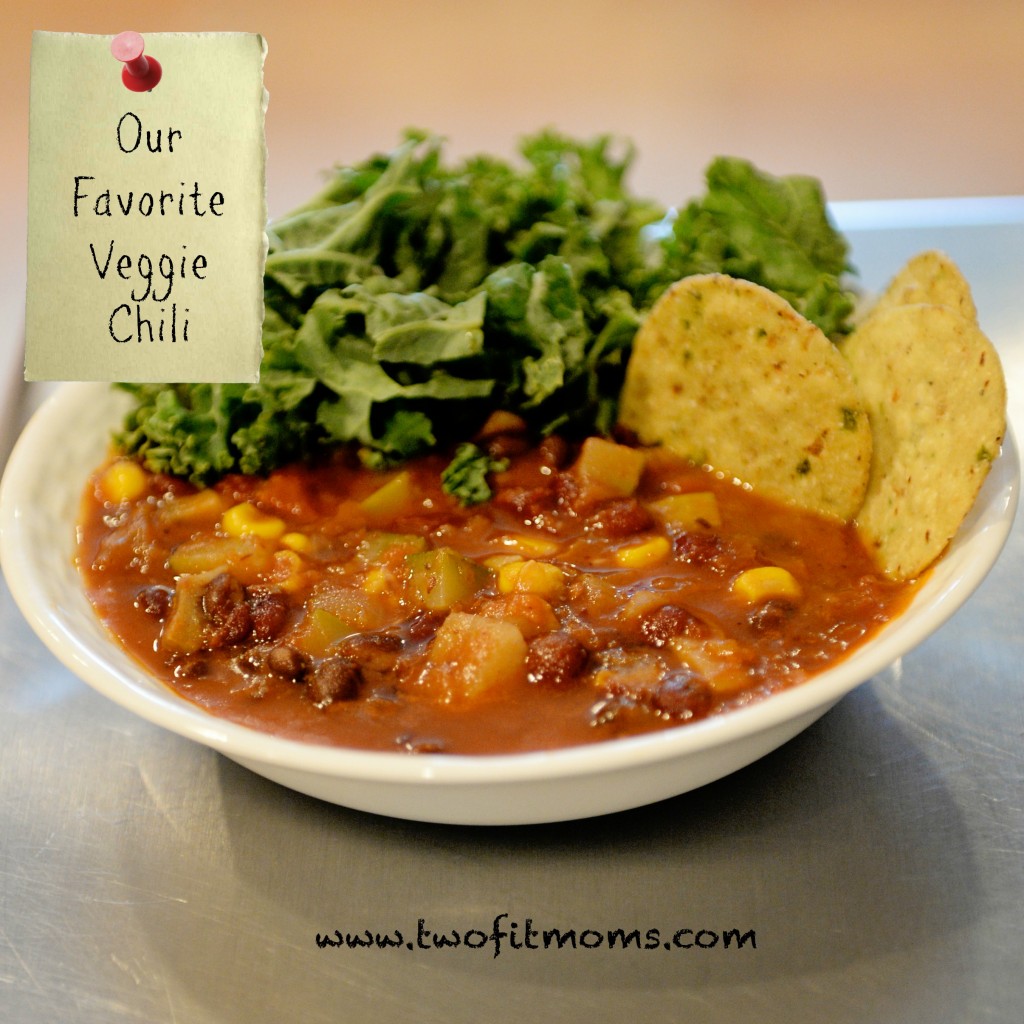
You can have your greens alongside your breakfast (which is what I do) or pack them up to eat with your lunch or dinner later in the day. Throw them into soup or chili, or eat them as a side dish with a drizzle of your favorite vinegar. Remember that preparation is key! The greens will not magically appear if you do not prepare them. Give this healthy tip a try. Be proactive about your health, and fuel up on nutrient-dense foods.
If you would like to ease into macrobiotics, Alicia Silverstone’s cookbook, is a great one to try. The “Superhero” diet that she presents is actually a macrobiotic diet. She also includes many vegan and non-macrobiotic recipes that the whole family will enjoy. There is no pressure at all to adapt a new diet and lifestyle…just a lot of encouragement to dabble and enjoy!

 Do you ever get sick and tired of the taste of your own recipes? Some days, I feel like all of my meals taste the same, even if I change most of the ingredients. When I fall into this kind of cooking funk, I call up my childhood friend, Kate, for inspiration. I know that Kate will have a delicious recipe for me that can be modified to fit my diet, even on its strictest days. She also has an amazing knack for creating meals that my children find just as delicious as I do. This recipe is no exception and will become a staple in your house, as it is in mine.
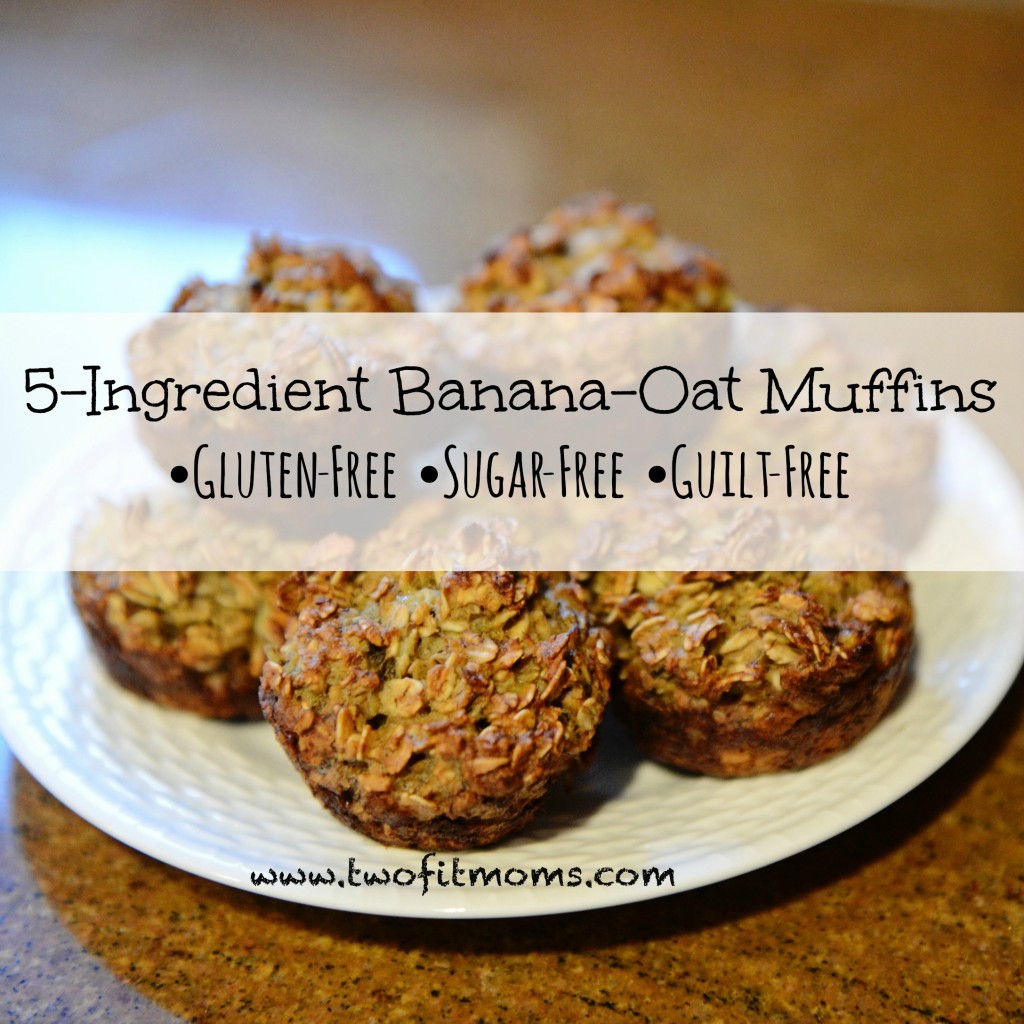
 This recipe is regularly on the menu in my house. My kids get so excited when they see chocolate pancakes on the table. They have no idea that mama put a nice collard green-blueberry surprise into the batter. Don’t worry—you won’t notice either, and it’s a great way to use up all of those hard collard green stems that usually end up in the trash.
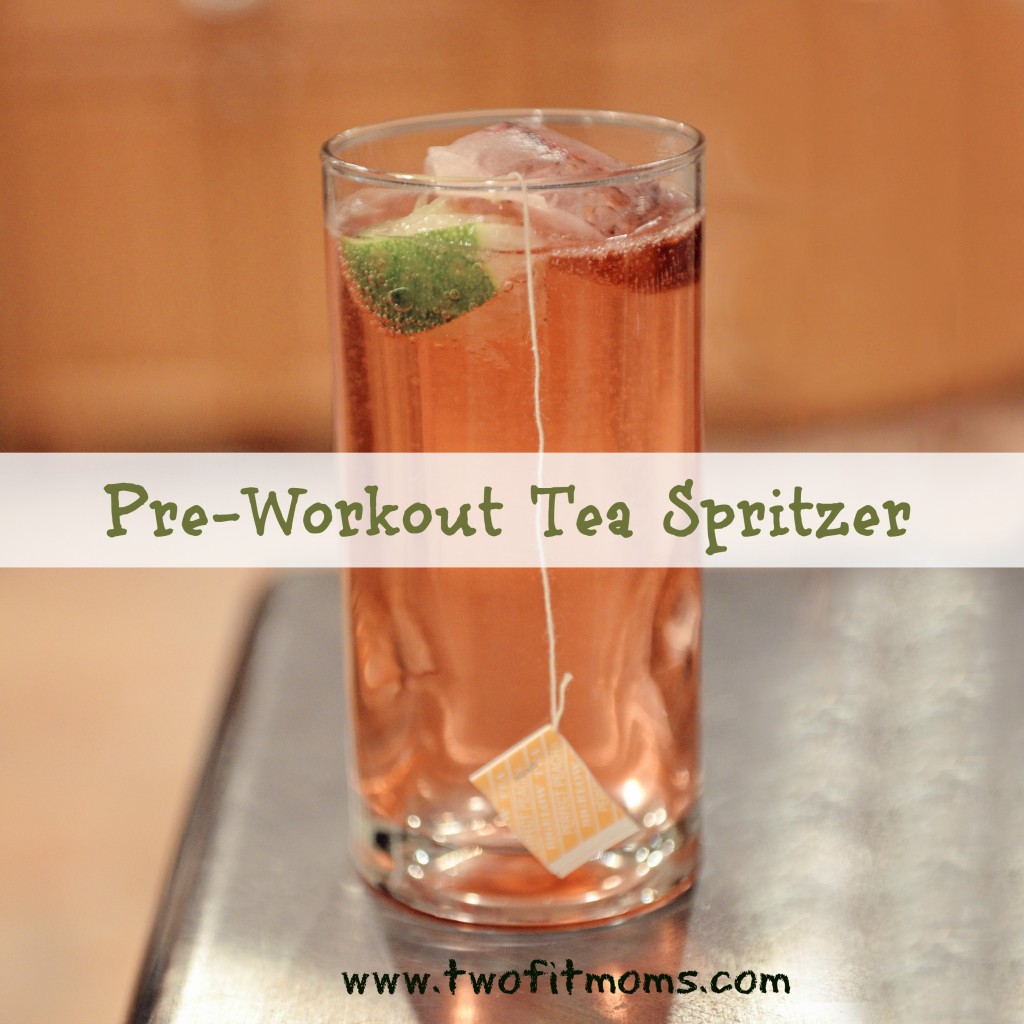 Are you drinking enough BEFORE exercising? The importance of staying hydrated during and after an exercise session is common knowledge, but drinking prior to a workout is just as essential.
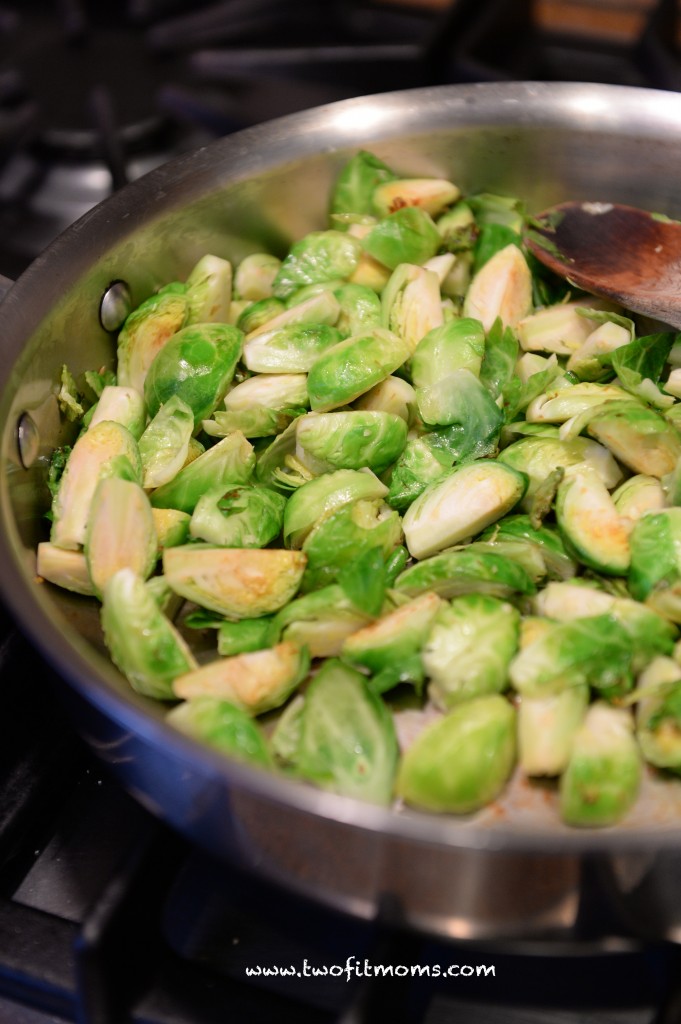
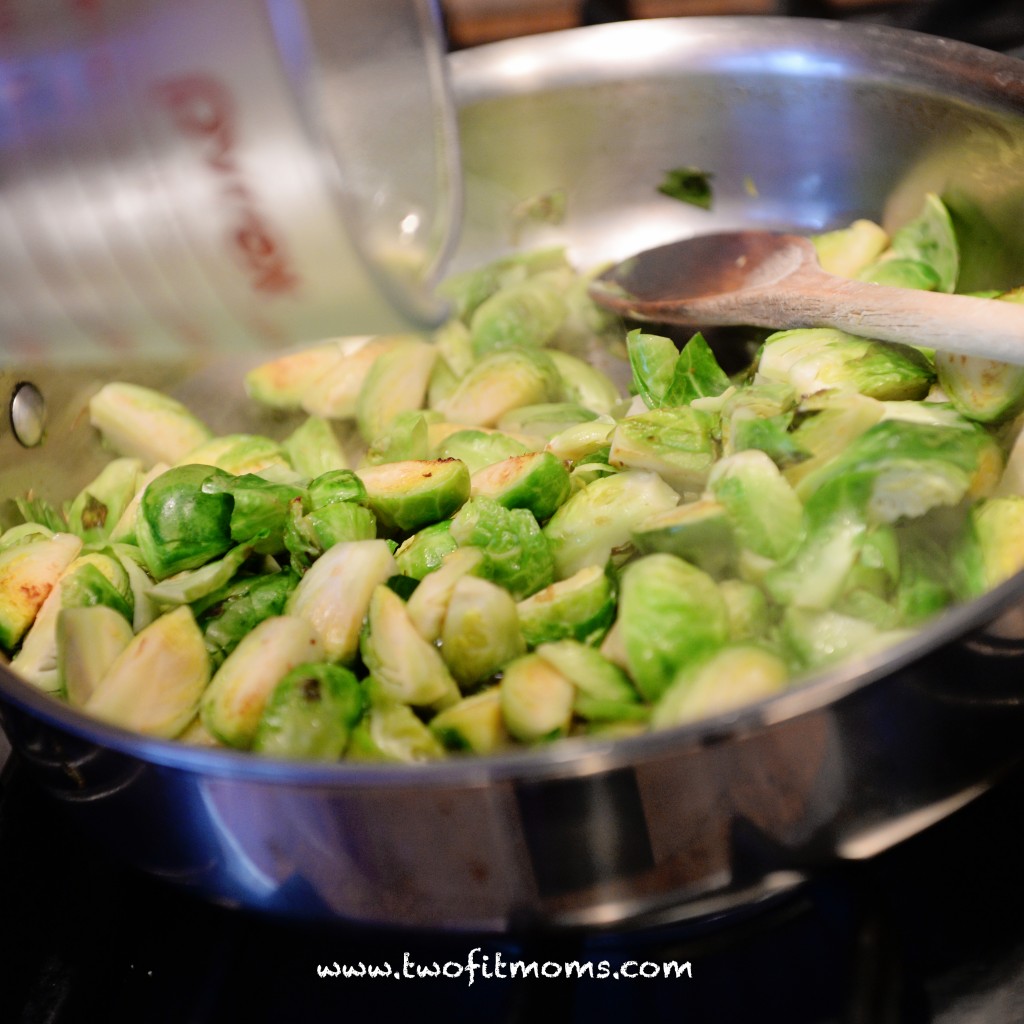
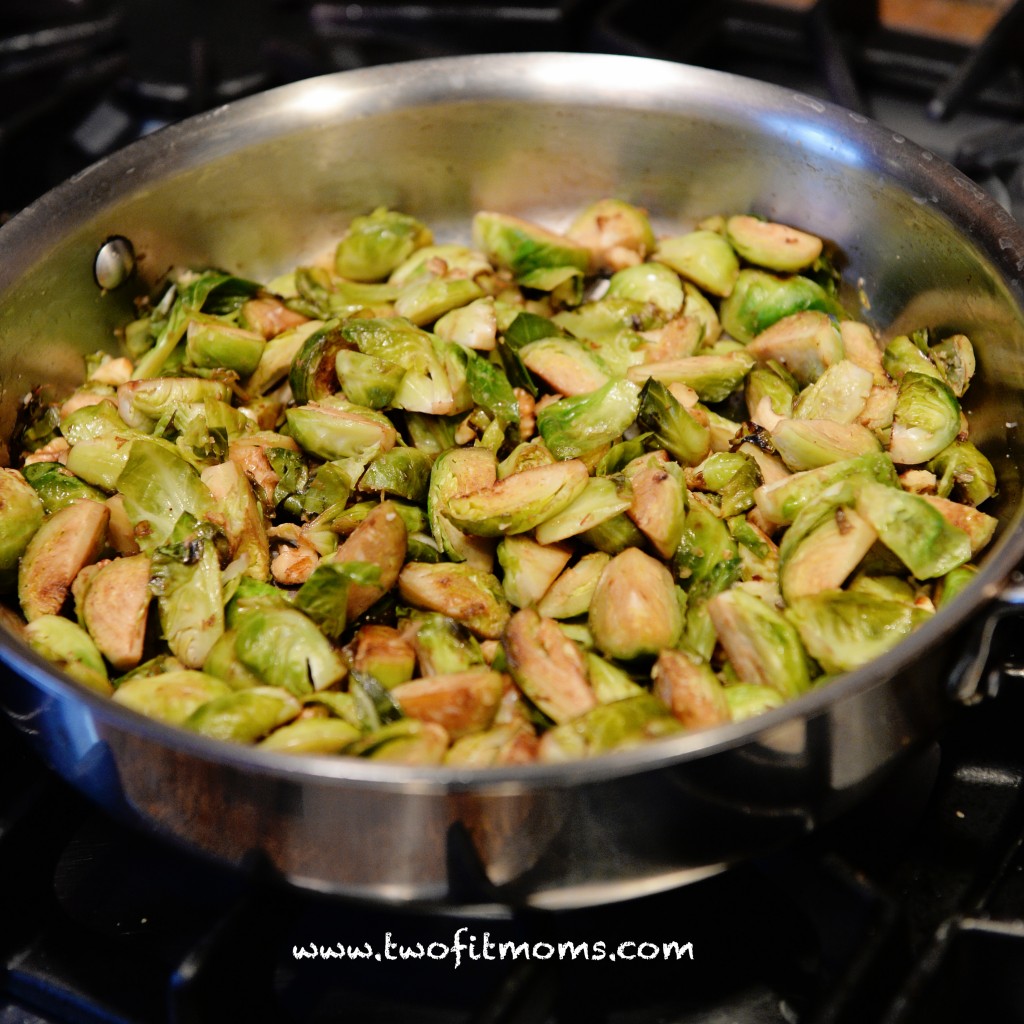
 want to gag. I know that so many of you must have had similar experiences, which is why I am SO excited to introduce you to THIS recipe. I’m not exactly sure when my mom started making this version of brussel sprouts, but I am very grateful for the change. Trust me. This recipe makes me WANT to eat brussel sprouts just about every day. Give this a try.
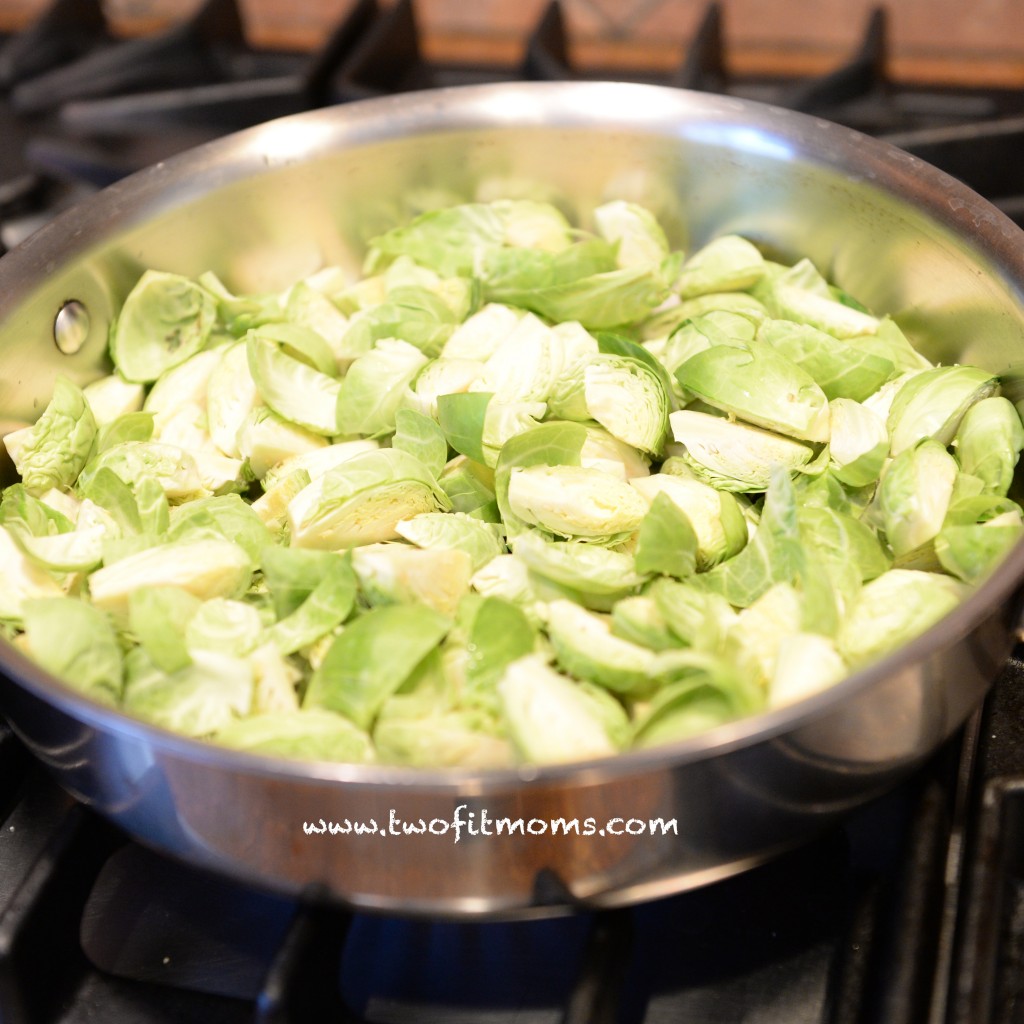

 intensive flour-based pancake batter from scratch—And you KNOW how annoying it is to pull out all of the ingredients to make real pancake batter with flour, sugar, baking powder, milk, eggs, etc. Who has time for all of that on a weekday? Or even on a weekend, for that matter. If the kids don’t even have a preference, I’m going with the two-ingredient version.
 quick, and 18 minutes in the oven is all it takes to have piping hot muffins on your table.

 following items in your blender with a couple of new ingredients each day to change the flavor. If you are working with recipes rather than mixing up your own concoctions, don’t worry—many recipes will include a few of these ingredients. You might need to add one or two new items from the supermarket, but the staples listed here will be used repeatedly. Nothing listed here will be wasted.