Category: Recipes

  • Banana Bread – An Updated Classic

    Banana Bread – An Updated Classic

    The icy weather outside kept me indoors today, so I had some extra time on my hands to experiment in the kitchen.

    I had two nearly black bananas staring at me — begging me to do something with them.  So, I decided I’d try to make a gluten free banana bread — with no white sugar.  I’ve never made such a thing before.  When it comes to dessert, I generally go all in — white flour, white sugar, butter, oil.  I don’t like to skimp on dessert since I hardly make them given my hectic schedule.  However, today I thought I would try to alter a traditional banana bread recipe – a classic, if you will.

    I knew there were certain items that I wanted to use — brown rice flour, almond meal and maple syrup, specifically — oh, and those two over-ripe bananas. So, I pulled together other traditional cake ingredients —  eggs, a little vanilla extract, salt, cinnamon, and yogurt . . . . . and, voila, I had banana bread deliciousness baking in my oven!
    banana bread header 2
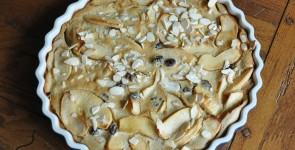
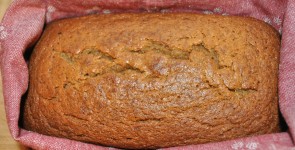
    I could hardly wait the 60 minutes it took for the bread to bake.  To be honest, I wasn’t sure how the brown rice flour would work in this recipe so I was anxiously waiting for the timer on my oven to sound.

    I’m happy to say, I was soooo pleased with the results!  In fact, I was overjoyed. I can’t explain the excitement I feel when I make a healthy version of a generally not-too-healthy recipe — especially DESSERT! However, this recipes proves that you can lighten up your desserts and still retain the delicious flavor and texture you are used to – you just need to use some creativity.

    Also, just a side note, banana bread is a completely acceptable breakfast — at least in my house!

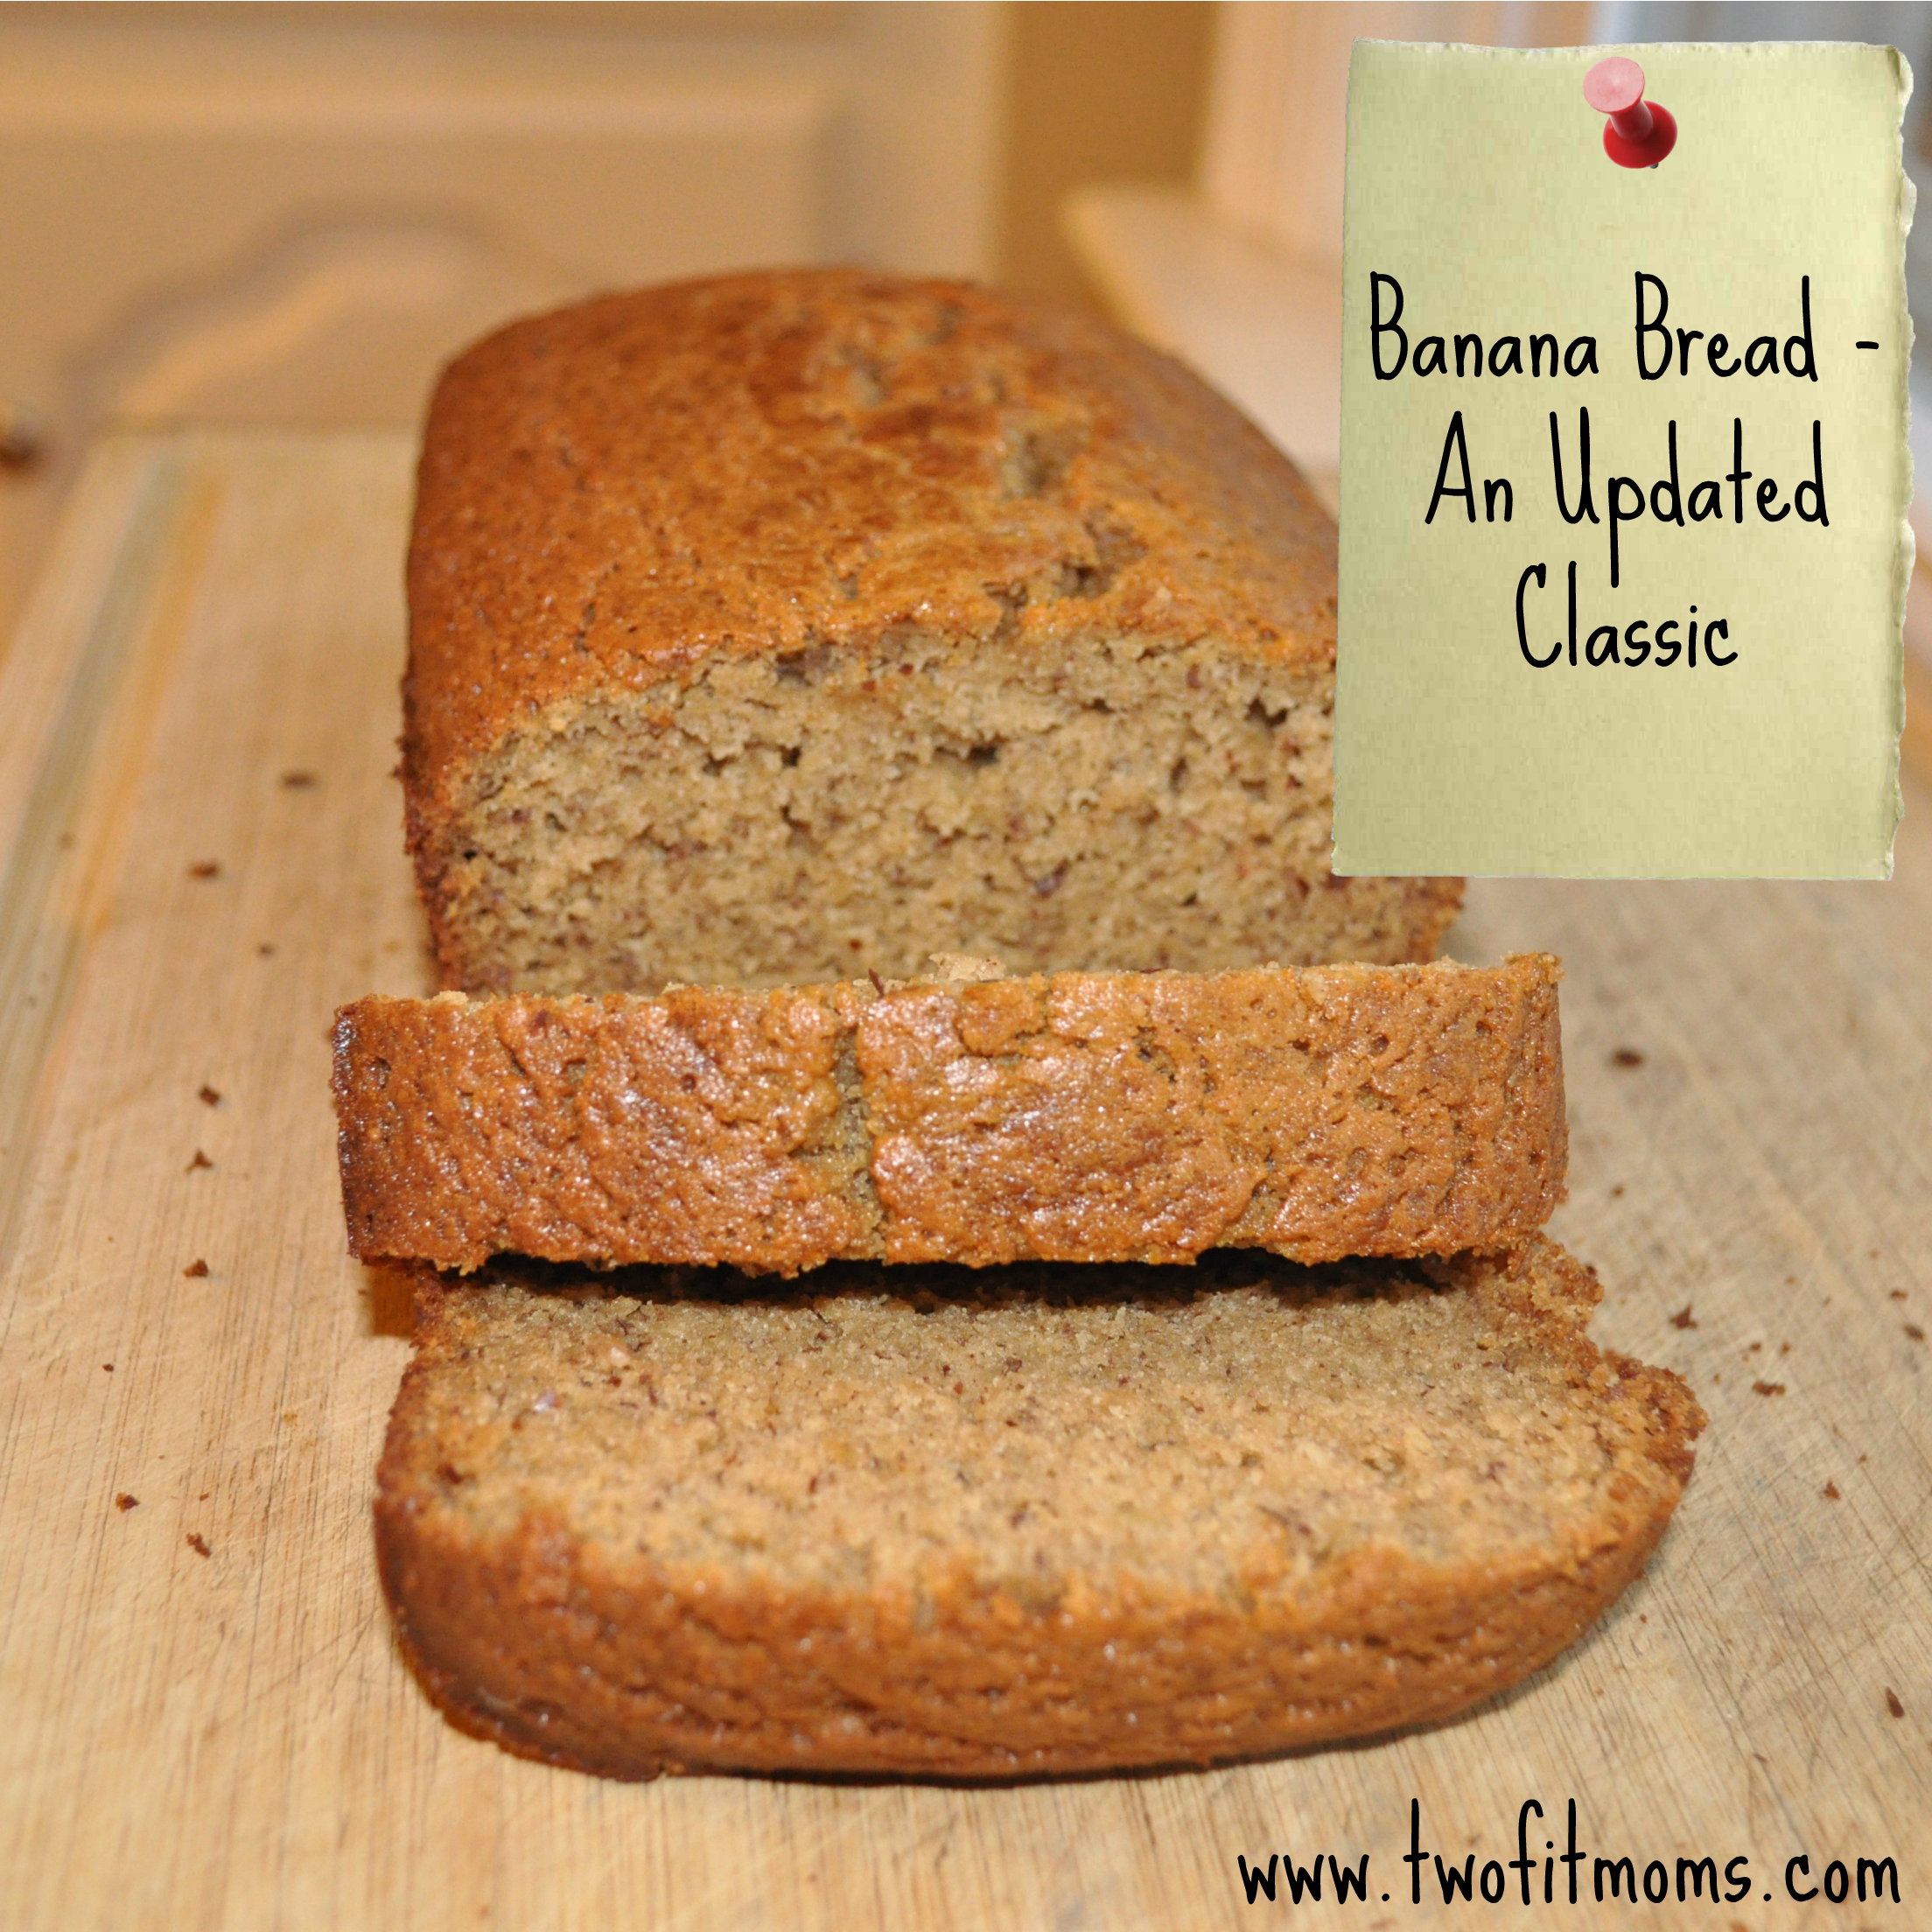
    So, here’s my Banana Bread recipe. I hope you try it — modify it — make it your own.  Don’t be afraid to experiment in the kitchen — I’m so happy I wasn’t!

    Banana Bread–An Updated Classic
    Yields 1 loaf

    1 ½ cups of brown rice flour
    ½ cup almond meal
    ½ teaspoon salt
    1 teaspoon baking soda
    ½ teaspoon cinnamon
    2 eggs
    ½ cup of maple syrup
    ⅓ cup of coconut oil
    ⅓ cup of plain yogurt or sour cream
    2 over-ripe bananas, mashed (about 1 cup)
    1 teaspoon vanilla extract

    optional — add ½ cup of chopped nuts or chocolate chips or shredded coconut — or whatever addition suits your fancy. 

    Preheat the oven to 350 degrees. Grease a loaf pan with an oil of your choice.

    In a bowl, add your dry ingredients — brown rice flour, almond meal, baking soda, salt and cinnamon.

    In a larger bowl add your wet ingredients — eggs, maple syrup, coconut oil (heat to liquid form), yogurt/sour cream, bananas, and vanilla extract.  With a hand mixer, beat all wet ingredients until combined.  Add the dry ingredients to the wet mixture and beat until incorporated.

    Pour mixture into the prepared loaf pan and bake in the oven for approximately 1 hour, or until a cake tester comes out clean.

    Let it cool.  Slice and serve.


  • Best Recipes of 2014

    Best Recipes of 2014

    Over the past year, we shared many of our “go-to” recipes with you — simple-to-prepare, seasonal recipes that we regularly make for our own families.

    We also created new dishes by experimenting with old family recipes that tasted great but were in need of a healthy makeover.  We replaced white sugar with maple syrup.  We swapped white flour for brown rice flour.  We relied on cooking methods that yield the most taste — for example, roasting our veggies for optimal flavor.

    We tried to present traditional recipes in a new way.  We made pesto out of broccoli rabe (vs. basil). We offered a baked oatmeal for a spin on your go-to bowl of oats. We created a delectable dairy and gluten-free banana walnut frozen dessert. We even brought you a light and healthy take on a classic French dessert with our Apple Raisin Clafoutis.

    As we say goodbye to 2014, we want to take a moment to recognize those dishes that really stood out, for us, and, we think for you too.  We hope all of our recipes make it into your kitchen in 2015, but if you only choose a few, here are the ones that we consider our “best in class.”

    Best Drink:
    ApplePieSmoothie

    Best Breakfast:
    BananaOatMuffinRecipe

    Best Appetizer:
    guacamole with banner updated

    Best Salad:
    kale with header

    Best Soup:
    butternut squash with header

    Best Side Dish:
    smashed pot banner

    Best Main Course:
    lemon dijon salmon with banner

    Best Dessert:
    blueberry crisp


  • Entertaining 101: Best Dishes for Feeding a Crowd

    Entertaining 101: Best Dishes for Feeding a Crowd

    Now that we’ve got our planning down, let’s figure out what types of dishes are best for entertaining.  When you are expecting a large crowd, individual portions become difficult to manage.  Family style (or buffet style), is the way to go. But, what will you serve that will feed a crowd?  You need dishes that spread.

    Here are my suggestions for the types of recipes (appetizers to desserts!) that work best when entertaining a group of people.
    Below view of people clinking glasses with each other
    Simple dips and crudite platters
    You can make them in advance, and they can generally work for vegetarians and meat-eating folks.  And, if you don’t have time to make your own dip or vegetable platter, you can purchase the individual items and assemble.  There’s no shame in picking up a store bought hummus or guacamole.  Do what works for you.

    Pasta
    A big bowl of pasta is hearty and can feed many.  Make a homemade pesto or marinara or any other sauce of choice and top it onto your favorite pasta.  We do not have dietary restrictions in our house, but some of our guests do, so we make brown rice pasta and semolina pasta — two big bowls — both with the same sauce.  You can also make a baked pasta — a lasagna or stuffed shells — or baked manicotti (which is what my family eats during the holidays). Generally, kids and adults are both happy with it!

    Salads
    They will go a mile and everyone enjoys them.  My recommendation is to make a green salad and a grain salad.  Not everyone at your party may be well versed on farro and quinoa, but everyone can relate to a nice green salad.  Make both. Throw some seasonal ingredients into them to make them more festive — like pomegranate seeds, cranberries, toasted walnuts.  You get the picture.

    Veggies
    A big platter of vegetables is always welcomed.  You can grill them and serve them along with other appetizers, including breads and cheeses.  Or, you can include them on your buffet along with your other dinner items.  You can never go wrong with grilled vegetables and they taste even better room temperature.

    If it’s too cold to bust out your grill, try a roasted vegetable platter instead — beets, butternut squash, throw some nuts and maybe cheese on top.  Yum!

    Meat or Fish
    This is a little more complicated because cooking meat and fish requires timing it, carving it, etc.  That being said, if you don’t mind stealing away from your guests to do so, there are definitely some options.  You can roast a whole fish or salmon fillets and arrange on a platter.  You can also bake a ham or roast a whole filet mignon and serve it room temperature.  I tend to include meat on my holiday table because the older crowd look for it, but I’m seriously considering skipping it this season — just to give myself a break and offer myself a chance to not cook while my guests are around.

    Dessert
    Well, dessert is easy.  Make a big fruit crisp.  You can make it in advance, and just pop it in the oven to warm it before serving (with ice cream, or whipped cream or nothing because it’s so delicious on it’s own!).  You can make cookies or cupcakes or a cake or pie or two.  Just don’t make too much.  I prefer quality over quantity.

    In addition to the sweets, put out some fruit and nuts as well.  Not everyone will be up for a heavy dessert after a big meal.

    I hope these tips help make your holiday entertaining a bit easier and a lot less stressful.

  • Entertaining 101: Planning Makes Perfect (well, almost)

    Entertaining 101: Planning Makes Perfect (well, almost)

    I love entertaining, but it’s a lot of work.  Creating the menu, buying the food, cleaning the house, setting the table, slaving over a stove . . . . all while managing kids and work and possibly wrapping and decorating too! This doesn’t sound like fun at all.  In fact, entertaining can be really stressful.
    Closeup of christmas placecard holders with plates and intencils
    So as the holidays get closer, consider these tips that are sure to make entertaining more manageable this year, especially if you are planning for a crowd.

    1. Plan Your Menu in Advance. In fact, write down your menu. While you are at it, make your grocery list too! We love lists, and this is definitely time to pull one or two together.  Try to avoid any guessing.  Even with a list, you may forget an item or two, but not having a list will be a disaster.

    2.Keep it Simple. There’s no need for 10 appetizers and 12 desserts.  Limit your menu to a few really good, quality dishes. And, while you are at it, don’t use the holidays to test a new recipe.  Stick to familiar favorites — and ones that are easy to prepare.

    3. Start Cooking Ahead of Time.  Make as much of your meal, as far in advance as possible.  Soups, sauces, appetizers are all things you can generally prepare ahead of time.  I make my Marinara Sauce a day or two in advance of serving it — the same with my Roasted Butternut Squash Soup.  We like to make our White Bean Dip in advance (in fact, it tastes better once it’s flavors have had a chance to meld.) You can also wash and cut veggies a day in advance of cooking them.  Don’t forget that prepping a recipe in advance saves time too!

    I always make my pies the day before I serve them.  Our Maple Sweet Potato Pie is the perfect example of a make-ahead dessert.  Crisps and cakes can also, usually, be made a day ahead of time too. This is true for our Blueberry Crisp (try it with apples this season) and our Apple Raisin Clafoutis.

    Ultimately, the key is to get as much cooking and prepping done before the actual event to avoid slaving over a stove while your guests have already arrived.

    4. Set Your Table the Night Before.  Iron your table linens, pull out your dinnerware and cups and cutlery and decorative accents ahead of time.  If you can set your table a few days in advance all the better — if not, the night before is perfect.  No one needs to worry about ironing a tablecloth the day of the event.

    5. Make a Buffet. A sit down dinner is all nice and good, but it’s much harder to pull off! Create a more casual vibe by arranging your food family style.  If you have a counter or island in your dining area, arrange the dishes on it so that people can get up and help themselves. You can use chafing dishes to keep things warm.  Crock pots are also great. They not only keep food hot, but you can serve from them too.

    A buffet offers a much more relaxed environment — and it works out well for families (especially those with young children) and in homes where seating is an issue.

    As you can see, all of these tips largely center around planning in some way, shape or form.  We guarantee that if you plan in advance, and spread the work over a few days, you will successfully entertain this season.  In fact, you may even enjoy yourself!

    Now, if you need some ideas on the types of dishes that work best when entertaining large groups, check out our next article . . .


  • Thanksgiving Starters, Sides & Desserts

    Thanksgiving Starters, Sides & Desserts

    Thanksgiving is one week away. Is your Thanksgiving dinner menu planned? If you are still searching for starters, sides and desserts, we have some great recipes for you.  In fact, they are not only delicious dishes, but they are healthy alternatives to traditional Thanksgiving favorites.

    Check out some of our favorite recipes below:

    A wonderful, light and delicious appetizer is our White Bean Dip with Seasoned Pita Chips.

    white bean dip

    And, what better way to start your dinner than with a savory Roasted Butternut Squash Soup with Sage Croutons?

    butternut squash with header

    Looking for a festive salad? Try our Harvest Salad with Arugula, Roasted Butternut Squash and Quinoa.

    harvest salad square

    We have some great sides to accompany your turkey or veggie loaf, including our Balsamic Brussel Sprouts.

    BrusselSproutsPicRoasted Sweet Potatoes.

    HowToRoastVeggies

    And, our Smashed Potatoes.

    smashed pot banner

    For dessert, we try our Apple Raisin Clafoutis.

    apple cake slice square

    And, our Maple Sweet Potato Pie!

    sweet potato pie

    We hope some of our delicious starters, sides and desserts make it onto your table this holiday season!

  • Maple Sweet Potato Pie

    Maple Sweet Potato Pie

    Thanksgiving is one of my favorite holidays because the focus isn’t on gifts, but on family — and food! And, not just any food — familiar and traditional food.

    In fact, I bet your family is expecting a decadent pecan pie, sugared yams and your famous stuffing. I think the one thing to keep in mind is that it’s a special day — a day to splurge — a day to delight in familiar traditions and recipes, but you might want to consider adding a new recipe or two!  This particular recipe is a great alternative to heavier pies made with white sugar and cream.  Everyone will love this version of sweet potato pie that lightens up the ingredients but does not compromise flavor. sweet potato pie

    I used a traditional recipe, but swapped out the white sugar for grade B maple syrup.  I generally substitute maple syrup for white sugar — 1:1.  However, I used half the amount of maple syrup this time, and it was perfect. You would never know the recipe was altered. I promise!

    The key to this recipe is roasting your sweet potatoes.  DO NOT use canned sweet potato puree.  As a busy mom, I tried a short cut.  It didn’t work.  Take the time to roast your own sweet potatoes .  . . it will set up perfectly and have a delicious, dense texture.

    You can use any pie crust that works for you.  I tend to use pre-made pie crust.  There are some really good ones on the market — I like Trader Joe’s frozen pie crust.  It saves time, which is important, especially around the holidays.

    You can make one 9-inch deep dish pie with this recipe — or two shallow 9 inch pies.

    If you are considering a new Thanksgiving dessert, I hope you try our Maple Sweet Potato Pie.  It’s so good, you may even consider it a replacement for your traditional pumpkin pie!

    Maple Sweet Potato Pie
    Yields 8 slices

    2 cups of roasted sweet potato puree (I roasted 3 medium sized sweet potatoes in their skin, in foil, at 400 degrees, until they were fork tender. I peeled them and mashed them in a bowl)
    2 eggs, beaten
    1 cup of milk (I used 2% milk, but feel free to substitute)
    3/4 cup of grade B maple syrup
    1 teaspoon, vanilla extract
    1/2 teaspoon of ground cinnamon
    1/4 teaspoon of ground ginger
    1/8 teaspoon of salt
    1, 9-inch prepared deep dish pie crust or 2, 9-inch prepared shallow pie crusts (like the ones you find in the freezer case of your supermarket!)

    Preheat oven to 400 degrees.

    In a large bowl, add the mashed sweet potatoes, eggs, milk, maple syrup, cinnamon, ground ginger, salt and vanilla extract to a large bowl and beat with a hand mixer until combined.

    Pour sweet potato mixture into a prepared pie shell (or two depending on whether you use one deep dish or two shallow pie crusts).  Bake for 10 minutes at 400 degrees and then lower the temperature to 350 degrees and bake for an additional 30-40 minutes for the two shallow pies and an additional 40-50 minutes for the deep dish pie.  The pie will be done when the center is set and not jiggly.

    Let the pie cool and serve at room temperature — or cold — and top with whipped cream — or nothing — it’s delicious either way!!

    Helpful Hint: If your sweet potatoes are too stringy, you can press them through a potato ricer.

  • Harvest Salad with Arugula, Roasted Butternut Squash and Quinoa

    Harvest Salad with Arugula, Roasted Butternut Squash and Quinoa

    I like to mix grains and seeds into my salads. They offer an interesting texture and help fill me up. In fact, recently I attended an event where they featured a green salad and a quinoa salad, and I wondered why they didn’t just combine the two. harvest salad square So, I decided to make one beautiful salad with greens and quinoa — along with the addition of some nice seasonal ingredients.

    This salad includes a blend of peppery arugula juxtaposed by sweet roasted butternut squash. I added cooked red quinoa, roasted pumpkin seeds for crunch and pomegranate seeds for some added texture and color! I also topped mine with some nutty shaved parmigiano-reggiano cheese, but that’s completely optional.

    It’s a beautiful salad — perfect for the fall — and, I think, perfect for a holiday table.

    Harvest Salad with Arugula, Roasted Butternut Squash and Quinoa
    Serves 4

    5 ounces of arugula greens (I used half of a bag of pre-washed arugula)
    1 cup of cooked red quinoa
    2 cups of roasted butternut squash (which was salted, peppered and olive oiled)
    1/3 cup of pomegranate seeds
    1/3 cup of roasted pumpkin seeds (mine were salted)
    1/4 cup of balsamic vinaigrette
    1/4 cup of shaved parmigiano-reggiano cheese

    In a large bowl, add the arugula greens, quinoa, butternut squash, pomegranate seeds, pumpkin seeds, balsamic vinaigrette (recipe follows) and toss to combine. Top with shaved parmigiano-reggiano cheese.

    Simple Balsamic Vinaigrette
    Yields 1 cup

    3/4 cup of olive oil
    1/4 cup of balsamic vinegar
    2 teaspoons of brown sugar
    1 clove of garlic, crushed
    salt and pepper to taste

    Add, to a mason jar or lidded container, olive oil, balsamic vinegar, brown sugar, crushed garlic, salt and pepper to taste — shake until combined.  Vinaigrette will keep in the refrigerator for at least one week.

  • Make Ahead Breakfast: Pumpkin Spice Oatmeal Cake

    Make Ahead Breakfast: Pumpkin Spice Oatmeal Cake

    Who doesn’t love a hot bowl of oatmeal in the morning — especially as the weather starts to get a bit chilly? But, who has the time to prepare oats in the morning — aside from the instant ones that tend to be full of sugar?  If you want to get your oatmeal fix, but have little time to prepare them in the morning, consider making an oatmeal cake.  You can make it in advance and enjoy it throughout the week.  All you need to do is pop it in the microwave to heat it, and voila, a healthy breakfast is served!
    oatmeal cake square
    I got this idea from Cooking Light that offers a baked oatmeal recipe.  However, the Cooking Light recipe includes butter and brown sugar.  I wanted to lighten up the recipe, so I swapped out the butter and the brown sugar, replacing them with safflower oil and maple syrup.

    By now, you probably know that I use maple syrup a lot as a processed sugar replacement.  Maple syrup is a natural sugar, and I find that I can easily replace an equal amount of white sugar (or brown sugar) with maple syrup.  It works really nicely in this oatmeal cake recipe.

    You can flavor the oatmeal cake any way you’d like.   I decided to make a pumpkin oatmeal cake, because it’s fall, and I love pumpkin! You can also use mashed banana or applesauce in place of the pumpkin puree.  If you don’t consume dairy products, try making the cake with almond or soy milk.  I added raisins to the Pumpkin Spice Oatmeal Cake, but you can throw in cranberries or currants or chocolate chips! You can also top it with a little extra maple syrup for some additional sweetness. It’s really a very versatile recipe. It’s also a great recipe for the non-oatmeal lover in your life.

    If you happen to follow a gluten-free diet or have a gluten allergy, make sure to use oats that are labeled as gluten-free.  While oats are naturally gluten-free, they are often cross contaminated with grains containing gluten during the growing process.

    Pumpkin Spice Oatmeal Cake
    Yields nine servings

    2 cups of oats (not quick cooking)
    1/3 cup of raisins
    1/4 cup of chopped walnuts
    1 teaspoon of baking powder
    1 1/2 cups of milk
    1/4 cup of maple syrup (grade B)
    1/2 cup of pumpkin puree
    2 tablespoons of safflower oil
    1 large egg, beaten
    1 teaspoon vanilla extract
    1/4 teaspoon ground cinnamon

    Preheat your oven to 375 degrees.  Grease an 8 by 8 inch square pan.  Combine the first four ingredients in a bowl.  In a separate bowl, add the milk, maple syrup, pumpkin, oil and beaten egg.  Mix to incorporate and then add the wet mixture to the dry mixture.  Stir well.  Pour the oat mixture into the greased pan.  Bake for 25-30 minutes, until firm. Serve warm or refrigerate it and enjoy throughout the week!

    Helpful hint: You can make the oat mixture the night before, store it in the refrigerator  and bake it in the morning! I found the cooking time remained the same, but all ovens will vary.

  • Apple Raisin Clafoutis

    Apple Raisin Clafoutis

    One of my favorite fall activities is apple picking.  Not only do our kids love apple picking, but so do my husband and I.  Needless to say, we end up leaving with tons of apples.

    Apple pie, baked apples, applesauce and apple crisp are usually the first recipes that come to mind, but I like to use the apples to make a really delicious, light — and not too sweet —  cake called Apple Raisin Clafoutis.

    apple cake sliceClafoutis is a french baked dessert that involves fruit and a custard-like filling.  Traditionally, cherries are incorporated, but my version is made with apples, raisins and topped with sliced almonds.

    Generally, the cake is made with butter, white sugar and white flour.  I’ve modified the recipe, replacing the white flour with brown rice flour, the butter with safflower oil and the white sugar with natural maple syrup.  And, to be honest, you would never know the difference!!

    The beauty of this cake is that it doesn’t require a lot of effort — not much more than peeling and slicing four apples and making a quick batter in the blender.  It’s a no-fuss cake that’s perfect for any day of the week – but it’s also elegant enough for a dinner party or holiday gathering.

    I like to serve the cake with whipped cream — or ice cream.  If you are limiting your dairy, try cashew cream, or our Banana Maple Walnut Ice Cream! However, you can totally forgo a topping since the cake itself is so delicious!

    Apple Raisin Clafoutis

    Serves eight

    4 apples peeled, cored and thinly sliced
    2 tablespoons of safflower oil
    1/2 cup of raisins
    1/4 teaspoon of nutmeg
    1/2 cup of maple syrup (*I prefer Grade B for baking)
    1/2 cup of milk
    4 eggs
    1 tablespoon vanilla extract
    2/3 cup of brown rice flour
    1/4 cup of sliced almonds

    Preheat the oven to 350 degrees. Grease an 8-cup shallow baking dish or a 12-inch pie or tart pan.

    Add the safflower oil to a large skillet on medium/low heat.  Add sliced apples and cook until lightly browned and tender. Add the raisins, 1/4 teaspoon of nutmeg and 1/4 cup of maple syrup.  Mix to incorporate; turn off the heat and reserve.

    In the base of a blender add the eggs, milk, 1/4 cup of maple syrup, brown rice flour and vanilla extract. Blend on high for one minute.  If you are using a Vitamix or other high performance blender you might want to reduce the blending time.  At the end of the day, all of the ingredients should be well incorporated.

    Spread the apple/raisin mixture in the greased baking dish/pan and pour the batter over the apples.  Sprinkle sliced almonds on top of the cake. Bake one hour and serve warm.

  • Make Ahead Breakfast: Easy Baked Frittata

    Make Ahead Breakfast: Easy Baked Frittata

    I’m not a morning person.  It’s hard enough for me to get up and ready and out the door, but squeezing in a healthy and nutritious breakfast is nearly impossible.  However, you know what they say — breakfast is the most important meal of the day! So, over the next few weeks we are going to offer you some suggestions on healthy breakfasts that you can make ahead of time and, in some cases, ones that will stretch throughout the week.

    Frittata BannerWe are starting with our Easy Baked Frittata.  I make mine in a pie dish so it’s easier to divide and portion.  Baking the frittata is so much easier than cooking it on the stovetop.  You just pour the ingredients into a greased pie plate and pop it into the oven for approximately 20 minutes.  I suggest making it on Sunday and slicing it throughout the week.  Or, plan to make one when you know you will have leftovers to incorporate into the dish.

    Our frittata has a few basic ingredients — eggs, milk, veggie/meat, cheese, salt and pepper.  The picture you see to the right is made with leftover roasted vegetables and goat cheese.  One of my favorite versions incorporates leftover roasted potatoes and onions and parmigiano-reggiano cheese. You can nix the cheese altogether and throw in more veggies.  You can also add meat to the frittata.   At the end of the day, you can really modify the frittata to your liking but the point is that you are making it in advance — and hopefully getting rid of leftovers in the process!

    Additionally, a frittata is not only something you can enjoy for breakfast.  It can be eaten for lunch or dinner alongside soup, such as our Roasted Potato Leek Soup, or alongside salad, such as our Shaved Fennel Salad.

    Easy Baked Frittata
    Yields 8 slices

    8 large eggs
    1/4 cup of milk
    1/3 cup of cheese
    1 cup of veggies (or meat)
    1/2 teaspoon of salt
    pepper to taste

    Preheat the oven to 400 degrees.

    In the meantime, grease a 9 inch pie plate.  Beat eggs and milk until thoroughly combined.  Add cheese, veggies and/or meat, salt and pepper.  Mix until incorporated and pour into the prepared pie plate.  Bake in the oven 15-20 minutes.  Serve warm or at room temperature.

    Helpful hint: We used a ceramic pie plate.  Cooking times may vary depending on what your pie plate is made out of — metal or glass may take more or less time.