Category: Backbend

  • Dream Big in March!

    Dream Big in March!

    Hello to our online community!

    Tonight, we kick off our March yoga challenge on Instagram by posting instructions for the first pose.  The theme this month is “Dream Big”.  We are gearing up for the launch of our new clothing line with Gaiam in April, and honestly, it wouldn’t be happening if we didn’t start with a dream.  DreamBigWithTFM

    We want you to DREAM BIG, too, and develop a yoga practice that you love.  The goal of the challenge is to commit to your practice and to participate in some way, every day.  Can’t do all of the poses shown?  No problem.  Show us what you CAN do.  Modify. Get creative.  Have fun, and realize that you can be your own source of inspiration!

    For complete details about this challenge, follow @twofitmoms on Instagram, and find the full list of instructions for the challenge.

  • Pose of the Week: Ustrasana

    Pose of the Week: Ustrasana

    This week’s TFM Pose of the Week is Ustrasana or Camel Pose. Backbends are a great way to open up the front body and to energize yourself. Take your time getting into this one and remember to breathe!

    Level 1 Modification: Start with your shins parallel and toes untucked. Place your hands on your low back with fingers facing down towards your mat. Hug your elbows in. Take a deep breath in, and on the exhale, slowly start to lift your heart up towards the sky as you lean slightly back drawing the shoulder blades together. Keep your hips pushing forward while your thighs remain perpendicular to the ground. If it is comfortable, drop your head back. Try to take five steady breaths. When you are ready to come out, lead with your chest.  Your head should be the last thing to rise. Sit back on your heels and take a moment.  Repeat this sequence two more times.

    Ustrasana Level 1

    Level 2 Modification: Start with your shins parallel and toes tucked under. Place your hands on your low back with fingers facing down towards your mat. Hug your elbows in, and take a deep breath. On the exhale, slowly start to lift your heart up towards the sky as you lean slightly back drawing the shoulder blades together. Slowly bring one hand at a time down to your ankles. Keep pushing your hips forward while your thighs remain perpendicular to the ground. If it is comfortable, drop your head back. Try to take five steady breaths. When you are ready to come out, lead with your chest.  Your head should be the last thing to rise. Sit back on your heels and take a moment.  Repeat this sequence two more times.

    Ustrasana Level 2

    Ustrasana: Start with your shins parallel and toes untucked. Place your hands on your low back with fingers facing down towards your mat. Hug your elbows in. Take a deep breath, and on the exhale, slowly start to lift your heart up towards the sky as you lean slightly back drawing the shoulder blades together. Slowly bring both hands to the tops of your feet. Keep hips pushing forward while thighs remain perpendicular to the ground. Slowly drop your head back. Try to take five steady breaths. When you are ready to come out, lead with your chest.  Your head should be the last thing to rise. Sit back on your heels and take a moment.  Repeat this sequence two more times.

    Ustrasana Level 3

  • Introduction to Dropbacks

    Introduction to Dropbacks

    I originally created this four-step photo tutorial for my Instagram account, but I decided today that it was worthwhile to also post it to the website. I am always looking for new and creative ways to use my yoga blocks. Here is an unconventional, but very useful way to deepen your practice with a bit of help from a block.IntrotoDropbacks

    Dropping back into any kind of backbend can be terrifying the first time. Trust me, I get it. I’ve had visions of splitting my head open, and of course, breaking my neck. Hopefully, this post will alleviate some of your fears. Rather than starting with a traditional yoga dropback, which begins in a standing position and ends in wheel pose, I recommend starting a bit closer to the ground with a camel dropback.

    If you freak out half way through the tutorial, you can simply reach your hands to the mat on either side of you. Not a big deal. This tutorial will help you build confidence at YOUR pace.

    In my own experience, I’ve found it to be much more of an accessible feat to drop back if the process is broken down into baby steps. Rather than starting with the goal of dropping your head onto the mat, let’s work with a block and drop back onto that.

    Step 1
    Flip a block to its tallest orientation, and place it against your toes as you kneel on your mat. Bring your palms together in front of your heart.Step1wm

    Steps 2 and 3
    Slowly begin to push your hips forward, and find strength in your legs, as you lift your chest toward the sky and bend back. Be mindful of your breath—it’s so easy to forget to breathe while backbending. Inhale and exhale deeply through your nose.
    Steps2and3

    Step 4
    Gently place the top of your head onto your block. If the block is currently beyond your reach, start with a higher surface—maybe a stool with a cushion. See if you can hold this position for a few deep breaths. To exit the pose, engage the core, engage the thighs, and slowly rise back to a kneeling position.Step4wm

    You CAN overcome your fear of dropbacks, one step at a time. Once you become comfortable with the block at its highest orientation, go ahead and flip the block onto one of its other edges to practice a deeper dropback. Let us know how you do.


  • Open Your Heart

    Open Your Heart

    February is all about opening up the HEART! So, try incorporating our favorite heart opening stretches and backbends into your practice this month.

    These six postures will open up your shoulders and your entire front body. In fact, they will leave you feeling stretched, energized and ready to tackle your day!

    Ready to get started? Grab a few blocks and a strap. As always, be mindful of your body, modify when necessary and remember to breathe. Try to hold each of these postures for at least 5-10 breaths.

    Reclined Heart Opener with Blocks

    Photo Feb 06, 9 54 39 PM

    Lie onto your mat with one block (at its lowest height) under your head like a pillow and a second block (at a higher height) between your shoulder blades. Relax your arms alongside your body and stay on the blocks for at least one minute.

    Hero Pose with Gomukhasana Arms

    Photo Feb 06, 9 54 46 PM

    Start out on your shins, bringing your knees together and separating your feet slightly wider than your hips. From there, have a seat in between your ankles coming into Hero Pose. Feel free to prop yourself on a block if this pose hurts your knees.  Sitting up tall, slowly make your way into Gomukhasana arms. Use a strap if you cannot clasp your hands. Relax your shoulders and pull the elbows back. Stay here and hold for 5-10 breaths, then repeat on the other side.

    Wide Cobra Pose

    Photo Feb 06, 9 54 53 PM

    Lie on your belly and bring your feet hips’ width distance apart. Take your hands wide off of your mat and come onto your fingertips. On an inhale, slowly push into your fingertips lifting your heart high. Keep your elbows slightly bent and actively roll your shoulders back.

    Bow Pose

    Photo Feb 06, 9 55 00 PM

    Lie on your belly and relax your forehead on your mat. Bend your knees and grab onto the outside edges of your feet. On an inhale, kick your feet into your hands lifting your heart high. Use the strength of your legs to lift you up! Stay here and hold for 5-10 breaths, then repeat two more times.

    Funky Camel

    Photo Feb 06, 9 55 07 PM

    It’s time to start working on some deeper backbends. Feel free to take a traditional Camel pose or if you’re feeling adventurous, try our funky variations above! Start out on your shins, knees are hips’ width distance apart. From there, step your right foot forward planting the sole of your foot down on your mat. Bring both hands onto your hips squaring them off to the top of your mat. Slowly sweep the left hand up and around bringing your left hand onto your left ankle or sole of your left foot behind you. Take a moment and square your hips once again. Extend your right arm up or bring it to heart center. Take 5 deep breaths, then slowly come up. Repeat on the other side. 

    Wheel Pose

    Photo Feb 06, 9 55 16 PM

    Make your way onto your back and set up for Wheel. Feet should be hips’ width distance apart and parallel to one another. Hands should be shoulder width apart, fingers spread wide. Both arms and legs squeeze in towards one another. Feel free to bring one hand up to heart center as you hold for 5-10 deep breaths.

  • Insta-Inspiration

    Insta-Inspiration

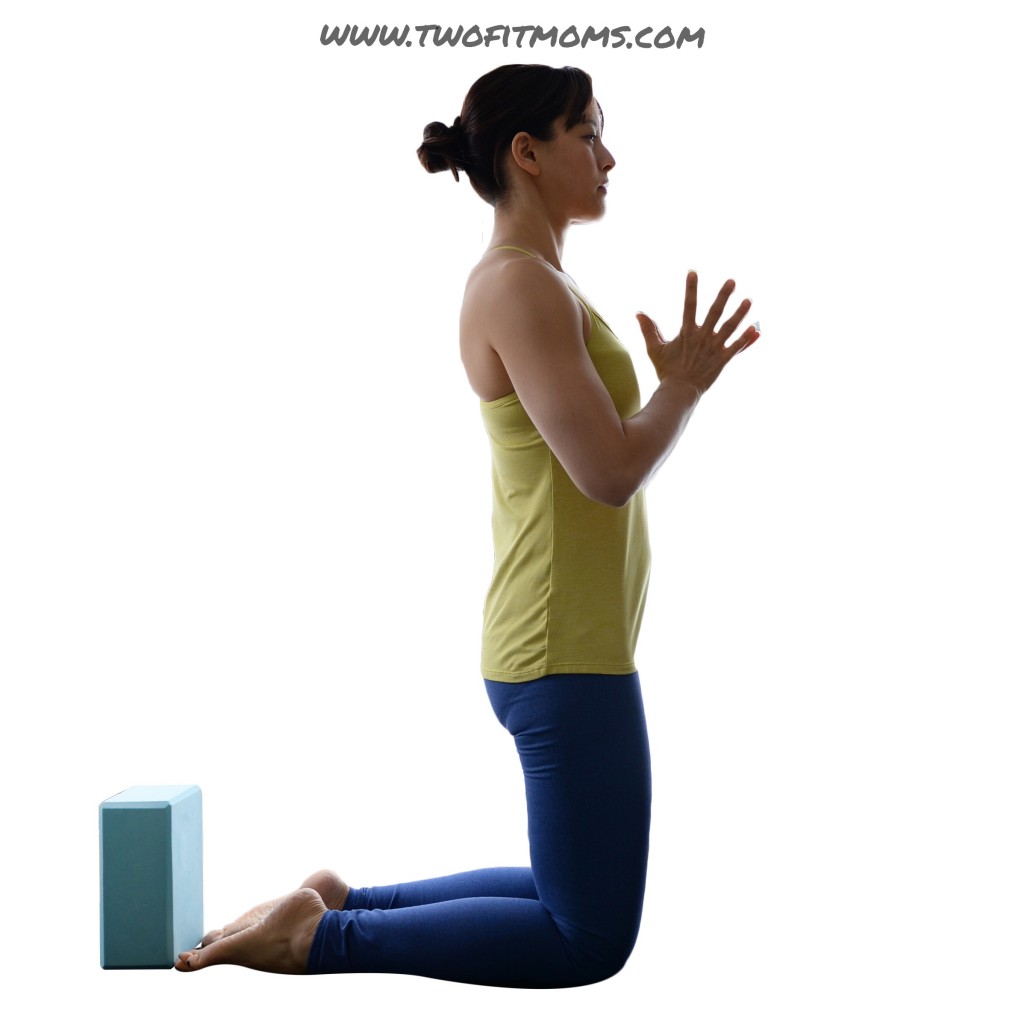
    At any given time, you can open your Instagram app to find a vast collection of yoga photos from around the world.  How is this collection of yoga photos any different from a collection of photos that you might find in a yoga book?  Well, the difference lies in the magic of having a centralized hub for a massive community of yogis to come together—a virtual platform for yogis to meet and inspire one another on a daily basis.  In the inspirational world of Instagram, creativity runs rampant, and a traditional pose suddenly morphs into new and interesting shapes.  It’s only natural that with many minds at work, many unusual variations of yoga poses will be born and shared.

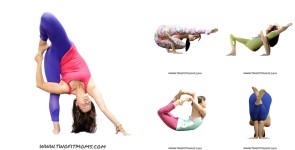
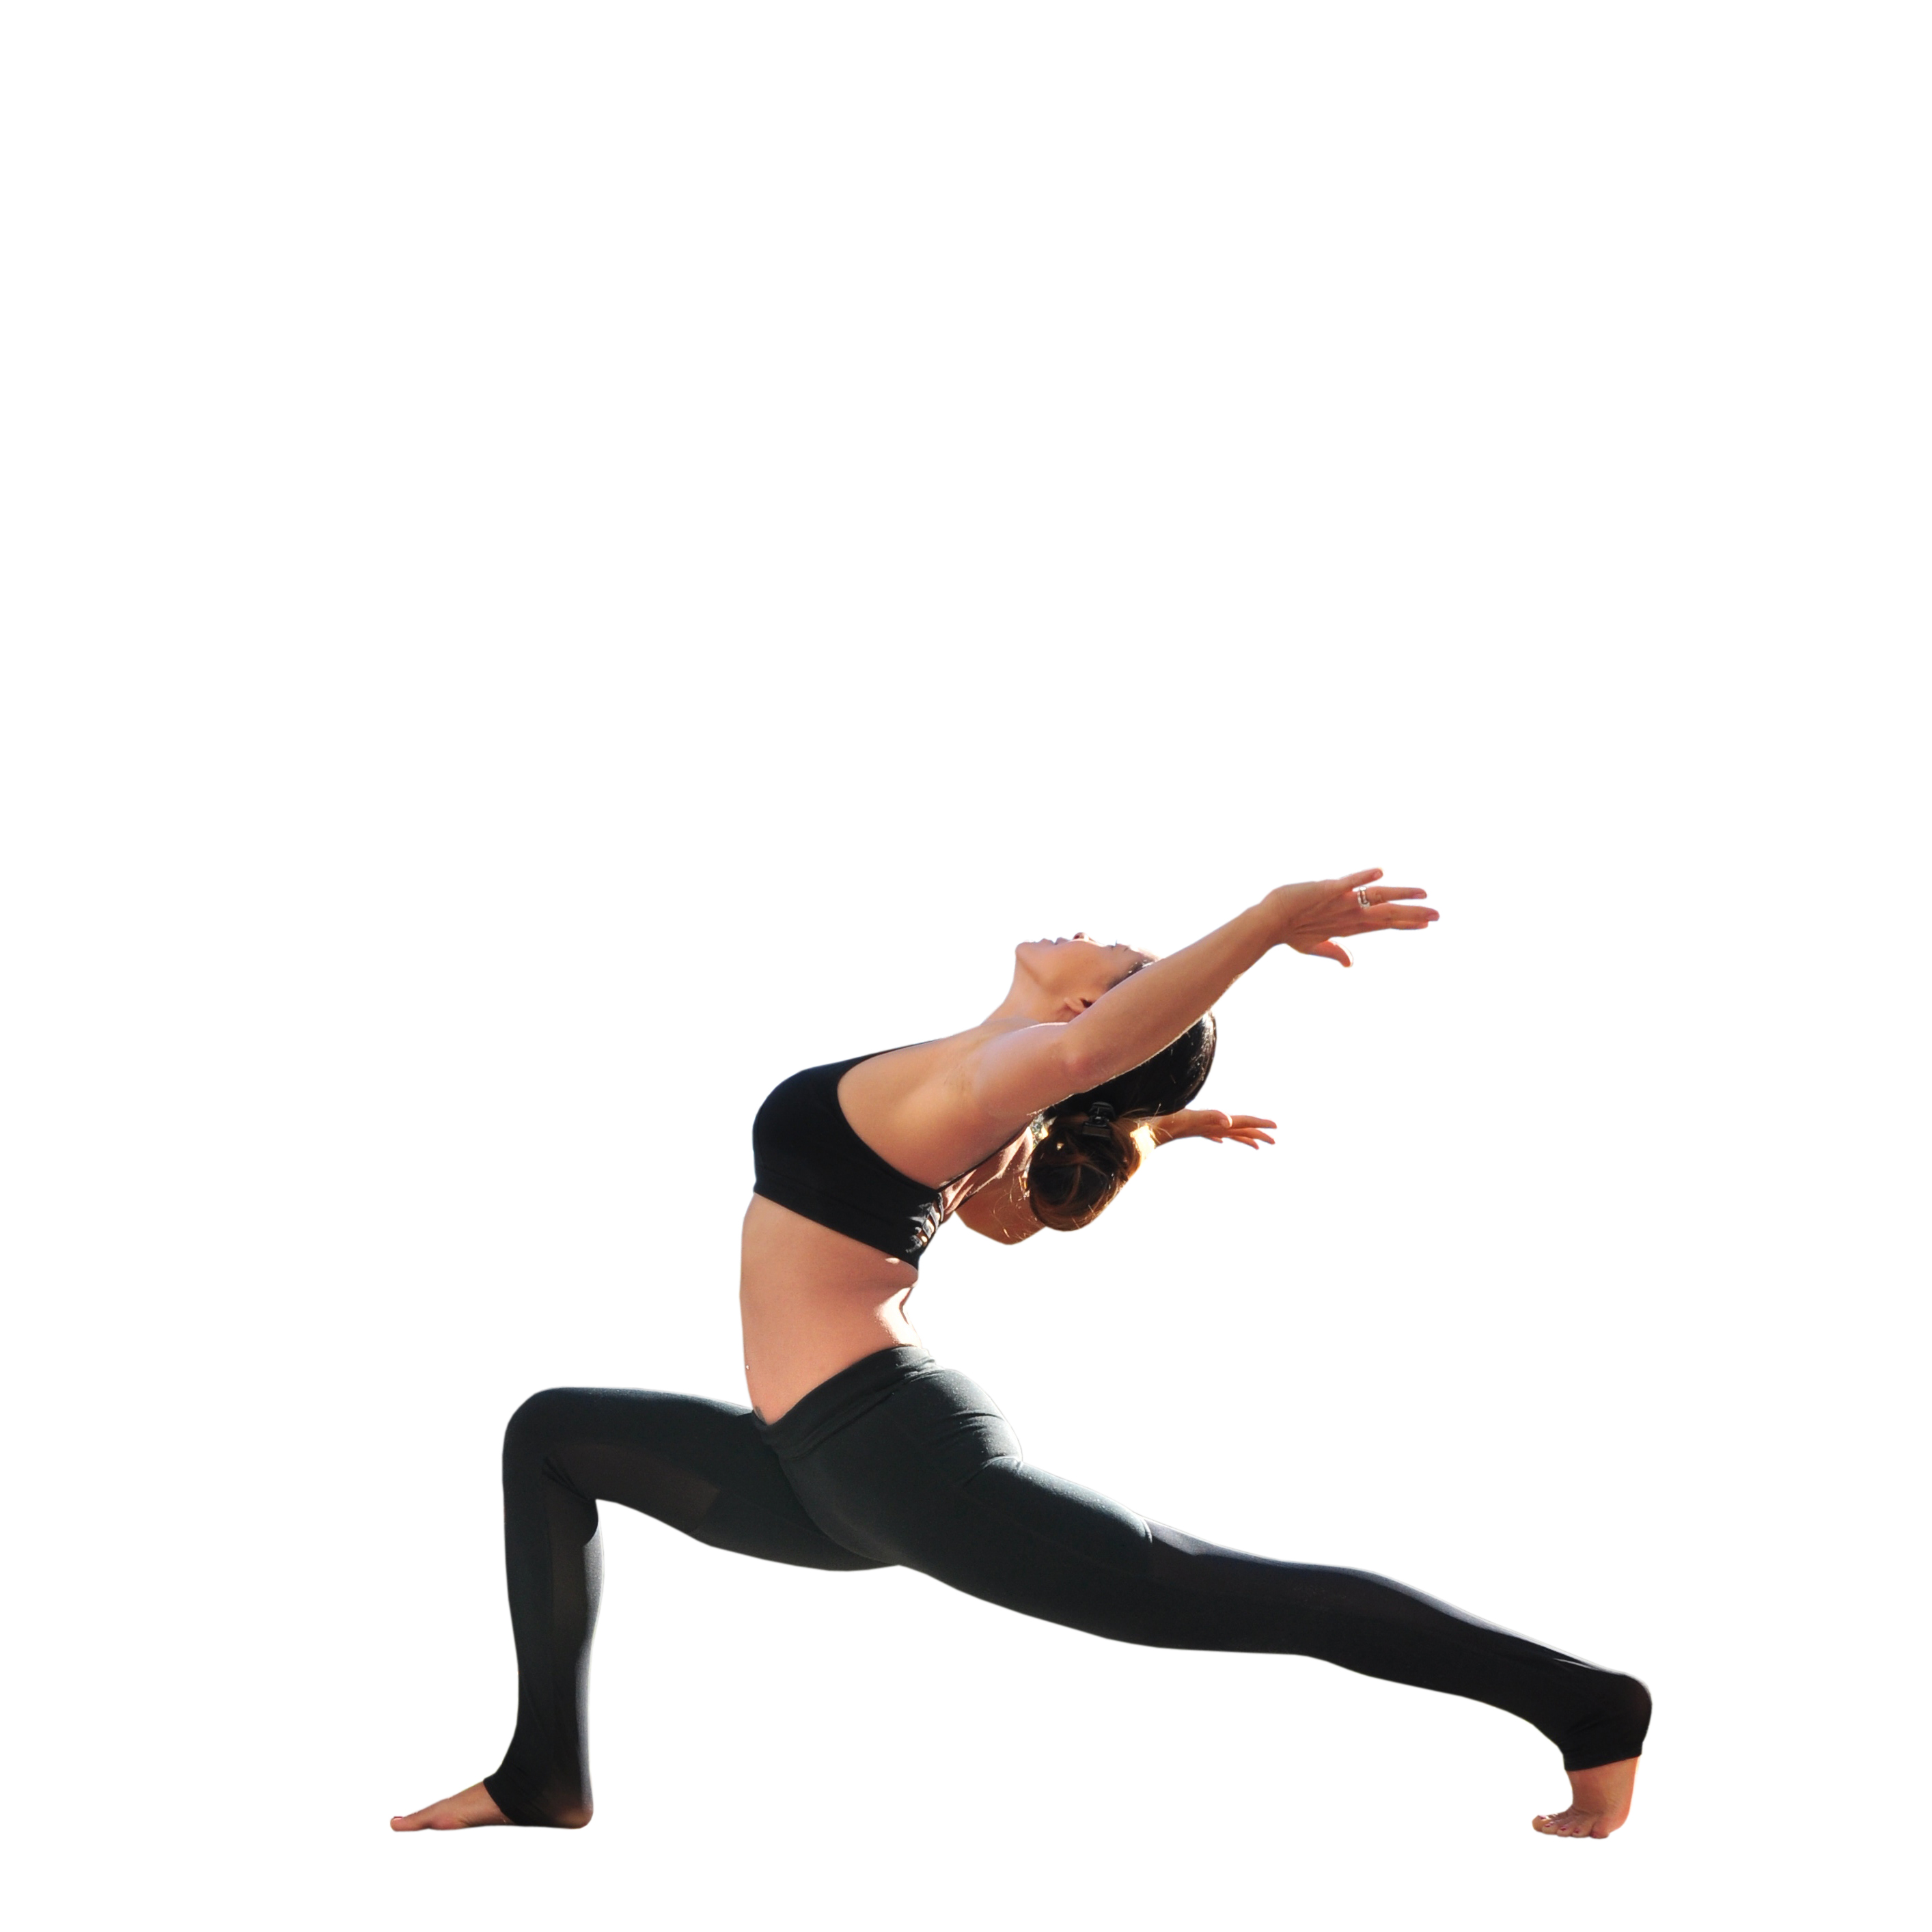
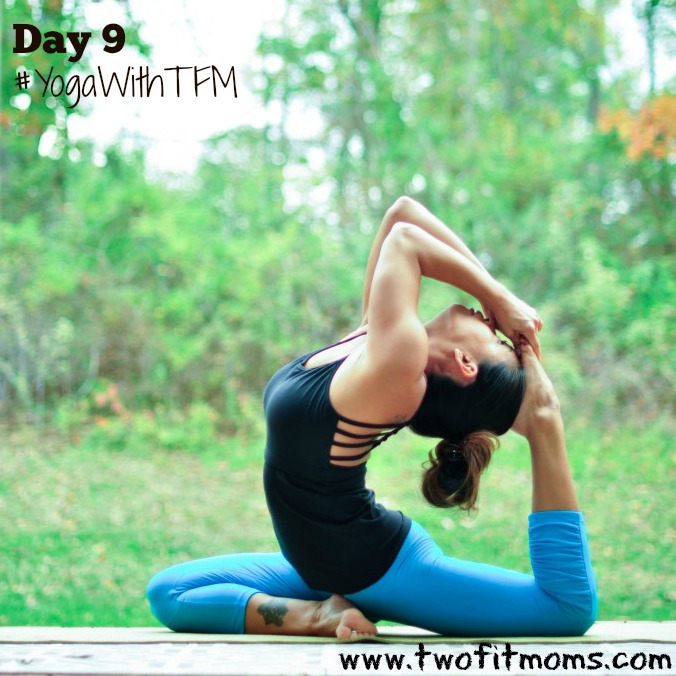
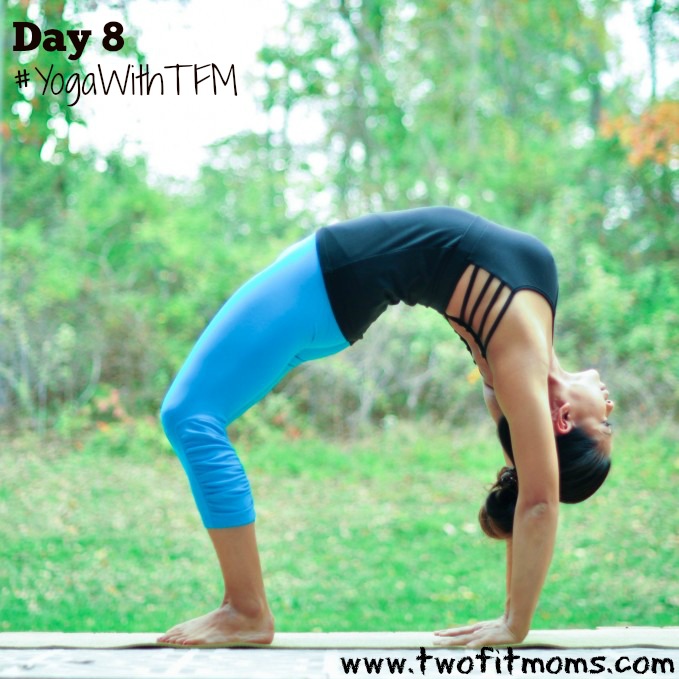
    Here are six of my favorite yoga pose variations that were inspired by Instagram posts.  Without this social media platform, I’m not sure if I would have ever seen or attempted these postures.  In 2015, I encourage you to get inspired, get excited, and add some variety to your practice.  Perhaps these interesting variations will be the poses that you attempt this year.

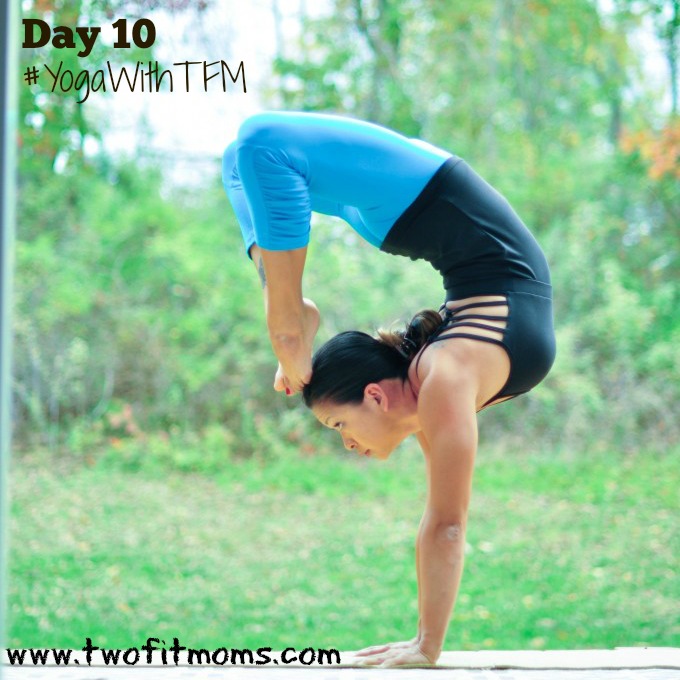
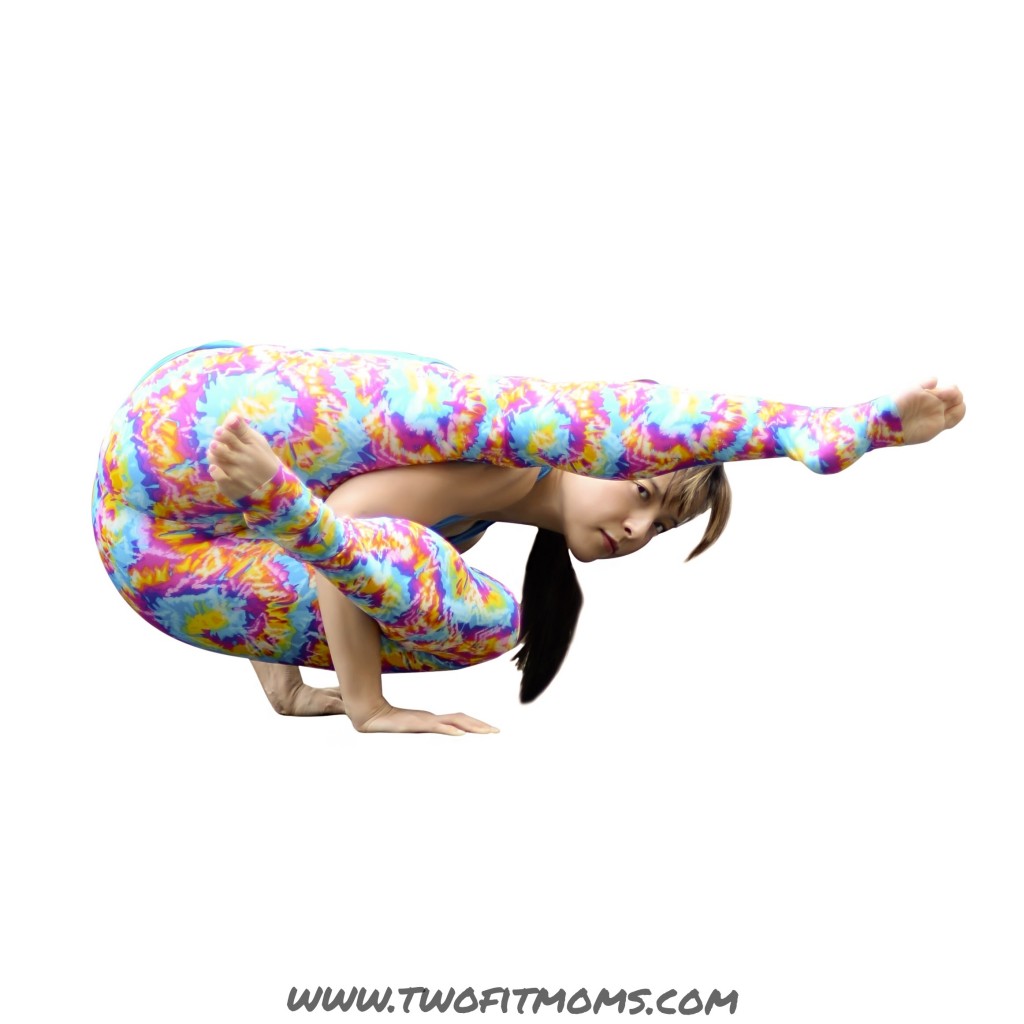
    Here’s a new arm balance for you to try.  It starts out innocently enough as Elephant’s Trunk Pose (Eka Hasta Bhujasana).  It then transforms into this funky shape when the top leg (which usually hooks over the shoulder) straightens, and the bottom leg wraps around an arm.  If you are new to arm balancing, skip this pose and head right over to our crow pose tutorial, which is more appropriate for a first timer.  Still unsure?  Get inspired here.

    Photo Oct 31, 9 36 42 AM

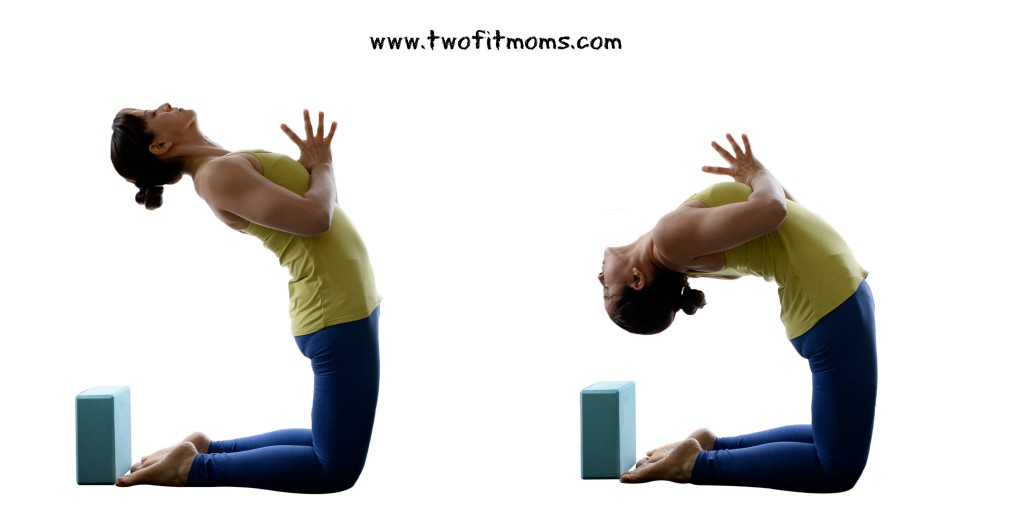
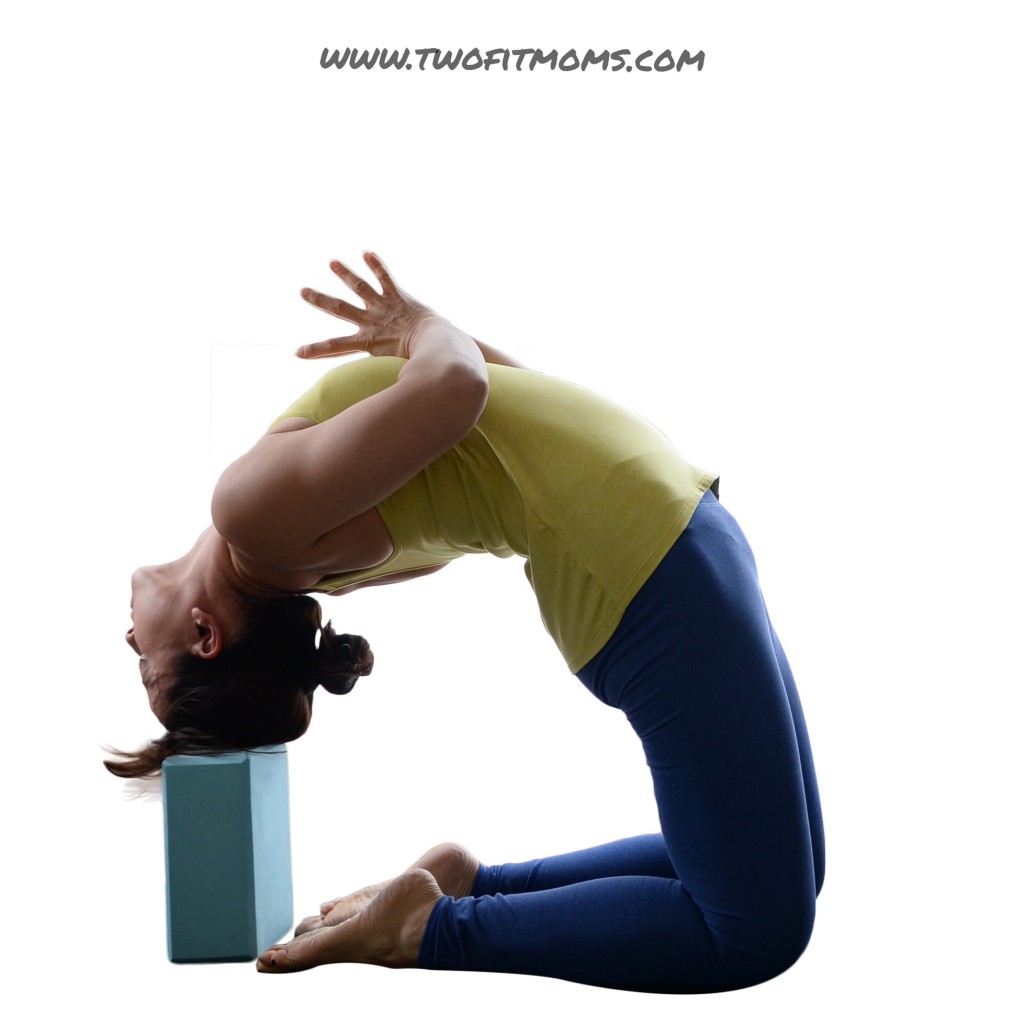
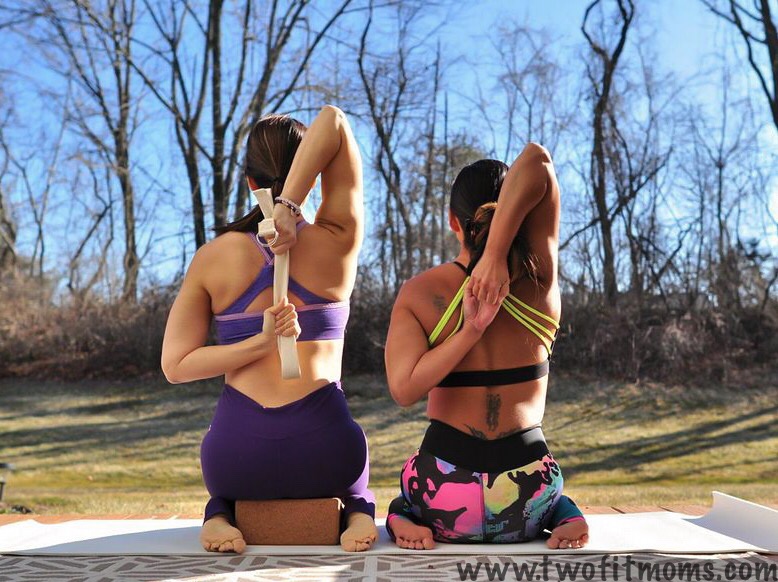
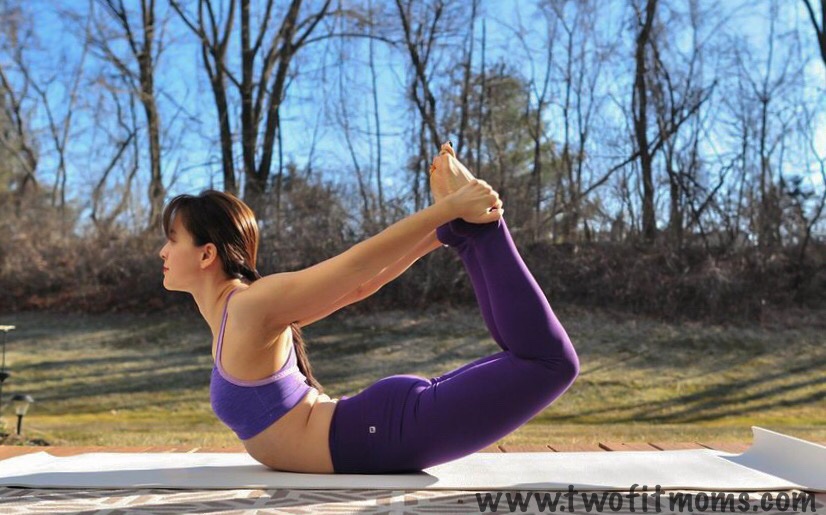
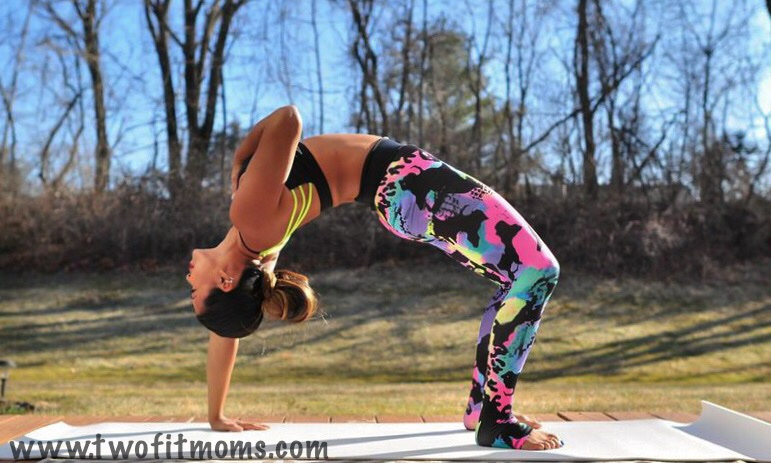
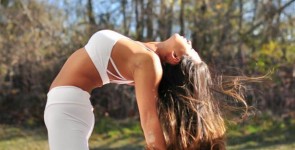
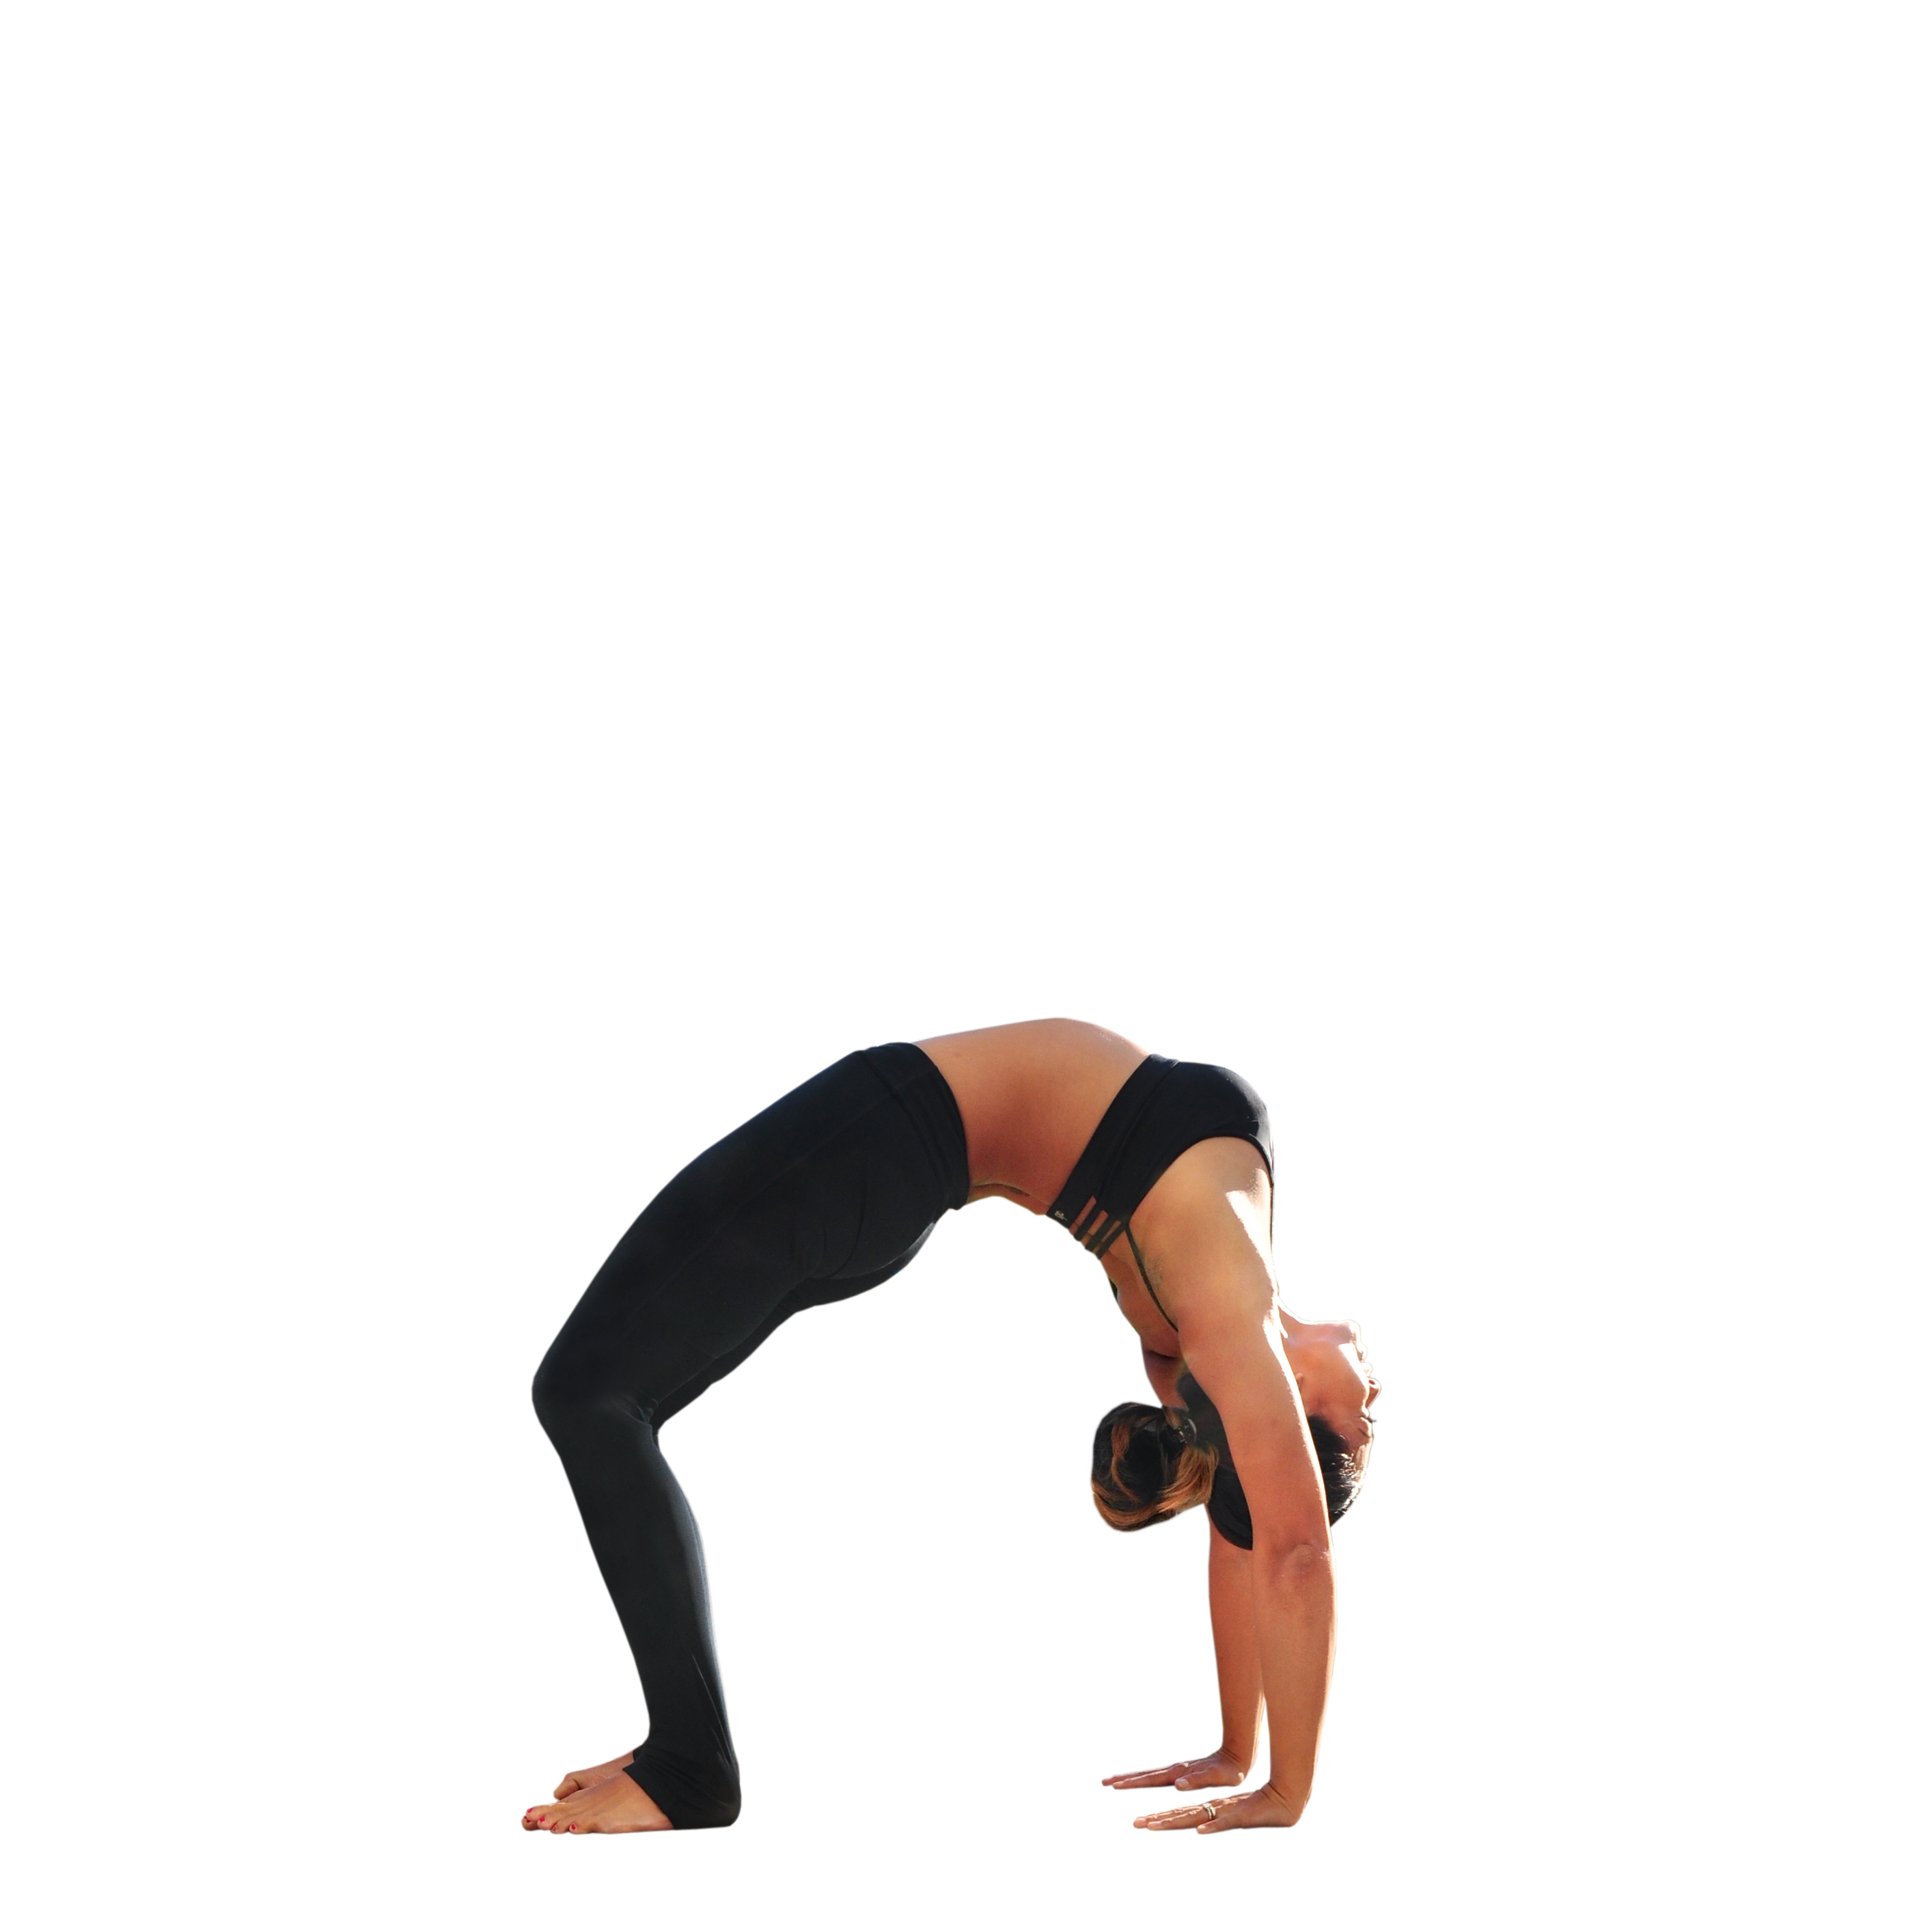
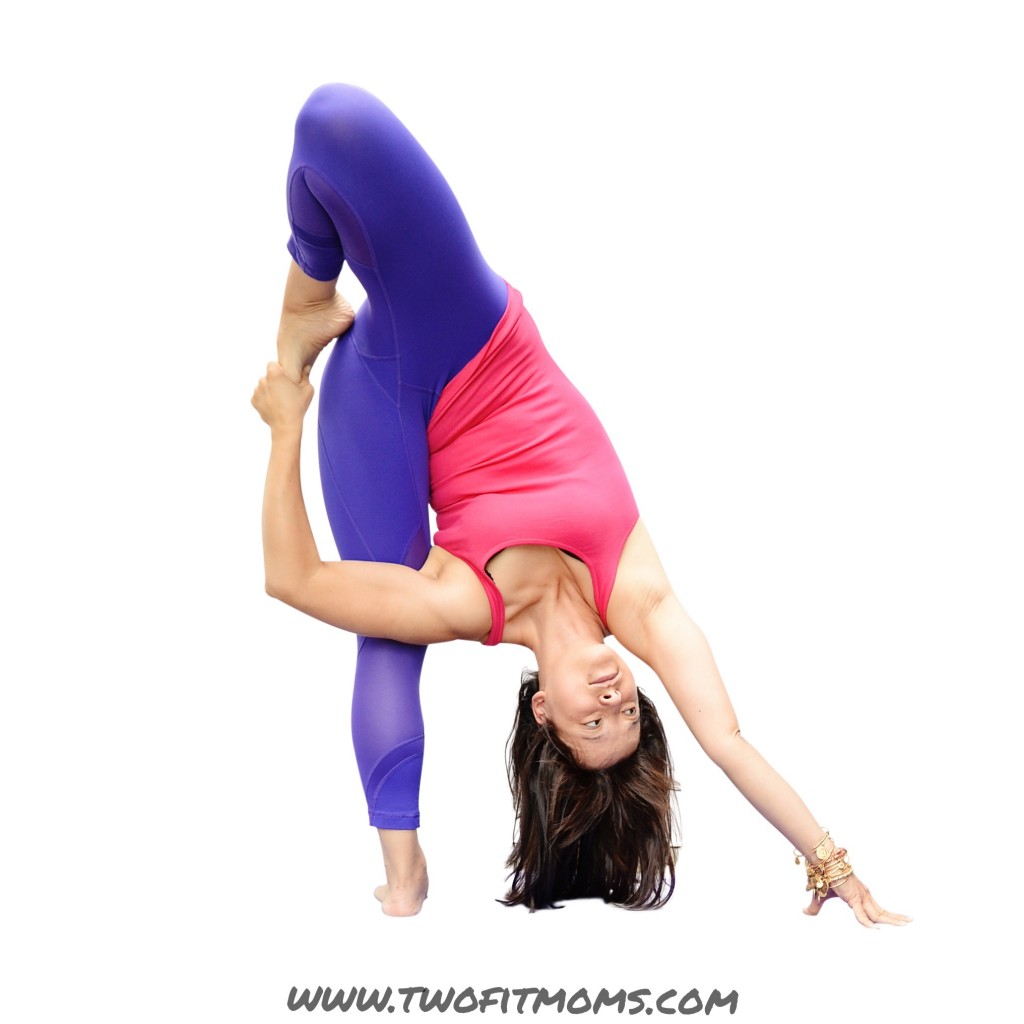
    If the elusive overhand grip is part of your practice, attempt this variation of bow pose, which comes complete with an arm scarf.  If an overhand grip is not yet accessible, you can still receive the same heart-and-shoulder-opening benefits by practicing the five front-body stretching exercises presented here.Photo Aug 20, 11 50 49 AM


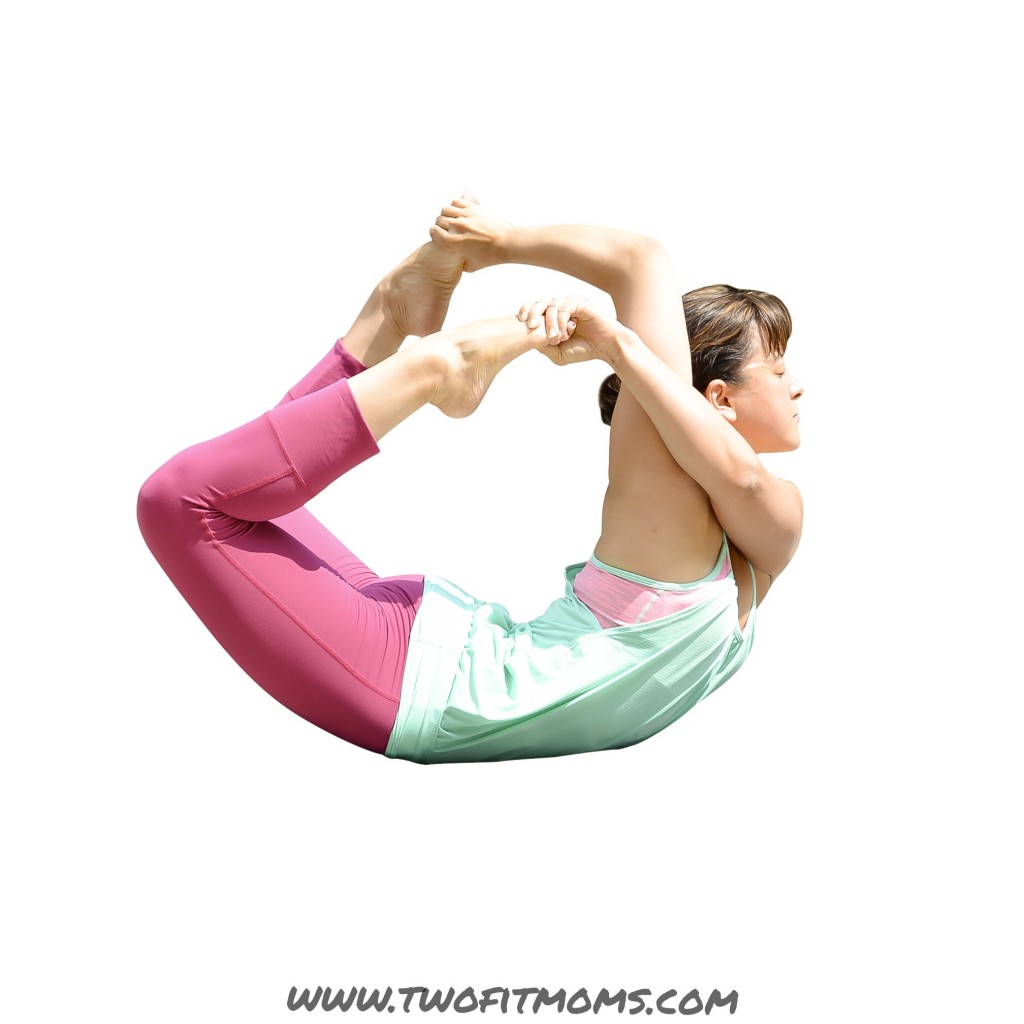
    This looks like a standing split variation, but it makes most sense to start in lizard pose.  Once in lizard pose, wiggle your front shoulder under your knee.  If you feel comfortable with your shoulder under your knee, rise back up onto your hands and begin to straighten the front knee while simultaneously lifting the back leg from the ground.  Once you find your balance, bend the lifted leg and reach for your foot with the opposite hand.  This is an advanced pose that requires hip flexibility, hamstring flexibility, balance and strength.  Is it necessary to ever achieve such a pose?  Of course not.  You will receive many of the same benefits by doing much more accessible hip stretches and hamstring stretches.

    Photo Jun 29, 9 53 27 AM

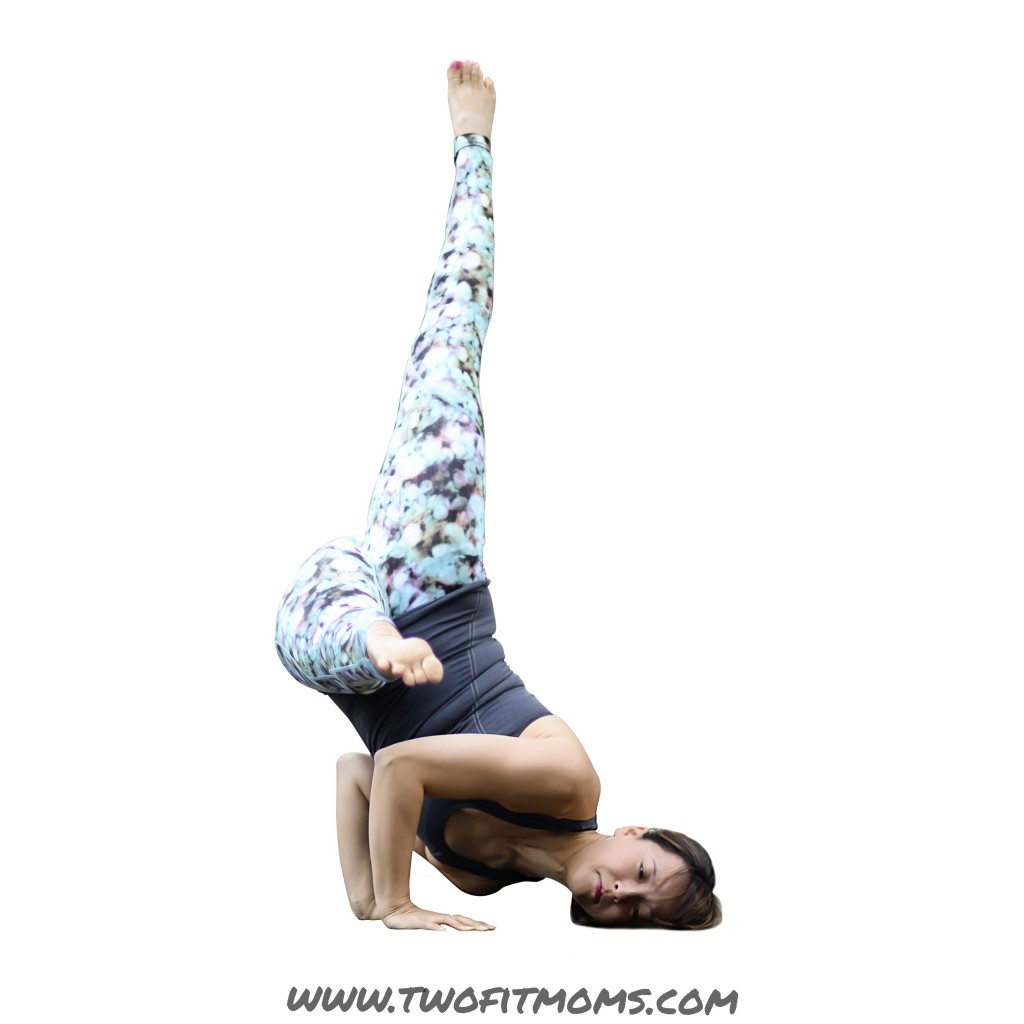
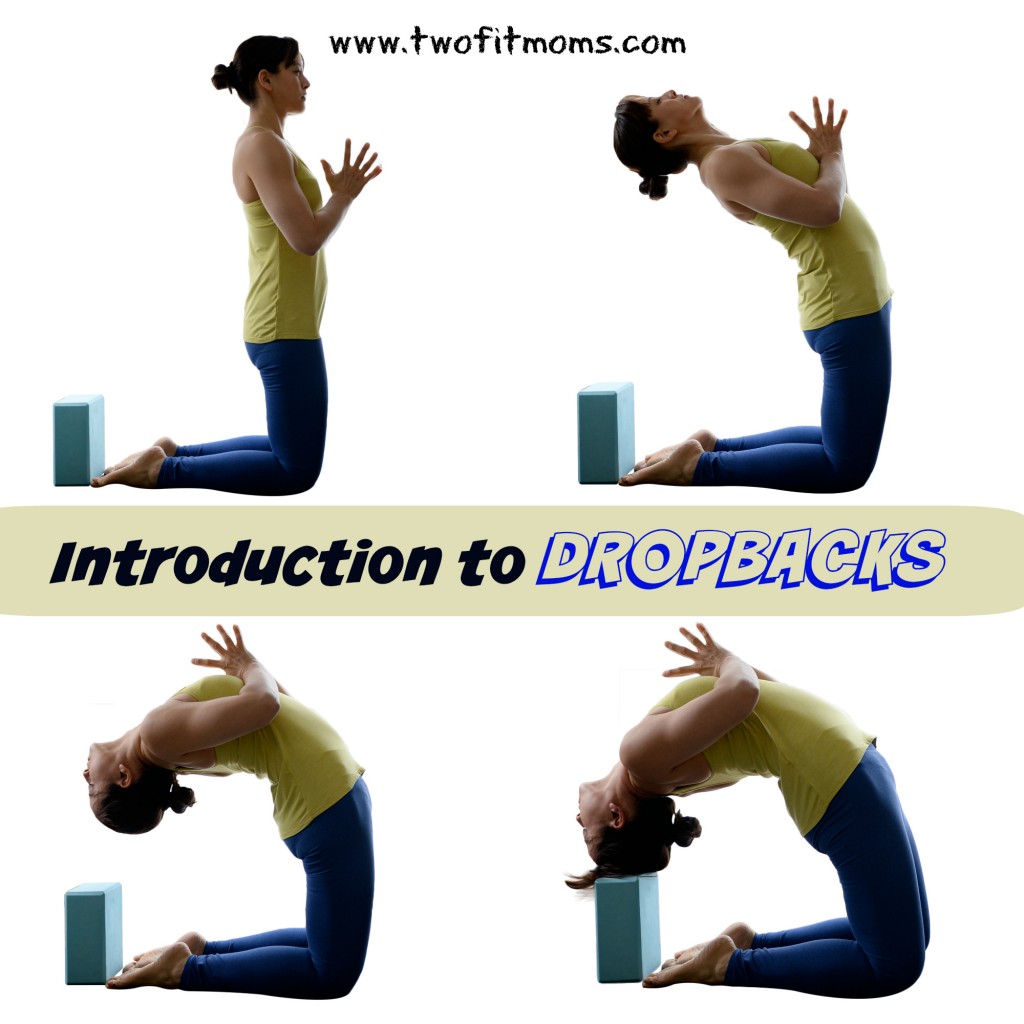
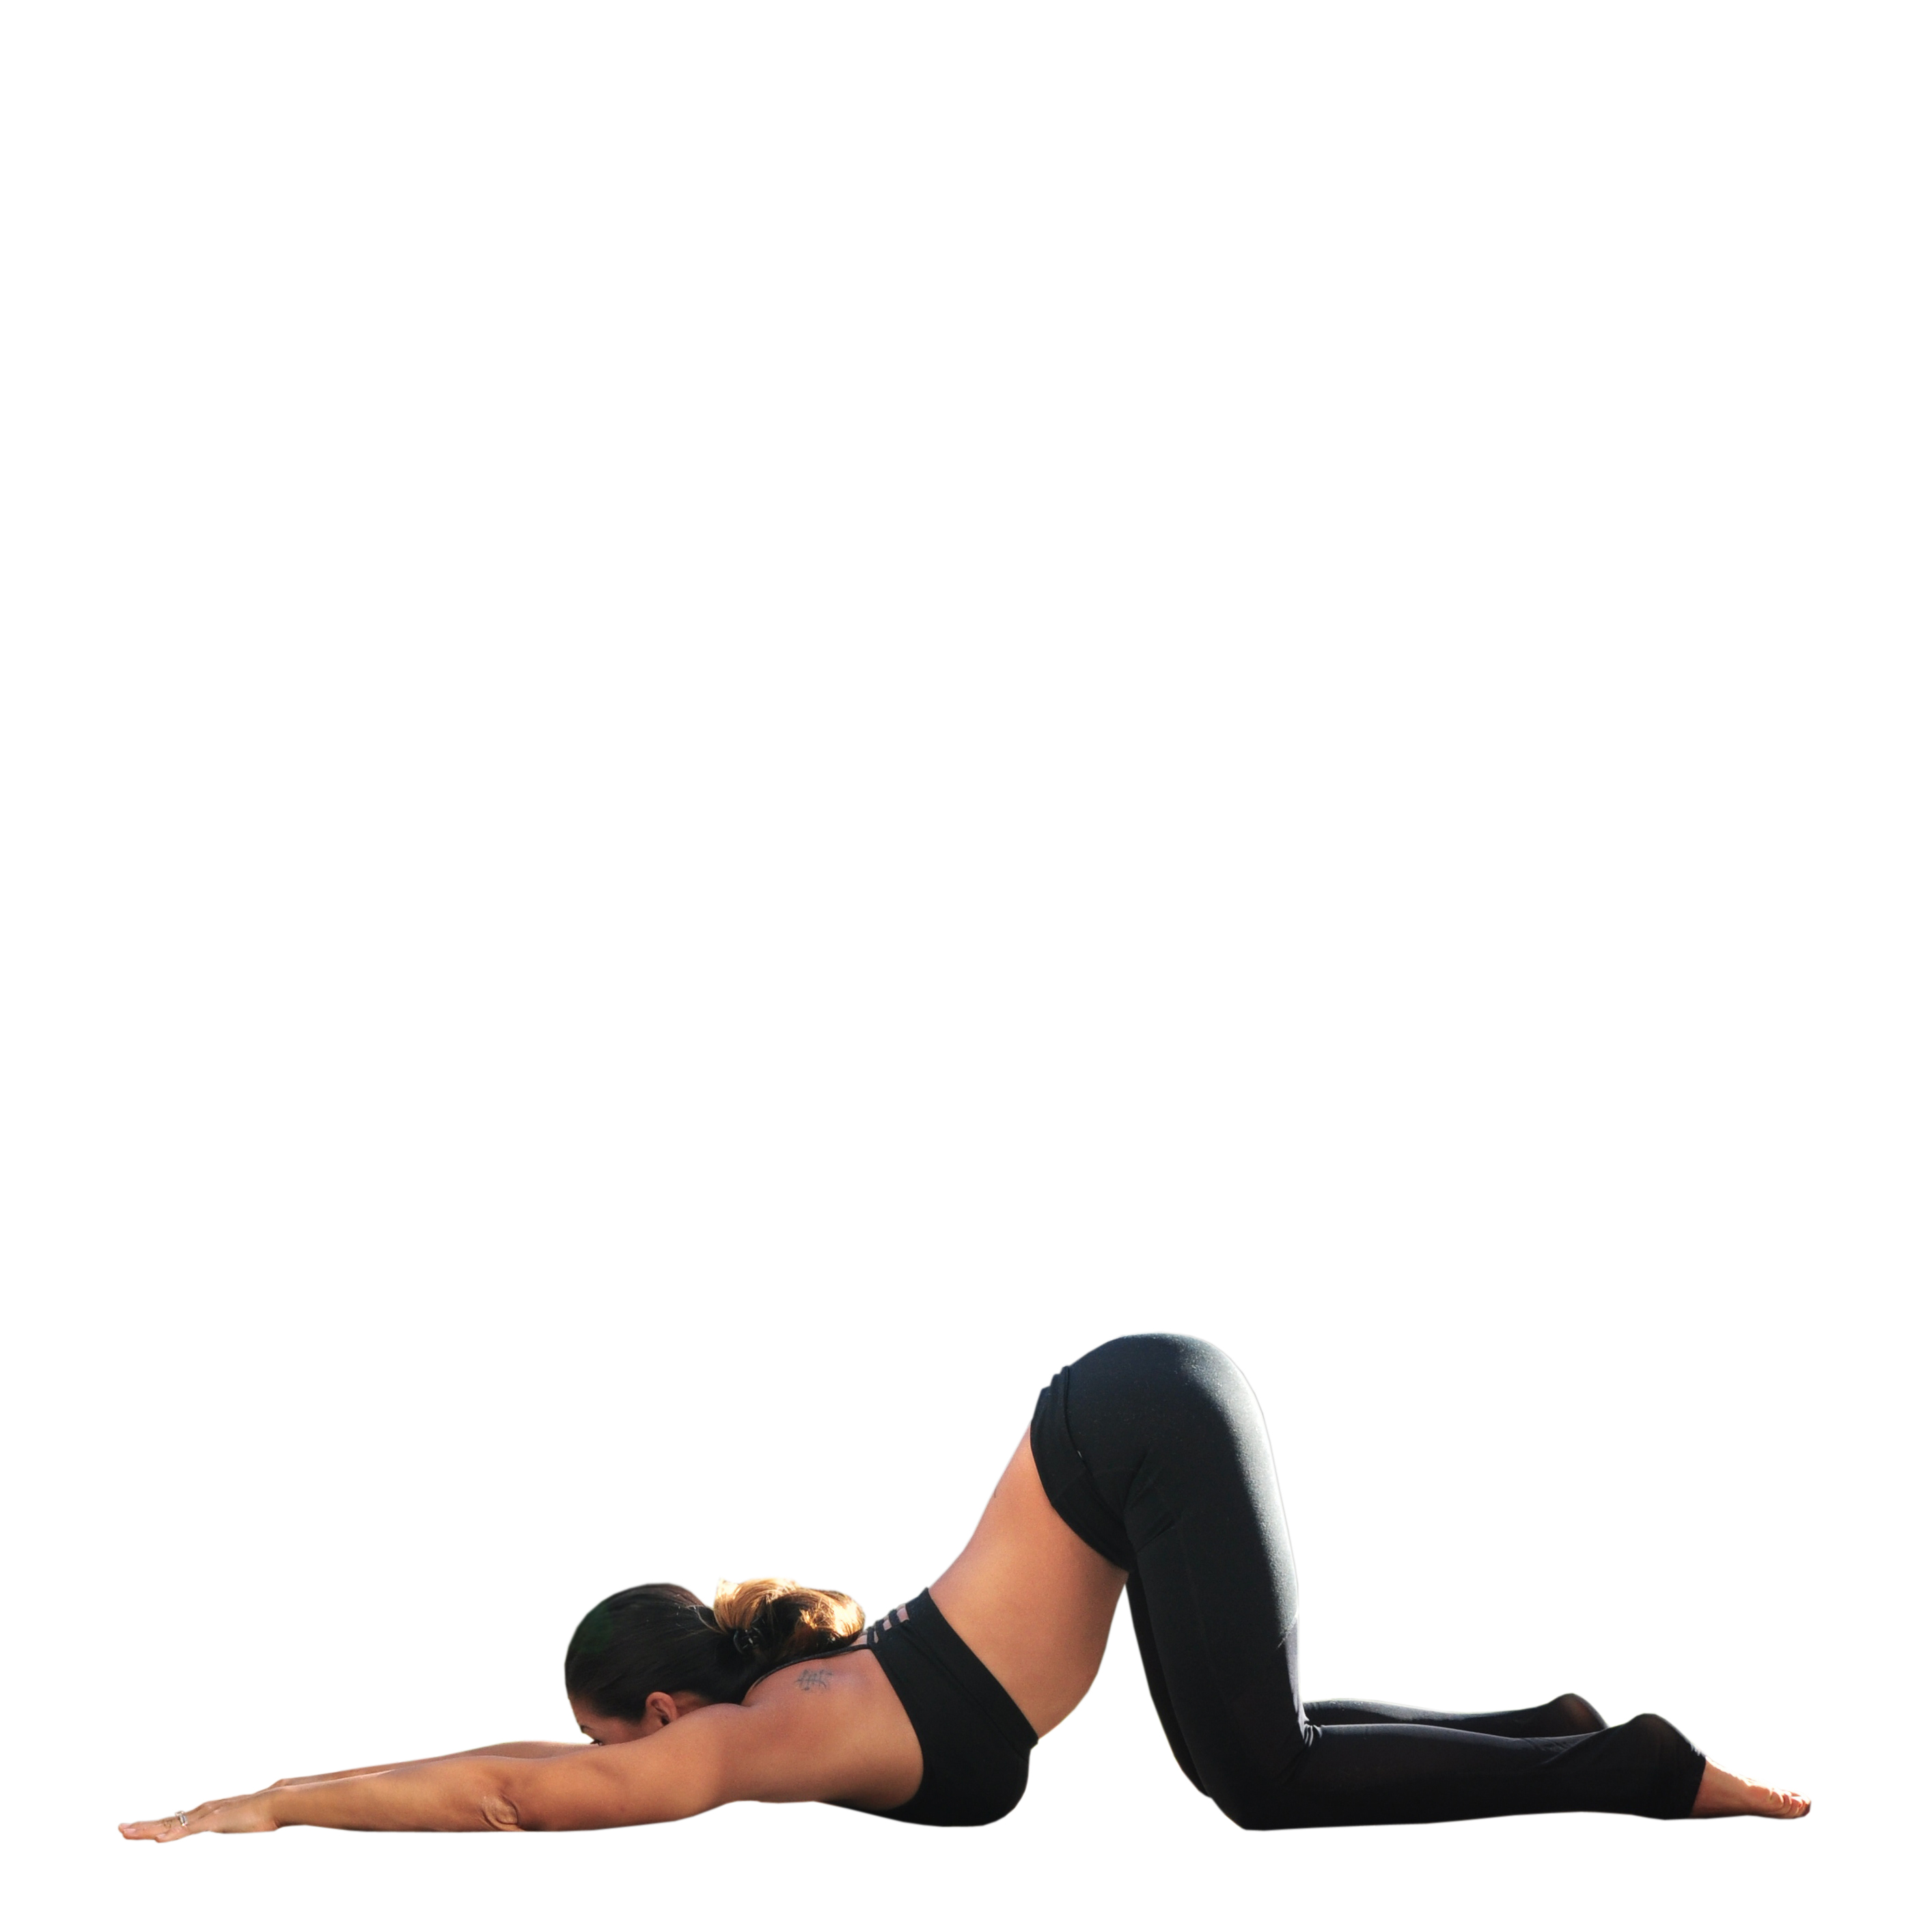
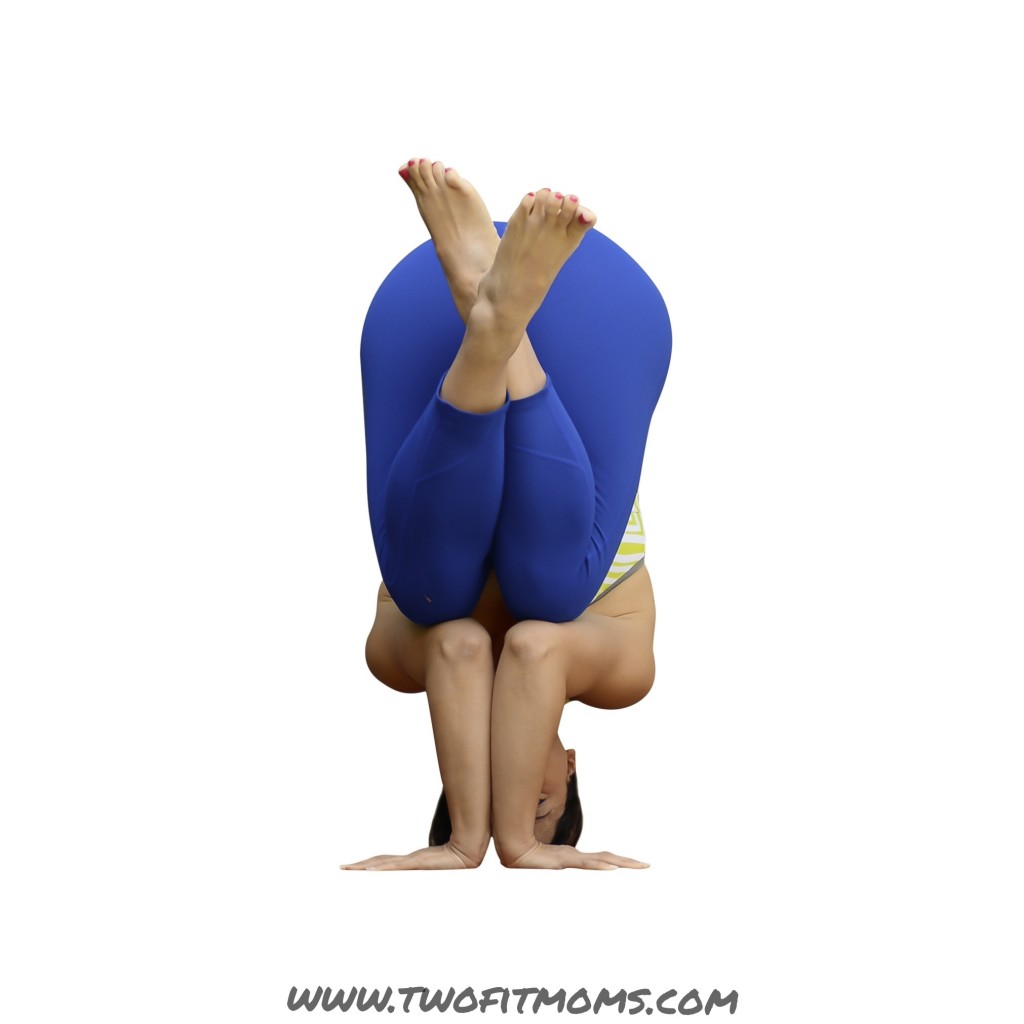
    Once you’ve mastered the tripod egg headstand, challenge yourself by pressing the forearms together and pointing the hands away from one another.  Remember—when practicing any inversion in the middle of a room, you must have an exit strategy!  Stay safe, and have fun.

    Photo Aug 14, 11 02 43 AM

    When you’re ready to take your compass pose to a whole new dimension, give this variation a try where both hands are planted on the ground and the hips are lifted from the mat.  Still working on getting your leg over your shoulder?  No problem.  Skip this pose, and open up the hips.  Maybe you’ll surprise yourself by getting into Elephant’s Trunk Pose.

    Photo Sep 23, 10 21 58 AM

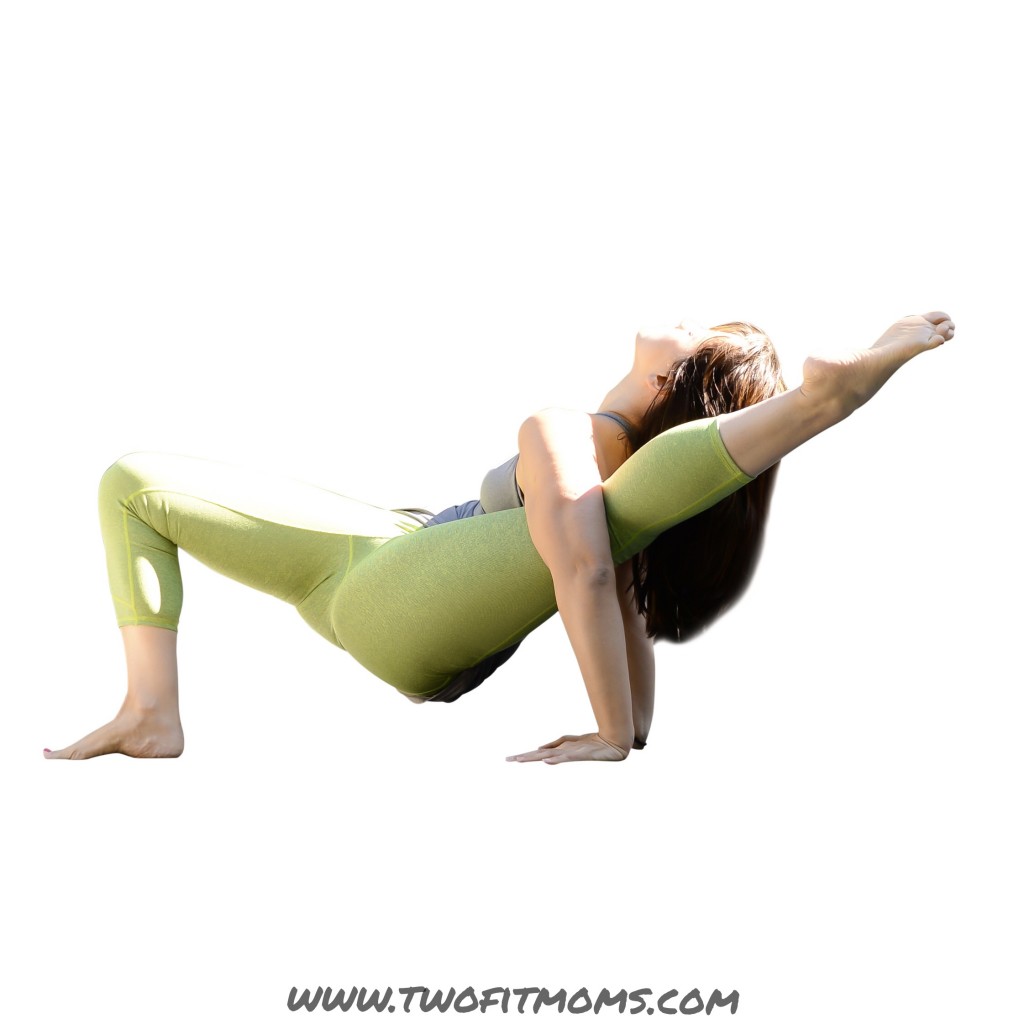
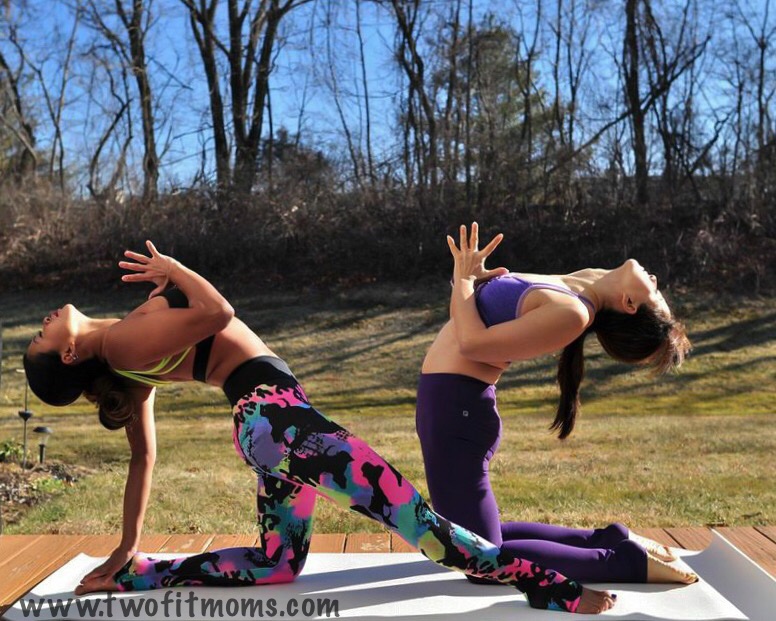
    Is it an inversion, an arm balance or some hybrid of the two?  You decide.  Start out in Fallen Angel pose, and then lift the bottom knee from the tricep.  Feel free to stay in a hovering version of Fallen Angel or straighten the lower leg so that the foot points in the same direction that you are facing.
    Photo Oct 27, 5 32 59 PM

  • The Backbend Flow to De-Stress

    The Backbend Flow to De-Stress

    After a long day hunched over a computer, the body craves movement – particularly, expansive movement to counteract the back-rounding posture that is so commonly seen in office parks around the world. Paperwork, computer work, web surfing and, even texting on mobile phones, are all culprits in creating tightness in the chest, shoulders and back.

    A backbend practice is a great way to relieve everyday stress and loosen up a tight upper body.

    2014-10-28 11.56.32


    The biggest misconception about backbends is that you need a flexible back in order to do poses such as Full Wheel or Camel, or asanas involving an over-hand grip such as One-Legged King Pigeon or King Dancer. Yes, you do need some mobility in your back, but in reality, it is the entire front body and shoulders that can make or break a backbend.   With consistent practice, you will find that your backbends will be deeper and easier to perform.


    As with any asana, take your backbend practice slowly, and never force your body into postures.  Start off your practice with a few rounds of Sun Salutations, then use our Backbends Practice to fire up your entire front body and shoulders.  Make sure to keep your abdominals engaged in your backbends and more importantly, make sure to breathe!


    Extended Puppy Pose (Uttana Shishosana)
    5

    This is one of our favorite poses for stretching the upper back and shoulders. Beginners should consider modifying the pose by placing their forehead on the mat. This will help relieve any potential strain in the neck. Start off in tabletop position and slowly walk the hands forward dropping your chest onto the mat. Keep your hands actively pressing into the mat and arms hugging in towards one another.

    High Lunge or Crescent Lunge Variation
    7

    While in high lunge, open your chest and shoulders by bending your elbows to create 90 degree angles with your arms (think goal-post arms!)  A more traditional version of this pose is with arms extended straight overhead.  Regardless, be sure to keep your head aligned between your arms.  Do not allow the head to fall back which will cause strain to your neck. Remember to engage the back quadricep and sink your hips toward the floor to activate your hip flexor and psoas muscles.

    Low Lunge or Anjaneyasana Variation
    2

    Clasp your hands behind your back, drawing your shoulder blades together to open up the front of your shoulders and your chest. Keep your core engaged as you take a mini-backbend moving your clasped hands towards your mat.

    Reclined Half Hero or Ardha Supta Virasana
    4

    Try a gentler modification of this pose. Rather than lying down completely, begin by leaning back onto your forearms.  This will produce a nice stretch in the front of the thigh.  For a more intense stretch, lie back further.  You should not experience any discomfort in your knee.

    Bridge Pose or Setu Bandha Sarvangasana
    6

    This is a great backbend for beginners. Use a block or blanket to relieve stress from your lower back or neck. Your feet should be parallel to each other and your knees should stack directly over your heels.  When you begin to lift up, keep your thighs hugging into the midline. Press actively into the mat with your arms and shoulders. Keep the neck long. You can lift one leg up for a deeper posture.

    Camel Pose or Ustrasana
    1

    There are many variations of this pose – from keeping your hands on your low back for support to tucking your toes under so that the backbend is not as deep to the full posture shown here. Find the one that works for you! Just remember to keep your hips pushing forward so the thighs remain perpendicular to your mat.

    Upward Bow or Urdhva Dhanurasana
    3

    Make sure your front body and shoulder are warmed up before trying this pose. Keep your feet parallel, hug your knees and thighs in – and don’t forget to breathe!

  • November Yoga Challenge Winner!

    November Yoga Challenge Winner!

    We are excited to announce the winner of our November Two Fit Moms yoga challenge on Instagram!

    Congratulations to @frenchie63 for successfully completing all ten days of the challenge. Please contact kate@twofitmoms.com to claim your Gaiam Sol prize package that includes: a DryGrip Mat, two blocks, a yoga strap and a free download, from the Gaiam.com website, of our Yoga Rising series!

    Thank you all for participating, and for a sneak peak of the December challenge poses, click HERE.

    November Challenge Winner

  • Day 10: Scorpion Pose or Vrschikasana

    Day 10: Scorpion Pose or Vrschikasana

    Welcome to Day 10 of the November #YogaWithTFM 10-Day  Challenge!  Today’s pose is Scorpion or Vrschikasana. Day-10 IG

    See the video below for a tutorial on how to get into Scorpion Pose, and keep in mind these three tips:

    1. Do not force yourself deeper by dumping into your low back.  Keep your abdominals engaged and move slowly.

    2. As you curl your legs to scorpion, start to drop your chest as a counterweight.

    3. Always think about bringing your head up to your feet, not your feet down to your head!

    Please remember to warm up before participating in any challenge.  If you would like to practice with us, download our 24-minute Backbends Practice class here.

    [KGVID poster=”http://www.twofitmoms.com/wp-content/uploads/2014/11/Video-Nov-09-2-16-44-PM_thumb19.jpg” width=”640″ height=”360″]http://www.twofitmoms.com/wp-content/uploads/2014/10/Video-Nov-09-2-16-44-PM.mov[/KGVID]


  • Day 9: One-Legged King Pigeon or Eka Pada Rajakapotasana

    Day 9: One-Legged King Pigeon or Eka Pada Rajakapotasana

    Welcome to Day 9 of the November #YogaWithTFM 10-Day Challenge! Today’s pose is One-Legged King Pigeon or Eka Pada Rajakapotasana.  Day-9 IG

    See the video below for a tutorial on how to get into One-Legged King Pigeon, and keep in mind these three tips:

    1. Props! Use a block if your hips are tight, use a strap to work the overhand grip.

    2. Keep your abdominal muscles engaged to protect your low back.

    3. Make sure to open up your quadriceps and front body before trying any of the variations shown in the video below.

    Please remember to warm up before participating in any challenge.  If you would like to practice with us, download our 24-minute Backbends Practice class here.

    [KGVID poster=”http://www.twofitmoms.com/wp-content/uploads/2014/11/Video-Nov-08-2-50-37-PM_thumb15.jpg” width=”640″ height=”360″]http://www.twofitmoms.com/wp-content/uploads/2014/10/Video-Nov-08-2-50-37-PM.mov[/KGVID]

  • Day 8: Wheel Pose or Urdhva Dhanurasana

    Day 8: Wheel Pose or Urdhva Dhanurasana

    Welcome to Day 8 of the November #YogaWithTFM 10-Day Challenge.  Today’s pose is Wheel Pose or Urdhva Dhanurasana.Day-8 IG

    See the video below for a tutorial on how to get into Wheel Pose, and keep in mind these three tips:

    1. Keep your feet parallel and thighs hugging into the midline.

    2. If you are just beginning… Try pushing into your feet and lifting your hips first, then slowly push into your hands coming onto the crown of you head.

    3. Keep your abdominal muscles engaged to protect your low back.

    Please remember to warm up before participating in any challenge.  If you would like to practice with us, download our 24-minute Backbends Practice class here.

    [KGVID poster=”http://www.twofitmoms.com/wp-content/uploads/2014/11/Video-Nov-07-2-48-02-PM_thumb14.jpg” width=”640″ height=”360″]http://www.twofitmoms.com/wp-content/uploads/2014/11/Video-Nov-07-2-48-02-PM.mov[/KGVID]