Category: Backbend

  • Daily Practice: 4 Reasons to Practice Backbends

    Daily Practice: 4 Reasons to Practice Backbends

    Do you avoid practicing backbends in your yoga practice? They can be uncomfortable, and a little scary, but once you learn to open up your shoulders and the entire front of your body, you will embrace backbending! (If you need help with heart openers check out this article.) In fact, there are many benefits to incorporating backbending into your daily yoga practice.  Here are our top four!

    #1: Energize!

    BACKBENDS2

    It’s no secret that backbending can be energizing!  After being stagnant all day, stretching out the spine, and thus opening up the heart center, can send waves of energy through your entire body. Notice your body after a series of backbends…You may feel happy!

    #2: Healthy spine, healthy body!

    BACKBENDS1

    Our spines are meant to be flexible and support us in every movement during the day. However, most of us spend the majority of our time bending forward…sitting at a desk, driving a car or even picking up a child. Safely practicing backbends not only helps to maintain flexibility in your spine, but it can reduce the risk of back injuries. Additionally, backbends will stretch out the entire front body from the quadriceps all the way up the abdominal muscles and chest — even into the throat and neck.

    #3: Brings attention to your breath

    BACKBENDS4

    Breathing in backbends can be one of the hardest things to do! It took me a long time to get used to taking deep breaths when doing any sort of deep backbend. However holding your breath can be stressful, restrict your movement and can even break blood vessels in your face and neck.  I know this from experience! While practicing backbends, bring attention to your breath and see if you can breath a little deeper. It will feel weird, and maybe hard at first, but it will lessen the stress you feel and possibly deepen the posture.

    #4: Overcome your fears

    BACKBENDS3

    By moving safely and slowly into backbends you will build strength and confidence in yourself! You will slowly overcome the fears and doubts associated with bending backwards. The “I can’t do that” attitude will slowly start to shift to “I will do that” and eventually become “I can do it”!

    XOXO

    Blog Signature


  • Handstands:  The Art of Falling

    Handstands: The Art of Falling

    If you are ready to move your handstand practice away from the safety of a wall, you must embrace the art of falling.  I call it an art because there is actually a bit of technique involved. Once you master the technique, you will not be afraid of practicing in the middle of a room.  You will realize that falling out of any inversion can be a controlled transition from one pose to another.  When you feel your body wavering as you balance on your hands, you will not flail around and then land flat on your back.  You will be armed with a game plan—a real exit strategy.  You will fall (or transition) from handstand into wheel pose.TheArtofFalling

    Practice Wheel Pose
    Before moving your handstands away from the wall, you MUST be very comfortable in wheel pose.  You will be falling into this deep backbend from a height, so you certainly don’t want to fall into this pose if you are uncomfortable or feel any strain at all when you lift into wheel from the floor.  Please review the proper form for wheel pose HERE.

    If you cannot do this pose with ease, continue to practice your handstands with a wall.  Every day, you can continue to work on your backbends and heart/shoulder opening stretches until wheel pose is no longer a struggle.

    At this point, if you are uncomfortable with wheel pose, you may be wondering if there are other alternatives to exiting a handstand.  Yes, there are other options, but I don’t like teaching them.  Falling into a cartwheel, for example, is a very popular exit strategy from handstand, but it doesn’t make sense for beginners.  As a recent beginner myself, I know that once you begin to lose your balance in a handstand, you do not have enough control to do anything but fall straight back.  Attempting to do anything else (like lift one hand to cartwheel to the side) is dangerous and could result in injury.  Trust this process.  If wheel pose is difficult, keep practicing your backbends each day.  Soon enough, you will be practicing handstands in the middle of the room, and you will stay safe because your hands will be rooted in one spot and remain there for the duration of any fall/transition.

    Practice the Transition
    Make sure you are warmed up before practicing this transition.  Kick up into any variation of handstand that feels stable, and when you begin to lose your balance, don’t fight the natural momentum.  The inclination will be to fall straight back, and that is what you will do.

    The most important step in this transition is to maintain straight arms the entire time.  If you bend your elbows during the fall, you might hit your head or land flat on your back.  Just think—strong, straight arms.  Repeat it over and over in your mind.  One way to stay strong is to grip your mat firmly with your fingertips.  By maintaining an engaged feeling in the tips of your fingers, you will be reminded to engage the entire length of your arms by staying strong and straight.

    If You are Scared…
    Kicking up into handstand in the middle of a room and then falling back into wheel requires a huge leap of faith.  You must believe that you have the strength in your arms, the flexibility in your back, and the overall balance necessary to land on your feet in wheel pose.  If you are not convinced of your own ability to do this, don’t be discouraged.  You can practice transitioning into wheel from handstand WITH the safety of a wall.

    To begin, lie down on your back with your knees bent, the soles of your feet flat on the ground, and the tips of your toes against a wall. Review your form before continuing—make sure that your heels are as close to your bottom as possible.  Bend your elbows, and bring your hands alongside your ears, with your fingers pointed toward your body.  You are now set up on the floor as if you were going to lift into wheel pose with your toes against a wall.  Take note of where your hands are relative to the wall.  THIS will be your starting point for your handstand practice.  No need to lift into wheel pose right now.  Go ahead and stand up, and place your hands down onto this starting point that you just determined.  Kick up into handstand, and when you lose your balance, allow your legs to fall against the wall.  Keep your arms strong and straight, and begin to walk your feet down the wall onto the floor into wheel pose.  Repeat this exercise as many times as necessary to become accustomed to the feeling of transitioning from handstand to wheel.  Once you feel confident, go ahead and try the transition in the middle of the room.

    Stay safe, believe in yourself, and enjoy the process.

  • Daily Practice: Heart & Shoulders

    Daily Practice: Heart & Shoulders

    Getting into King Dancer, Forearm Hollowback or any Wheel variation depends on opening your heart and shoulders.  For the longest time, I was convinced that I couldn’t do overhand grip poses because my back just wasn’t naturally bendy. In reality, it was my chest and shoulders that were too tight to reach back.  So, now, heart openers and shoulder openers are a part of my daily practice.  In fact, you might want to consider incorporating them into yours! I tend to rely on blocks and a strap for these exercises, so make sure to have them handy!

    DSC_3882b

    Here are the top 5 heart and shoulder openers that I practice daily.

    #1: Relaxing Heart Opener

    DSC_8195w

    DSC_8216w

    Blocks are a great way to open up your chest and relax at the beginning of your practice. Depending on your level of flexibility, you can play with the height of the blocks and also the number of blocks that you use. Whatever level you choose, place one block between your shoulder blades as you lie down onto your mat. Use a second block under your head or, if it’s comfortable, your head can rest on your mat. Let your arms fall open to your sides or you can place them overhead. I usually stay here a minimum of two minutes and up to five minutes. Also, feel free to deepen the stretch as your heart opens up.

    #2: Clasp Your Hands

    DSC_8242w

    Clasping your hands behind your back is a great way to open up your upper body!  And the great news is…you can add this to almost any standing posture! As you move through your flow, incorporate this into your Standing Forward Folds, Warrior Poses, Lunges and even Cobras.  Try to keep your palms squeezing together as you straighten your arms and do not forget to change your grip as well!

    #3: Bow Pose

    DSC_8269w

    I love doing about three rounds of Bow Pose at the end of my practice.  Each round I hold for about five deep breaths. The trick here is to let your feet do most of the work! After you grab onto the outside edges of your ankles, kick them into your hands. The strength of your legs will lift up your heart. Don’t fight it, let your arms extend back, let your heart open.

    #4: Overhead Strap Extensions

    DSC_8286w

    Time to grab your trusty yoga strap or belt!  Start out by holding it out in front of you.  Grip the strap much wider than your shoulders to begin and pull it straight. From here, slowly extend it up and over your head…the entire time, keeping the strap taut. Repeat a few times and then move your hands slightly closer and repeat.

    #5: Overhand Grip Prep

    DSC_8318w

    If you are working on your overhand grip, this is the perfect exercise to explore what it feels like. Stand on one end of your strap or belt and step the other foot forward for support. Grab the other end of the strap with one hand and bring it up overhead so you can comfortably grab the strap with the other hand.  With your arms squeezing in, bend your elbows and slowly start to walk your hands down the strap towards the ground. Stop when you feel the stretch and take five to eight breaths. Release, shake it out, and then repeat this two more times.

    Remember to move slowly and mindfully, especially with any shoulder exercises.

    XOXO

    Blog Signature


  • 10 Reasons I Do Instagram Yoga Challenges

    10 Reasons I Do Instagram Yoga Challenges

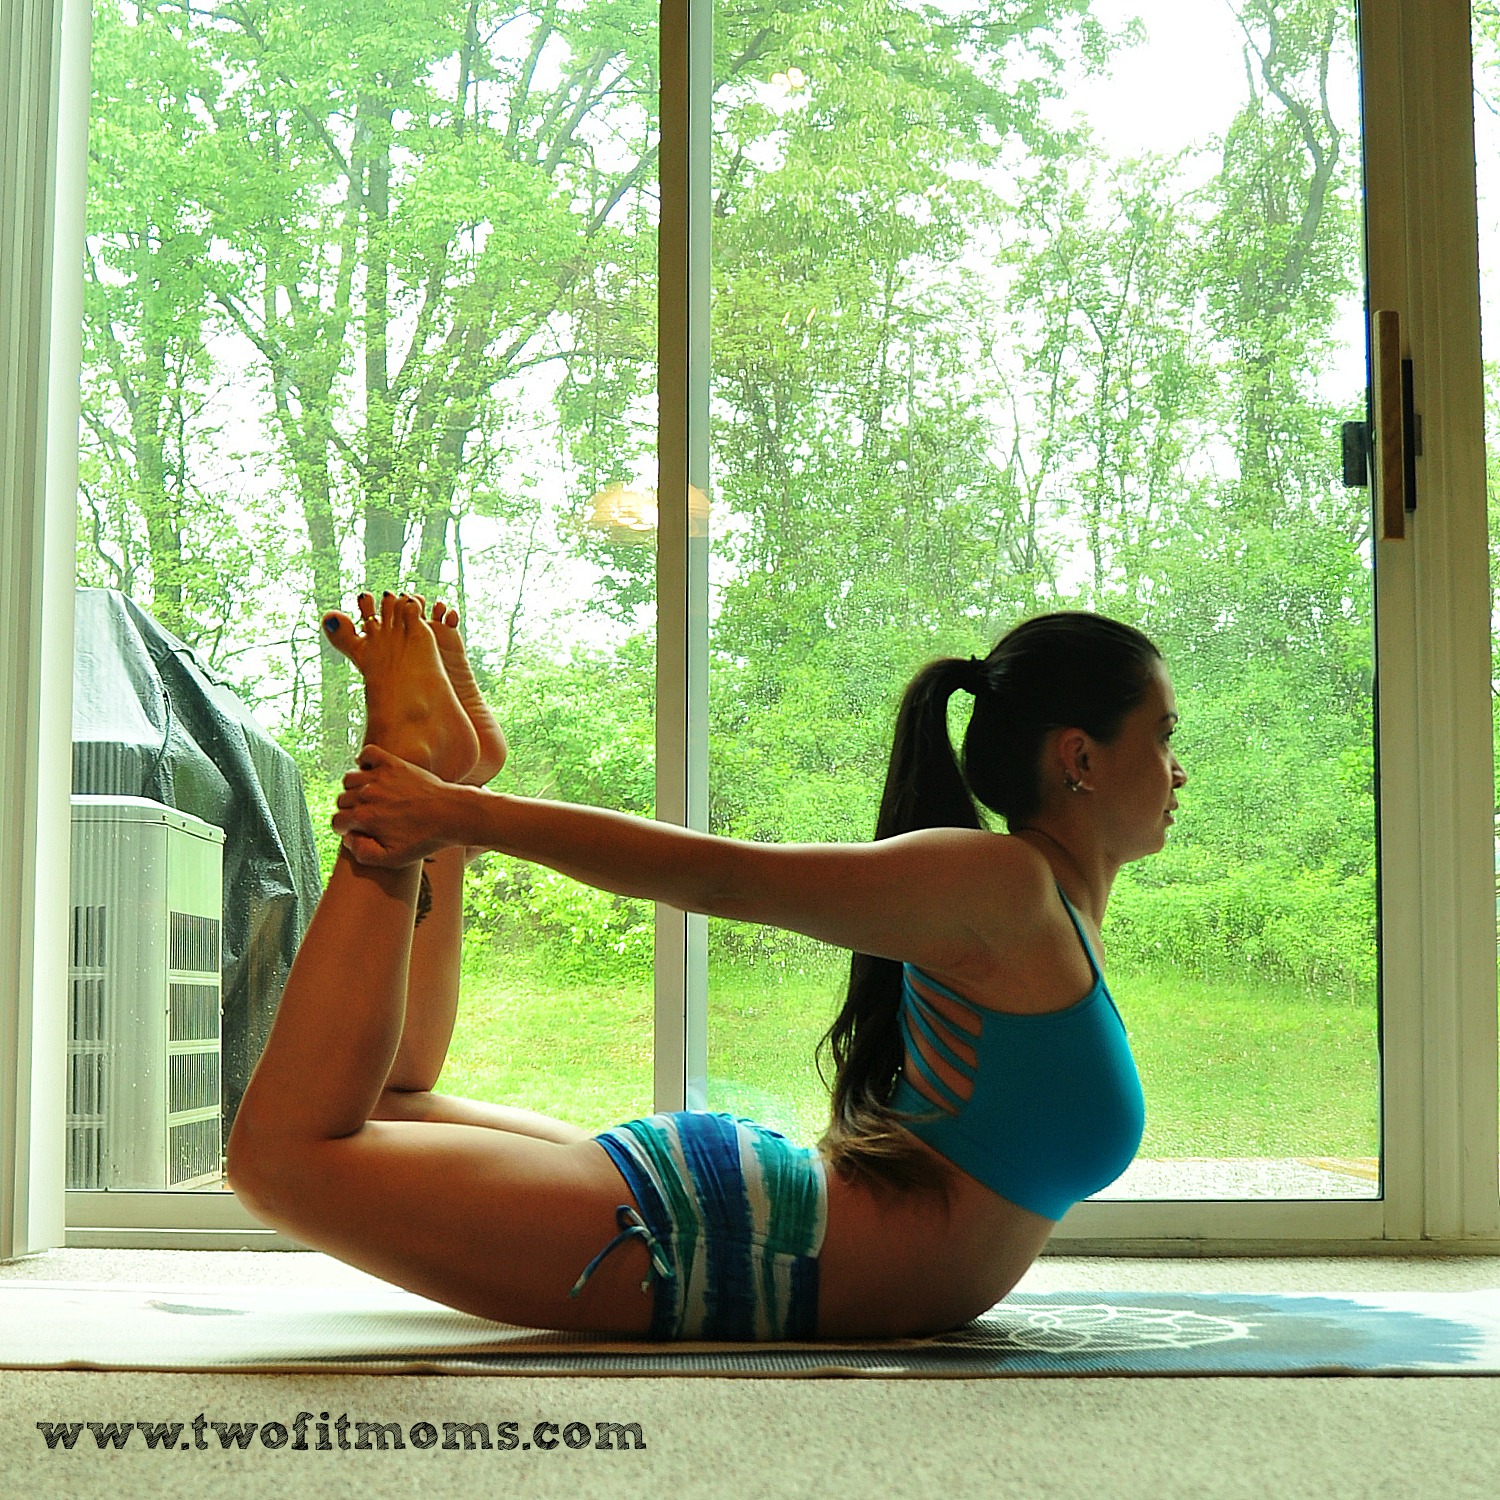
    Over the past year, Laura and I have been very active in the Instagram yoga community.  We’ve hosted some of the very first yoga challenges offered on Instagram, and we continue to remain active in hosting and participating in challenges today.

    Since our early days of posting very detailed step-by-step picture tutorials, we’ve watched thousands of people connect and grow a virtual Instagram yoga community just by attempting the GrasshopperPrep
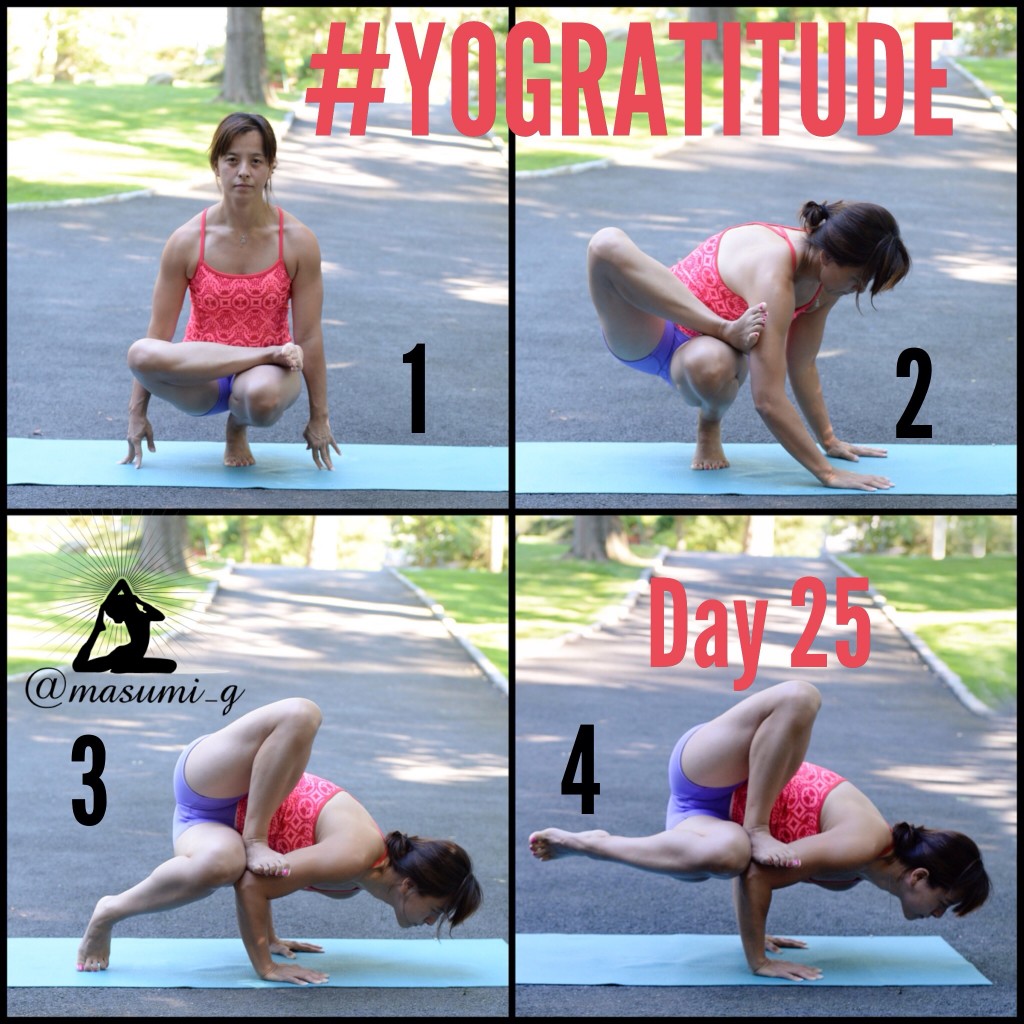
daily pose of the day and posting a photo of their attempt to a designated hashtag.  What an overwhelmingly positive experience to watch Instagram yogis grow, inspire, and BE inspired!

    If you have not yet given a challenge a try, I suggest that you pick one and get involved today.  Here are my top reasons for participating each month.

    It Creates a Daily Habit
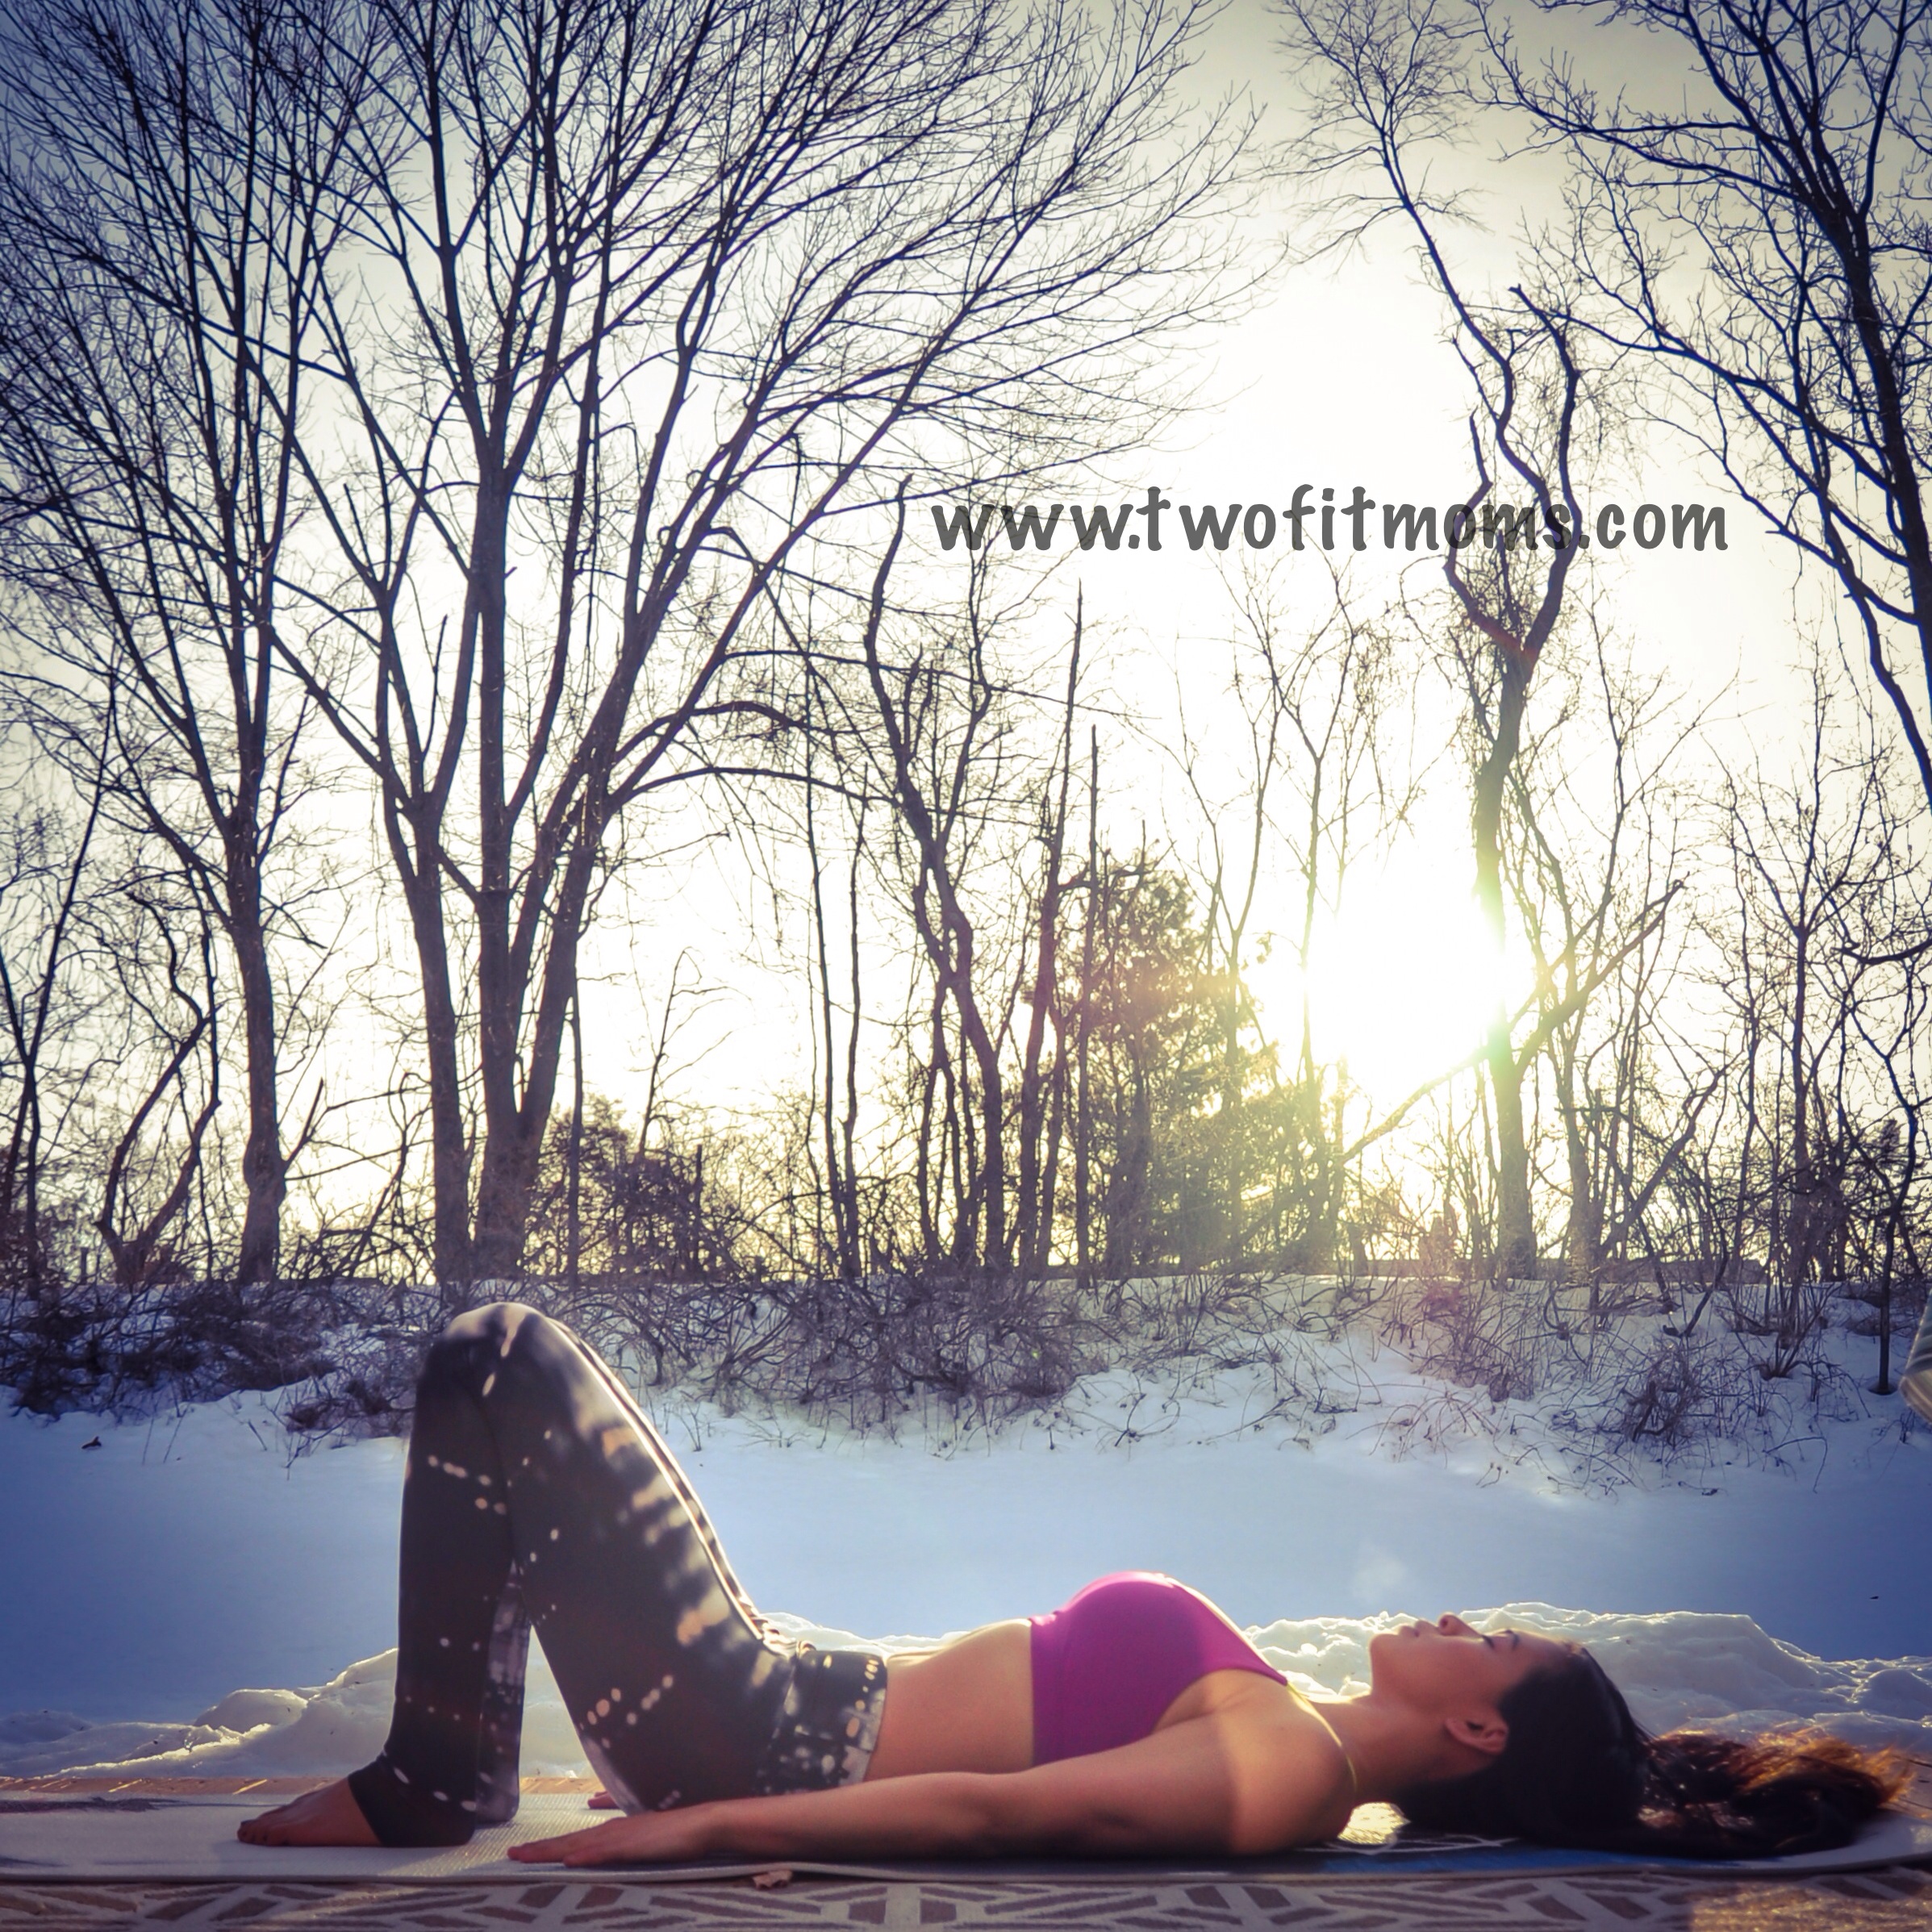
    A daily yoga challenge makes you commit to a daily practice.  Let’s be honest—it’s hard to commit to a daily hour-long yoga session.  We are all tired and busy, but, I assure you that it feels much less overwhelming if we believe that we just need to stretch and warm up for one yoga pose.  This is a great way to take baby steps toward a longer more meaningful daily practice.  Get in the habit of rolling out your mat daily by participating in a challenge.

    It’s Fun
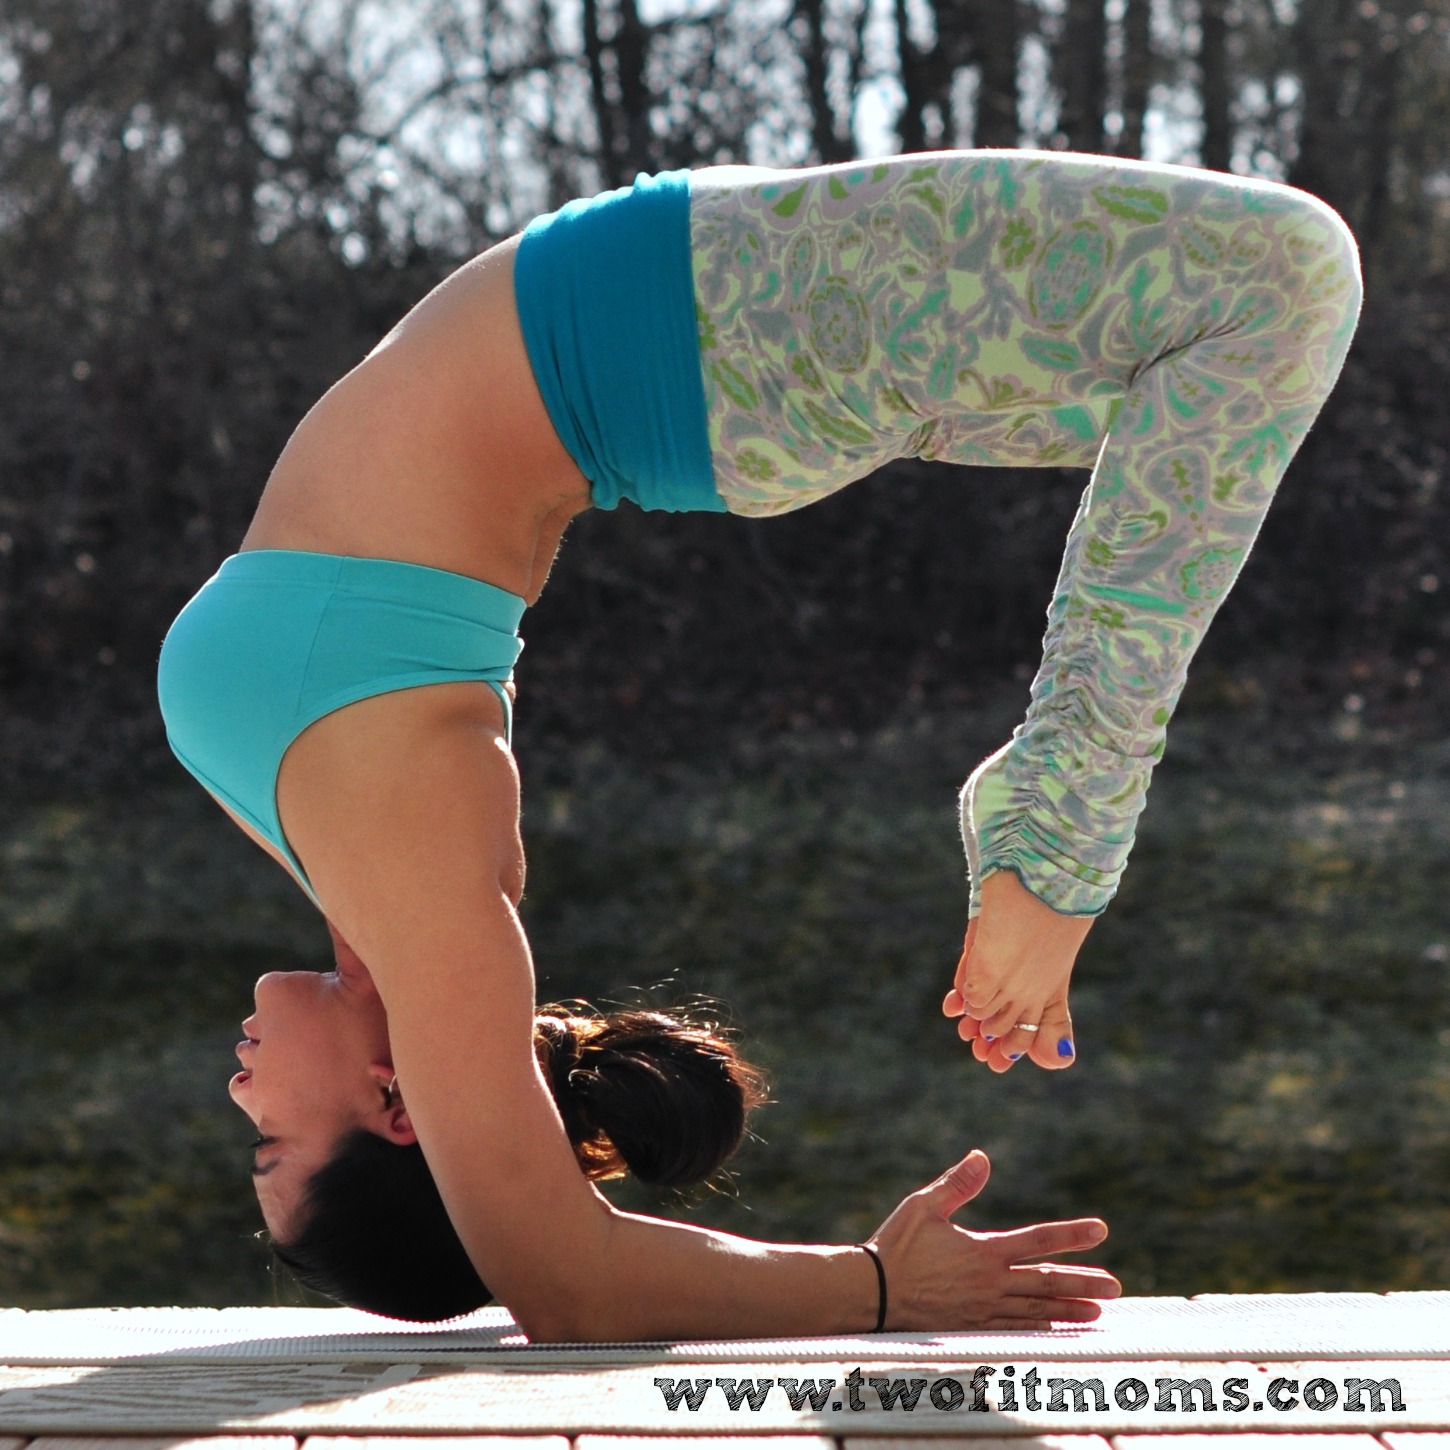
    Everyone loves a good challenge.  I still remember the first time I saw a photo of an arm balance pose on Instagram.  It looked incredible.  How was it even possible to balance in that way?!!!  I was fascinated and excited to get on my mat and try.  Perfecting the pose was not the goal.  The goal was to try, and practice, grow and play.  As adults, we rarely play.  Practicing new yoga poses each day awakens our inner child, and it’s just downright FUN.

    It’s Free
    Do I have to say more?  It’s free.  Free instruction, free participation, free fun, and often, you can even score a free prize!  Not everyone has the money to take a yoga class in a studio.  By participating in an Instagram yoga challenge, you can get your yoga fix without shelling out the big bucks.

    SideCrowIt’s Inspiring
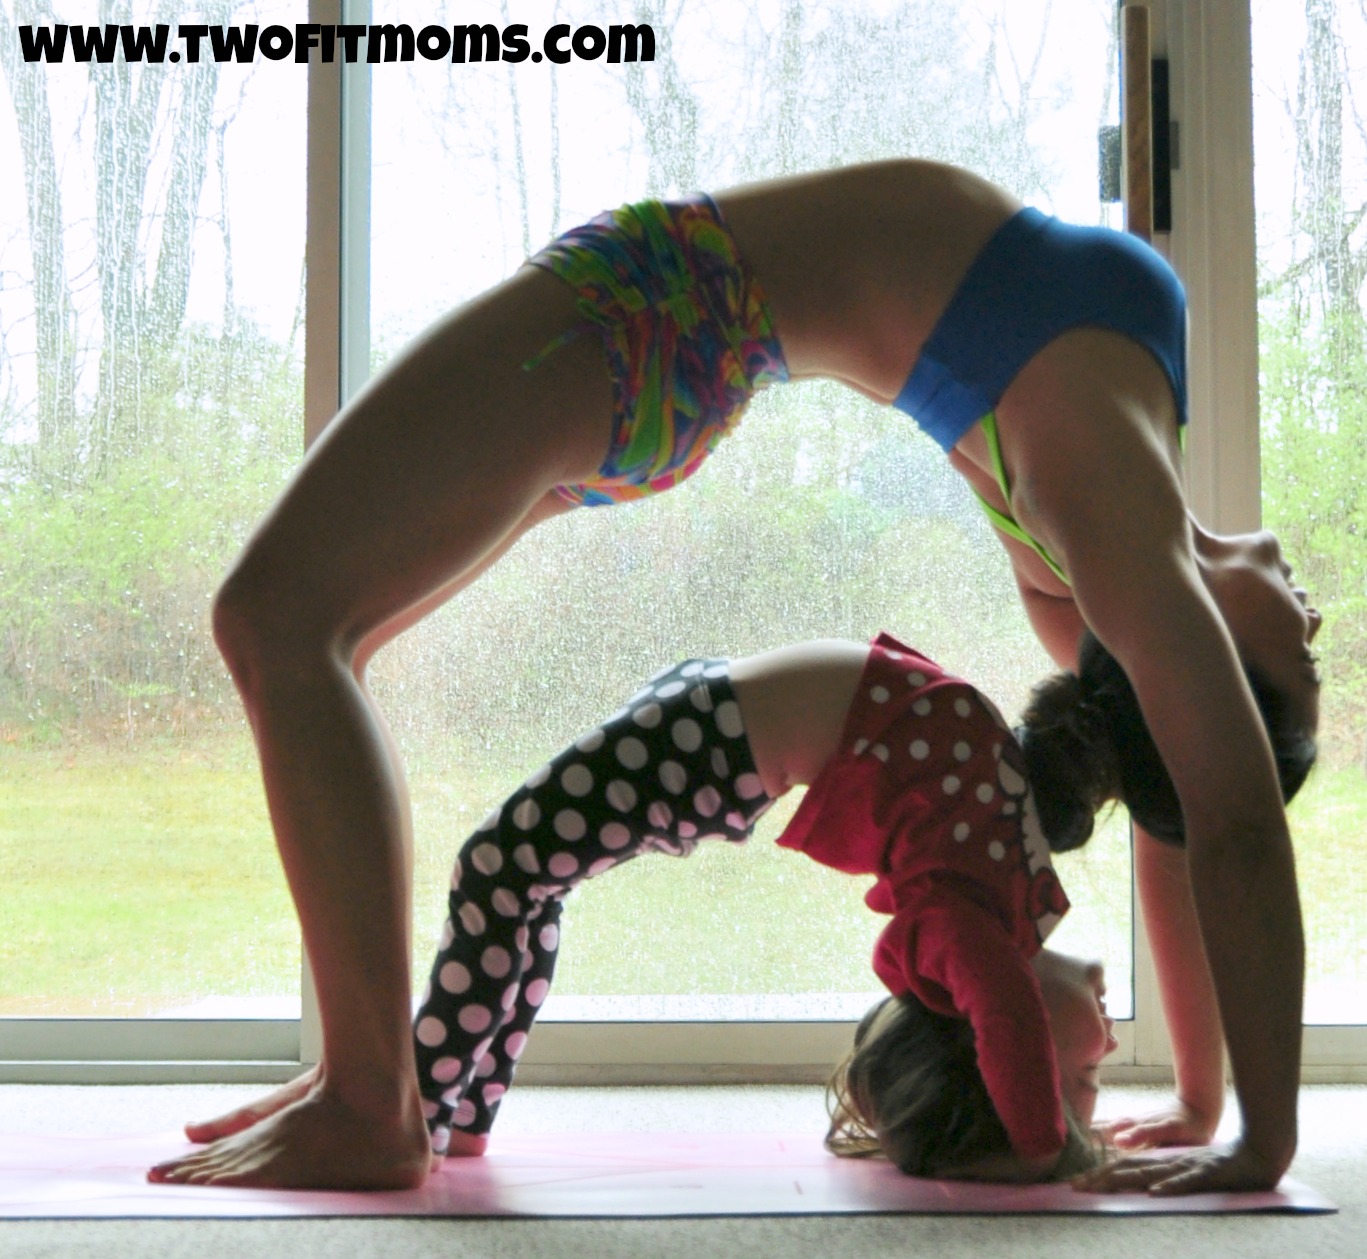
    It’s incredibly inspiring to look through a yoga challenge hashtag and see thousands of yogis from all walks of life doing the same pose.  These yogis are different ages, races, sizes and nationalities, but they have all come together to participate and grow in their practice.  Seeing a yogi that is twice your age is inspiring.  Seeing a parent and child together attempting a pose is inspiring.  Seeing yogis that are overcoming sickness and pain by using yoga as a healing tool is inspiring.  All of this inspiration will make you want to come back day after day and practice with the Instagram community.

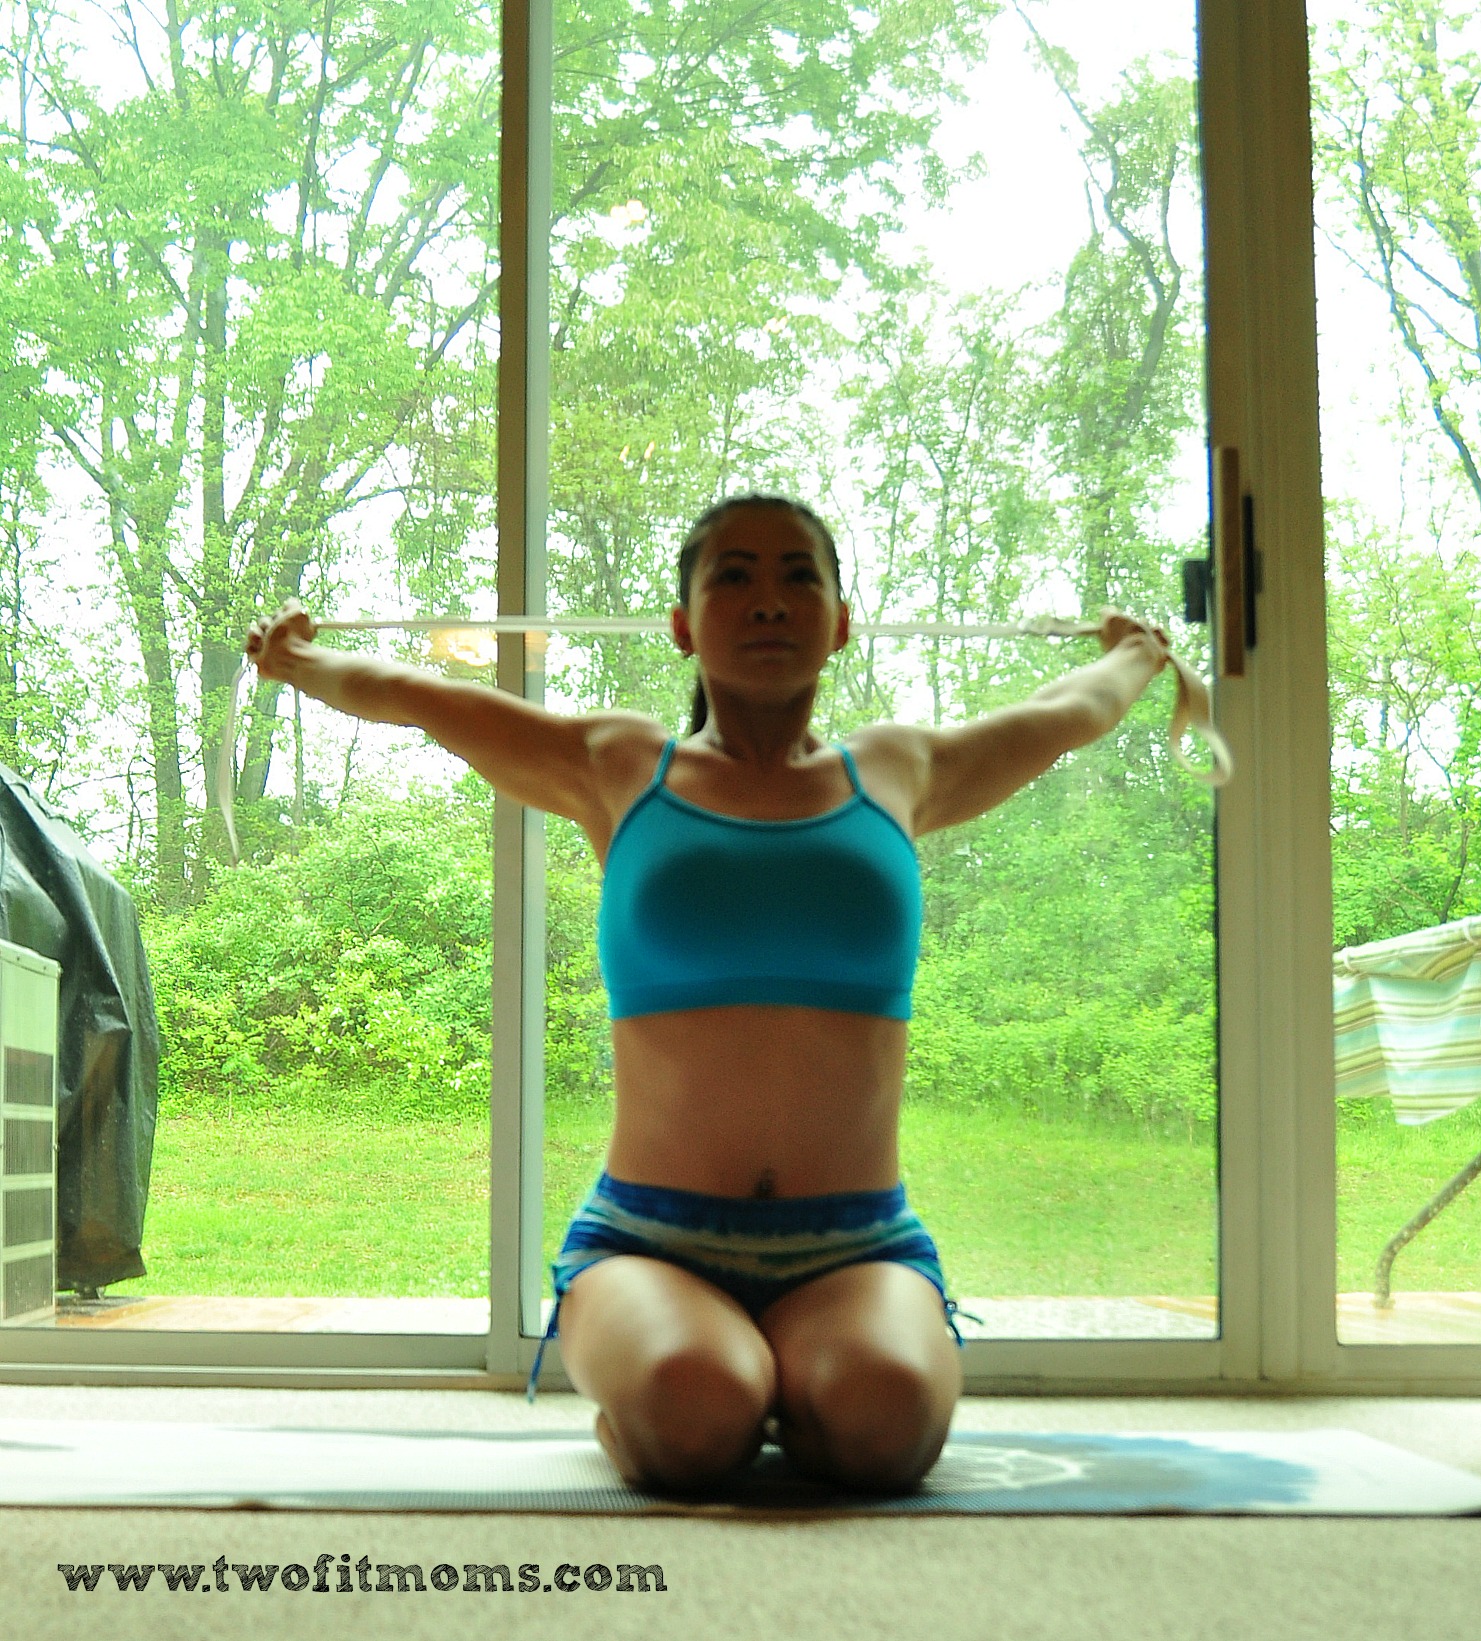
    It Can Be Done from Home
    Some people don’t have the money to take a yoga class, and others don’t have the time to take a class.  As a mother of young children, it takes a village for me to be able to leave my house to do basic things—like shop for groceries or get a haircut.  Traveling to a yoga studio does not happen often, and it doesn’t happen without planning in advance for babysitters.  By getting involved with Instagram challenges, I can practice at home whenever it’s convenient—even if that means taking photos of poses at midnight.

    It Documents Your Journey
    For better or for worse, if you participate in a daily Instagram yoga challenge, you will have a visual record of each pose that you attempt.  In the beginning, seeing your poor form or lack of flexibility may be discouraging, but as time passes, you will be grateful for these photos.  It amazes me to look back at my old yoga photos and see how far I’ve come in my practice.  My posture, flexibility, strength and form have improved dramatically, and I am aware of the progress that I’ve made over weeks or months.

    It’s a Great Way to Meet Yoga Friends
    The Instagram yoga community is an amazingly supportive group.  Everyone is encouraging and supportive, and that is a great kind of environment to learn and grow in your practice.  When you join an Instagram yoga challenge, you get the feeling that you are a part of something greater than yourself.  As soon as you join a challenge, you are no longer alone.  You have joined a movement, and it feels amazing to get caught up in the positive energy and practice (virtually) alongside your new Instagram yogi friends.

    FlyingLizardIt Creates a Well-Rounded Practice
    We all have our strengths.  We all also have our weaknesses.  I’ve found that when I practice yoga on my own, I have a tendency to work on poses that come easily to me, and I avoid working on the poses that target my weaker/less flexible body parts.  The wonderful thing about Instagram yoga challenges is that the pose of the day forces you to work on body parts that you might otherwise completely avoid.  If the challenge pose is a backbend, you will work on backbends, even if you dislike them.  If the challenge pose is a deep hamstring stretch, you will spend time stretching the backs of your legs.  I’ve found this aspect of the challenges to be very beneficial.  Rather than focusing on just the poses that I enjoy, I also work diligently on the poses that I don’t enjoy so much.  By doing this, I’ve become much more well-rounded in my practice than I otherwise would be.

    It Exposes You to Different Types of Yoga
    I used to think that there was one type of yoga—the kind where you sit with your hands in prayer and maybe do a warrior 1 pose from time to time.  The idea of doing yoga used to bore me to tears.  I had no idea that yoga could be a challenging, sweat-inducing workout.  There is a type of yoga for everyone, and the world of Instagram yoga has opened my eyes to it all.  Who knew that yoga could include inversions like headstands and handstands or arm balances that tested your strength, balance and flexibility?  Take a look through all of the available challenges this month and you will see how much variety yoga has to offer.

    TreeEnjoy the Non-Physical Benefits of Yoga
    If you join an Instagram yoga challenge and you’ve never tried yoga before, you might start out just enjoying the physical benefits of the poses.  That’s definitely the experience I had.  I would stretch, strengthen, sweat, take a photo of the pose of the day, and move on with my life.  Over time, however, I’ve noticed that my body has loosened up to the point where my practice has truly become a moving meditation.  I can find peace in each pose, as the poses become more accessible.    I am now able to focus on the present moment as I’m living it, and THIS is an invaluable skill on and off the mat.

  • You Can Be a Mermaid!

    You Can Be a Mermaid!

    YouCanBeAMermaid
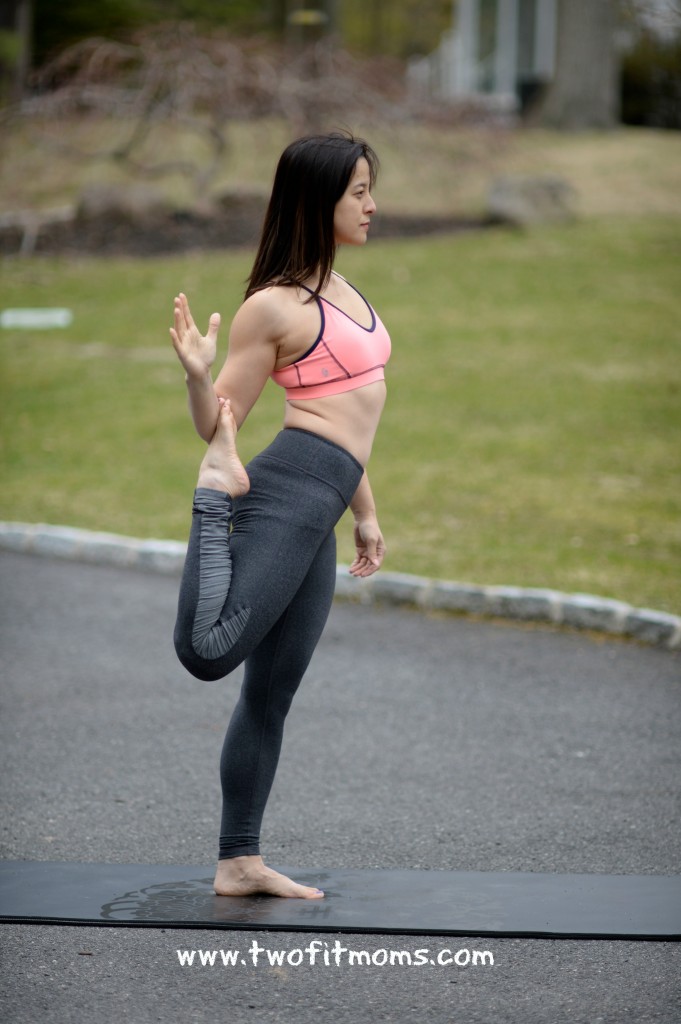
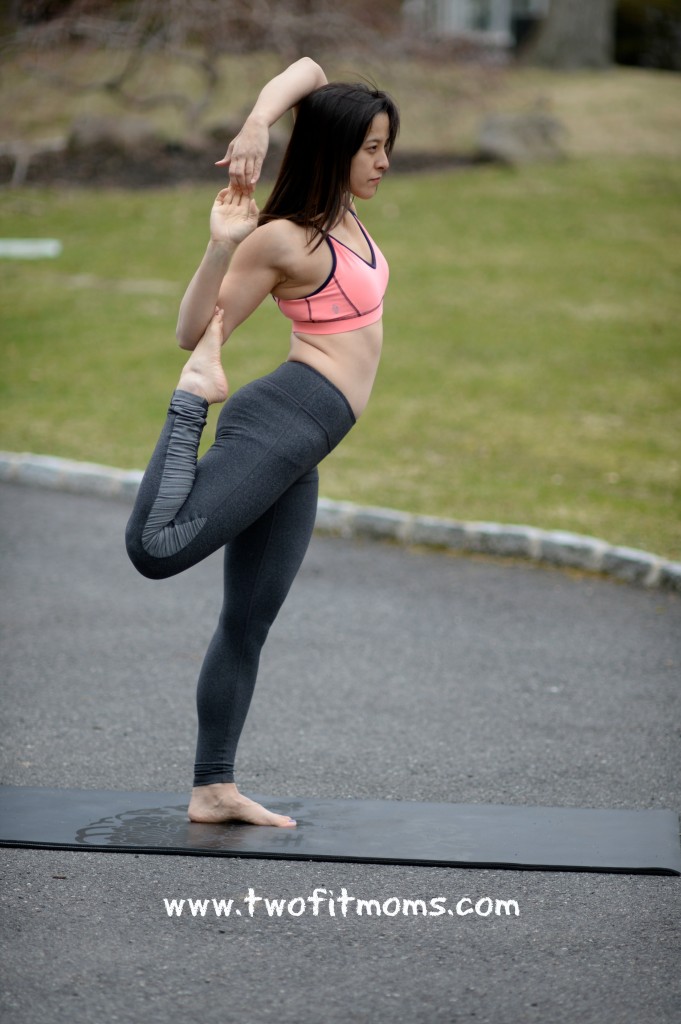
I still remember the first time I saw a photo of standing mermaid pose. I was scrolling through my Instagram feed, and I paused to look at this interesting posture. It appeared to be some kind of dancer pose variation, but I had never seen anything like it before. I had to try it!

    If only I had a video of what followed. What a disaster. Without any instruction, I had absolutely no idea how to get my foot lifted into the air and into the inner elbow crease of my arm. I tied a strap around my foot and did all sorts of crazy moves to see if I could raise my foot into the proper position. Ultimately, I gave up on my strap and realized that it was a much simpler process than I thought. In order to save you some time and aggravation, I will walk you through each step of getting into standing mermaid pose.

    Please keep in mind that mermaid poses of any kind are binding poses. The fingertips of both hands clasp (or bind) together, resulting in a deeper stretch than if the hands remained apart. The purpose of a bind is to intensify a stretch and deepen a posture. In a mermaid bind, your chest, back and shoulders will feel the intensity of the stretch. If you do not have a strong backbend practice, you should consider modifying your mermaid pose by skipping the bind altogether and focusing on keeping the top of your foot pressed into the crook of your arm. Once you improve your flexibility and notice some progression in your backbends, you can re-visit the bind.

    Step 1
    Begin to shift your weight into your left foot. Bend your right knee, and reach back with your right hand, palm facing up. Place the top of your foot into the palm of your hand.
    Step1
    Step 2
    Begin to slide the top of your foot down the length of your forearm until the top of your foot is sitting in the inner elbow crease of your arm.
    Step2
    Step 3
    Extend your left arm up toward the sky, bend your elbow, and see if your fingertips can clasp. If you feel any discomfort in your back, stop at this point.
    Step3
    Step 4
    Begin to press the top of your foot into the crease of your arm and lift your leg higher as you lean your torso forward to maintain your balance.
    Step4

  • Transition into Wild Thing

    Transition into Wild Thing

    One of my favorite backbending poses in yoga is Wild Thing, or Camatkarasana. The reason why I love it so much is that in order to get into the pose, you transition through a couple of my favorite stretches: downward facing dog and three-legged dog with an open hip. Not only do you reap the benefits of stretching out the entire front body with the backbend, but you also get a great hamstring stretch and hip-opener on your way into wild thing.

    Step 1
    Begin in downward facing dog. If you are unsure about the placement of your hands and feet for downward facing dog, start out in plank pose (top of a push-up). Make sure that your hands are directly stacked under your shoulders, and your feet are about hip width apart. The term “hip-width” refers to the distance between your two hip bones, and NOT the distance between the outer edges of your hips. From plank pose, lift your hips back and up into the air so that your body looks like an upside down V. Take 3 to 5 deep breaths in this pose, enjoying the stretch in your hamstrings, chest and shoulders.
    Step1

    Step 2
    Raise your right leg high into the air, stack your right hip over your left hip, and bend your right knee. Be mindful to keep an even amount of weight in both hands, and do not allow your weight to collapse into your left shoulder. Shoulders should be even. Take 3 to 5 deep breaths in this pose, and enjoy the hip stretch.
    Step2

    Step 3
    Slowly lower the ball of your right foot to the ground behind your left leg. Your right hand will simultaneously begin to lift from the mat.
    Step3

    Step 4
    Push firmly into the mat with both feet, as you lift your hips toward the sky and reach back behind you with your right hand. Keep your chest and hips lifted, and remember to breathe evenly through your nose. Hold this pose for 5 breaths (about 30 seconds), and repeat on the other side.
    Step4

  • Urdhva Dhanurasana: Getting into Wheel Pose

    Urdhva Dhanurasana: Getting into Wheel Pose

    Our journey into backbending continues with Urdhva Dhanurasana or Wheel Pose. As we discussed in the Bridge Pose tutorial, backbends can be energizing…flooding your body with oxygen while stretching out the entire front body, shoulders and chest. Be mindful when practicing and continue to take each posture slowly.

    Step 1: Lie down on your mat. Extend your legs out and take a couple of deep breaths. Bend your knees and bring your feet down onto your mat. Your feet should be parallel to one another and hip-width distance apart. Try to get your heels as close to your buttasana as possible. Bend your elbows and place your hands down alongside your ears. Fingers will point TOWARD your body. Squeeze the elbows in.

    Photo Mar 12, 1 57 37 PM

    Step 2: Take a deep inhalation. On the exhale, push into your feet and lift your hips up. Feet remain parallel and knees squeeze in. Try to keep your buttasana relaxed by drawing the tailbone slightly up. Take a breath. On another exhale, push into your hands this time and come up onto the crown of your head. Elbows squeeze in as your shoulder blades hug your back. I like to walk my hands closer to my body at this point. This is just an option though! Take a breath or two here.

    Photo Mar 12, 1 57 44 PM

    Step 3: On an exhalation, push firmly into your mat with your feet and hands and try to straighten the arms. Remember to keep the feet parallel. There will be a slight internal rotation of the thighs…this is what will prevent your feet and knees from spinning outward. Draw your tailbone down and relax your buttasana.  Keep your shoulders engaged and hugging your back.  Let your head fall neutral. Stay here and take 3-5 breaths.

    Photo Mar 12, 1 58 08 PM

    When you are ready to come down, bring your chin to your chest and slowly bend your elbows bringing the back of your head and your body gently onto your mat. Hug your knees into your chest and relax.

    XOXO

    Blog Signature

  • Pincha Mayurasana:  The Art of Falling

    Pincha Mayurasana: The Art of Falling

    If you’ve recently added Pincha Mayurasana (forearmstand) to your inversion practice, you may be wondering when or if you should move away from the safety of a wall.  As a general rule, you should NEVER move your inversion practice away from the wall until you have perfected your exit strategy.

    Falling flat onto your back and injuring yourself is NOT an exit strategy.  Falling safely out of an inversion is FallingFromPincha
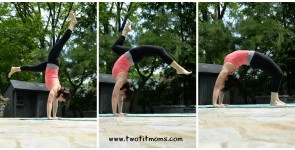
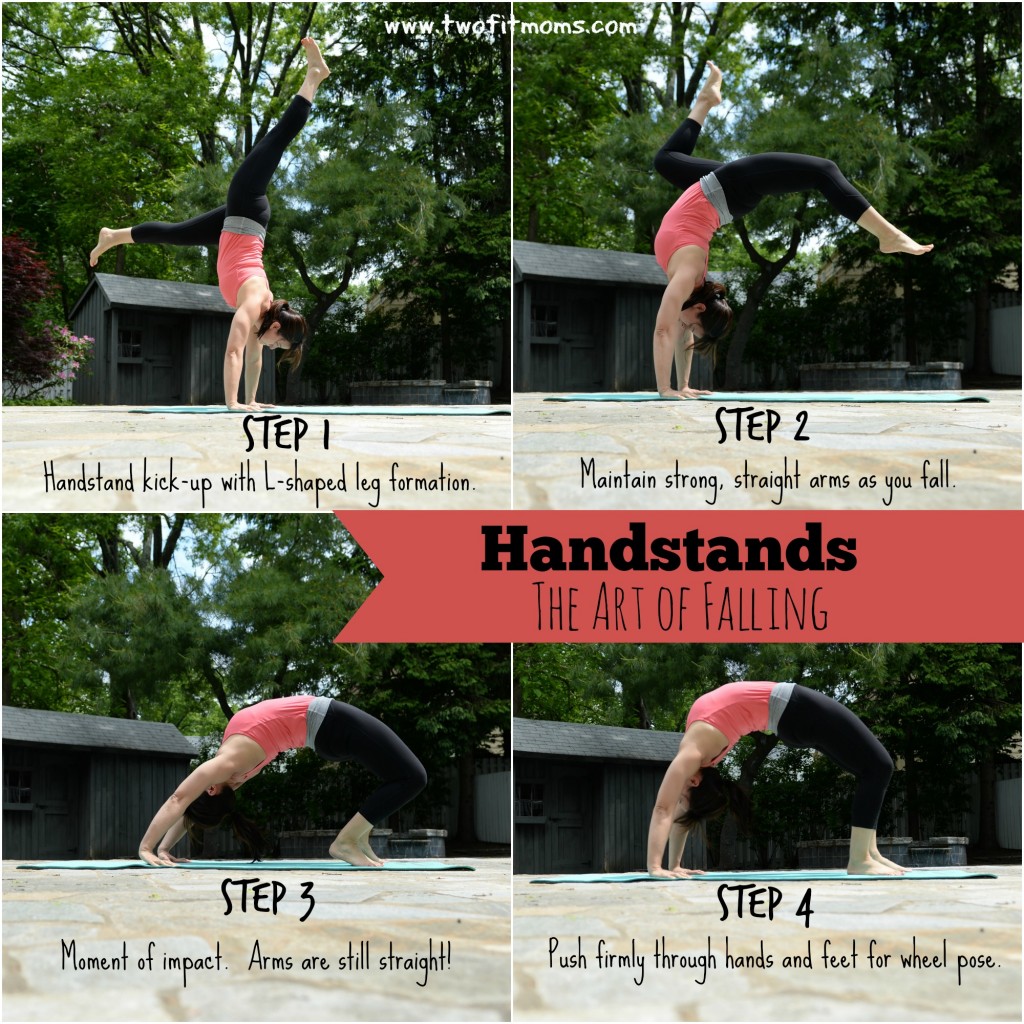
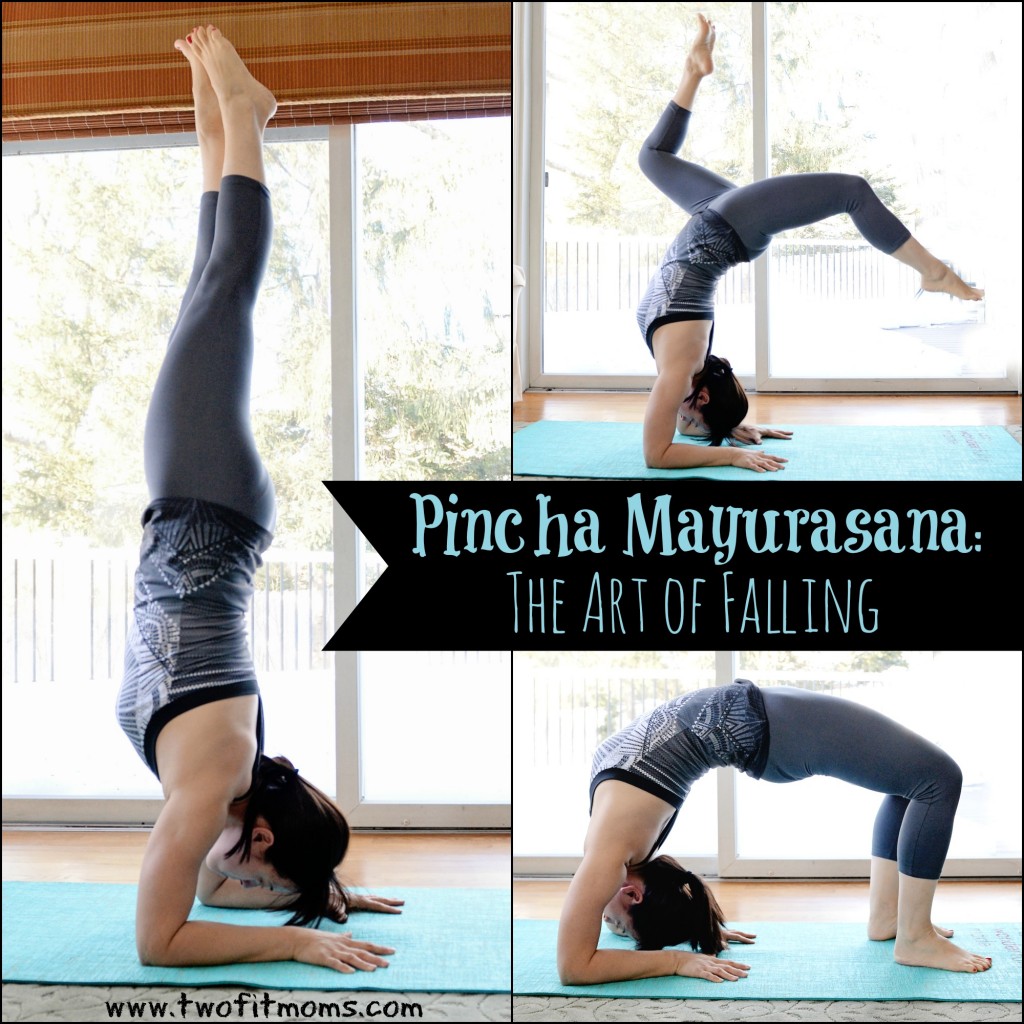
actually a skill, and today, I will show you how to turn your fall out of forearmstand into a controlled transition.

    The goal?  Forearmstand into forearm wheel.  Yes, forearm wheel is a deep pose requiring flexibility, but once you master this pose and this transition, you will practice in the middle of the room without fear.

    Getting into Forearm Wheel
    The first step in perfecting this transition is to practice the final pose:  forearm wheel.

    Step 1
    Lie on your back, with your knees bent and feet flat on the floor. Place your palms onto the mat on either side of your head with your fingers pointing toward your feet.  Press through your hands and feet and gently lift up onto the crown of your head for a breath or two.  Continue to press through your hands and feet, lifting your head from the floor. Straighten both arms and lift your hips toward the sky for wheel pose.  If you are unable to do wheel pose, please continue to practice your forearmstands against a wall and re-visit this article at a future date.  Being comfortable with your backbends is essential for this exit strategy.
    WheelPose
    Step 2
    Slowly bend your elbows and gently lower the top of your head to the mat. Keep your elbows stacked above your wrists and your chest lifted.
    LowerOnToHead
    Step 3
    Slowly lower yourself onto one forearm.  If the stretch feels too intense, stop.
    WheelOneArmDown
    Step 4
    If your back is not straining, lower yourself onto the other forearm.
    WheelBothArmsDown
    Step 5
    Press down firmly through your forearms and lift your chest to raise your head off the mat.
    ForearmWheel
    If you are unable to do this forearm backbend with ease, then please continue practicing your forearmstands with a wall.  Falling into a deep backbend from a height is potentially harmful until your flexibility improves.  Each day, make it a point to work on your backbends and to open up your chest, shoulders and hip flexors.  The sooner you become comfortable in your backbend practice, the sooner you will become free from the wall.

    Practicing the Transition
    Now that you’ve mastered the forearm wheel, let’s practice falling into it.  Make sure you are thoroughly warmed up before attempting.  When you begin to lose your balance in your forearmstand, your natural inclination is to simply tip over.  Work with that natural momentum, and do not try to fall to the side or to lift your forearms from the ground.  Keep your forearms firmly rooted into your mat, with your elbows stacked right under your shoulders.  Do not collapse into your arms!  If you stay strong through your shoulders and arms, your legs will touch down, your head will never touch the mat, and you will be in a forearm backbend.

    Remember:
    Keep your inversion practice at the wall until you perfect your exit strategy.  Perfecting an exit strategy, however, may take a great deal of time.  Do not get discouraged.  Your yoga practice is not a race, and it is here to serve you through your lifetime.  Practicing your inversions with a wall is FINE.  Be prudent and use a wall if your body is not quite ready for the exit strategy presented here in this article.  Good luck!

  • Start Your Backbend Journey with Bridge Pose

    Start Your Backbend Journey with Bridge Pose

    Backbends are extremely powerful and energizing poses. They open up the heart, the chest and the shoulders.  They stretch out the spine, the neck and the entire front body. They flood the body with oxygen and have the ability to quickly get you out of a funk.  Backbends are also known to offer relief from fatigue, stress, anxiety and depression, to name a few.

    Deep backbends can be extremely intimidating for beginners. Bridge pose or Setu Bandha Sarvangasana is a great intro pose to set you on your backbend journey. Take it slow and be mindful.  Do not do this if you have any neck or shoulder injuries. Always respect your limits.


    Step 1: Lie down on your mat. Extend your legs out and take a couple of deep breaths. Bend your knees and bring your feet down onto your mat. Your feet should be parallel to one another and hip-width distance apart. Relax your shoulders and release any tension you may have in your face.

    Photo Mar 06, 8 44 50 AM

    Step 2: On an exhale, press your feet and hands firmly into your mat as you lift your hips up. Keep your neck long, do not bring it down towards your chest. Draw your tailbone up and be careful not to clench your bottom. No squeezed cheeks allowed!

    Photo Mar 06, 8 45 05 AM

    Step 3: Keeping a firm base, start to work your shoulders underneath your body. Your shoulder blades draw in towards one another. Clasp your hands together underneath your body and straighten your arms. Press your arms firmly into your mat as you actively reach your clasped hands toward your heels. Be mindful to stay evenly on the soles of you feet and keep your knees directly stacked over your ankles. Do not let them sway in or out. Stay here and take 5-10 breaths. To release, unclasp your hands and set them down beside you, then slowly lower your hips down. Relax.

    Photo Mar 06, 8 45 20 AM

     Optional Variation: Extend on leg up and hold for a 3-5 breaths.  Lower the leg and extend the second leg up.  Hold for the same number of breaths as the first side. Lower the leg and hold in regular Bridge pose for 3-5 breaths…Then slowly lower down and relax.

    Photo Mar 06, 8 45 29 AM

    Remember to have patience with yourself and your practice. Speaking from experience, backbends can be frustrating…but they can also be very rewarding. Take your time.  In the words of K. Pattabhi Jois: “Practice and all is coming”.

    XOXO

    Blog Signature