Author: Laura Kasperzak

  • Floating Down

    Floating Down

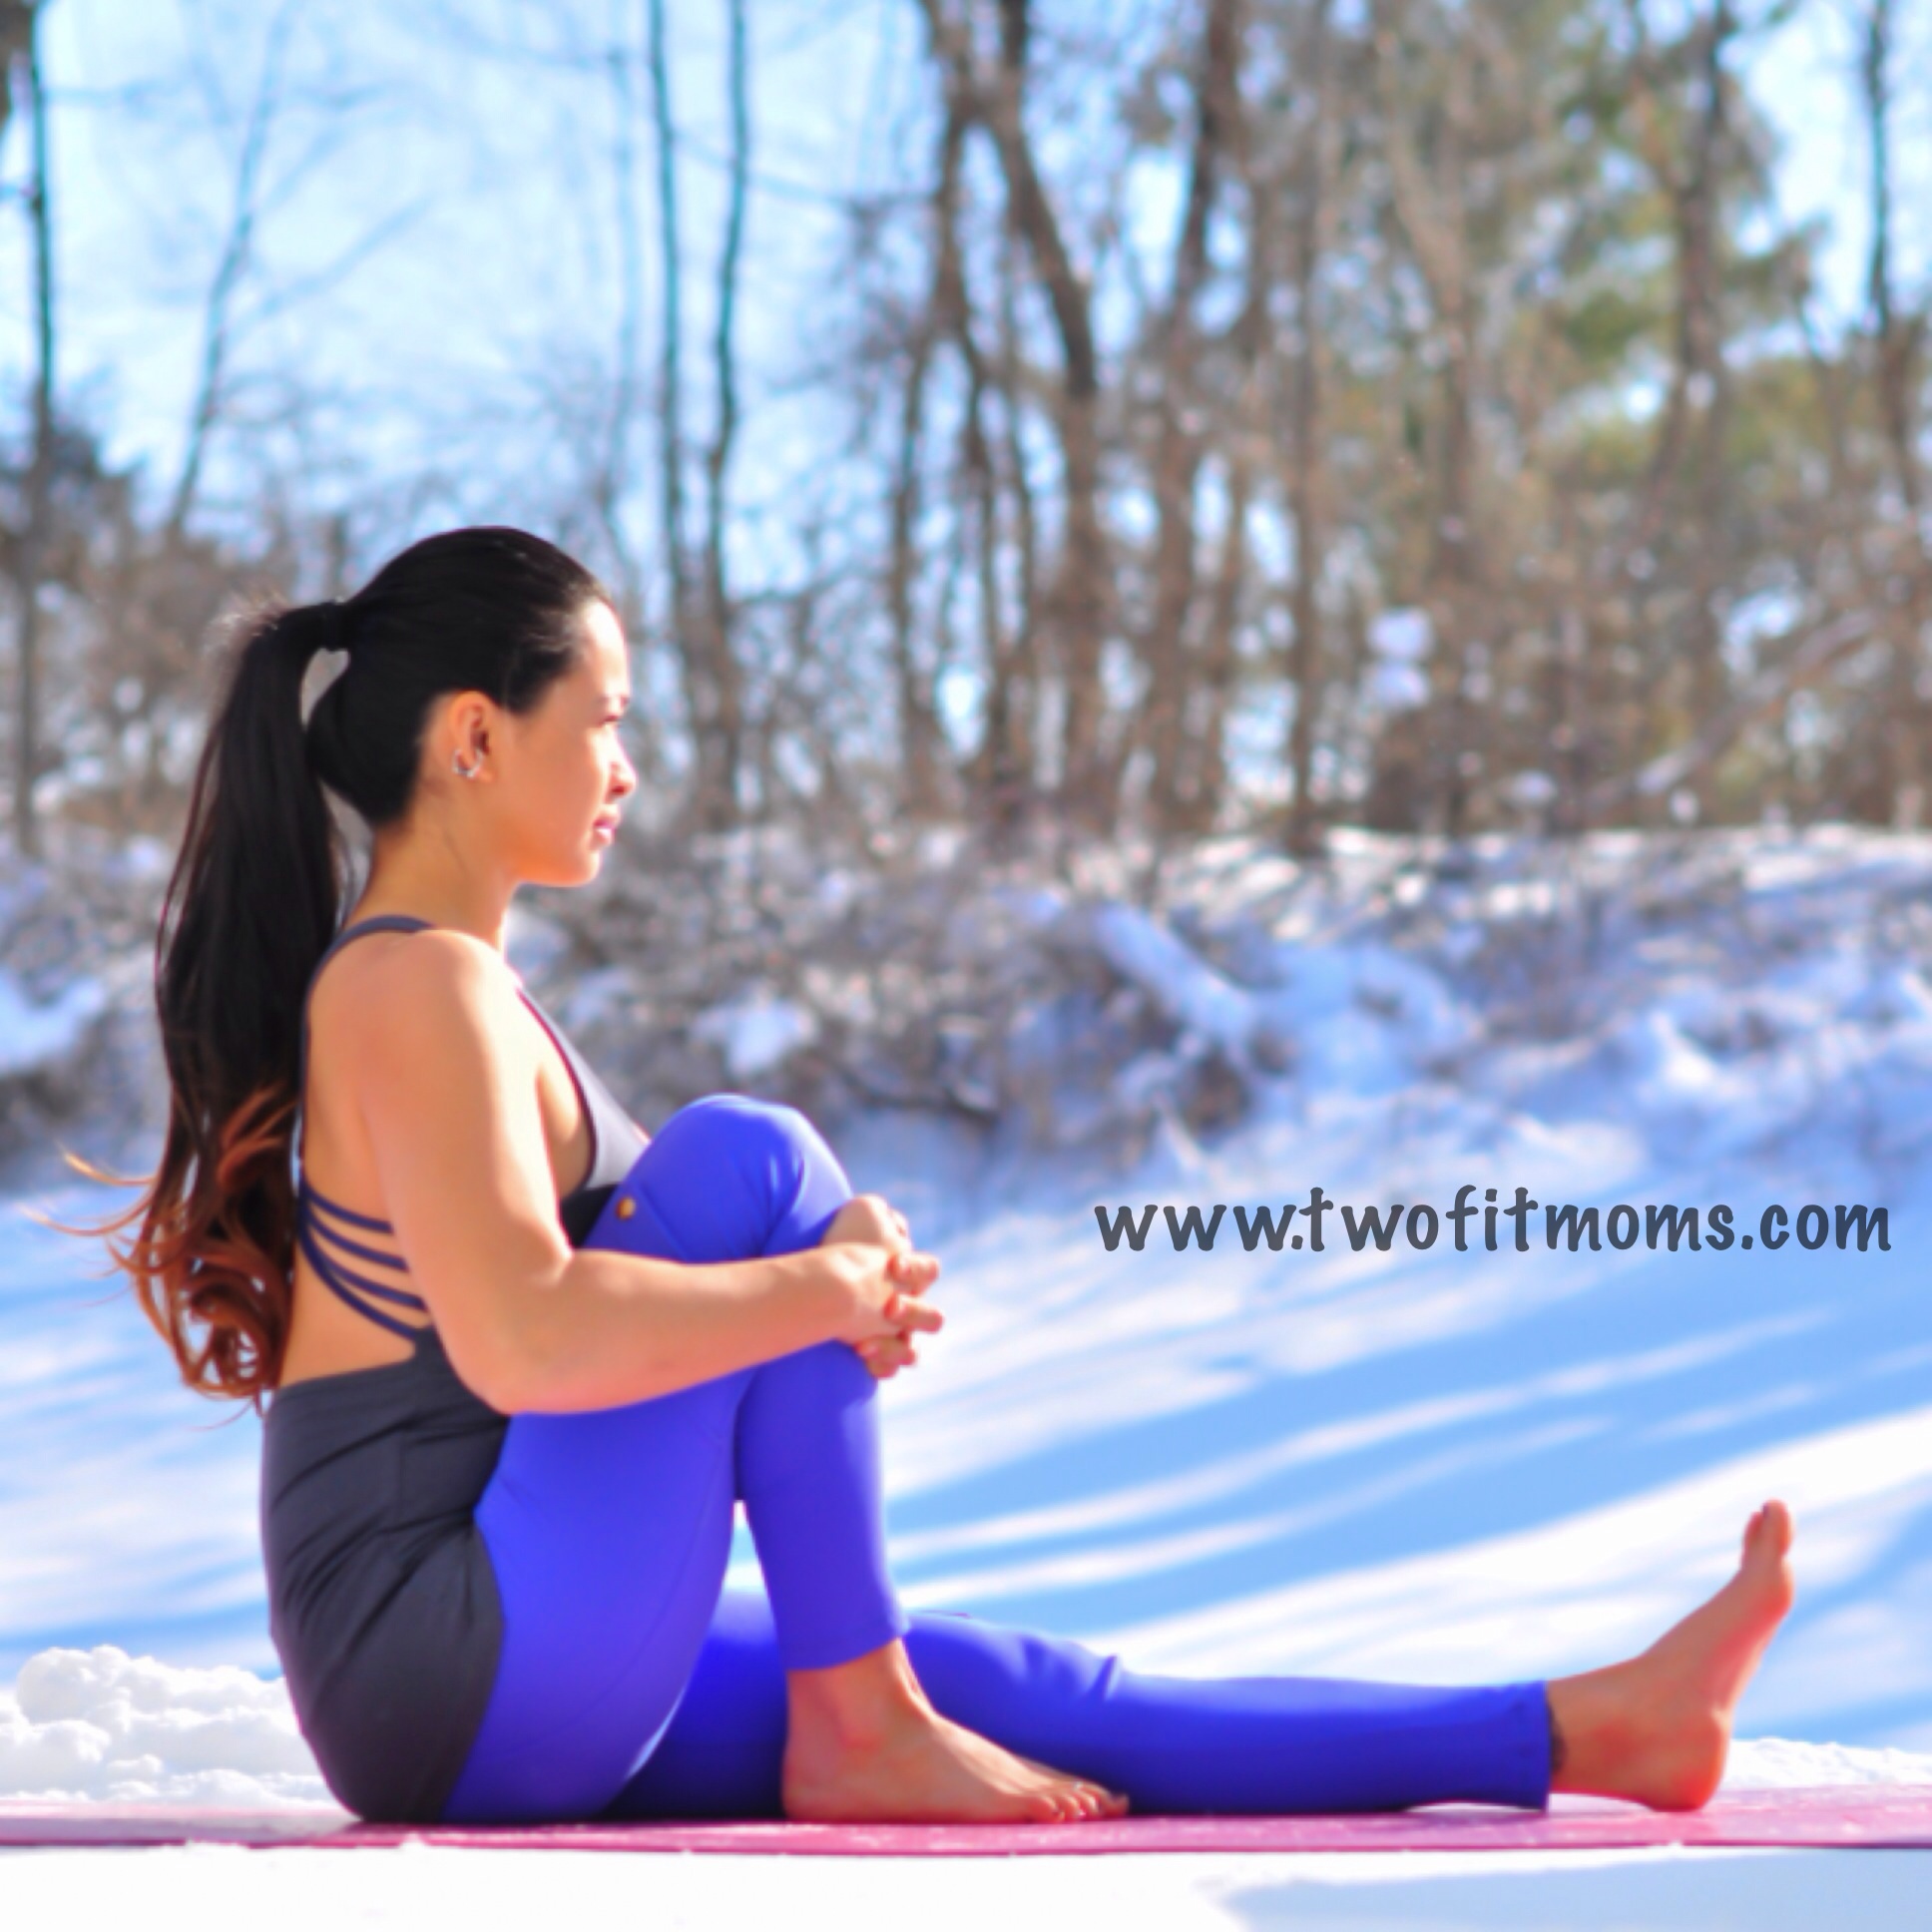
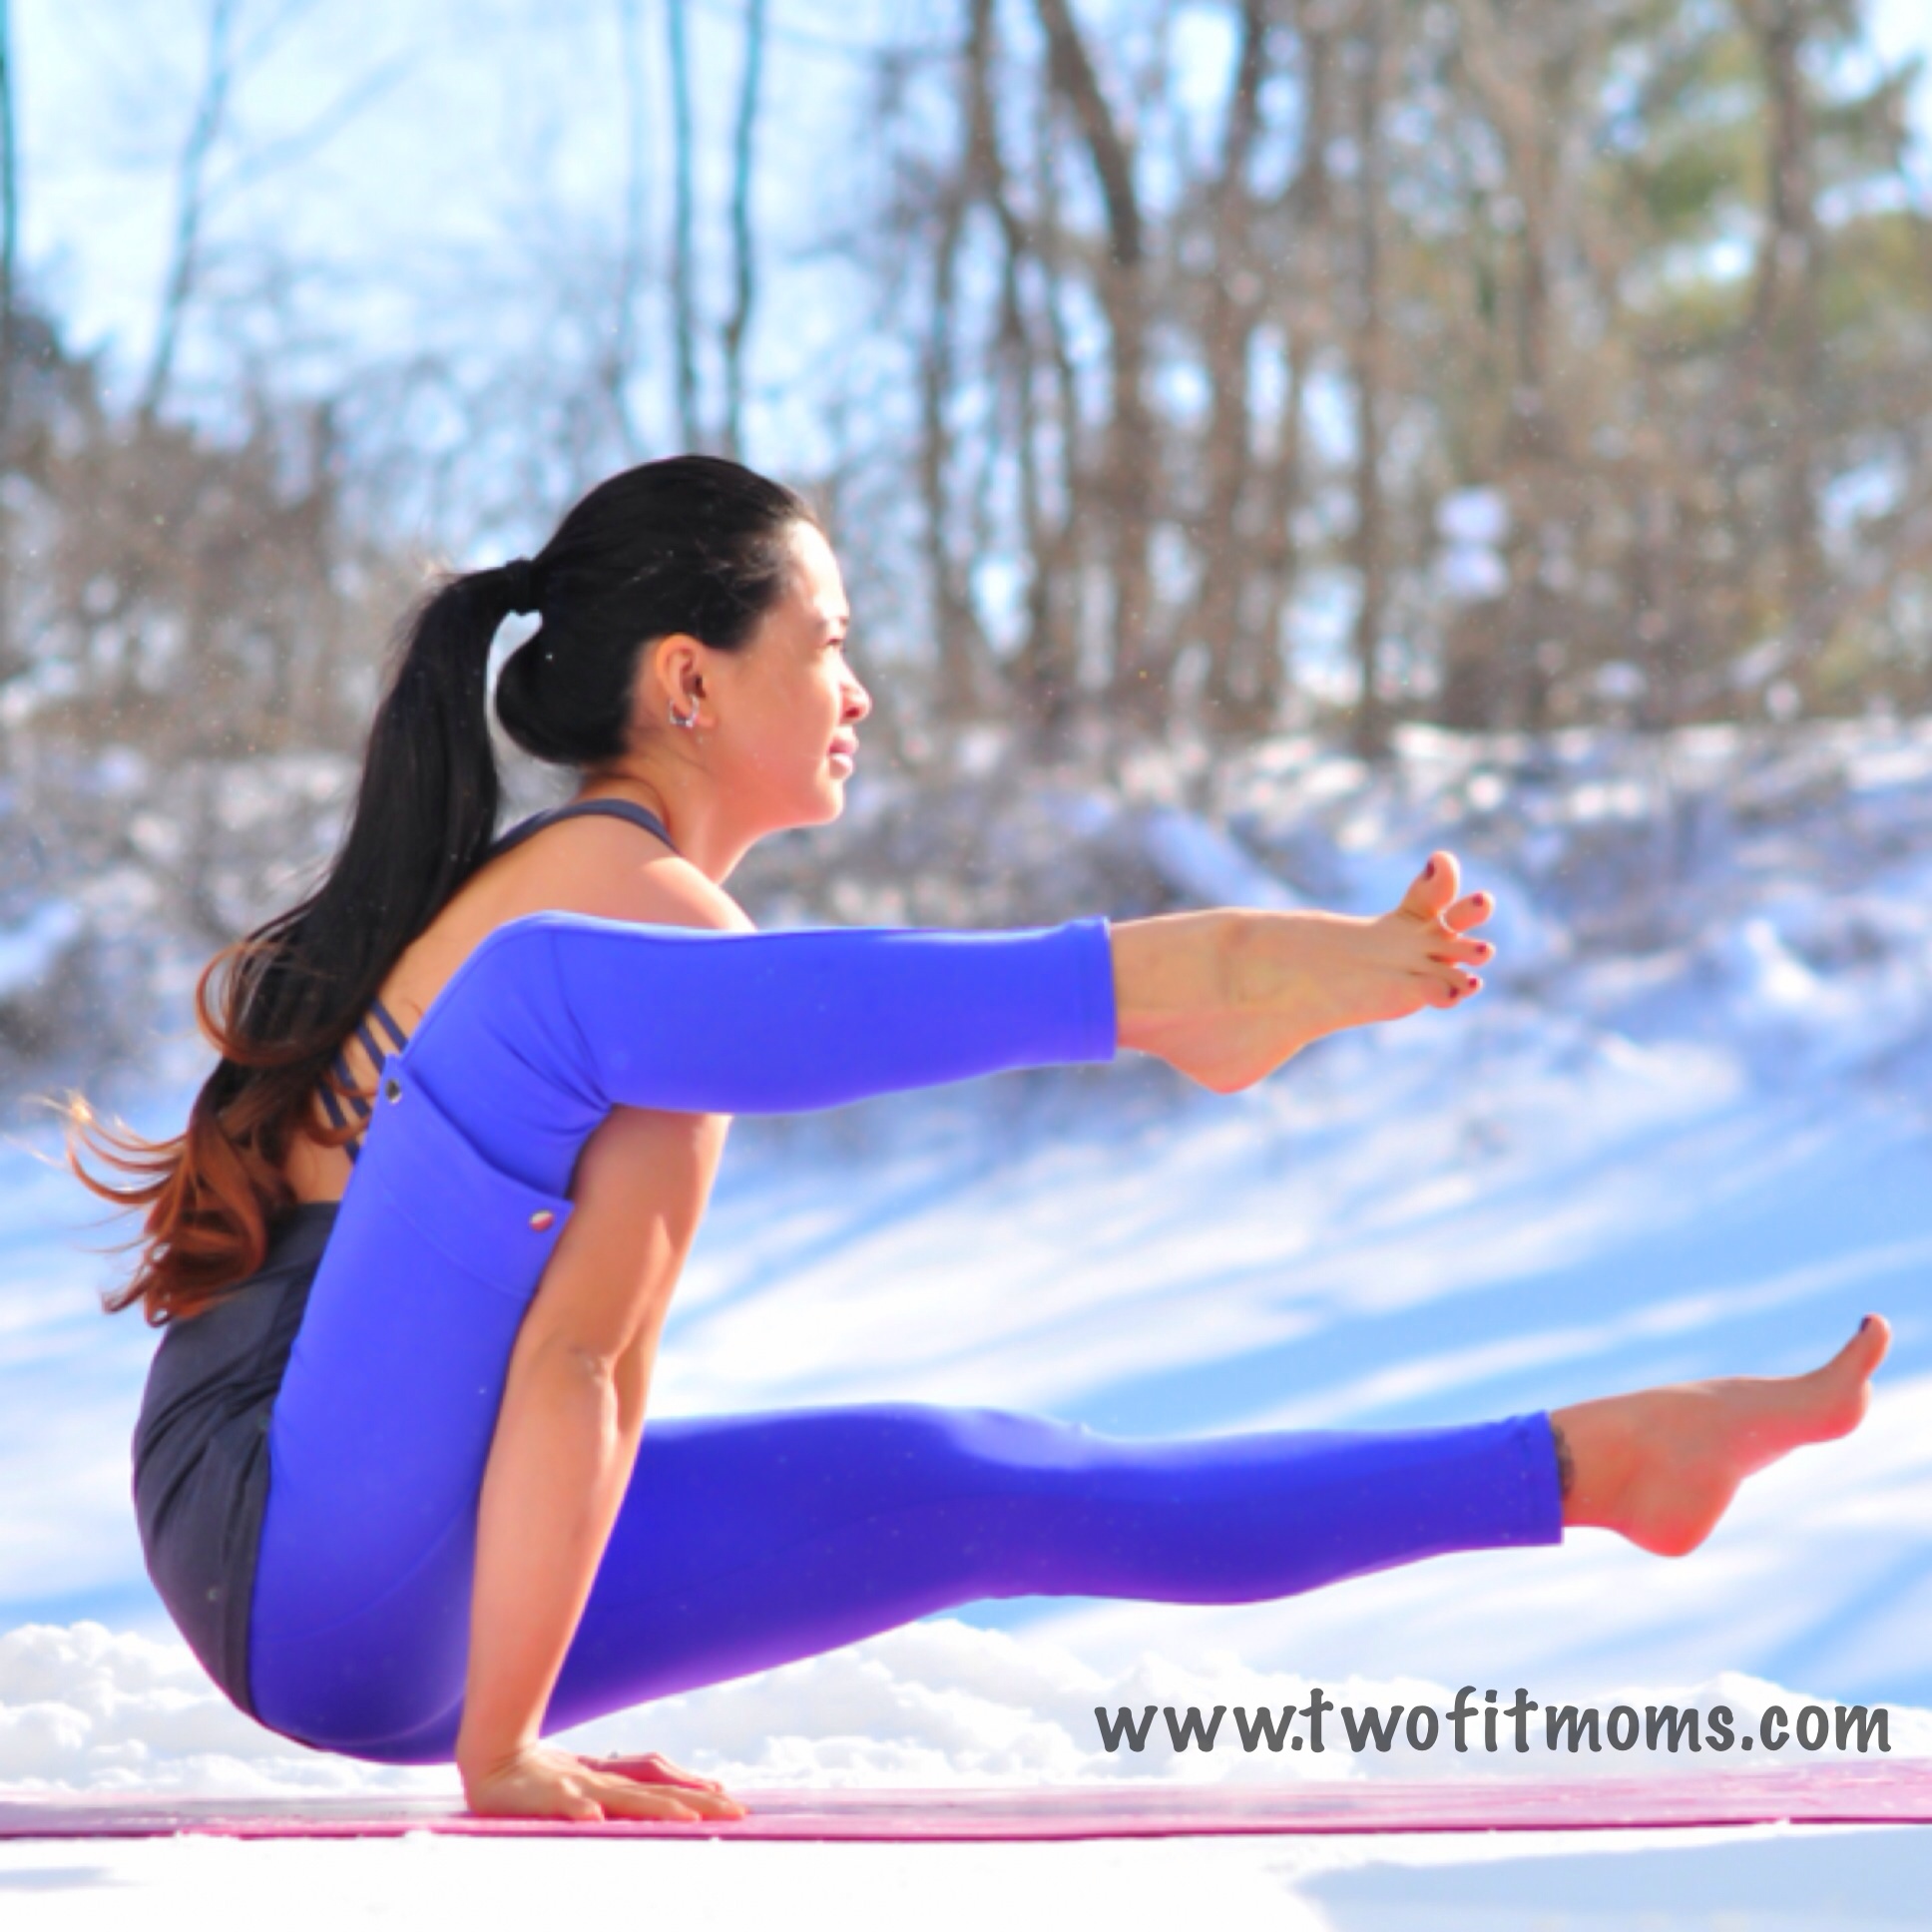
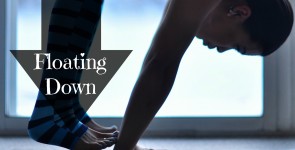
    Slowly floating the legs down from any inversion can be challenging. It takes time, patience and practice to develop the strength and body awareness to successfully lower down. It also requires being able to engage deep abdominal muscles.  Despite popular belief, you don’t need a six-pack to float down!  And, once you float down, floating up will likely follow — it did for me!

    DSC_1228a

    What muscles do we need to engage?

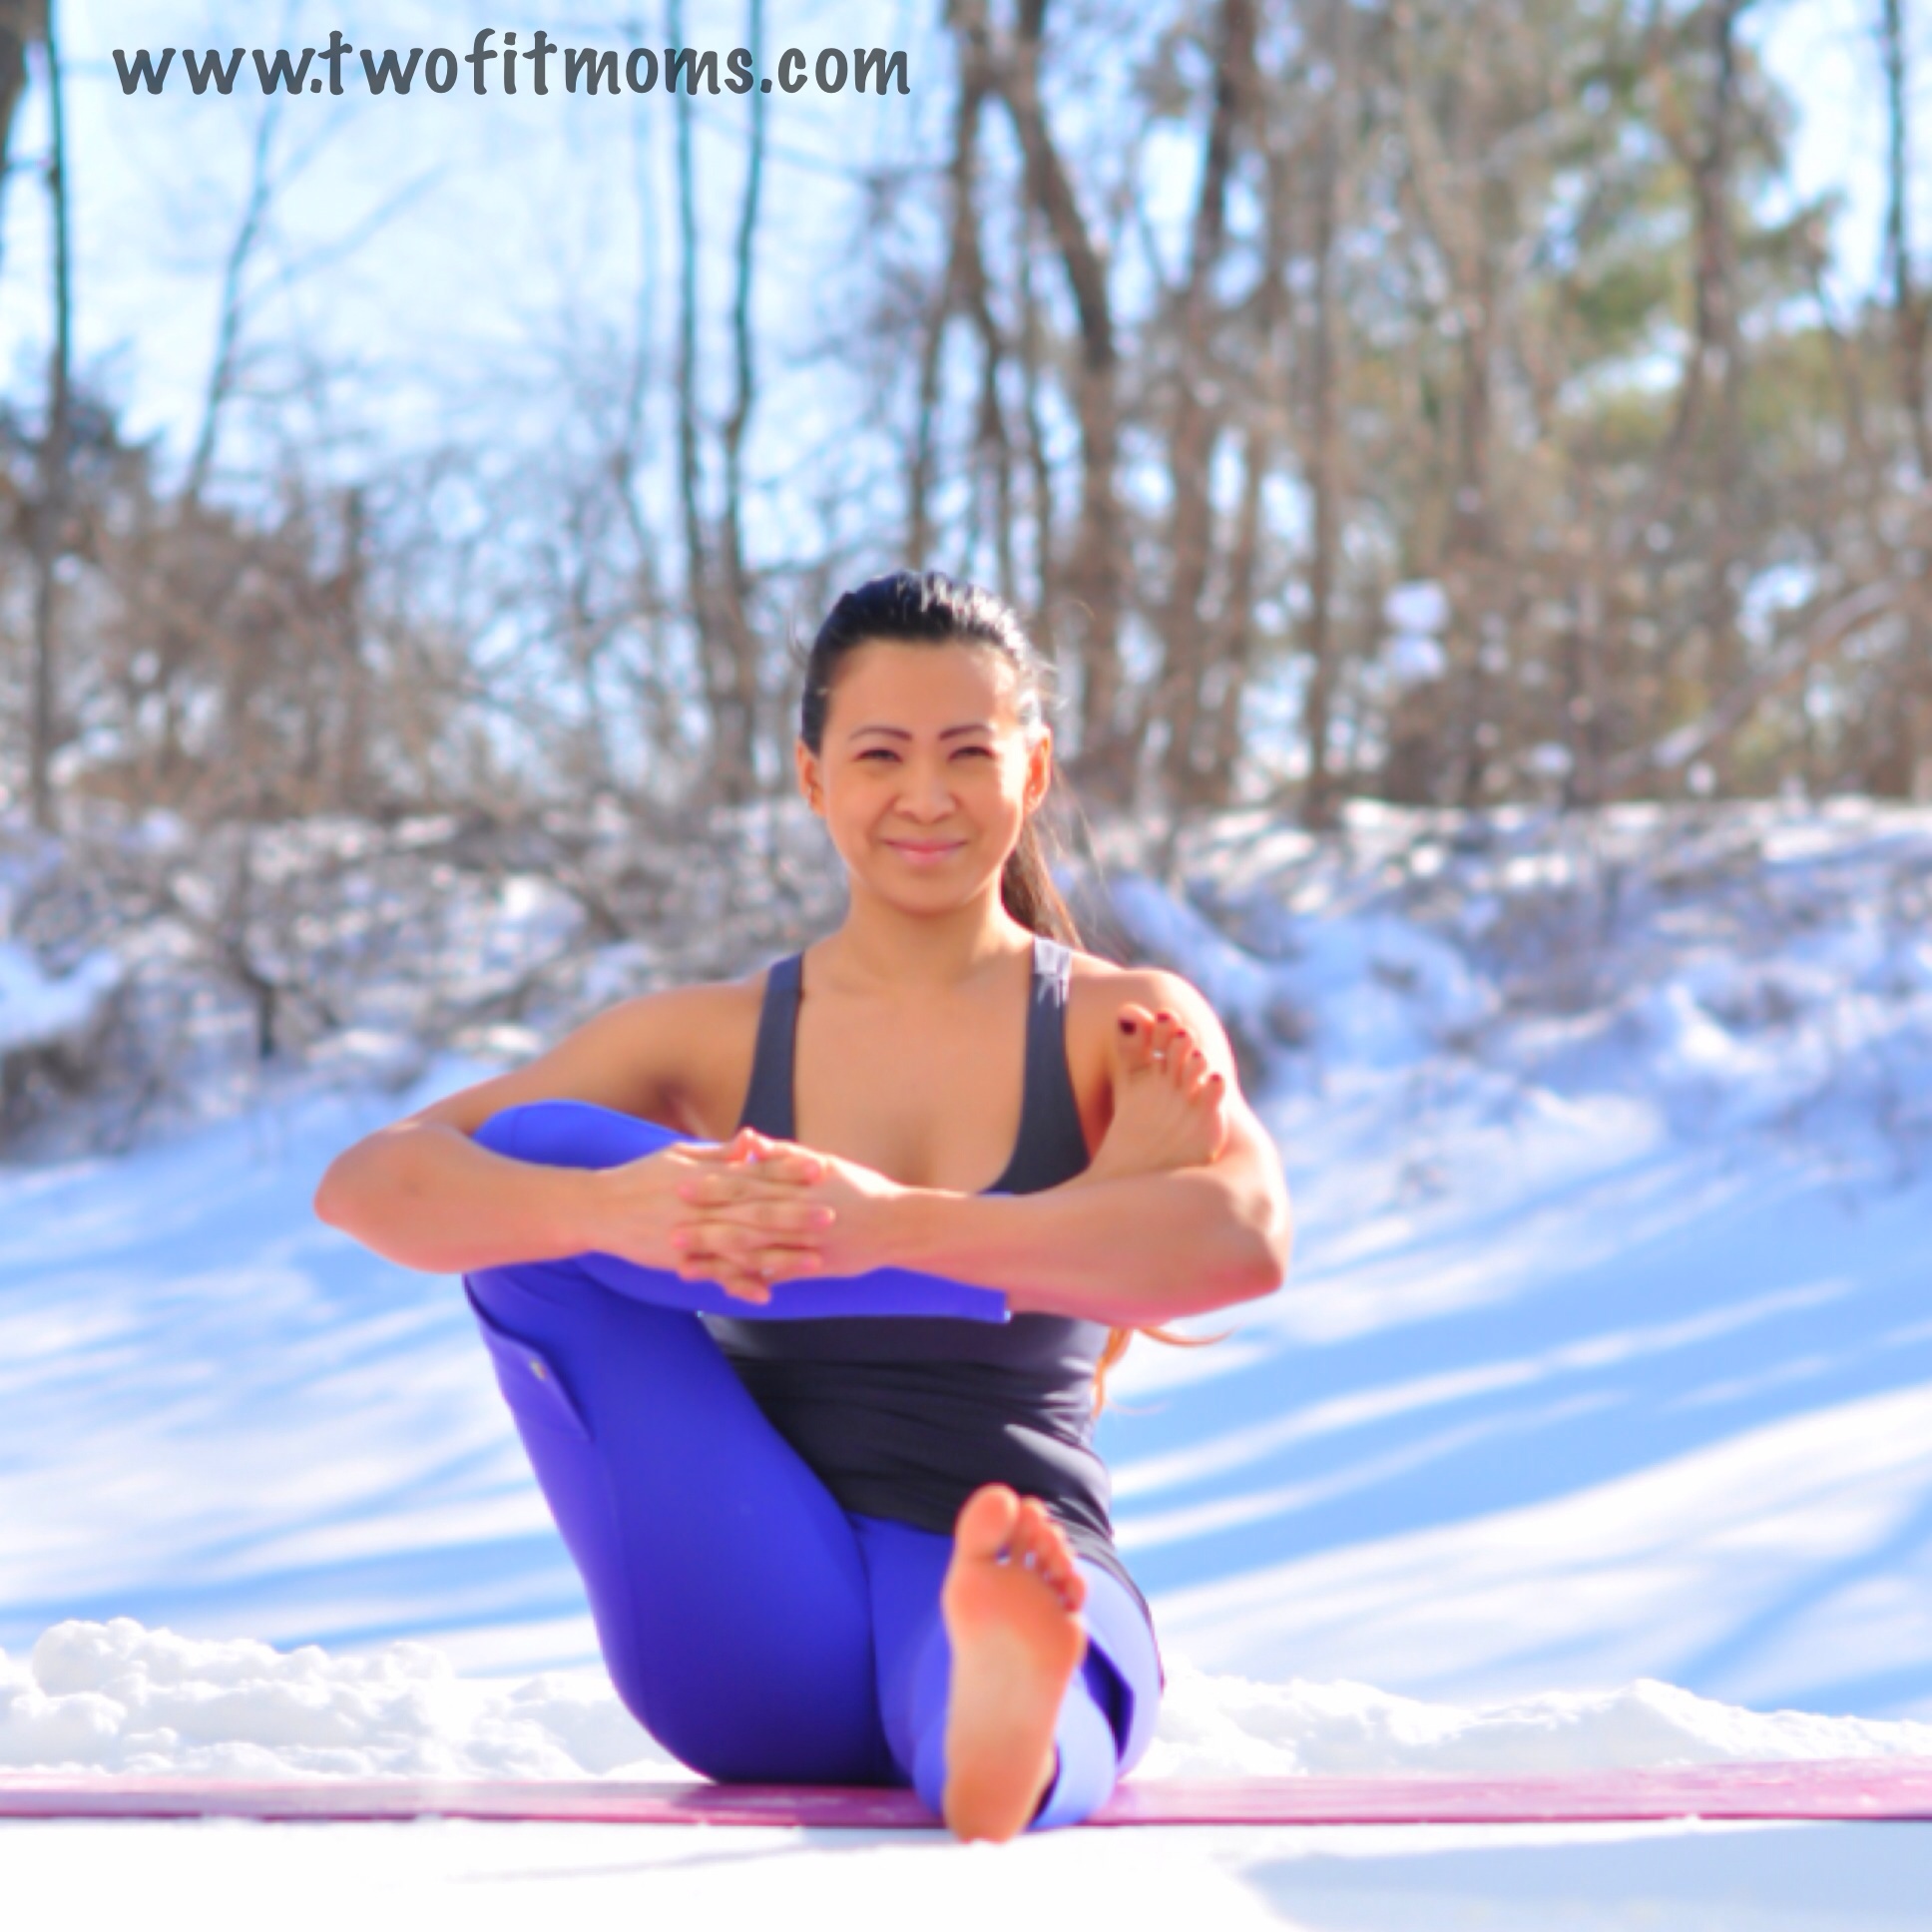
    There are a total of six abdominal muscles in your body; from deepest to superficial they are the the transversus abdominis, the internal obliques, the external obliques and the rectus abdominis. The deeper the muscles, the more impact they will have on your posture and maintaining a healthy spine. Here is a brief description of each:

    Transversus Abdominis: It is the deepest of your abdominal muscles, and it wraps around your torso. You cannot feel this muscle from the outside. The best description I’ve read for this muscle is that it is like a back support belt but for the front of your body.

    Internal Obliques: These are a pair of muscles that run alongside your torso that help your spine twist and move laterally.

    External Obliques: These are another pair of muscles that also run alongside your torso and help your spine twist and move laterally.

    Rectus Abdominis: These are the most superficial muscles of the group and the ones that make up the “six-pack” abs.

    Do I need six-pack abs to do this?

    Quite simply… No, you do not. In fact, a six-pack will help you the LEAST when working with floating down or pressing up for that matter. It is the ability to engage the transverse abdominal muscle that will have the most impact on your inversion practice.

    Engage those bandhas?

    Before going through my yoga teacher training, I’d always hear teachers say “engage your bandhas”! If you haven’t been practicing long, more than likely your first reaction is “what the heck does that mean??!! Simply put… a “bandha” is a lock in the body that helps seal in the energy and engages the muscles.

    The two bandhas that most teachers will reference during inversions are the Mula Bandha and the Uddiyana Bandha. In very simple terms, the Mula Bandha occurs in the pelvic area and low belly while the Uddiyana Bandha occurs in the upper abdominals. The best way to describe the Mula Bandha is the feeling you get when you have to go to the bathroom and are holding it. The Uddiyana Bandha can be felt when you draw your navel up toward your heart while wrapping your lower ribs in towards one another.  I learned how to do this by placing my hands on my lower ribs, fingers facing in towards each other, and by making believe my hands were a corset.  As I exhaled and drew my navel up and in, I closed my hands towards one another.

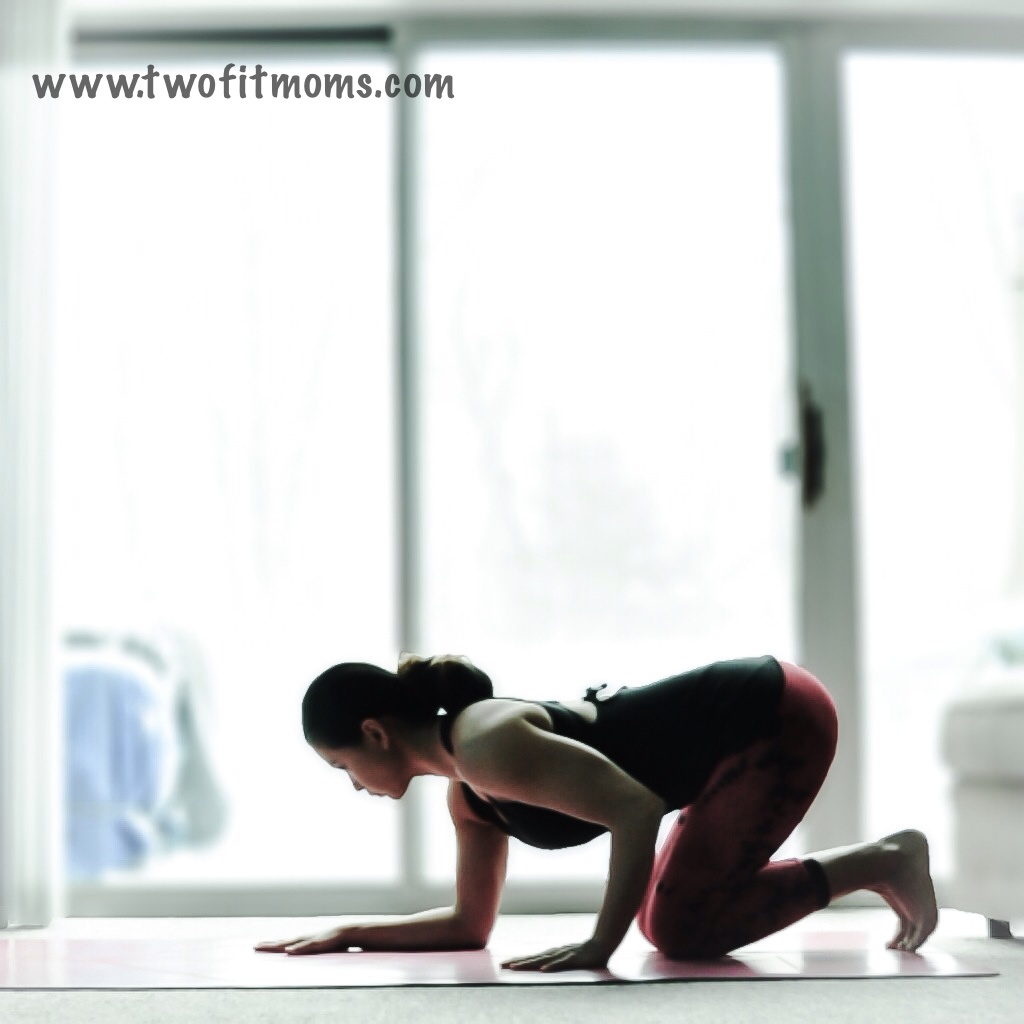
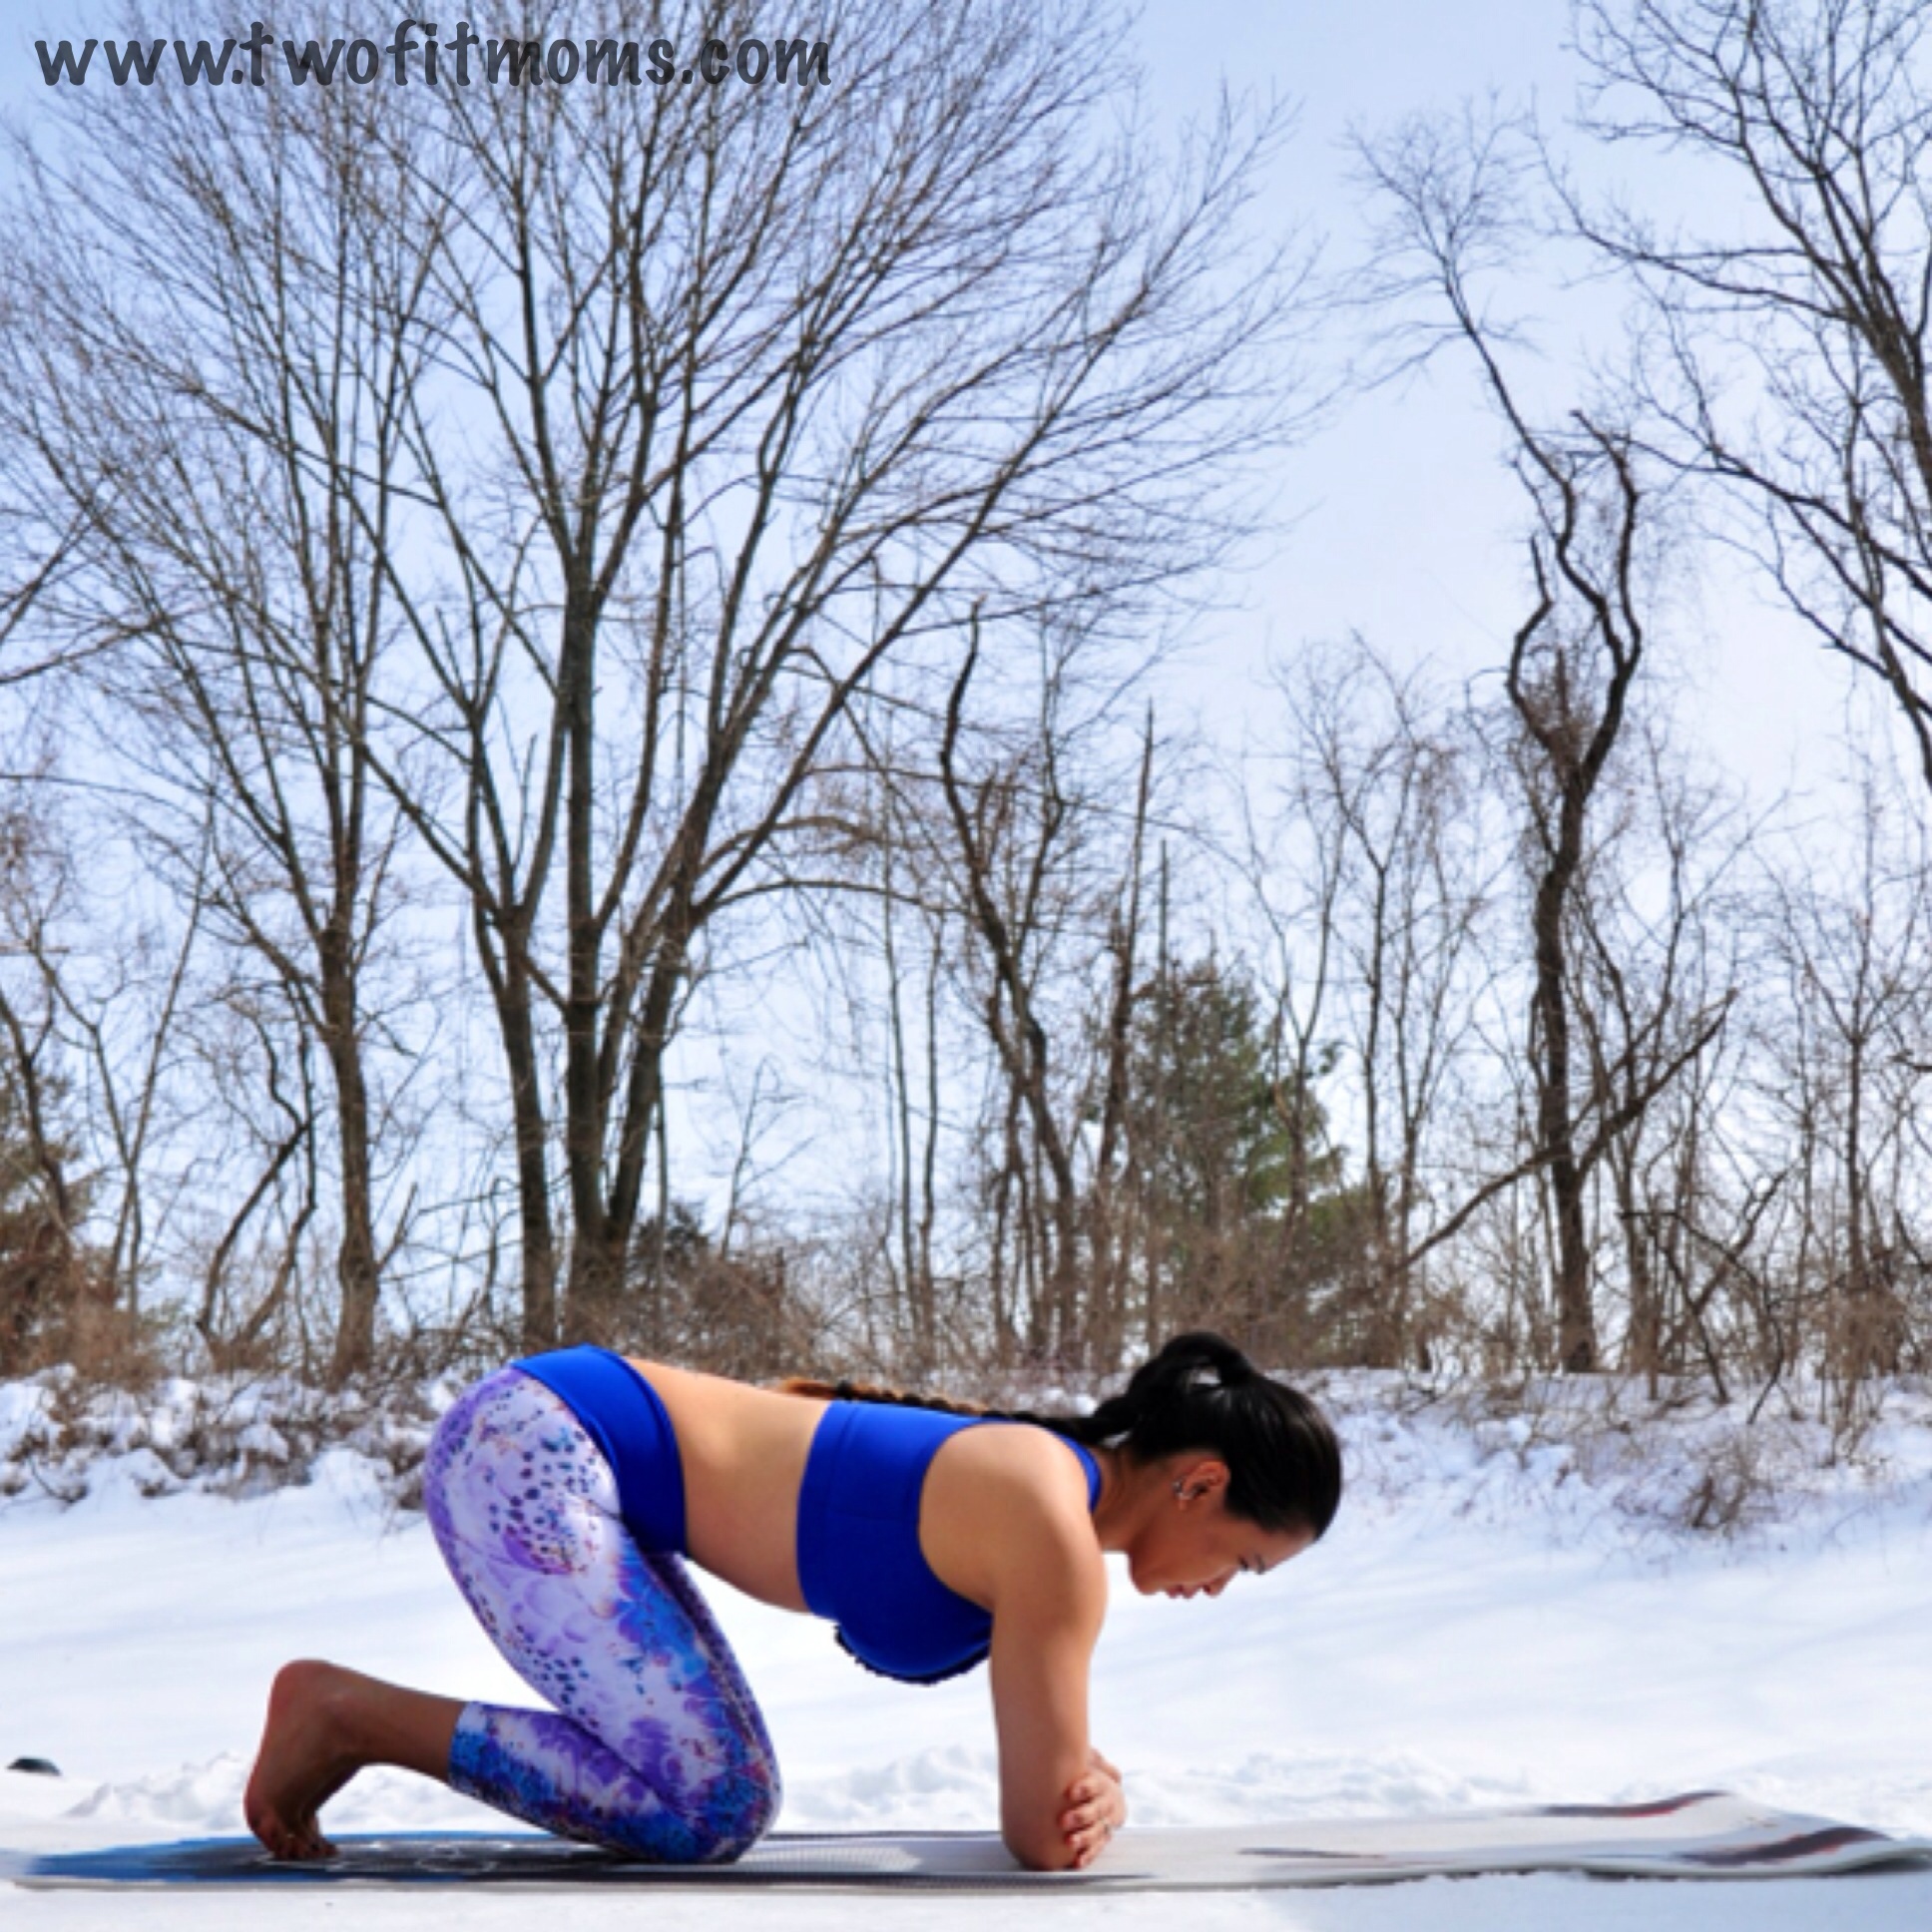
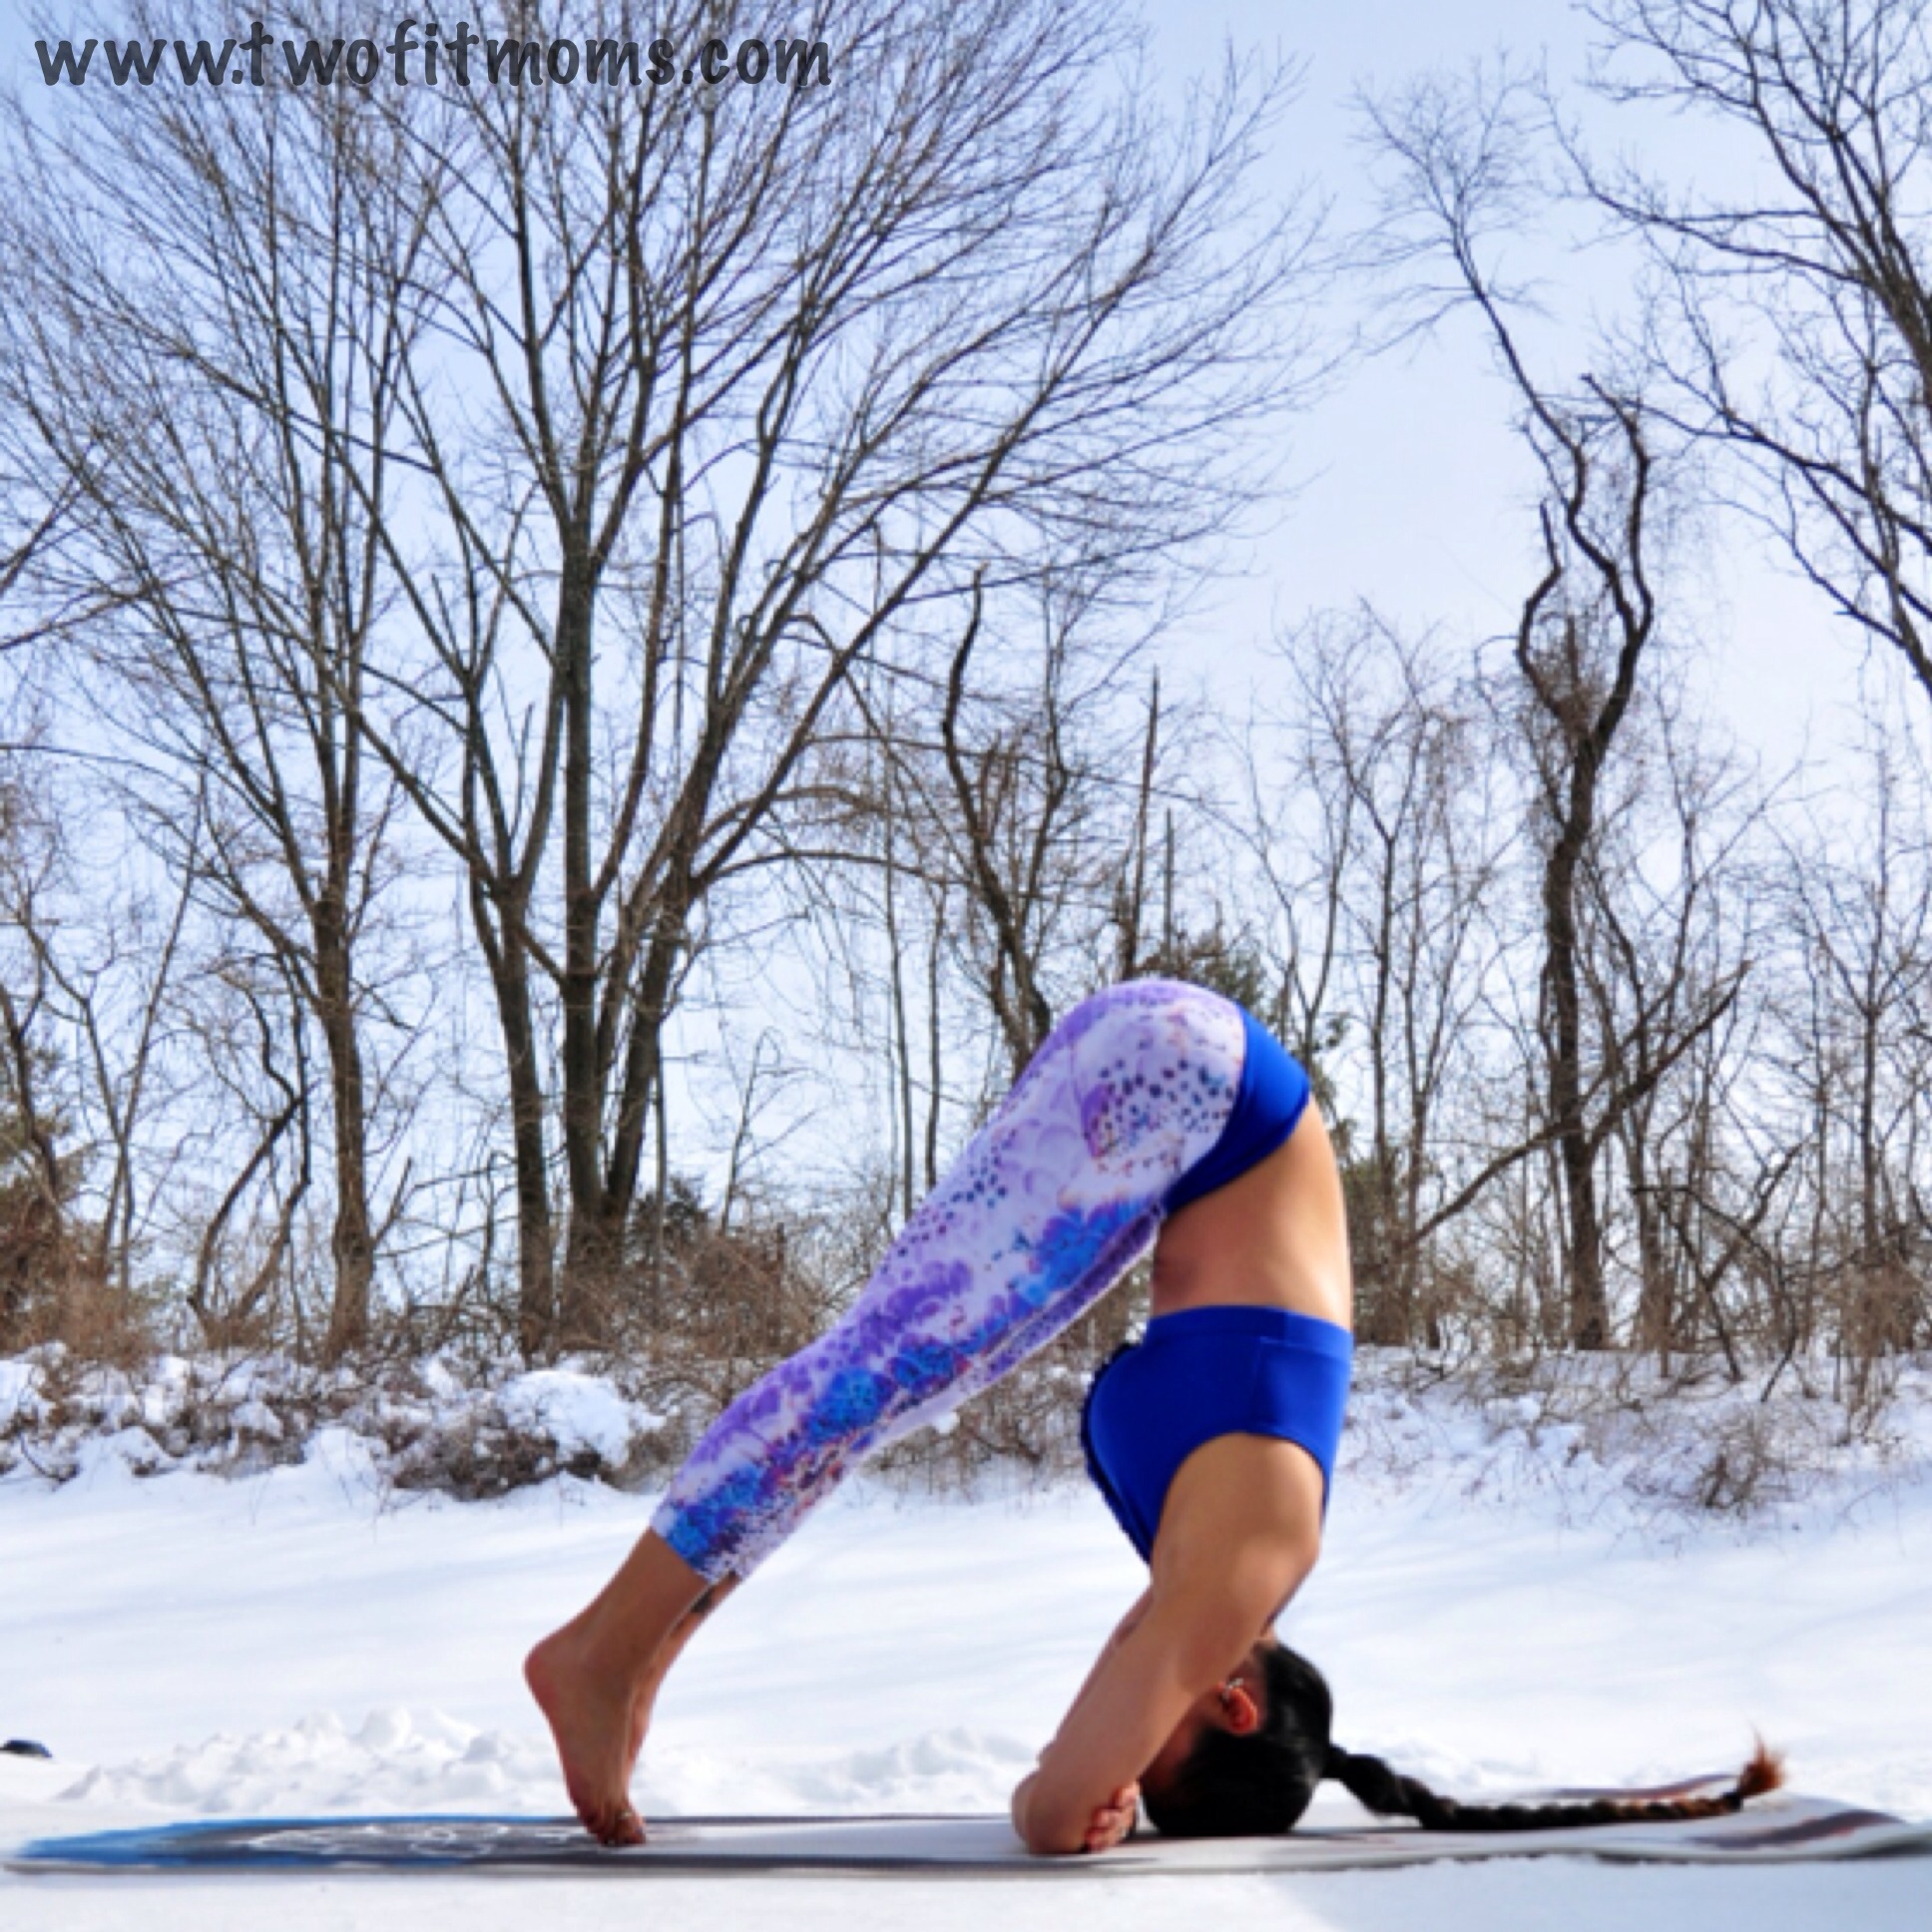
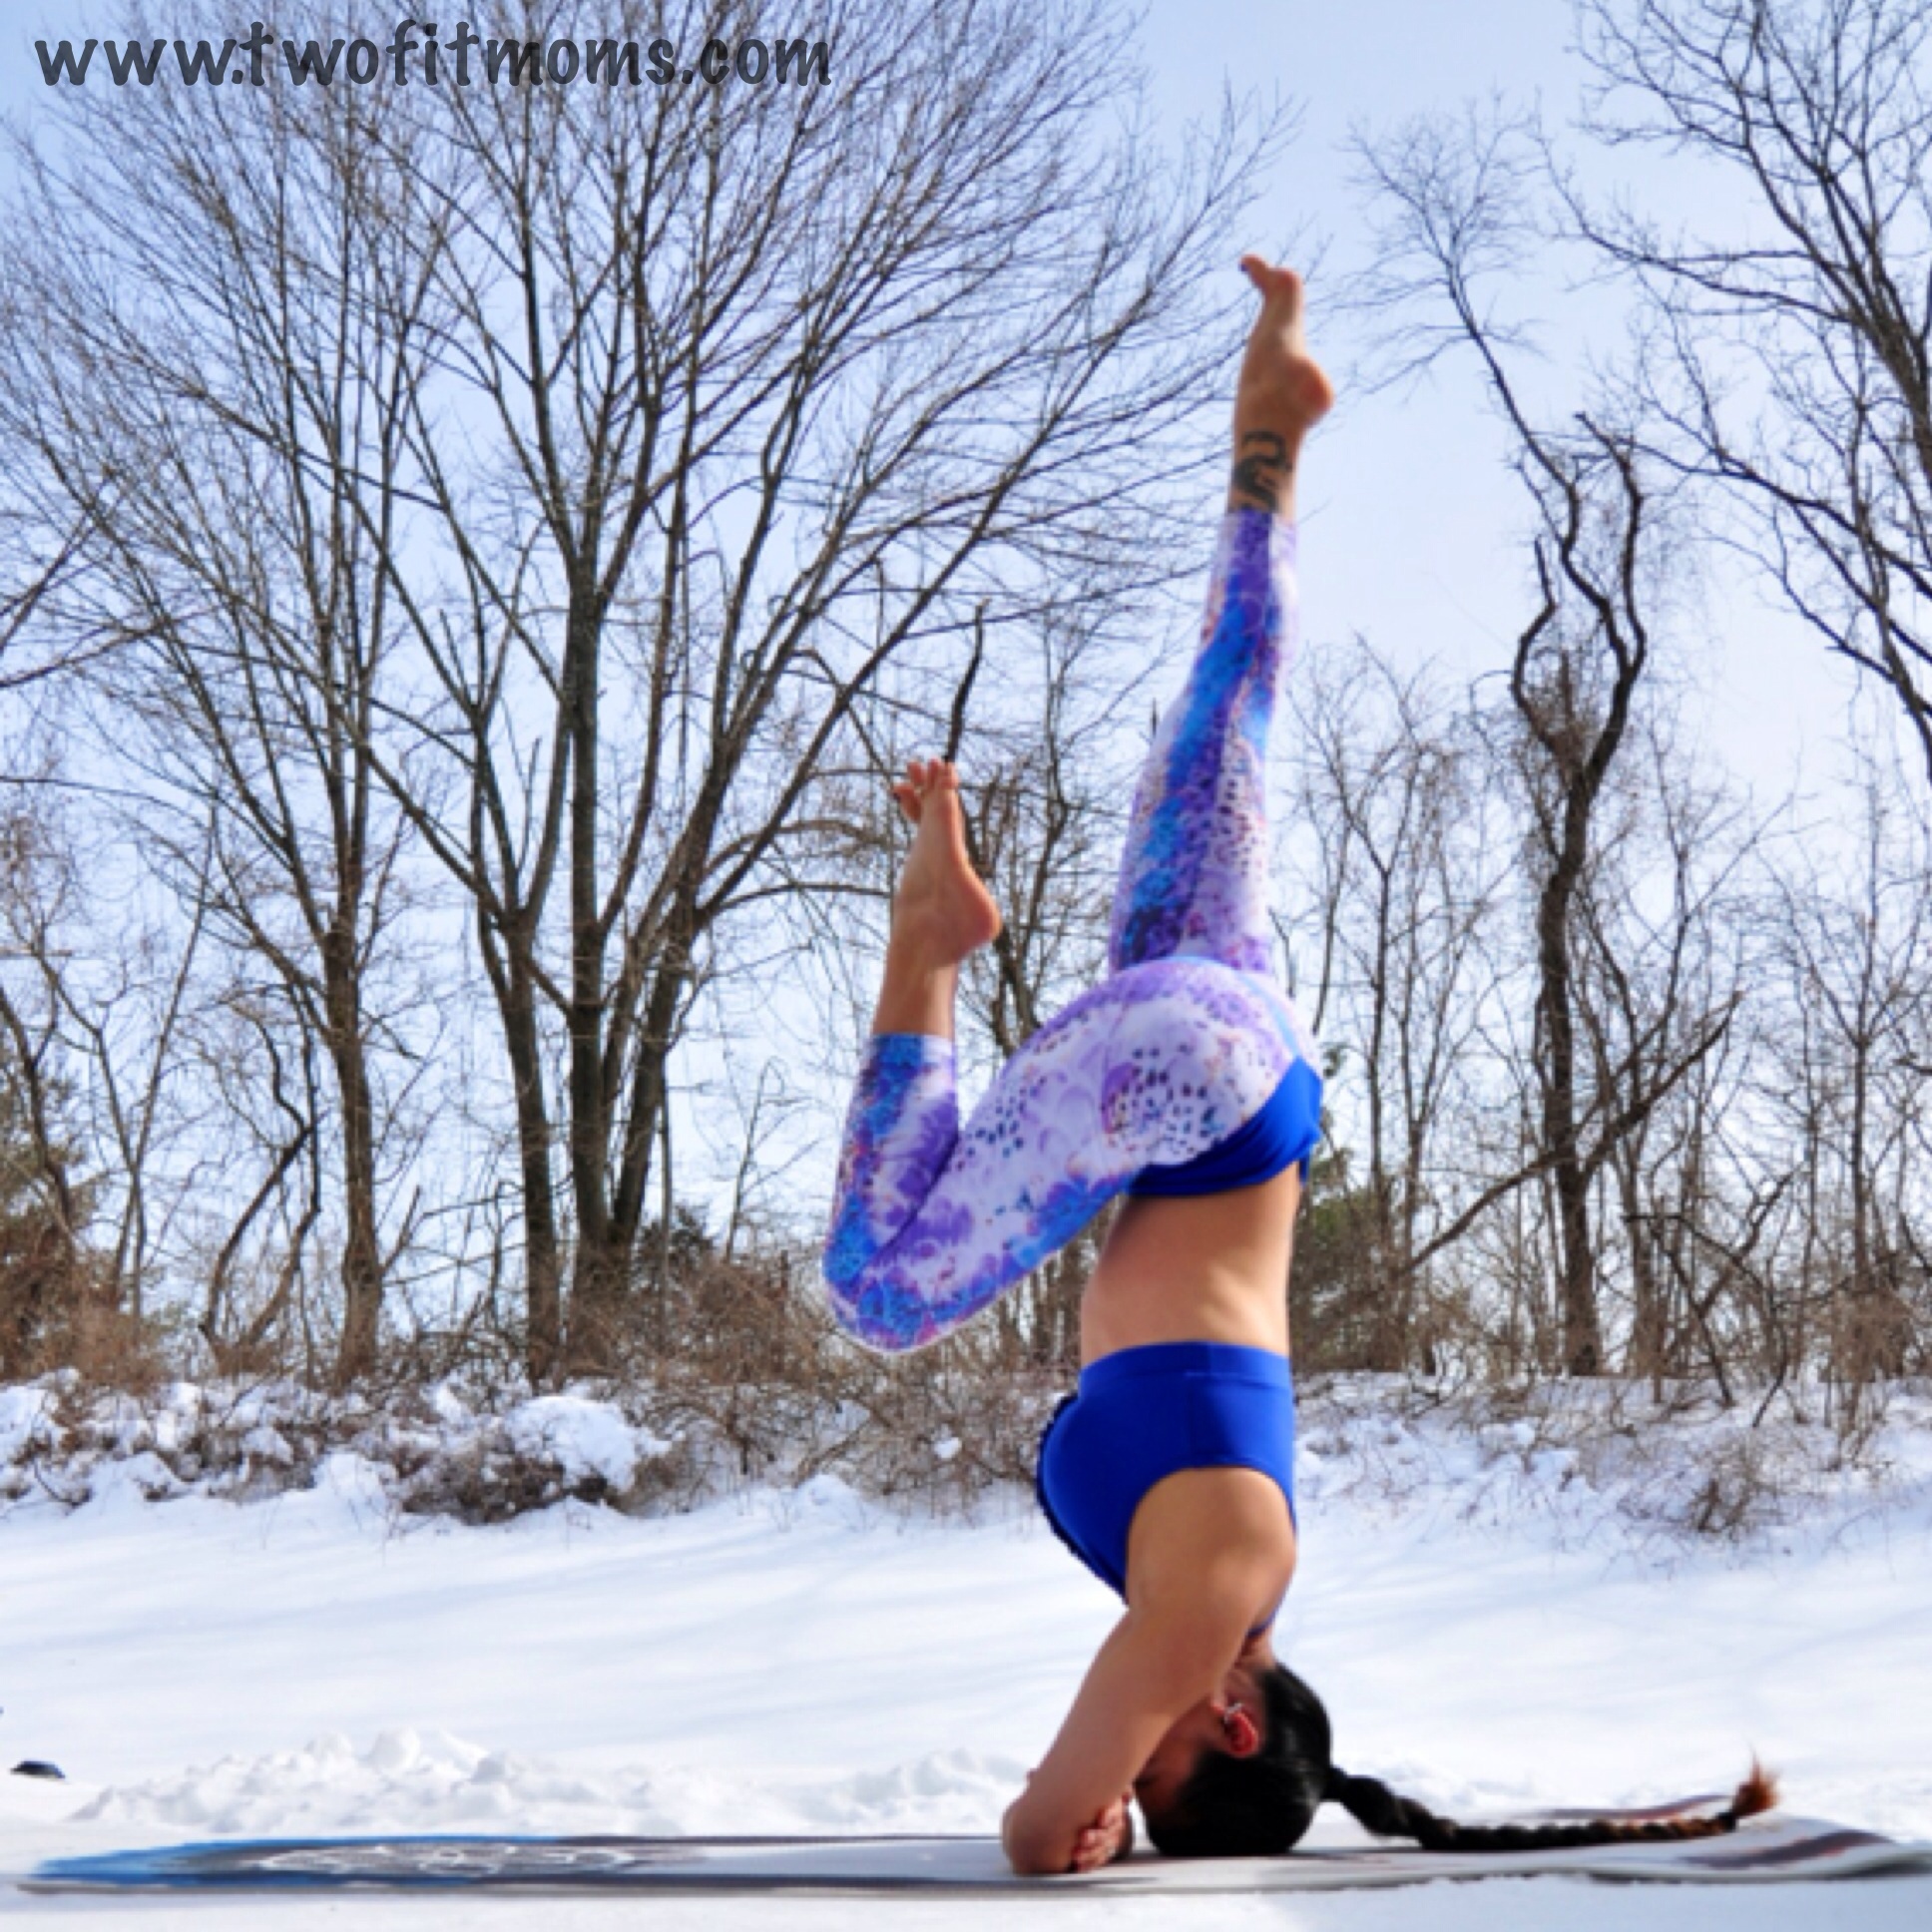
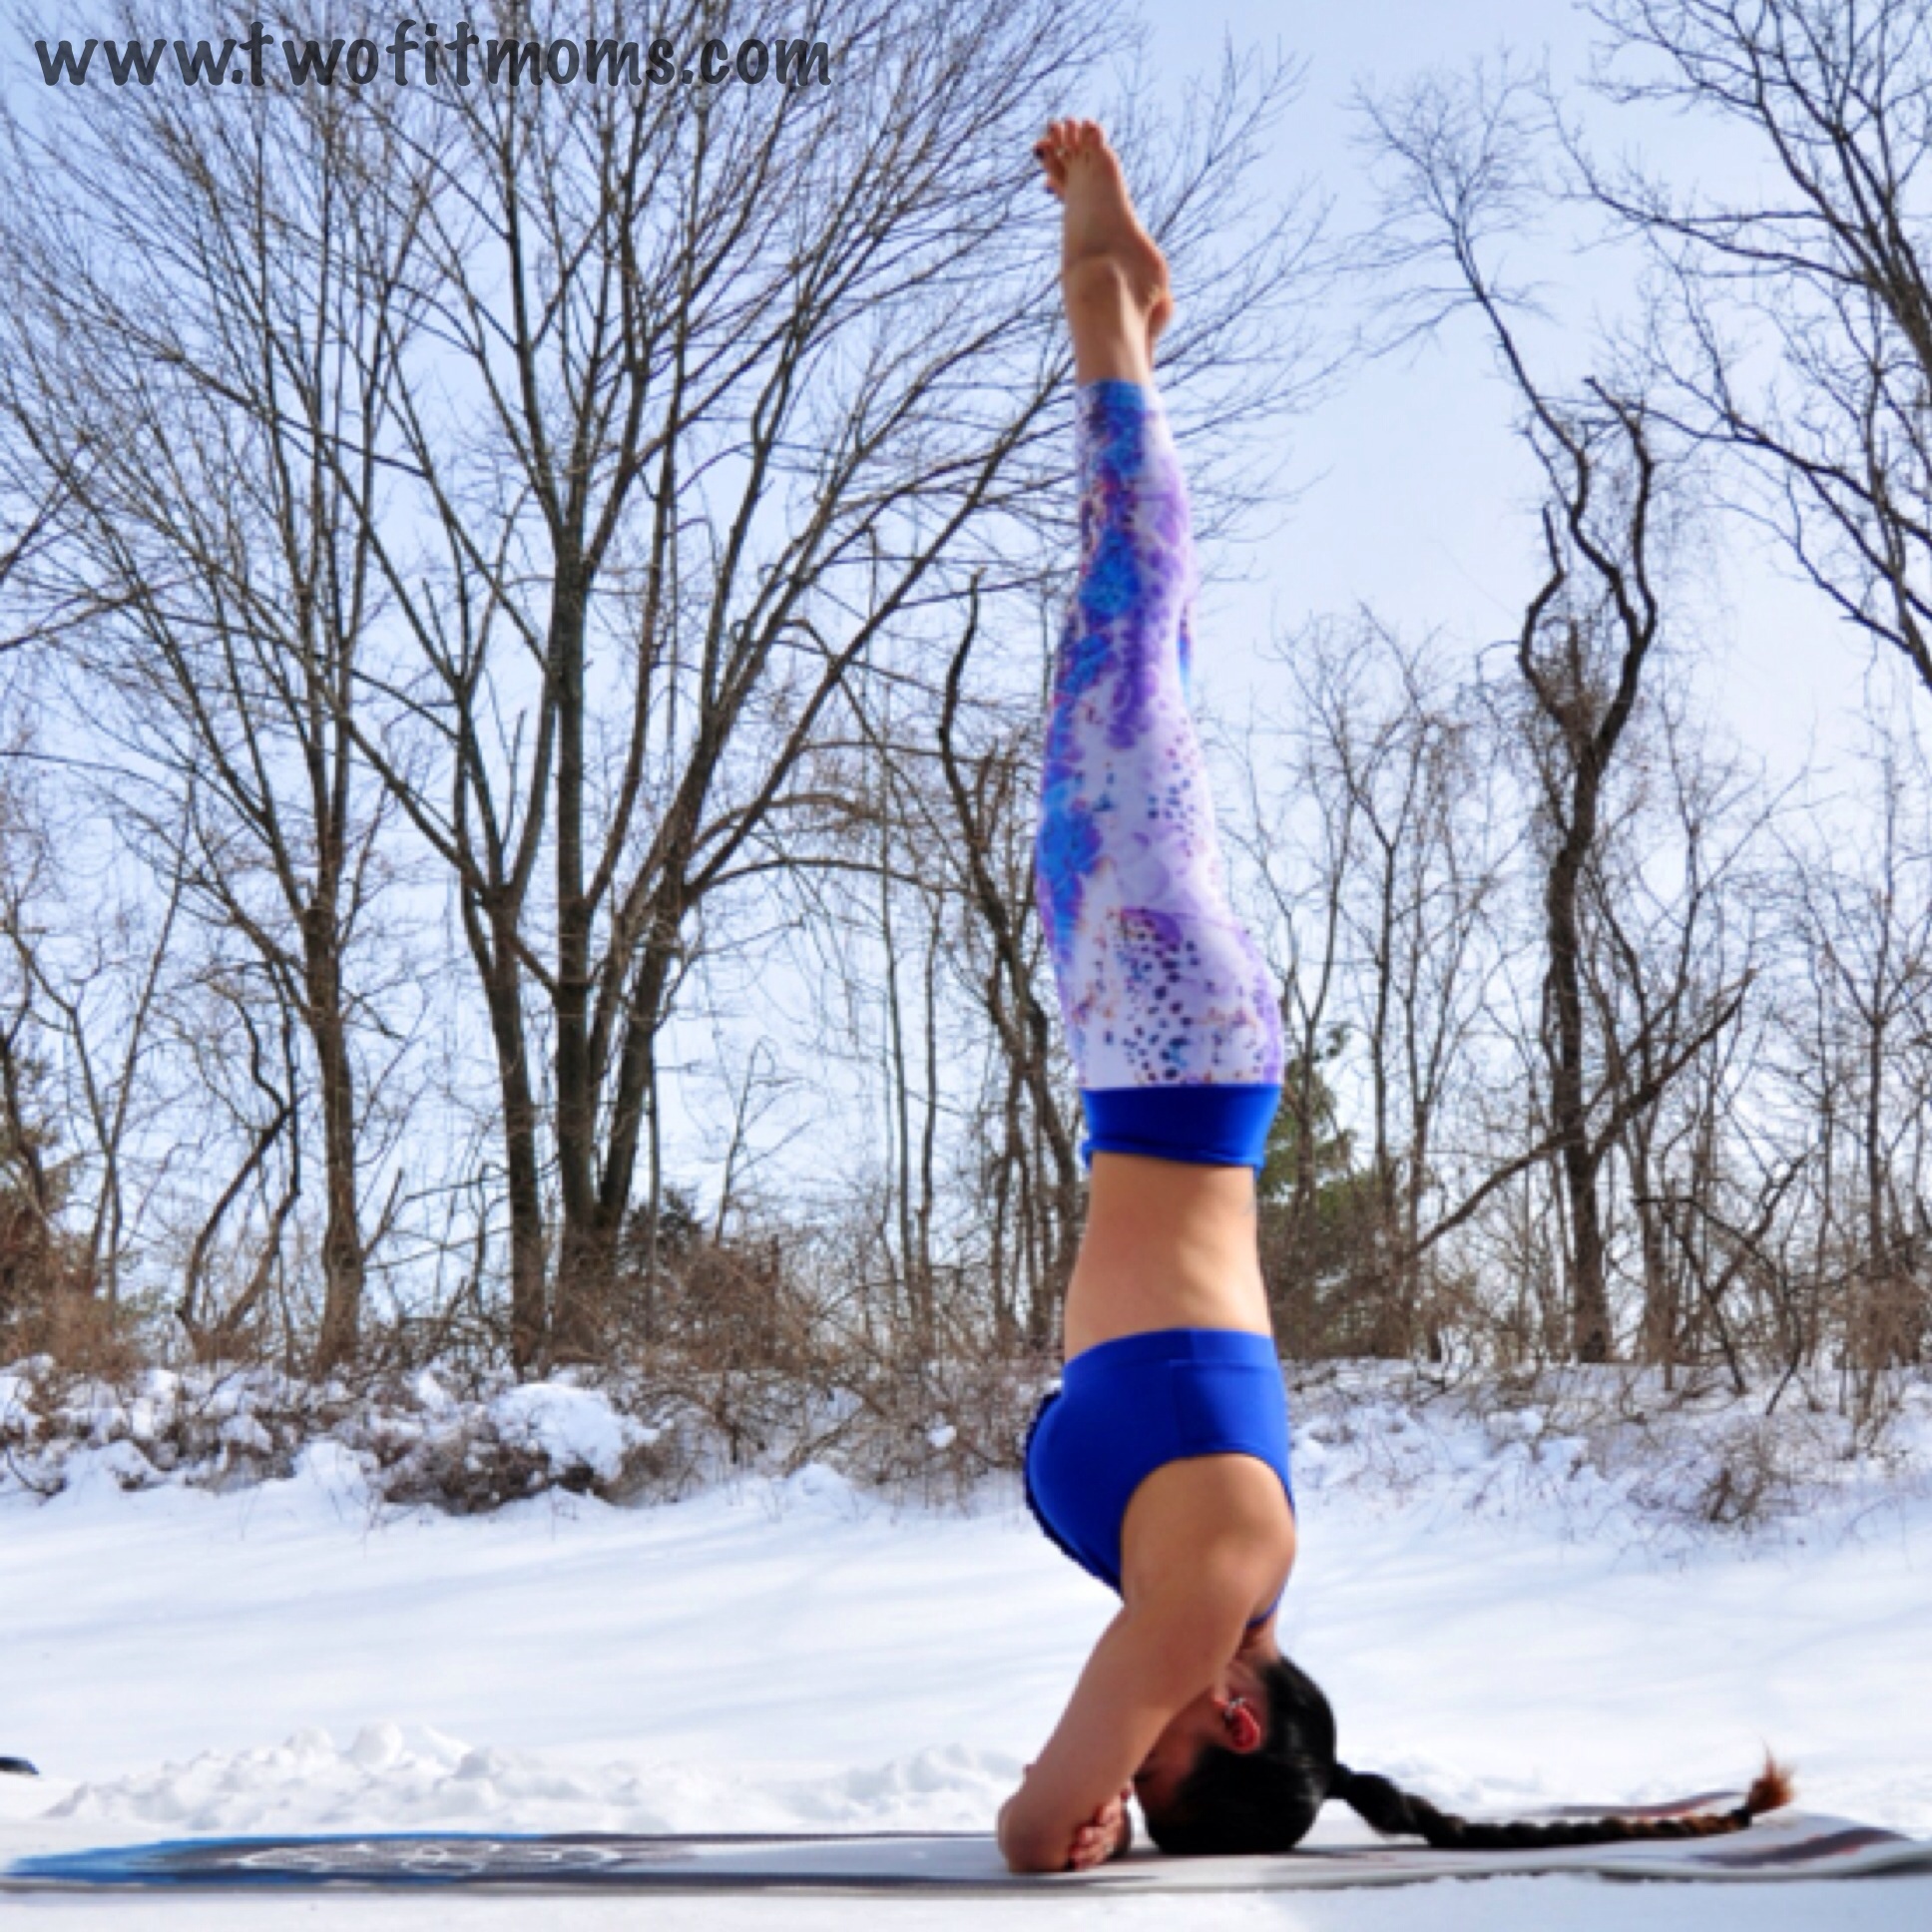
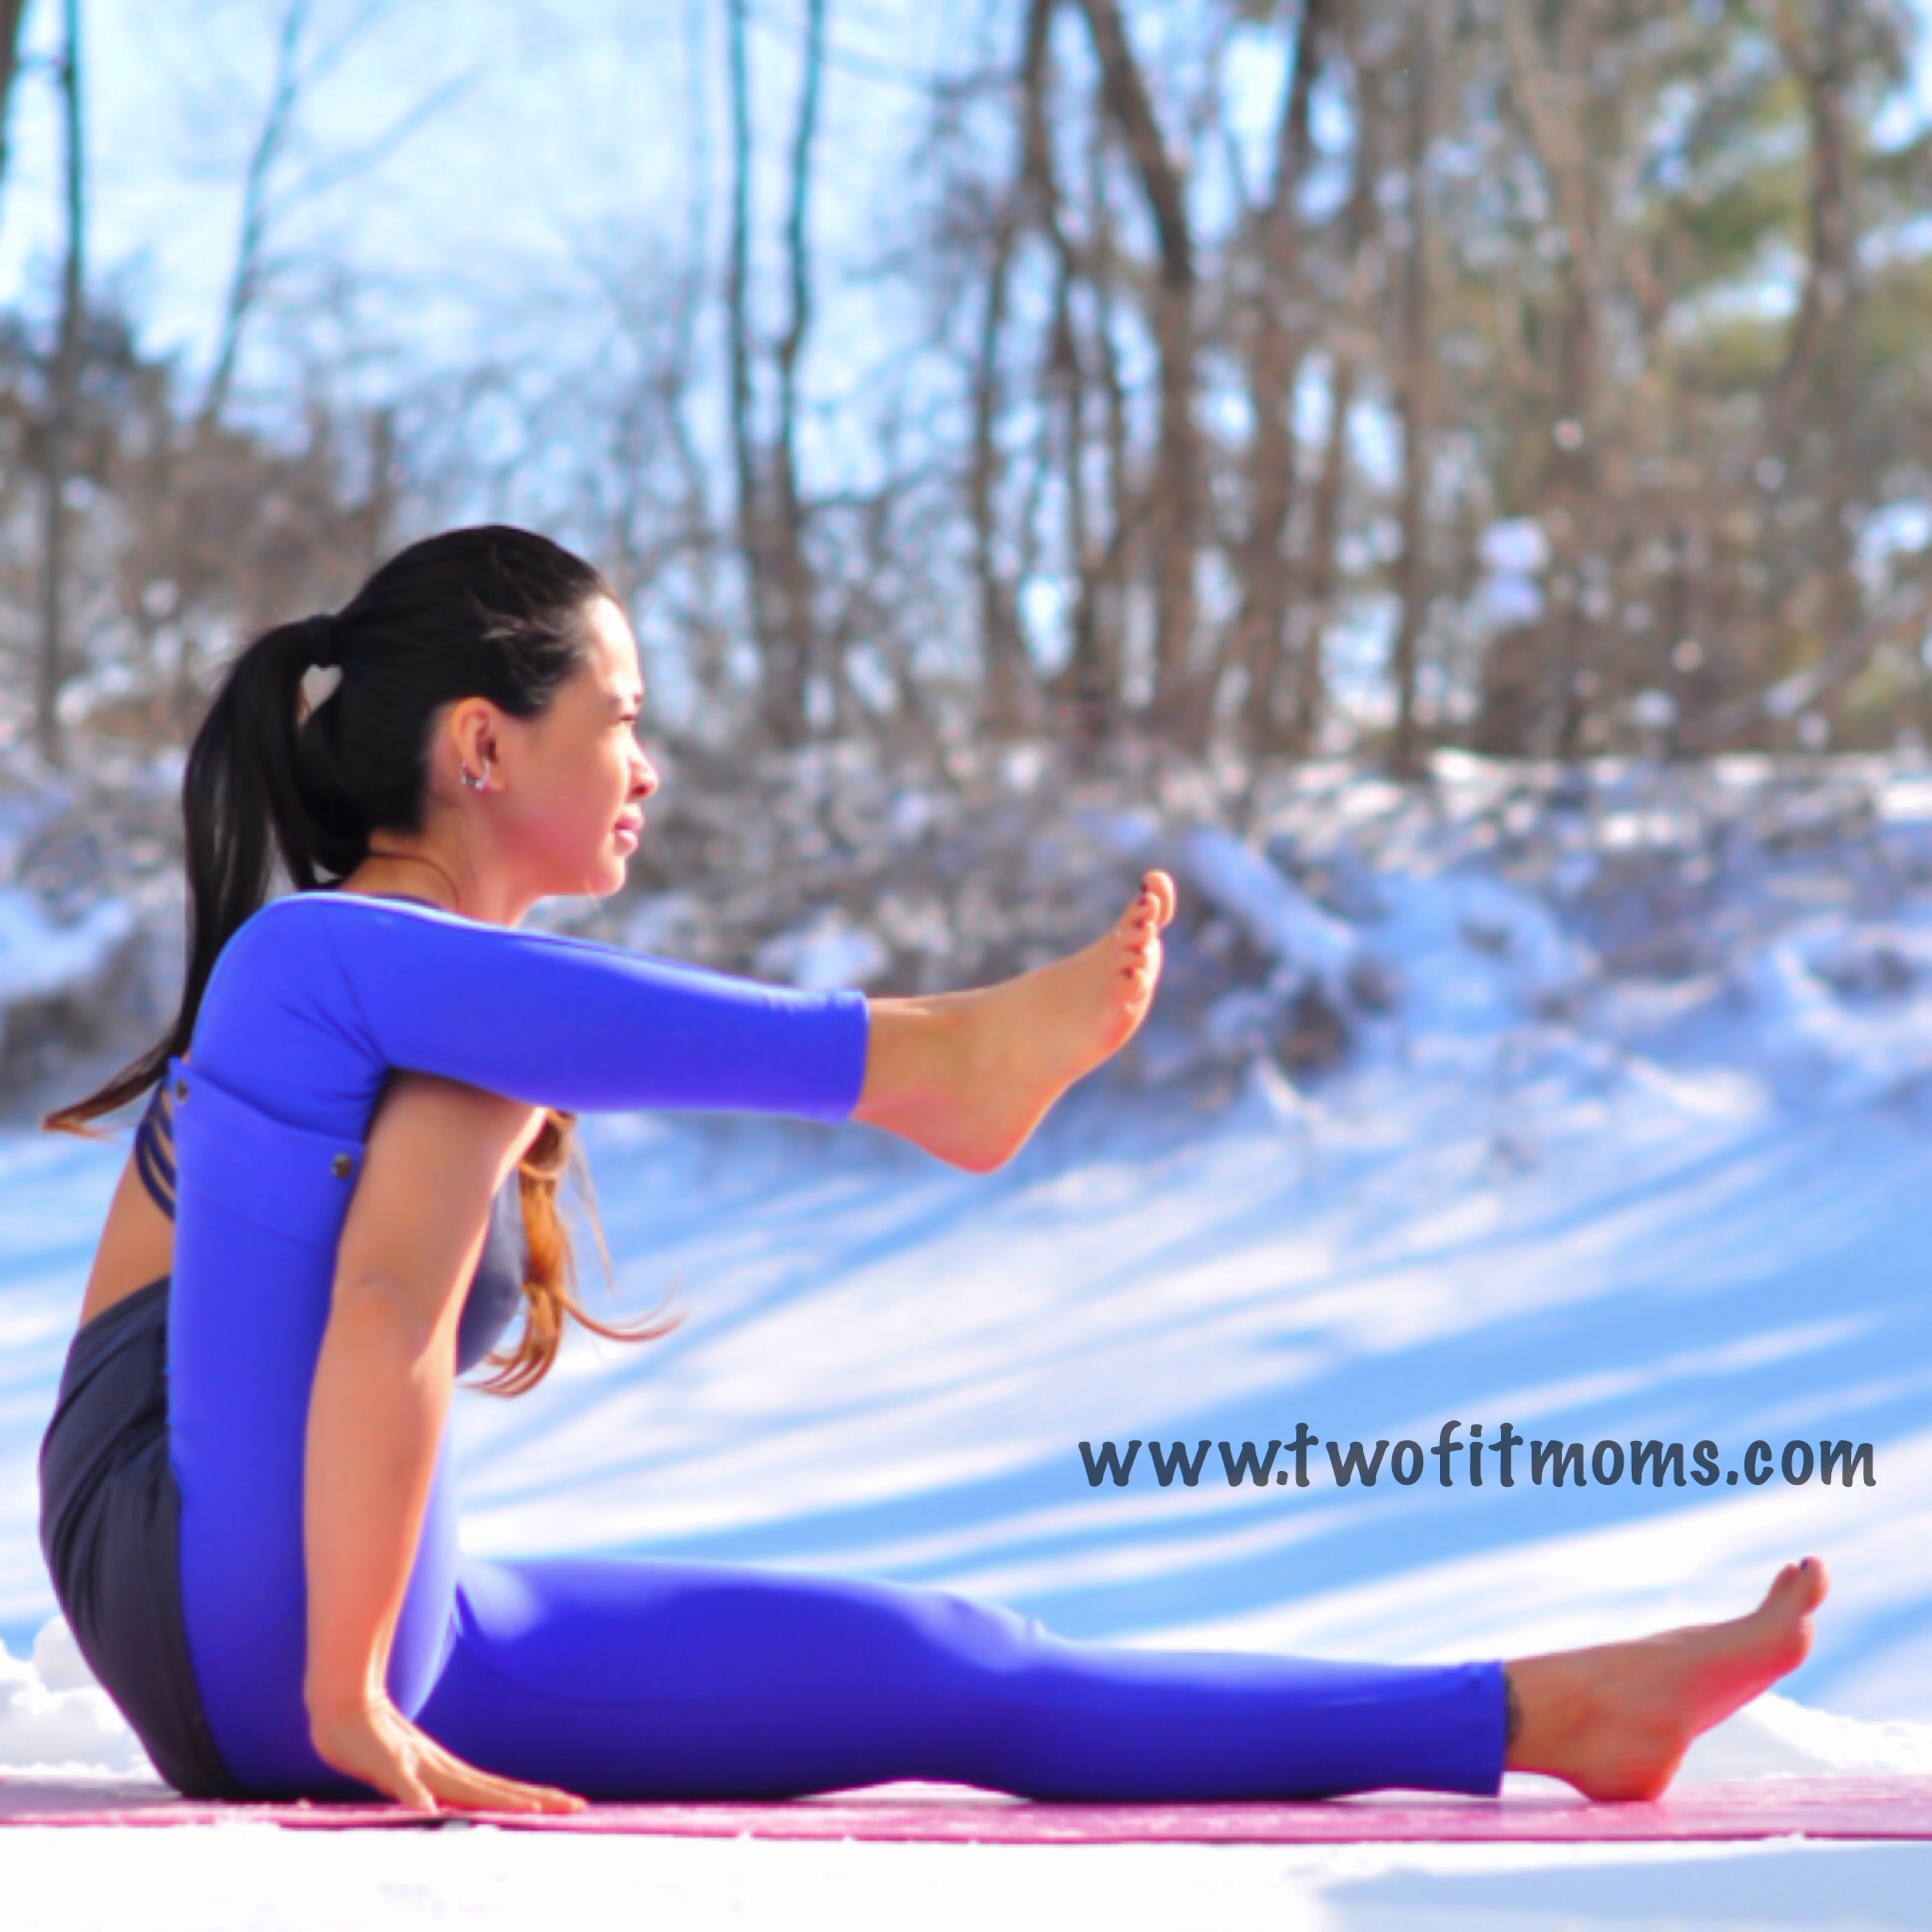
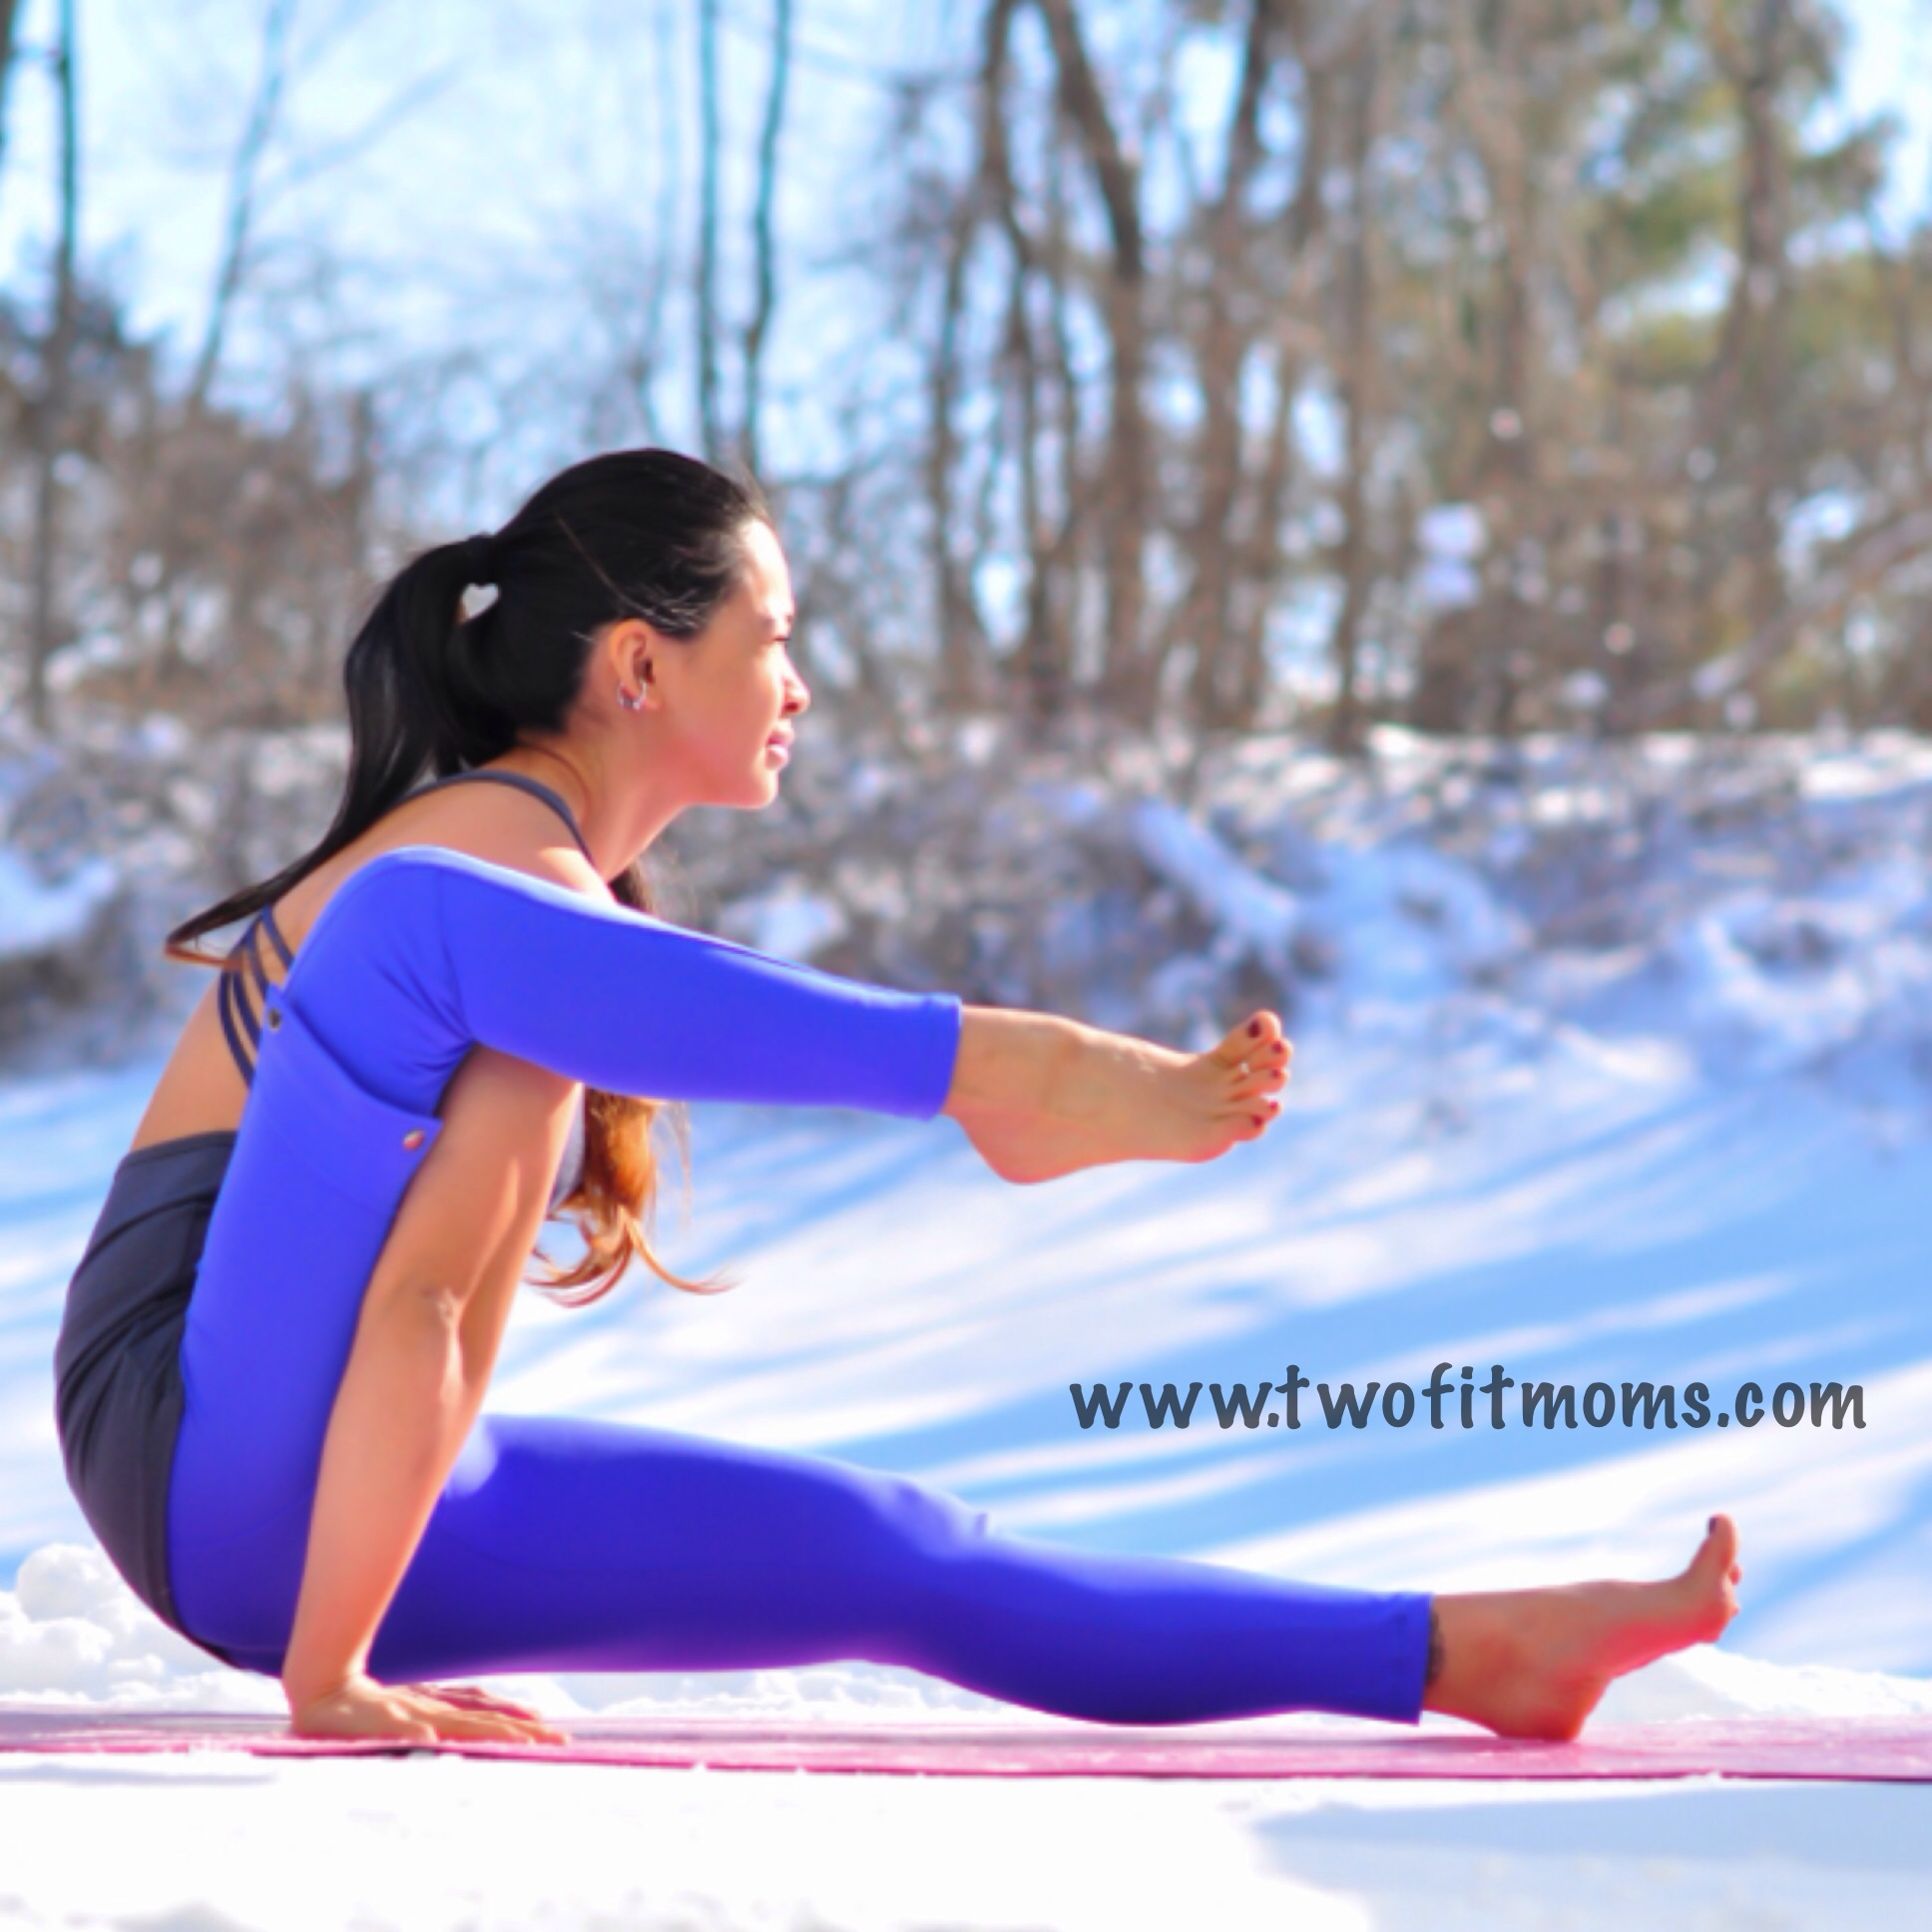
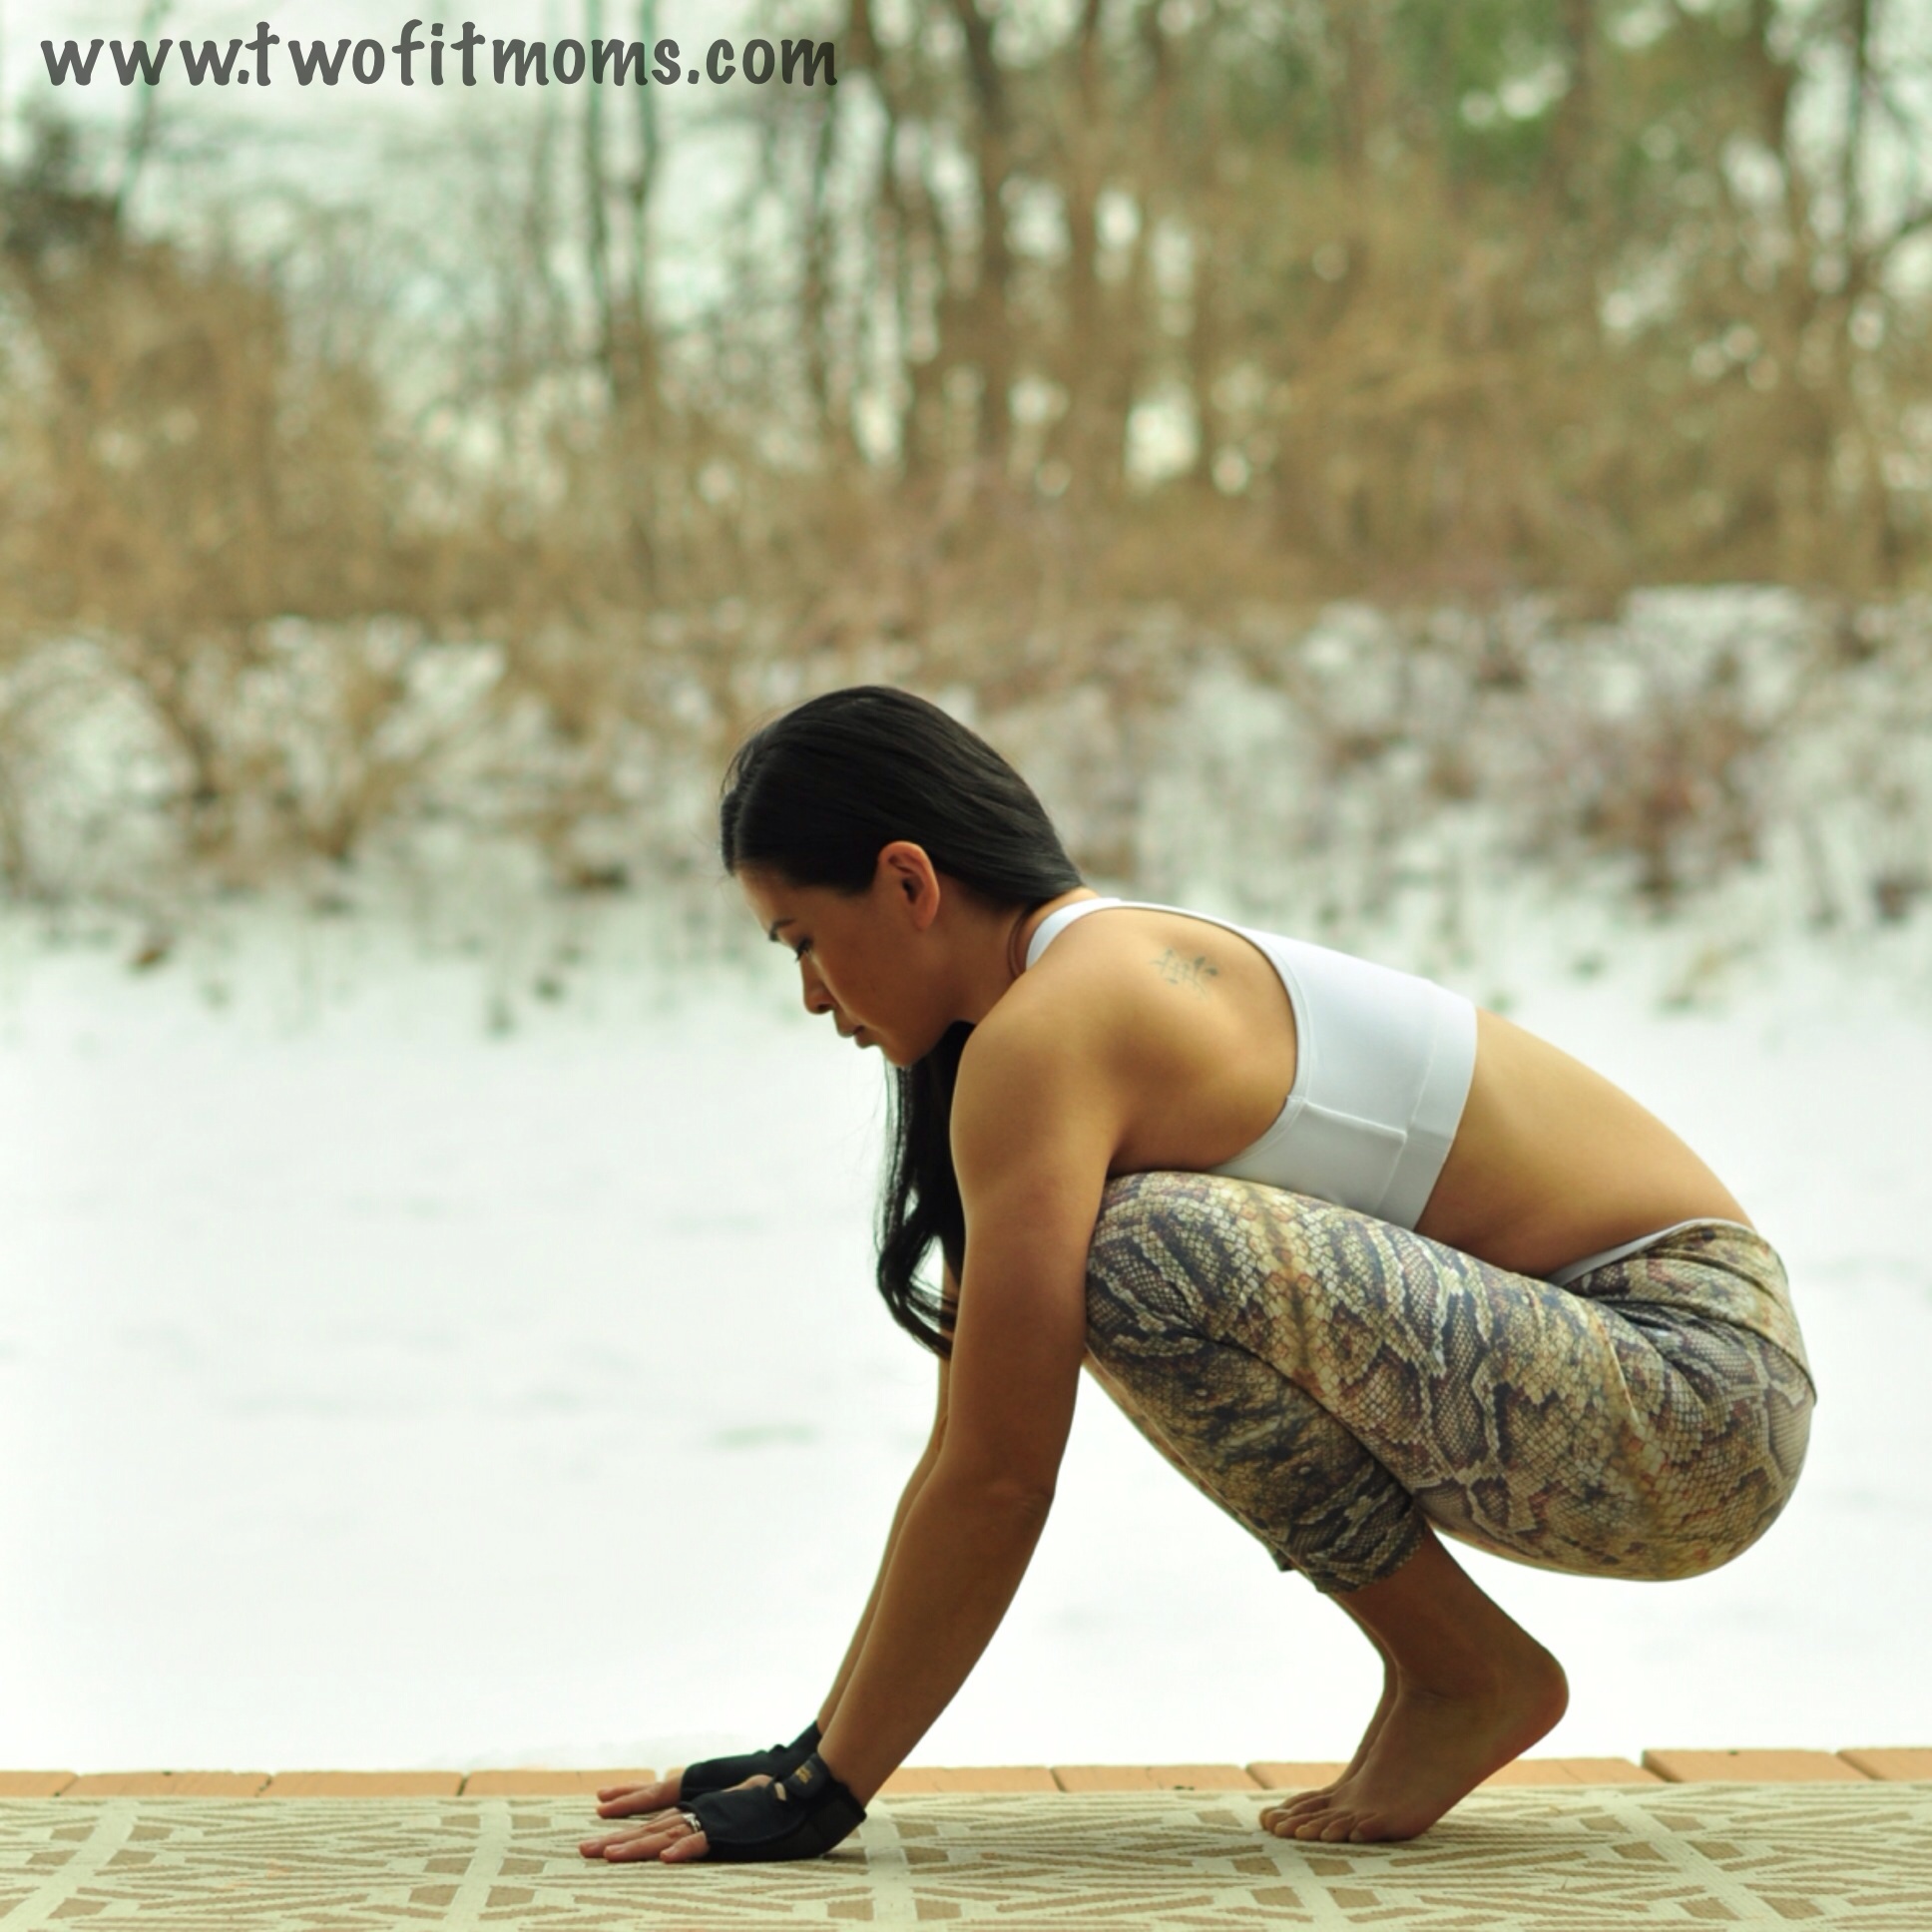
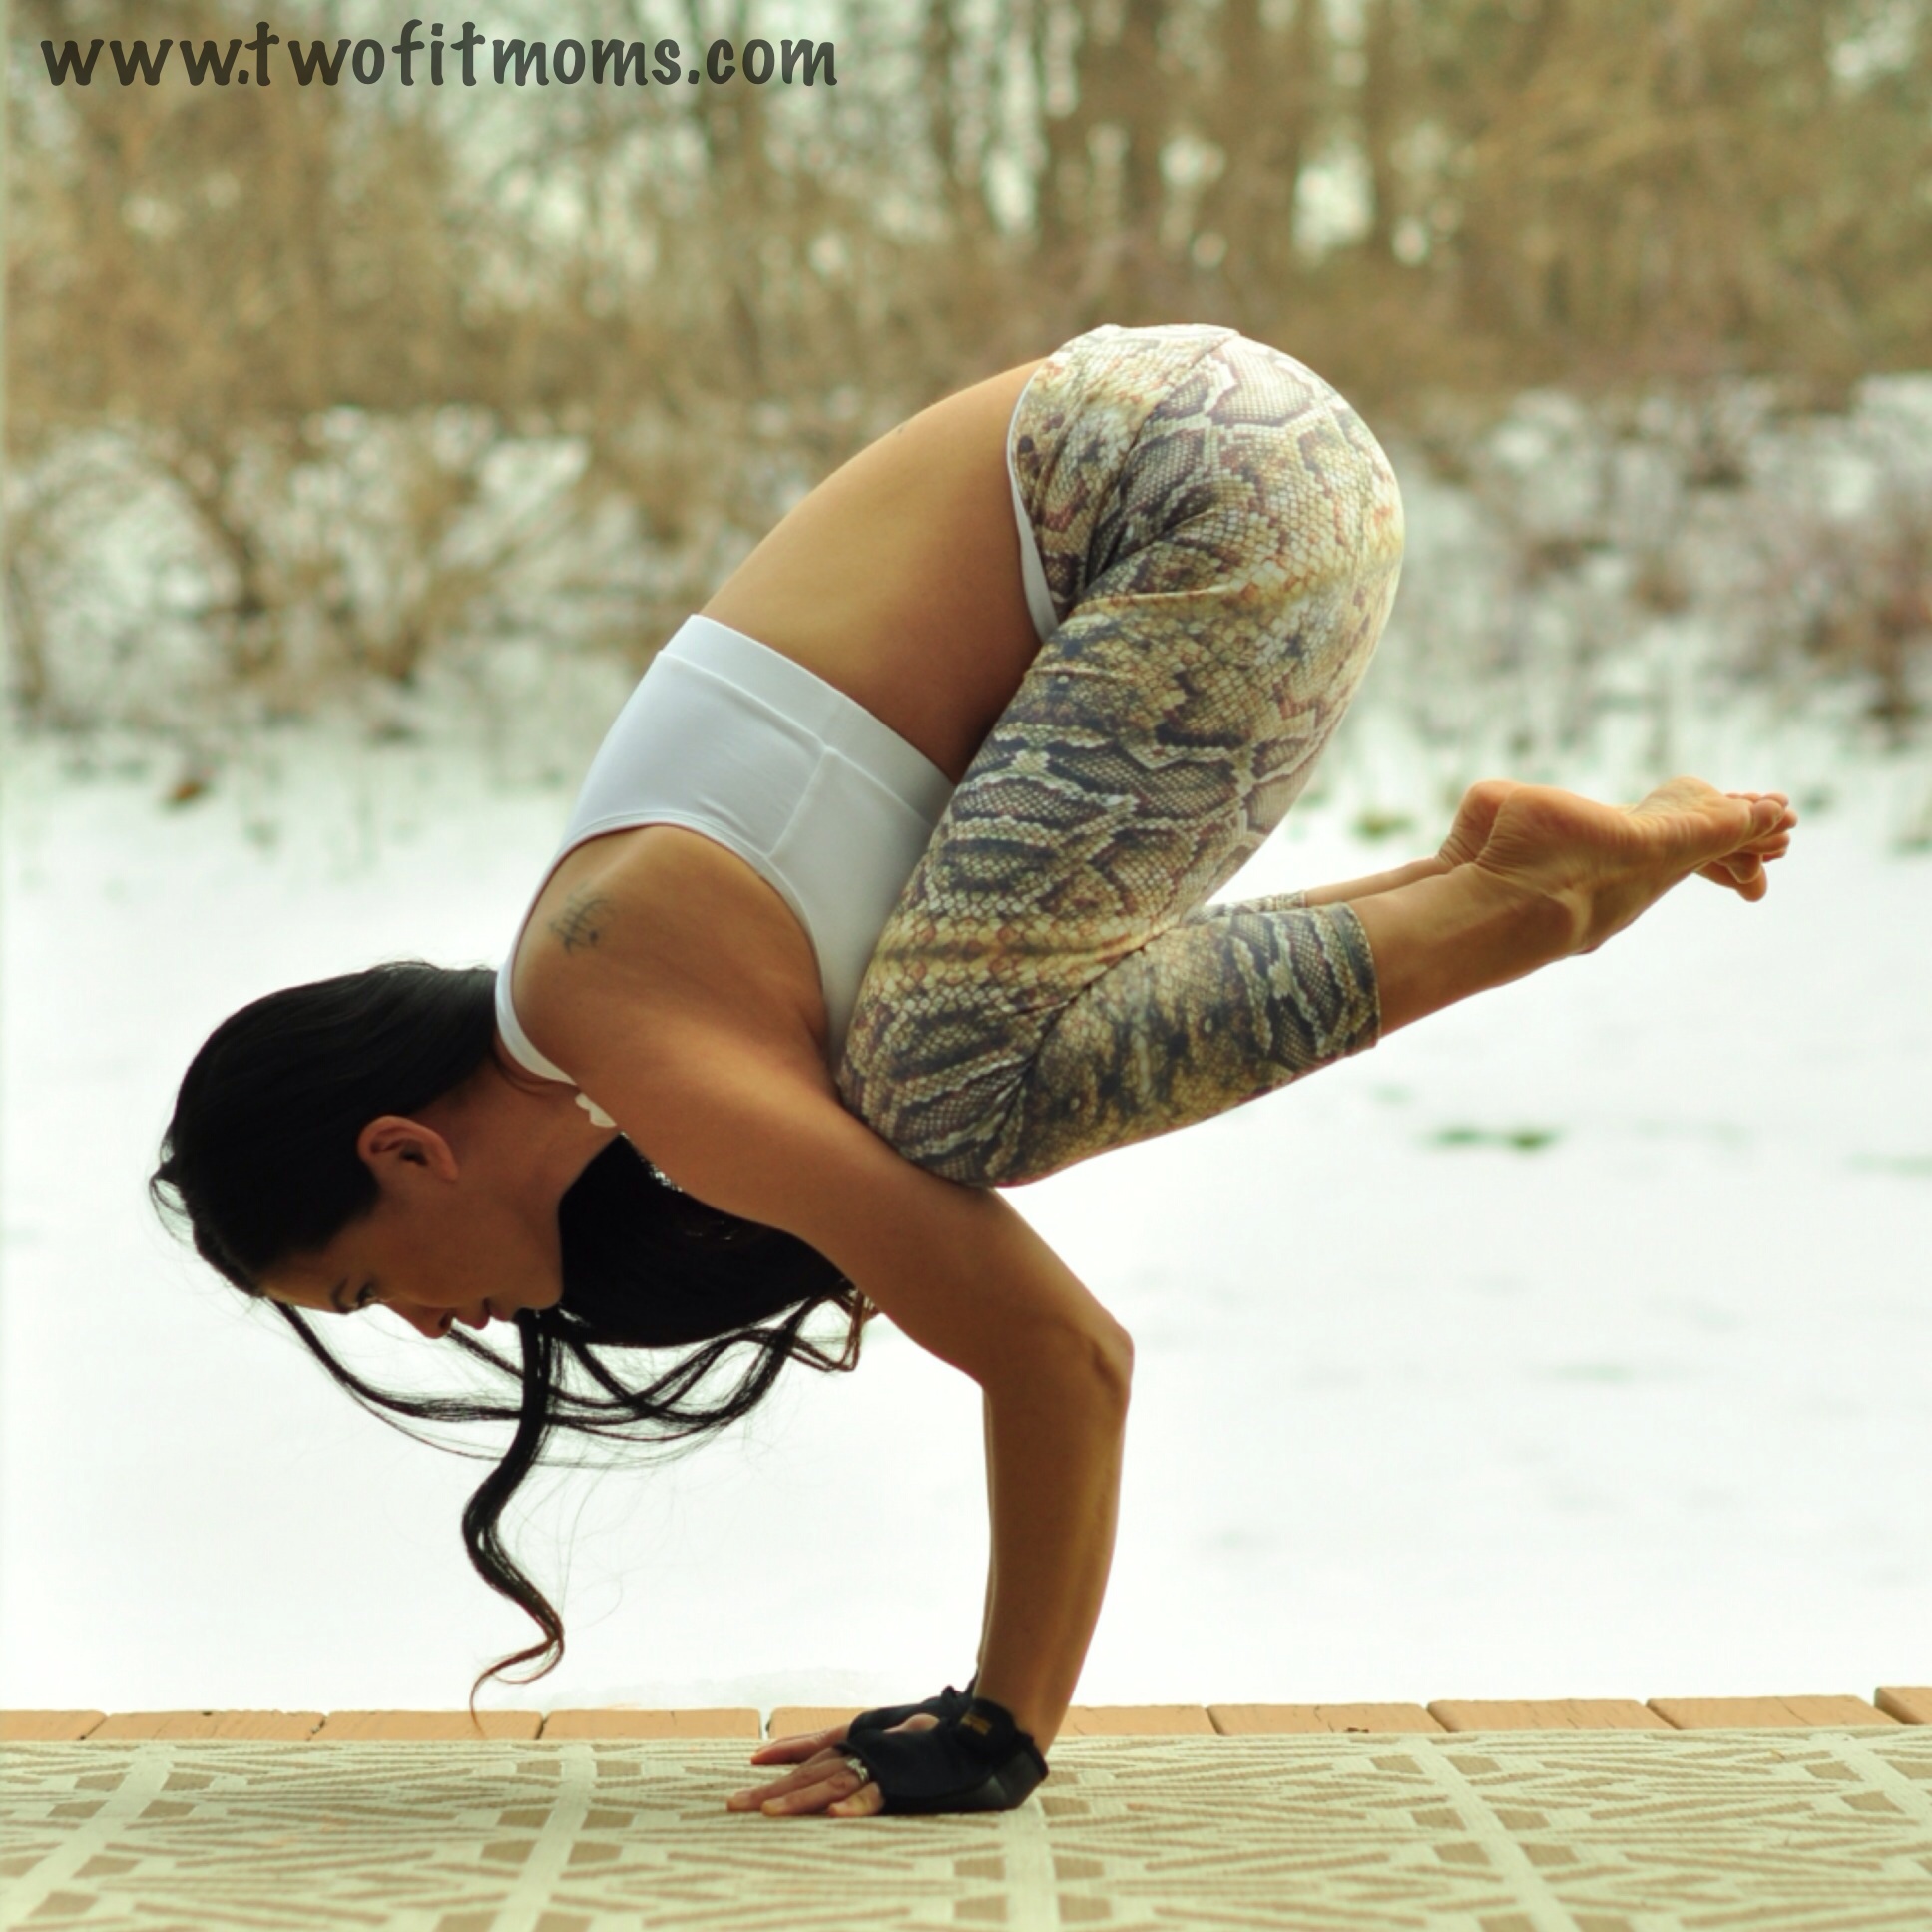
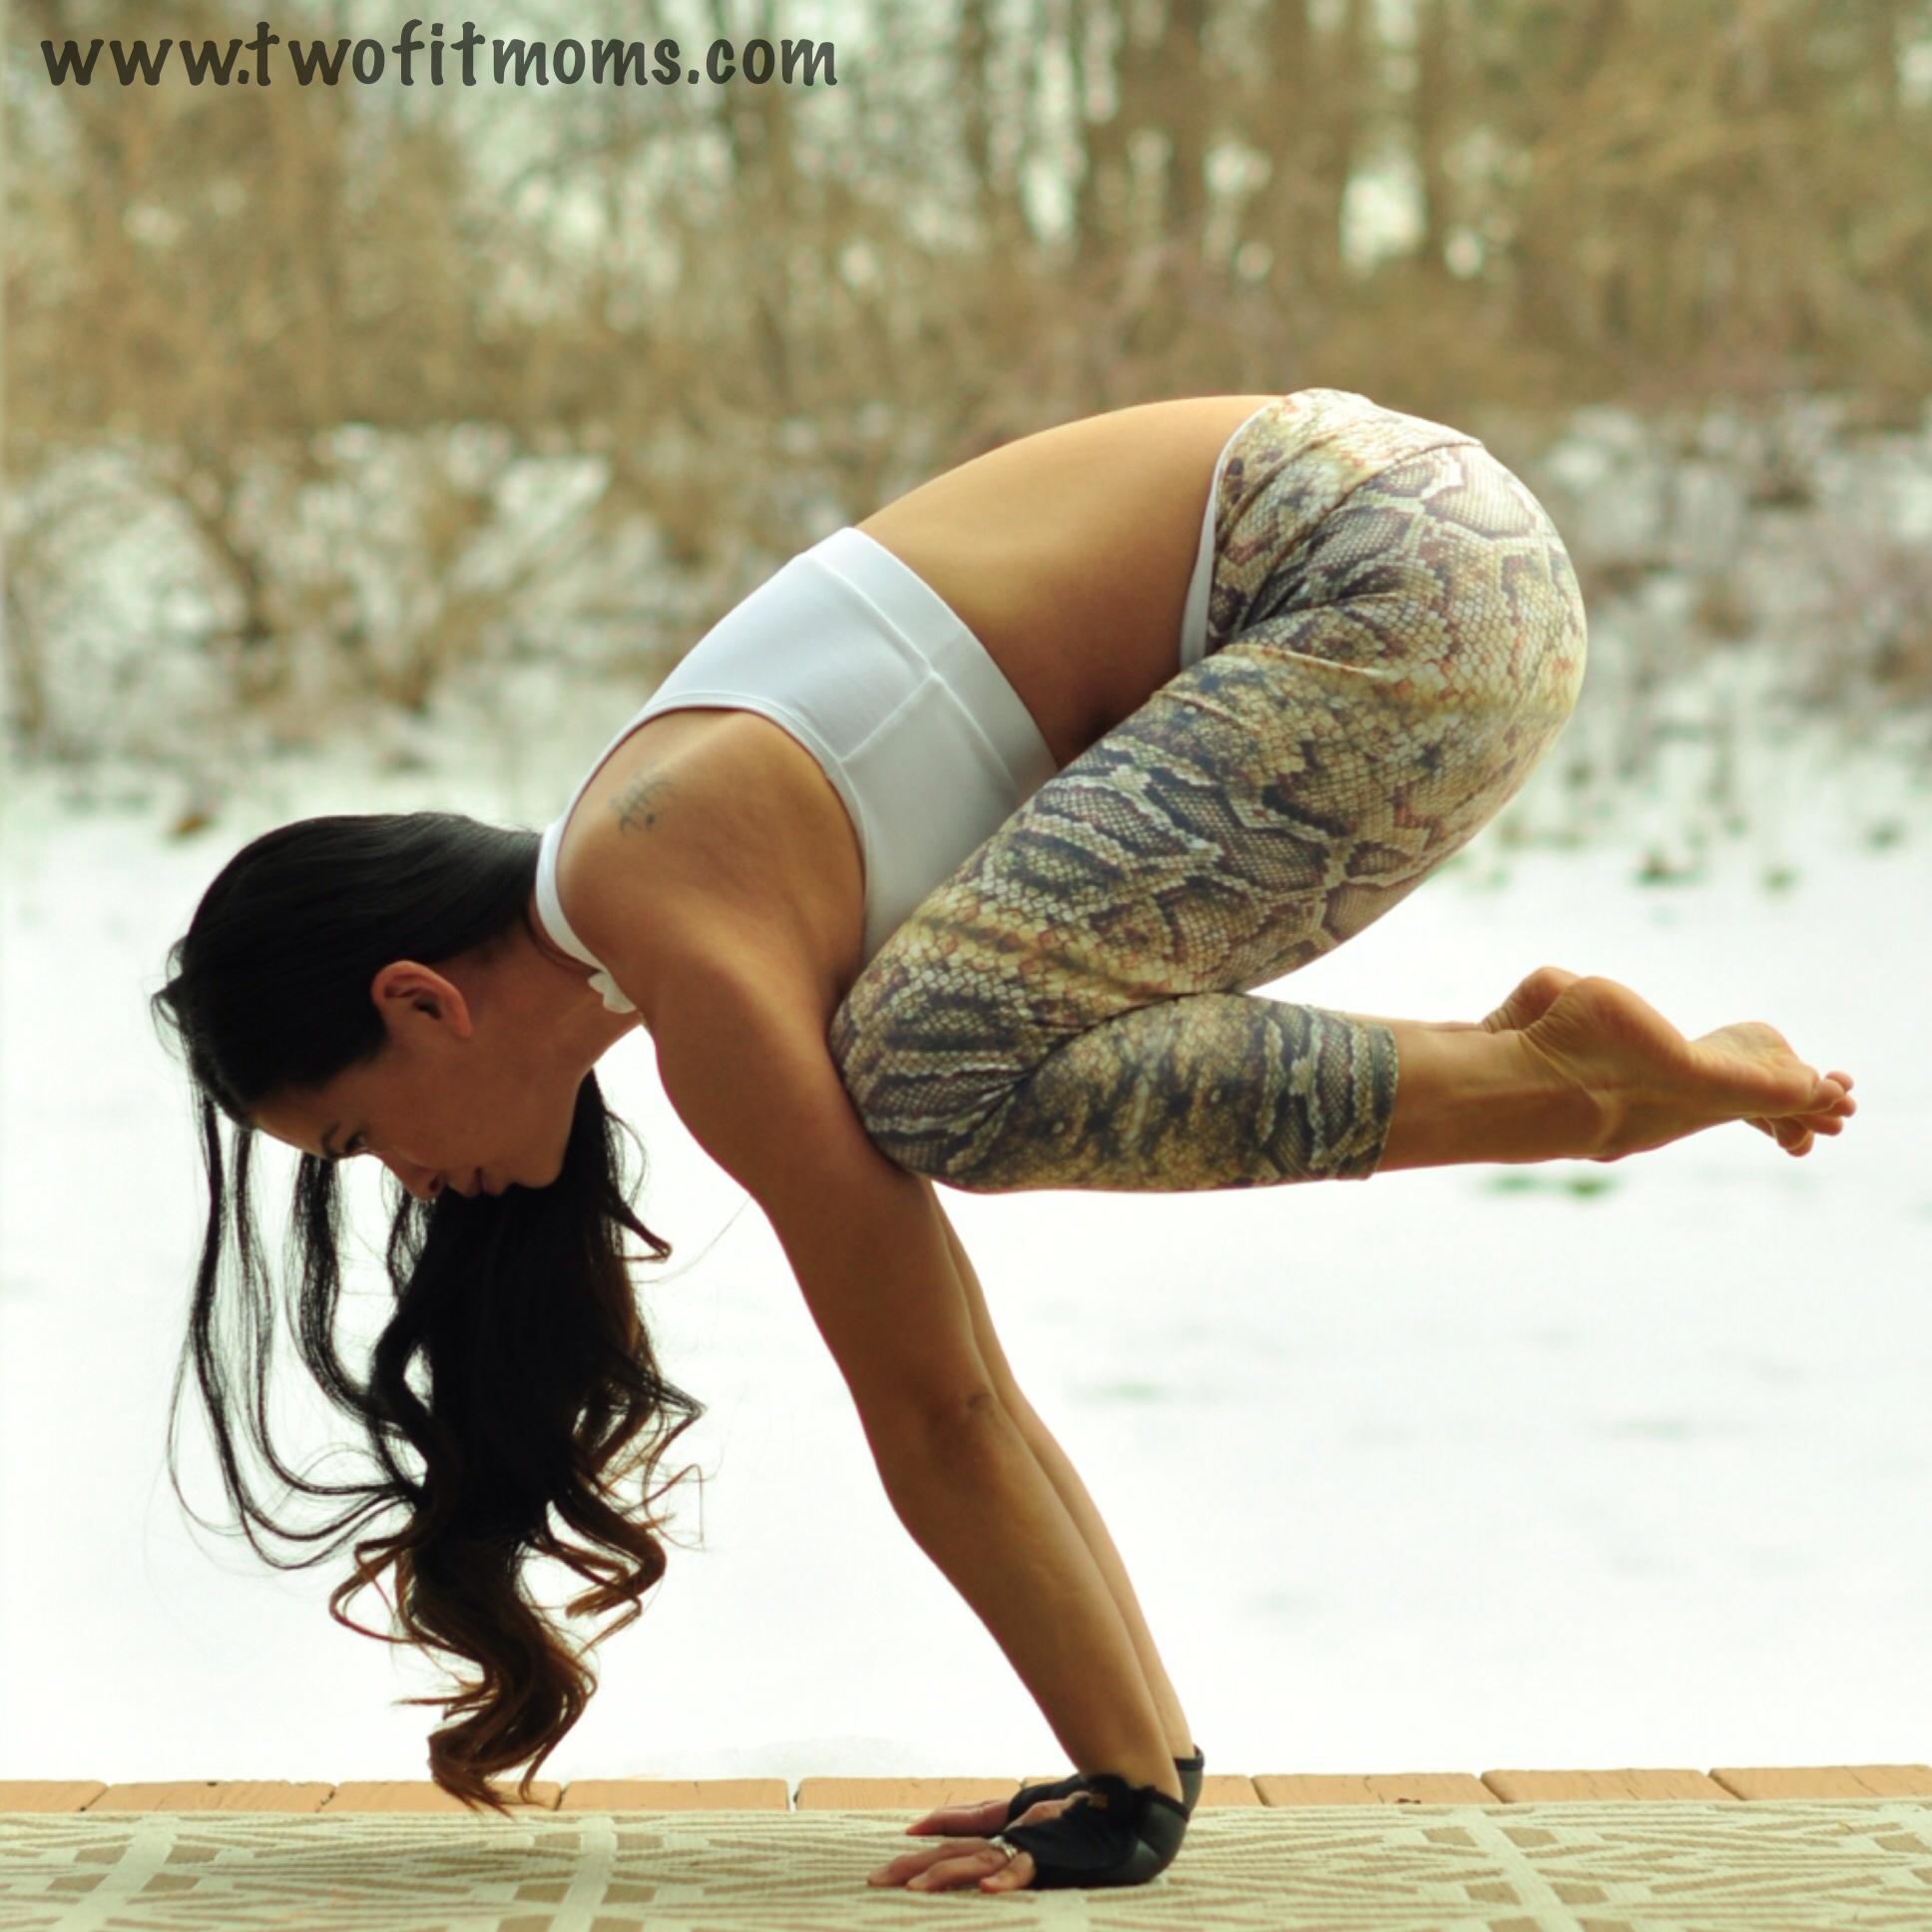
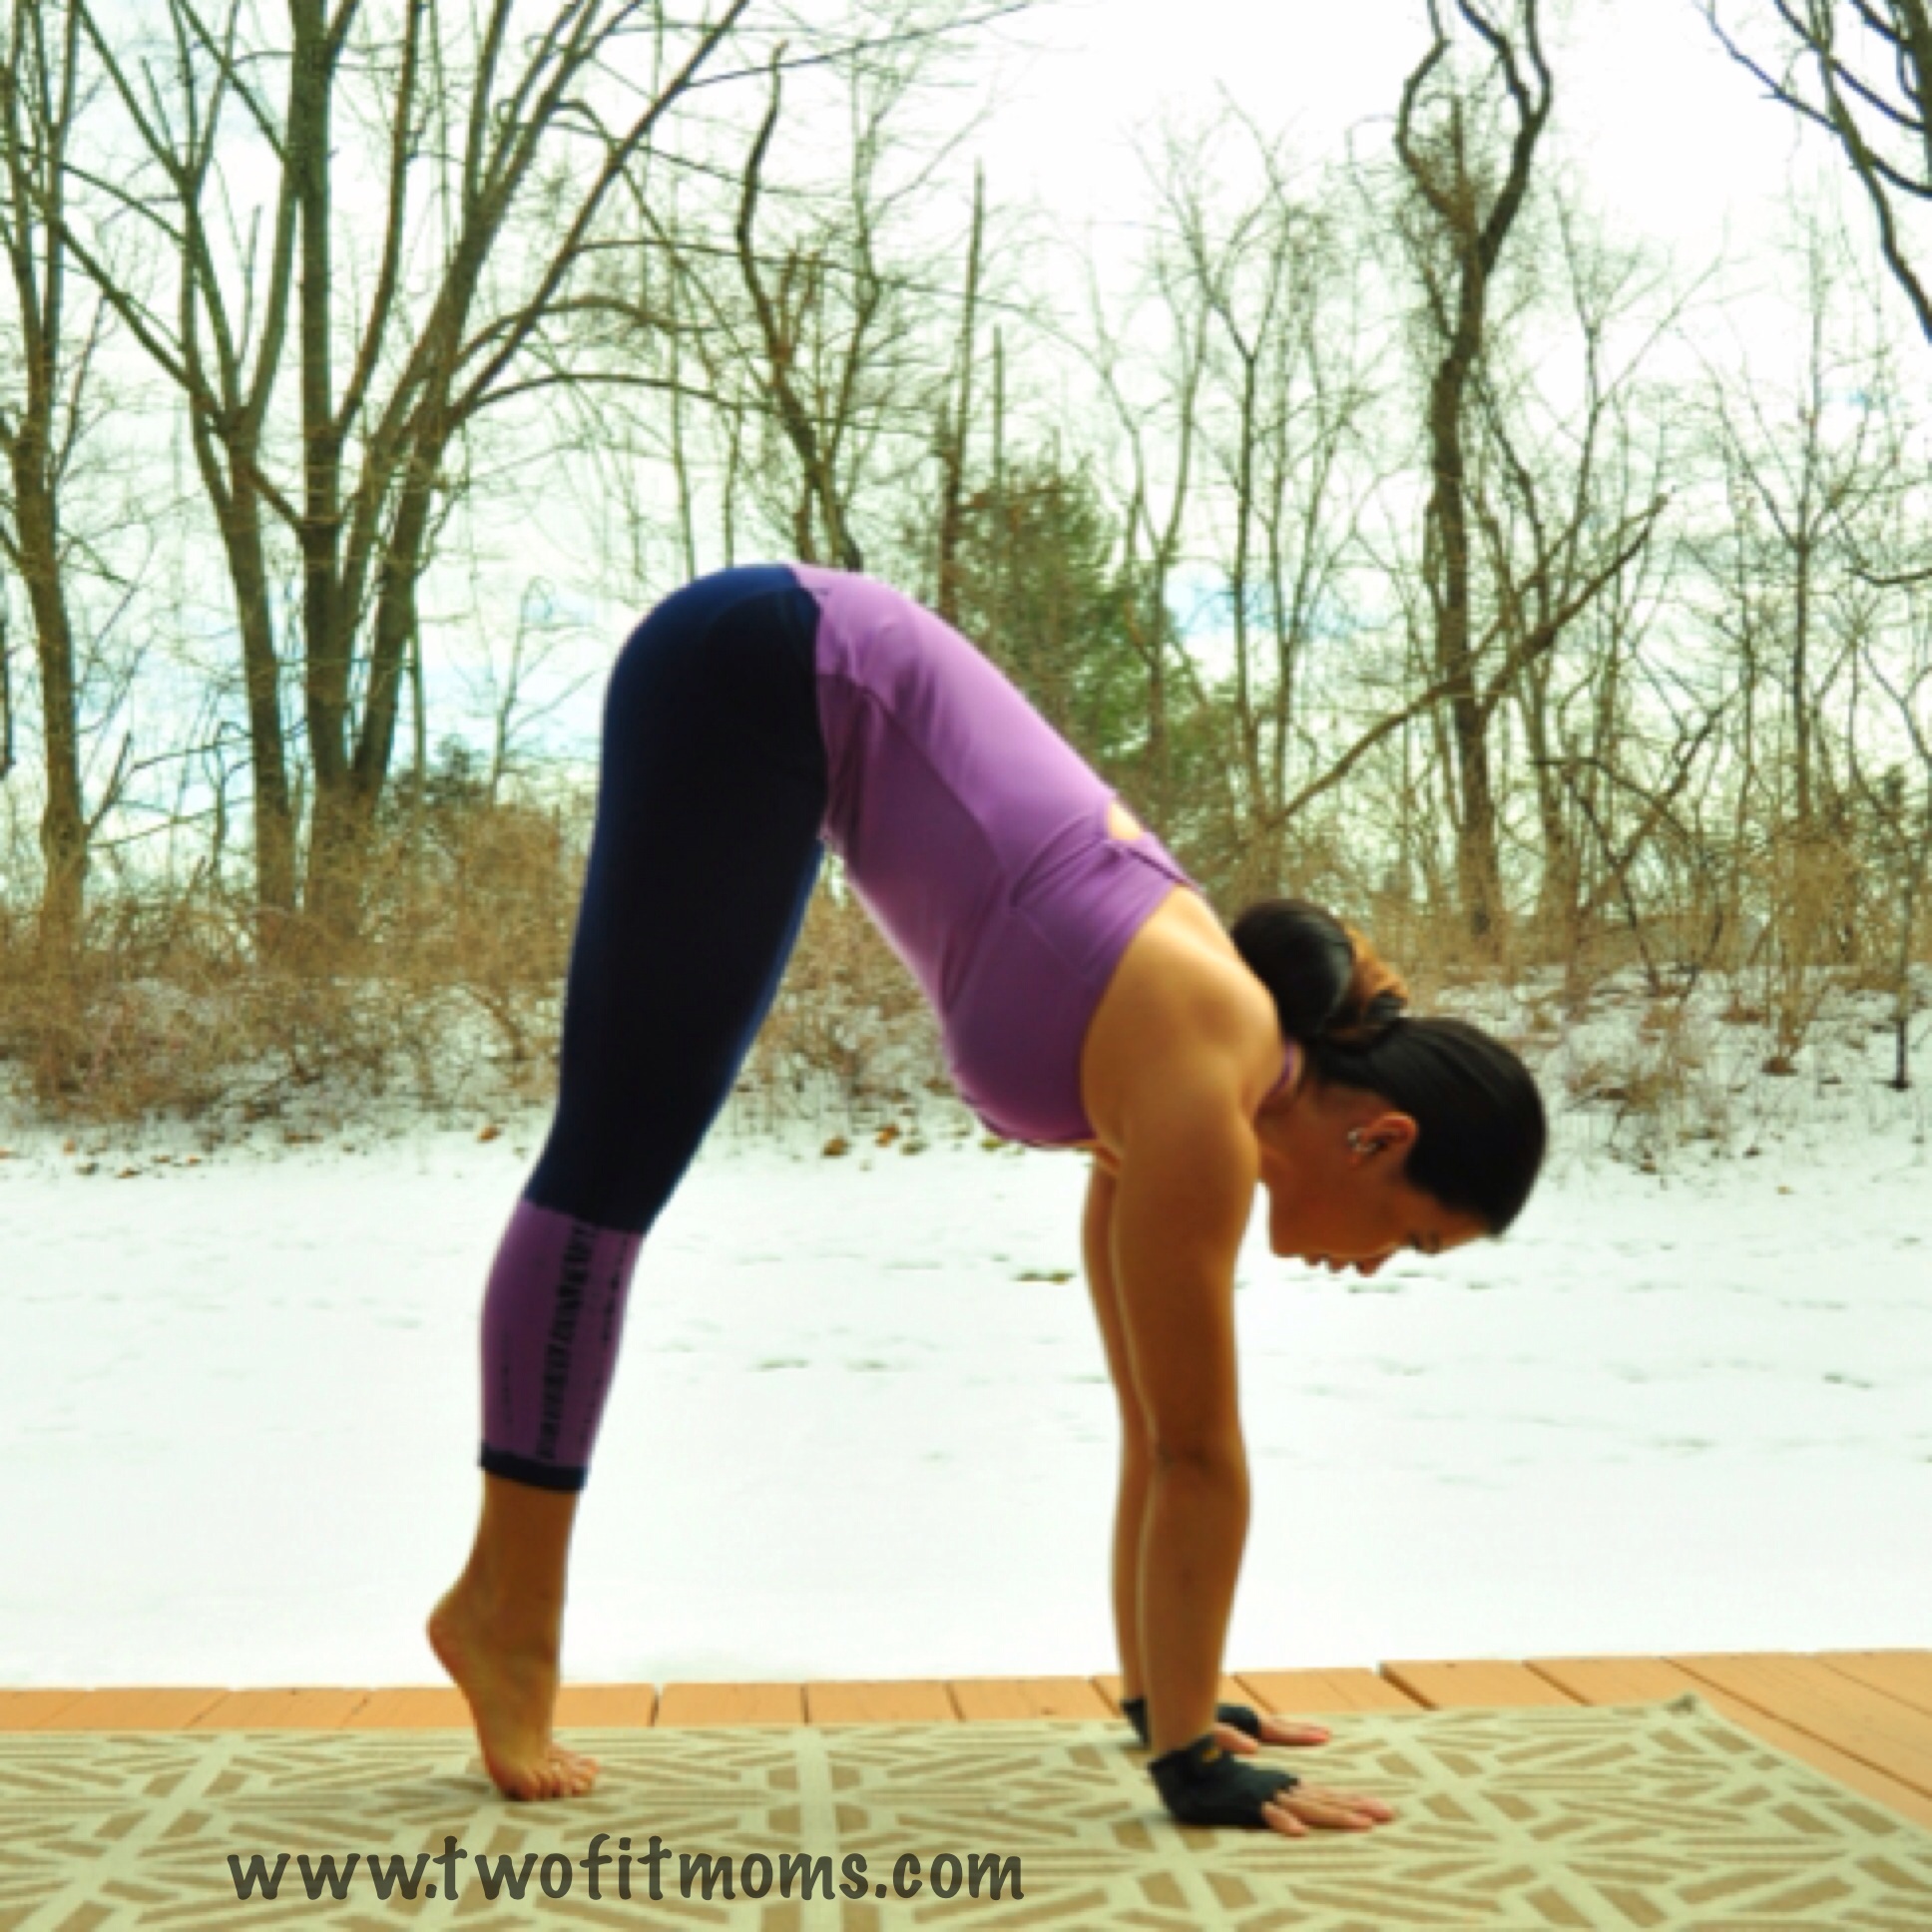
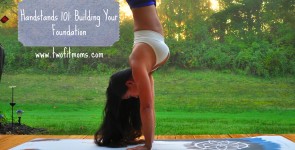
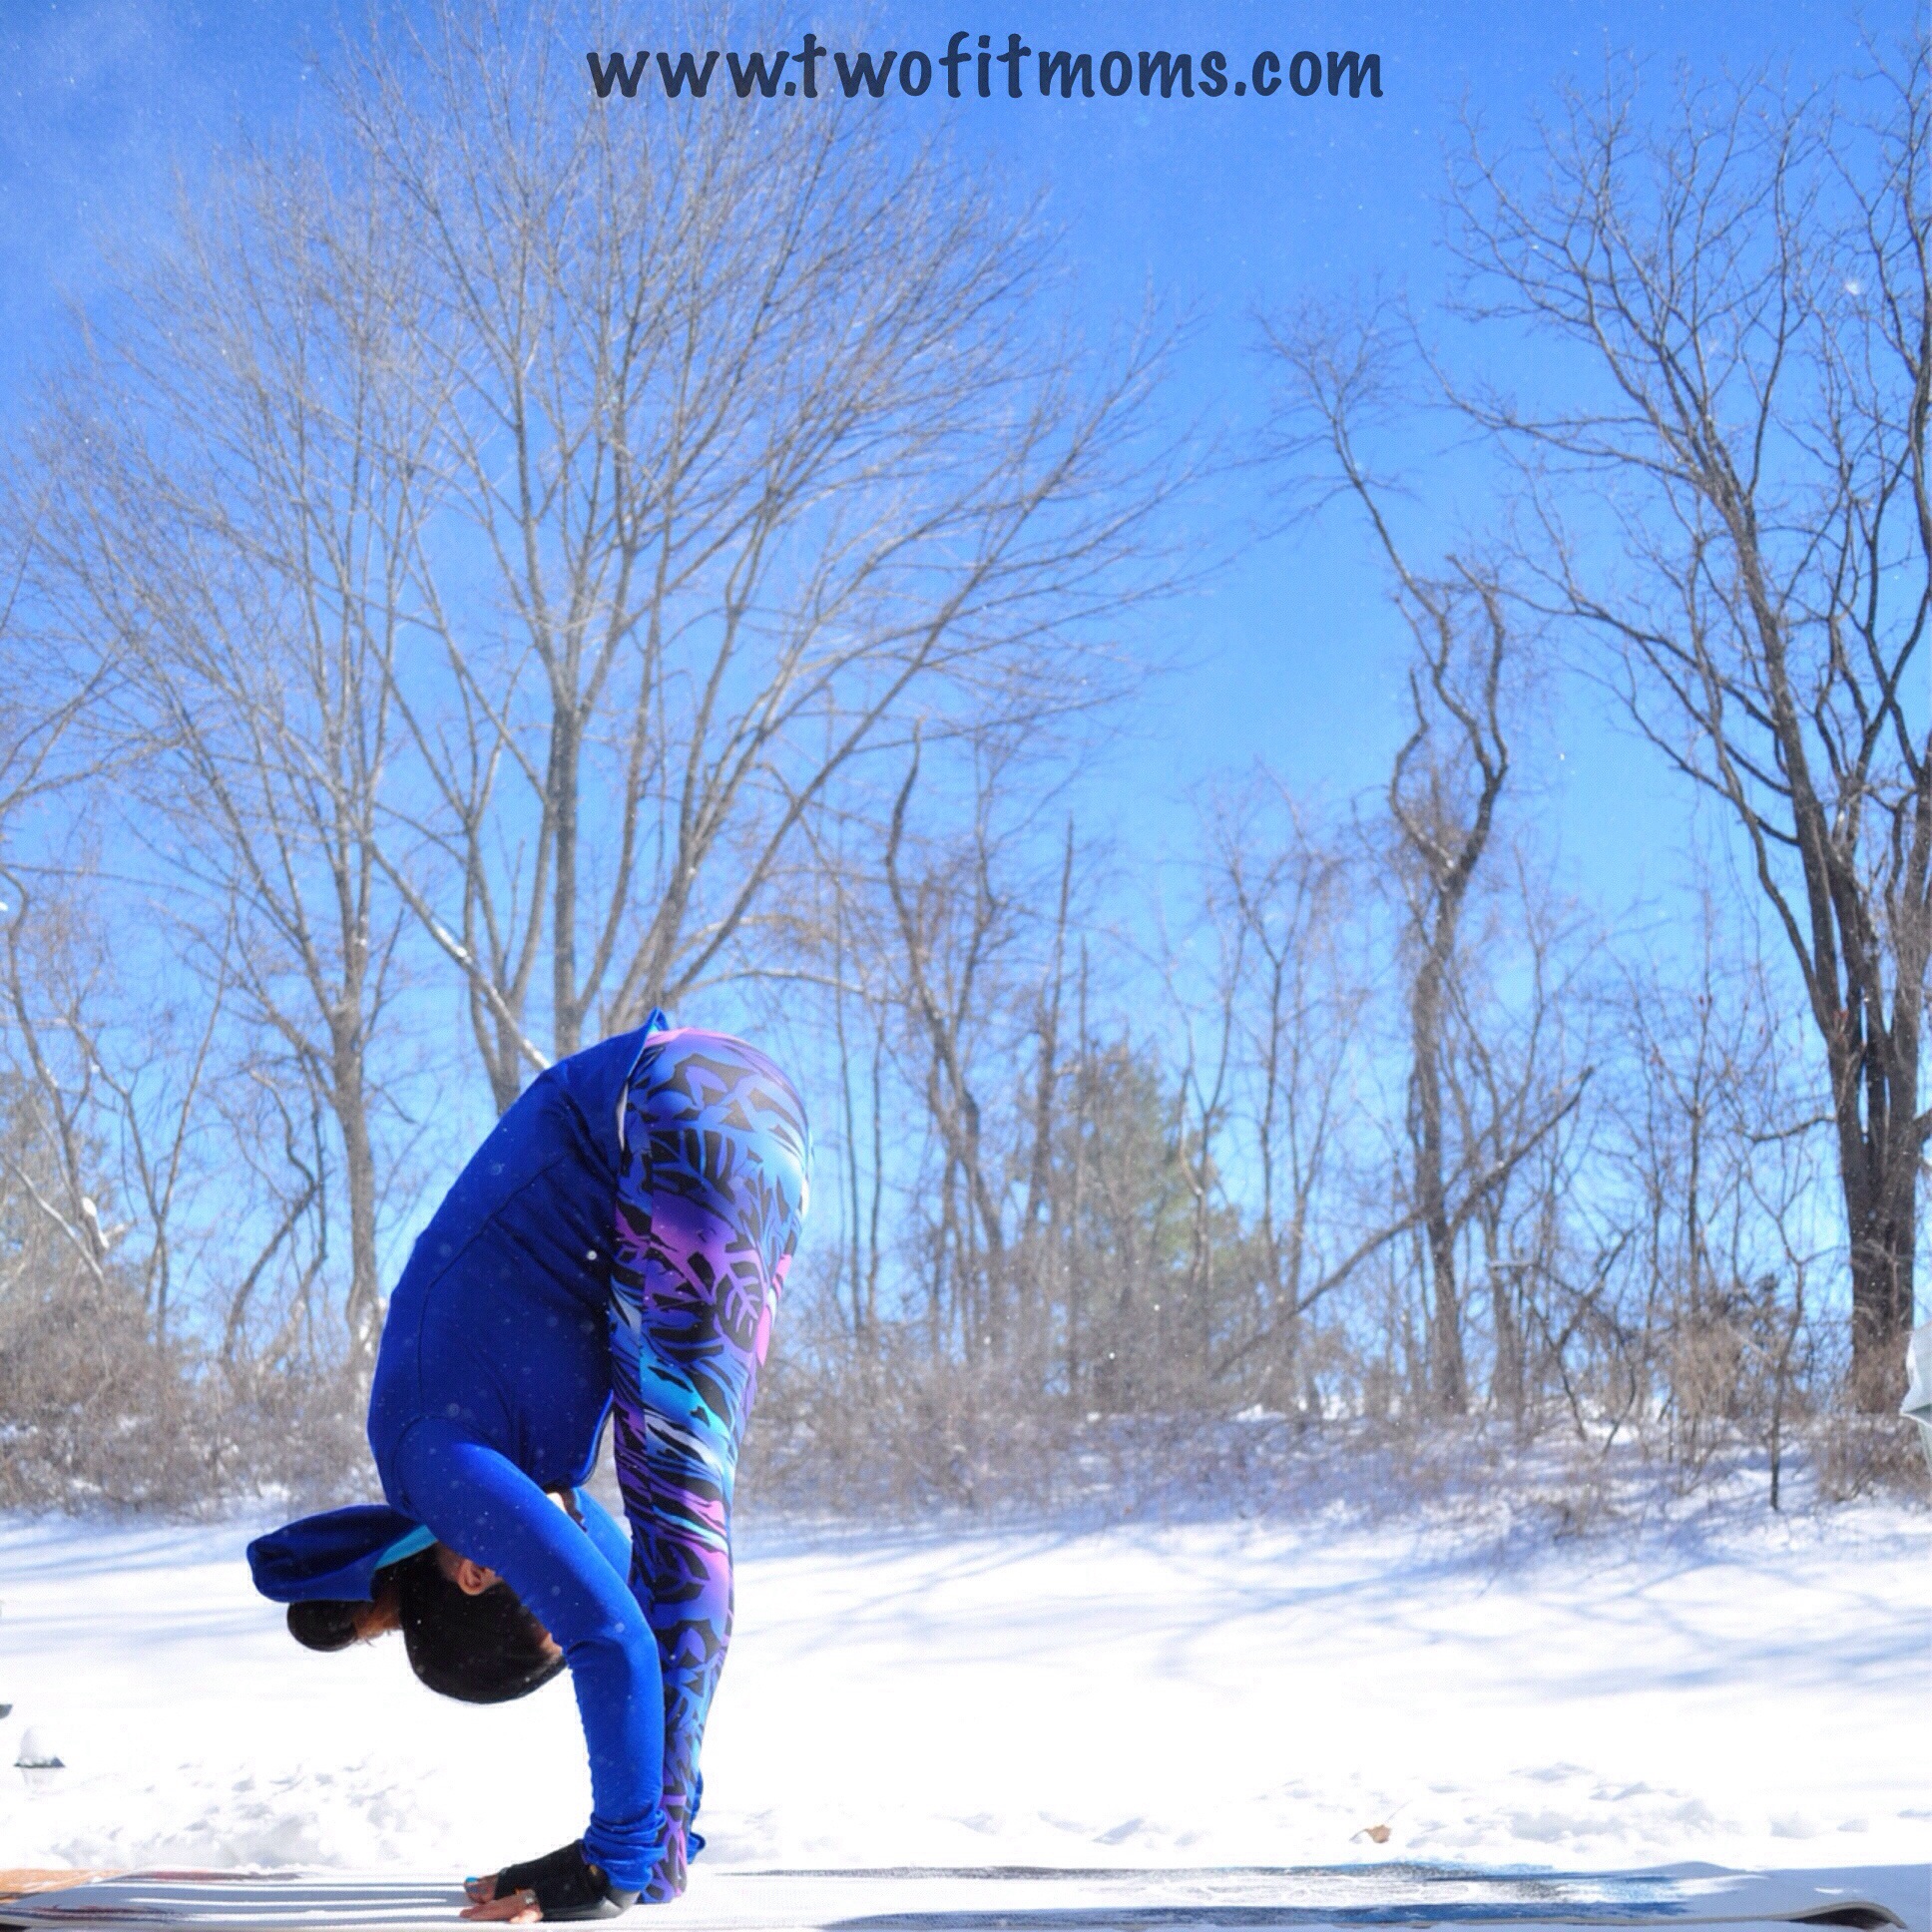
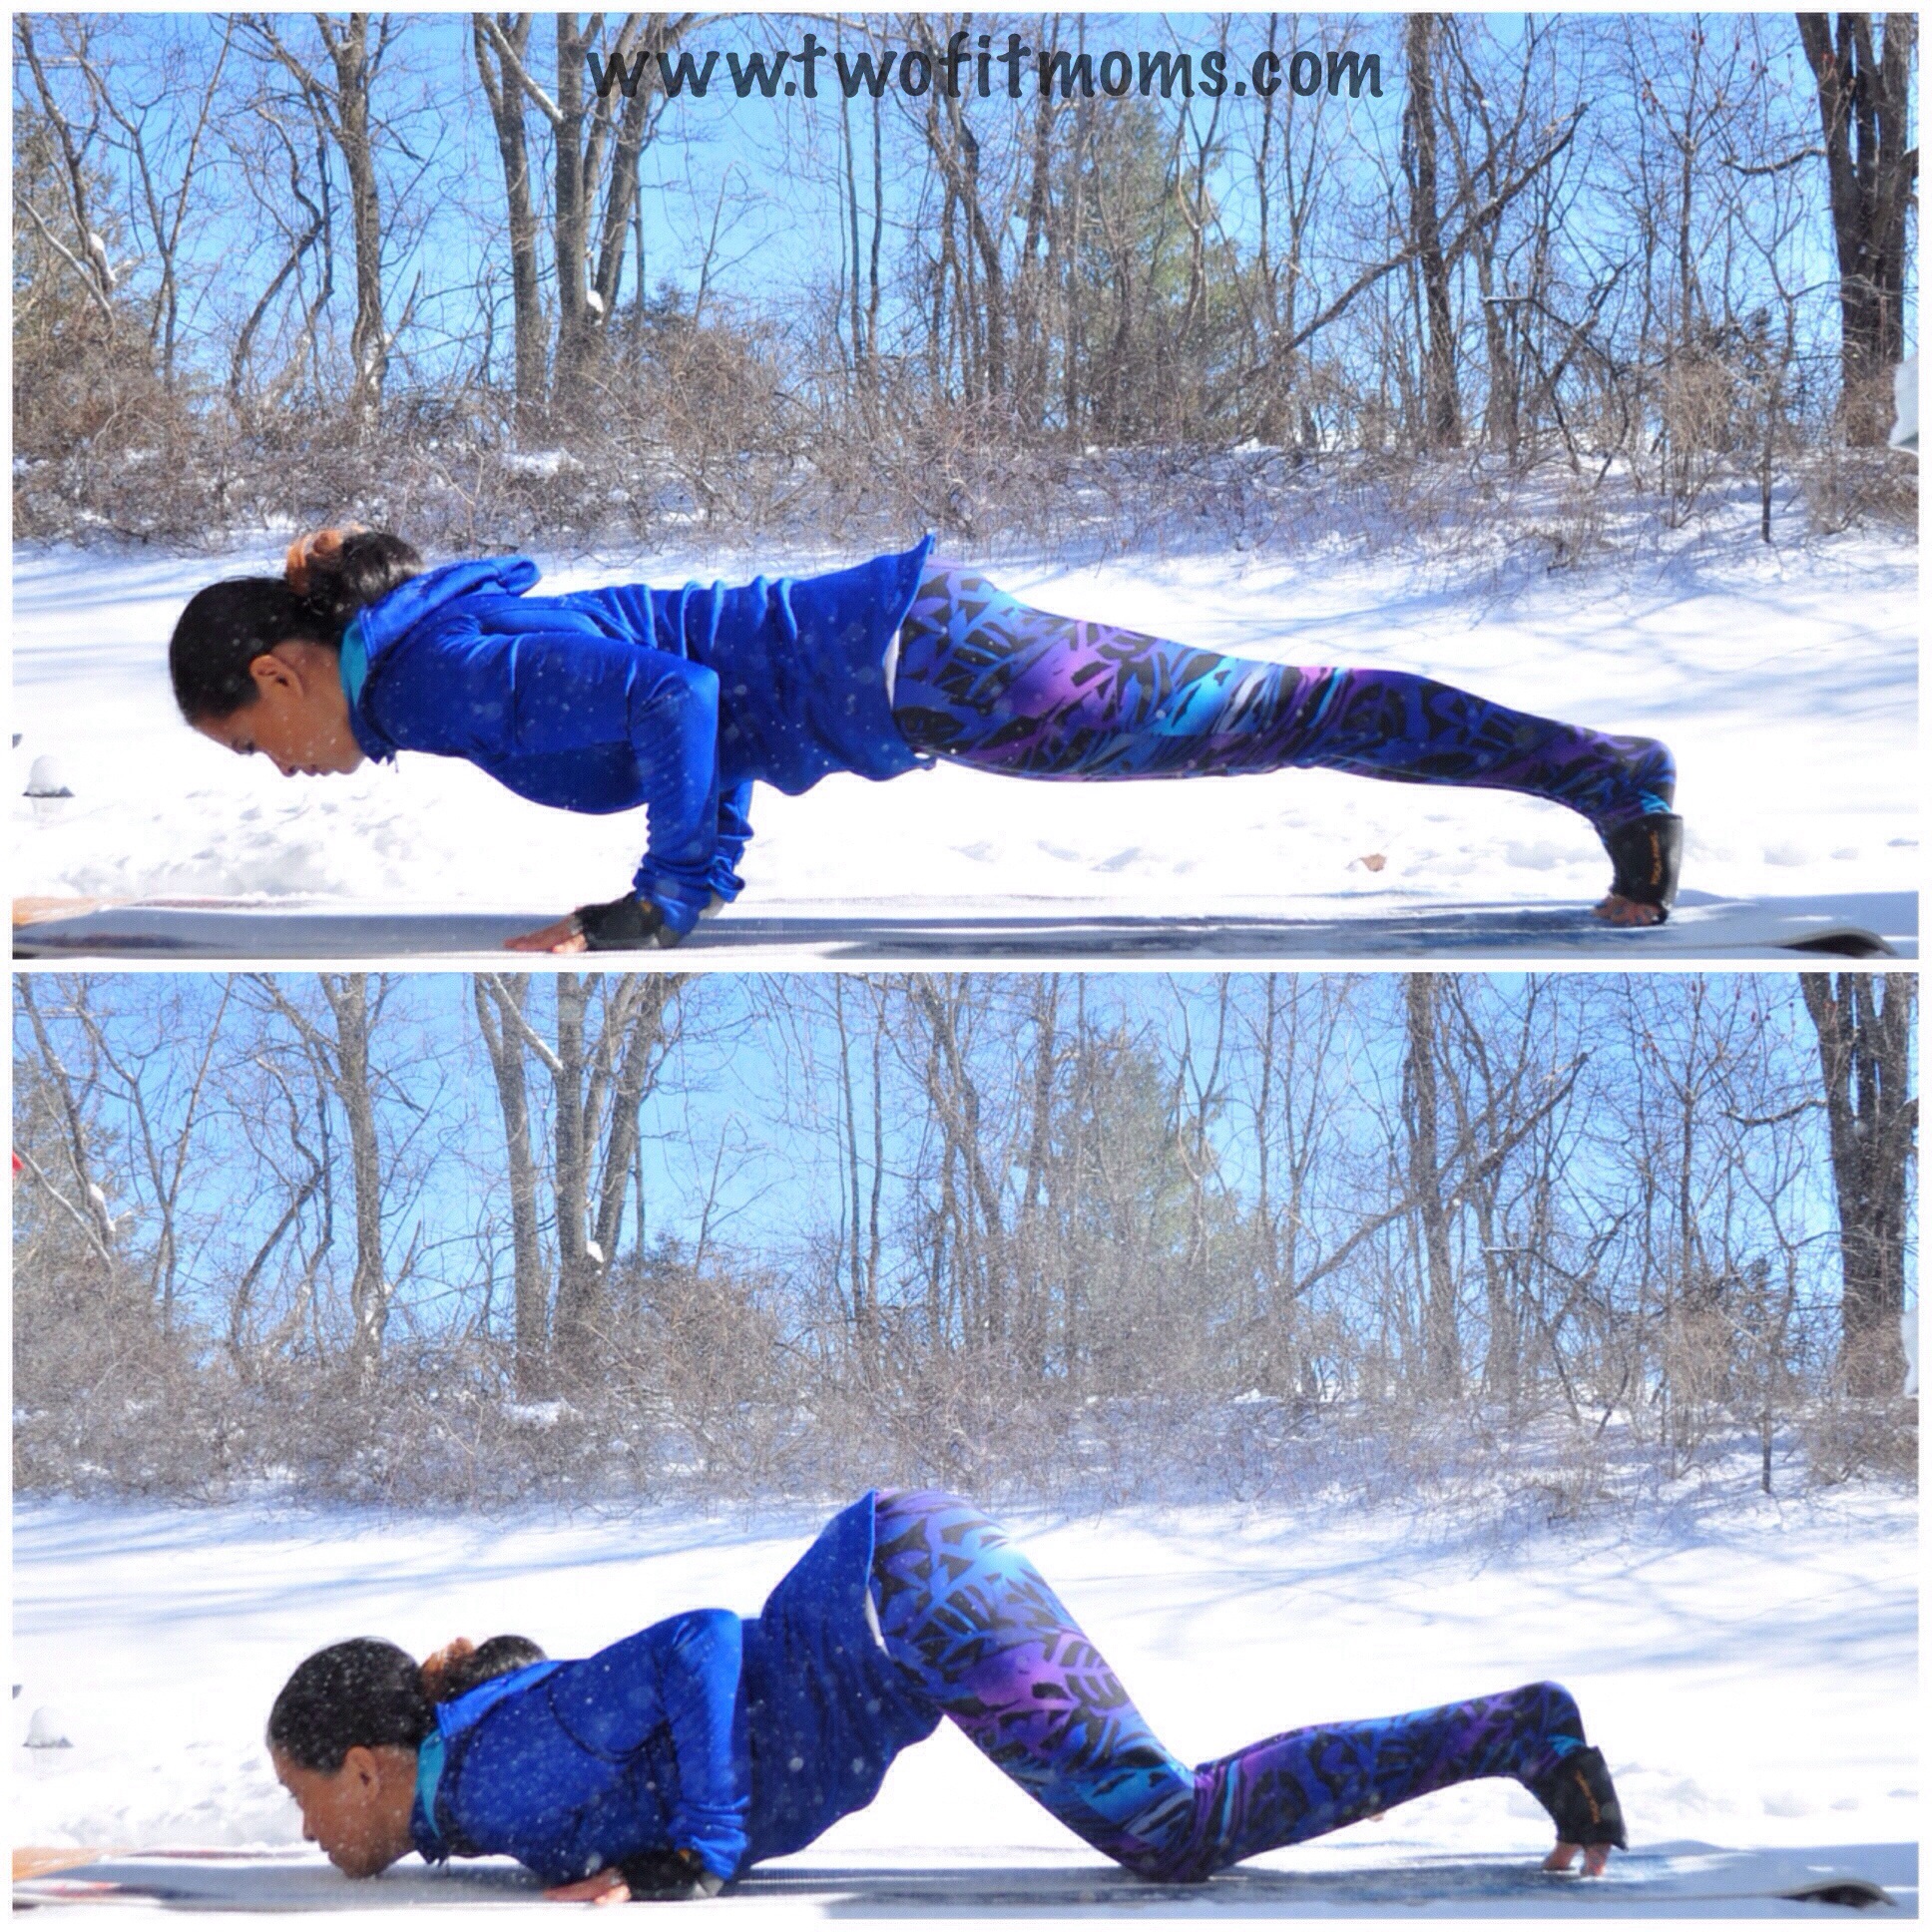
    Start the float down from Tripod Headstand

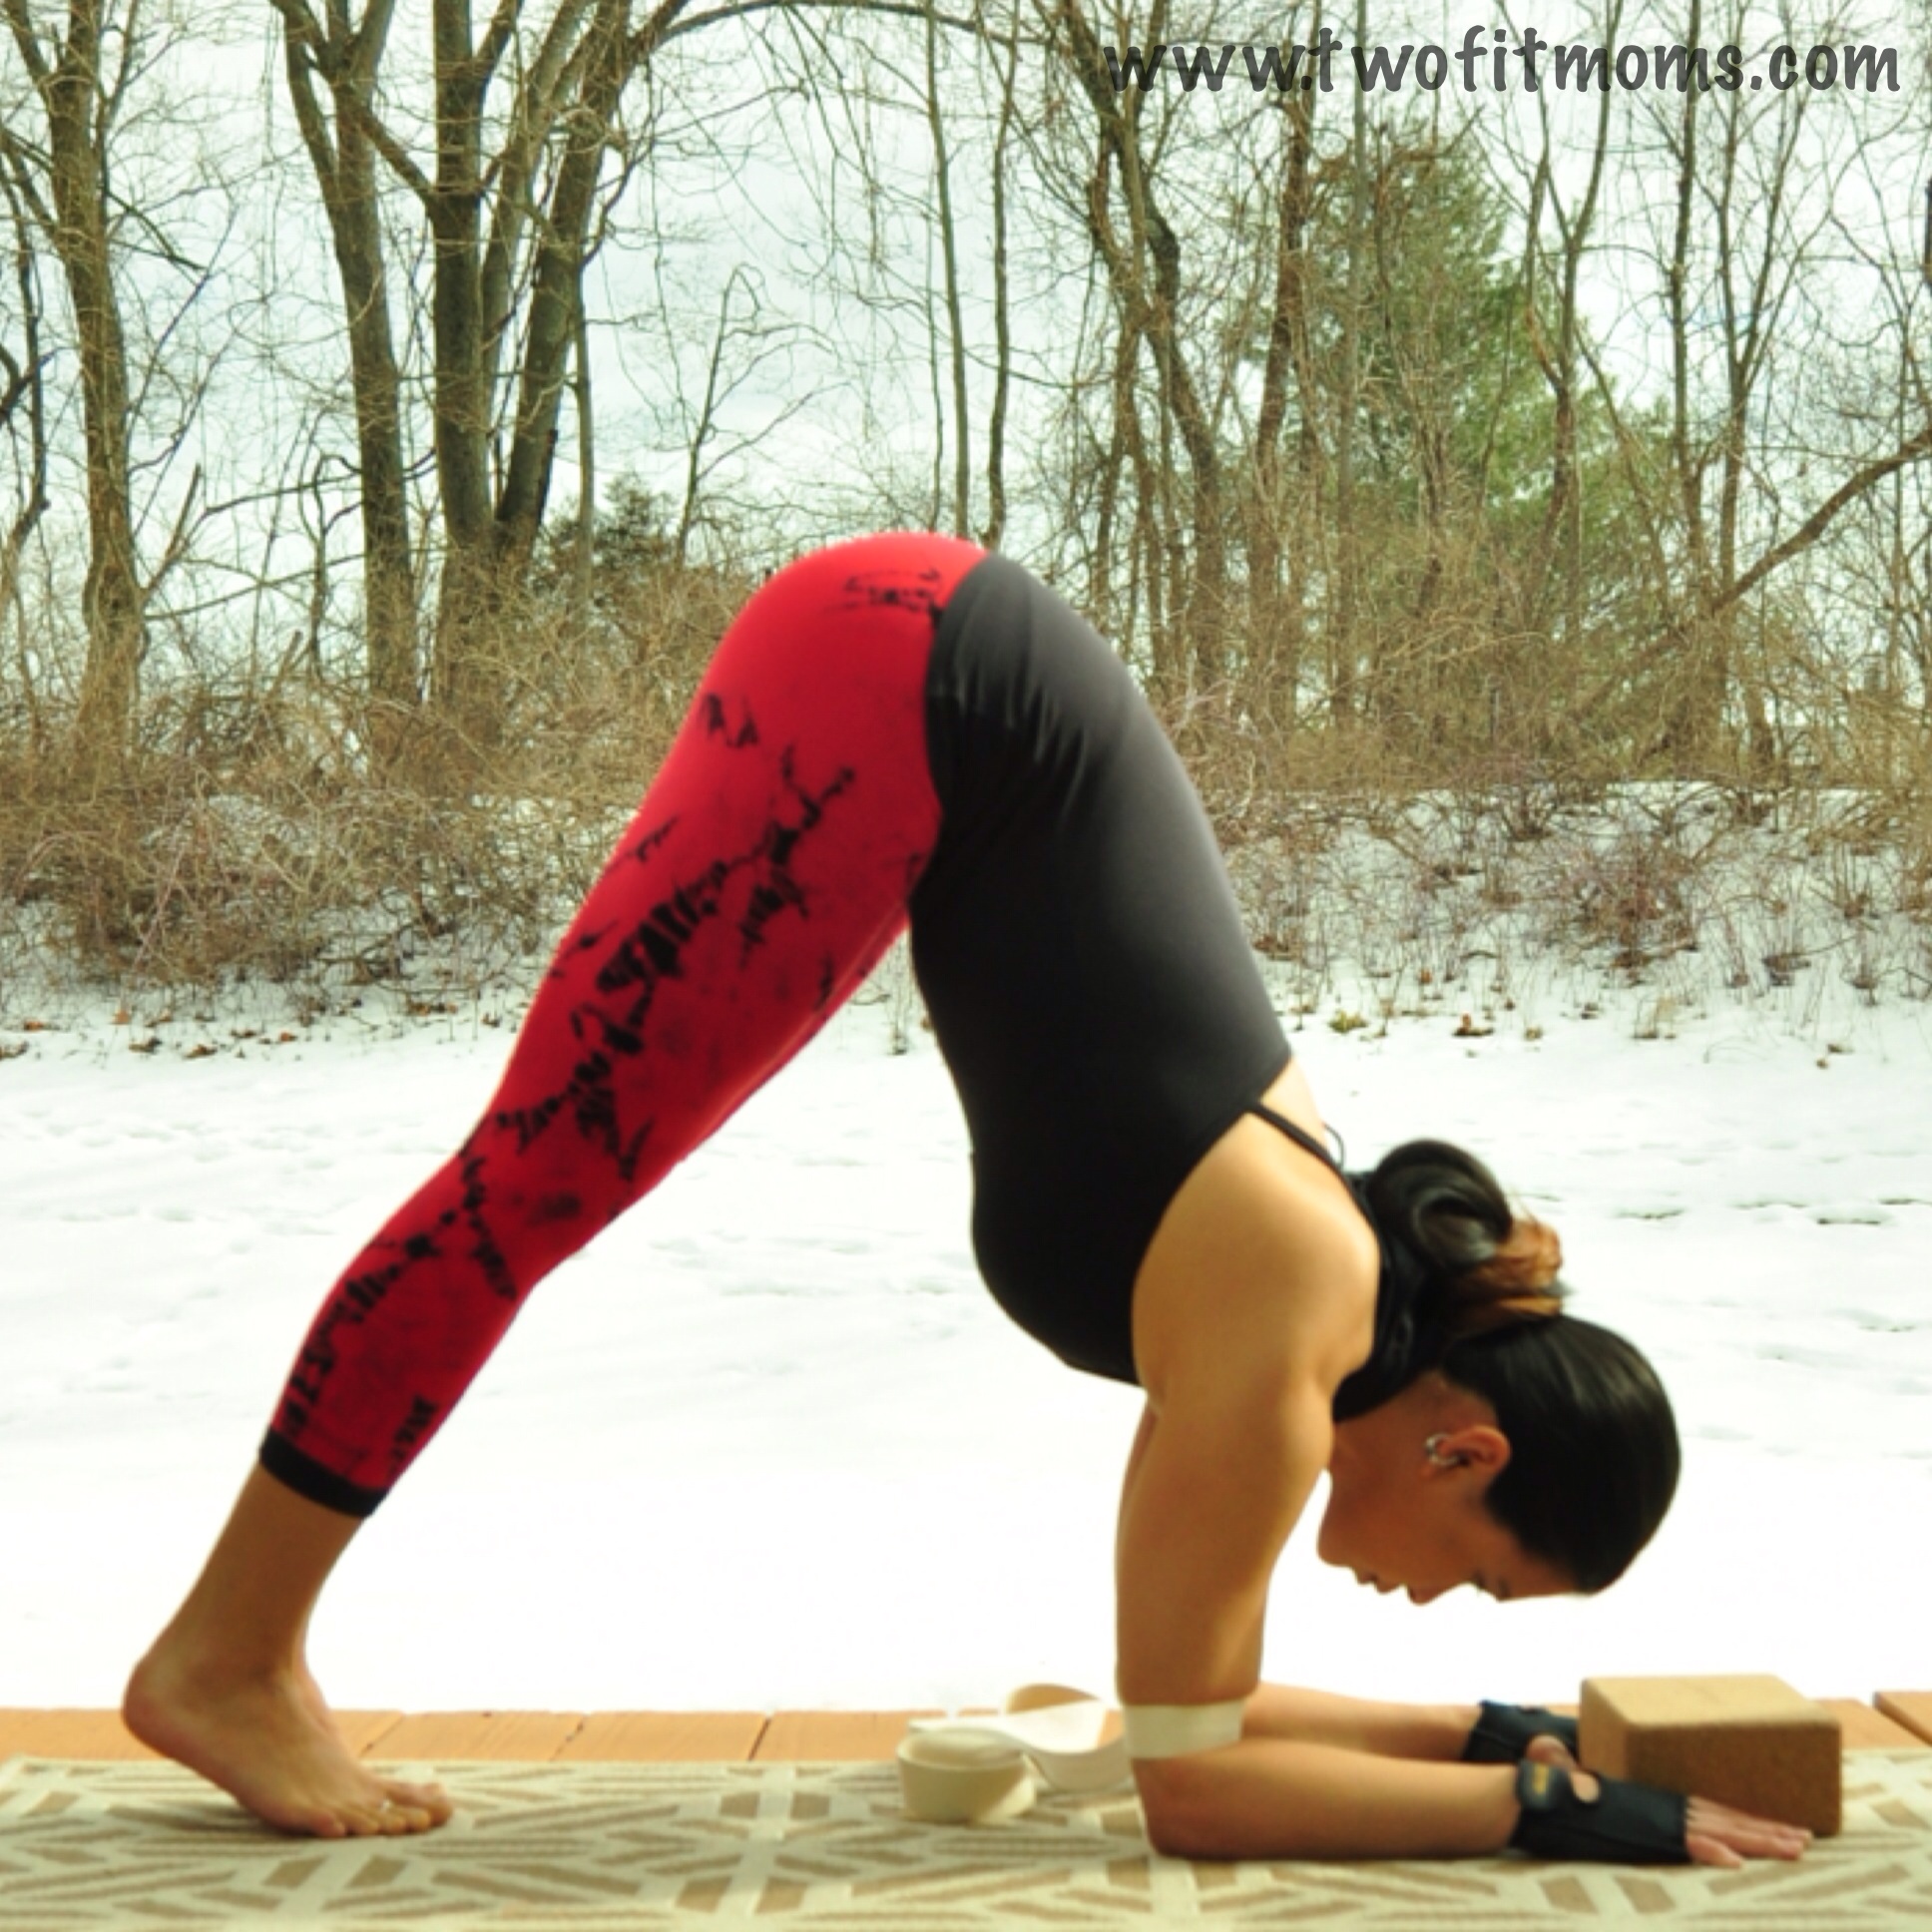
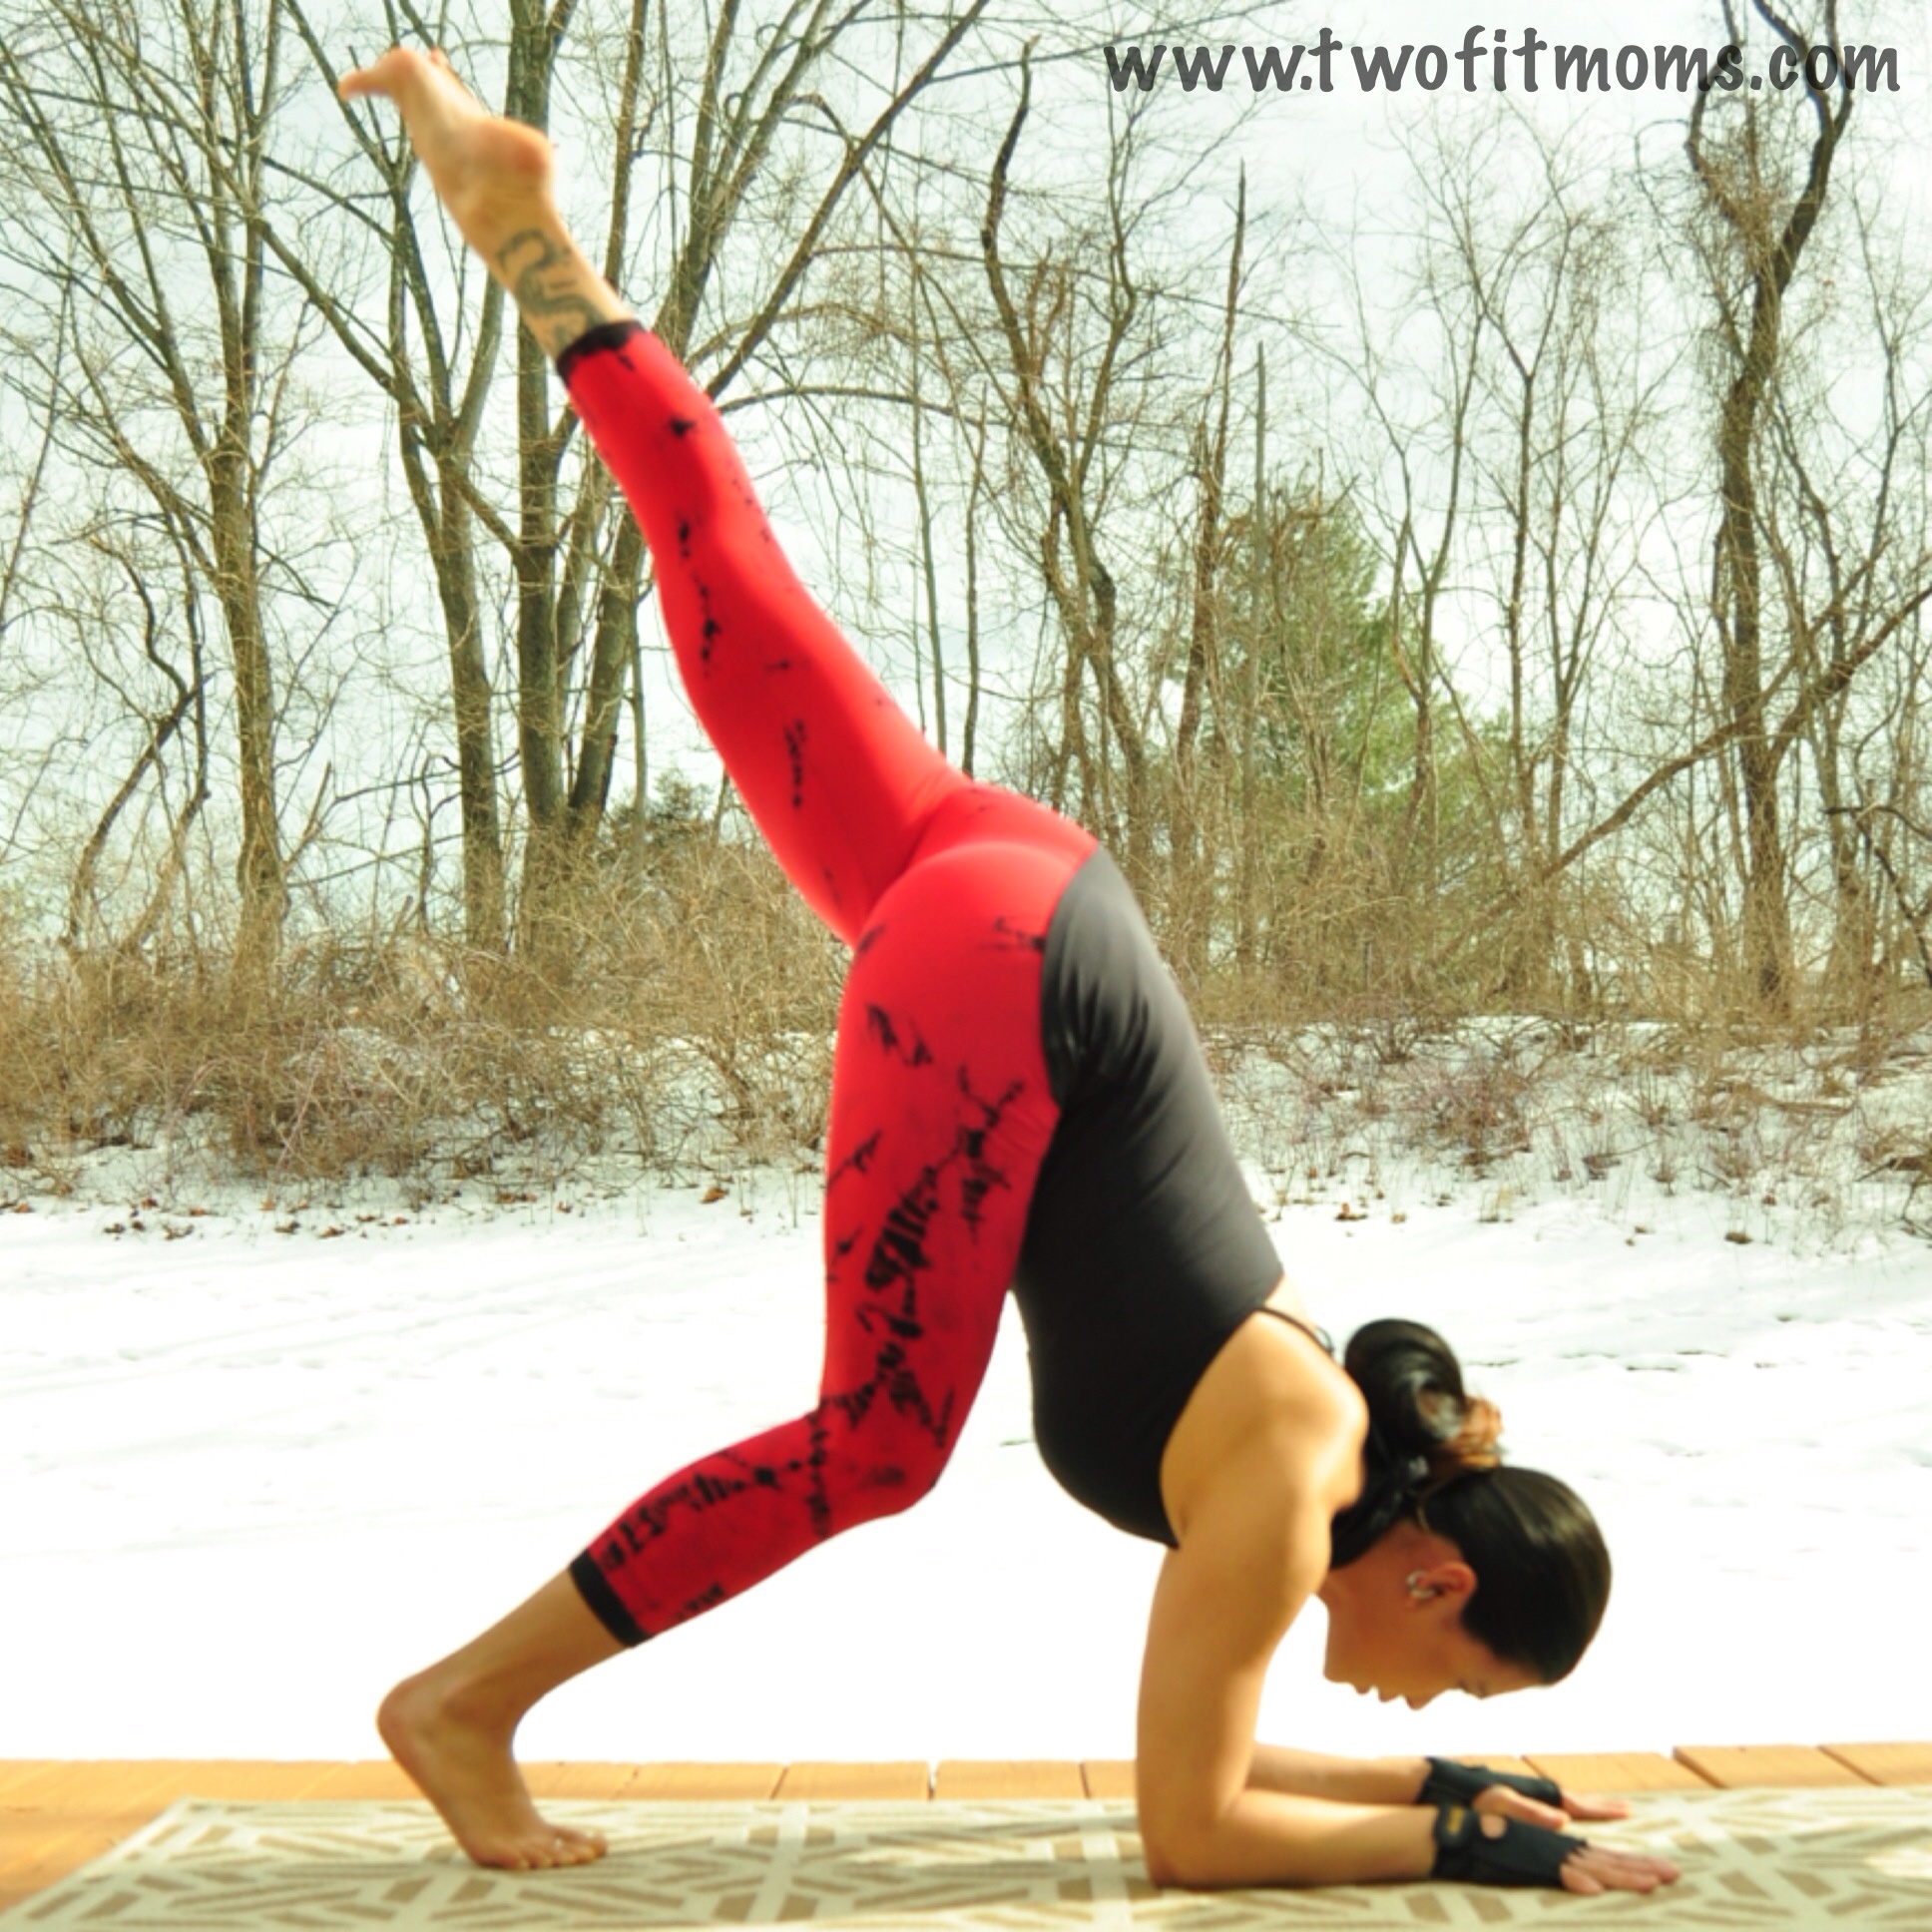
    If you are new to this, start off by attempting this from your Tripod Headstand. Working the float down from here will also help you gain strength within your core!

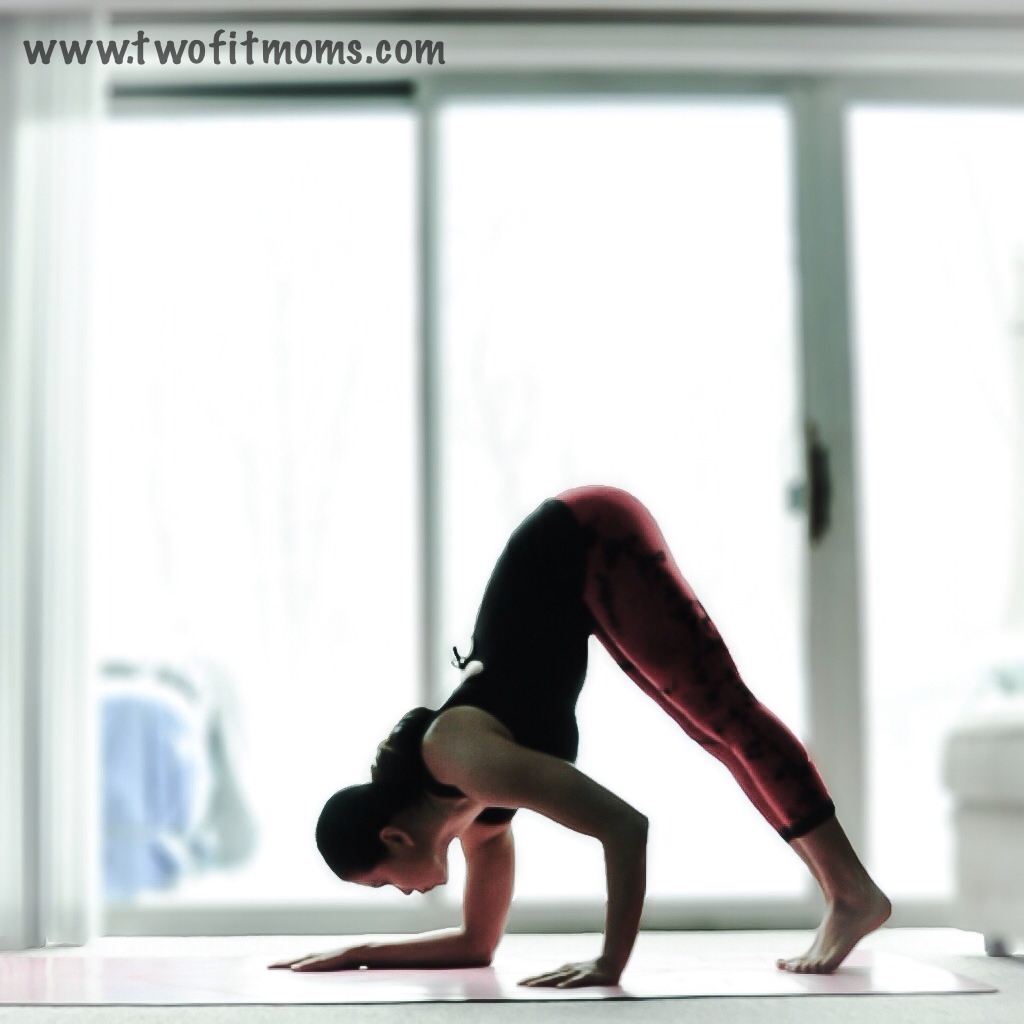
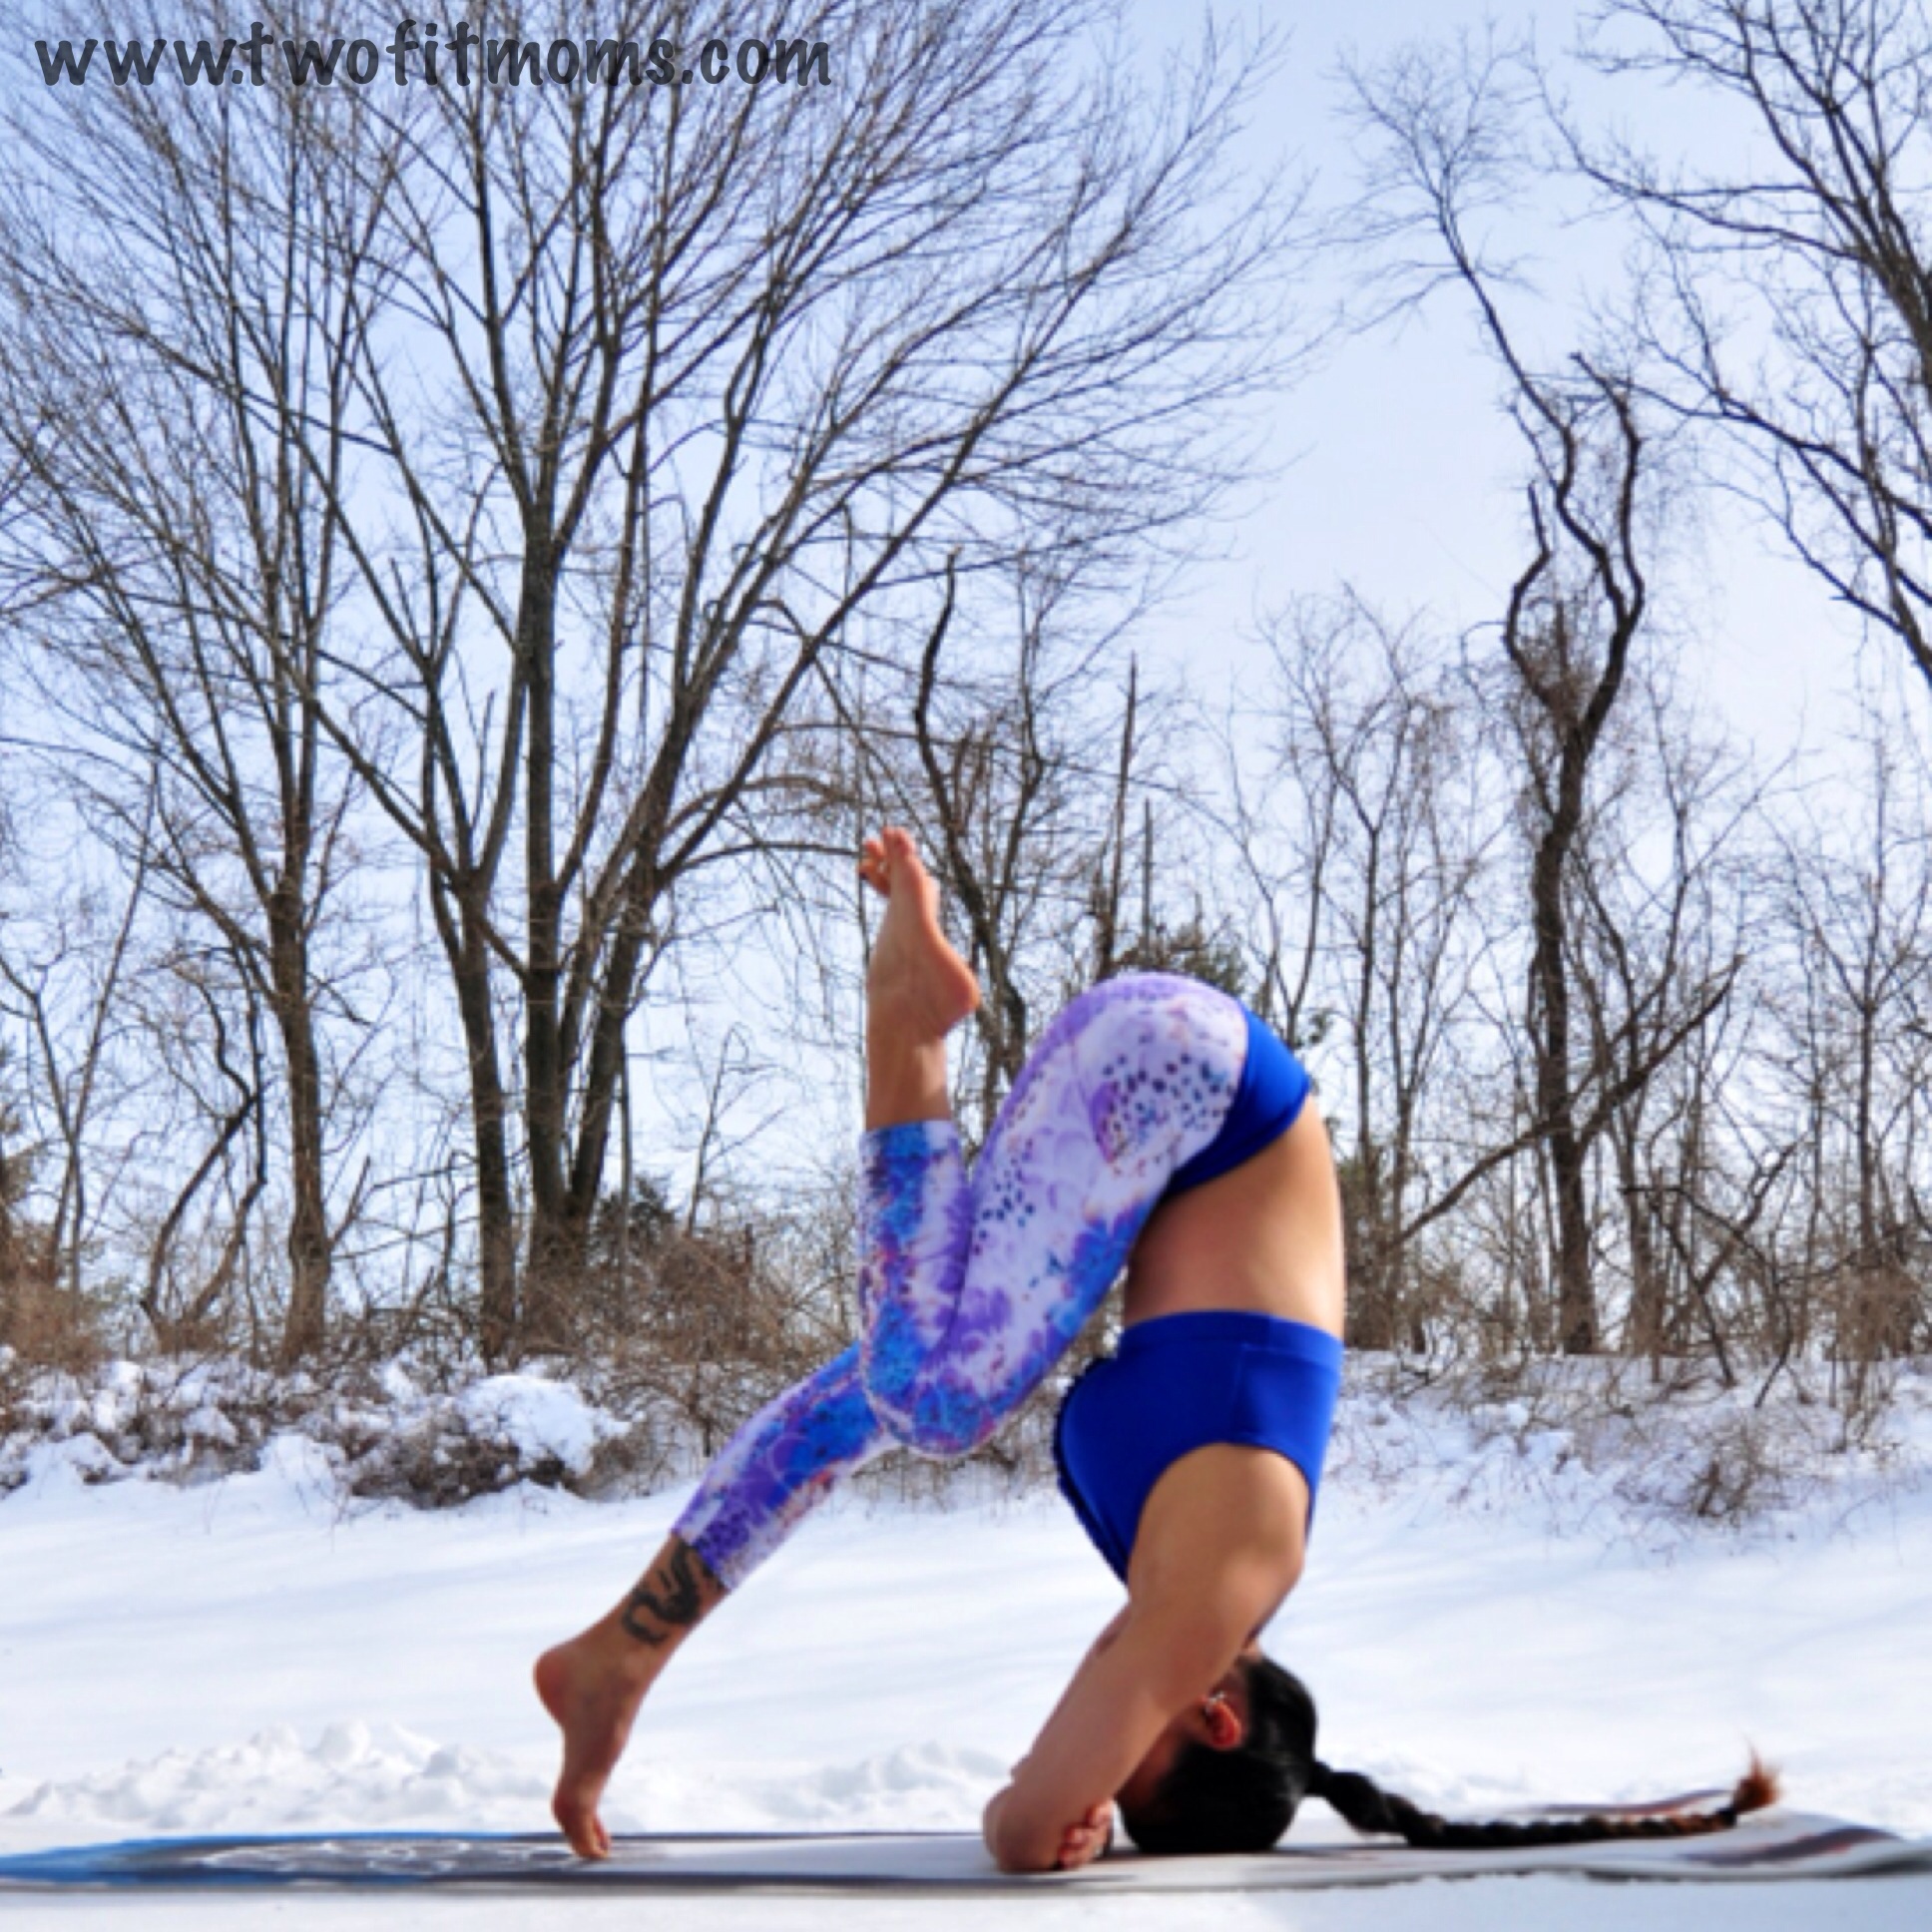
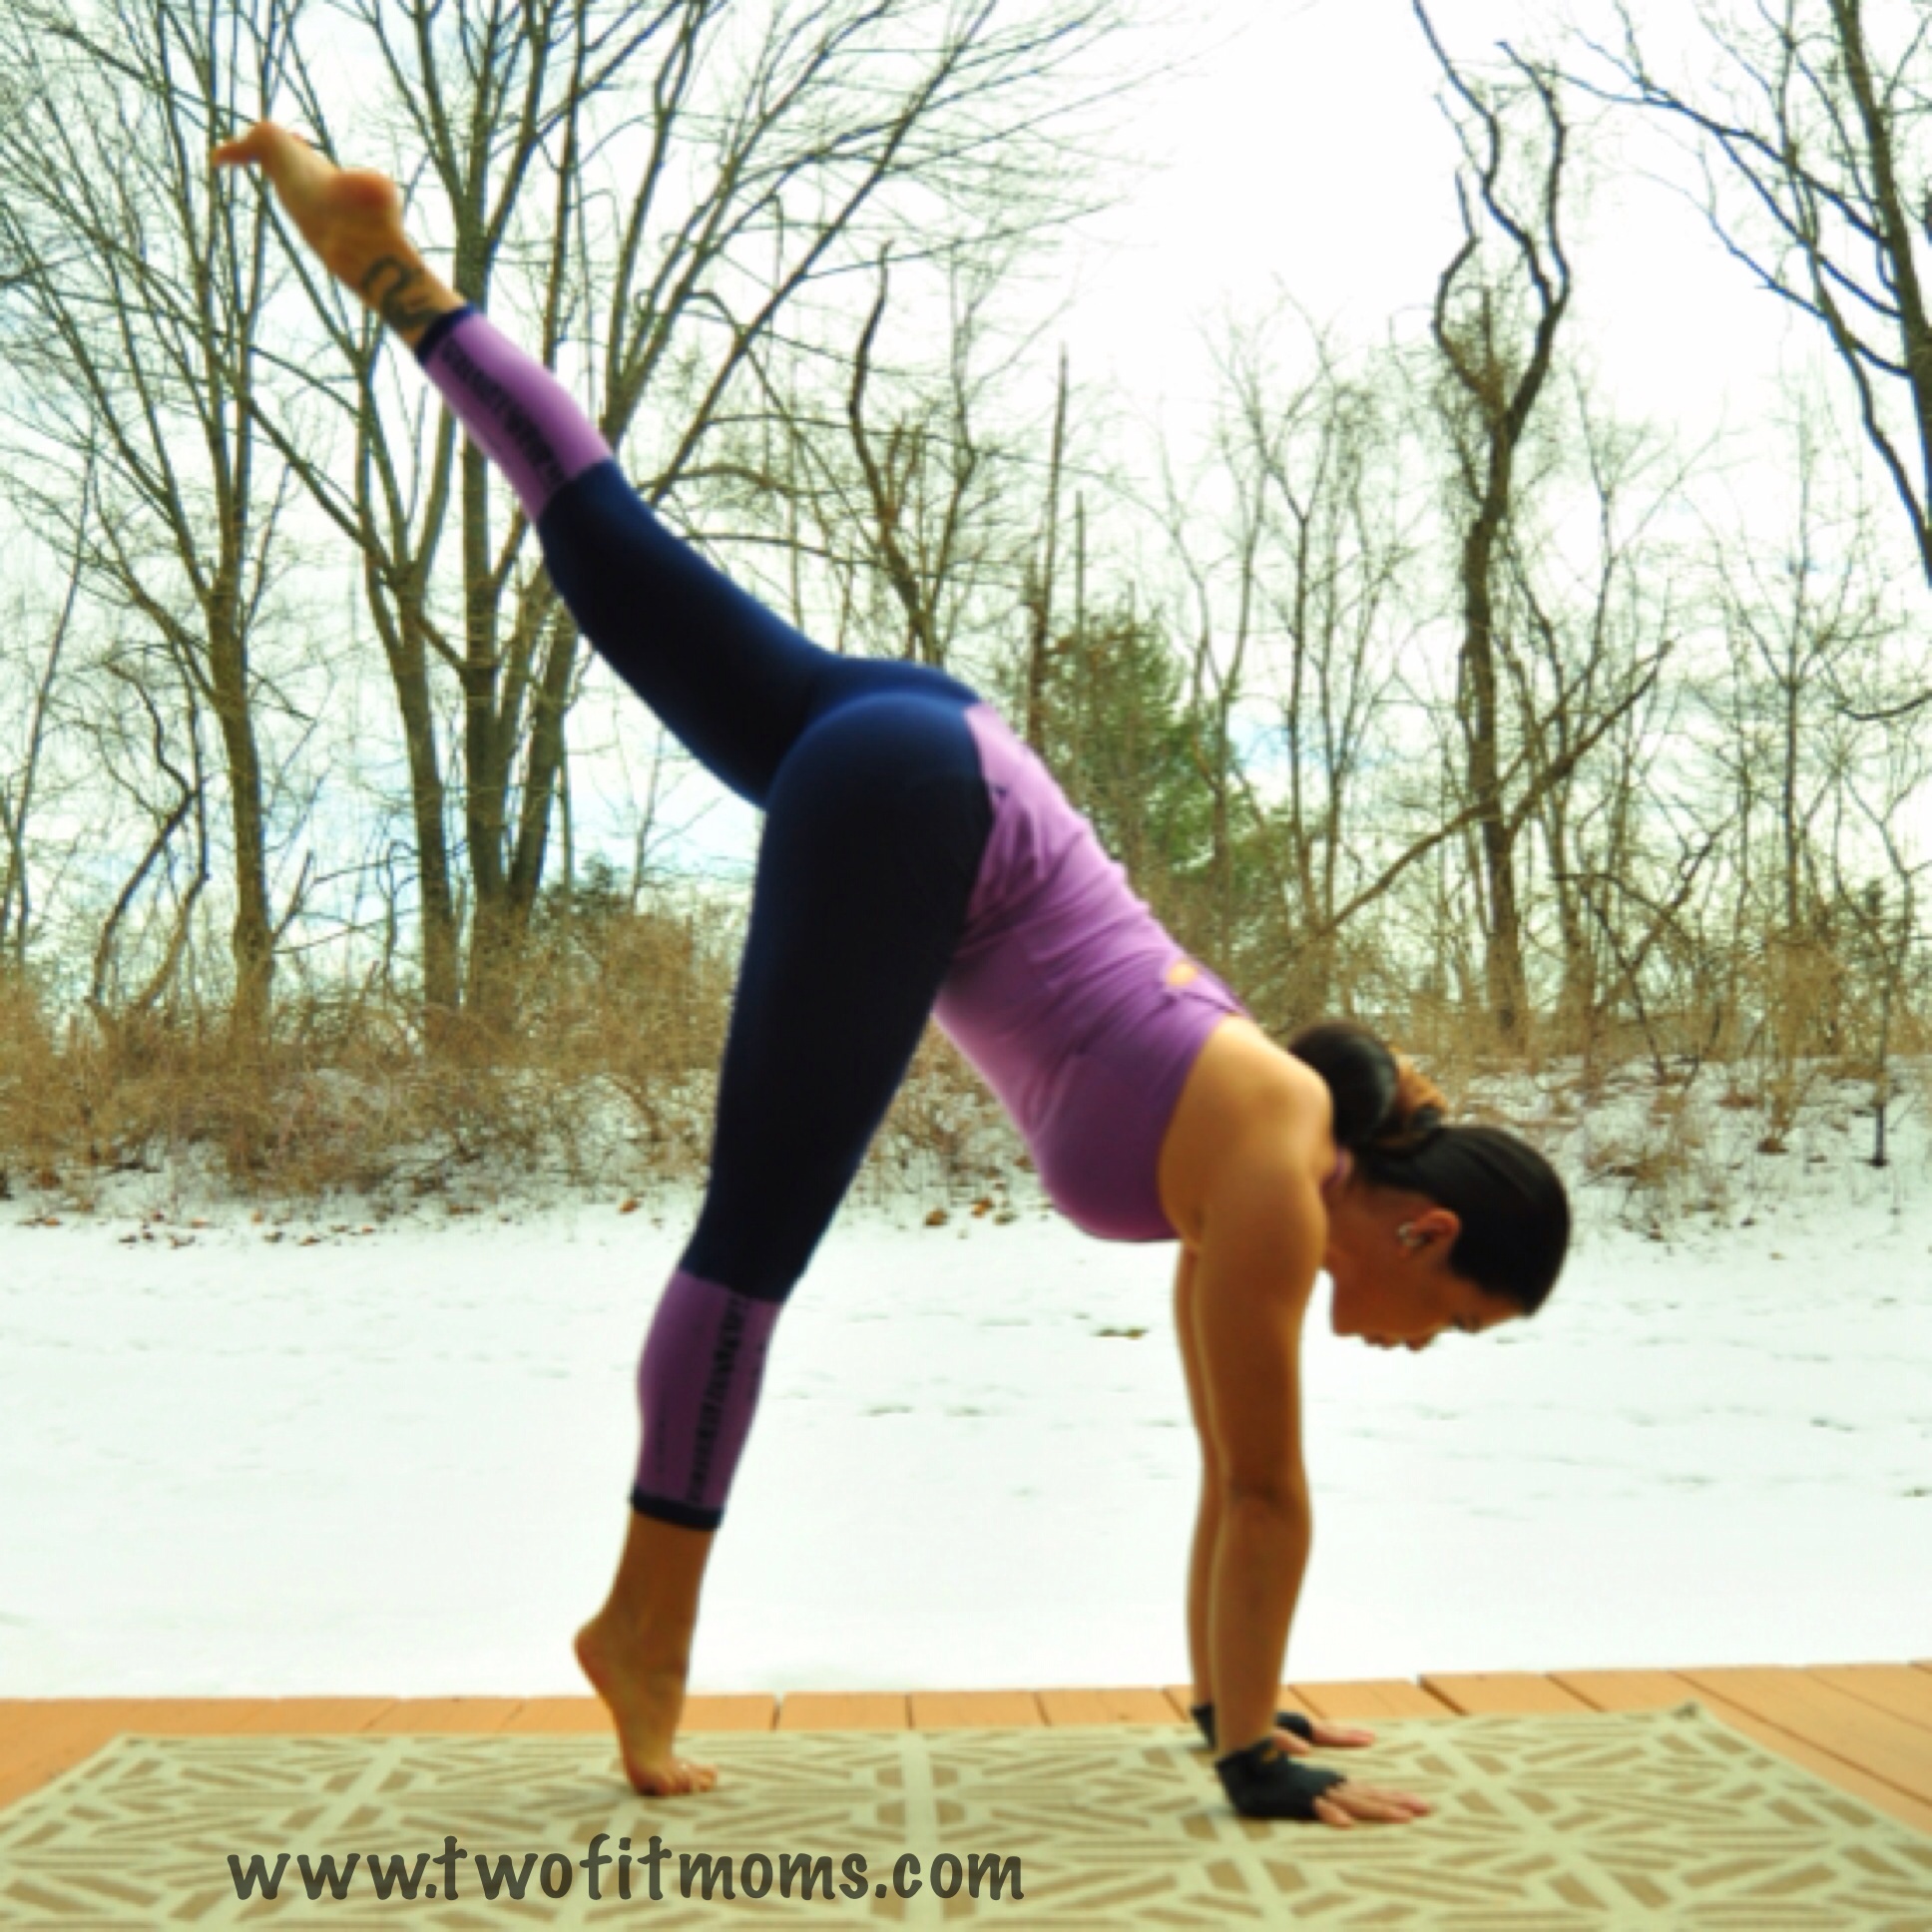
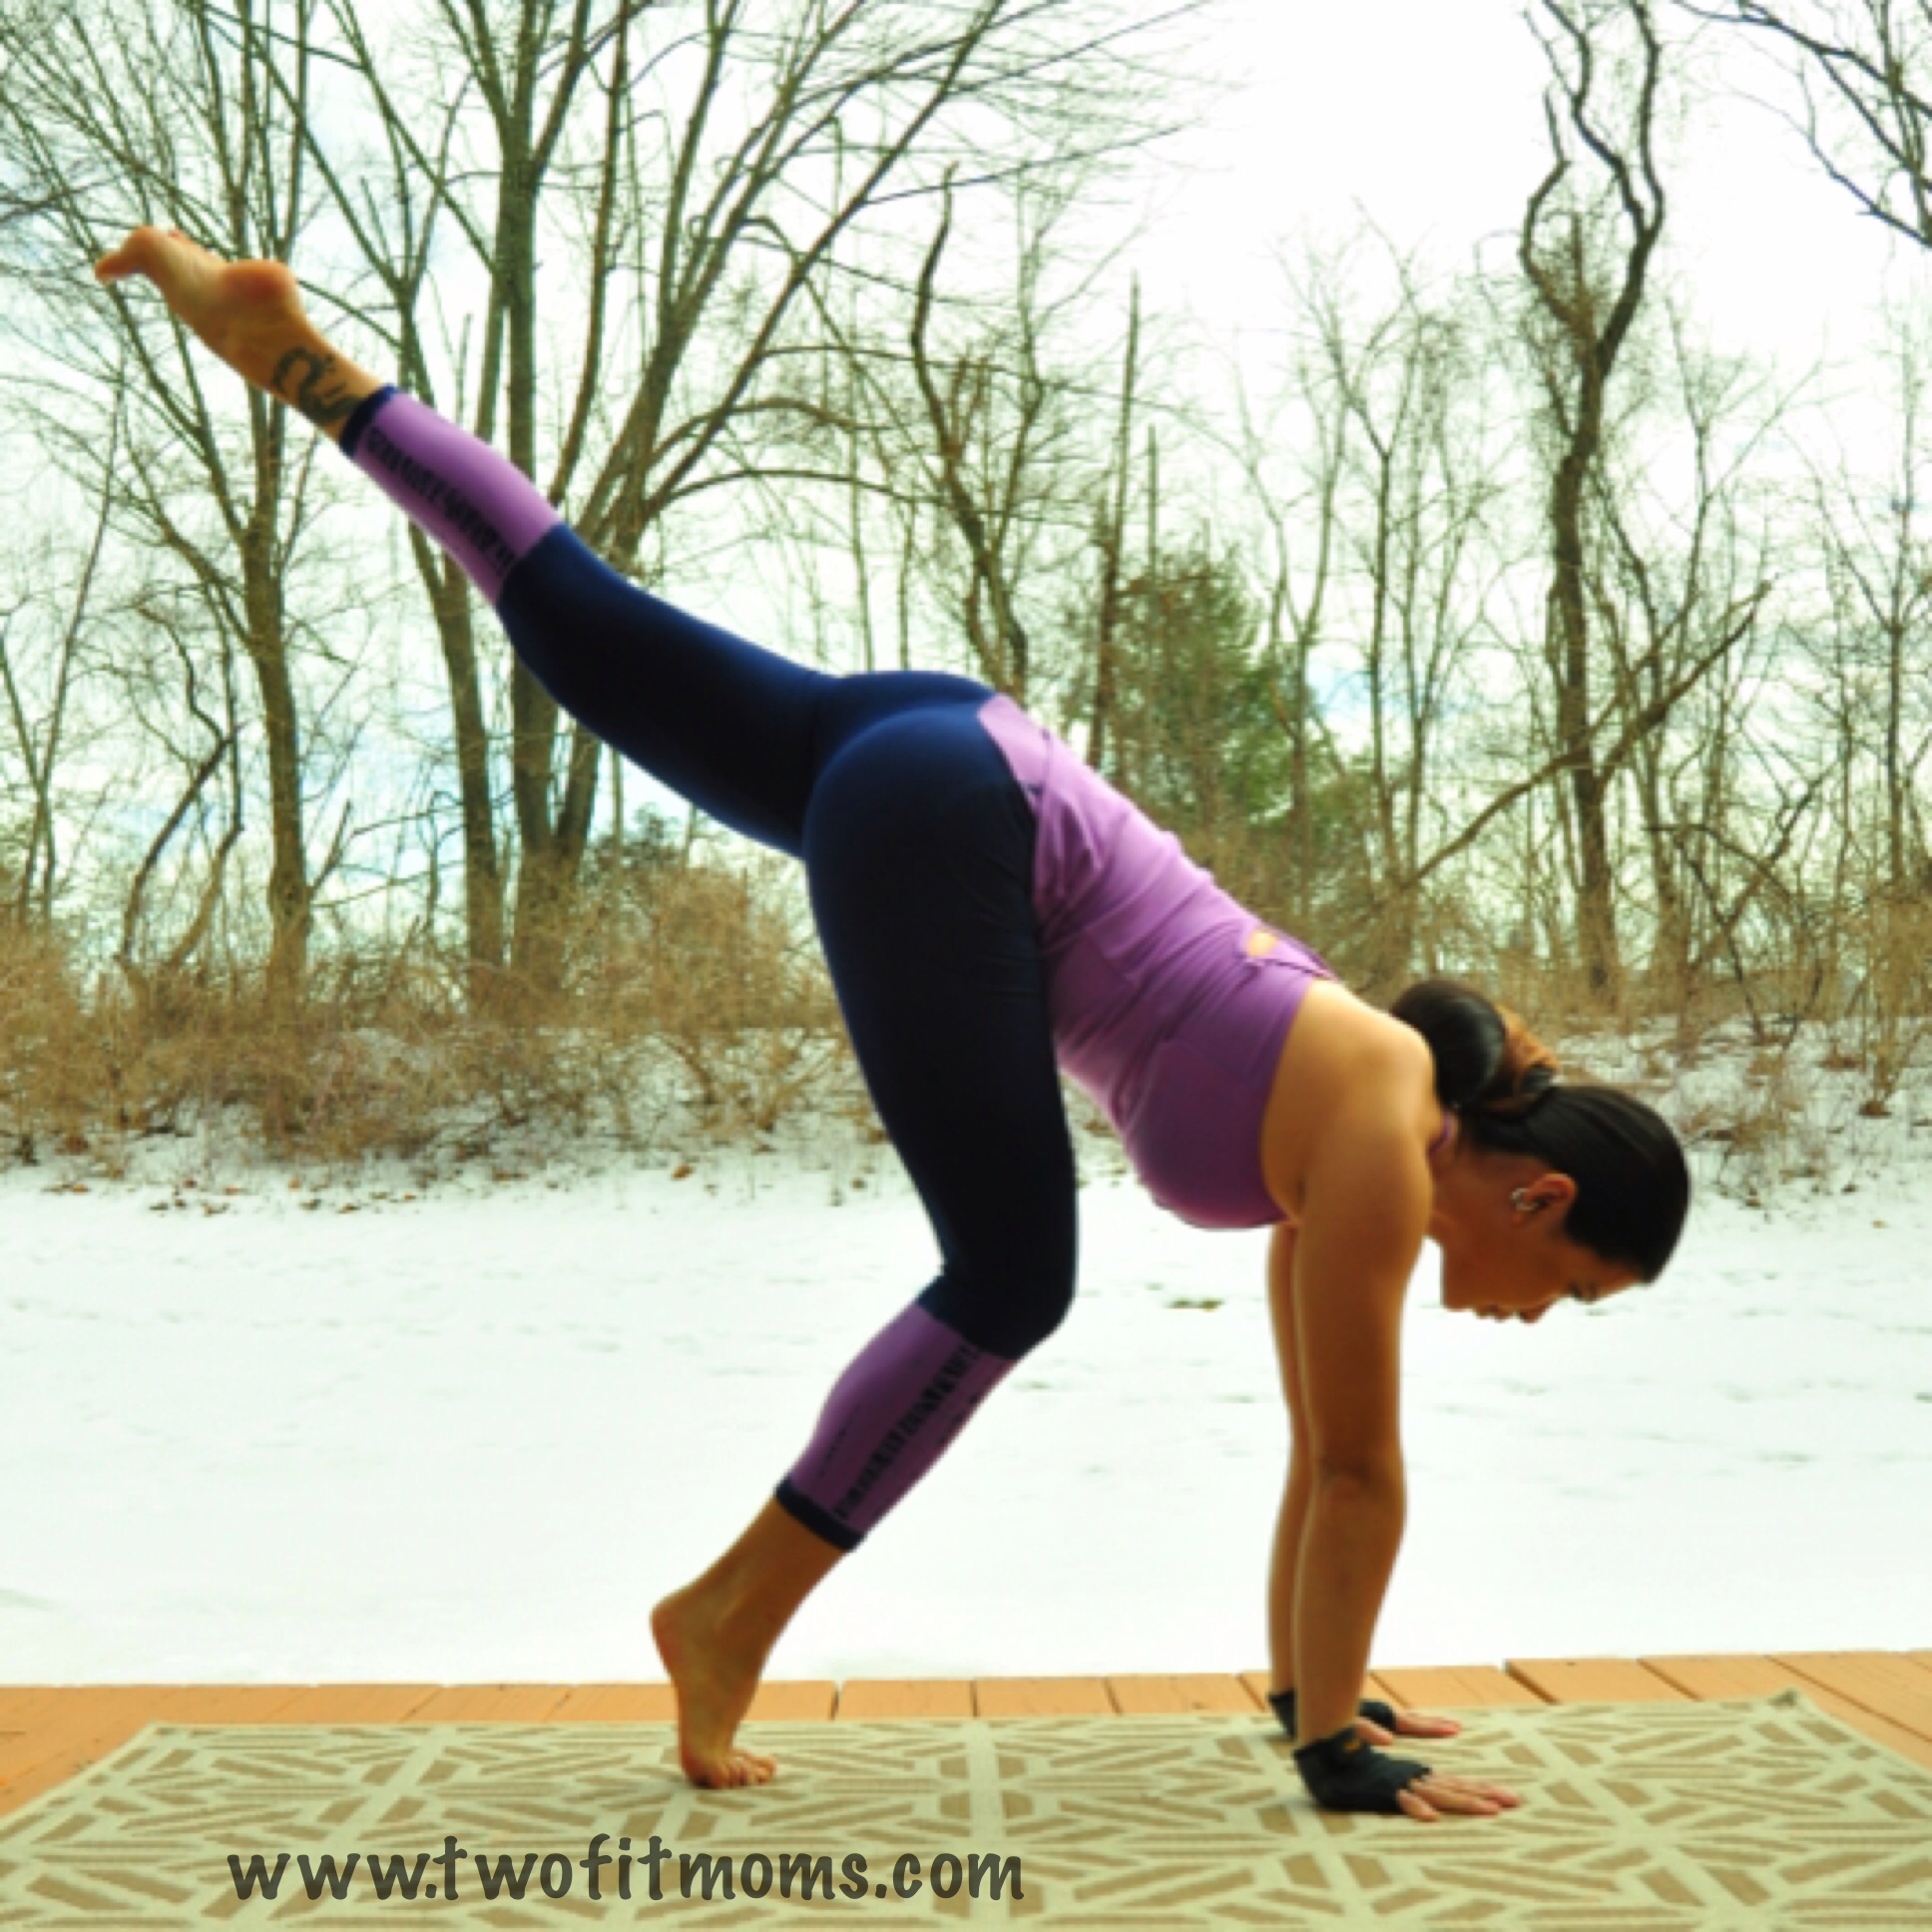
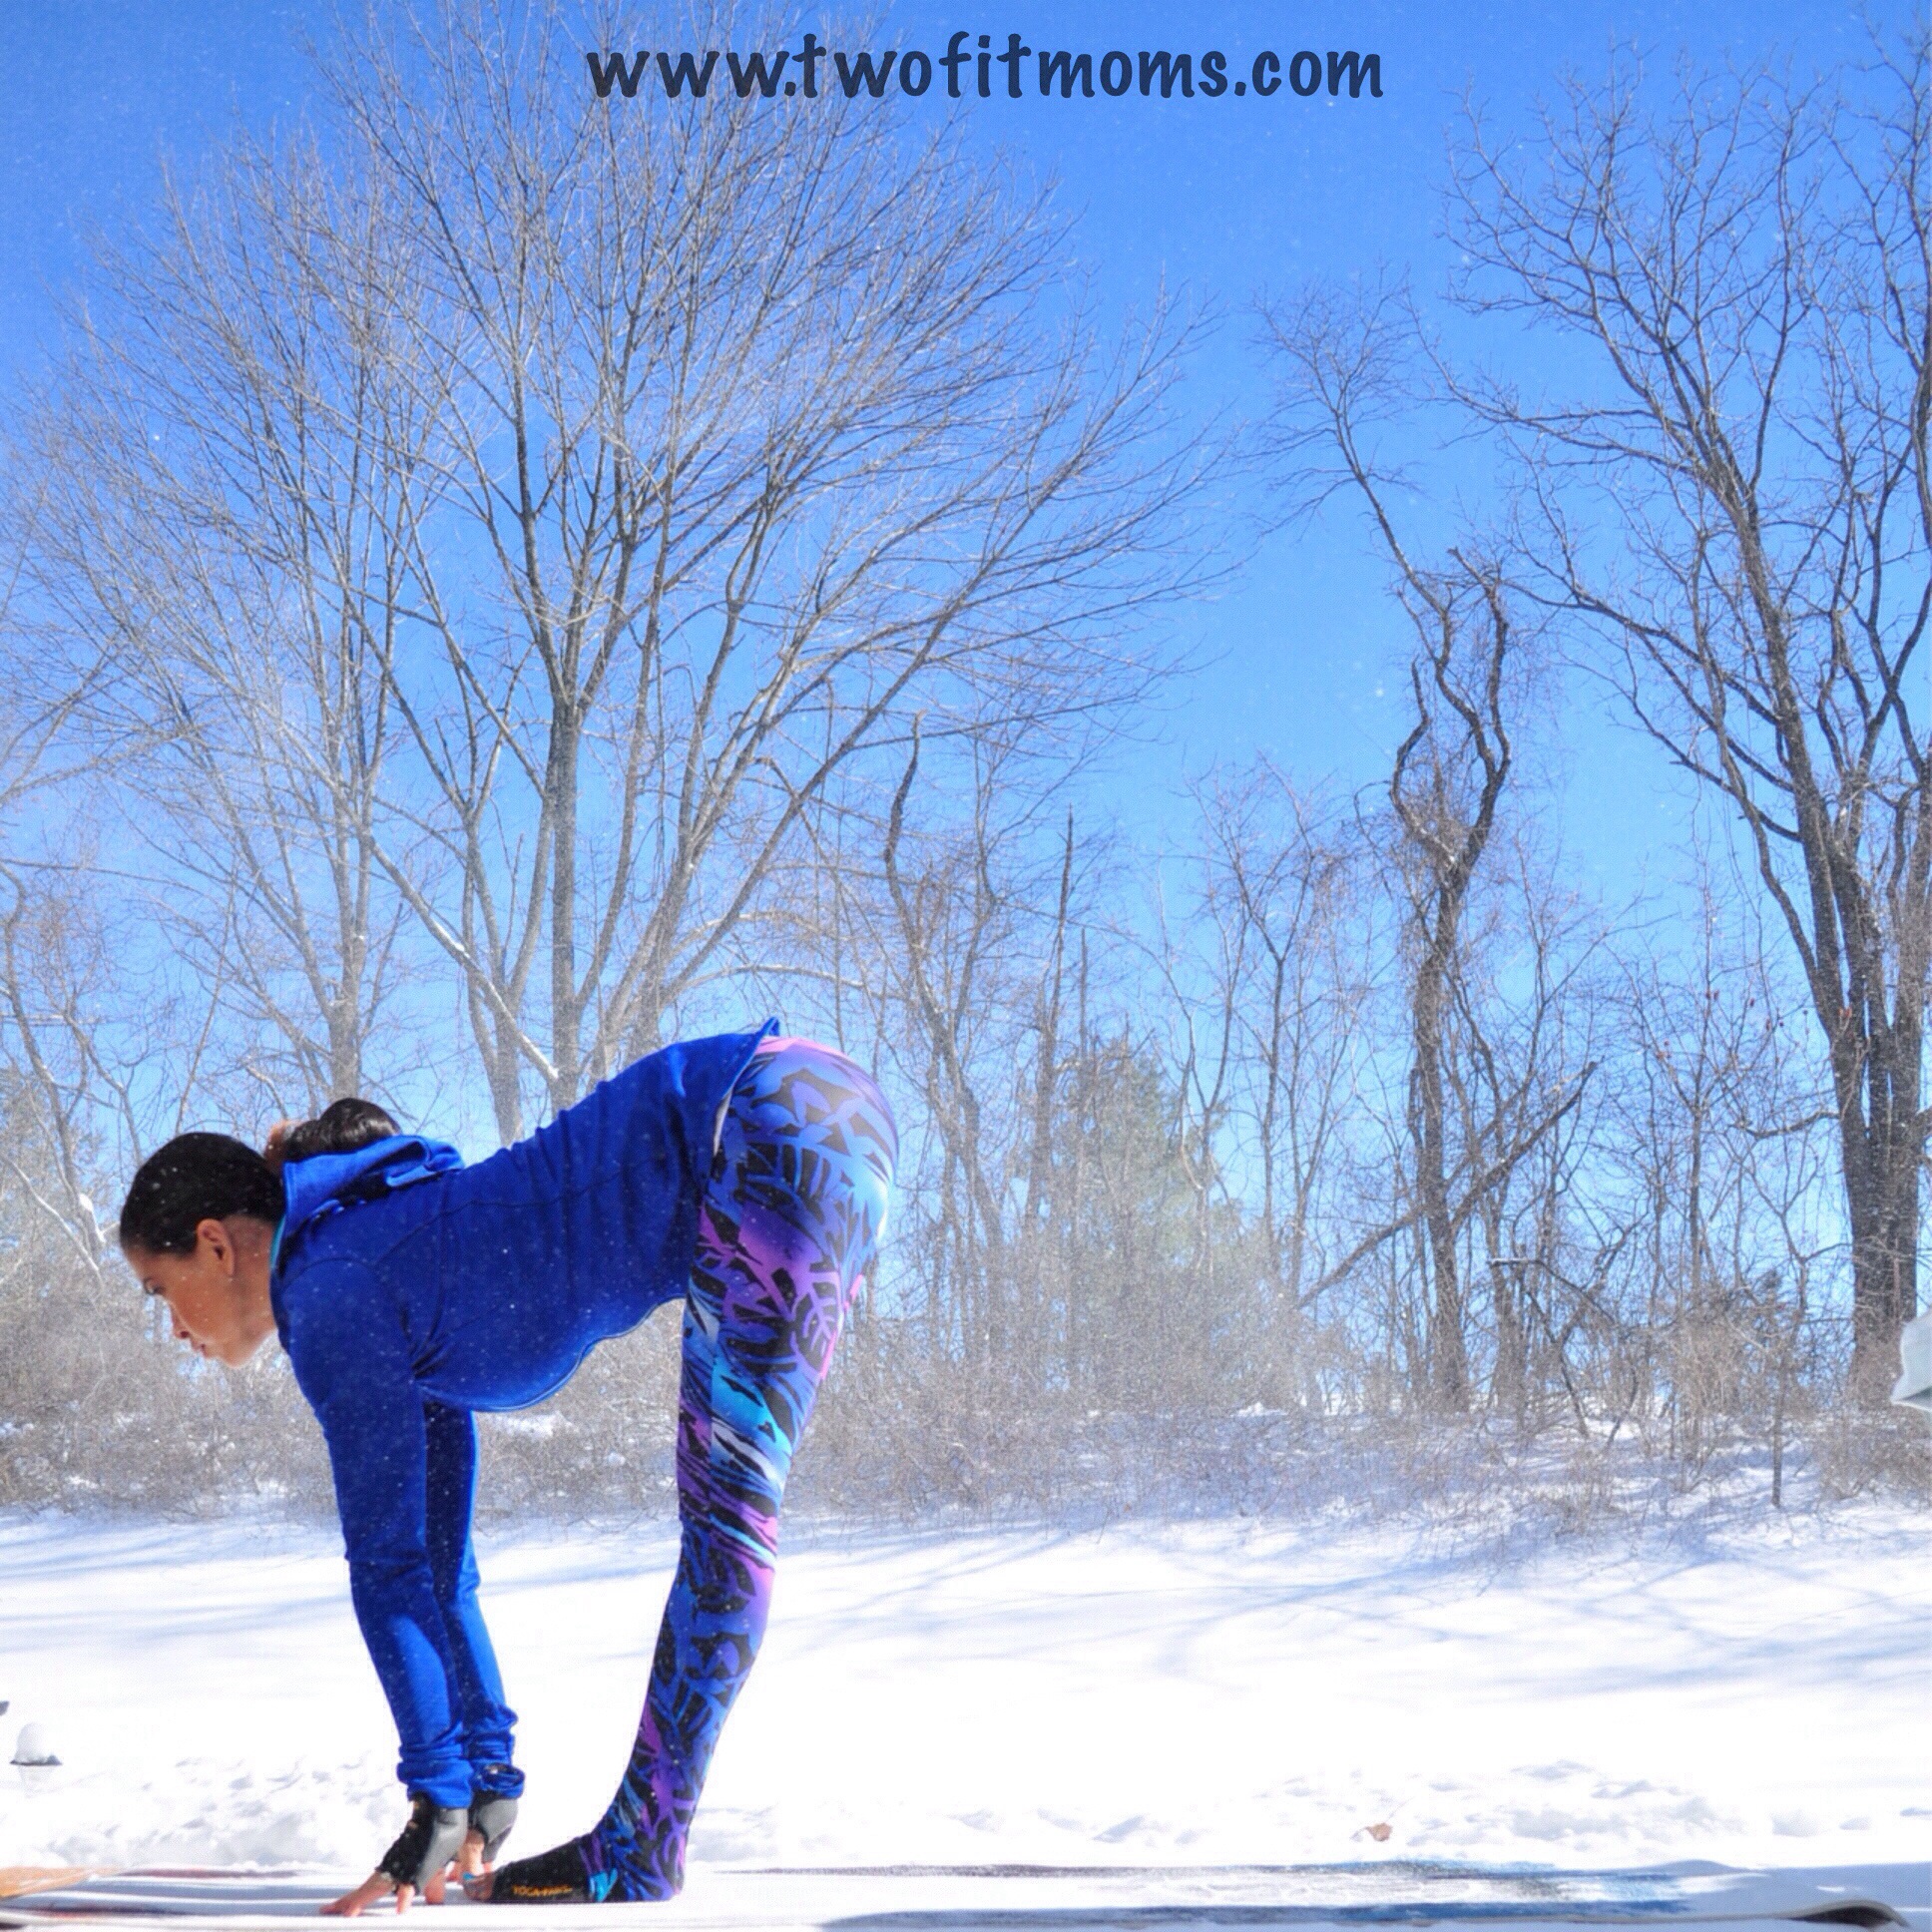
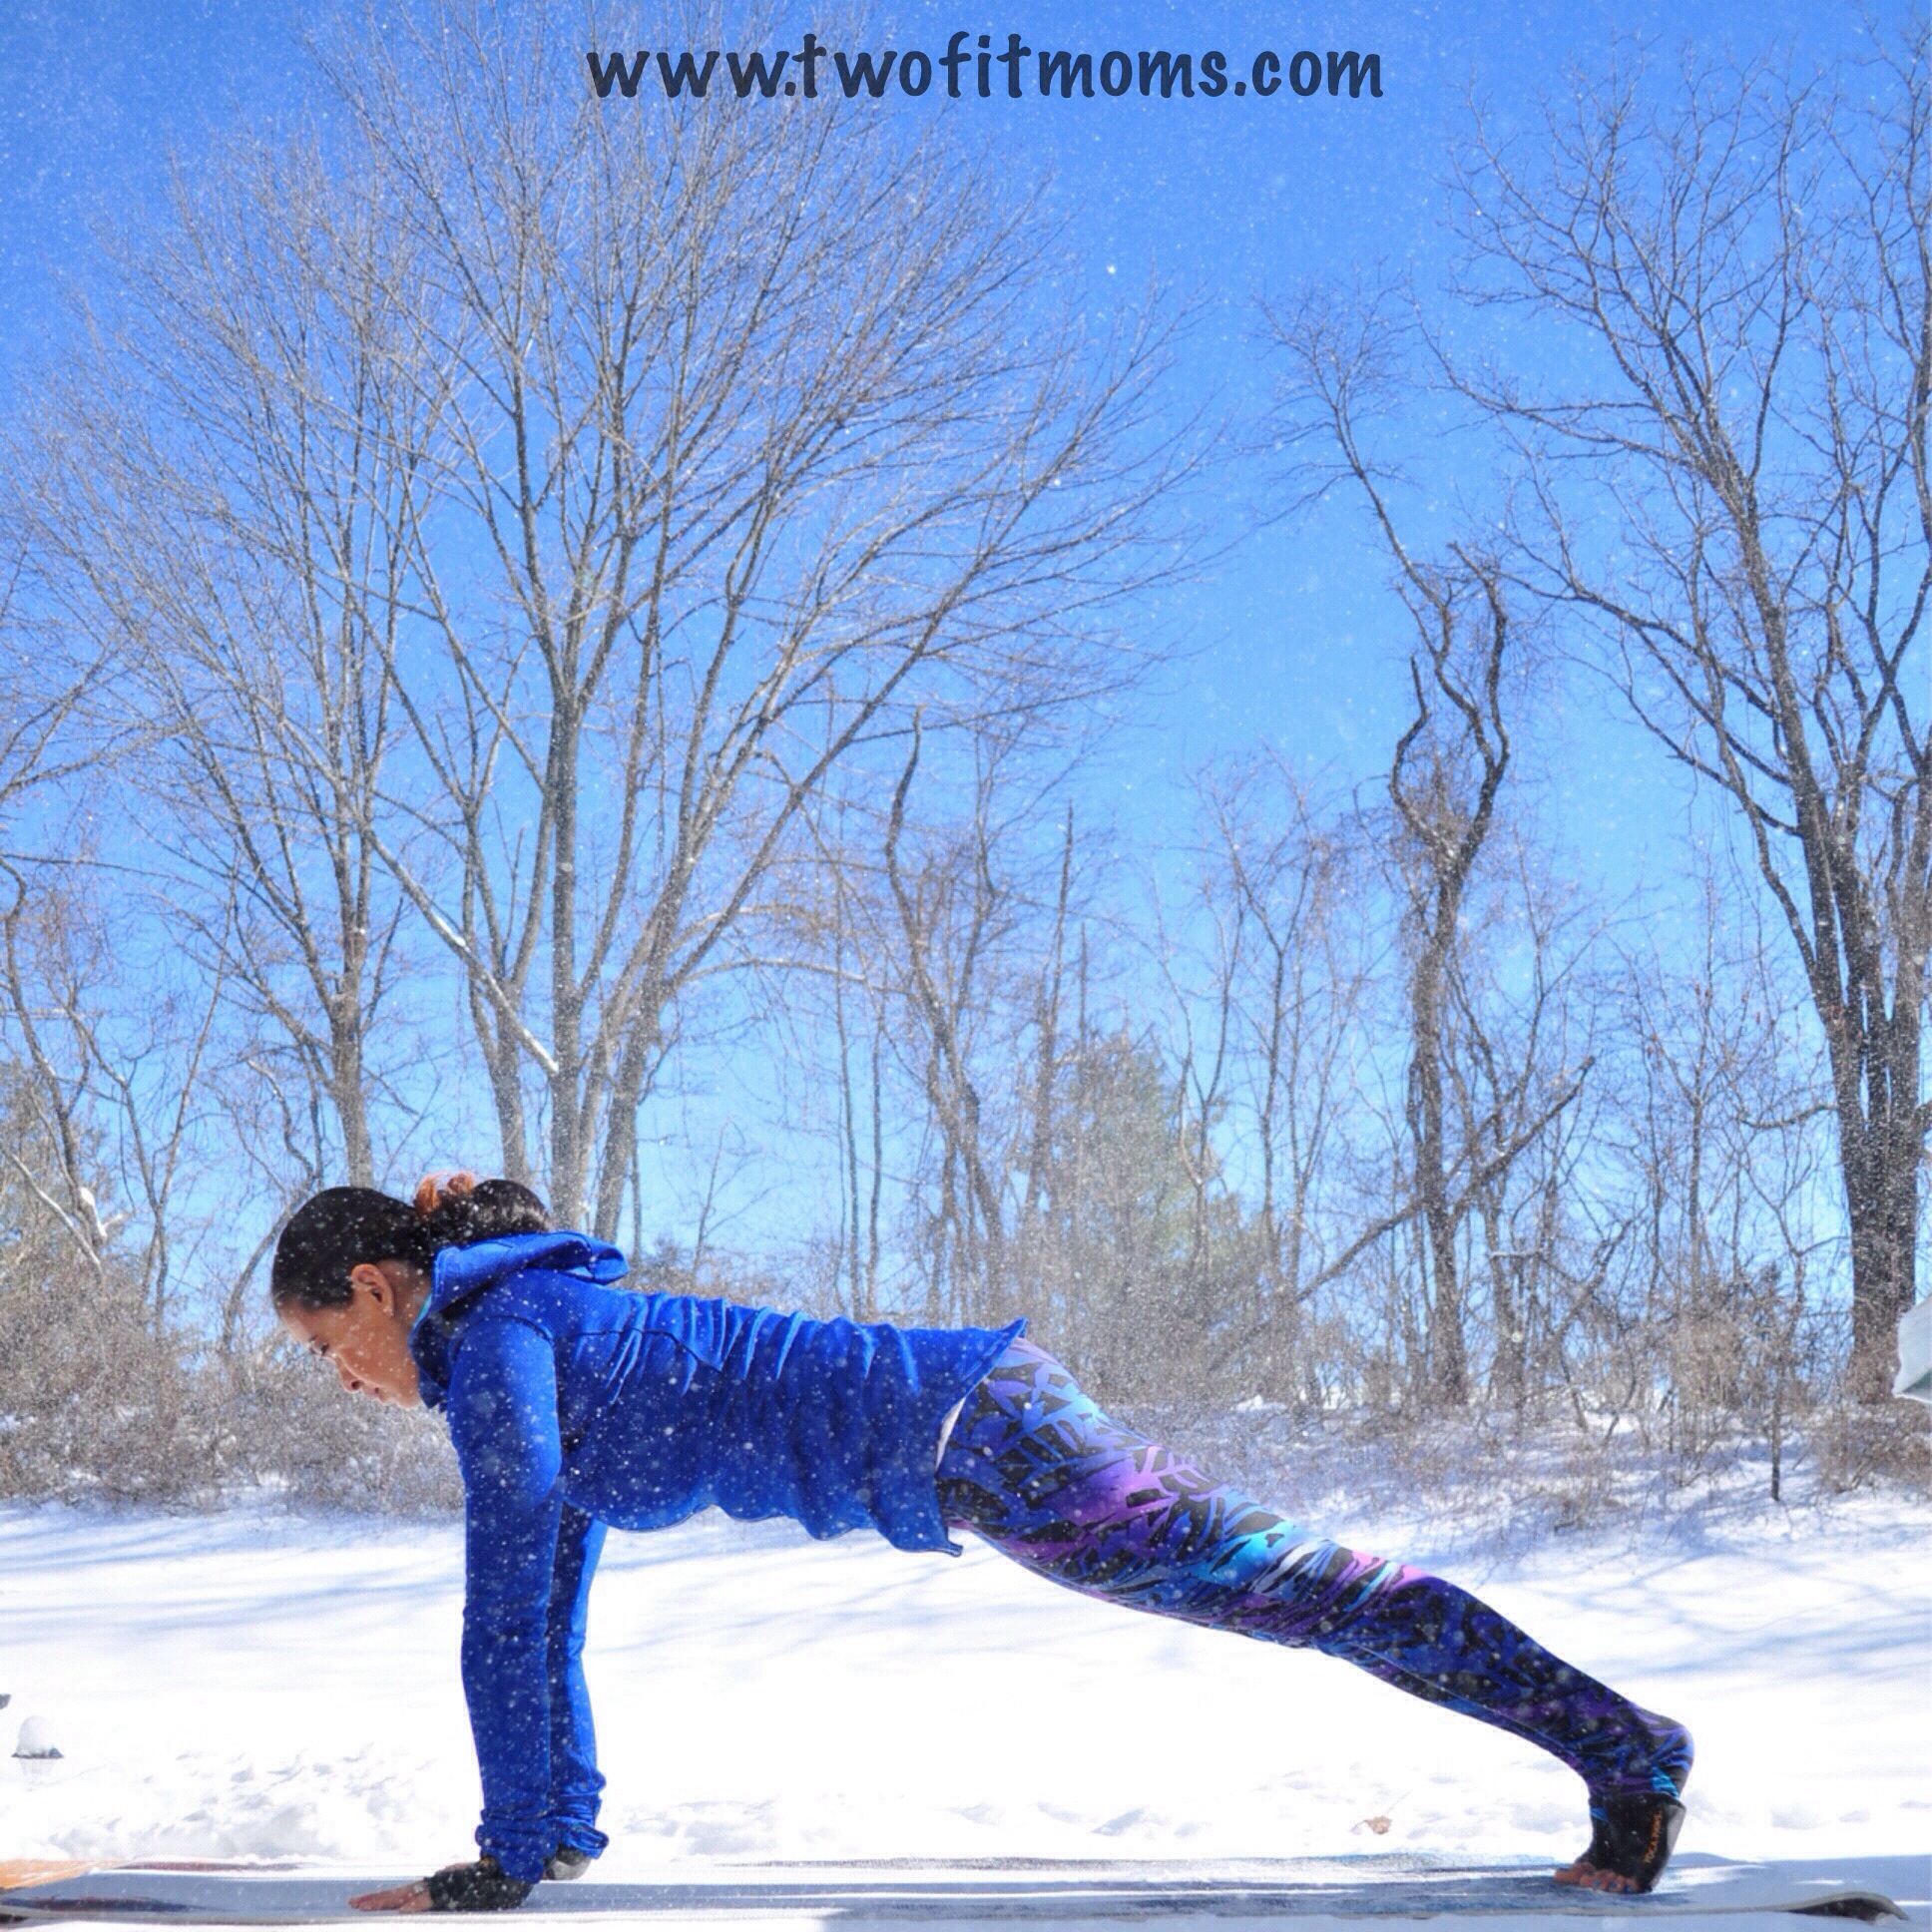
    Slowly come into your Tripod Headstand. Start by flexing your feet to activate your entire lower body… and also to prepare your feet for the landing! Take a deep breath in. On the exhale, engage those bandhas and try to lower your legs down a few inches. Inhale. On the exhale, lower them down a little more.  Make a mental note where your legs come down if you cannot float them gently onto the ground.

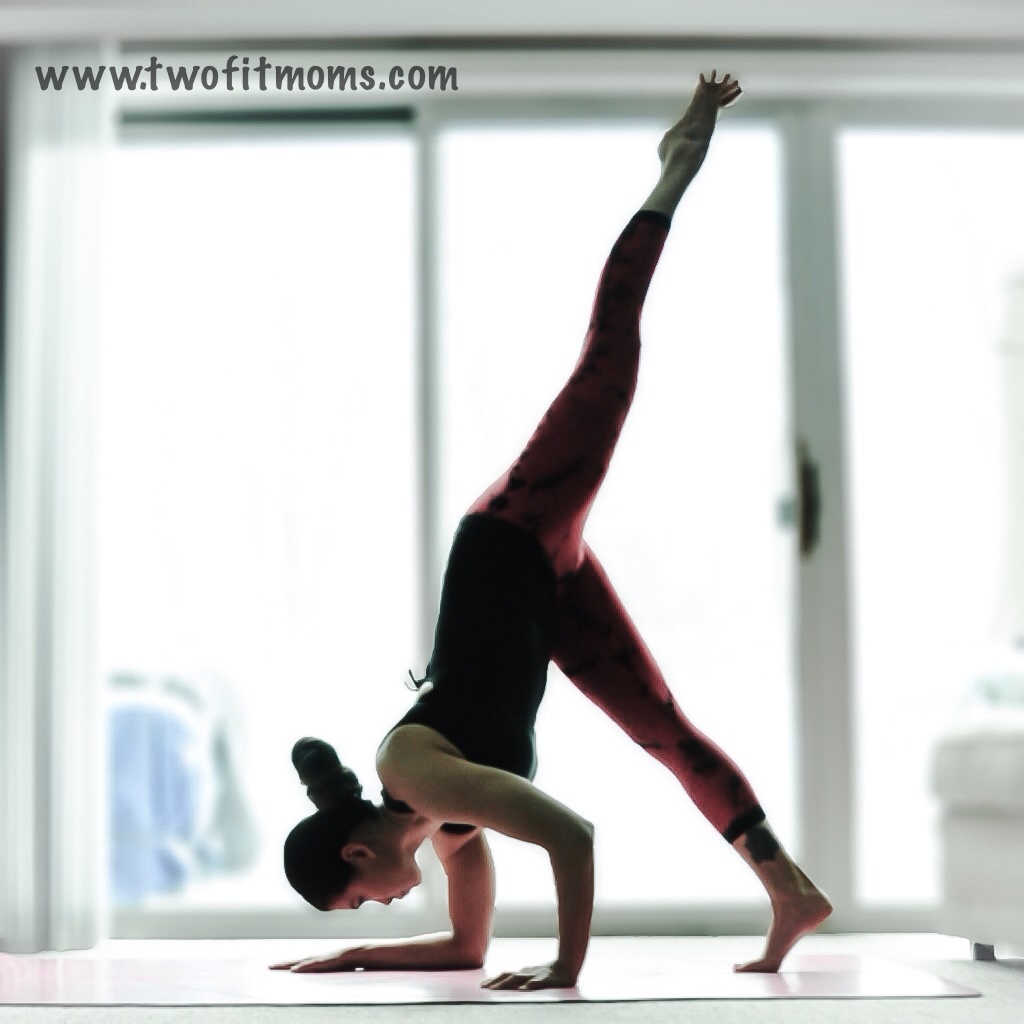
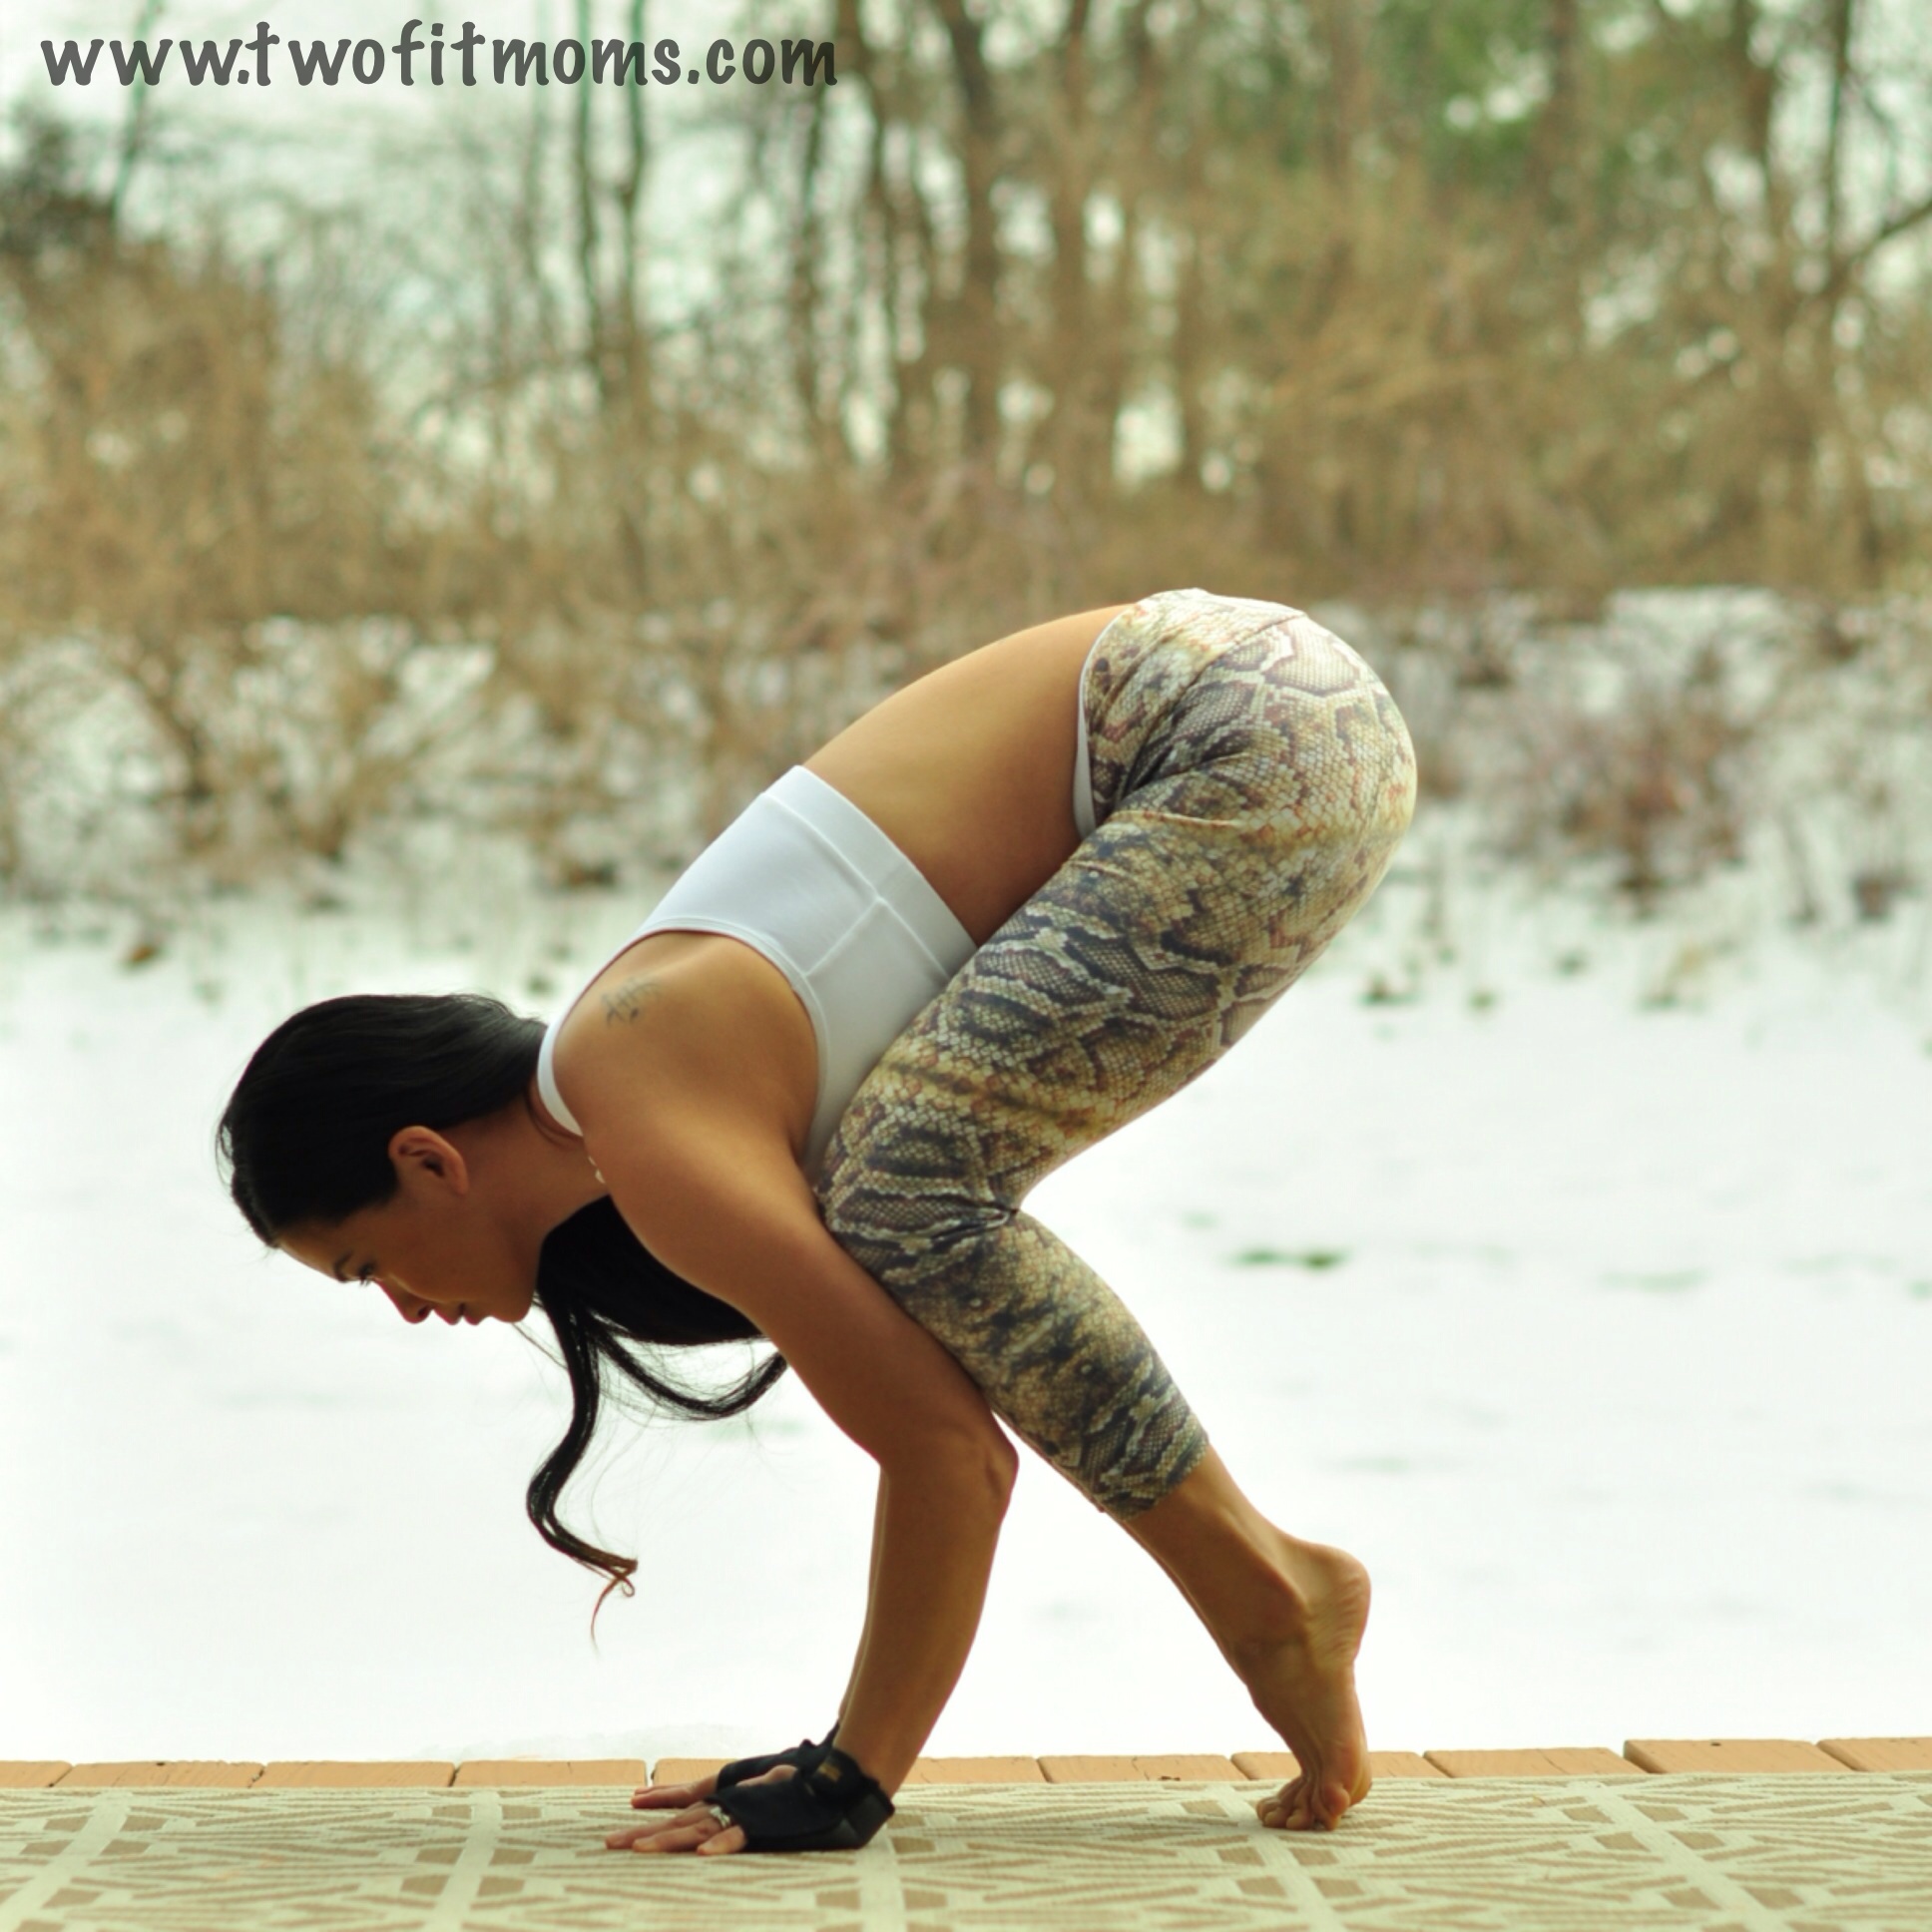
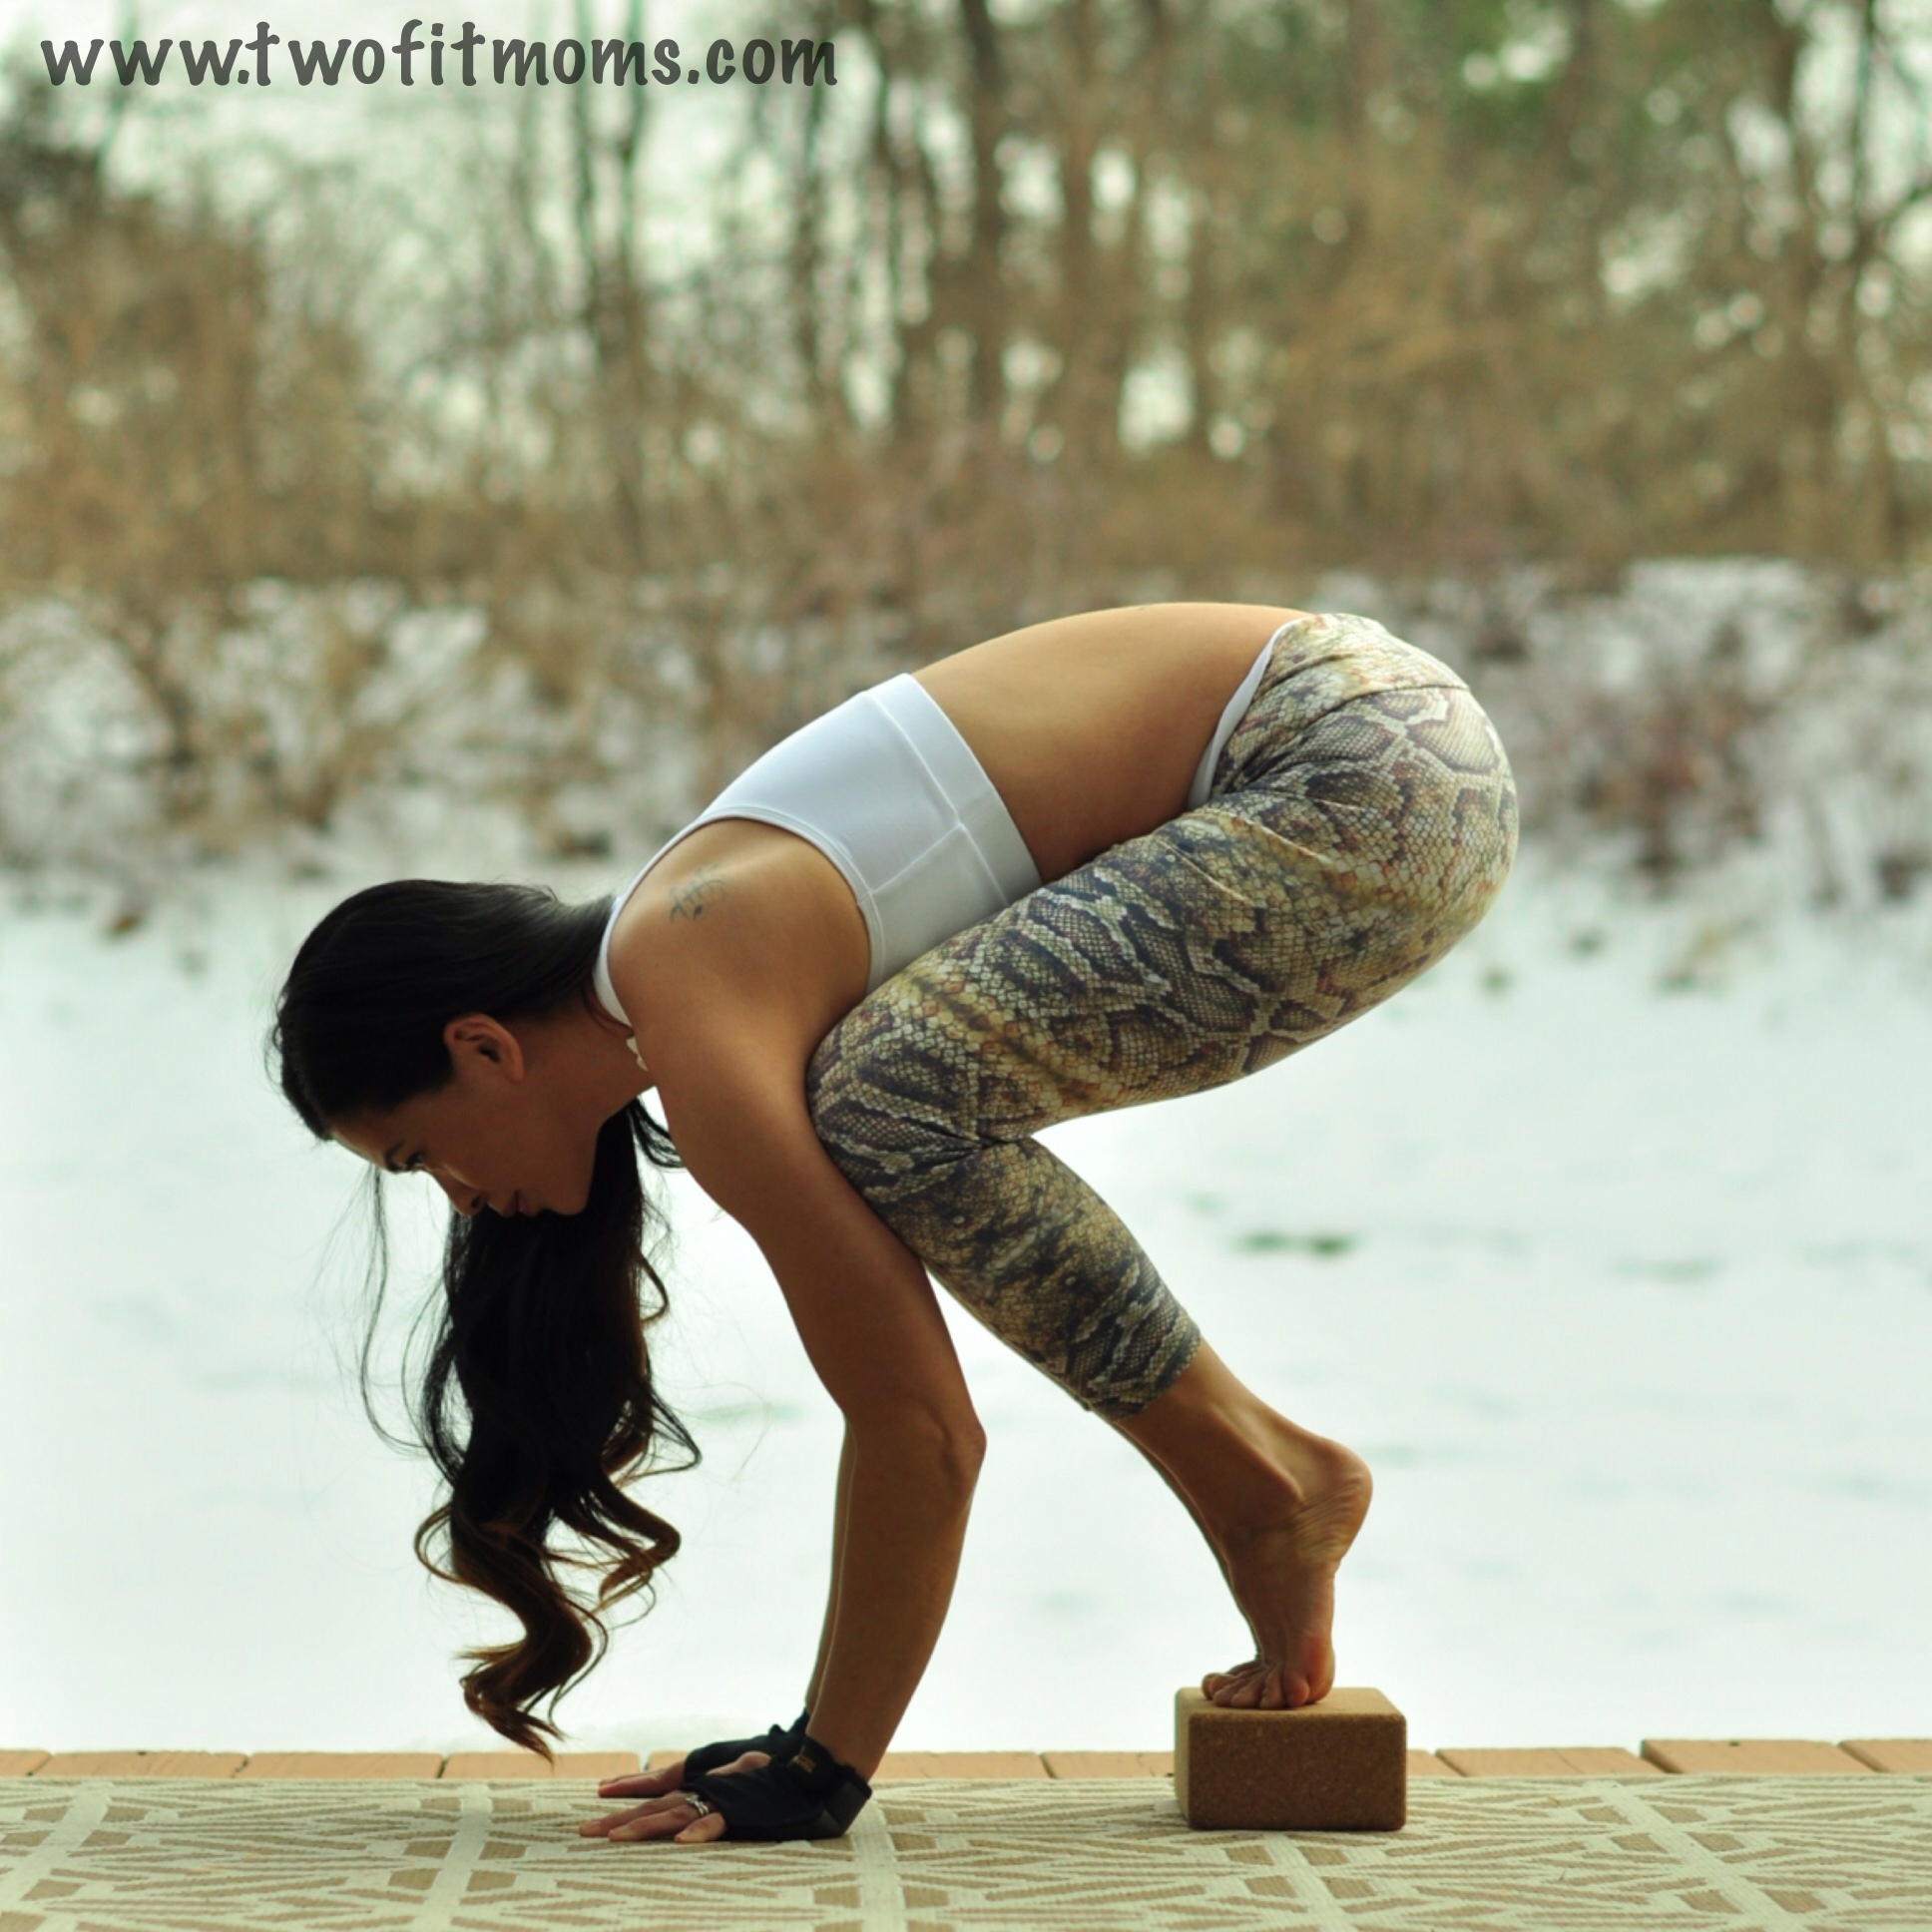
    Come back into your Tripod Headstand again.  This time, float them down to your “breaking” point or slightly above that… On the inhale, try to lift them back up again. Try to do this three to five times. This small action will help strengthen your core over time. Keep working this as low as you can go… eventually coming all the way down onto the ground gently and maybe back up!


    [KGVID poster=”http://www.twofitmoms.com/wp-content/uploads/2014/02/IMG_3117_thumb5.jpg” width=”640″ height=”360″]http://www.twofitmoms.com/wp-content/uploads/2014/02/IMG_3117.mov[/KGVID]

    Ready to move on?

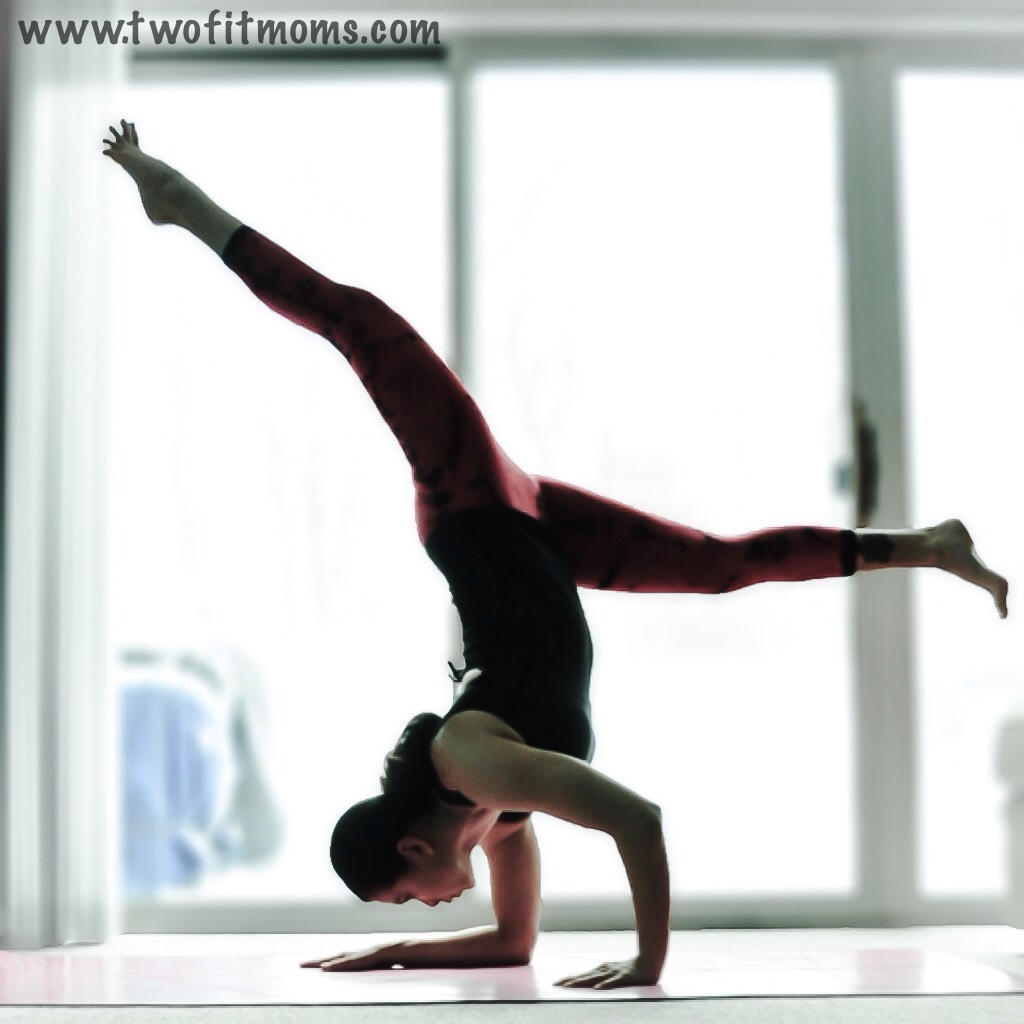
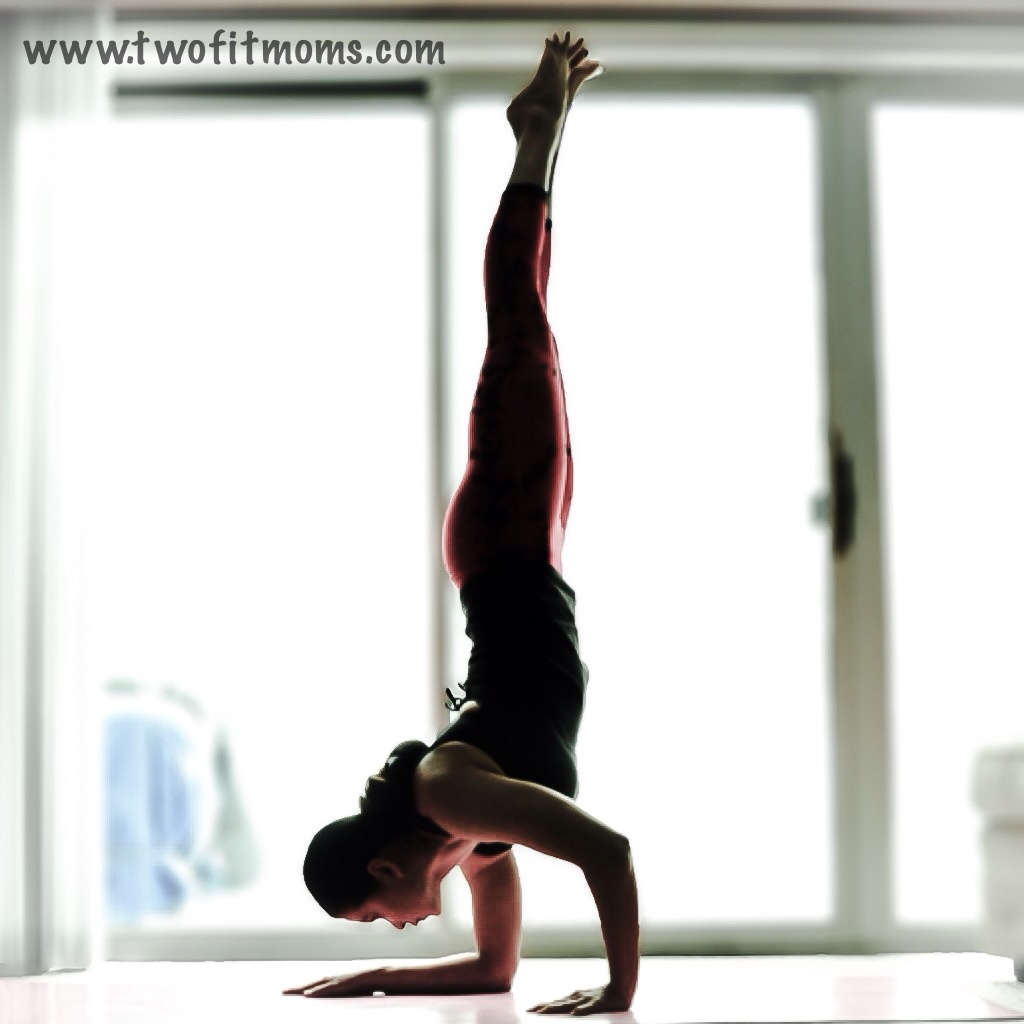
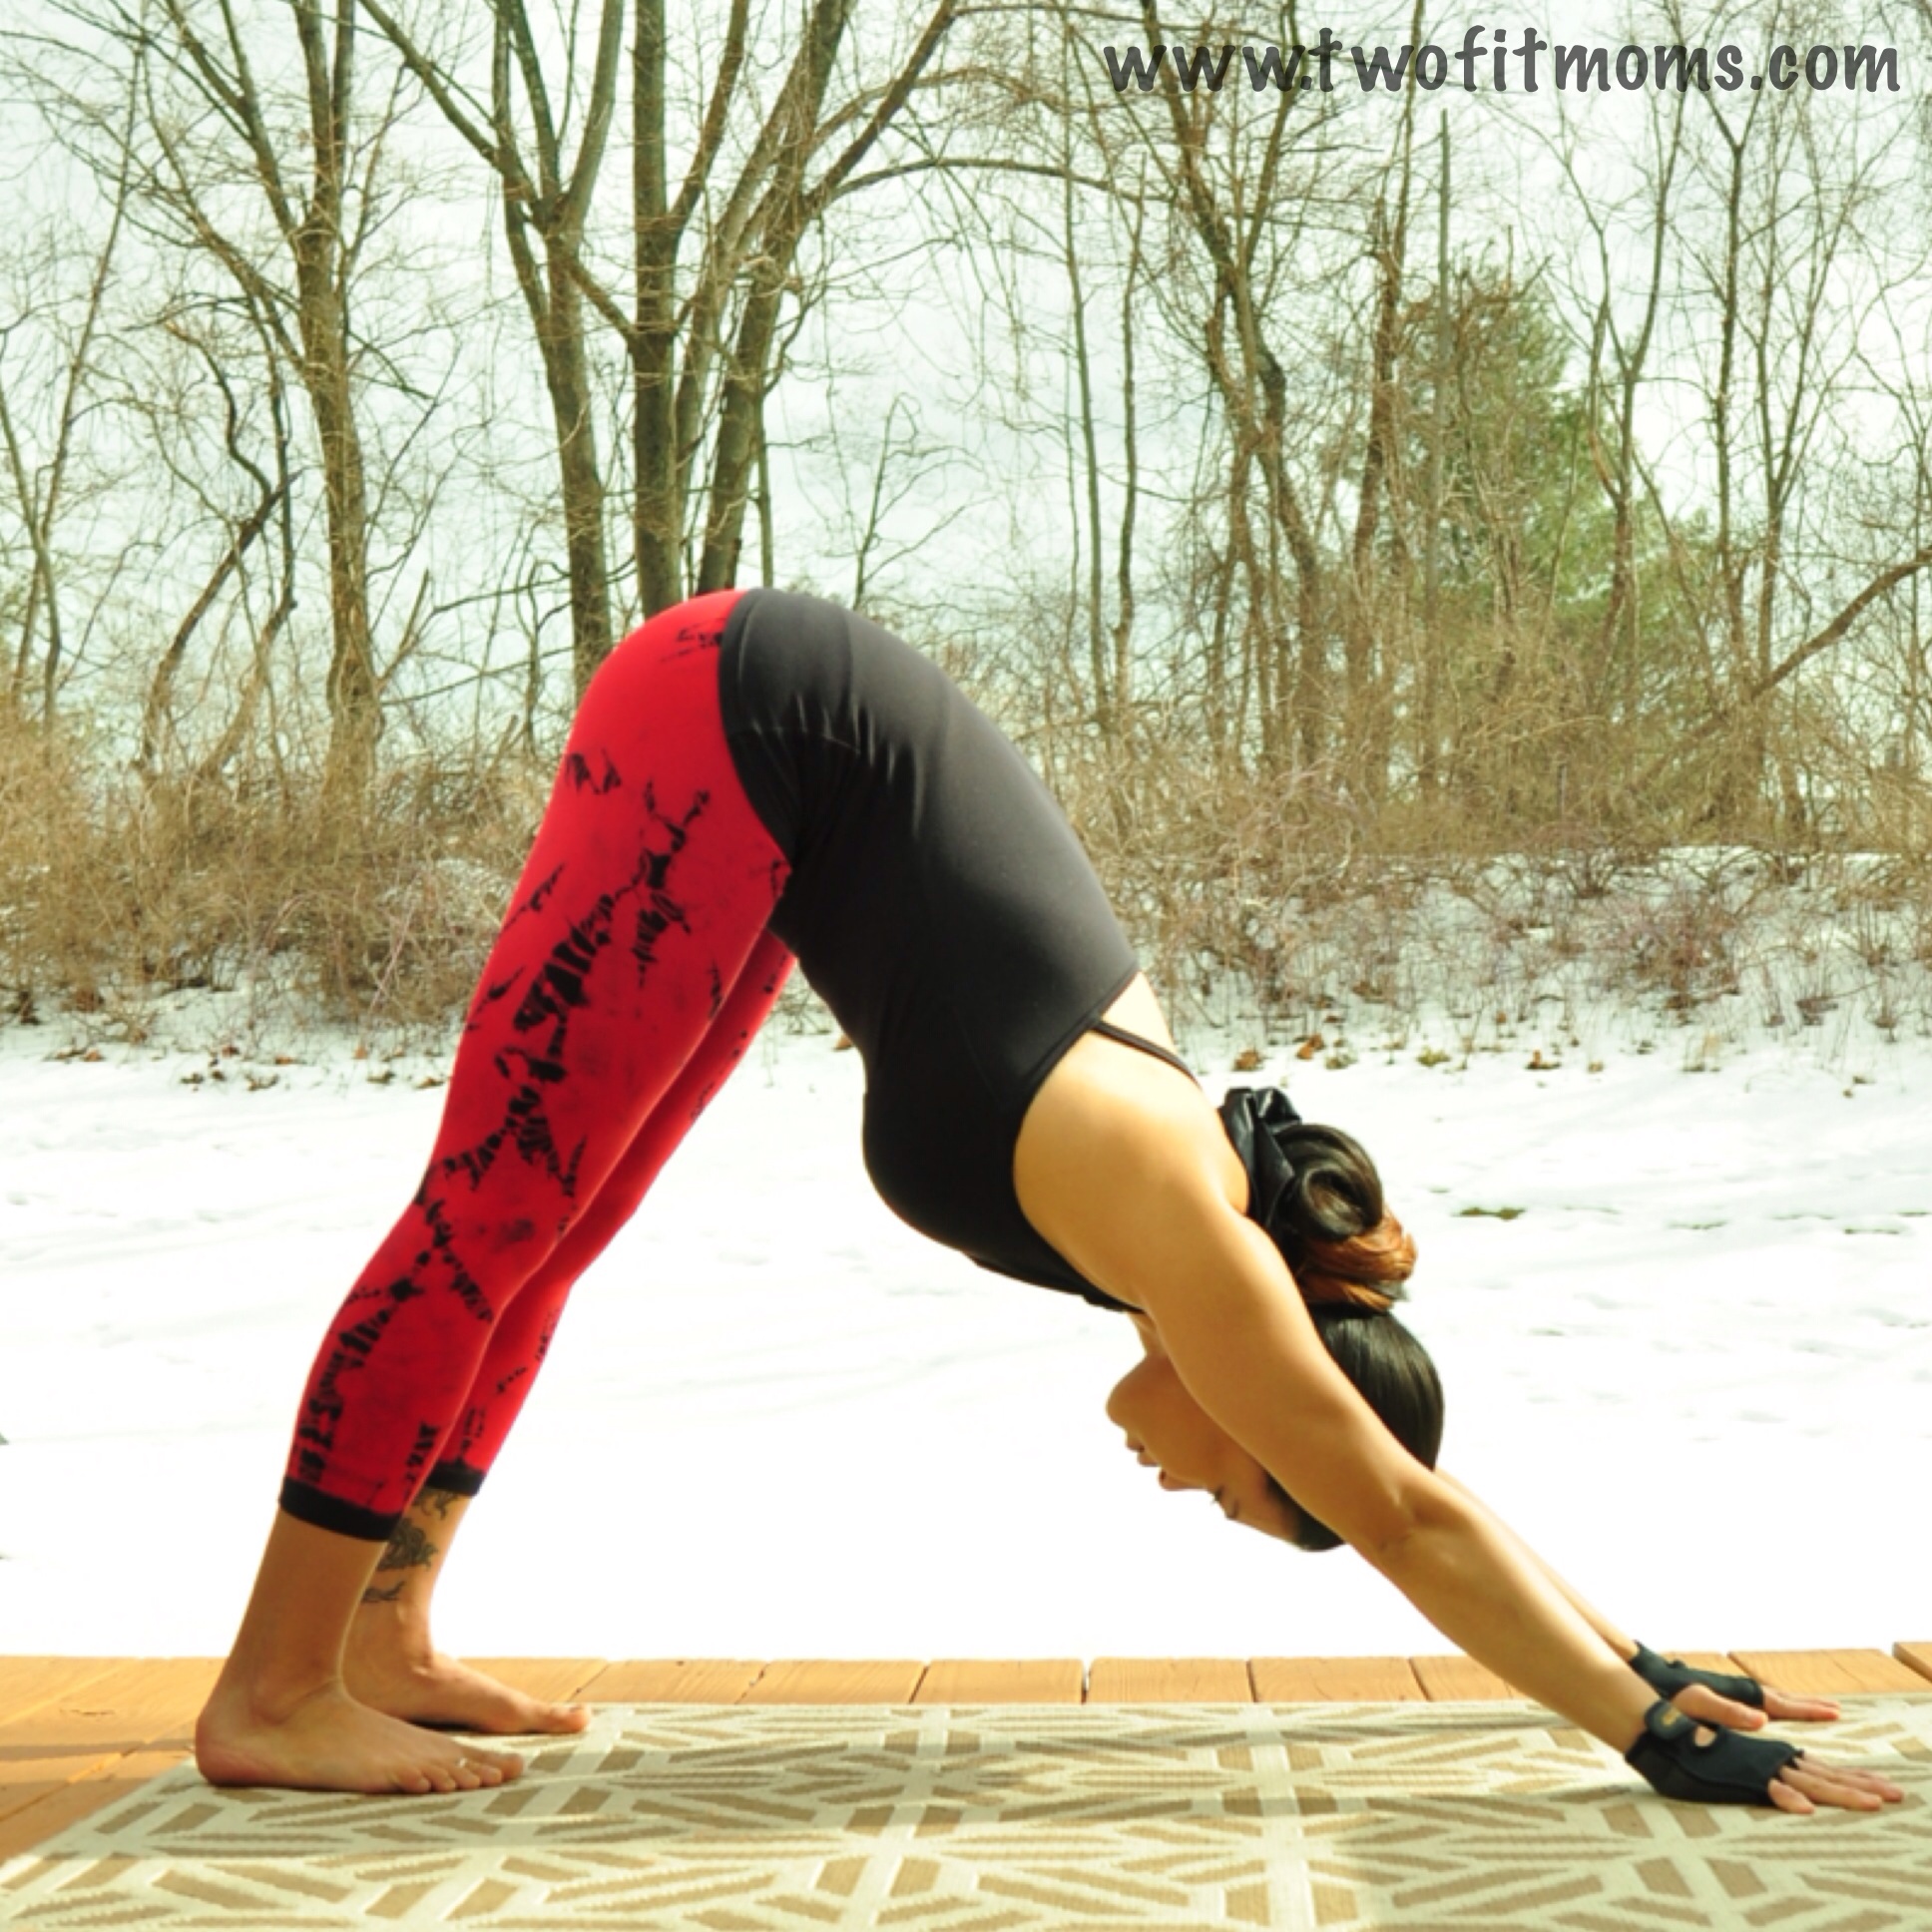
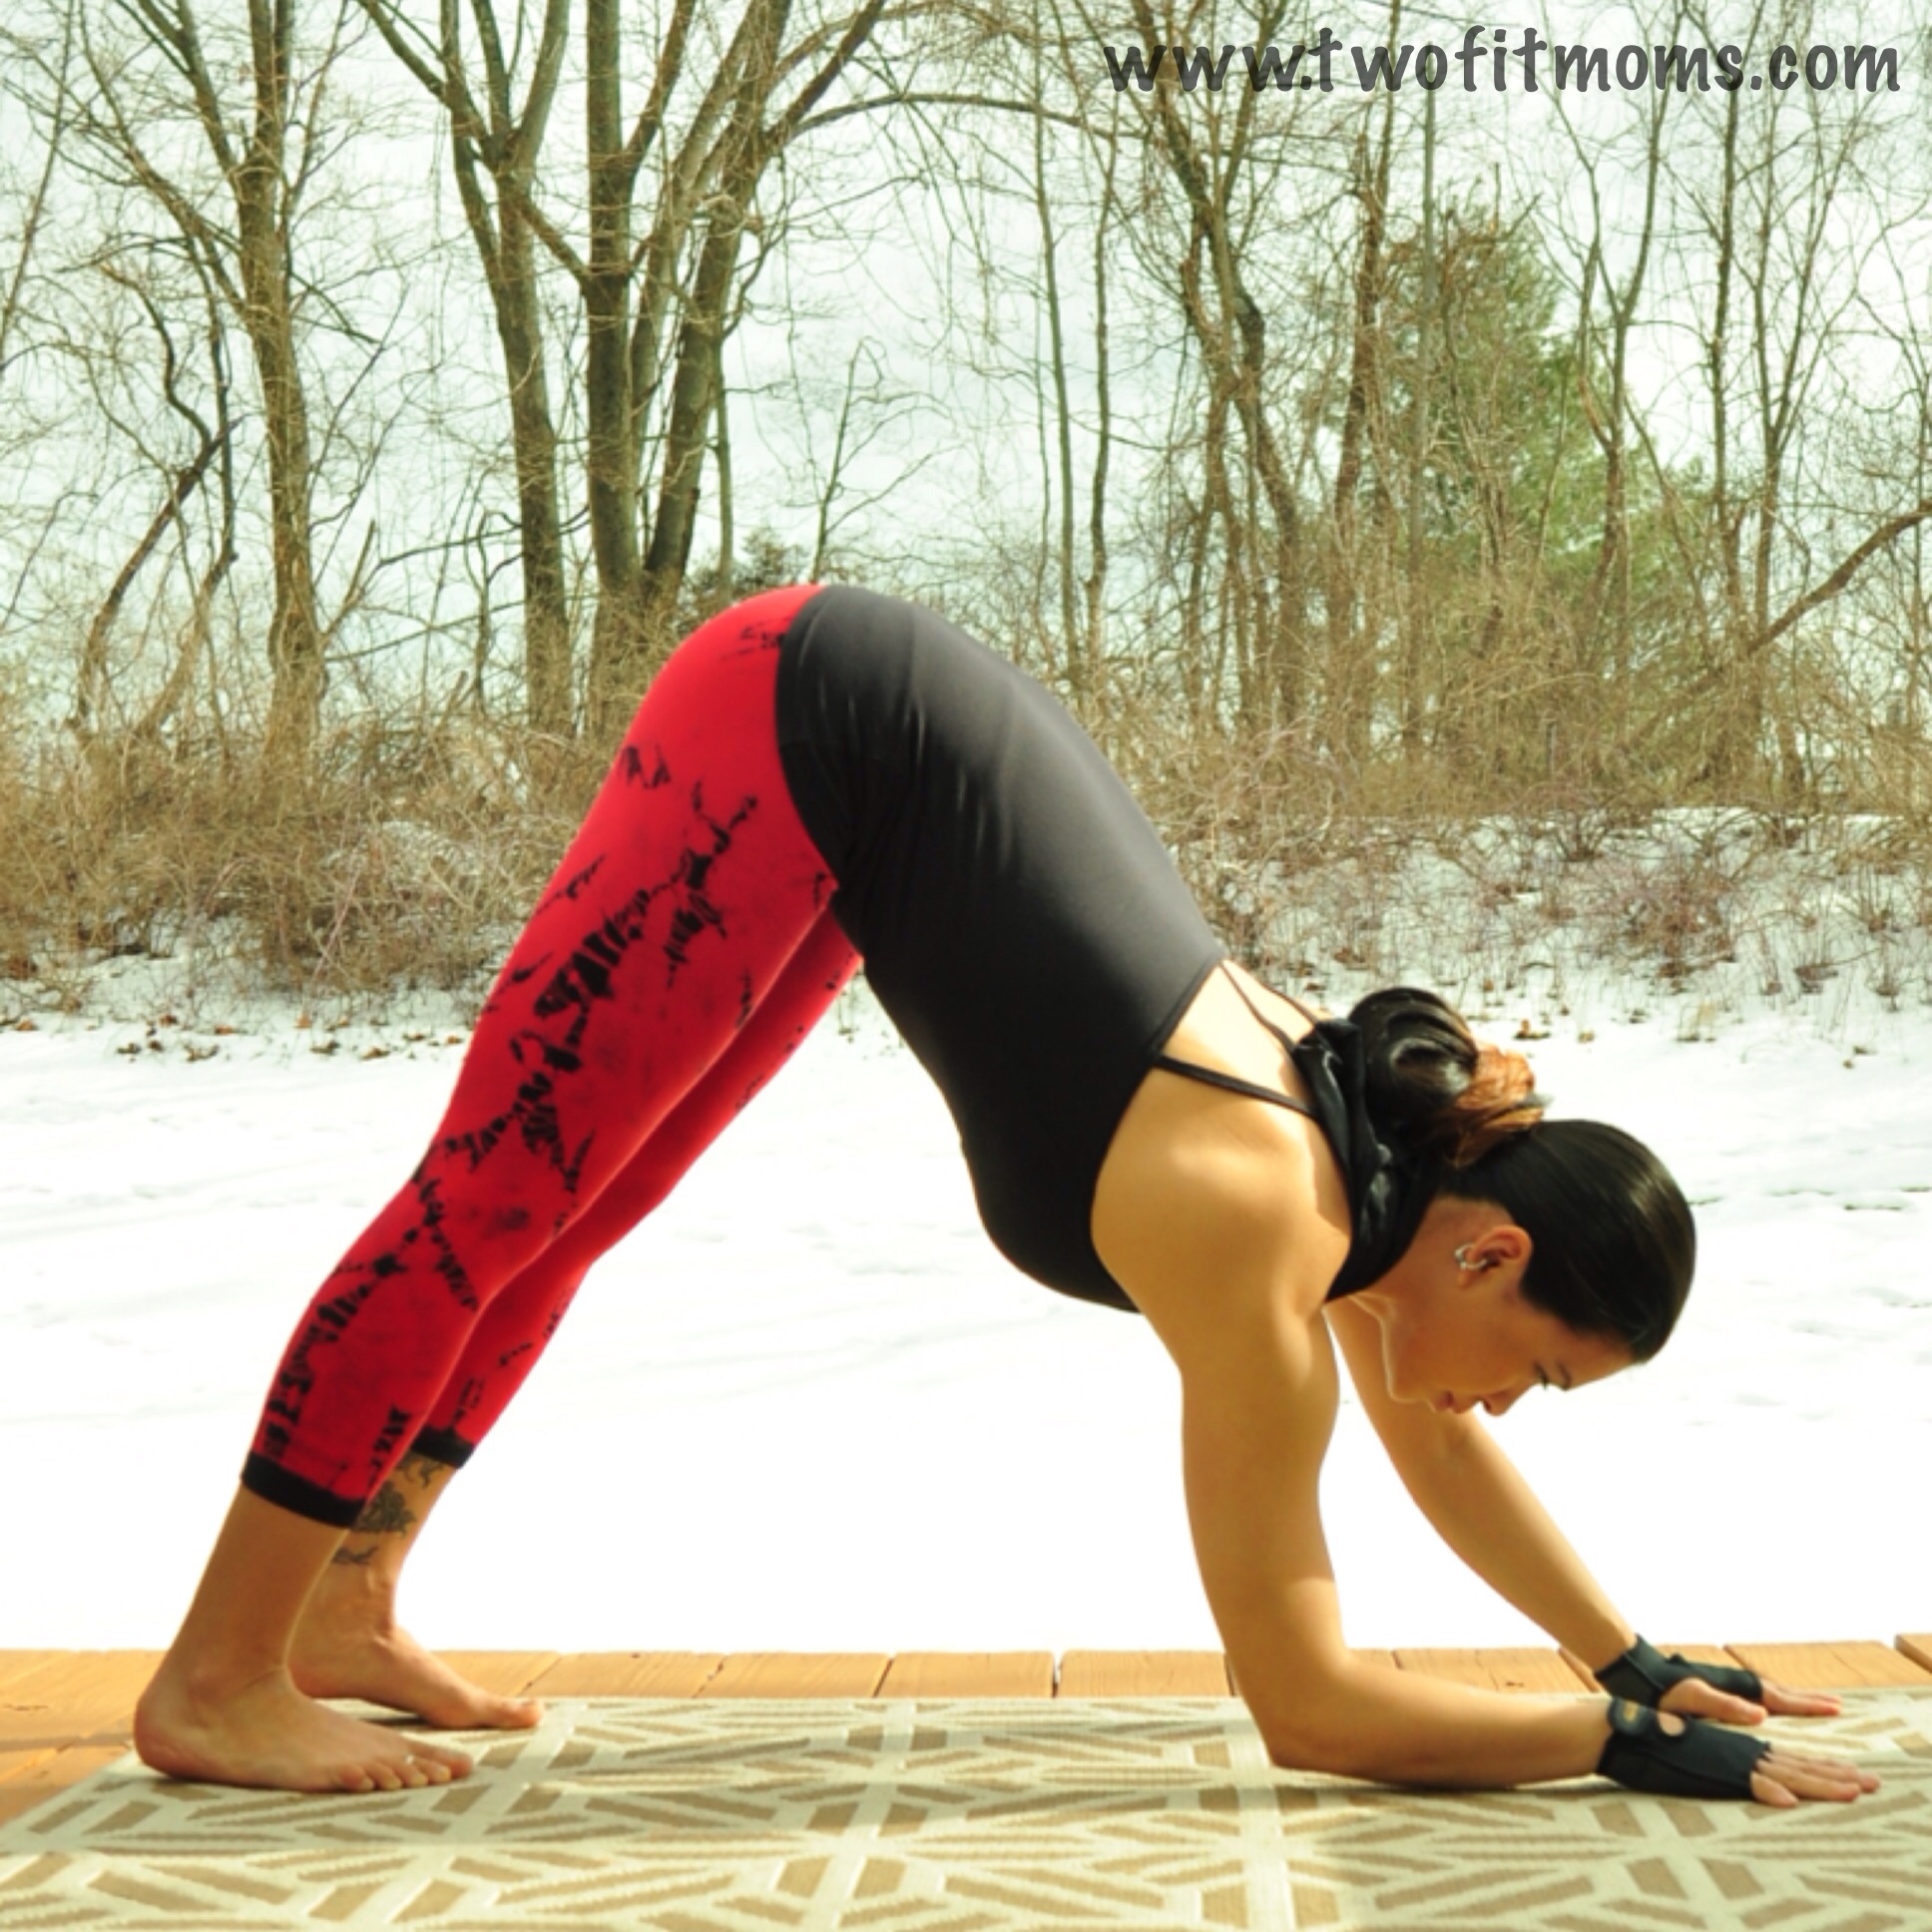
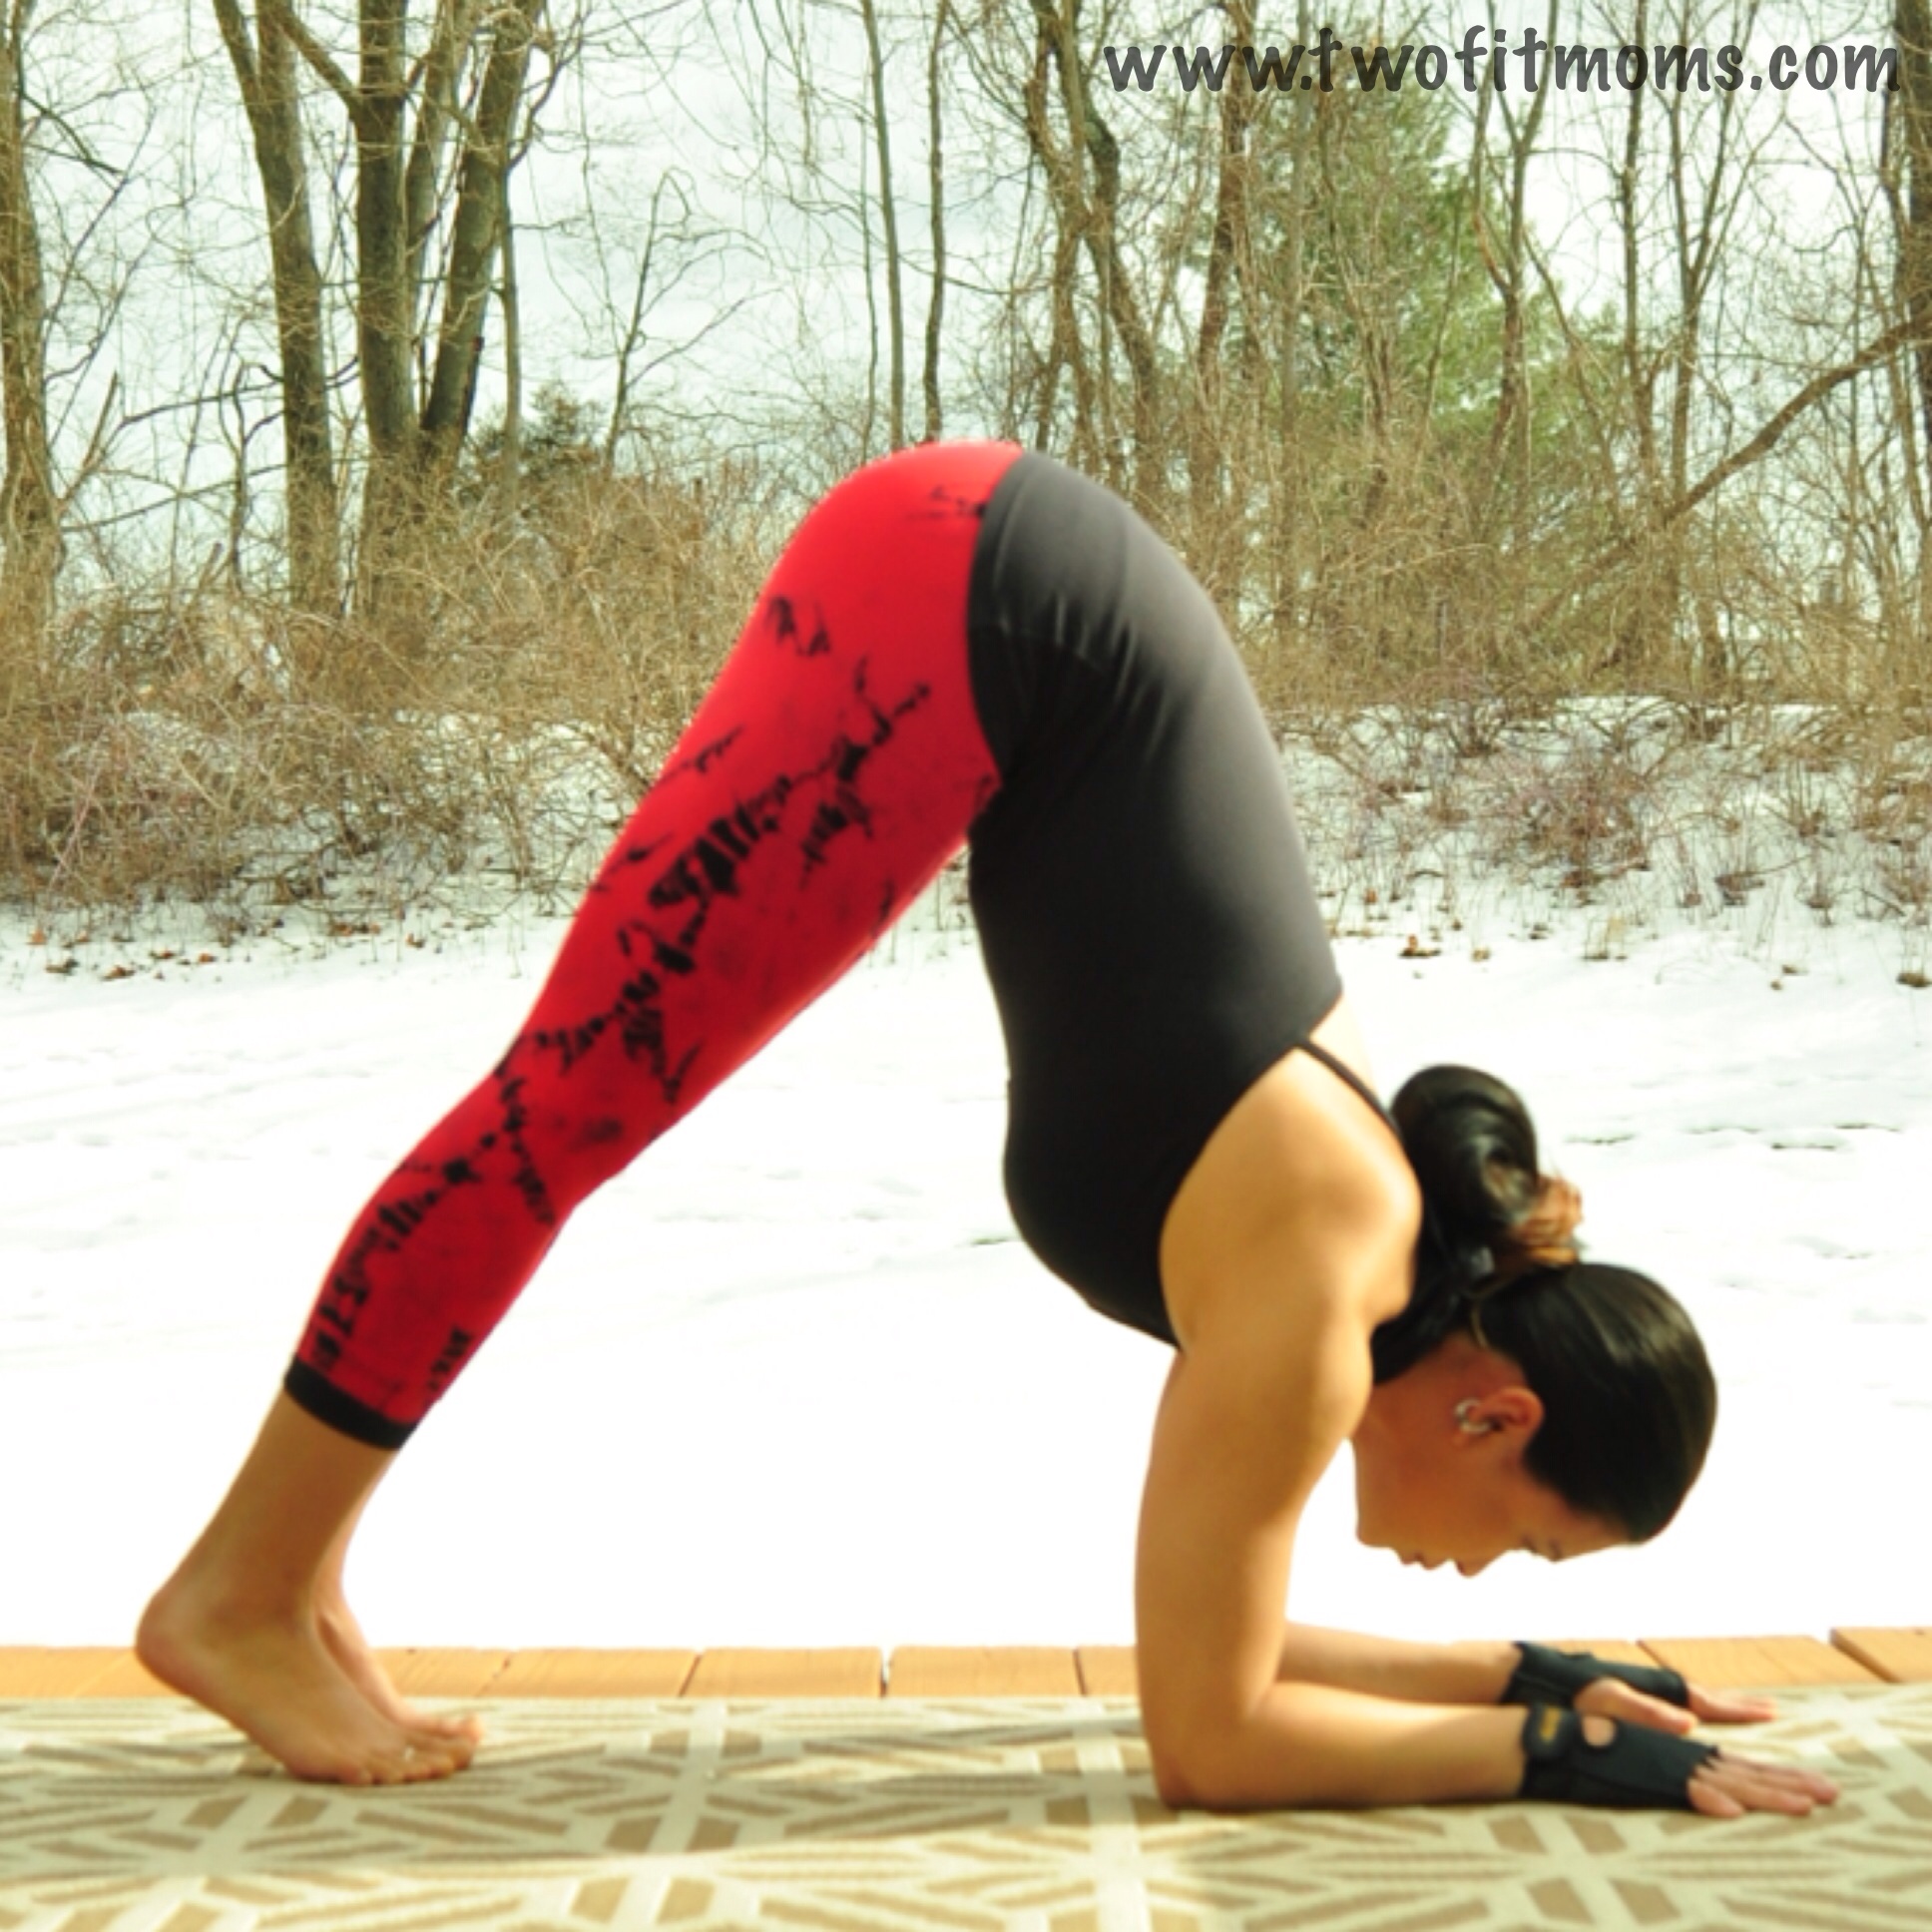
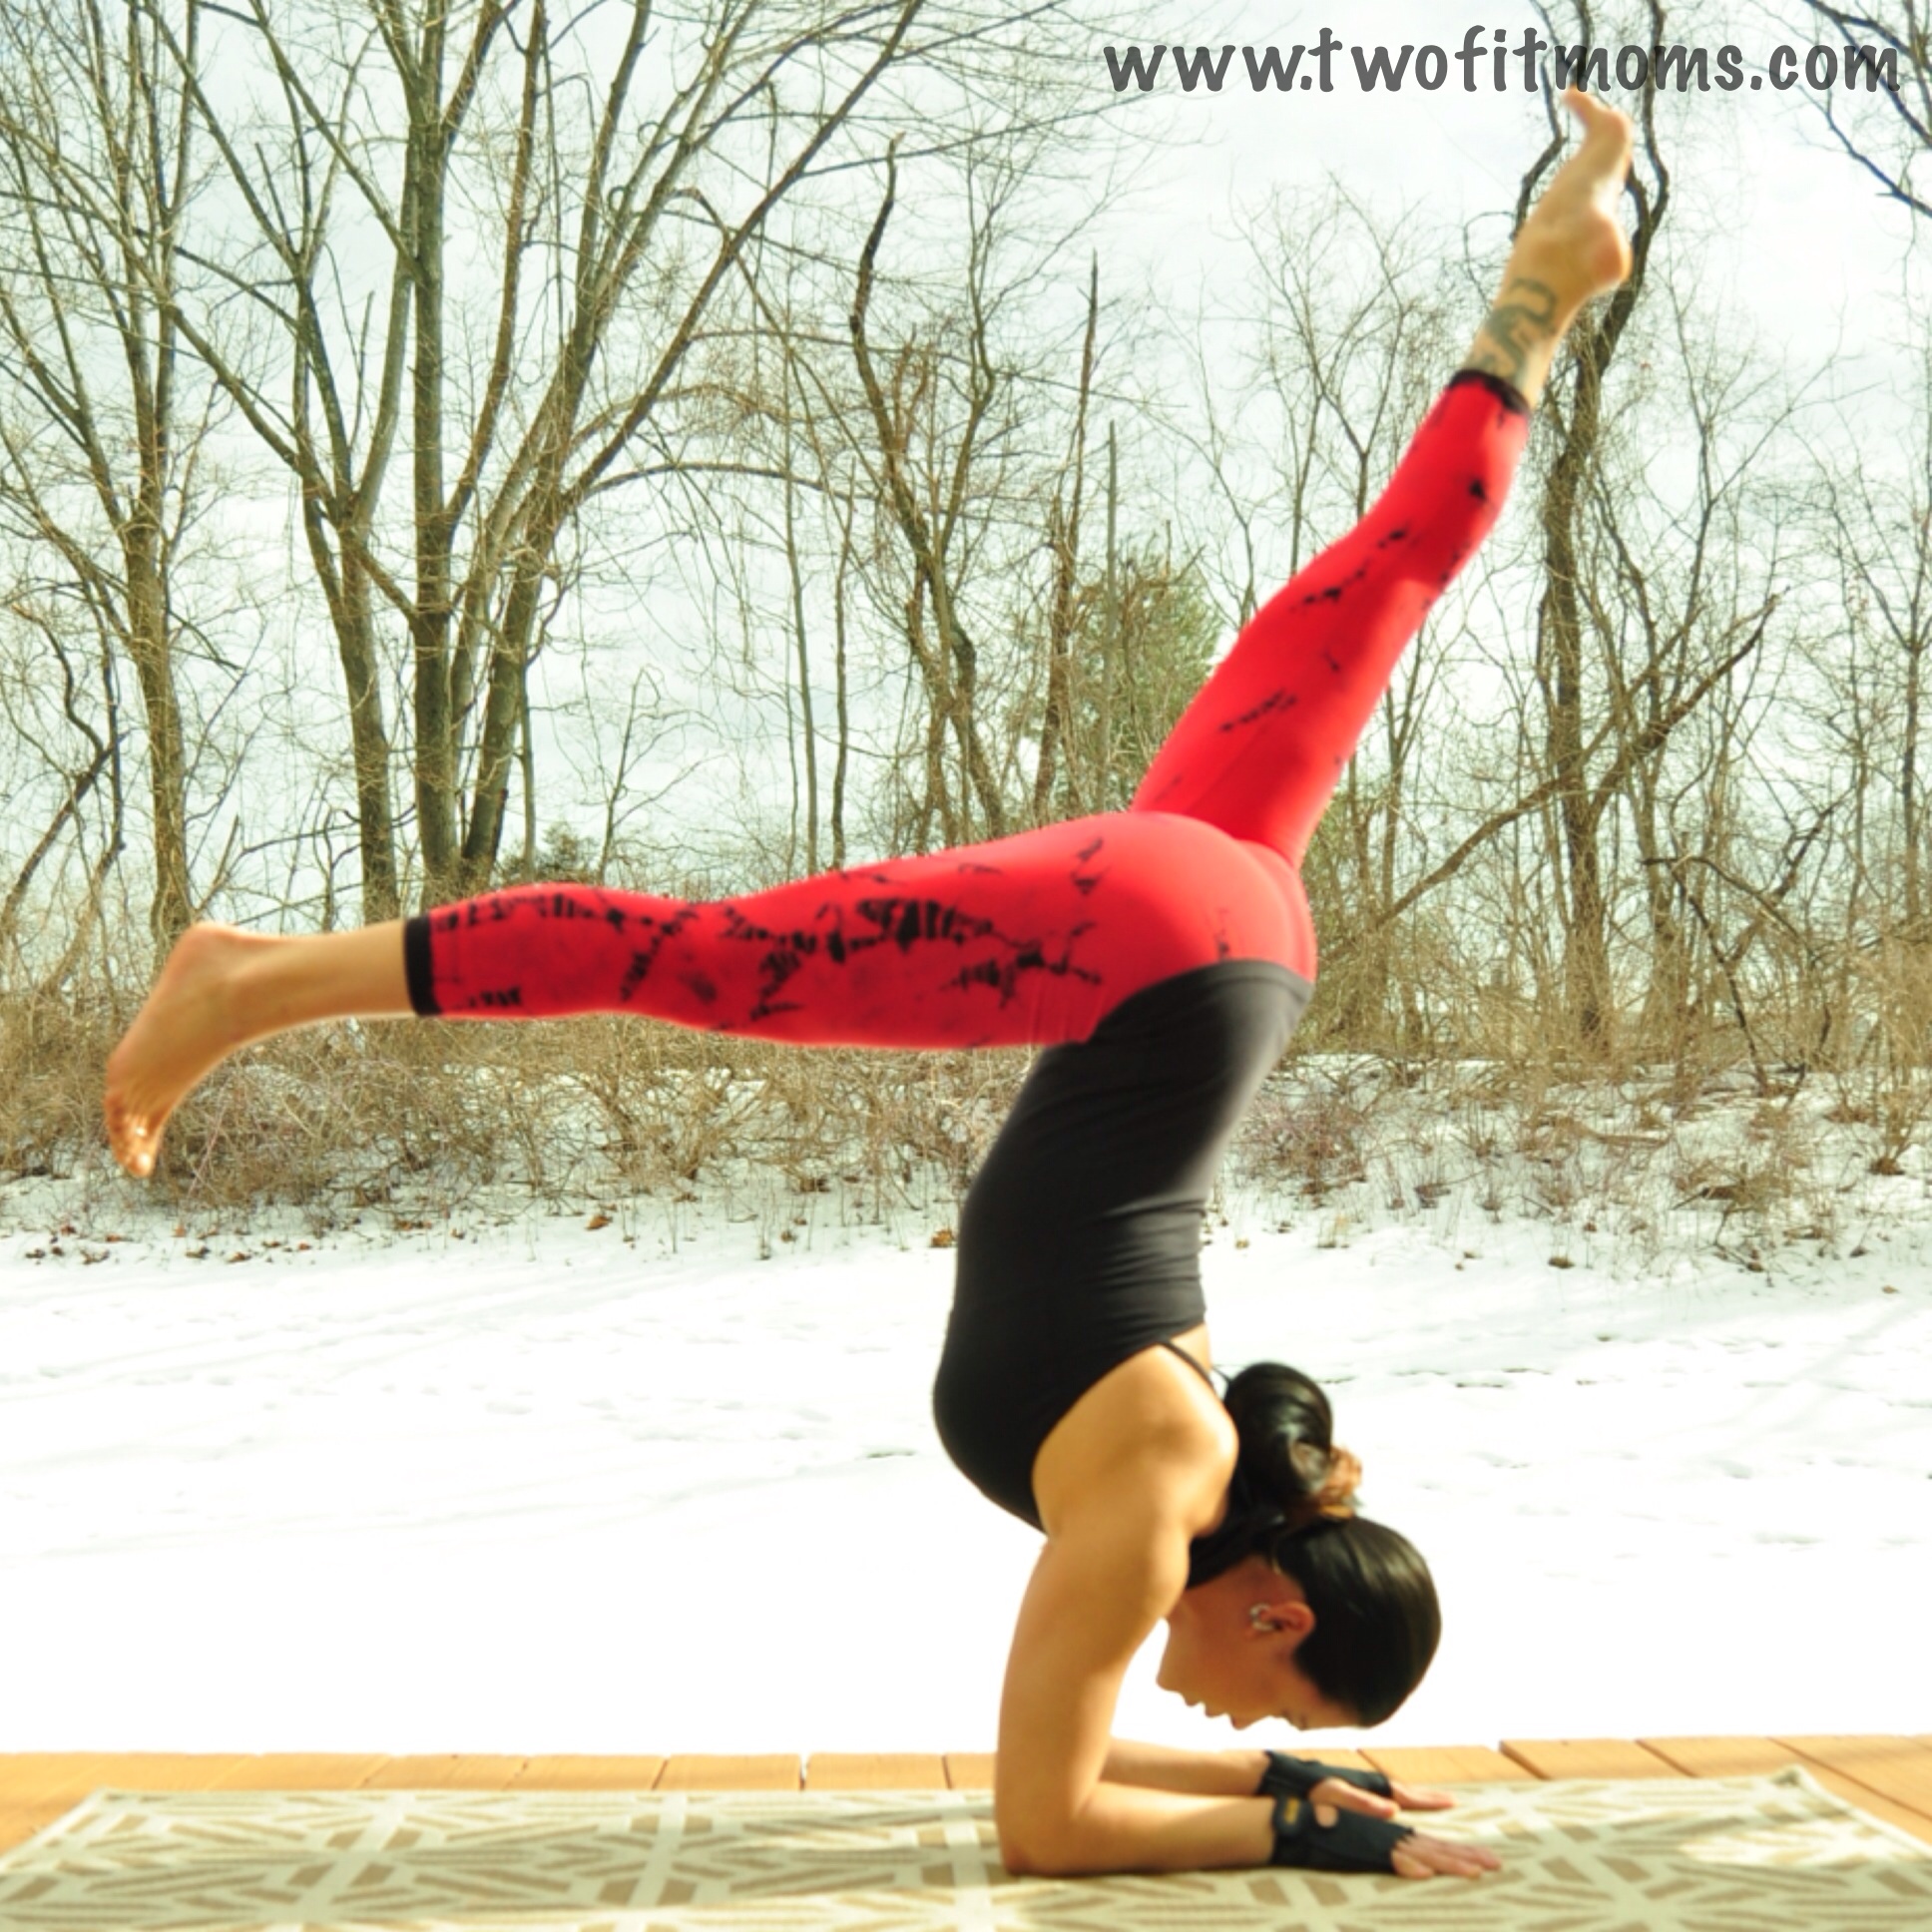
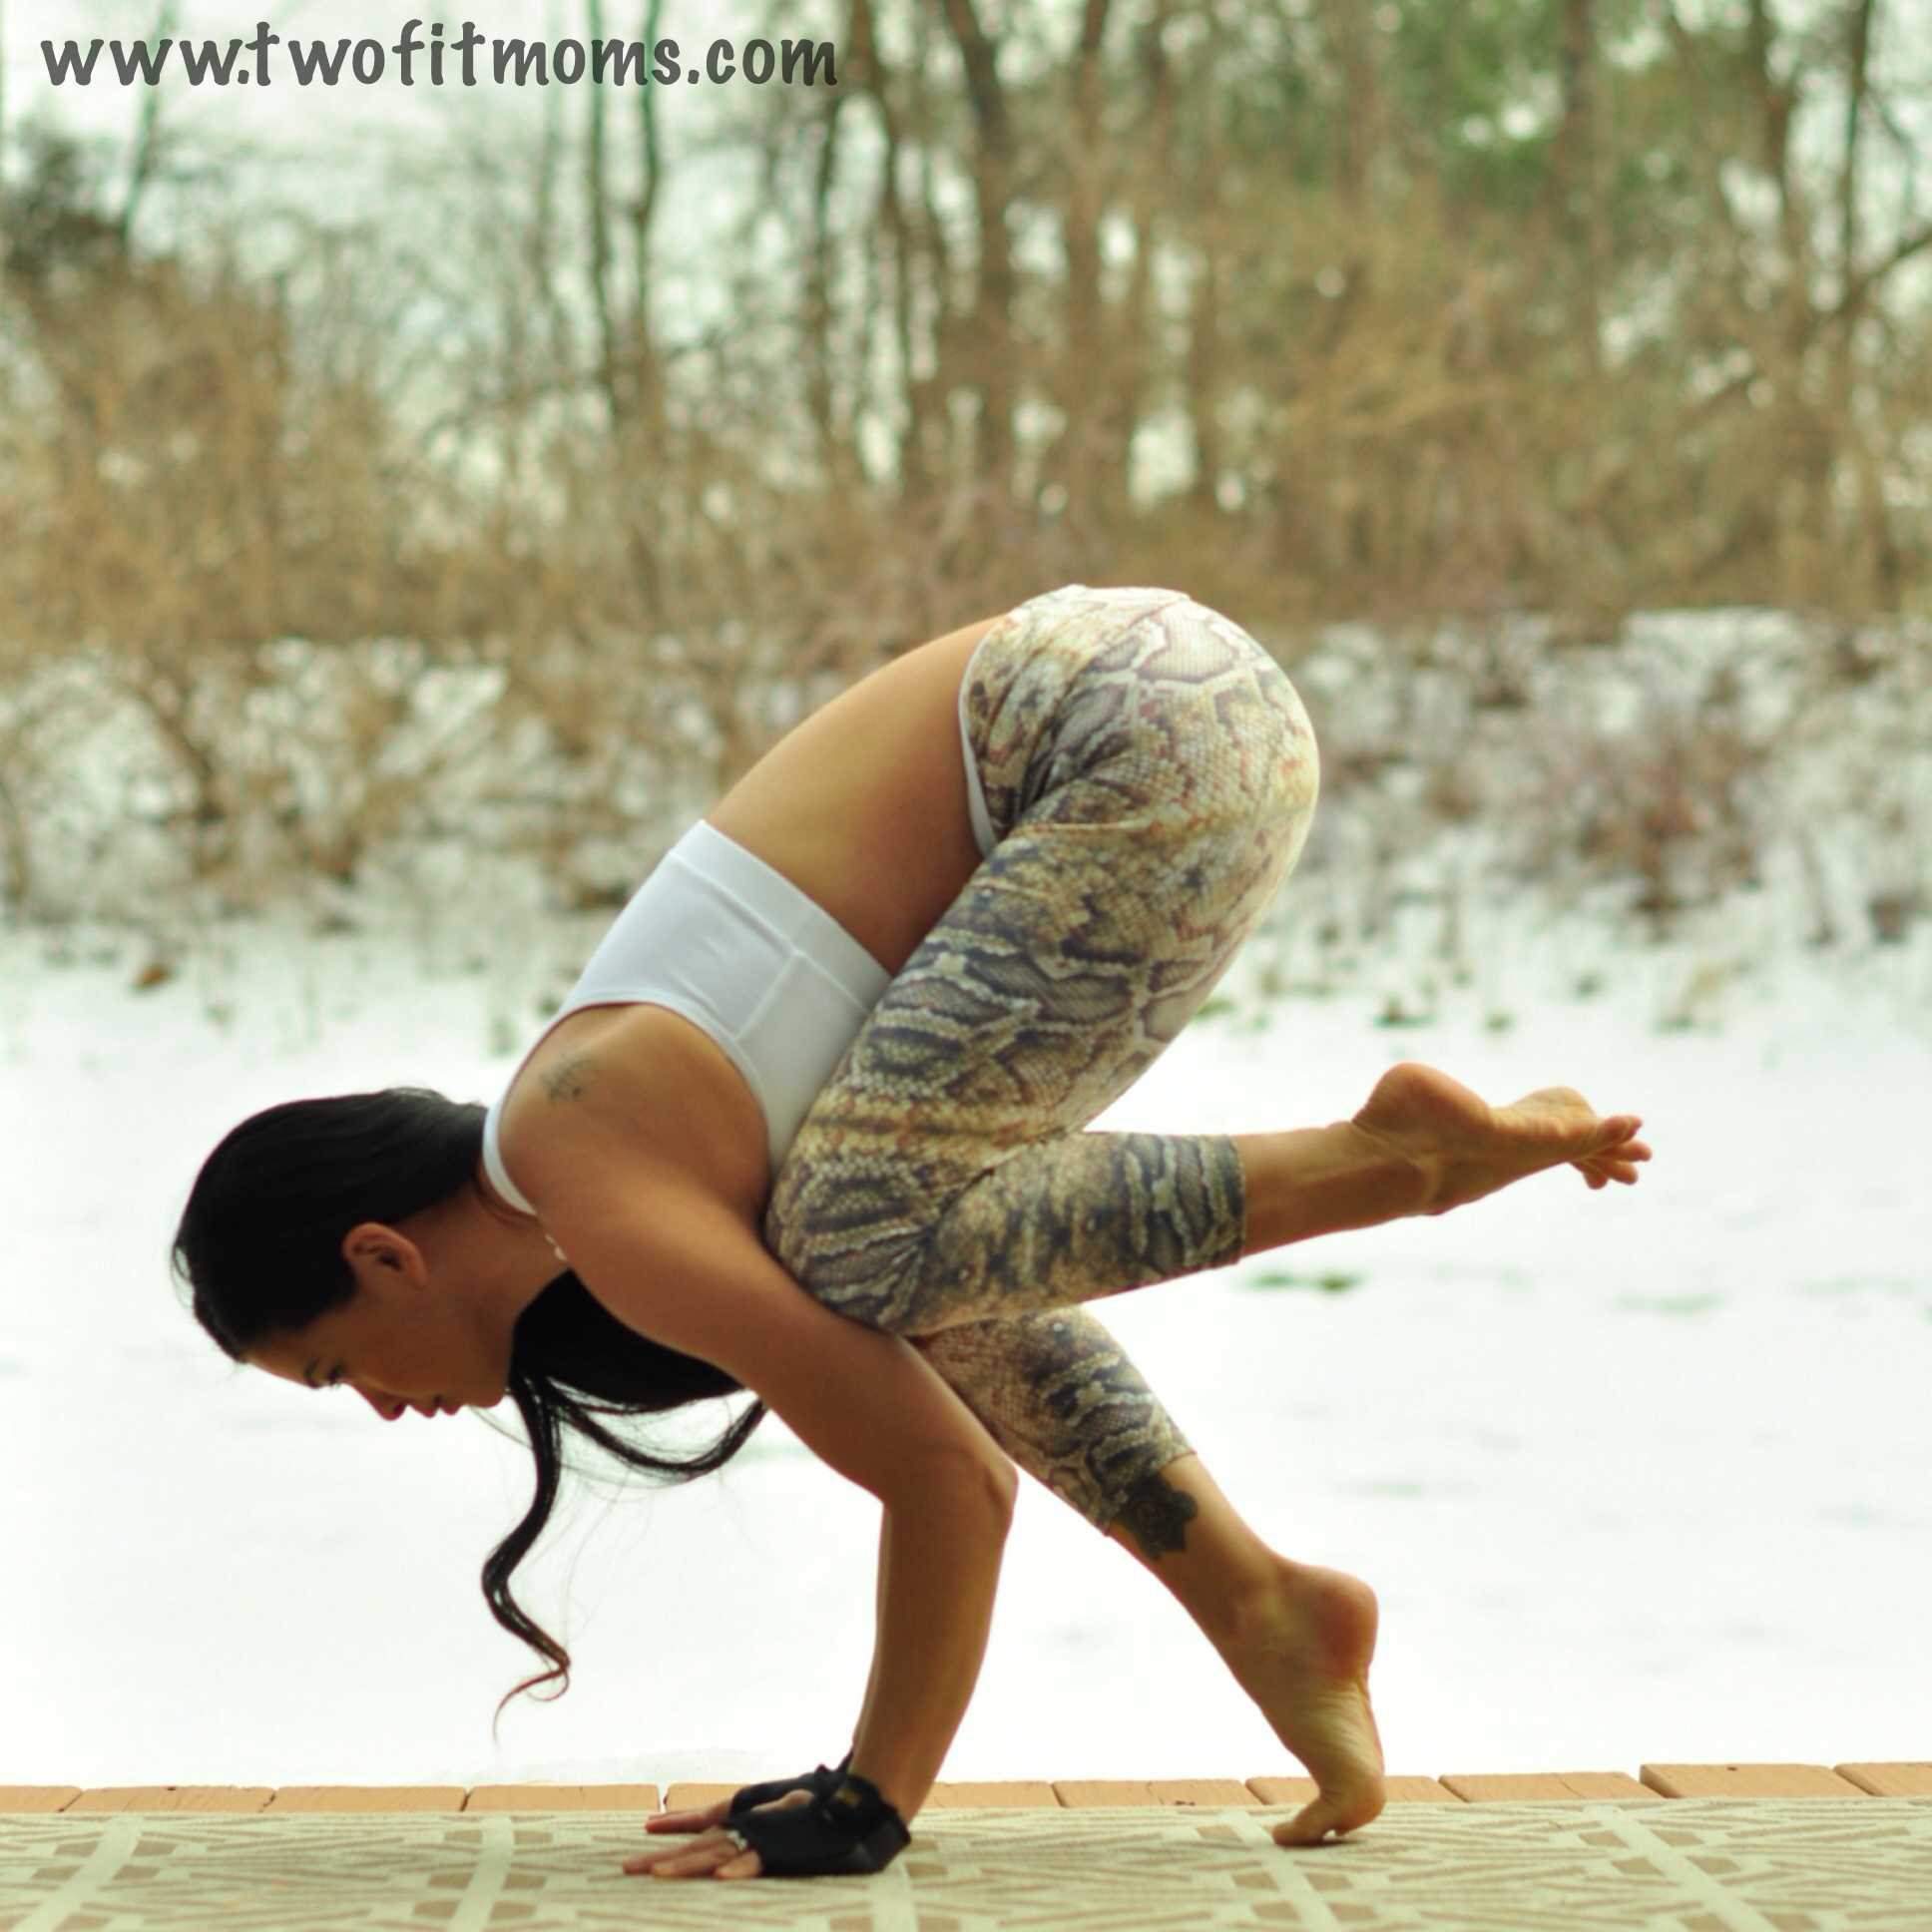
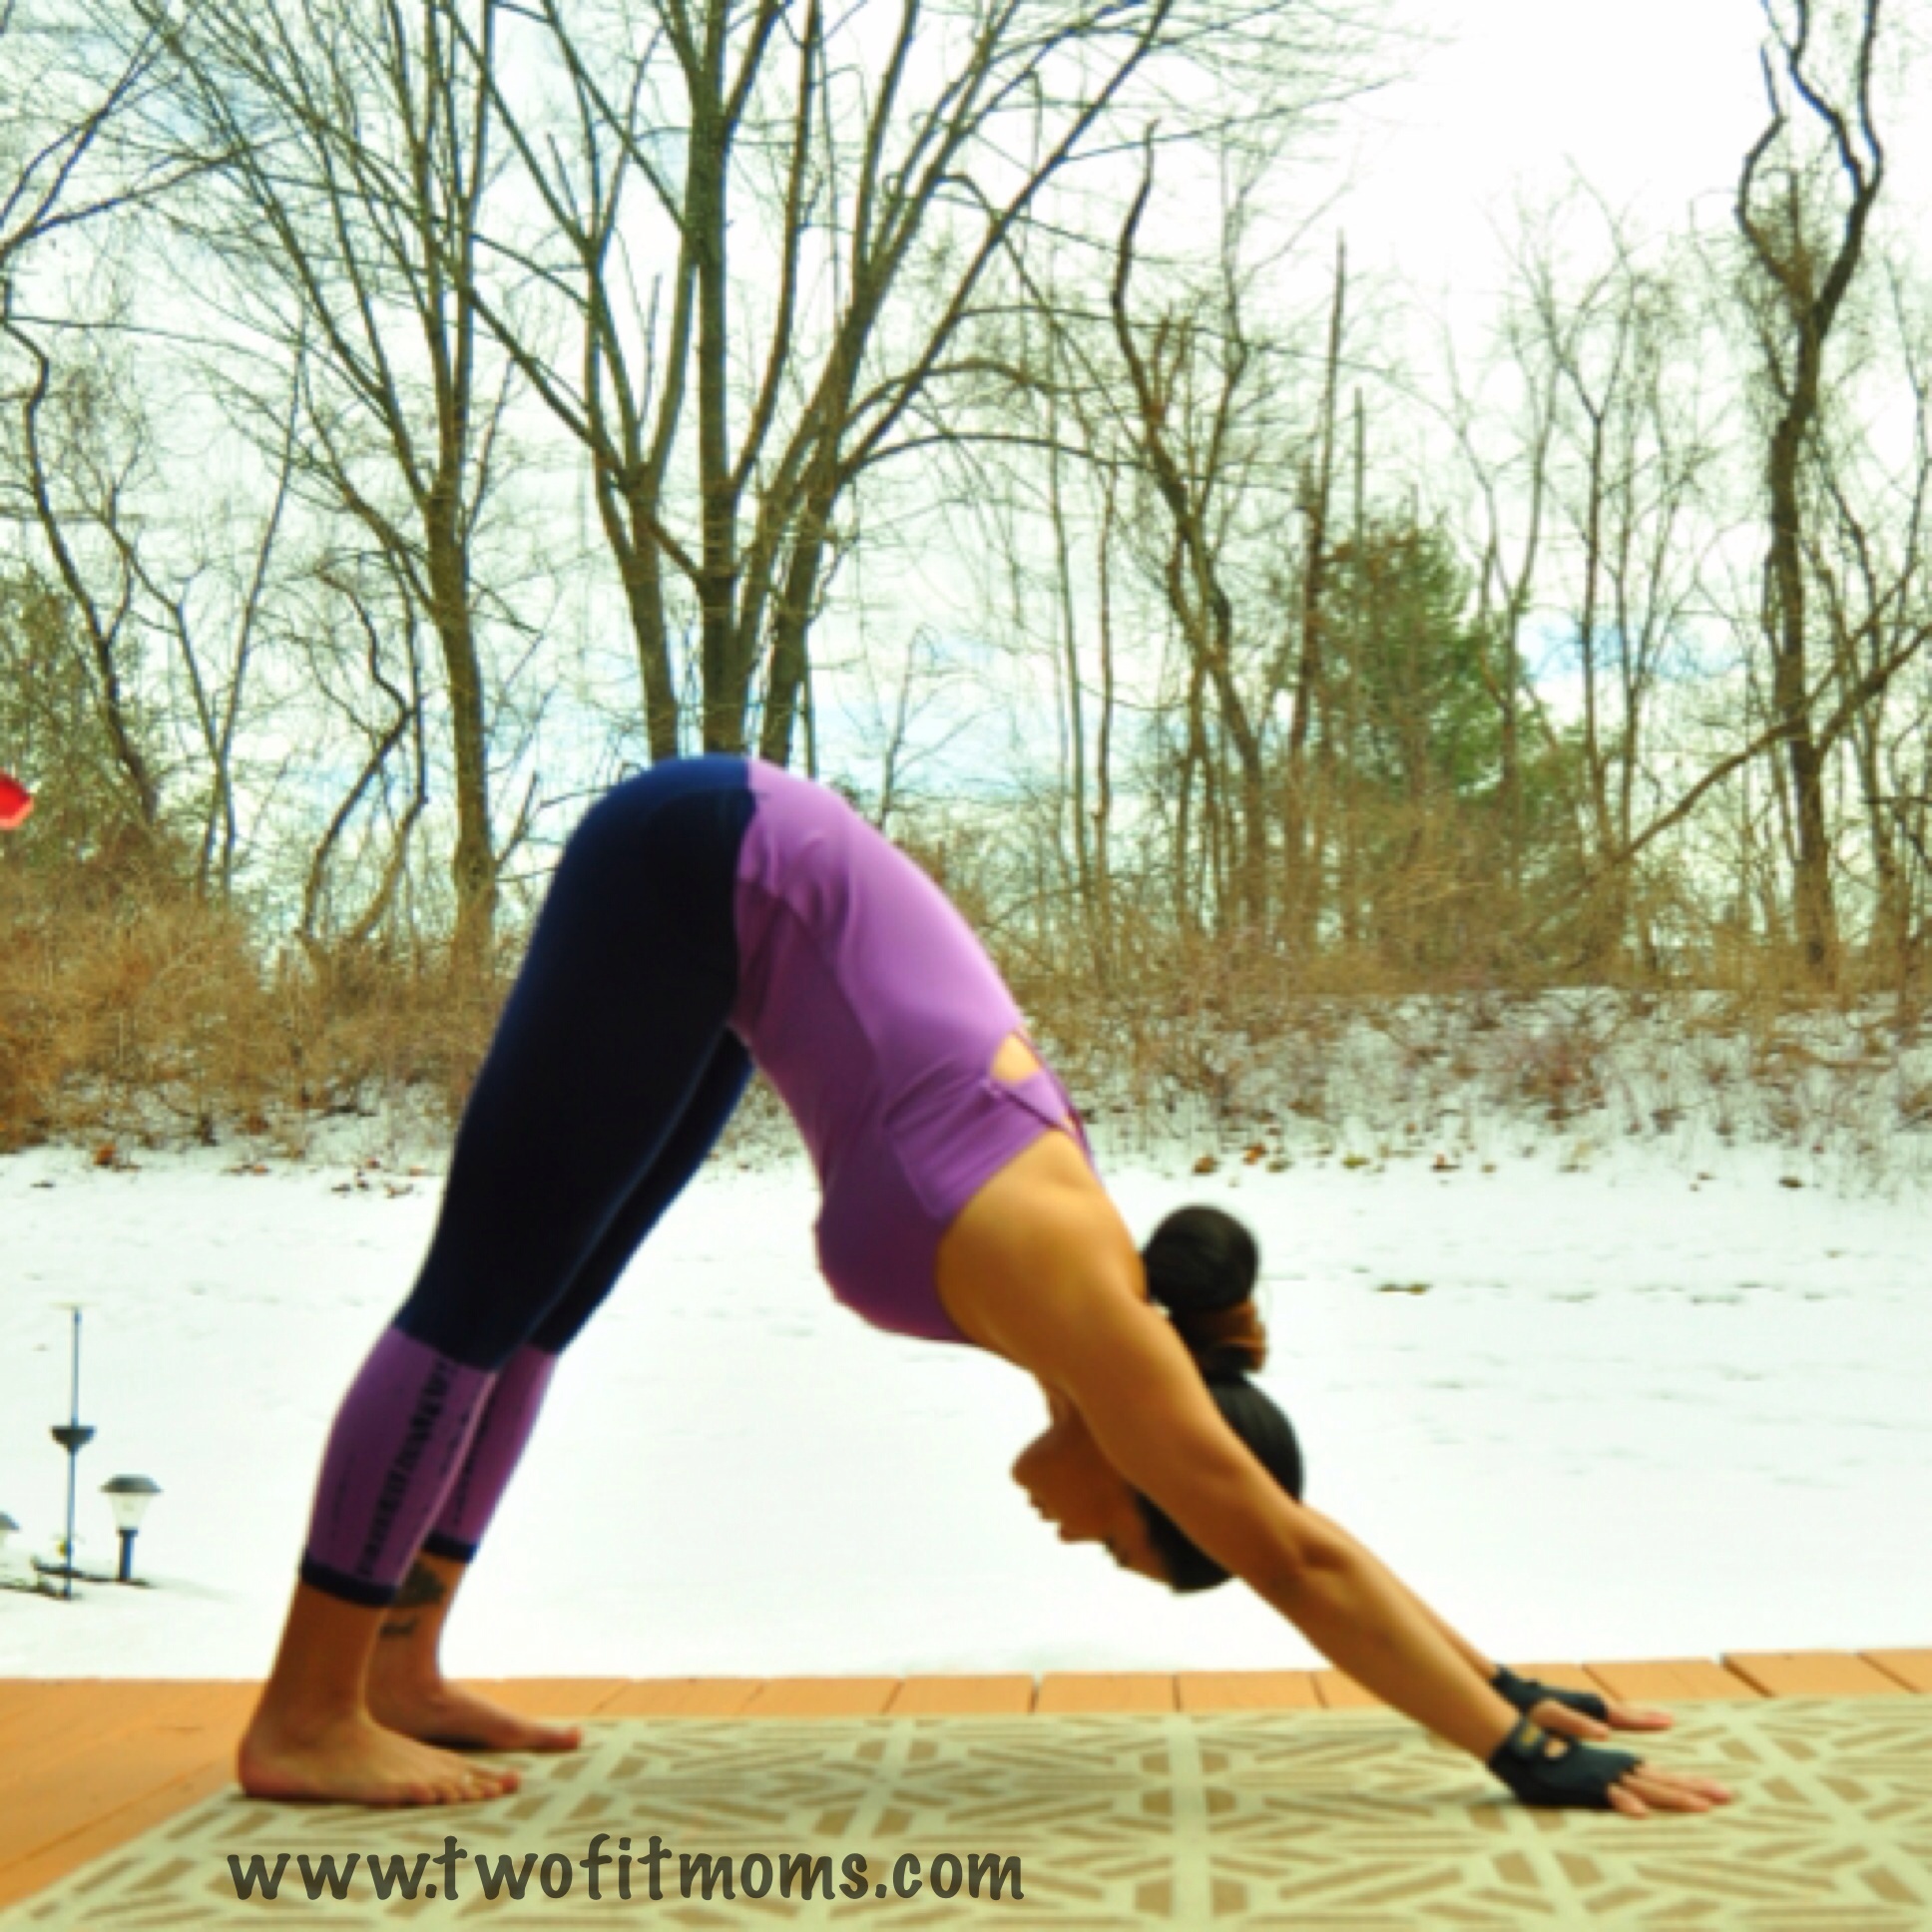
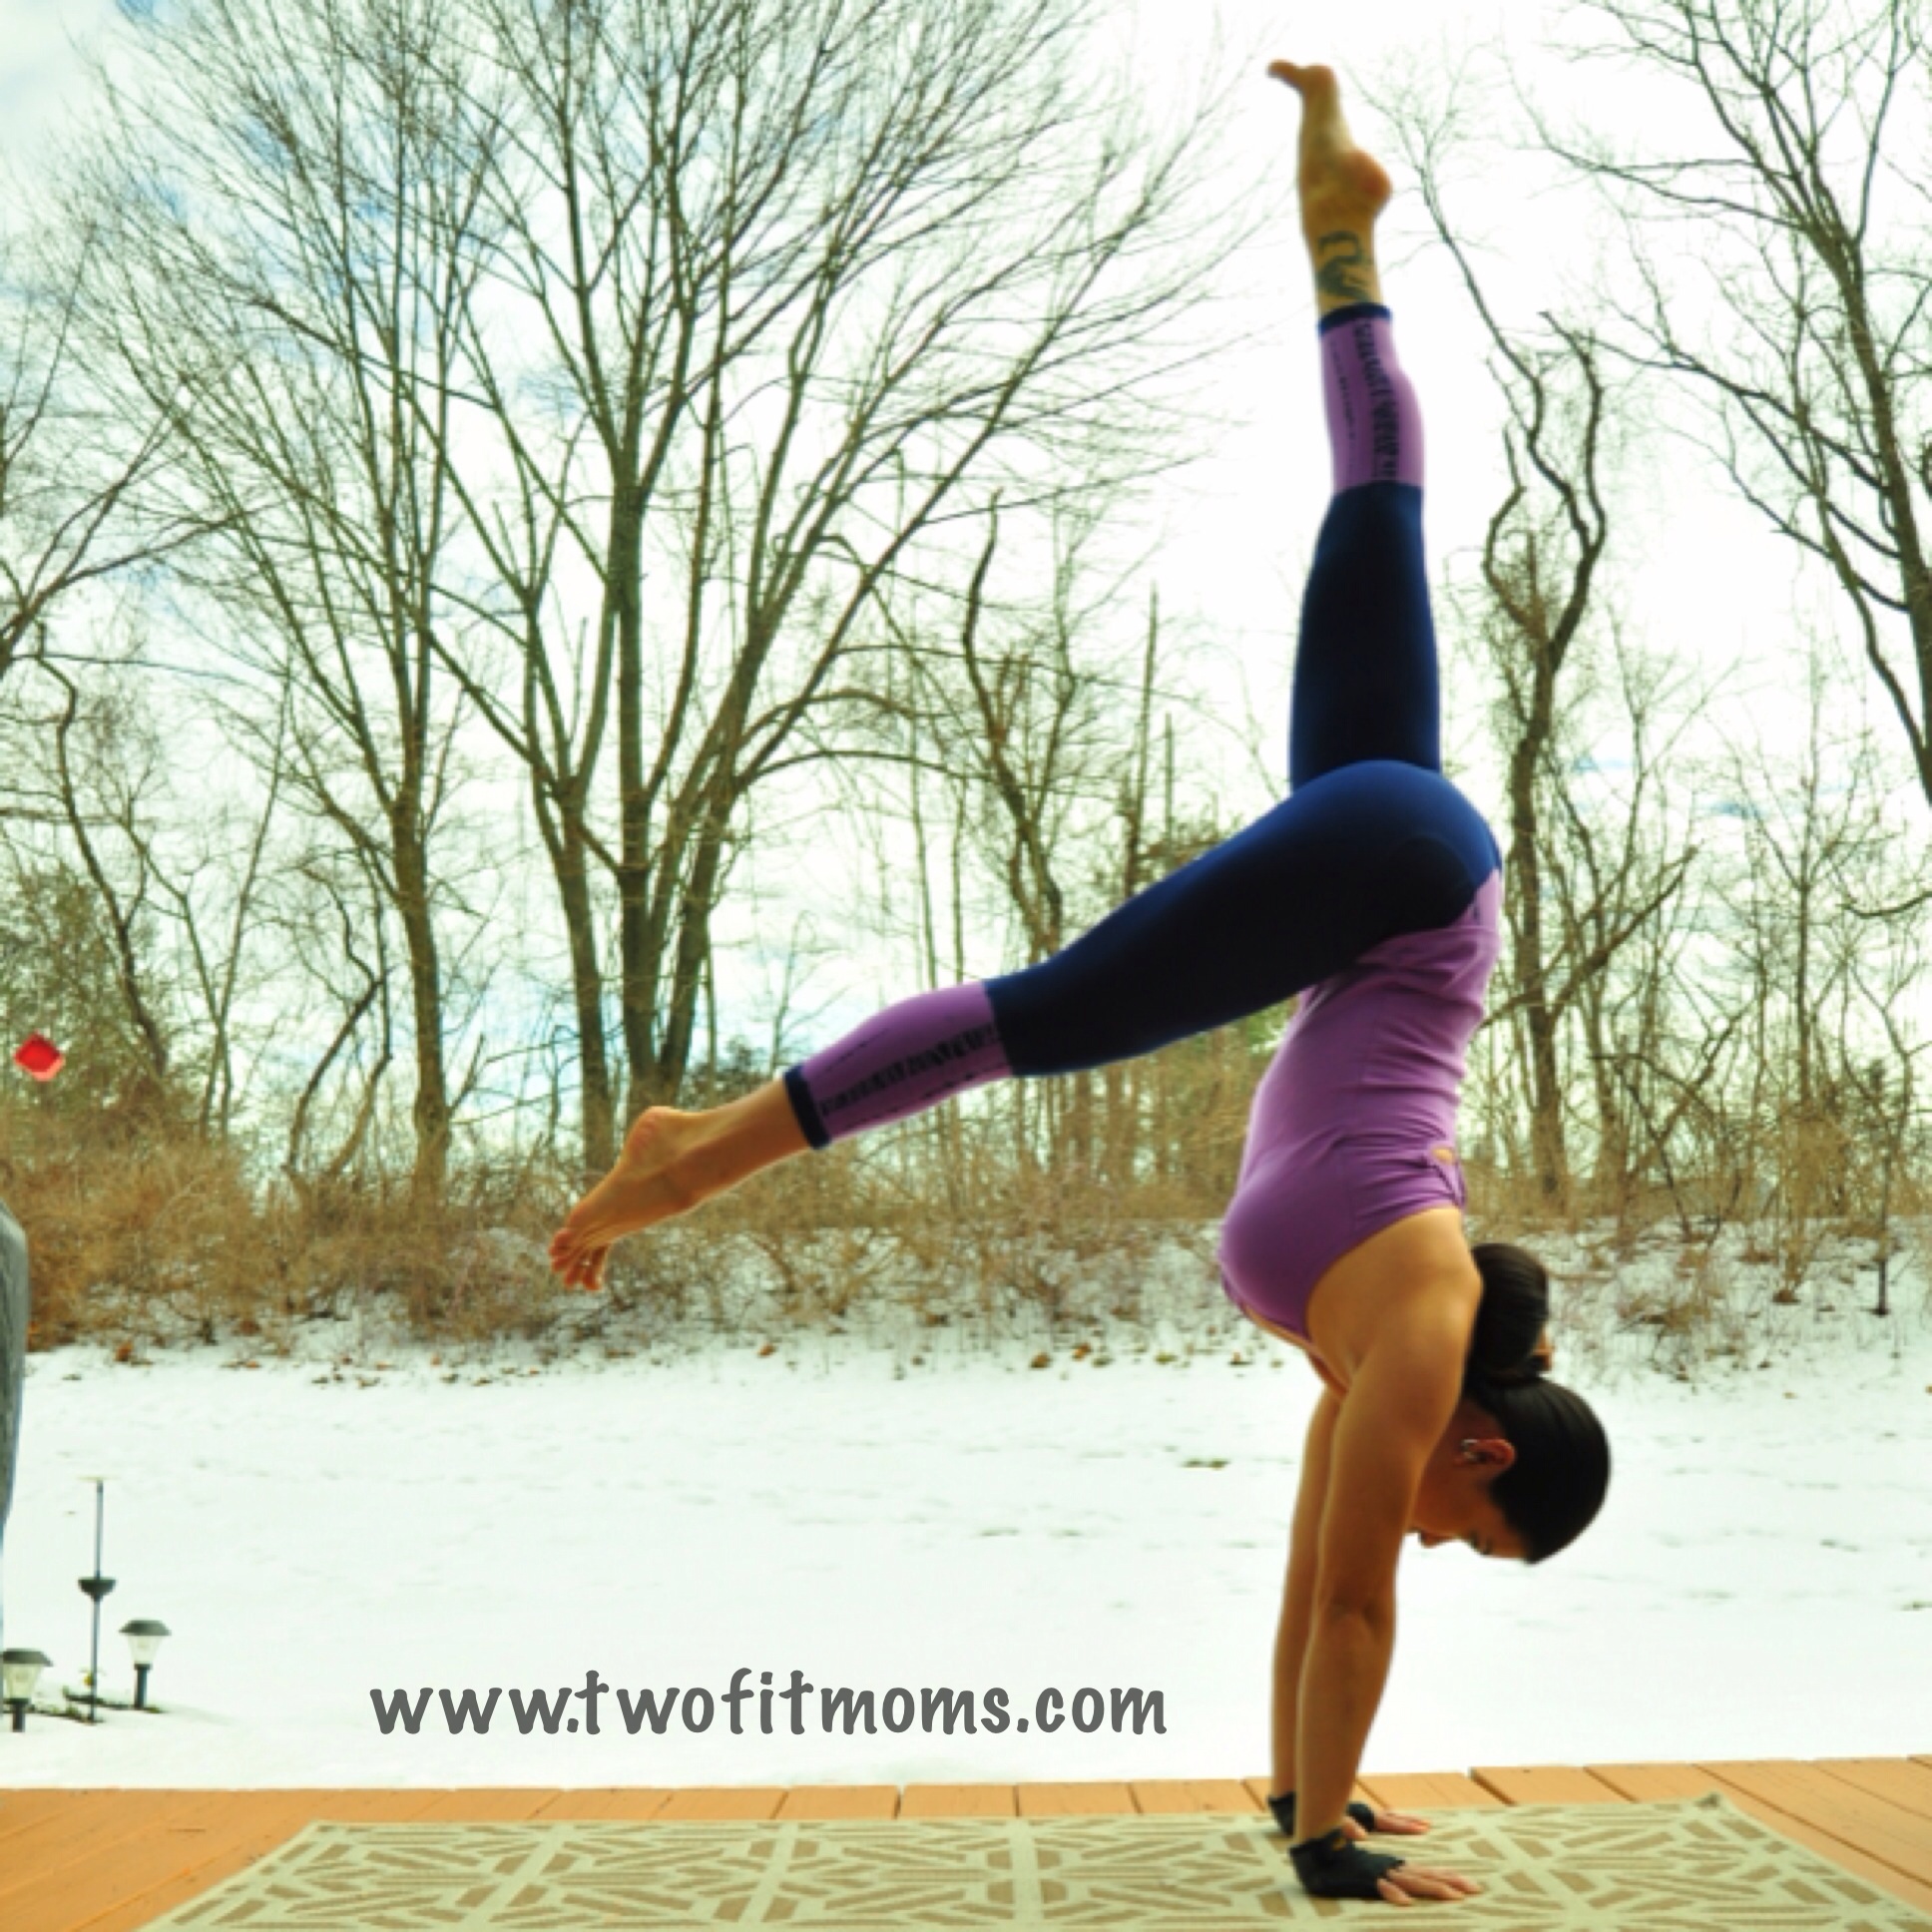
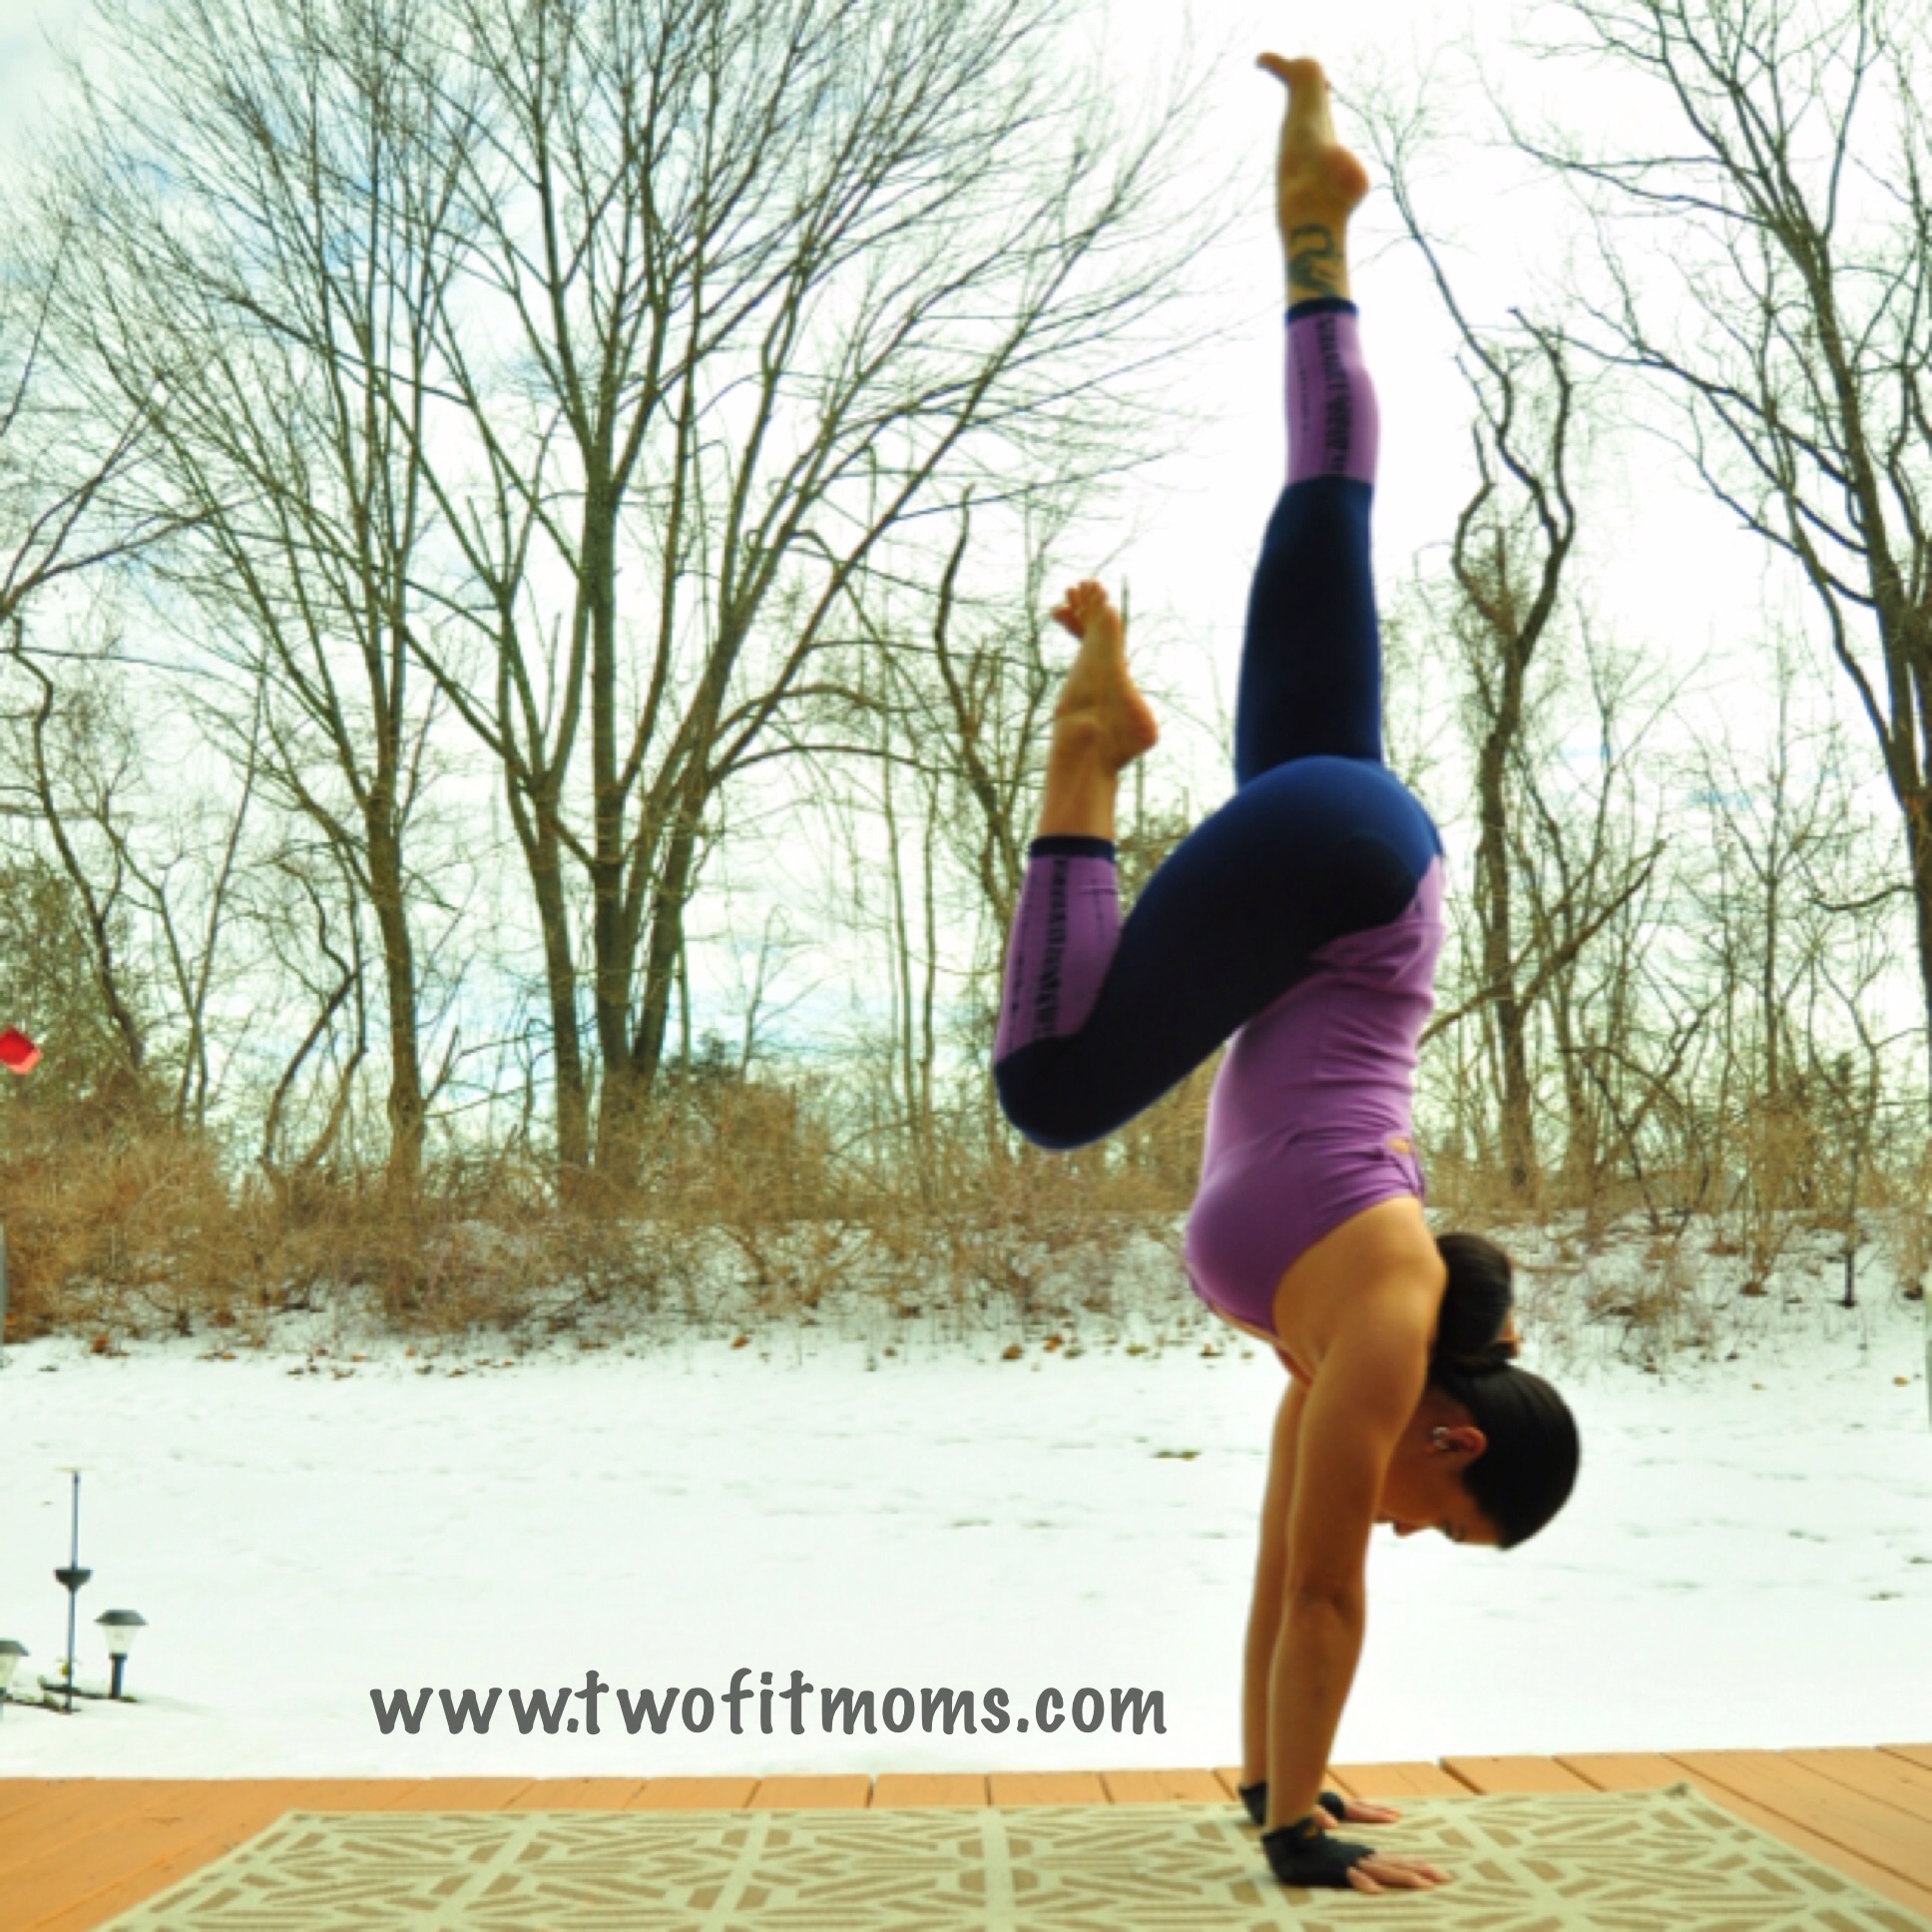
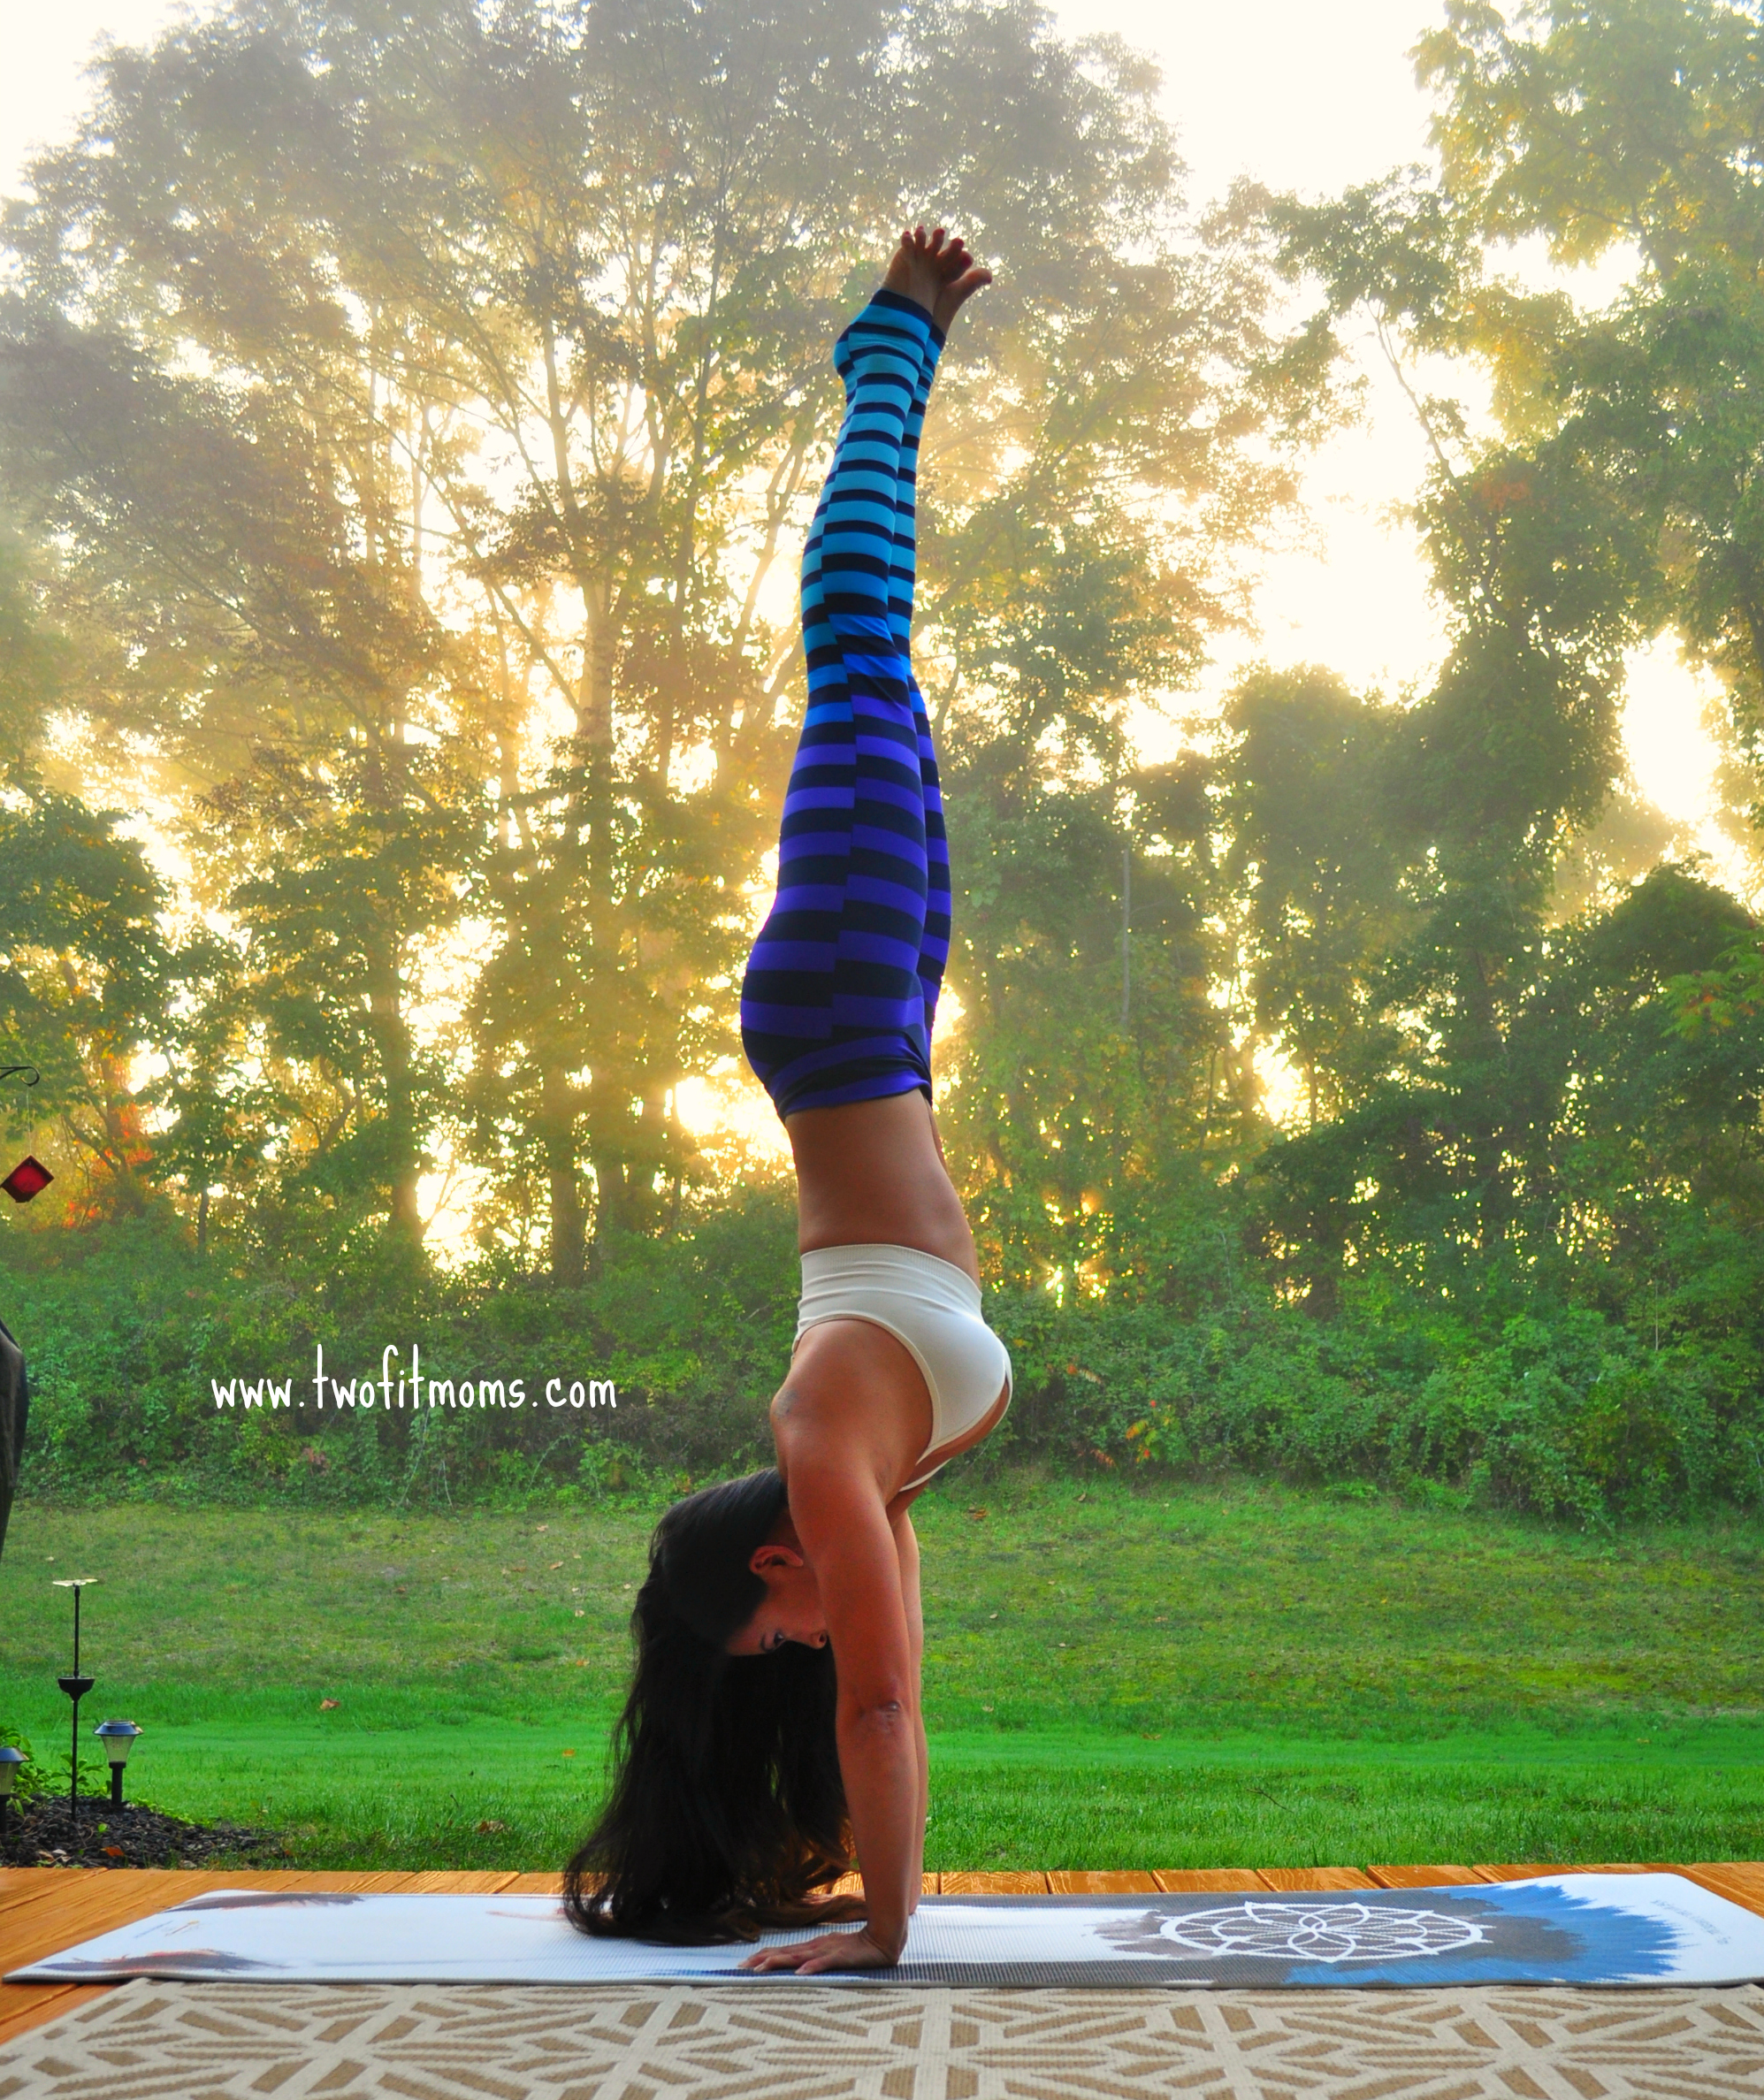
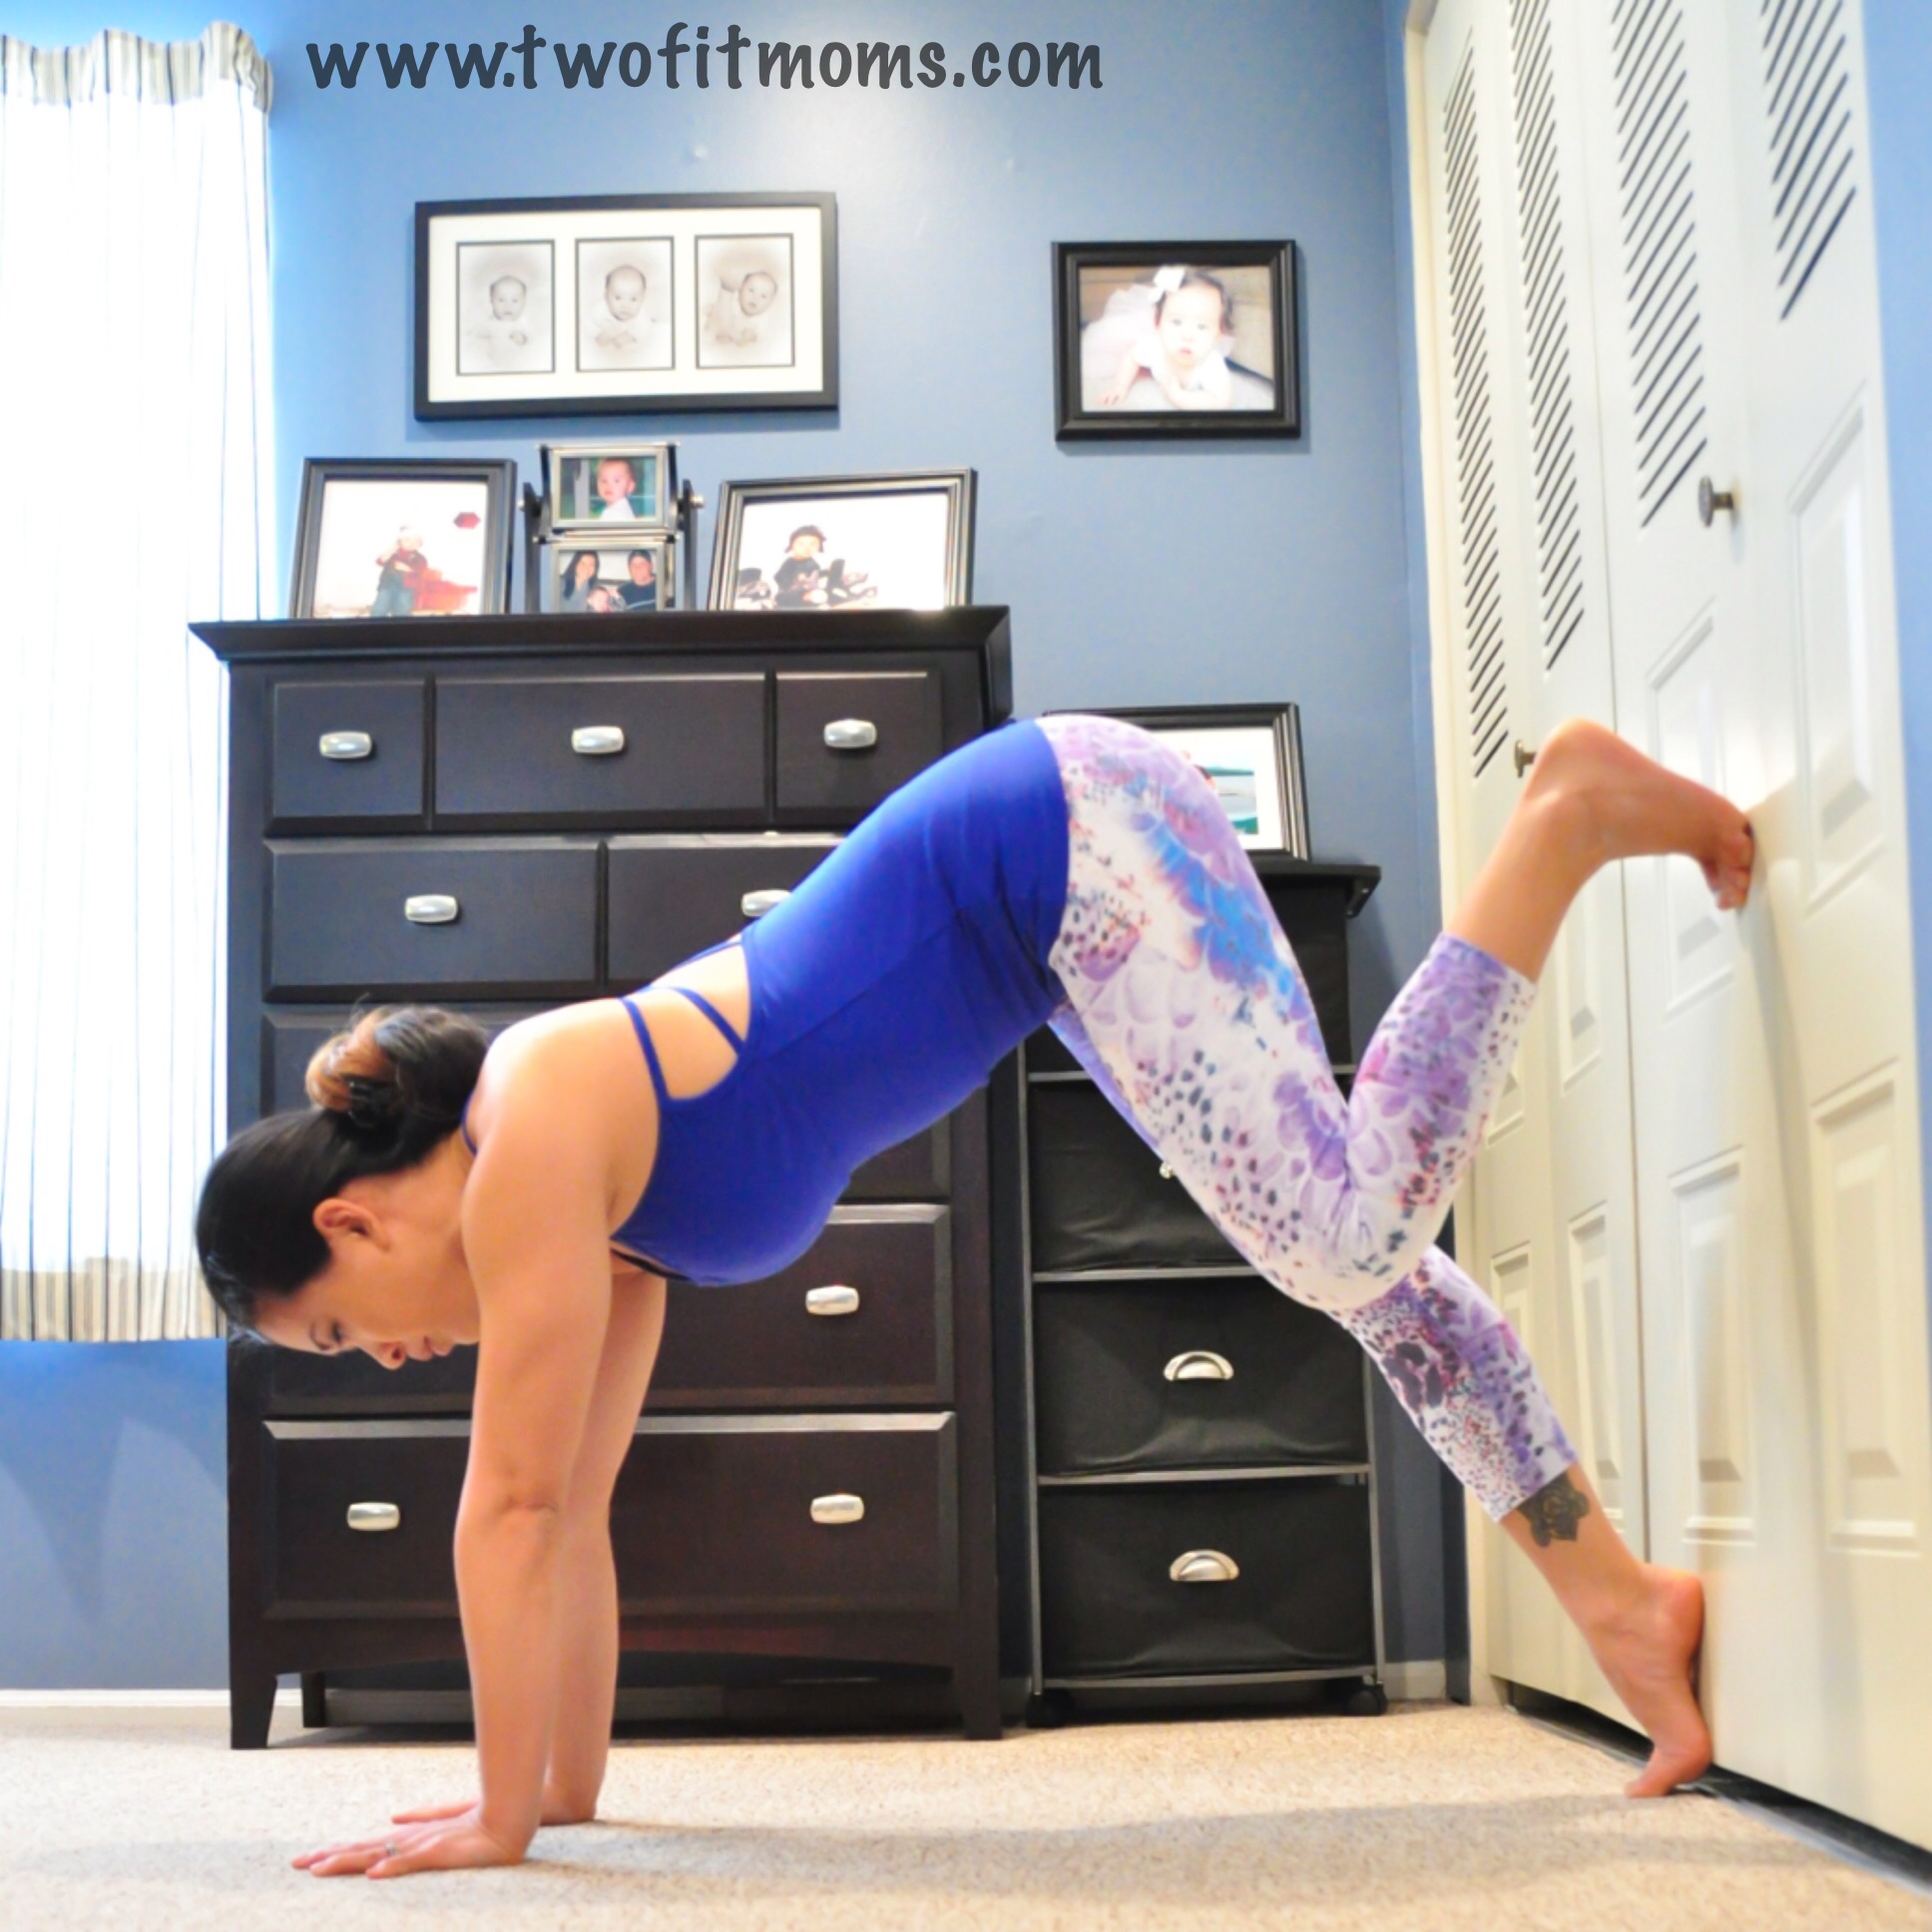
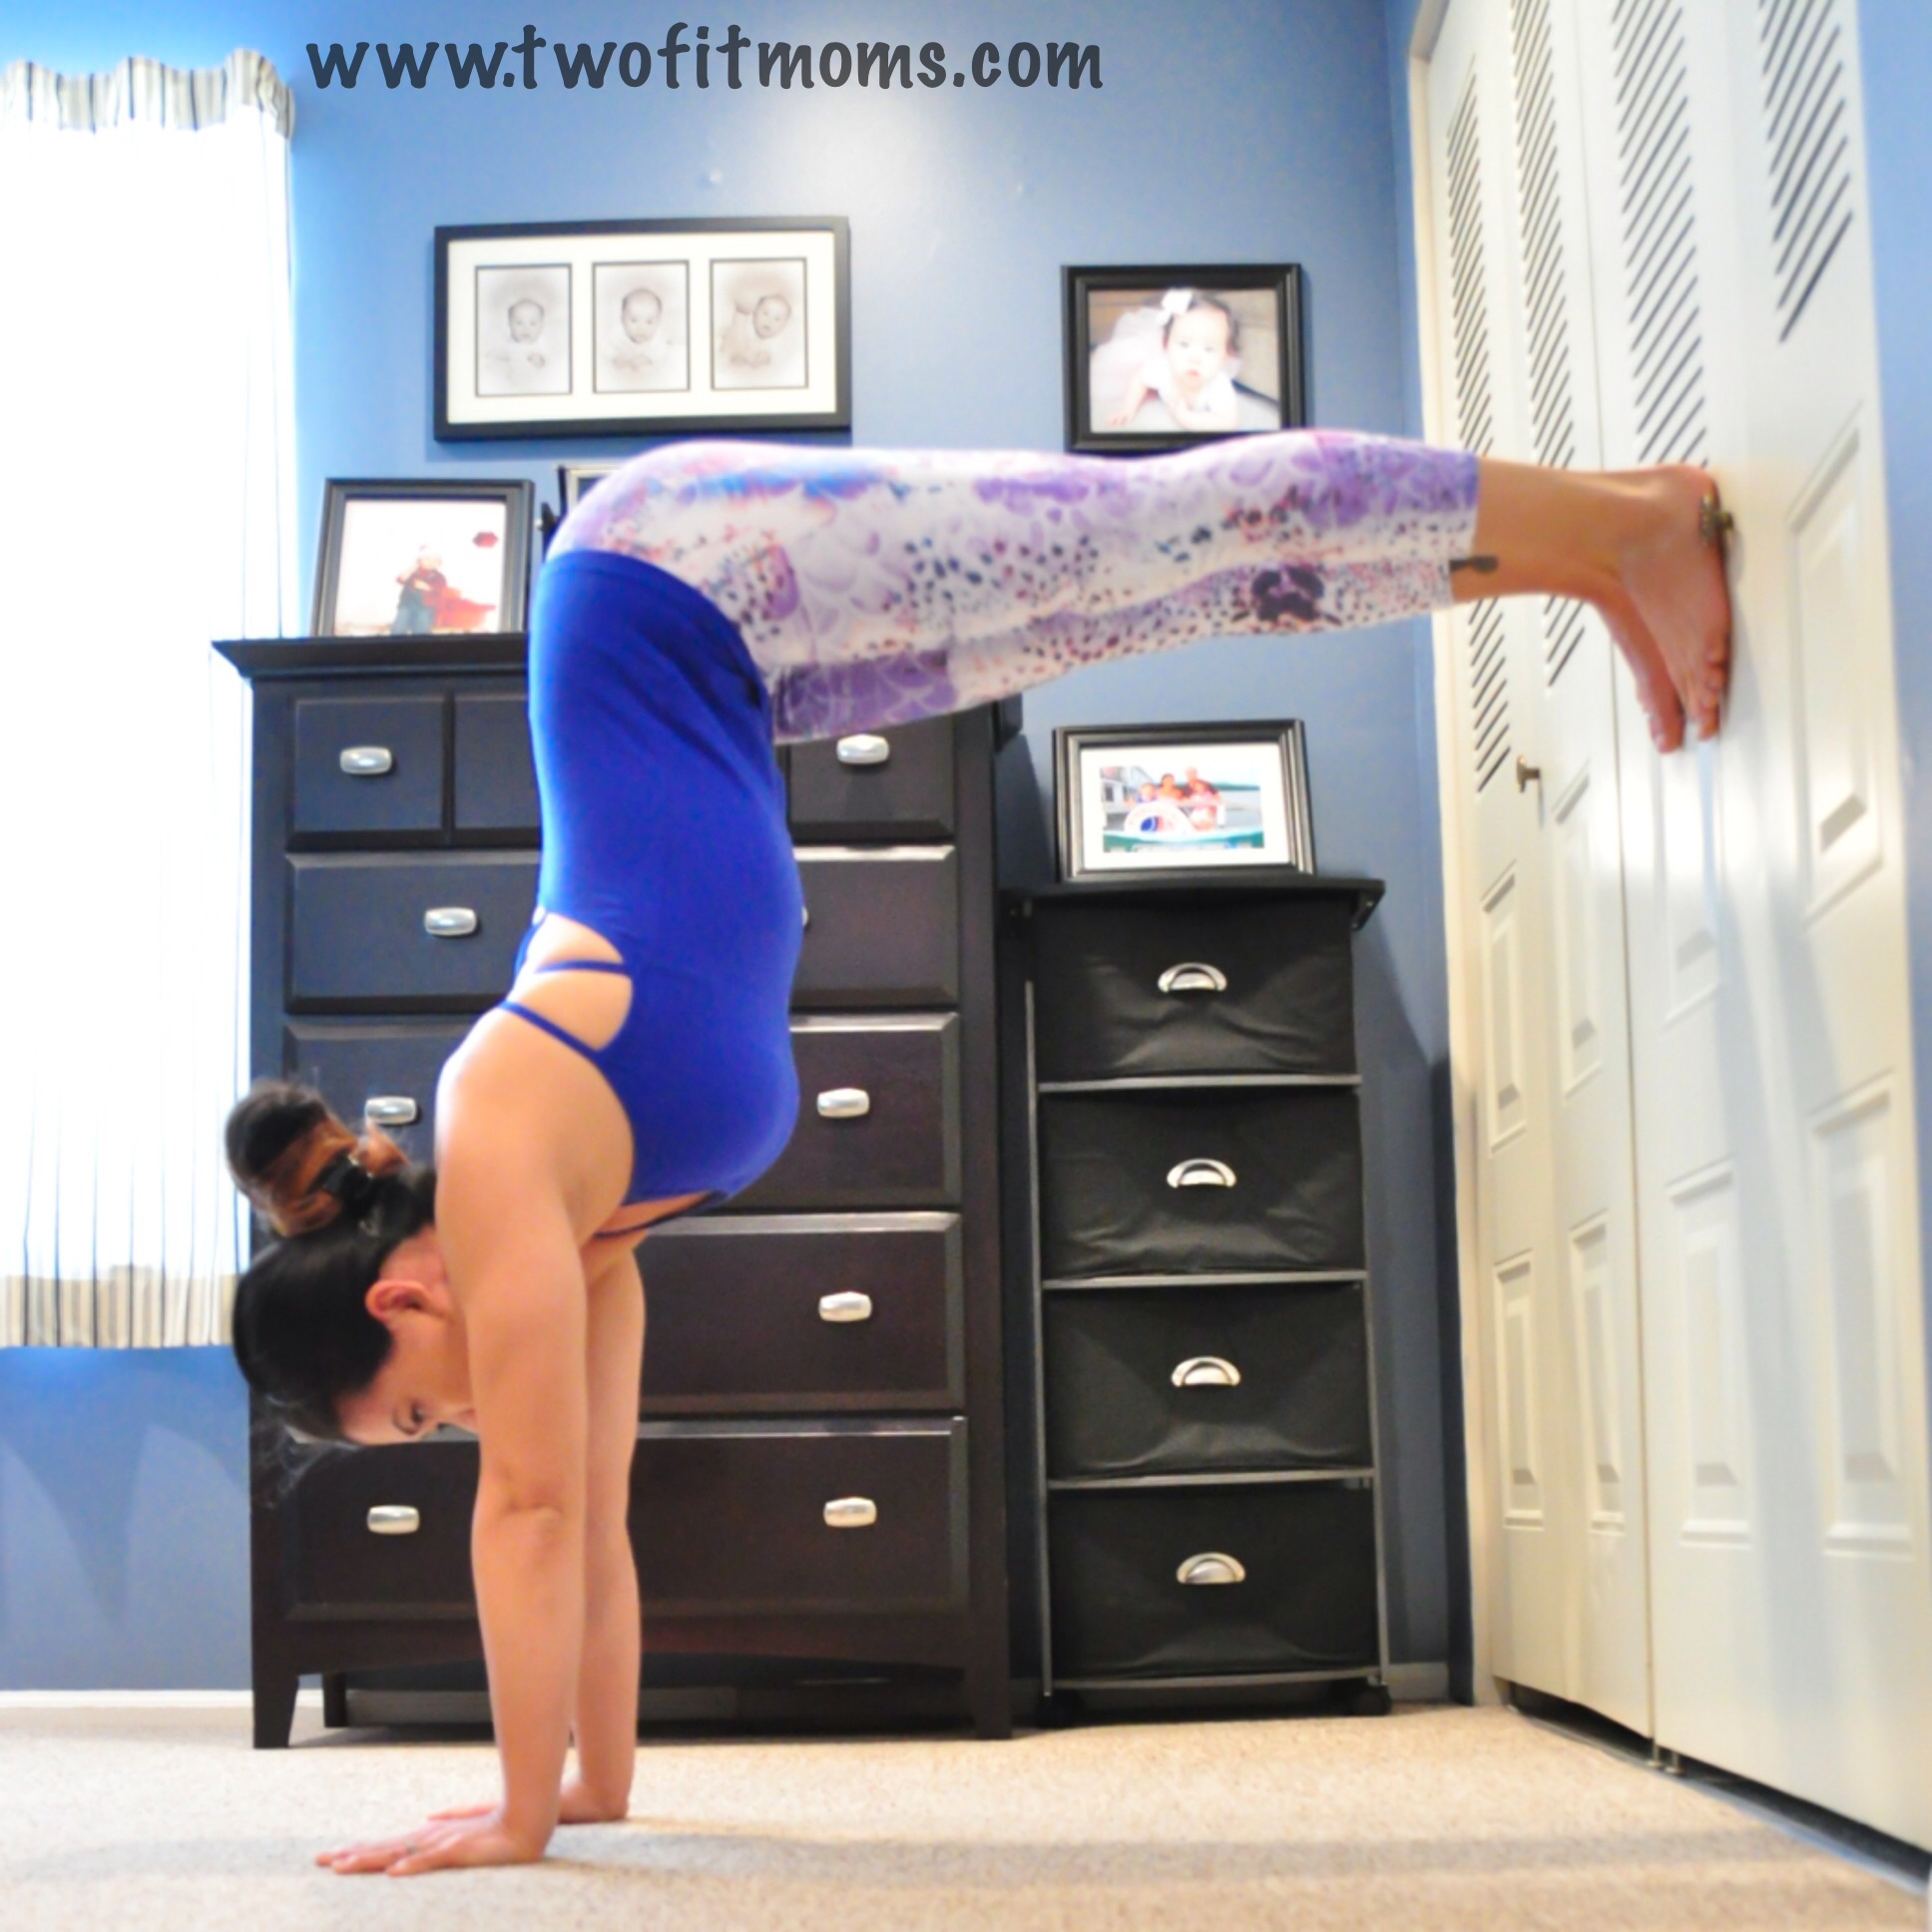
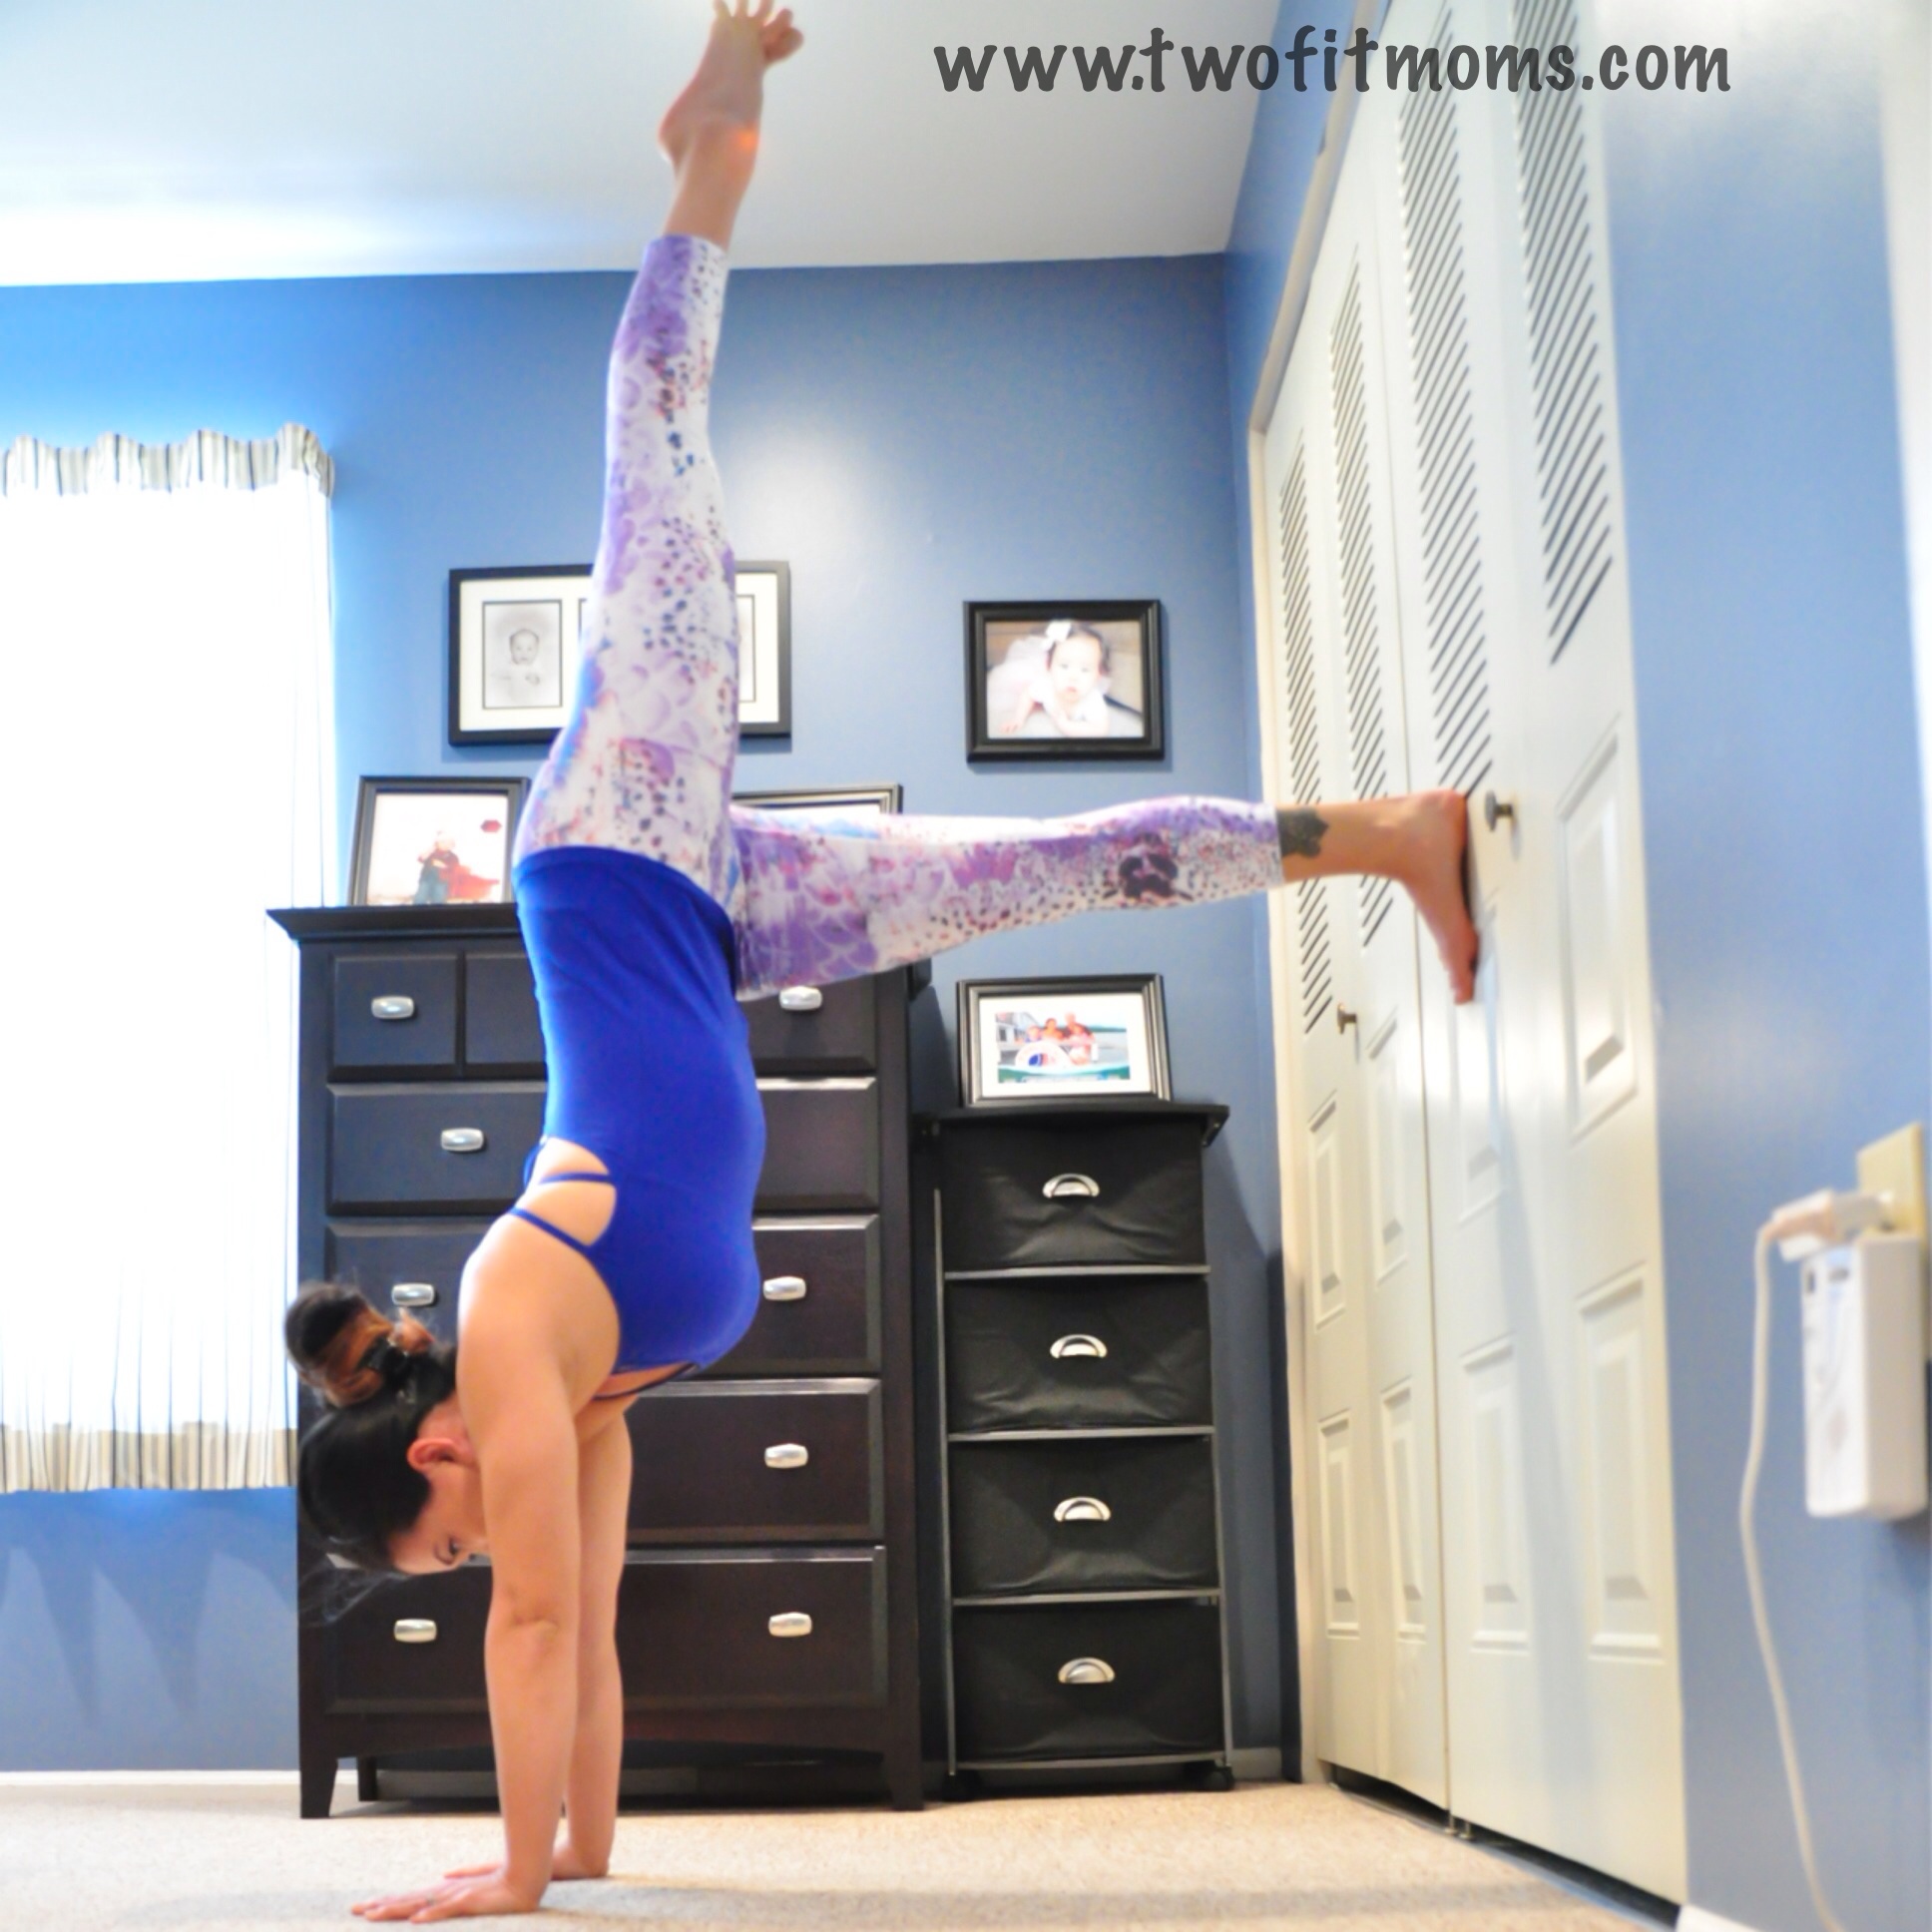
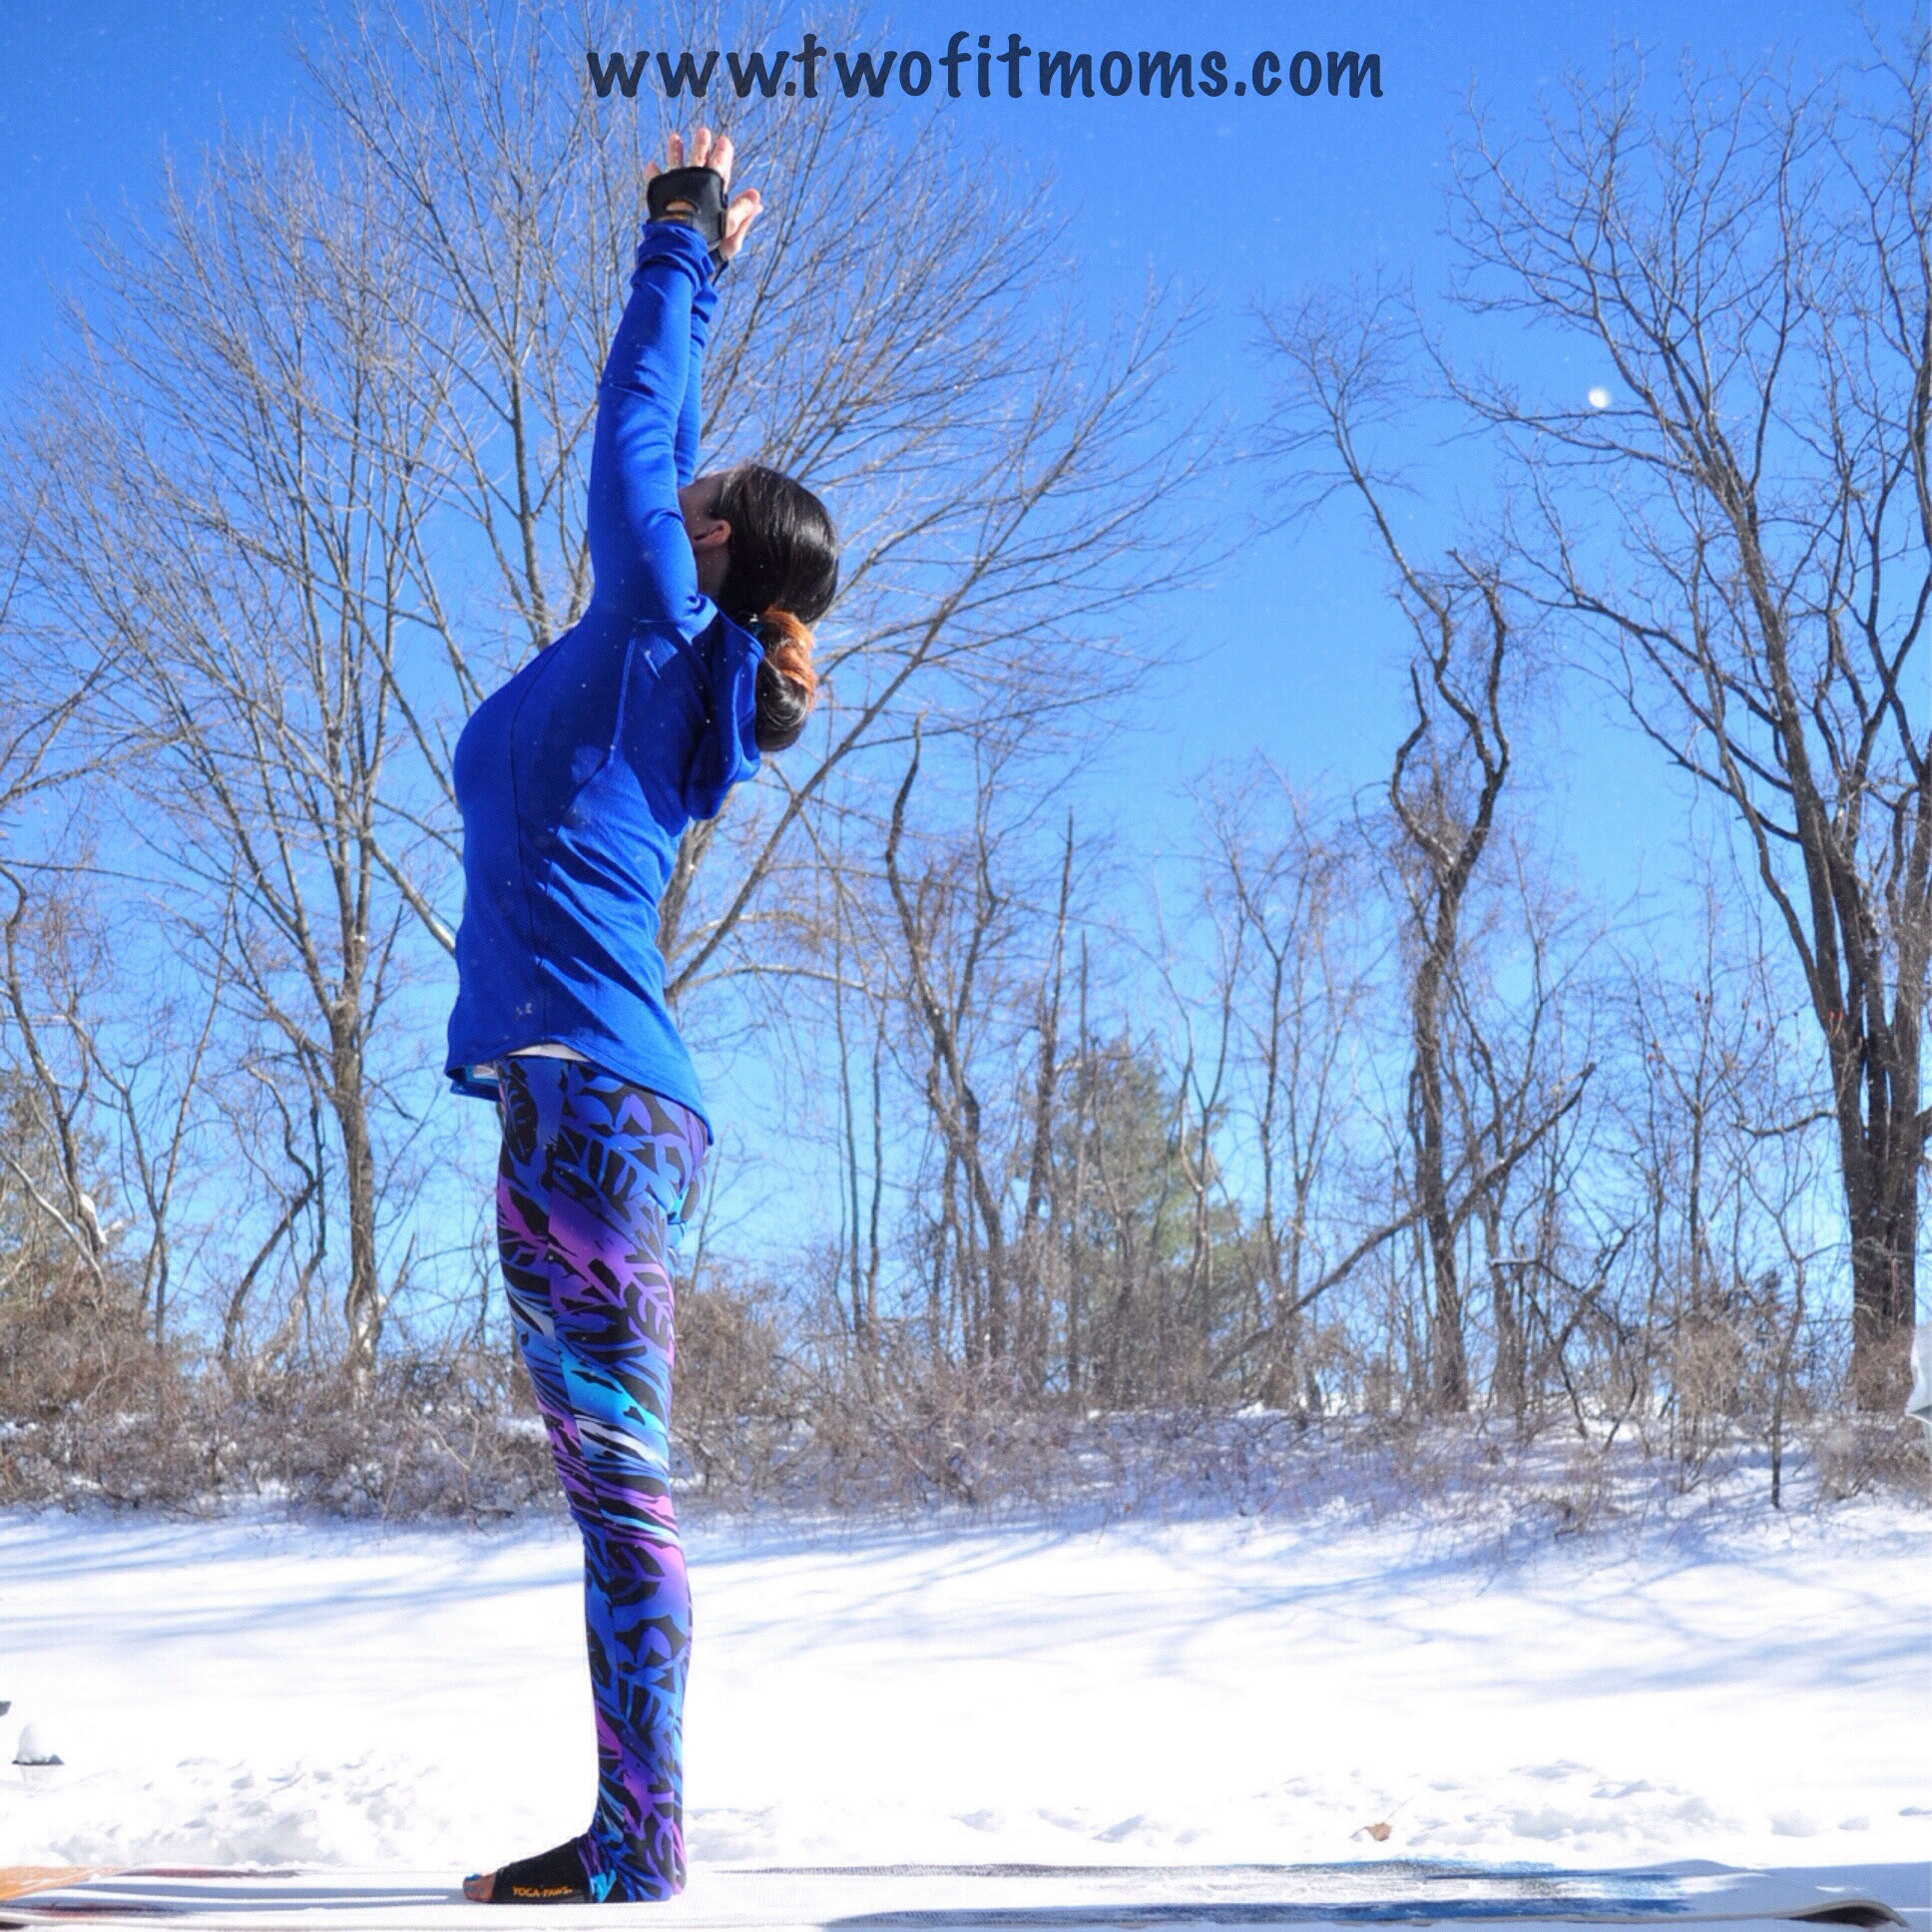
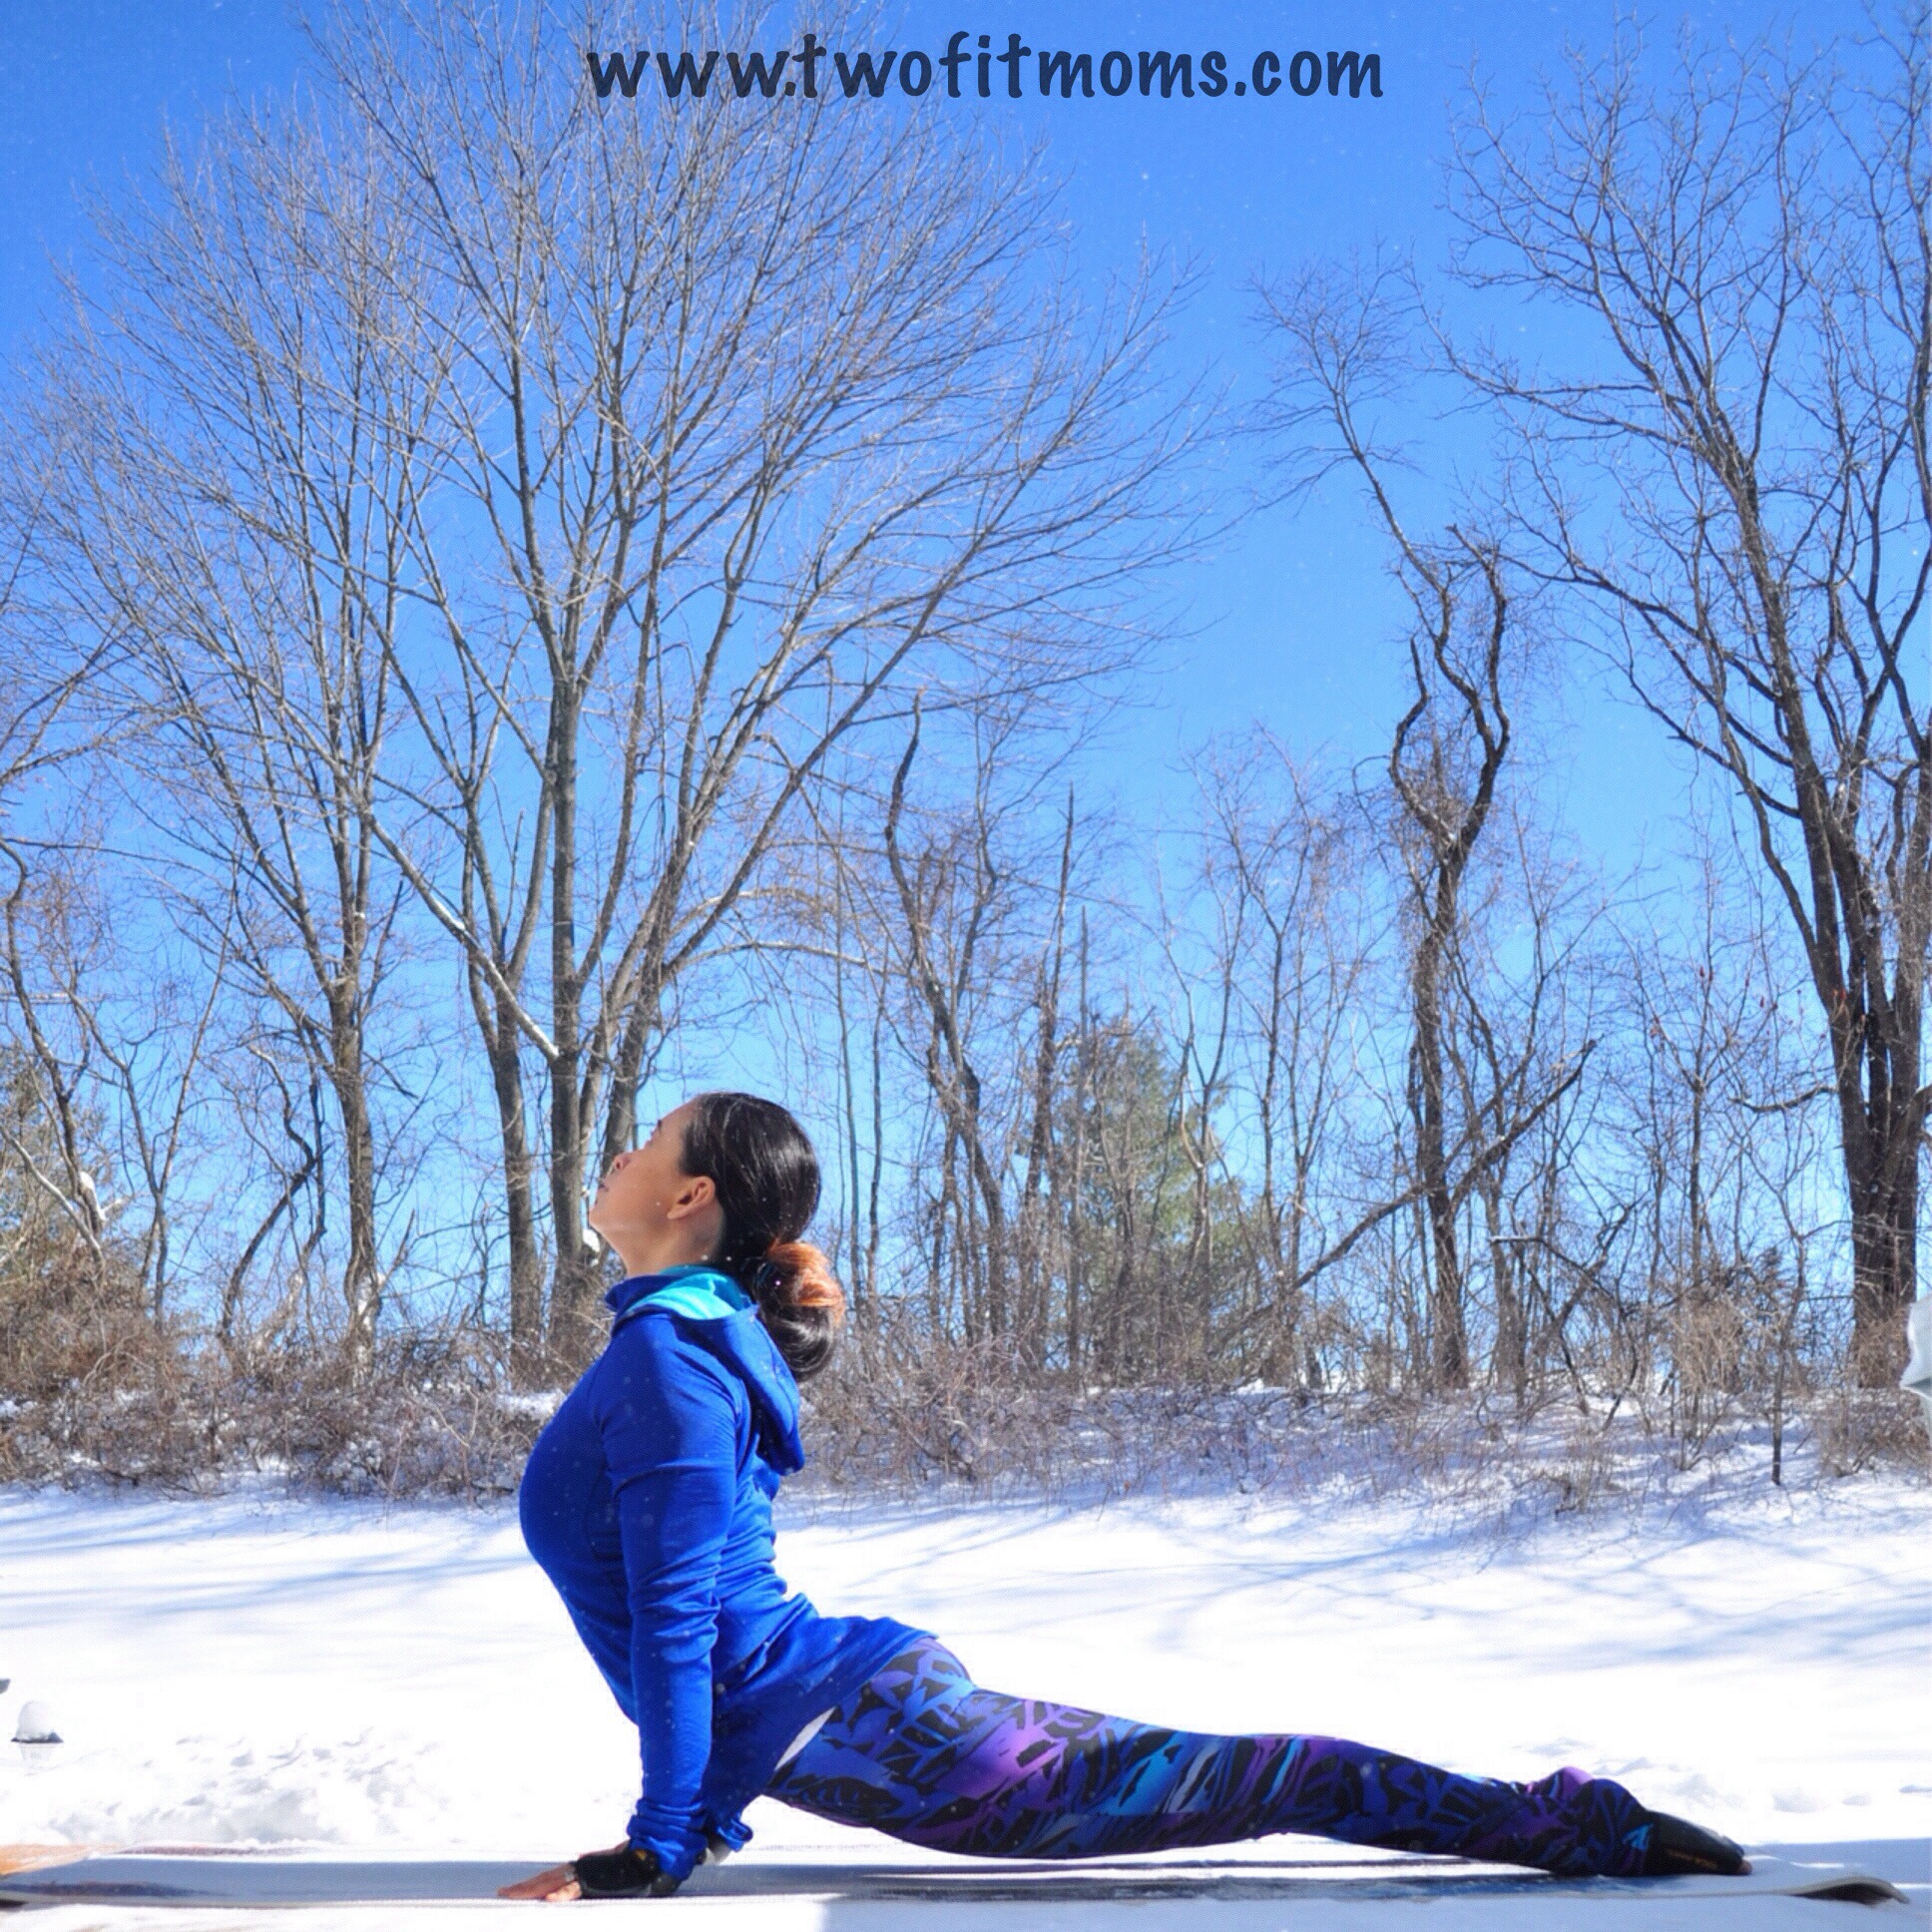
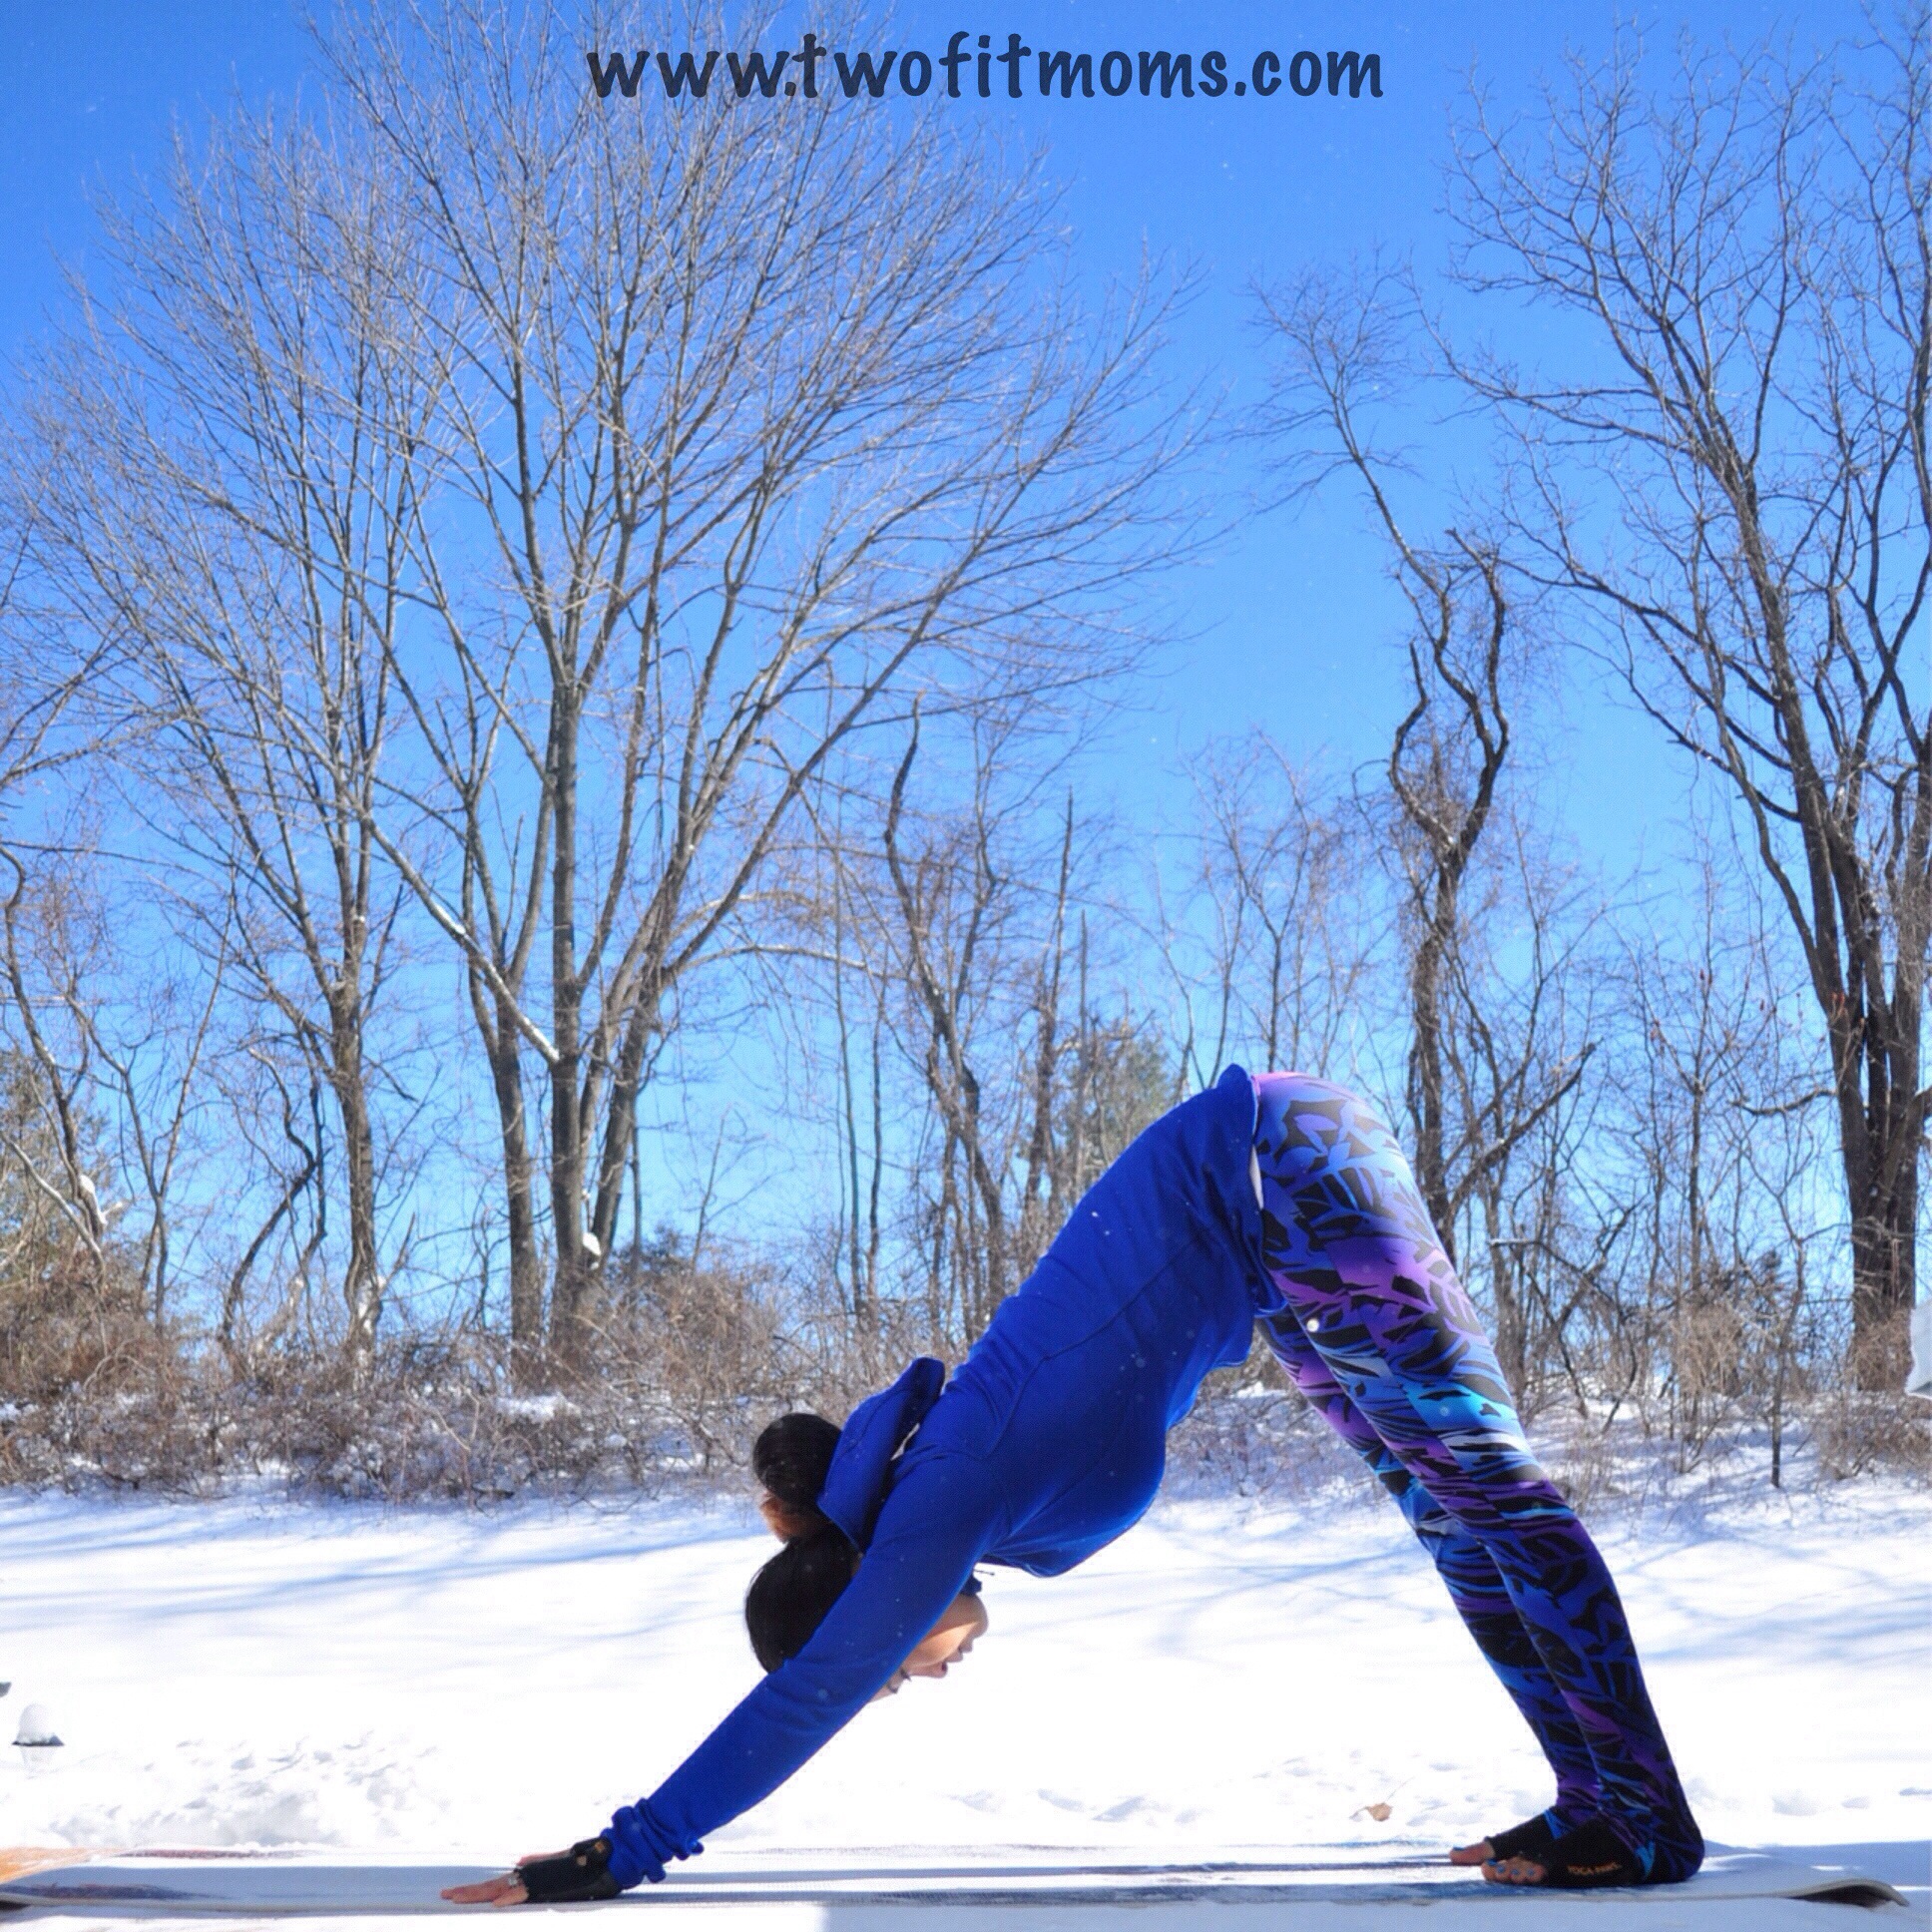
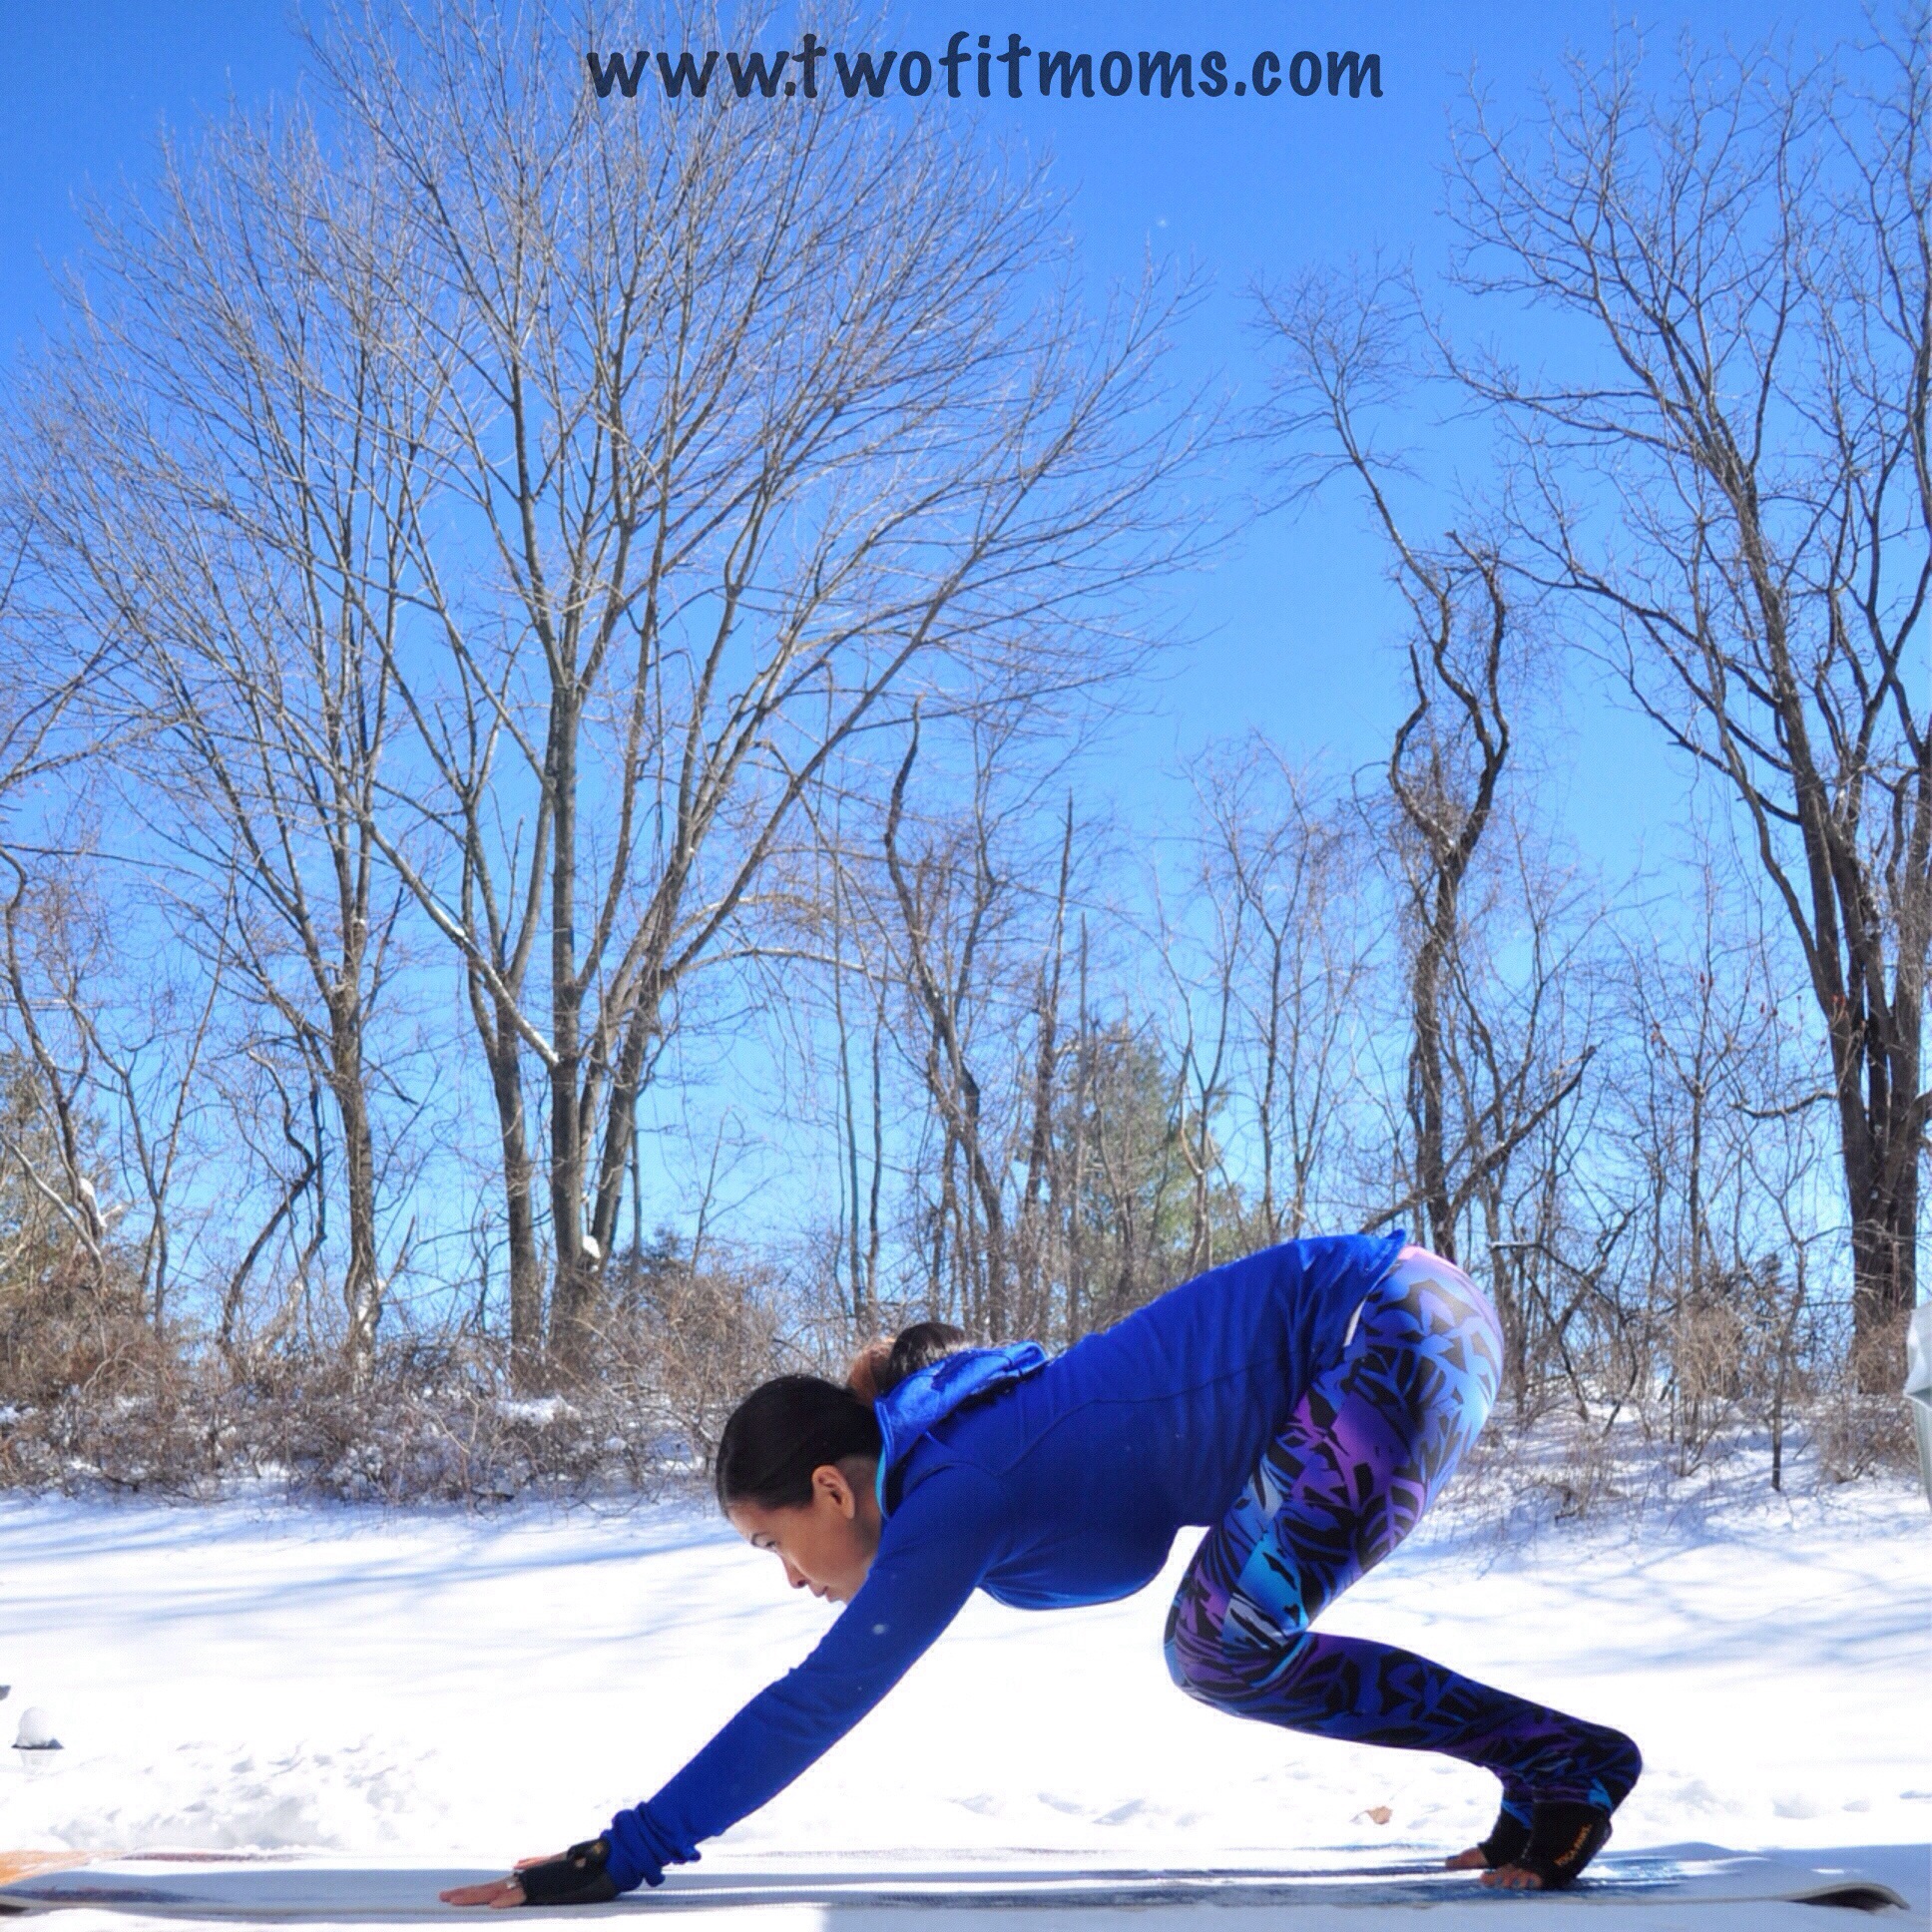
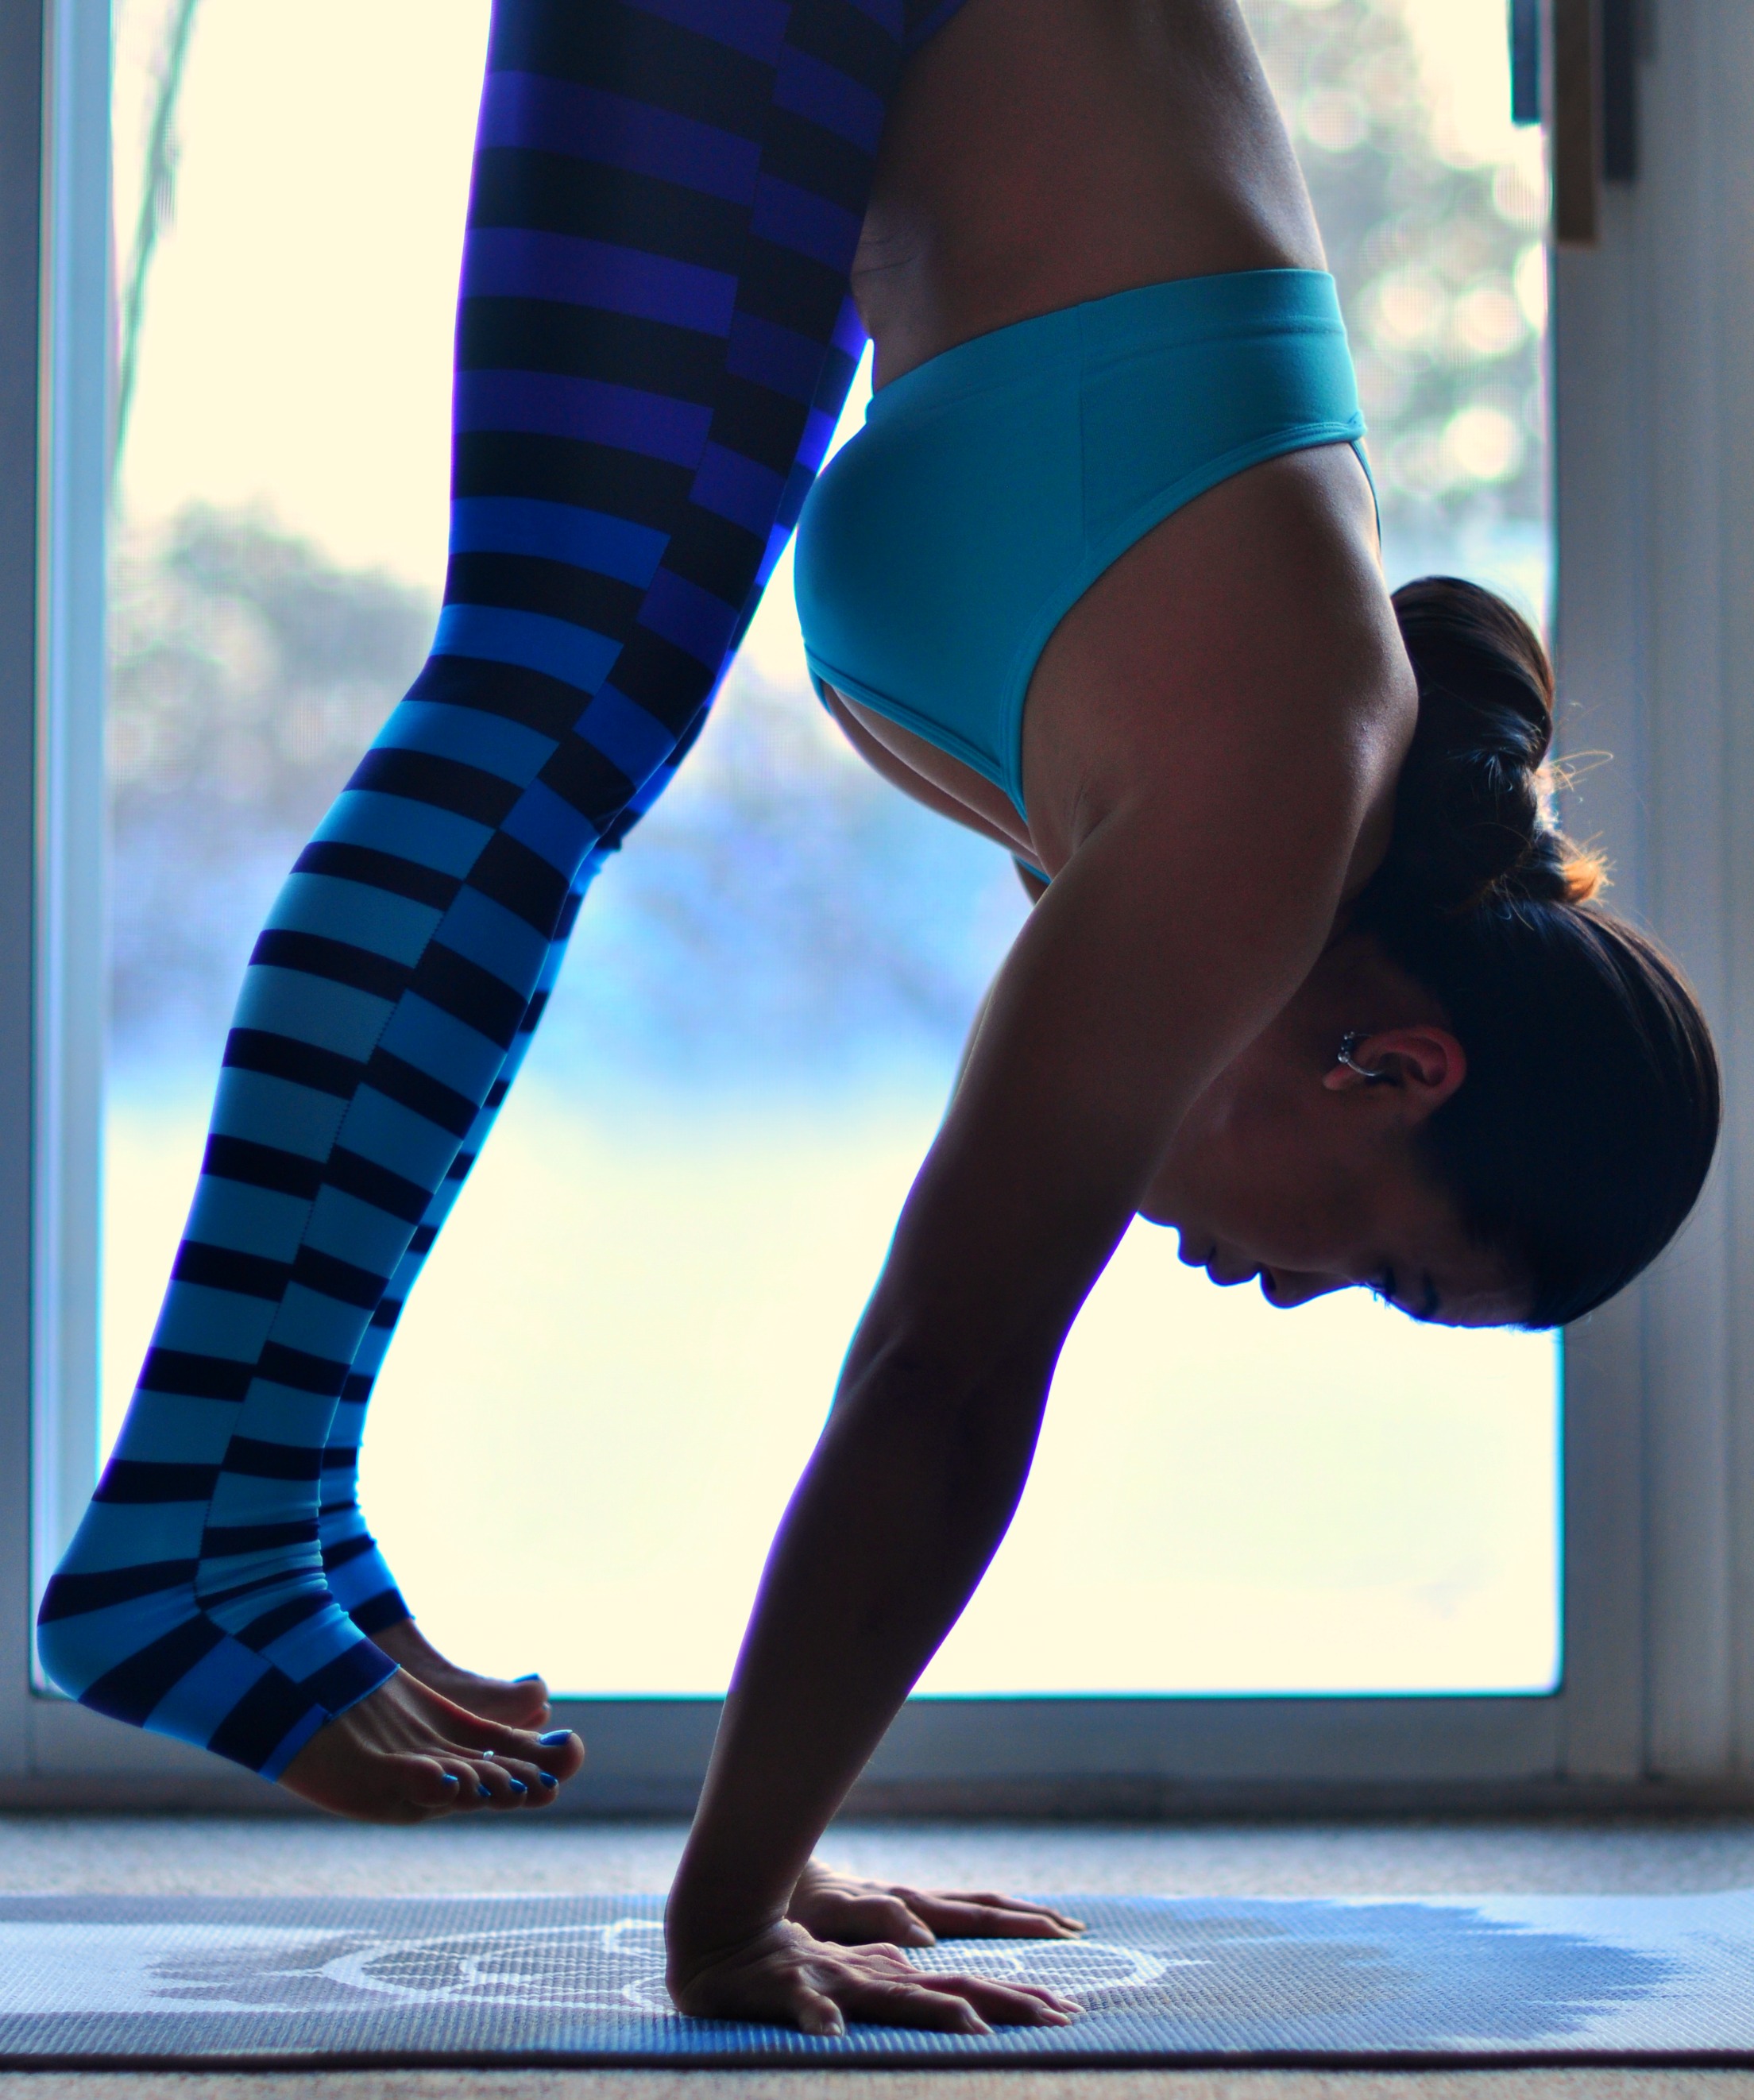
    Once you can comfortably float down and up in Tripod Headstand, you can start to work on your float down from Handstand. Feel free to use a wall if you have trouble balancing and you can even press the crown of the head into the wall to help slow your descent. You may feel this in your wrists, so take it slow! Remember the foundations of a handstand and press firmly into the ground with your hands. Engage your core and slowly start to float down.  If you are having serious trouble with this, you can also try straddling your legs to float down! Play with it…but most importantly, have patience!

    [KGVID poster=”http://www.twofitmoms.com/wp-content/uploads/2014/02/Video-Feb-21-1-14-35-PM_thumb19.jpg” width=”1920″ height=”1080″]http://www.twofitmoms.com/wp-content/uploads/2014/02/Video-Feb-21-1-14-35-PM.mov[/KGVID]

    XOXO

    Blog Signature

  • Funky Pincha Mayurasana

    Funky Pincha Mayurasana

    It’s time to get FUNKY in Pincha Mayurasana! In this variation you are on one forearm and one hand versus both forearms. The key is squeezing the elbows in toward the midline.

    It is incredibly important to note that you should have a solid, REGULAR Pincha Mayurasana practice before attempting to kick up in this variation. Feel free to practice funky Dolphin pose to get yourself familiar with the different arm placement.

    Step 1: What it means to get “funky”

    Start off on all fours, Tabletop position… fingers spread wide, shoulders stack directly over your wrists, hips stack directly over your knees.  Biceps roll forward, so there is an external rotation of your upper arms. Arm bones plug into their sockets, shoulder blades pull down your back. Keep your toes curled under. It is important to have a solid base to start.

    Keeping the external rotation in your right arm, slowly lower your right elbow down onto your mat. Your right forearm should be parallel to the edge of your mat. Even though it is down, feel your right elbow continue to squeeze in.

    Move your left hand back so your left fingertips line up with the back edge of your right elbow that is on your mat. You may have to play with this to find what is most comfortable… move maybe an inch or so up. Where ever your hand lands though, squeeze that elbow in!

    Photo Feb 18, 11 07 53 AM


    Step 2: Funky Dolphin

    Keeping the elbows in, press your forearm and hand firmly into your mat and lift your knees up. Hips will lift and legs will straighten. Walk your feet in towards your arms as much as your flexibility allows. Try to keep equal pressure in your forearm and hand. The tendency will be to put more pressure into your forearm… try to keep the weight equal. Stay here and hold for five breaths. Come down, take a Child’s Pose and repeat on the other side.

    Photo Feb 18, 11 08 03 AM

    Step 3: Lift a leg

    I prefer to lift the leg that is on the same side where the hand is planted. Try both legs though and see what is more comfortable for you. Keep the lifted leg engaged… really energized and pulling up. Remember to keep the elbows pulling in and lifted leg internally rotating… try not to let your hips open too much. Mine tend to open a little, but if they are too open, you will be crooked when trying to kick up and probably fall over. Come down, take a Child’s Pose and repeat on the opposite side.

    Photo Feb 18, 11 08 10 AM

    Step 4: Take a few baby hops, maybe catch some hang time

    If you are ready to start baby kick ups, please find a wall space and set yourself up about six to eight inches away and come into the previous step, funky Dolphin with one leg raised. Before bending the bottom leg, ask yourself . . . Are you pressing equally into your forearm and your hand? Are your elbows squeezing in? Are your hips relatively square? Is your lifted leg engaged? Are you gazing down at your mat?

    When you are ready, put a slight bend into the bottom leg and take a few baby hops. Between each hop, check to make sure you are in form. As you become more comfortable, you will find more hang time. Play with both legs extending out as shown below or bending in the bottom leg.

    Come down and take a Child’s Pose… then repeat on the other side!

    Photo Feb 18, 11 08 20 AM

    Step 5: Full expression

    Once you find your balance with legs apart, you can play with bringing the legs together.

    Photo Feb 18, 11 07 44 AM


    XOXO

    Blog Signature

  • Baddha Hasta Sirsasana B

    Baddha Hasta Sirsasana B

    Baddha Hasta Sirsasana B is probably my favorite headstand variation.  “Baddha Hasta” refers to the bound hand position which is the base for this variation. With ANY headstand, be mindful and be extremely aware of your body and its position. Headstands can be fun and exhilarating when practiced with caution. There should never be any rush…the asana will come with patience and diligence. Remember to use a wall if needed!

    Step 1: Get a grip!

    Start by sitting on your heels. Extend your arms out, bend the elbows and loosely grab the opposite forearm by the elbow.

    Photo Feb 15, 2 26 11 PM

    Step 2: Set yourself up

    Keeping the grip on opposite arms, place your forearms down onto your mat and curl your toes under. Place the crown of your head down right in front of your forearms. Start to press your forearms firmly down into your mat as you draw your shoulders down to lengthen your neck. No turtles allowed!

    Remember to use a wall if needed!

    Photo Feb 15, 2 26 25 PM

    Photo Feb 15, 2 26 37 PM

    Step 3: Dolphin

    Keeping pressure in your forearms and neck long, slowly lift up off of your knees and walk the feet in towards your head. The goal is to get the hips stacking over your shoulders. Resist the urge to dump into your neck as weight is added onto your arms, shoulders and head. Stay here and hold for 5-8 breaths. Come down and rest in Child’s Pose before moving on.

    Photo Feb 15, 2 26 49 PM

    Step 4: One step at a time

    When you’re ready to move on, come back into Dolphin. Slowly bend one knee into your chest, then place it back down onto your mat. Repeat with the other knee. Come down and rest in Child’s Pose before moving on.

    Photo Feb 15, 2 27 01 PM

    Step 5: Headstand egg

    From Dolphin, bend one knee tight into your chest. Using your core and maybe the tiniest push off, bring the second leg into your chest. I do not suggest kicking up with straight legs. Move slowly and with awareness to prevent any injuries to your neck. Once both legs are tucked into your chest, do a little check… Are you firmly pushing into your mat with your forearms? Are your shoulders melting away from your neck? Is your core engaged?

    Photo Feb 15, 2 27 13 PM

    Step 6: Lift off!

    When you are ready to lift up, try lifting one leg at a time SLOWLY. The quicker you move, the more likely you are to fall, lose balance or tweak your neck. If you successfully lift one leg up, THEN try to bring the second leg up to meet the first. Keep the legs engaged by flointing or pointing the toes. Stay here and breathe…

    Photo Feb 15, 2 27 25 PM

    Photo Feb 15, 2 27 36 PM

    Slowly come down and take a Child’s Pose.

    Remember, this is a more advanced headstand variation! If you do not get it this time around, no worries! Your yoga journey is your own… There is no timetable to your practice. Have patience and keep practicing.

    XOXO

    Blog Signature

  • Eka Hasta Bhujasana

    Eka Hasta Bhujasana

    Eka Hasta Bhujasana, or One-Leg-Over-Arm Balance, is another great intro to balancing on your hands.  It helps build strength in your arms and core which are essential in all of your arm balances and inversions. Feel free to have blocks nearby if you cannot get your hands flat on your mat.  Let’s break it down!

    Step 1: Warm up!

    I always start my practice with about 5-10 Sun Salutions to get my body moving.  Feel free to warm up anyway that you would like! This pose does require a lot of hip mobility and open hamstrings, so make sure to spend some time in poses like a seat forward fold and single/double pigeon.

    Step 2: Cradle the leg

    Take a seat on your mat and extend both legs out. Bend the right knee and plant the foot down onto your mat. Slowly pick up the bent leg and hug it into your chest. With your left hand, grab the sole of your right foot and start to pull it in toward you.  The goal is to get your right shin parallel to the ground.  Option 1: Cradle your shin by taking the sole of the right foot to the inner left elbow and the outer knee to the inner right elbow as shown above.  Option 2: Use your arms like a forklift by sliding both arms under the shin to hold your leg upright. With either variation…stay here and breath for 8-10 breaths!

    Photo Feb 12, 1 23 29 PM Photo Feb 12, 1 23 51 PM

    Step 3: Backpack it!

    Take the sole of the foot again with your left hand and slide the right hand under the right calf muscle. Slowly begin to work the leg out to the right, then up over the right shoulder.  Make believe you are putting on a backpack strap!

    Photo Feb 12, 1 24 10 PM

    Step 4: Clamp it down

    Once you have worked your leg as high up the arm/shoulder as your flexibility allows, clamp the leg down so it stays. Place your hands down onto your mat next to your hips. If you cannot get your hands flat, use your blocks to bring the ground up to you! Engage both legs by flointing or pointing the toes.

    Photo Feb 12, 1 24 26 PM

    Step 5: Start the lift

    You can play around with either lifting the left foot up or lifting the buttasana up.  Try both! Feel your core engage. Try to hold your option for five breaths.

    Photo Feb 12, 1 24 42 PM

    Step 6: Full expression

    Work your leg up over your arm/shoulder and plant your hands firmly onto your mat. Using a bit of momentum, take a deep breath in and lift the leg off of the ground. On the exhale, lean slightly forward and, keeping the leg lifted, try to lift your bottom up as well. Keep the upper back rounding and arms squeezing in toward the midline.  Continue to clamp down the leg over the arm/shoulder. Press firmly into the ground and keep your gaze forward.  Hold for a few breaths if possible and release.

    Don’t forget to work the other side!

    Photo Feb 12, 1 24 57 PM

    XOXO

    Blog Signature


  • Pincha Mayurasana

    Pincha Mayurasana

    Pincha Mayurasana, or Forearmstand, is probably the scariest of all of the inversions. There is just something about being on the forearms that seems harder. I highly recommend having a block, a yoga strap and a wall nearby to practice.

    Step 1: Downward Facing Dog

    Photo Feb 05, 4 52 42 PM

    Start off in Downward Facing Dog, or Adho Mukha Svanasana.  Hands are shoulder width apart, fingers are spread wide and grip the mat, weight is equally distributed through all four corners of your palms, biceps externally rotate out, upper arm bones plug into their sockets, shoulder blades roll down the back, lower ribs corset in, navel pulls in, core engages and inner thighs rotate in. It’s a long checklist, but a solid down dog will translate to a solid inversion practice. I like to start with my fingers and move down to my feet when mentally adjusting myself.

    Step 2: Dolphin Pose

    Keeping the external rotation in those arms, slowly make your way onto your forearms. Forearms should be shoulder width apart and parallel to each other. Let the head hang neutral. Push firmly into your hands and forearms, and keep the elbows and upper arms squeezing in.  Stay here and breathe.  This is a great preparatory pose, and it will build arm/shoulder strength. You will probably start to feel this about three breaths in.  Try to stay here for five breaths and then take a Child’s Pose before continuing.

    Photo Feb 05, 4 52 56 PM

    When you are ready, come back into Dolphin Pose and walk your feet in as much as your flexibility allows. Look down and focus on the space in between your forearms.

    Photo Feb 05, 4 53 07 PM

    If you are having trouble keeping your elbows in, create a loop in your yoga strap.  Measure the loop so that it is as wide as your shoulders.  Place the strap just above your elbows. Additionally, you can also use a block in between your hands.  The block should be placed longways.   Using the corners of the block, set your hands up so the index fingers squeeze the sides while the thumbs squeeze the bottom.

    Photo Feb 05, 4 53 19 PM

    Photo Feb 05, 4 53 30 PM

    Step 3: Lift a leg

    Slowly lift one leg high into the air.  Keep the hips square by flexing the foot of the lifted leg and pointing the toes down toward your mat. PLAY with lifting both legs up.  Everyone usually has a more dominant side or one that just feels more comfortable.  In the beginning, stay with the dominant leg. Once you get more comfortable, THEN practice using both!

    Photo Feb 05, 4 53 42 PM

    Step 4: Baby kick ups

    Bend the bottom leg and lightly push off of the foot – maybe only an inch or so off of your mat.  Keep the top leg energized and extended toward the sky, while the bottom leg extends out.  Both legs need to be active. Make sure not to let your face sink towards your mat.  Push actively into your forearms and hands, keep the shoulders down and away from your ears. Try to keep the arms at 90 degrees.

    Photo Feb 05, 4 53 53 PM

    Be patient. When you feel ready, you can start kicking up a bit harder to try to get the hips up over the shoulders and maybe gain more hang time.

    Photo Feb 05, 4 54 05 PM

    Step 5: Full expression

    Once you are comfortable kicking up into an “L” shape and holding it, you can start to play with bringing the bottom leg up to the top leg.

    Keep your lower ribs pulled in and your core engaged to avoid banana back.

    Photo Feb 05, 4 54 15 PM

    Don’t be frustrated if this pose does not come easily.

    “Even if you fall on your face, you’re still moving forward.” – Victor Kiam

    XOXO

    Blog Signature

  • Bakasana: Time to Get Your Crow On!

    Bakasana: Time to Get Your Crow On!

    Bakasana, or Crow Pose, is usually the first arm balance you will learn on your yoga journey. Hamstring flexibility and core strength are key elements to any arm balance. Make sure you have a block nearby if you have tight hamstrings and a pillow if this is your first time attempting this pose.

    Step 1: Block or no block…

    Photo Feb 05, 2 50 39 PM

    Start off by standing on your mat with feet and legs together. Slowly bend the legs, come up onto the balls of your feet, and squat down bringing your fingertips onto your mat. Separate your knees and plant your hands flat onto your mat so they are shoulder width apart. Your hands can be directly in front of your knees or knees can be slightly wider to the outside of your arms. Fingers are spread wide, index fingers parallel, biceps are externally rotating so that the elbows squeeze in. If any part of this is difficult for you, try standing on a block. The added height will help get your hands flat and knees up into your armpits.  If this is your first time, you can also set a pillow up in front of your hands in case you fall forward.

    Step 2: Lift the buttasana

    Photo Feb 05, 2 50 52 PM Photo Feb 05, 2 51 01 PM

    Once you plant your hands firmly on your mat, slowly start to lift your bottom as you lean forward. Elbows begin to bend while continuing to hug in toward the midline. Knees also squeeze in…Think Thighmaster! Keep your gaze forward. Begin to round your upper back and engage your abs.

    Step 3: Lift a foot

    Photo Feb 05, 2 51 11 PM

    While continuing to round the upper back, try lifting up one foot. Squeeze the heel toward your bottom, then set it back down, and repeat with the other foot.

    Step 4: Get your crow on!

    Photo Feb 05, 2 51 21 PM

    If you feel ready to continue, lift one foot off your mat. Keep your gaze forward, and slowly try to pick up the second foot to meet the first. Really round the upper back and engage the abs to take some of the weight off of your arms. If you sag down, your body will feel extremely heavy. Your elbows and thighs should continue to squeeze in; pull your heels up toward your buttasana.

    Be mindful of your movement, try not to kick or fling that second foot up. Be patient, and work your way up to being able to hold this for 5-10 breaths.

    Advanced: Now straighten your arms!

    Photo Feb 05, 2 51 31 PM

    If you can solidly hold your crow, you can start to work on straightening your arms. This can put pressure on your wrists, so please be careful and listen to your body.

    From your bent-arm bakasana, slowly start to straighten the arms while simultaneously pulling the knees up even higher into your armpits. Squeeze your elbows and thighs in! Your upper back rounds even more to release some of the weight off of your arms. Your wrists will move past 90 degrees, so be careful!

    Play around, have fun and be mindful!

    XOXO

    Blog Signature

  • Handstands 101: Part 2… The Kick Up

    Handstands 101: Part 2… The Kick Up

    If you are comfortable walking your feet up the wall and being on your hands, you are ready for the next move (if not, check back to my last post  here for a refresher).  The next step on your journey to handstand is the “kick up.”  As the name implies, it involves kicking your legs up into the air and placing all of your weight onto your hands.  I highly encourage you to have a person, and a wall, nearby  if this is your first time!

    Let’s get started!

    Step 1: For my newbies

    If you are completely new to the handstand and nervous, please ask a friend, partner, spouse or family member to spot you.  Sometimes just having someone there as an added safety measure reduces the fear.  Also, I recommend positioning yourself  8″-12″ inches from the wall.  This time, fingers will face the wall so that you are kicking up towards it.

    Step 2: Get set in downward facing dog

    Photo Feb 02, 2 21 03 PM

    Considered a mild inversion itself, Downward Facing Dog, or Adho Mukha Svanasana, offers the perfect starting position for your handstand practice.  Many of the alignment cues for handstand should also be applied in this pose.  Here is a quick rundown of what I discussed in my previous post.

    – Fingers are spread wide and grip the mat
    – Weight should be equally distributed through all 4 corners of your palms
    – Biceps externally rotate out
    – Arms remain straight!
    – Upper arm bones plug into their sockets
    – Shoulder blades roll down the back
    – Lower ribs corset in
    – Navel pulls in, core engages
    – Inner thighs rotate in
    – BREATHE, BREATHE, BREATHE!

    Step 3: Stack the shoulders over your wrists

    Photo Feb 02, 2 21 18 PM

    From Downward Facing Dog, slowly walk the feet in towards the hands so that the shoulders stack directly over your wrists and you come onto the balls of your feet.  Keep your gaze down. I usually gaze slightly past my fingertips.  Make a mental note – even though you have shifted slightly forward and put more weight into your hands, the above key alignment points have not changed.

    Step 4: Lift a leg

    Photo Feb 02, 2 21 33 PM

    Slowly lift one leg high into the air.  The key is to avoid opening up your hip.  A good way to keep the hips square is to flex the lifted foot and keep the toes pointing down toward the mat.  PLAY with lifting both legs up.  Everyone usually has a more dominant side or one that just feels more comfortable.  In the beginning, stay with that leg. Once you get more comfortable, THEN practice using both!


    Step 5: Get ready to spring!

    Photo Feb 02, 2 21 51 PM

    Keeping the hips square, bend the bottom leg.  DO NOT lower the top leg down towards the ground!  Keep the lifted leg extending up towards the sky.


    Step 6: Take flight!

    Photo Feb 02, 2 22 30 PM

    Pushing off of the bottom leg, GENTLY… I repeat.. GENTLY kick off of the ground.  The first few times you try, you may only get a few inches off of the ground.  THAT IS TOTALLY FINE!  You are building confidence and trust in yourself!  Take your time and set yourself up in between attempts.  Remember that checklist in the beginning of this tutorial?  Keep going through it in your mind.

    Remember, handstands are a full body posture… so claw your mat, engage your core, floint or point those feet!

    Once you kick up, the bottom leg can extend out straight which is usually called an “L” handstand or you can bend it in towards your body (shown below).  When learning, I preferred the “L” better for gaining hangtime but please try both.  Everyone is different!


    Photo Feb 02, 2 22 12 PM

    Whatever method you choose, ALWAYS remember to breathe.  The traditional way is to inhale while kicking up.  I like to exhale on the way up. I know, it’s weird. ..but I feel more connection to my core this way.  When you are learning and trying to remember what to do, I think it’s more important to just REMEMBER to breathe.  So play around with it, and try it both ways.


    HAVE FUN and BE SAFE!

    XOXO

    Blog Signature


  • Handstands 101: Building Your Foundation

    Handstands 101: Building Your Foundation

    Handstands have become an integral part of my practice.  They can be fun and exhilarating, and can take your practice to a whole new level.  For beginners, they can be scary and seem impossible.  Here is how you can comfortably start a handstand practice. 

    DSC_6079

    Step 1: Get out of your head!

    The phrase “I can’t” can no longer be in your vocabulary. Although the journey to a free-standing handstand may seem impossible for you, it isn’t!  Handstands are not built in a single day… for most people it takes time, practice and patience.  If you cannot do something today, that does not mean you will never do it.  All of us START some where, and all of us were BEGINNERS at some point.  So get it out of your head that you can’t do a handstand and get it into your head that you WILL!

    Step 2: Your phalanges are your best-friend

    Photo Jan 31, 8 04 34 AM

    Just as the name implies, the goal is to be able to balance on your HANDS.  Your ten little fingers are the key to helping you balance and connect with the earth.  The weight of your body should be equally distributed through all four corners of your palms.  Too far toward the heel of your hand, you will come down immediately… too far toward your fingers, you will fall the other way and hurt your fingers.

    GRIP your mat with your fingers!  Keep your fingers active by clawing your mat.  Those ten little digits can make or break your handstand.  By actively using them, it will keep your weight centered and help you stay balanced.

    Step 3: Building your foundation

    Photo Jan 31, 8 04 50 AM

    Time to find a wall space!  Begin at the wall and make your way into tabletop position with your heels going up the wall.  Set yourself up so that your shoulders are directly over your wrists and your hips are over your knees.  Hands are shoulder width distance apart.  Remember what we just talked about?  Spread your fingers wide, index fingers will be parallel to one another or close to that.  Everyone is different, so play with this!

    Roll the biceps out!  You will hear this often and may think… What the hell does that mean?  What this implies is an external rotation of your arms.  Still lost?  Try this little exercise… Sit up tall and extend both arms out in front of you so that hands are shoulder width apart, hands are flexed and index fingers are parallel to one another.  Slowly rotate the hands so that the index fingers start to point towards one another… Feel the upper arm bones pull out of their socket and feel your upper back round? This is NOT what we want.  Now, slowly start to rotate the hands back out and bring the index fingers back to parallel… Feel the arm bones plug back in, the upper back straighten and shoulder blades roll down the back.  Bingo!  You can exaggerate this feeling by actively rolling the shoulders away from your ears.

    Now take that external rotation into your tabletop position against the wall!

    Step 4: Lift those hips!

    Photo Jan 31, 8 05 06 AM

    Time to add some more weight onto those hands and arms! From tabletop position, push into your hands and lift your hips up into a shortened downward facing dog.  Your feet will press into the wall.  Keeping your hands and arms exactly as is, slightly shift forward so that the shoulders line up directly over the wrists again.  Keep your gaze focused on the ground and slightly beyond your fingers.  Feel the weight distribute equally through your palms, feel your fingers claw at the earth.

    Take a few breaths and come down if you need to rest!

    Step 5: Walk the feet up the wall

    Photo Jan 31, 8 05 21 AM

    Slowly bend one knee and bring the foot higher onto the wall.  Push into the wall with that foot so the bent leg straightens and you can slowly bring the second foot up to meet the first.


    Step 6: Congratulations on your first handstand!

    Photo Jan 31, 8 05 36 AM

    When you straighten both legs, your hips will stack over your shoulders which should already be over your wrists. Suck your bottom ribs in by not dumping into your chest.  This will help prevent the “banana back” or curve in your spine.  Engage your core and bring your navel in.  Masumi described it best… It’s similar to the feeling you get when someone throws a football to you to catch.  Your ribs pull in, your core engages to prepare for the impact.  Keep your legs engaged, feet pushing into the wall!

    Congratulations!  You’ve done your first handstand!  Stay here and breath.  Try to work your way up to ten deep, slow breaths in and out through your nose.  Not only will this get you comfortable on your hands, this exercise will also start to build strength in your wrists, arms, shoulders, core and legs.

    Step 7: Take it up a notch!

    Photo Jan 31, 8 05 58 AM

    Only when you are ready, you can start to play with lifting one leg actively into the air. Keep the hips square towards the wall and the inner thigh rolling in.  A great way to practice this is by keeping the lifted foot flexed.  Are your toes still pointing toward the wall?  Always keep one foot solidly pressing into the wall.


    Step 8: Relax and do a happy dance!

    Congratulations! You did it! Remember… everyone’s practice is unique and progresses at a different pace. Do not compare yourself to others.  Your practice is YOUR own.

    XOXO

    Blog Signature


  • Taking the Leap, Having Faith: How a Bad Day Set Me on the Path to Change

    Taking the Leap, Having Faith: How a Bad Day Set Me on the Path to Change

    DSC_9014

    Today was a crappy day. It was a bad work day.  It was one of those days where you just want to throw in the towel. It made me realize that being happy is important and that the path to happiness lies within me.  Today, I made the decision to make a change.  Today, I’ve committed within myself to make yoga my full time job. Maybe this isn’t happening today, or tomorrow, or even a month from now, but I know it’s coming, and the right time for that change will be here soon.

    I’m excited . . . I’m scared! Why did it take me so long to make this decision? Fear is really what has been holding me back.  The fear of instability, the fear of failure – all very real concerns for anyone but especially for a mother and wife who has responsibilities beyond taking care of herself.  That being said, the straw broke the camel’s back today, and it made me realize that I’m ready.  I CAN do it.

    I have to tell you though, I never would have guessed that yoga would make such a comeback in my life and that Instagram would transform the experience and help lead me to where I am today.

    In March 2012, at the request of my niece, I joined Instagram.  I had no idea what Instagram or Twitter was, or any of the other social media apps for that matter. What the hell was a hashtag?  Why would someone follow me?  It all sounded a bit creepy.  My account remained dormant for a good four months. I honestly just didn’t know what to take pictures of, what to post or what to say.

    Then one day, I had an epiphany… Why not take pictures of some of the yoga poses I’ve been working on? That’s when this journey for me all started.


    Photo Jan 27, 2 00 24 PM

    I began practicing yoga 17 years ago, when I was 19, so that makes me… 29 today? LOL. Okay, okay… I am 36 now.  I started doing yoga from a Baron Baptiste VHS tape of my sister’s.  It was very basic, but it’s what I used to learn a Sun Salutation, Warrior I and Navasana.  Up until that point, I had no experience with yoga.  I practiced from this tape until I knew it inside out, and then I purchased a few more of his tapes.  Eventually, I started taking classes at the local gym.  This is where my knowledge of yoga started to grow and manifest.  It was also the place where I did my first Bakasana (Crow Pose), and where I attempted my first headstand as an adult. I was hooked.

    In 2005, I had my son and in 2009, I had my daughter. During these four years, yoga took a backseat to my other cardio/weight workouts.  Although my pregnancies were quite uneventful and “easy,” I did not enjoy being pregnant.  To be honest, gaining weight was the hardest for me.  I was winded walking up a flight of stairs, I felt like a stuffed sausage in everything I wore, and, generally, I felt downright unattractive.  Of course, I’d do it all again for my two lovebugs… but it was HARD.

    Photo Jan 27, 2 05 50 PM

    I worked out like a crazed lunatic for most of my pregnancies so I could stay as fit as possible and lose the baby weight as soon as possible.  Back then my mindset was still…cardio and weights… burn those calories… a workout isn’t great unless you SWEAT LIKE A PIG!  Boy oh boy… I wish I had known then, what I know now.

    After my mini was born in 2009, I went into a fitness craze and ordered every home workout system known to man… Insanity, P90X, Insanity Asylum, TurboJam, TurboFire and P90X2.  I spent a good two years focusing on these workouts.  Yoga for the most part, took a further backseat.  I was only doing it once a week in the form of the yoga from P90X.

    It wasn’t until early 2012 that I discovered online sites that streamed yoga classes.  This, coupled with my start on Instagram, put yoga back into my fitness plan. Previously, I was drawn to yoga for its physical aspects, but more advanced classes opened up a whole new world for me.  I instantly became addicted to learning more.

    Photo Jan 27, 2 15 05 PM

    By October 2012, I made the decision to stop doing my other workouts in favor of yoga, which I practiced every day for a month. A month turned into two months… which then turned into a year, and the rest is history.  I’ve never once regretted that decision.  My asana practice has grown more in these past 16 months than it did in those first 17 years.

    At some point, my Instagram started to inspire people. It inspired my partner-in-crime, Masumi, to start her yoga journey.  My world was starting to shift.

    “Are you a yoga teacher? Can you teach me?”  Those questions started popping up like crazy.   It was time to get certified and take that first leap of faith.

    Yoga Teacher Training (YTT) was scary as shit for me.  I had severe TMJ growing up which resulted in my slight lisp – something that I am extremely self-conscious of. It took every ounce of courage to go through with YTT.  I sucked so badly in the beginning that I almost gave up in finishing. Thank goodness for Masumi and my teachers, Victoria and Anayra.  They believed in me, and I will always be grateful for their support.

    In August of 2013, I officially became a yoga teacher!

    Photo Jan 27, 2 38 04 PM

    So, to bring it back full circle, the reason I wrote this post was because today sucked.  It sucked enough to make me make a change.  It made me realize that I need to have faith in myself, faith in my abilities, faith that I am meant to do something more than my “day job.”  It also made me realize that I have the whole-hearted support of my family, which is most important to me.

    “Courage is never to let your actions be influenced by your fears.” – Arthur Koestler

    Change is not easy.  It won’t happen overnight, but I’m on a clear path.  Thanks for joining me on this path.  I can’t wait to see where it takes me.

    XOXO

    Blog Signature

  • The Sun Salutation: The Flow Every Yogi Should Know

    The Sun Salutation: The Flow Every Yogi Should Know

    Hello my sunshines!

    Welcome to my first official blog post here on our TwoFitMoms website!

    One question I get asked a lot is… “Where do I start?” or “What poses should I do first?” My answer is quite simple… LEARN THE BASICS! So I decided that the first thing I would break down is a Modified Sun Salutation or Surya Namaskar A.  The variations you can do with this simple flow are endless… but let’s break down a basic, beginner flow that I like to teach.

    1. BREATHE! Each movement will happen on an inhalation or an exhalation through the nose… Ujjayi Pranayama. Ujjayi breathing is known for the soft “hissing” sound it makes as a person inhales and exhales over the back of their throat. The purpose of Ujjayi breathing is to slow the breath down, bring attention to the breath throughout the practice and prevent the mind from wandering. A simple way of learning this is to simply place the tip of the tongue on the roof of your mouth, take a deep breath through the nose and slowly exhale out of your nose. Did you hear the soft sound this makes?


    1. Tadasana or Mountain Pose: Stand at the top of your mat… Feet together or hips-width distance apart.  Feel your spine lengthen as you stand up tall with your chin parallel to your mat.  Roll your shoulders away from your ears.  Place your hands at heart center in Anjali Mudra or prayer position; or alongside your torso, palms facing outward. Close your eyes and take a few deep breaths in and out through your nose… Ujjayi Breathing.

    Photo Jan 23, 1 46 59 PM

    1. Urdhva Hastasana or Upward SaluteOn an inhale, sweep the arms up overhead.  Look up, watch the palms touch.

    Photo Jan 23, 1 47 08 PM

    1. Uttanasana or Standing Forward Fold:  Exhale.  Leading with your heart, swan dive down bringing your hands to your mat, thighs, shins or blocks. Make sure to evenly distribute your weight into your feet. For most people, that means shifting your weight slightly towards your toes. Inner thighs spin back, spine remains long, shoulders continue to pull away from your ears. Don’t be a turtle!

    Photo Jan 23, 1 47 14 PM

    1. Ardha Uttanasana or Half Standing Forward Fold:  Inhale. Look up; come up onto fingertips, blocks or higher up onto your legs. Lengthen the spine, flat back.

    Photo Jan 23, 1 47 20 PM

    1. Uttanasana or Standing Forward Fold:  Exhale. Lower back down into Uttanasana.

    Photo Jan 23, 1 47 14 PM

    1. Utthita Chaturanga Dandasana or Plank Pose:  Inhale. Place your hands onto your mat and step back into Plank Pose or top of a push up. Shoulders will stack directly over your wrists. Keep your gaze on your mat. Spread your fingers wide. Your biceps roll forward so the creases of your elbows point toward the top of your mat. Shoulder blades broaden down your back. Core engages… think navel to spine while your tailbone tucks under.  The goal is to make a straight line from head to heels.  If this is too much for you, lower down onto your knees!

    Photo Jan 23, 1 47 25 PM

    1. Chaturanga Dandasana or Four-Limbed Staff Pose:  Exhale. Keeping your elbows pinned to your sides, shift slightly forward and slowly bend the elbows so they come to a 90 degree angle. Do not collapse onto our mat! If you struggle with keeping your elbows in, you have two options. 1 – Try the “caterpillar” instead! From plank pose, lower your knees, chest and chin to your mat as shown in the bottom pic. 2 – Do a modified Chaturanga by lowering onto your knees. In either modification, keep those elbows squeezing in.

    Photo Jan 23, 1 47 31 PM

    1. Urdhva Mukha Svanasana or Upward Facing Dog:  Inhale. Roll over the toes or flip one foot at a time so the tops of the feet press firmly into your mat. Press into your hands as you simultaneously start to straighten your arms and lift your torso up. Your hands and the tops of your feet are your only connection to your mat. Keep your gaze straight ahead or slightly back. Squeeze your shoulder blades against your back as you puff out the sides of your ribs. Relax your buttasana, try not to clench.

    Photo Jan 23, 1 47 37 PM

    1. Adho Mukha Svanasana or Downward Facing Dog:  Exhale. Roll back over the toes and lift the hips high. You should look like an upside down “V”.  Fingers spread wide, biceps roll forward, shoulders melt down the back, lower ribs corset in towards one another… so do not dump into your chest… navel pulls in, tailbone lengthens, quadriceps lift as your inner thighs spin in, heels press actively towards your mat.  It’s OK if your heels do not touch the mat but the intention should be down. Keep your gaze about halfway down your mat towards your toes without letting your head sag.


    Some modifications?  If you have tight hamstrings, bend your knees slightly to take any tension out of the lower back. You may feel tugging there when you try to straighten the legs out… So be mindful, and take the bend. You can also sit back onto your heels from Upward Facing Dog before going into Downward Facing Dog.

    Take 5 deep breaths here.

     Photo Jan 23, 1 47 44 PM

    1. Move on up… Inhale.  Look forward and bend your legs.  Exhale. Walk or jump to the top of your mat.

    Photo Jan 23, 1 47 50 PM


    1.  Ardha Uttanasana or Half Standing Forward Fold:  Inhale.  Look up, flat back.

    Photo Jan 23, 1 47 20 PM

    1. Uttanasana or Standing Forward Fold:  Exhale.  Fold.

    Photo Jan 23, 1 47 14 PM


    1. Urdhva Hastasana or Upward Salute:  Inhale.  Keeping the spine long, sweep the arms up towards the sky… Look up, palms press.

    Photo Jan 23, 1 47 08 PM

    1. Tadasana or Mountain Pose: Exhale. Hands in prayer in front of your heart or down by your sides.

    Photo Jan 23, 1 46 59 PM

    If you’re new to yoga, start out by doing 3-5 of these a day! Take them as slowly as you need to, and if something doesn’t feel good… MODIFY!

    “The journey of a thousand miles begins with a single step.” – Lao Tzu

    XOXO

    Blog Signature