Author: Laura Kasperzak

  • Daily Practice: 4 Must-Do Hamstring Stretches

    Daily Practice: 4 Must-Do Hamstring Stretches

    Your hamstrings are the three muscles that run along the back side of your thighs. We use our hamstrings everyday in activities such as walking, running and jumping. In yoga, flexibility in your hamstrings can make all the difference, so it is important to work them everyday. They can be notoriously tight if you spend a lot of time sitting. Here are four hamstring stretches that I incorporate in my daily practice. Take these stretches slowly and never force yourself deeper!

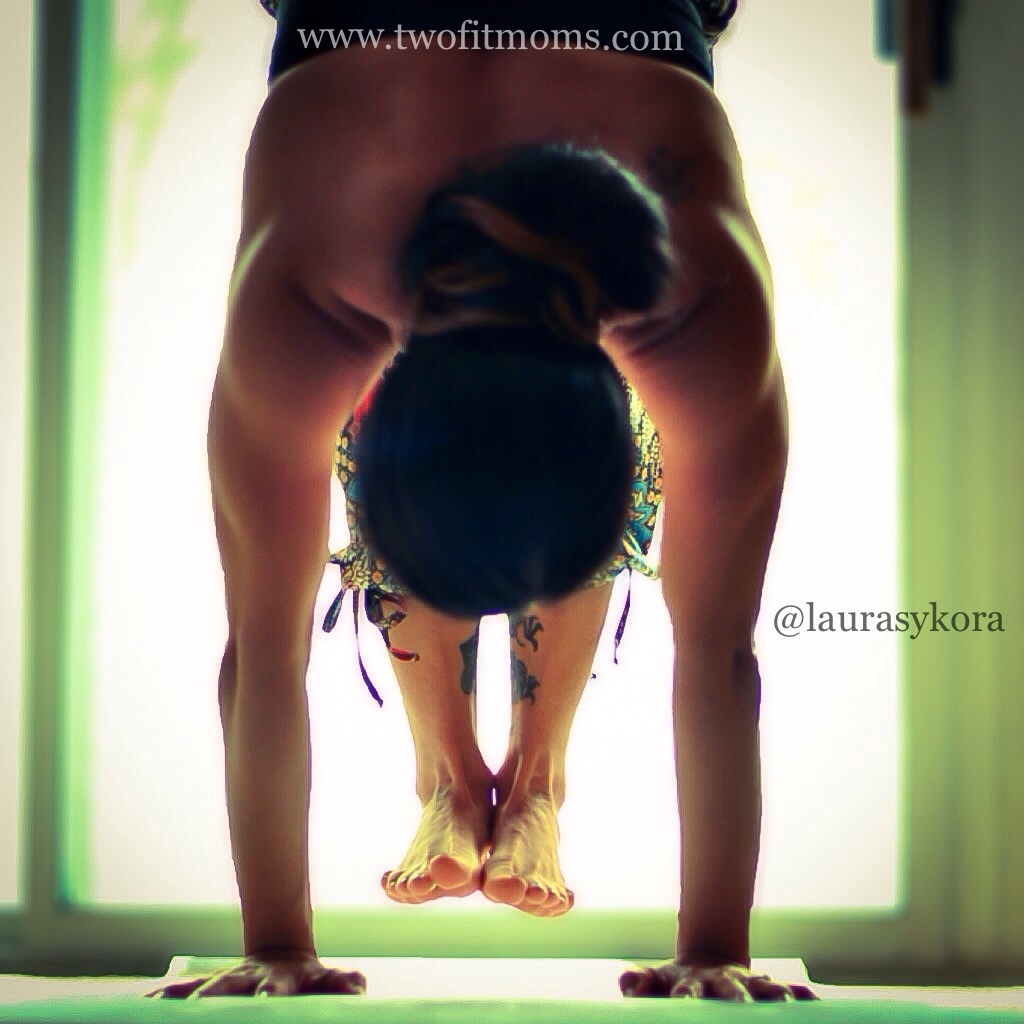
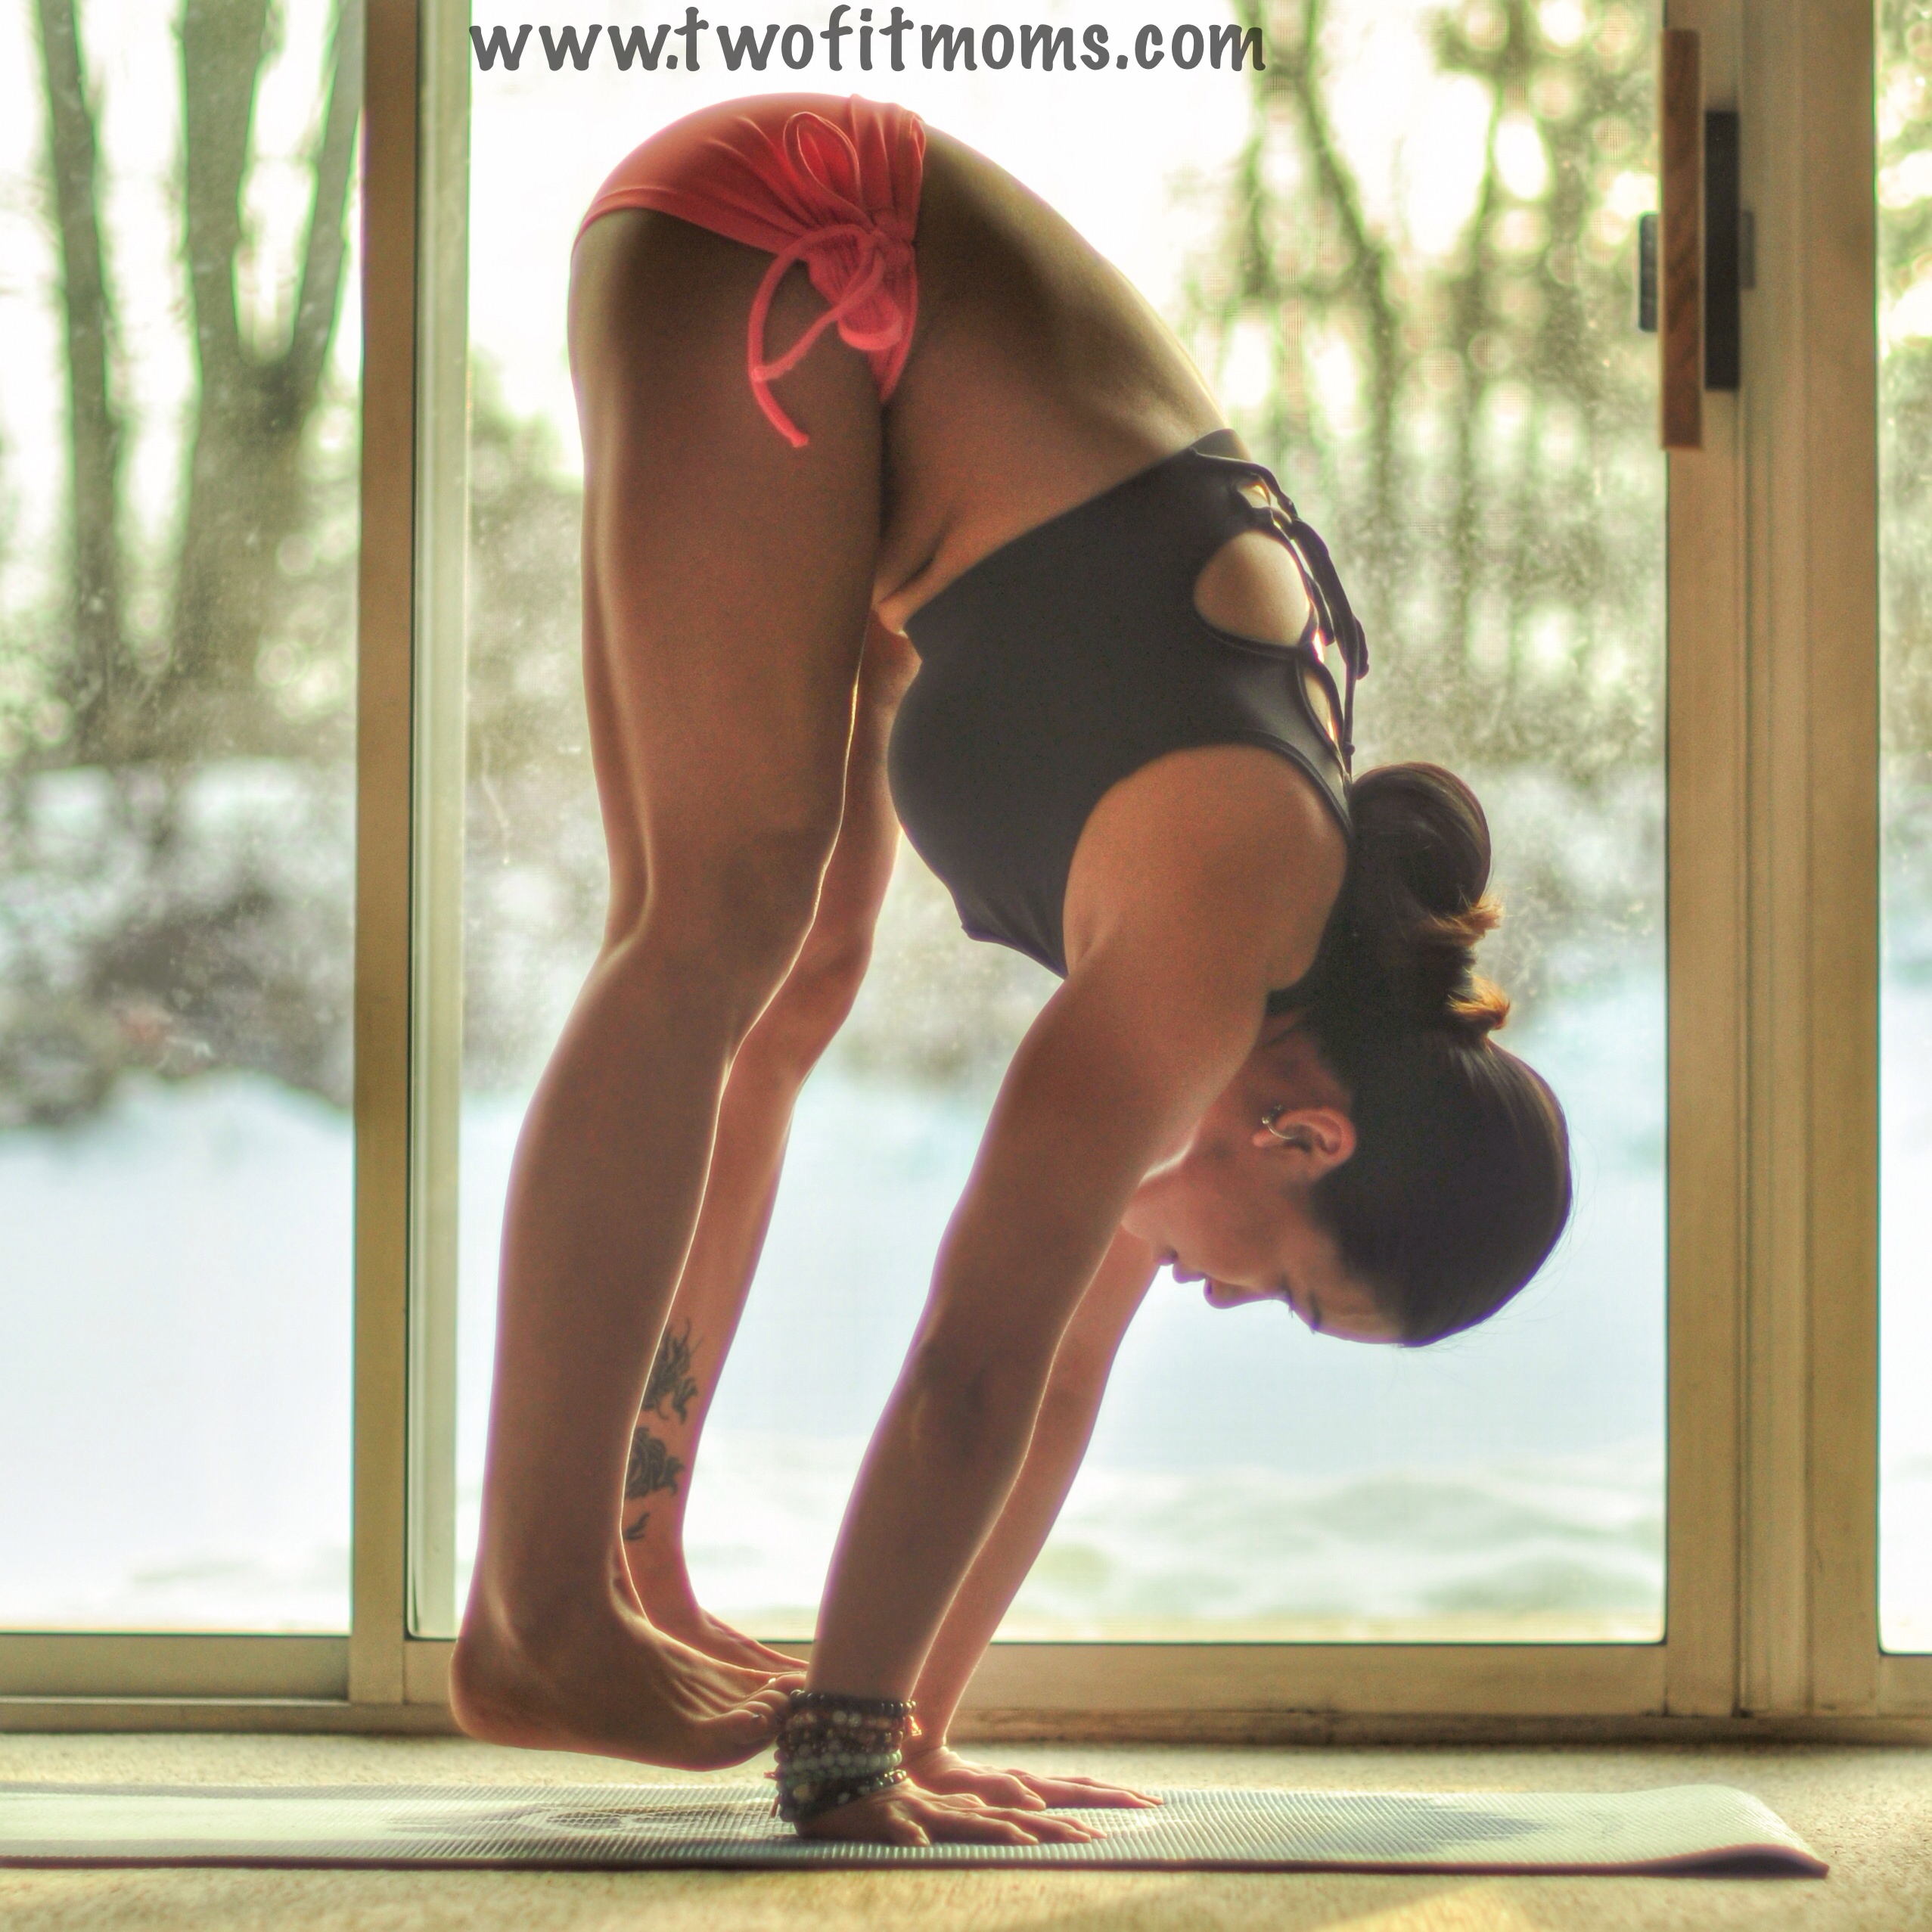
     #1: Uttanasana or Standing Forward Fold

    DSC_2158s

    Key Points:

    – Keep the torso lengthened.  Try not to round the back and hunch.

    – If you cannot reach the ground, use blocks or hold onto opposite elbows.

    – Shift your weight slightly towards the toes so the hips stack over the ankles.

    – Keep a slight bend in your knees to avoid hyper-extension.

    – Upper thighs internally rotate.

    – With every few breaths try to deepen the fold.

    – Stay in the pose for about a minute.

    #2: Parsvottanasana or Pyramid Pose
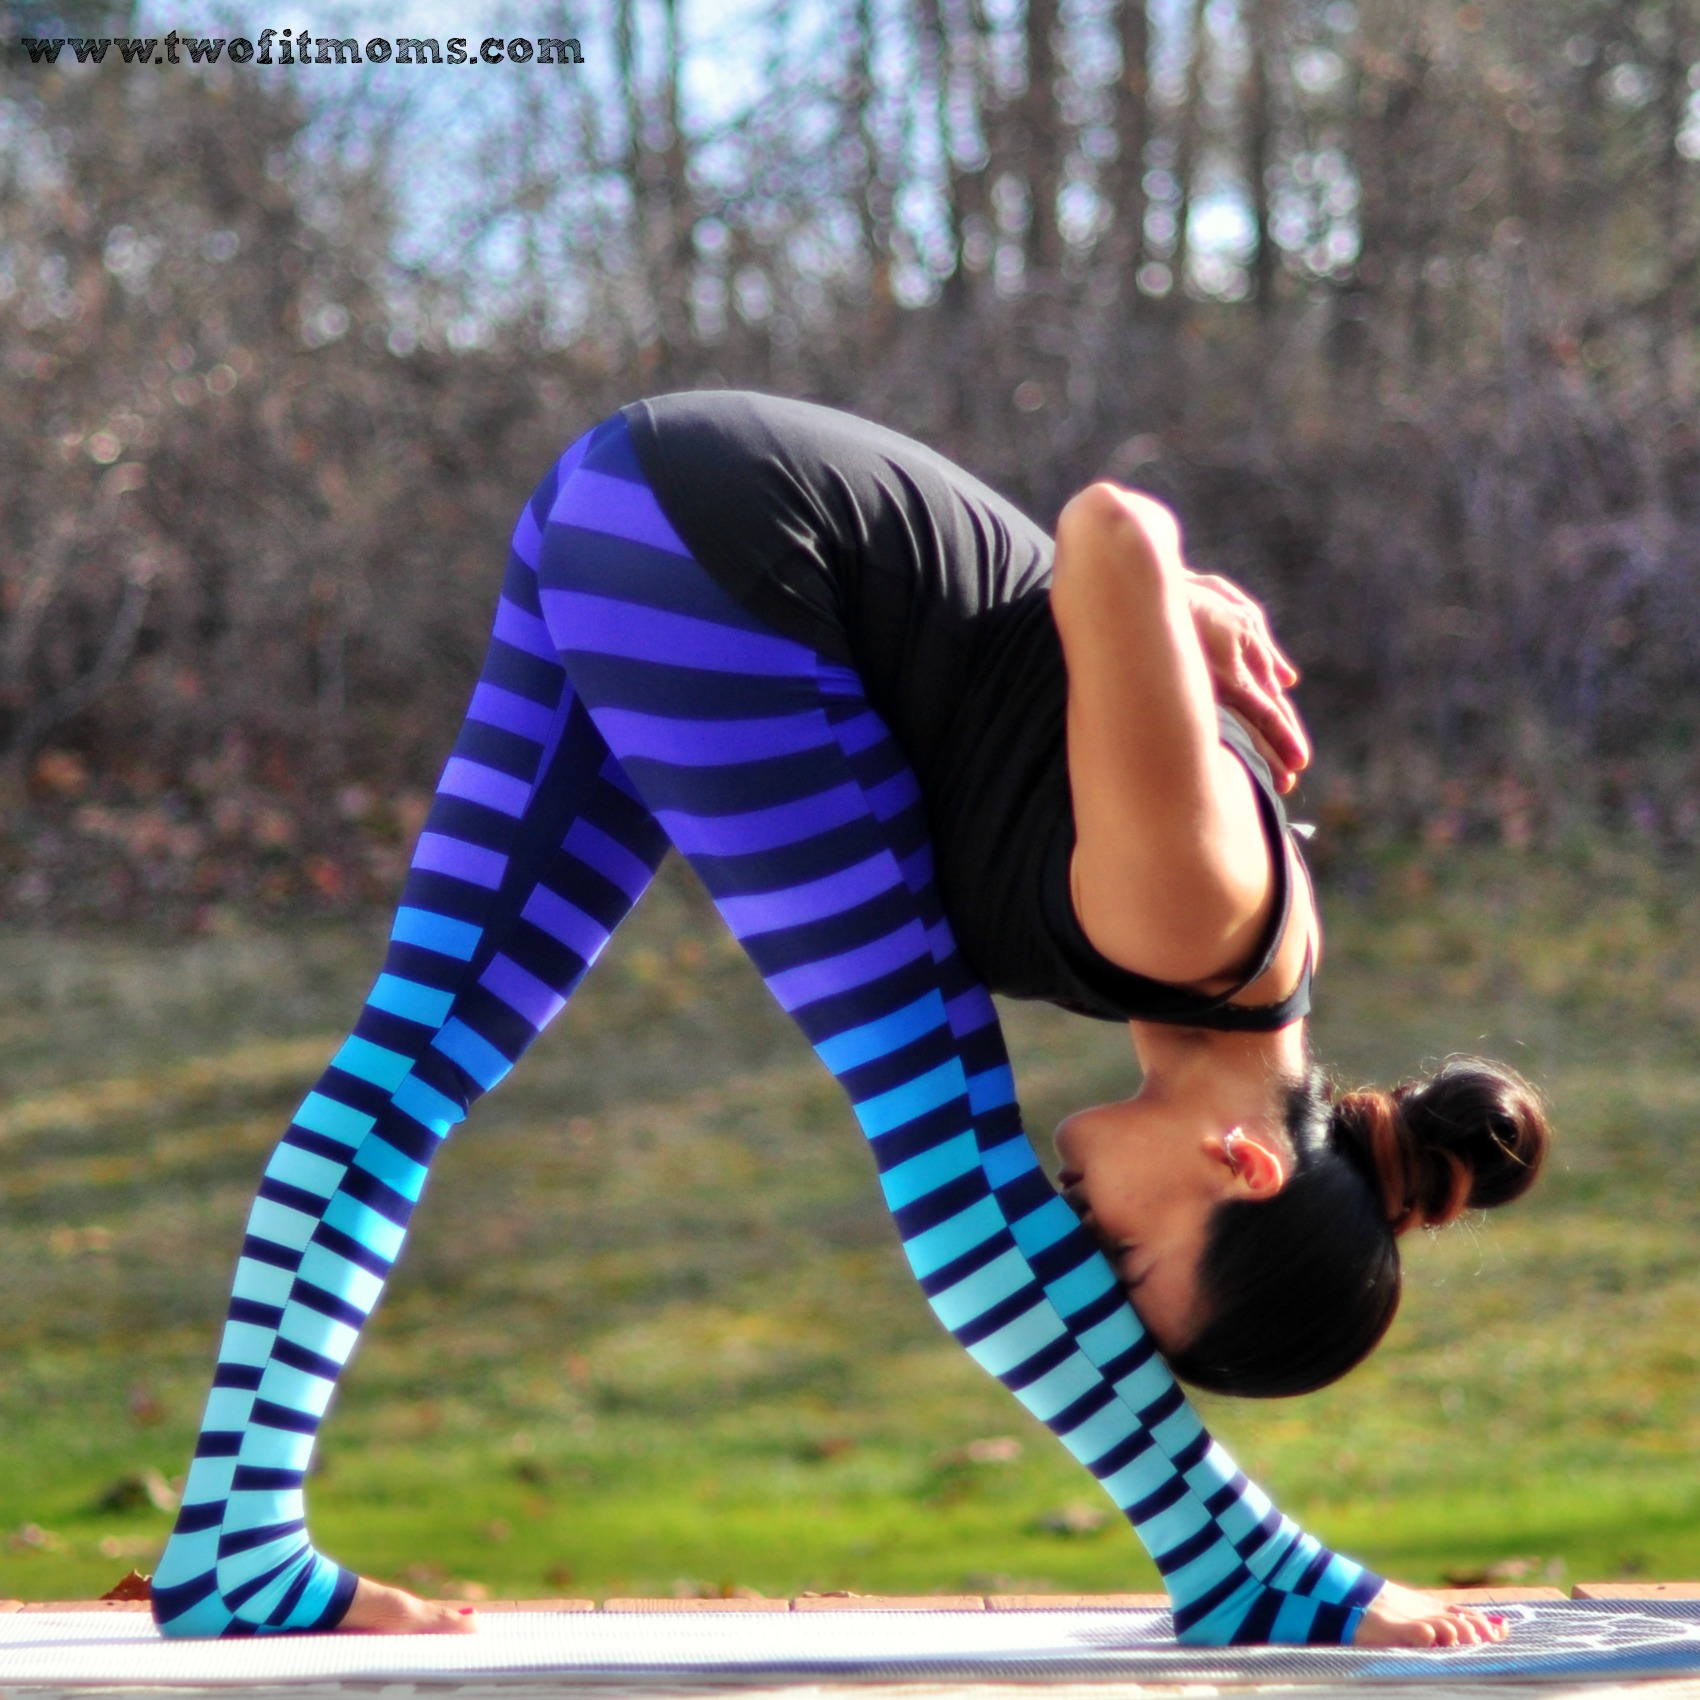
    DSC_7592s

    Key Points:

    – Both feet face towards the top of your mat.

    – Stance is about a leg’s distance apart.

    – Try to keep your hips as square as possible.

    – Squeeze both thighs in towards one another.

    – Keep your torso lengthened.

    – Use blocks if you cannot reach the ground.

    – Stay in the pose for 30-60 seconds, then switch sides.

    #3: Prasarita Padottanasana or Wide-Legged Forward Fold
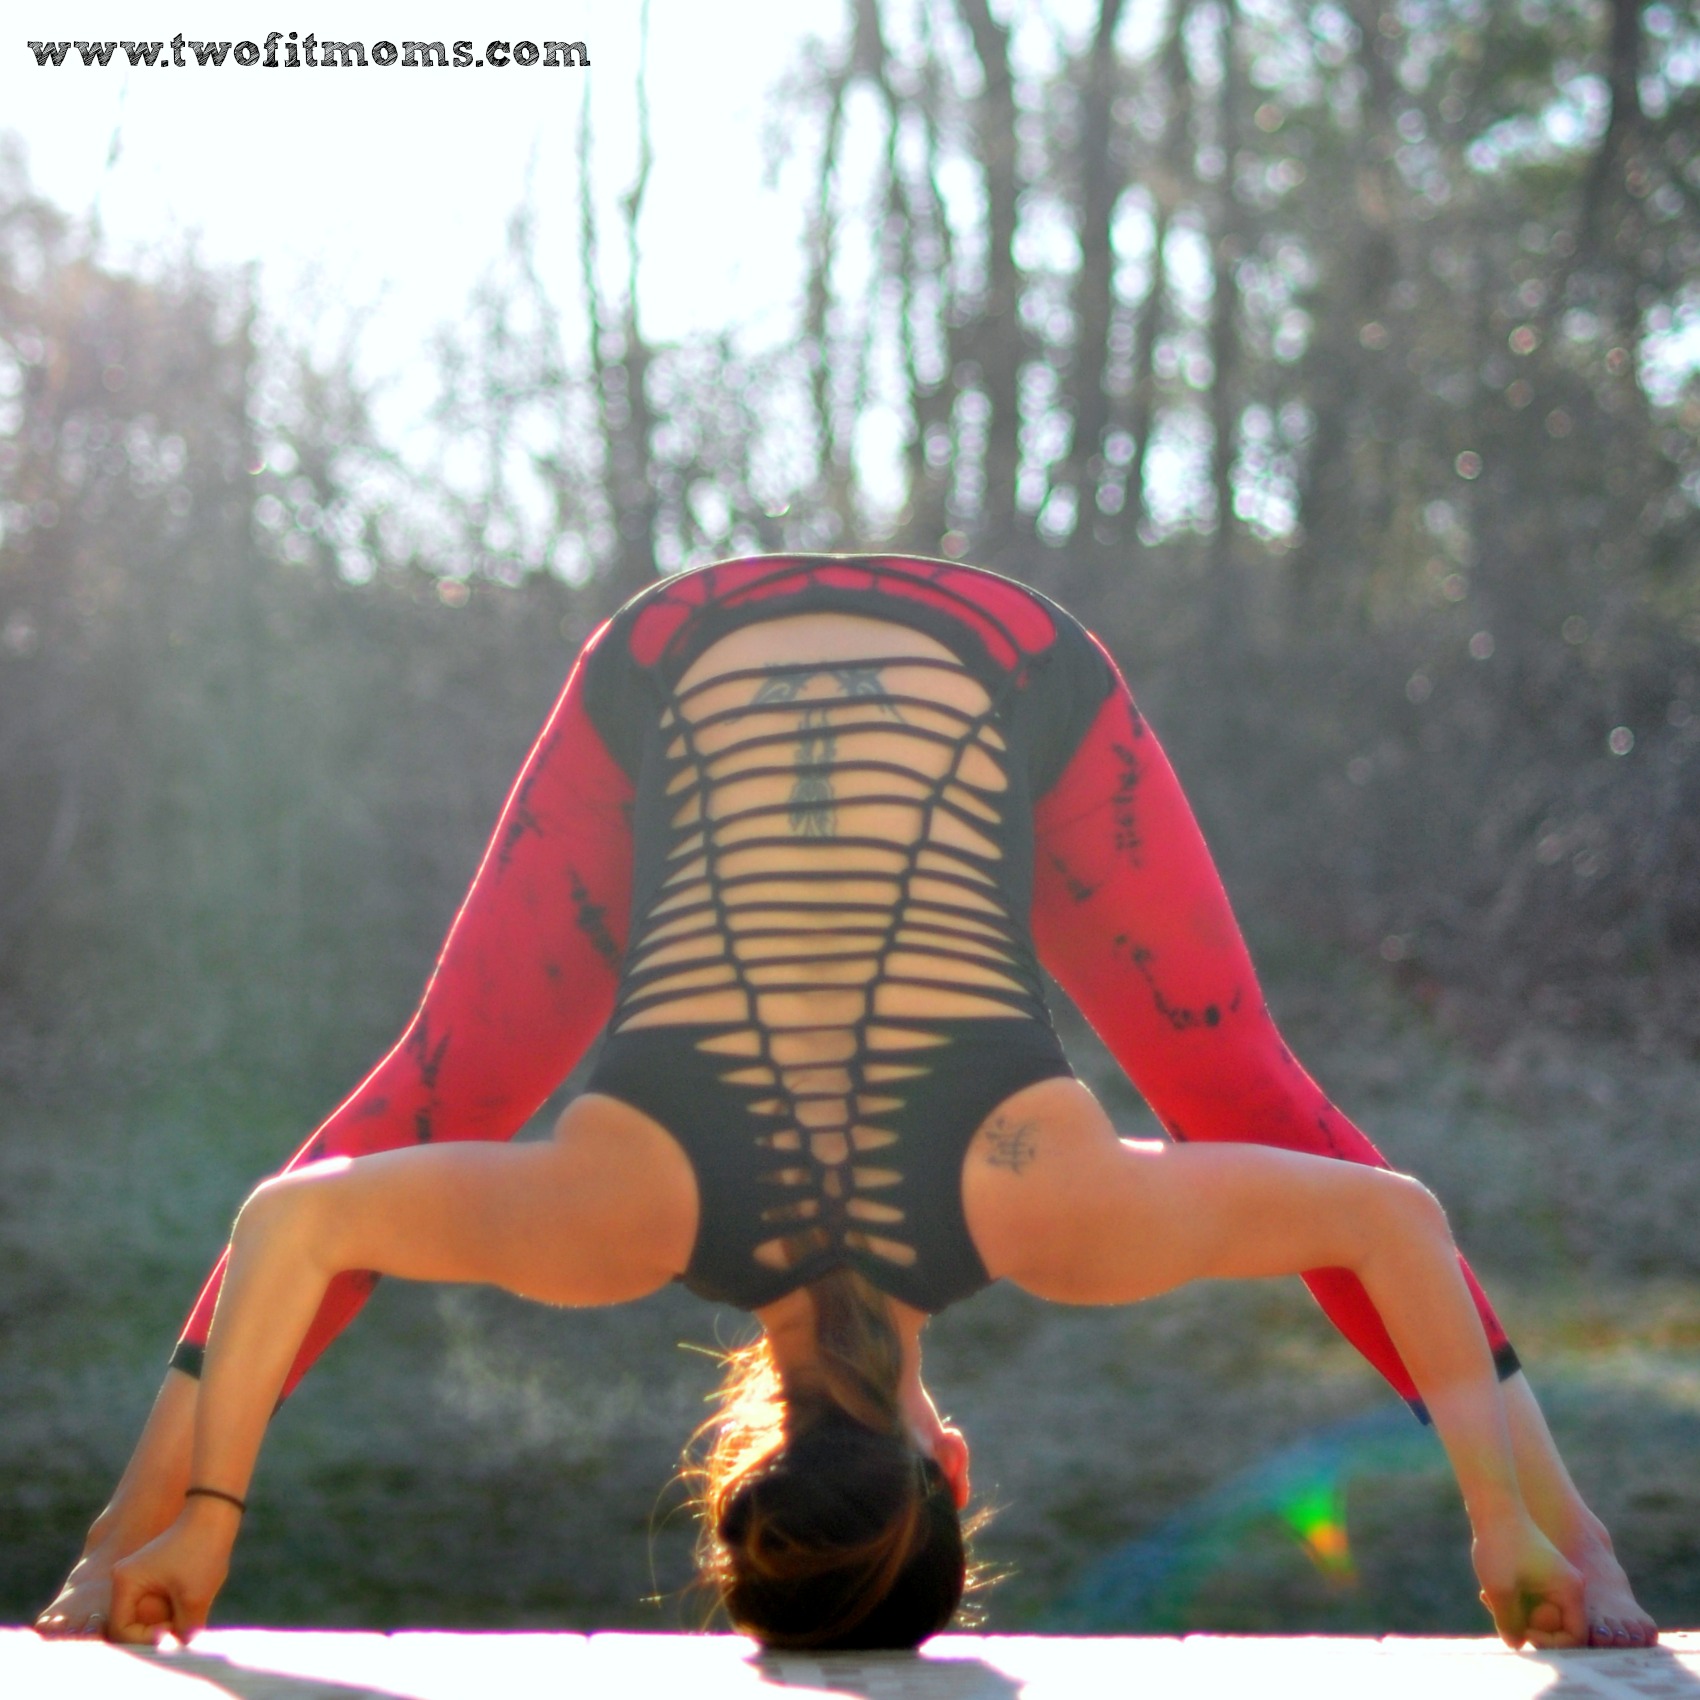
    DSC_7102s

    Key Points:

    – Feet will be anywhere from 3-4 feet apart. Try not to over-exaggerate the distance because you are trying to get your head to the ground.

    – Feet will be parallel to each other.

    – Do not roll onto the inside edges of your feet.  Press into the outside edges of your feet.

    – Draw your quadriceps up; keep them engaged.

    – Shift your weight slightly towards your toes so you are perpendicular to the ground. Don’t sink back into your heels.

    – Keep your torso lengthened.

    – Use blocks if you cannot reach your mat.

    – With every few breaths, try to deepen the fold…working the crown of your head towards your mat.

    – Stay in this pose for about a minute.

    #4: Janu Sirsasana or Head to Knee Forward Bend
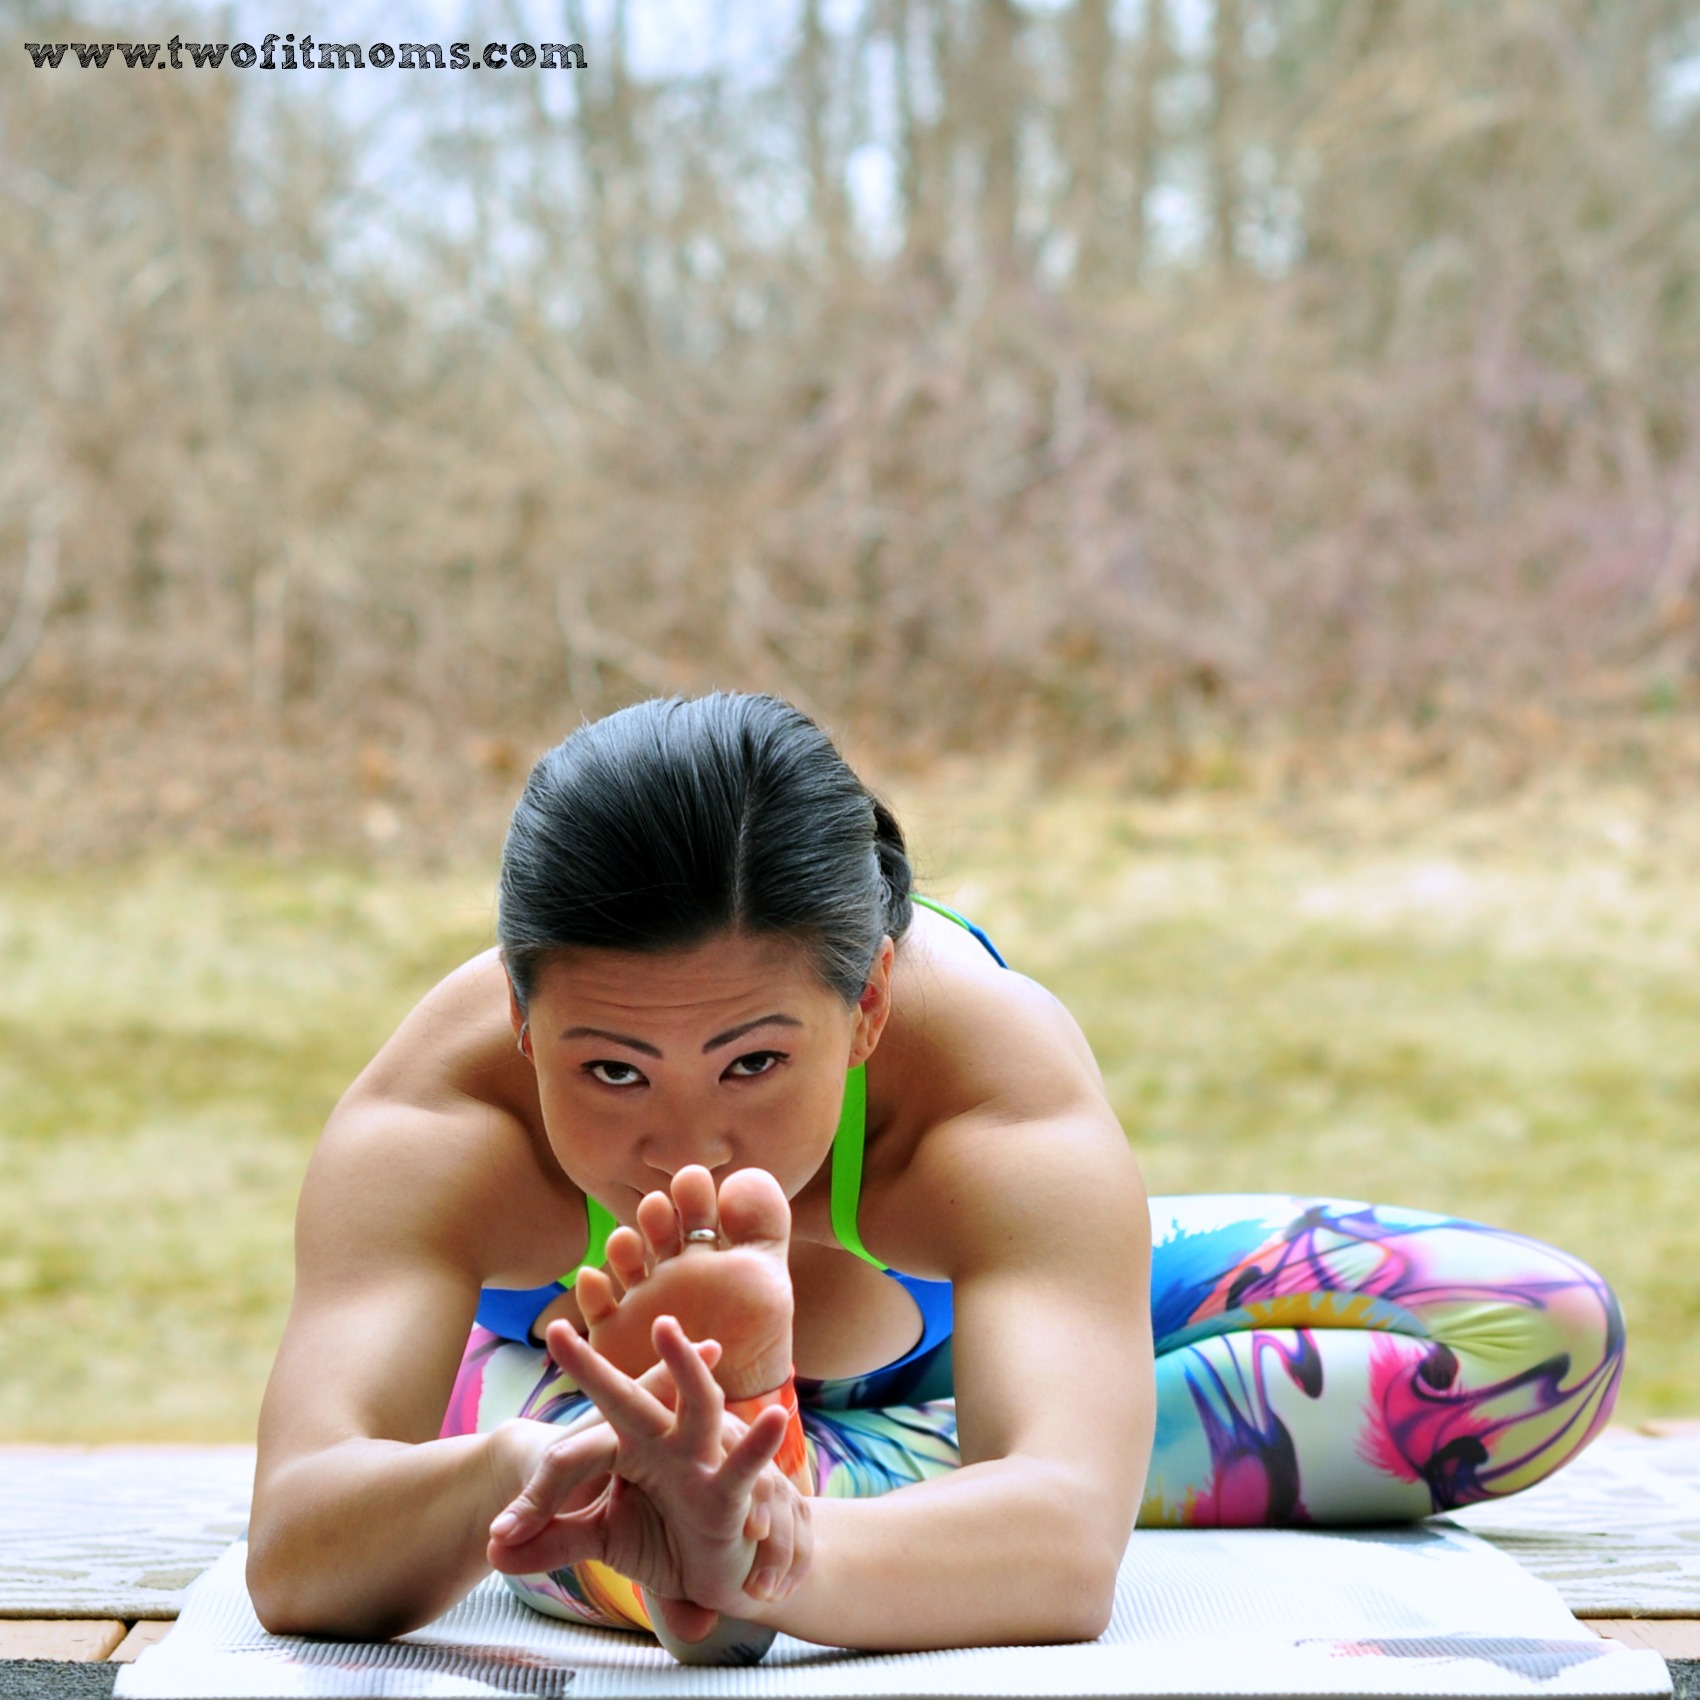
    DSC_1271s

    Key Points:

    – Use blocks and/or a blanket to support yourself. Sitting on a blanket can ease any discomfort in your sacrum. Use a block or blanket under your bent knee if it does not easily come onto your mat.

    – Keep your torso lengthened as you fold forward.

    – Slightly twist your torso as you fold so the center of your torso folds over the leg.

    – Keep the foot flexed on the straight leg and press the back of the leg down towards the mat.

    – With every few breaths, try to deepen your fold.

    – Stay in this pose for about a minute, then switch sides.

     XOXO

    Blog Signature

  • Looks Funny, Feels Great!

    Looks Funny, Feels Great!

    Yoga classes are often serious, but once in a while, you find yourself in an embarrassing or funny looking pose that just makes you laugh.  I know, I know… yoga is NOT about how a pose looks, but how it feels. Sometimes though… You just have to LAUGH.

    Here are my top four favorite “It-Looks-Funny-But-Feels-Great” yoga poses.

    #1: Puppy Pose

    Extended Puppy Pose is one that I do everyday and usually very early into my practice.  It feels great on my shoulders and upper back, and just starts to wake up my spine after sleeping. There are a lot of things that race through my mind when doing it but I’ll  keep it G-rated here. After months of teaching it in my classes, it has become clear to me what the actual name of this pose SHOULD be.  It should be called the “Are-My-Yoga-Pants-See-Through” pose. As a teacher who likes to walk around while teaching… It is clear to me that we should also be doing this pose to check the transparency of our new pants.

    DSC_6827s

    #2: Star Pose

    Let’s face it… by the end of my practice, I do not want my face anywhere near my feet, but Star Pose is usually something I will do at the end. Unlike Baddha Konasana, your feet are further away from your body. When you fold forward, your face will come closer to your feet. From this moment on, I shall call this pose… the “Do-My- Feet-Smell” pose.

    DSC_6872s

    #3: Happy Baby (You knew this one was coming!)

    Happy Baby pose or what I affectionately like to call “the hottest pose in yoga”! It feels wonderful rolling around on your mat like a two year old with your legs spread open, right?  To all of my fellow moms… I bet you’ll agree that this stretch should actually be called the “Am-I-Giving-Birth” pose.

    DSC_6913s

    #4: Lion’s Pose or Lion’s Breath

    This one just cracks me up. I usually incorporate Lion’s Breath in Downward Facing Dog after I’ve worked my students hard. It’s a great way to release tension and frustration during your practice.  It’s also hysterical to see how timid students are in letting go of their breath and ego, and allowing themselves to really let it go!  My first-time students usually feel weird when I tell them to stick out their tongues and really exhale. I really think there is no better name for this exercise than the “W…T…F…” pose.

    DSC_6888s

    Always remember to practice safely and stay playful!  You do not always have to take your practice so seriously.  Don’t forget to laugh at yourself once in a while.

    “Don’t sweat the petty things… And don’t pet the sweaty things.” – George Carlin

    XOXO

    Blog Signature

  • Learn to Balance in Toe Stand

    Learn to Balance in Toe Stand

    Toe Stand looks simple, but it actually requires a lot of concentration and focus. You will wobble, fall over and probably be pretty frustrated, but keep at it!  The good news is that the more you practice, the easier it becomes! Make sure to warm up the hips thoroughly. Do not practice this pose if you have any hip, knee or ankle injuries. Always remember to listen to your body and work the pose at your own pace.

    Step 1: Figure “4” it!

    Start by standing up tall, feet together and spine long. Shift your weight into your right foot and cross the left ankle just above your right knee. If you have really open hips, you can place your left ankle up near your right hip bone for half lotus. In either variation, the knee should be pointing down toward the ground. Keep driving the knee back, hips open.

    DSC_5186s

    Step 2: Fingertips to your mat!

    Hinging from your waist, slowly start to bend the right knee and place your fingertips onto your mat or onto blocks.

    DSC_5190s

    Step 3: Squat down

    Slowly lower the hips even further down coming up onto the ball of the right foot.  The right thigh should be parallel to the mat. Your buttasana will rest on your right heel. From here, you can walk your fingertips back so that they are closer to your hips. Keep your core engaged, spine long! This will help you balance. If this is your first attempt, stay here and breath.

    DSC_5197s

    Step 4: Hand up!

    Look straight ahead and find something to focus on! Slowly try to bring one hand up to heart center while maintaining your balance.

    DSC_5200s

    Step 5: Toe Stand!

    Staying focused and calm, try to bring your second hand up to meet the first hand. Namaste!

    DSC_5206ss

    XOXO

    Blog Signature


  • Parsva Bakasana

    Parsva Bakasana

    Twist, twist, twist! Parsva Bakasana, or Side Crane/Crow, can be a huge challenge for some yogis. Just like Bakasana, this pose requires flexibility, and the more flexibility you have the better! So, don’t be ashamed if you need some help. Use a block to perch on and a strap to keep your elbows in towards your body.


    Step 1: Warm up with a twist

    Begin by standing at the top of your mat, feet together or hip width distance apart. On an inhale, sweep the arms up overhead as you bend your knees and come into Chair Pose. Weight shifts slightly towards your heels…you should be able to lift up your toes! Take 5 deeps breaths.

    Bring your hands in prayer at heart center. On an exhale, twist over to the right, hooking the left elbow to the outside of your right thigh for Revolved Chair Pose. Try to work the left armpit down toward your thigh as your hands press actively together. Your right shoulder will pull slightly back. Try your best to keep your knees in line with each other and your hands at heart center. Take 5 deep breaths then release and twist to the opposite side. Take a forward fold once you have completed this on both sides.

    001

    Step 2: Find your birdie perch!

    Start off in your Revolved Chair Pose. Slowly start to lower your bottom down, coming onto the balls of the feet and bringing your hands down onto your mat. Remember to stay twisted!  If you have trouble here, grab a block and stand on it.  That little bit of added height will help you get your hands onto your mat.

    Spread your fingers and suction the palms of your hands onto your mat. Keep your elbows squeezing in. The outside of your right thigh will be alongside your left tricep.  Your right hip will be between your hands. Take a moment to adjust…working the right thigh up toward the left armpit.

    002

    Step 3: Almost ready for lift off!

    From your little birdie perch, slowly start to lift your bottom up as you lean forward and bend your arms. Think Chaturanga Dandasana arms…so squeeze in your elbows! Gaze forward and try to keep your shoulders square.

    003

     Step 4: Start to take off!

    Keeping your gaze forward, elbows squeezing in, shoulders square…attempt to lift up the top foot.

    004

    Step 5: Take Flight!

    Only when you are ready…try to bring the bottom foot up to meet the top foot and take flight! Squeeze your thighs together, engage your core. If you can, hold the pose for 5-8 breaths before coming back down.

    ***Modification #1:  Place a block, longways, either under your forehead or your chest to give added support. This will allow you to feel what this arm balance is like with both feet lifted!

    ***Modification #2:  Allow your right hip to rest on top of your right tricep so you are balancing your weight between both arms.

    005

    Advanced Option: Straight Arms

    006

    Have fun and be safe!

    XOXO

    Blog Signature


  • Instagram Quick Tip: Photography 101

    Instagram Quick Tip: Photography 101

    I am extremely passionate about my yoga.  What you may not know is that I am equally passionate about  photography. Combining these two art forms came naturally to me when I started my Instagram. As my yoga progressed over these past two years, so has my photography. I’ve learned to really USE my camera through a lot of trial, error and practice. Without getting too technical, here are a few tips I’ve learned and put into practice every single day.

    Photo Mar 26, 8 05 14 AM

    Camera vs. Phone

    The cameras on our phones these days are incredible. When I’m out and about, it’s a no brainer to whip out my phone if I want to snap a picture. With the abundance of self timer apps available and baby phone tripods, you really don’t need anything else to shoot basic pictures.

    During my Junior year in high school, I took my first ever photography class…and fell in love. Digital cameras were not around yet, so we used film. There was no “deleting” pictures and “reshooting”…It was you, your camera and about 24-36 chances per roll. You learned very quickly how to make good use of your shots. Although shooting today is much easier, I learned a lot from that class that I still put into practice to this day…exposure, set up, lighting…just to name a few.

    When I decided to purchase a digital single-lens reflex camera (DSLR), I knew I had to look at it as an investment.  They do not come cheap — they are also a lot bulkier than a camera phone — but they yield beautiful results! If photography is something that really interests you, regardless of whether or not you are using it for yoga, you need a decent camera to shoot. Being able to set your own shutter speed and depth of field can take a great shot and make it amazing.

    Here are a few of my favorite tips to help you take beautiful yoga pictures!

    Tip #1: Shoot Low

    Photo Mar 27, 10 29 58 AM

    I am constantly growing and learning in my yoga practice.  The same is true for my photography practice. In October, I had the privilege of shooting with Robert Sturman,  a renowned photographer who specializes in yoga photography. One of the most important tricks I learned from collaborating with him is to SHOOT LOW. I mean…on the ground low. Whether you or someone else is taking the picture — get LOW.  This one simple technique will offer new perspective and make all the difference in your pictures.

    This picture was taken last summer.  My camera was about three feet off of the ground shooting straight at me.

    Photo Aug 16, 7 52 15 AM


    This picture was taken last month.  My camera was on the ground and propped up to shoot up.  See the difference?

    Photo Mar 04, 9 07 37 AM

     Tip #2: Use Natural Lighting

    I’m not a fan of flash photography. Nine times out of ten, the subject ends up looking washed out. Look for locations with  lots of natural light! Usually the best light is during sunrise and sunset…or on cloudy days! If it’s possible, try to have the subtle light from the sunrise/sunset facing you so your face is not in shadow. The light during full sun can overexpose a picture, cause you to squint or create too many shadows.  Lastly, avoid shooting directly into the sun UNLESS you are going for silhouettes. Any back lighting will make you appear dark as in my example below.

    Photo Mar 25, 7 51 39 AM

     Tip #3: Have a Plan

    Contrary to what many people believe, I do not spend hours on end taking pictures of myself everyday. After my real yoga practice, which is usually before sunrise, I have about 10-15 minutes to snap some pictures for the day. I make those 10-15 minutes count by having a plan. Each night, I decide what I am going to work on for the next day, and I write down three to four things I want to capture. Some days I end up with more shots, some days I end up with one shot.

    Photo Mar 27, 1 43 22 PM

    Tip #4: Think Outside the Box

    I’m a huge fan of thinking outside the box when it comes to taking my yoga pictures.  I look for opportunities to take pictures at different angles in order to offer new perspective. Turning ever so slightly towards the camera or away from the camera can make a shot look completely different. Also, zooming into just a portion of the pose can offer amazing effect. I don’t suggest cutting limbs out of pictures for the sake of it, but I do suggest focusing on certain aspects of the pose and purposely cutting parts out. There is a big difference between the two.

    Photo Mar 27, 1 45 27 PM

    I hope these tips offer you some perspective on how I take my pictures! Look out for some more photography tips coming your way soon!

    XOXO

    Blog Signature

    If you are seriously interested in buying a phone tripod or a new camera, here are some of my favorite cameras and photography products. My camera is a few years old, so I have listed the two newer models. (I shoot with a Nikon D5000!)


  • Urdhva Dhanurasana: Getting into Wheel Pose

    Urdhva Dhanurasana: Getting into Wheel Pose

    Our journey into backbending continues with Urdhva Dhanurasana or Wheel Pose. As we discussed in the Bridge Pose tutorial, backbends can be energizing…flooding your body with oxygen while stretching out the entire front body, shoulders and chest. Be mindful when practicing and continue to take each posture slowly.

    Step 1: Lie down on your mat. Extend your legs out and take a couple of deep breaths. Bend your knees and bring your feet down onto your mat. Your feet should be parallel to one another and hip-width distance apart. Try to get your heels as close to your buttasana as possible. Bend your elbows and place your hands down alongside your ears. Fingers will point TOWARD your body. Squeeze the elbows in.

    Photo Mar 12, 1 57 37 PM

    Step 2: Take a deep inhalation. On the exhale, push into your feet and lift your hips up. Feet remain parallel and knees squeeze in. Try to keep your buttasana relaxed by drawing the tailbone slightly up. Take a breath. On another exhale, push into your hands this time and come up onto the crown of your head. Elbows squeeze in as your shoulder blades hug your back. I like to walk my hands closer to my body at this point. This is just an option though! Take a breath or two here.

    Photo Mar 12, 1 57 44 PM

    Step 3: On an exhalation, push firmly into your mat with your feet and hands and try to straighten the arms. Remember to keep the feet parallel. There will be a slight internal rotation of the thighs…this is what will prevent your feet and knees from spinning outward. Draw your tailbone down and relax your buttasana.  Keep your shoulders engaged and hugging your back.  Let your head fall neutral. Stay here and take 3-5 breaths.

    Photo Mar 12, 1 58 08 PM

    When you are ready to come down, bring your chin to your chest and slowly bend your elbows bringing the back of your head and your body gently onto your mat. Hug your knees into your chest and relax.

    XOXO

    Blog Signature

  • Getting Your Kids Involved In Your Yoga Practice

    Getting Your Kids Involved In Your Yoga Practice

    Health and fitness has always been an integral part of my life. When I found out that I was pregnant in March of 2005, I was overjoyed that I was going to be a mom, but I was also panicked about how it was going to change my body and how I was going to get it back to its pre-pregnancy state. It wasn’t until after I had my son that I realized that life and fitness don’t end when you have a child. My body was still mine. I just had to reclaim it!


    Fast forward to today. I’m 36, I have two kids, a husband, a full time job and a growing business…My goals of staying fit have not changed…HOW I make the time and get it done has changed. One of my favorite things to do now is to get my kids on my mat with me! Whether it’s for 5 or 10 minutes, it’s an opportunity to get them involved in my exercise routine.

    Here are five quick tips on how I got my kids involved!

    1. DO NOT expect them to do a full practice! I know that sounds obvious, but when my son and daughter started to join me, I thought they would just fall in love with yoga and practice the full 30-45 minutes with me. WRONG. Children under the age of 10 do not have that long of an attention span, but they can manage 5-10 minutes on the mat. So, start there!

    2. Begin with the basics! Kids love Downward Facing Dog. Another favorite is Cobra pose, Tree Pose, Warrior II and seated Easy Pose or Sukhasana. These are great beginner poses, in general.

    3. Teach them…but don’t expect perfection! Teach them the names of the poses. You will be amazed how quickly they will pick them up. Teach them what they SHOULD be doing, and don’t fret if the poses aren’t perfect. Just make sure they are not going to hurt themselves.

    4. Get them their own yoga gear! I don’t know about your kids, but mine love to have their own stuff…their own space and their own gear. So maybe look into a toddler mat or even an inexpensive full-sized mat! They will feel grown up and you won’t have to share your mat!

    5. Make it fun! Remember to keep it light and fun! In my experience, it’s all about the memories you are building with your child while instilling the importance of fitness. Keep your practice with them consistent.  It builds their knowledge and makes it part of their daily routine…something that can last a lifetime!

    “The best thing to hold onto in life is each other.” – Audrey Hepburn

    Yoga with mini
    [KGVID poster=”http://www.twofitmoms.com/wp-content/uploads/2014/03/Video-Mar-13-11-40-24-AM_thumb9.jpg” width=”1280″ height=”720″]http://www.twofitmoms.com/wp-content/uploads/2014/03/Video-Mar-13-11-40-24-AM.mov[/KGVID]


    XOXO

    Blog Signature

  • Start Your Backbend Journey with Bridge Pose

    Start Your Backbend Journey with Bridge Pose

    Backbends are extremely powerful and energizing poses. They open up the heart, the chest and the shoulders.  They stretch out the spine, the neck and the entire front body. They flood the body with oxygen and have the ability to quickly get you out of a funk.  Backbends are also known to offer relief from fatigue, stress, anxiety and depression, to name a few.

    Deep backbends can be extremely intimidating for beginners. Bridge pose or Setu Bandha Sarvangasana is a great intro pose to set you on your backbend journey. Take it slow and be mindful.  Do not do this if you have any neck or shoulder injuries. Always respect your limits.


    Step 1: Lie down on your mat. Extend your legs out and take a couple of deep breaths. Bend your knees and bring your feet down onto your mat. Your feet should be parallel to one another and hip-width distance apart. Relax your shoulders and release any tension you may have in your face.

    Photo Mar 06, 8 44 50 AM

    Step 2: On an exhale, press your feet and hands firmly into your mat as you lift your hips up. Keep your neck long, do not bring it down towards your chest. Draw your tailbone up and be careful not to clench your bottom. No squeezed cheeks allowed!

    Photo Mar 06, 8 45 05 AM

    Step 3: Keeping a firm base, start to work your shoulders underneath your body. Your shoulder blades draw in towards one another. Clasp your hands together underneath your body and straighten your arms. Press your arms firmly into your mat as you actively reach your clasped hands toward your heels. Be mindful to stay evenly on the soles of you feet and keep your knees directly stacked over your ankles. Do not let them sway in or out. Stay here and take 5-10 breaths. To release, unclasp your hands and set them down beside you, then slowly lower your hips down. Relax.

    Photo Mar 06, 8 45 20 AM

     Optional Variation: Extend on leg up and hold for a 3-5 breaths.  Lower the leg and extend the second leg up.  Hold for the same number of breaths as the first side. Lower the leg and hold in regular Bridge pose for 3-5 breaths…Then slowly lower down and relax.

    Photo Mar 06, 8 45 29 AM

    Remember to have patience with yourself and your practice. Speaking from experience, backbends can be frustrating…but they can also be very rewarding. Take your time.  In the words of K. Pattabhi Jois: “Practice and all is coming”.

    XOXO

    Blog Signature


  • Quest for the Press 101: Toe Taps

    Quest for the Press 101: Toe Taps

    My quest to press into a handstand probably started around eight months ago. “Pressing” is when you can place your hands onto the ground and float your legs up into a handstand…No kicking required! There is no science to pressing into a handstand, and everyone’s experience is unique. I am going to show you how I learned — hopefully it will help you!

    The only prerequisite is that you MUST have a solid Bakasana practice. You can view my tutorial for this particular asana here.

    Step 1: Start in Bakasana

    Key points to remember in Bakasana…Fingers should be spread wide to help grip the mat. Hands are shoulder width apart. Elbows and knees squeeze in toward the midline.  Upper back rounds to avoid “dumping” into your arms and making the pose feel heavy. Navel pulls in toward your spine to activate the core.

    Photo Feb 27, 8 56 45 AM

    Step 2: Flex the feet

    Flex both feet so your toes point down towards your mat.  Using your core to keep the knees on your arms, slowly start to shift forward slightly as you bring your toes toward your wrists. You may only get an inch or two down before you fall… That’s Okay! Try again!

    As you move your feet down, concentrate on rounding the upper back and squeezing your arms in. If your arms begin to open out, try using a strap.  Measure the loop shoulder width in length and place the strap just above your elbows.

    Photo Feb 27, 8 56 47 AM

    Step 3: The toes have landed!

    Eventually, your toes will touch your wrists! Once you get to this point, try to hold them there for as long as possible.  Not only will this build arm strength, but it will build your core strength as well!  You will begin to feel your deep ab muscles engage. These are the ones that will eventually help lift you up.

    Photo Feb 27, 8 56 49 AM

    Step 4: Lift up!

    Once you can hold your toes to your wrists for a few breaths, you can try lifting your bottom up towards the sky and taking the knees off of your arms to hover. To do so, actively push your toes into your wrists and engage your core (Uddiyana Bandha). Press actively into your mat using your fingers for grip. Start out by trying to lift your butt higher! If that goes well, then try to straighten the legs. Proceed slowly and with patience.

    Photo Feb 27, 8 56 53 AM

    As always… Have FUN and be SAFE!

    XOXO

    Blog Signature

  • Baby Bakasana

    Baby Bakasana

    Baby Bakasana is the world’s smallest arm balance. And although it may look pretty simple, this little gem of a pose can be pretty tough. Moving the shoulders past the elbows can be difficult. The trick to this pose is to round the upper back to help resist the urge to dump into the arms.

    Step 1: Take a squat

    From standing, bend your knees and squat down coming onto the balls of your feet. Bring your fingertips to your mat.

    Photo Feb 24, 11 40 55 AM

     Step 2: Drop on down

    Separate your knees and make your way onto your forearms. Forearms should be parallel and at shoulder width distance apart. Spread your fingers wide to create a solid base. Your knees will be just outside of your triceps and should hug in.

    Photo Feb 24, 11 41 07 AM

    Step 3: Lift it up

    Keeping your gaze slightly past your fingertips and the knees squeezing in, slowly start to raise your buttasana up. You can adjust and place your knees directly onto your triceps or keep them slightly wider. As you rise up, start to lean forward bringing your face closer to your mat and shoulders past your elbows. Round your upper back and start to hug the shoulders in; stay here and take a few breaths.

    Photo Feb 24, 11 41 21 AM

    Step 4: Baby step

    Shift your weight and face even further toward your mat and slowly pick up a foot.  Hug the heel of your foot in towards your bottom.  Continue to round your upper back and squeeze in so you do not collapse!

    Photo Feb 24, 11 41 34 AM

    Step 5: Take flight!

    Round and squeeze…round and squeeze…round and squeeze! Maybe pick the second foot up towards your bottom to get your Baby Bakasana to take flight!

    Hold for five to eight breaths and slowly release down.

    Photo Feb 24, 11 41 58 AM

    Advanced Option

    Please only try this if you have a solid Pincha Mayurasana practice. Take this super slow if you have never attempted this…and expect to fall! I know I did when I started. Do not be discouraged if you cannot do this!

    From Pincha Mayurasana or Forearmstand, slowly bend your knees. Actively press into your forearms and hands as you move your knees into your torso. As you descend, your shoulders will start to move past your elbows and your face will move closer to your mat. Arms and shoulders hug in to maintain a solid base for your knees to land. The key to this transition is engaging the core and bandhas…which we discussed in my last post. As gently as you can, bring the knees down onto your triceps into Baby Bakasana!

    [KGVID poster=”http://www.twofitmoms.com/wp-content/uploads/2014/02/Video-Feb-24-12-56-23-PM_thumb11.jpg” width=”960″ height=”540″]http://www.twofitmoms.com/wp-content/uploads/2014/02/Video-Feb-24-12-56-23-PM.mov[/KGVID]

    XOXO

    Blog Signature