Category: Yoga

  • Quest for the Press 101: Toe Taps

    Quest for the Press 101: Toe Taps

    My quest to press into a handstand probably started around eight months ago. “Pressing” is when you can place your hands onto the ground and float your legs up into a handstand…No kicking required! There is no science to pressing into a handstand, and everyone’s experience is unique. I am going to show you how I learned — hopefully it will help you!

    The only prerequisite is that you MUST have a solid Bakasana practice. You can view my tutorial for this particular asana here.

    Step 1: Start in Bakasana

    Key points to remember in Bakasana…Fingers should be spread wide to help grip the mat. Hands are shoulder width apart. Elbows and knees squeeze in toward the midline.  Upper back rounds to avoid “dumping” into your arms and making the pose feel heavy. Navel pulls in toward your spine to activate the core.

    Photo Feb 27, 8 56 45 AM

    Step 2: Flex the feet

    Flex both feet so your toes point down towards your mat.  Using your core to keep the knees on your arms, slowly start to shift forward slightly as you bring your toes toward your wrists. You may only get an inch or two down before you fall… That’s Okay! Try again!

    As you move your feet down, concentrate on rounding the upper back and squeezing your arms in. If your arms begin to open out, try using a strap.  Measure the loop shoulder width in length and place the strap just above your elbows.

    Photo Feb 27, 8 56 47 AM

    Step 3: The toes have landed!

    Eventually, your toes will touch your wrists! Once you get to this point, try to hold them there for as long as possible.  Not only will this build arm strength, but it will build your core strength as well!  You will begin to feel your deep ab muscles engage. These are the ones that will eventually help lift you up.

    Photo Feb 27, 8 56 49 AM

    Step 4: Lift up!

    Once you can hold your toes to your wrists for a few breaths, you can try lifting your bottom up towards the sky and taking the knees off of your arms to hover. To do so, actively push your toes into your wrists and engage your core (Uddiyana Bandha). Press actively into your mat using your fingers for grip. Start out by trying to lift your butt higher! If that goes well, then try to straighten the legs. Proceed slowly and with patience.

    Photo Feb 27, 8 56 53 AM

    As always… Have FUN and be SAFE!

    XOXO

    Blog Signature

  • Baby Bakasana

    Baby Bakasana

    Baby Bakasana is the world’s smallest arm balance. And although it may look pretty simple, this little gem of a pose can be pretty tough. Moving the shoulders past the elbows can be difficult. The trick to this pose is to round the upper back to help resist the urge to dump into the arms.

    Step 1: Take a squat

    From standing, bend your knees and squat down coming onto the balls of your feet. Bring your fingertips to your mat.

    Photo Feb 24, 11 40 55 AM

     Step 2: Drop on down

    Separate your knees and make your way onto your forearms. Forearms should be parallel and at shoulder width distance apart. Spread your fingers wide to create a solid base. Your knees will be just outside of your triceps and should hug in.

    Photo Feb 24, 11 41 07 AM

    Step 3: Lift it up

    Keeping your gaze slightly past your fingertips and the knees squeezing in, slowly start to raise your buttasana up. You can adjust and place your knees directly onto your triceps or keep them slightly wider. As you rise up, start to lean forward bringing your face closer to your mat and shoulders past your elbows. Round your upper back and start to hug the shoulders in; stay here and take a few breaths.

    Photo Feb 24, 11 41 21 AM

    Step 4: Baby step

    Shift your weight and face even further toward your mat and slowly pick up a foot.  Hug the heel of your foot in towards your bottom.  Continue to round your upper back and squeeze in so you do not collapse!

    Photo Feb 24, 11 41 34 AM

    Step 5: Take flight!

    Round and squeeze…round and squeeze…round and squeeze! Maybe pick the second foot up towards your bottom to get your Baby Bakasana to take flight!

    Hold for five to eight breaths and slowly release down.

    Photo Feb 24, 11 41 58 AM

    Advanced Option

    Please only try this if you have a solid Pincha Mayurasana practice. Take this super slow if you have never attempted this…and expect to fall! I know I did when I started. Do not be discouraged if you cannot do this!

    From Pincha Mayurasana or Forearmstand, slowly bend your knees. Actively press into your forearms and hands as you move your knees into your torso. As you descend, your shoulders will start to move past your elbows and your face will move closer to your mat. Arms and shoulders hug in to maintain a solid base for your knees to land. The key to this transition is engaging the core and bandhas…which we discussed in my last post. As gently as you can, bring the knees down onto your triceps into Baby Bakasana!

    [KGVID poster=”http://www.twofitmoms.com/wp-content/uploads/2014/02/Video-Feb-24-12-56-23-PM_thumb11.jpg” width=”960″ height=”540″]http://www.twofitmoms.com/wp-content/uploads/2014/02/Video-Feb-24-12-56-23-PM.mov[/KGVID]

    XOXO

    Blog Signature

  • Floating Down

    Floating Down

    Slowly floating the legs down from any inversion can be challenging. It takes time, patience and practice to develop the strength and body awareness to successfully lower down. It also requires being able to engage deep abdominal muscles.  Despite popular belief, you don’t need a six-pack to float down!  And, once you float down, floating up will likely follow — it did for me!

    DSC_1228a

    What muscles do we need to engage?

    There are a total of six abdominal muscles in your body; from deepest to superficial they are the the transversus abdominis, the internal obliques, the external obliques and the rectus abdominis. The deeper the muscles, the more impact they will have on your posture and maintaining a healthy spine. Here is a brief description of each:

    Transversus Abdominis: It is the deepest of your abdominal muscles, and it wraps around your torso. You cannot feel this muscle from the outside. The best description I’ve read for this muscle is that it is like a back support belt but for the front of your body.

    Internal Obliques: These are a pair of muscles that run alongside your torso that help your spine twist and move laterally.

    External Obliques: These are another pair of muscles that also run alongside your torso and help your spine twist and move laterally.

    Rectus Abdominis: These are the most superficial muscles of the group and the ones that make up the “six-pack” abs.

    Do I need six-pack abs to do this?

    Quite simply… No, you do not. In fact, a six-pack will help you the LEAST when working with floating down or pressing up for that matter. It is the ability to engage the transverse abdominal muscle that will have the most impact on your inversion practice.

    Engage those bandhas?

    Before going through my yoga teacher training, I’d always hear teachers say “engage your bandhas”! If you haven’t been practicing long, more than likely your first reaction is “what the heck does that mean??!! Simply put… a “bandha” is a lock in the body that helps seal in the energy and engages the muscles.

    The two bandhas that most teachers will reference during inversions are the Mula Bandha and the Uddiyana Bandha. In very simple terms, the Mula Bandha occurs in the pelvic area and low belly while the Uddiyana Bandha occurs in the upper abdominals. The best way to describe the Mula Bandha is the feeling you get when you have to go to the bathroom and are holding it. The Uddiyana Bandha can be felt when you draw your navel up toward your heart while wrapping your lower ribs in towards one another.  I learned how to do this by placing my hands on my lower ribs, fingers facing in towards each other, and by making believe my hands were a corset.  As I exhaled and drew my navel up and in, I closed my hands towards one another.

    Start the float down from Tripod Headstand

    If you are new to this, start off by attempting this from your Tripod Headstand. Working the float down from here will also help you gain strength within your core!

    Slowly come into your Tripod Headstand. Start by flexing your feet to activate your entire lower body… and also to prepare your feet for the landing! Take a deep breath in. On the exhale, engage those bandhas and try to lower your legs down a few inches. Inhale. On the exhale, lower them down a little more.  Make a mental note where your legs come down if you cannot float them gently onto the ground.

    Come back into your Tripod Headstand again.  This time, float them down to your “breaking” point or slightly above that… On the inhale, try to lift them back up again. Try to do this three to five times. This small action will help strengthen your core over time. Keep working this as low as you can go… eventually coming all the way down onto the ground gently and maybe back up!


    [KGVID poster=”http://www.twofitmoms.com/wp-content/uploads/2014/02/IMG_3117_thumb5.jpg” width=”640″ height=”360″]http://www.twofitmoms.com/wp-content/uploads/2014/02/IMG_3117.mov[/KGVID]

    Ready to move on?

    Once you can comfortably float down and up in Tripod Headstand, you can start to work on your float down from Handstand. Feel free to use a wall if you have trouble balancing and you can even press the crown of the head into the wall to help slow your descent. You may feel this in your wrists, so take it slow! Remember the foundations of a handstand and press firmly into the ground with your hands. Engage your core and slowly start to float down.  If you are having serious trouble with this, you can also try straddling your legs to float down! Play with it…but most importantly, have patience!

    [KGVID poster=”http://www.twofitmoms.com/wp-content/uploads/2014/02/Video-Feb-21-1-14-35-PM_thumb19.jpg” width=”1920″ height=”1080″]http://www.twofitmoms.com/wp-content/uploads/2014/02/Video-Feb-21-1-14-35-PM.mov[/KGVID]

    XOXO

    Blog Signature

  • Funky Pincha Mayurasana

    Funky Pincha Mayurasana

    It’s time to get FUNKY in Pincha Mayurasana! In this variation you are on one forearm and one hand versus both forearms. The key is squeezing the elbows in toward the midline.

    It is incredibly important to note that you should have a solid, REGULAR Pincha Mayurasana practice before attempting to kick up in this variation. Feel free to practice funky Dolphin pose to get yourself familiar with the different arm placement.

    Step 1: What it means to get “funky”

    Start off on all fours, Tabletop position… fingers spread wide, shoulders stack directly over your wrists, hips stack directly over your knees.  Biceps roll forward, so there is an external rotation of your upper arms. Arm bones plug into their sockets, shoulder blades pull down your back. Keep your toes curled under. It is important to have a solid base to start.

    Keeping the external rotation in your right arm, slowly lower your right elbow down onto your mat. Your right forearm should be parallel to the edge of your mat. Even though it is down, feel your right elbow continue to squeeze in.

    Move your left hand back so your left fingertips line up with the back edge of your right elbow that is on your mat. You may have to play with this to find what is most comfortable… move maybe an inch or so up. Where ever your hand lands though, squeeze that elbow in!

    Photo Feb 18, 11 07 53 AM


    Step 2: Funky Dolphin

    Keeping the elbows in, press your forearm and hand firmly into your mat and lift your knees up. Hips will lift and legs will straighten. Walk your feet in towards your arms as much as your flexibility allows. Try to keep equal pressure in your forearm and hand. The tendency will be to put more pressure into your forearm… try to keep the weight equal. Stay here and hold for five breaths. Come down, take a Child’s Pose and repeat on the other side.

    Photo Feb 18, 11 08 03 AM

    Step 3: Lift a leg

    I prefer to lift the leg that is on the same side where the hand is planted. Try both legs though and see what is more comfortable for you. Keep the lifted leg engaged… really energized and pulling up. Remember to keep the elbows pulling in and lifted leg internally rotating… try not to let your hips open too much. Mine tend to open a little, but if they are too open, you will be crooked when trying to kick up and probably fall over. Come down, take a Child’s Pose and repeat on the opposite side.

    Photo Feb 18, 11 08 10 AM

    Step 4: Take a few baby hops, maybe catch some hang time

    If you are ready to start baby kick ups, please find a wall space and set yourself up about six to eight inches away and come into the previous step, funky Dolphin with one leg raised. Before bending the bottom leg, ask yourself . . . Are you pressing equally into your forearm and your hand? Are your elbows squeezing in? Are your hips relatively square? Is your lifted leg engaged? Are you gazing down at your mat?

    When you are ready, put a slight bend into the bottom leg and take a few baby hops. Between each hop, check to make sure you are in form. As you become more comfortable, you will find more hang time. Play with both legs extending out as shown below or bending in the bottom leg.

    Come down and take a Child’s Pose… then repeat on the other side!

    Photo Feb 18, 11 08 20 AM

    Step 5: Full expression

    Once you find your balance with legs apart, you can play with bringing the legs together.

    Photo Feb 18, 11 07 44 AM


    XOXO

    Blog Signature

  • Headstands 101:  The Art of Falling

    Headstands 101: The Art of Falling

    I would be remiss to write a “Headstands 101” series of articles and not touch upon the topic of falling.  Falling is the greatest fear in practicing any inversion.  Nobody wants to fall because it feels so uncontrolled and unexpected and could result in an unwanted injury.

    Today, I’m here to tell you that falling is a skill.  You CAN and WILL turn your falls into transitions.  You will no longer fall out of a headstand.  When you feel your body wavering as you balance on your head, you will not flail around and fall flat onto your back.  Instead, you will execute a controlled transition from one pose into another.  The goal?  Tripod headstand into a somersault.  Once you master this transition, your headstand practice will soar to another level.  When you can practice without fear, amazing things will happen on your mat.  Let’s get started.

    Channel Your Inner Kindergartener
    First, remind yourself what it feels like to do a somersault.  Squat down onto your mat as you rest on the balls of your feet.  Keep your knees together and place your hands down onto the floor in front of you.  Spread your fingers and begin to lean forward, putting pressure into your hands.  Tuck your chin to your chest and place the back of your head onto the ground, slightly in front of your hands.  Round your back, push off of your feet, and turn yourself into a tight ball.  Somersaulting should not hurt!  Keep practicing this move until it feels natural and smooth.

    Once you feel comfortable somersaulting, come into a tripod egg to practice the exit strategy.  If you need a refresher on getting into a tripod egg, click HERE to review the steps for this pose.

    Banner
    From your tripod egg, tuck your chin to your chest, round your back by squeezing your knees into your body, and safely roll out of the headstand.  Practice this over and over until it is second nature to tuck and roll as soon as you feel as though you no longer have control of the pose and may tip over.  Once you can tuck and roll out of a tripod egg, lift your knees from your triceps a few inches and try somersaulting again.  Keep lifting your legs and practicing your forward roll until you can safely tuck and roll out of the full expression of the pose with your legs fully extended.

    If you cannot master the somersault, don’t worry about it.  You can always re-visit this transition at some later date.  Until you can MASTER the somersault, however, you should NOT move your headstand practice away from the support of a wall.  There is no purpose in practicing if you put yourself in danger.  You must be able to safely exit a headstand in the middle of a room via forward roll, and until you are comfortable practicing somersaults, you should continue practicing with a wall behind you.  This is all a process, so please do not be discouraged if you are struggling.  It does not need to happen today.  Or tomorrow.  Or even a year from now.  Let yoga be a lifelong practice.  Be safe, have fun, and practice without fear.

  • Baddha Hasta Sirsasana B

    Baddha Hasta Sirsasana B

    Baddha Hasta Sirsasana B is probably my favorite headstand variation.  “Baddha Hasta” refers to the bound hand position which is the base for this variation. With ANY headstand, be mindful and be extremely aware of your body and its position. Headstands can be fun and exhilarating when practiced with caution. There should never be any rush…the asana will come with patience and diligence. Remember to use a wall if needed!

    Step 1: Get a grip!

    Start by sitting on your heels. Extend your arms out, bend the elbows and loosely grab the opposite forearm by the elbow.

    Photo Feb 15, 2 26 11 PM

    Step 2: Set yourself up

    Keeping the grip on opposite arms, place your forearms down onto your mat and curl your toes under. Place the crown of your head down right in front of your forearms. Start to press your forearms firmly down into your mat as you draw your shoulders down to lengthen your neck. No turtles allowed!

    Remember to use a wall if needed!

    Photo Feb 15, 2 26 25 PM

    Photo Feb 15, 2 26 37 PM

    Step 3: Dolphin

    Keeping pressure in your forearms and neck long, slowly lift up off of your knees and walk the feet in towards your head. The goal is to get the hips stacking over your shoulders. Resist the urge to dump into your neck as weight is added onto your arms, shoulders and head. Stay here and hold for 5-8 breaths. Come down and rest in Child’s Pose before moving on.

    Photo Feb 15, 2 26 49 PM

    Step 4: One step at a time

    When you’re ready to move on, come back into Dolphin. Slowly bend one knee into your chest, then place it back down onto your mat. Repeat with the other knee. Come down and rest in Child’s Pose before moving on.

    Photo Feb 15, 2 27 01 PM

    Step 5: Headstand egg

    From Dolphin, bend one knee tight into your chest. Using your core and maybe the tiniest push off, bring the second leg into your chest. I do not suggest kicking up with straight legs. Move slowly and with awareness to prevent any injuries to your neck. Once both legs are tucked into your chest, do a little check… Are you firmly pushing into your mat with your forearms? Are your shoulders melting away from your neck? Is your core engaged?

    Photo Feb 15, 2 27 13 PM

    Step 6: Lift off!

    When you are ready to lift up, try lifting one leg at a time SLOWLY. The quicker you move, the more likely you are to fall, lose balance or tweak your neck. If you successfully lift one leg up, THEN try to bring the second leg up to meet the first. Keep the legs engaged by flointing or pointing the toes. Stay here and breathe…

    Photo Feb 15, 2 27 25 PM

    Photo Feb 15, 2 27 36 PM

    Slowly come down and take a Child’s Pose.

    Remember, this is a more advanced headstand variation! If you do not get it this time around, no worries! Your yoga journey is your own… There is no timetable to your practice. Have patience and keep practicing.

    XOXO

    Blog Signature

  • Eka Hasta Bhujasana

    Eka Hasta Bhujasana

    Eka Hasta Bhujasana, or One-Leg-Over-Arm Balance, is another great intro to balancing on your hands.  It helps build strength in your arms and core which are essential in all of your arm balances and inversions. Feel free to have blocks nearby if you cannot get your hands flat on your mat.  Let’s break it down!

    Step 1: Warm up!

    I always start my practice with about 5-10 Sun Salutions to get my body moving.  Feel free to warm up anyway that you would like! This pose does require a lot of hip mobility and open hamstrings, so make sure to spend some time in poses like a seat forward fold and single/double pigeon.

    Step 2: Cradle the leg

    Take a seat on your mat and extend both legs out. Bend the right knee and plant the foot down onto your mat. Slowly pick up the bent leg and hug it into your chest. With your left hand, grab the sole of your right foot and start to pull it in toward you.  The goal is to get your right shin parallel to the ground.  Option 1: Cradle your shin by taking the sole of the right foot to the inner left elbow and the outer knee to the inner right elbow as shown above.  Option 2: Use your arms like a forklift by sliding both arms under the shin to hold your leg upright. With either variation…stay here and breath for 8-10 breaths!

    Photo Feb 12, 1 23 29 PM Photo Feb 12, 1 23 51 PM

    Step 3: Backpack it!

    Take the sole of the foot again with your left hand and slide the right hand under the right calf muscle. Slowly begin to work the leg out to the right, then up over the right shoulder.  Make believe you are putting on a backpack strap!

    Photo Feb 12, 1 24 10 PM

    Step 4: Clamp it down

    Once you have worked your leg as high up the arm/shoulder as your flexibility allows, clamp the leg down so it stays. Place your hands down onto your mat next to your hips. If you cannot get your hands flat, use your blocks to bring the ground up to you! Engage both legs by flointing or pointing the toes.

    Photo Feb 12, 1 24 26 PM

    Step 5: Start the lift

    You can play around with either lifting the left foot up or lifting the buttasana up.  Try both! Feel your core engage. Try to hold your option for five breaths.

    Photo Feb 12, 1 24 42 PM

    Step 6: Full expression

    Work your leg up over your arm/shoulder and plant your hands firmly onto your mat. Using a bit of momentum, take a deep breath in and lift the leg off of the ground. On the exhale, lean slightly forward and, keeping the leg lifted, try to lift your bottom up as well. Keep the upper back rounding and arms squeezing in toward the midline.  Continue to clamp down the leg over the arm/shoulder. Press firmly into the ground and keep your gaze forward.  Hold for a few breaths if possible and release.

    Don’t forget to work the other side!

    Photo Feb 12, 1 24 57 PM

    XOXO

    Blog Signature


  • How to Create a Yoga Playlist

    How to Create a Yoga Playlist

    I am a big believer that ANY kind of music can effectively be used in a full-spectrum vinyasa yoga class.  Does it make sense to play heart-pumping booty music in a candle-lit, restorative yoga class that introduces five poses YogiwithHeadphoneswithin an hour?  Probably not.  But for the high-energy, sweat-inducing type of yoga that I practice and teach, it makes sense, and it can be done.  If you are ready to raise your home practice to another level, make your own yoga playlist.  I’ll show you how.

    First off, there is a method to the madness. 
    You will not enjoy your yoga experience if you simply string 60-minutes of your favorite songs together.  A yoga practice has ebb and flow—like a wave that builds, reaches a peak, and then falls off into peacefulness. The music must follow this wave-like trajectory to mirror the movement of the practice.

    Here’s the basic structure of my own 60-minute practice and how I pick the music to fit.

    0:00 – 5:00 minutes
    Type of Music:  Peaceful instrumental
    I like to use the first five minutes of my practice to sit in peace.  I close my eyes, I breathe deeply, I do some very light stretching (like reaching my arms overhead), and I set an intention for my practice.  I find it necessary to remind myself why I step onto my mat.  I set my purpose.  I find it difficult to do this however, if the music playing in the background is distracting.  I need purely instrumental music to tune into my own inner voice.  The perfect song for my first five minutes of practice is “Beyond this Moment” by Patrick O’Hearn.  Go listen to it.  I bet you’ll want to add it to your own playlist.

    5:00 – 10:00 minutes
    Type of Music:  Slow tempo
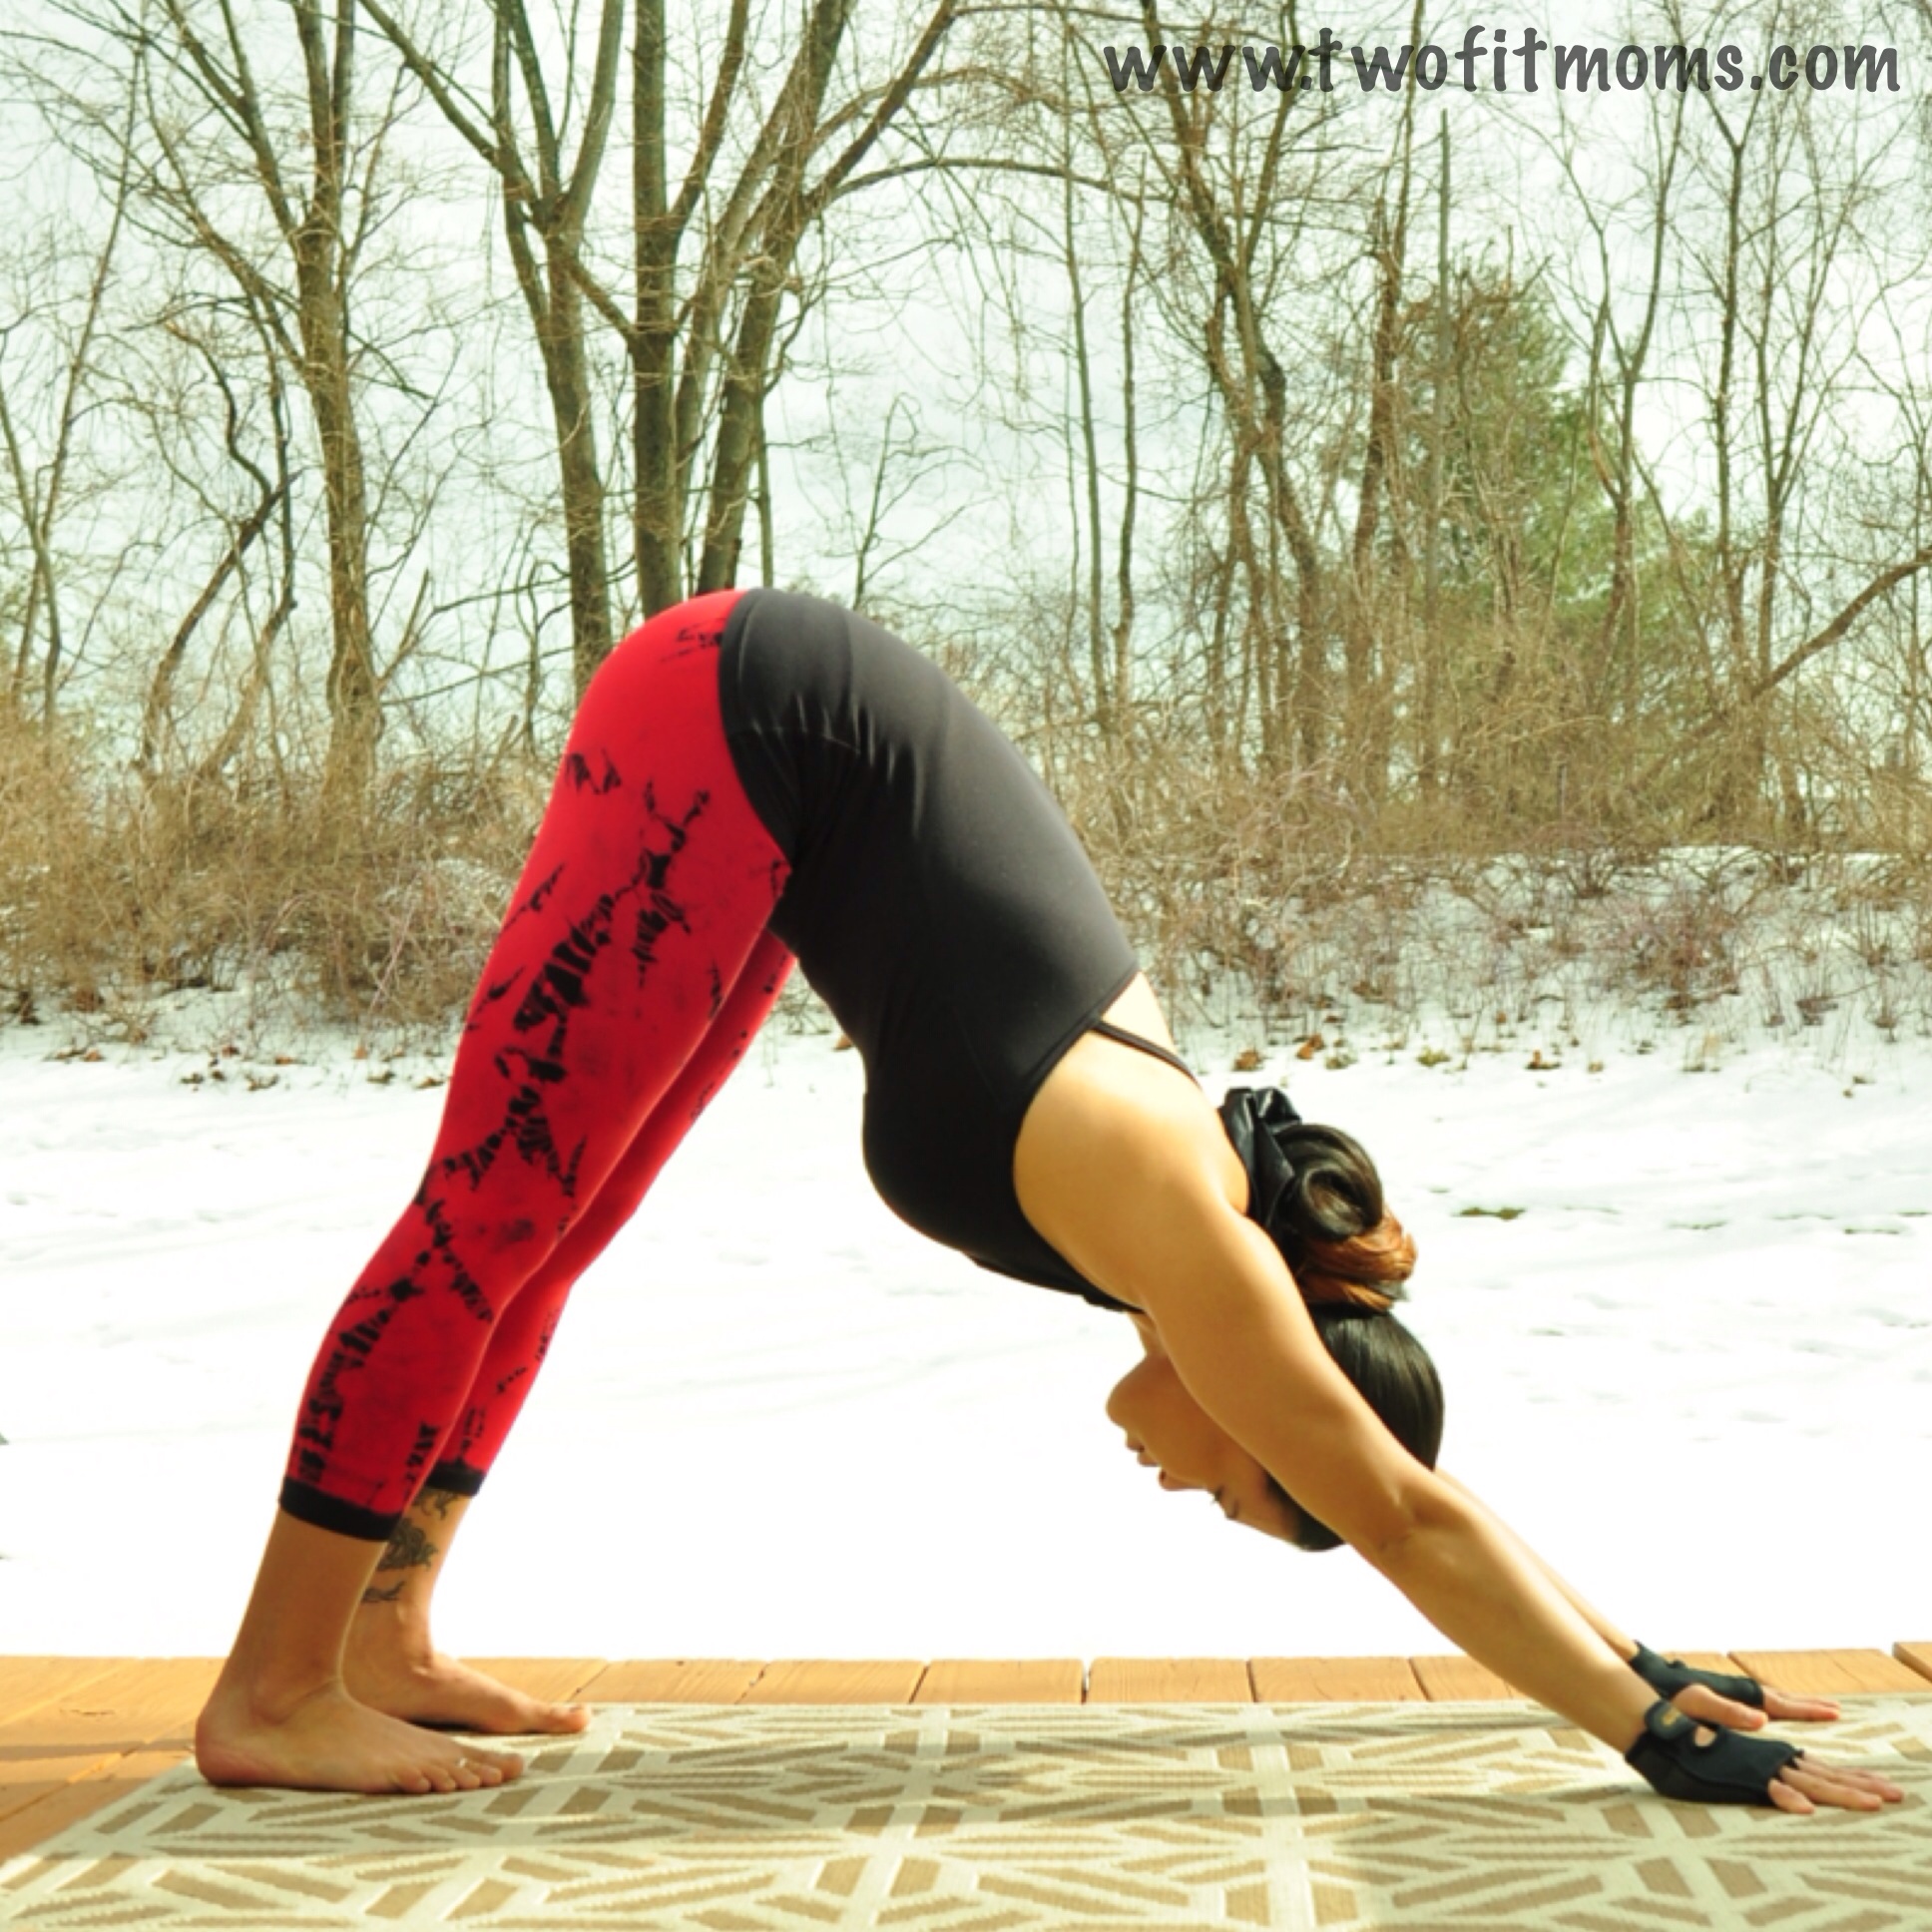
    In the next five minutes, I usually do a number of warm-up poses.  Seated twists, light hamstring stretches, a few cat-cows to warm up the chest and back, and maybe a nice long downward facing dog.  In these five minutes, I am beginning to move.  I am no longer sitting with my eyes closed as I was in the first five minutes, but I am also not moving through a flow.  It makes sense for the music to remain low key.  I do not usually pick an instrumental song, but I do pick something with a slow tempo that will match my slow movements.

    10:00 – 15:00 minutes
    Type of Music:  Faster tempo; upbeat
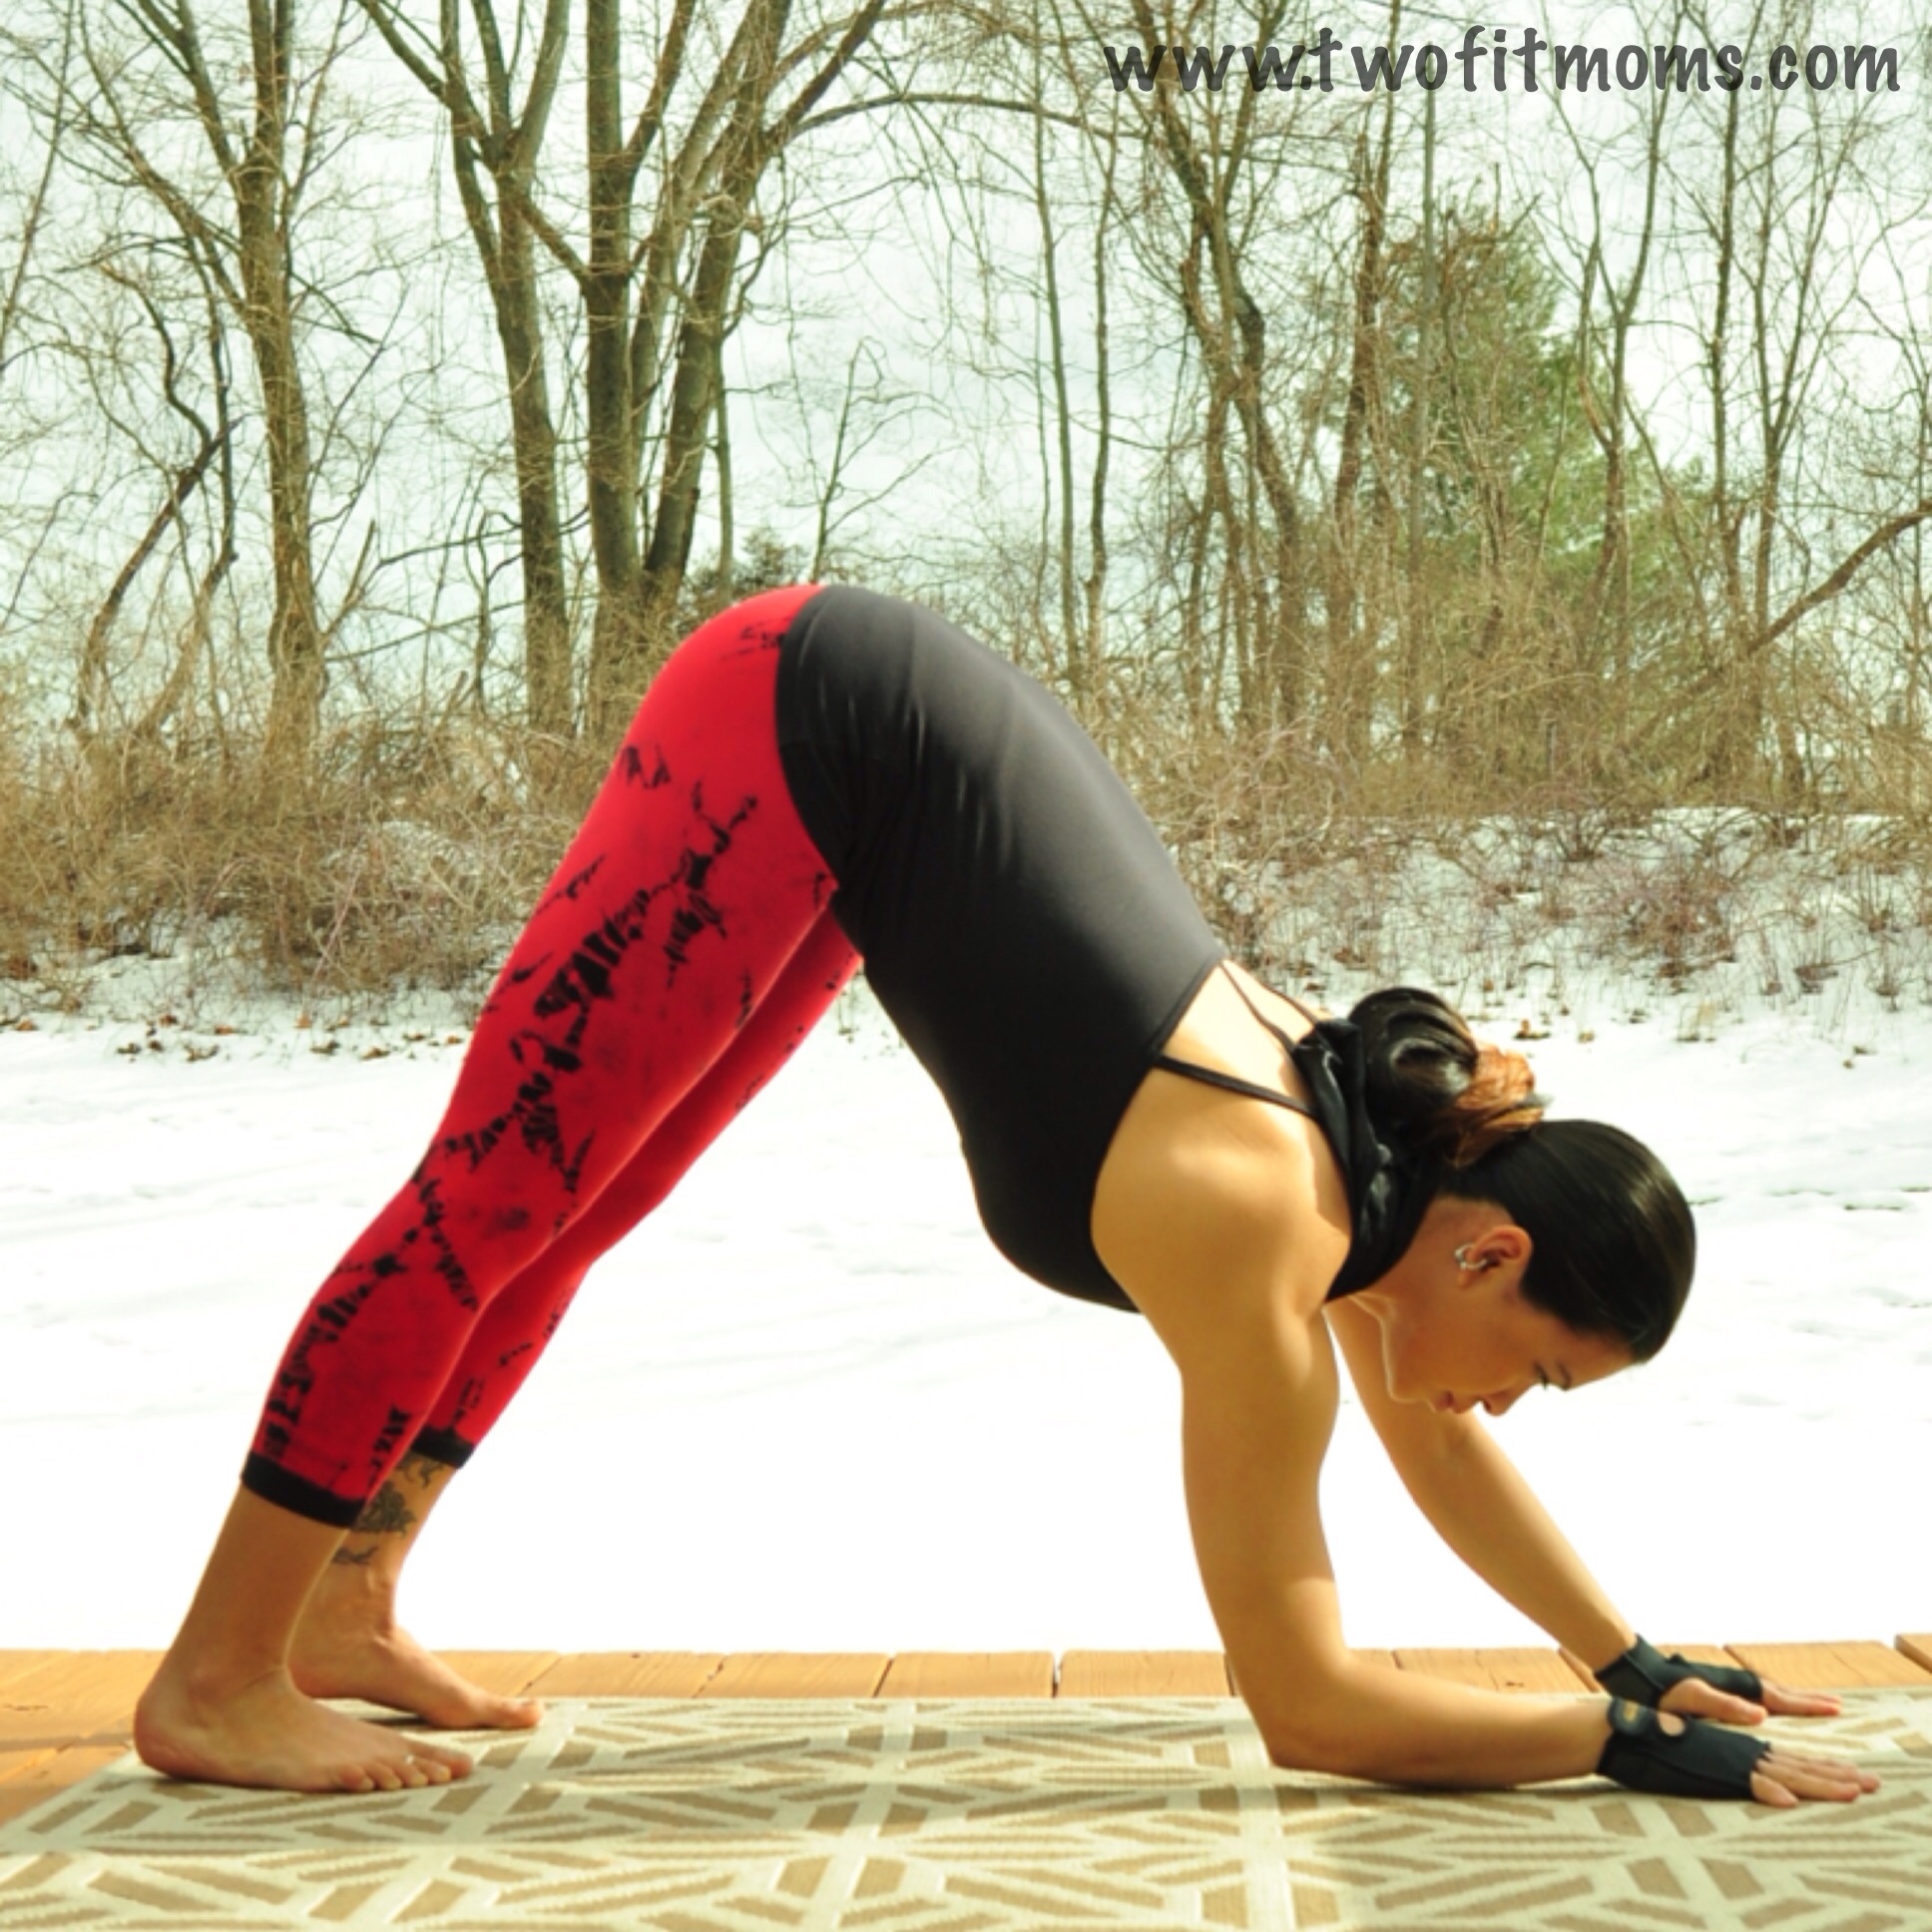
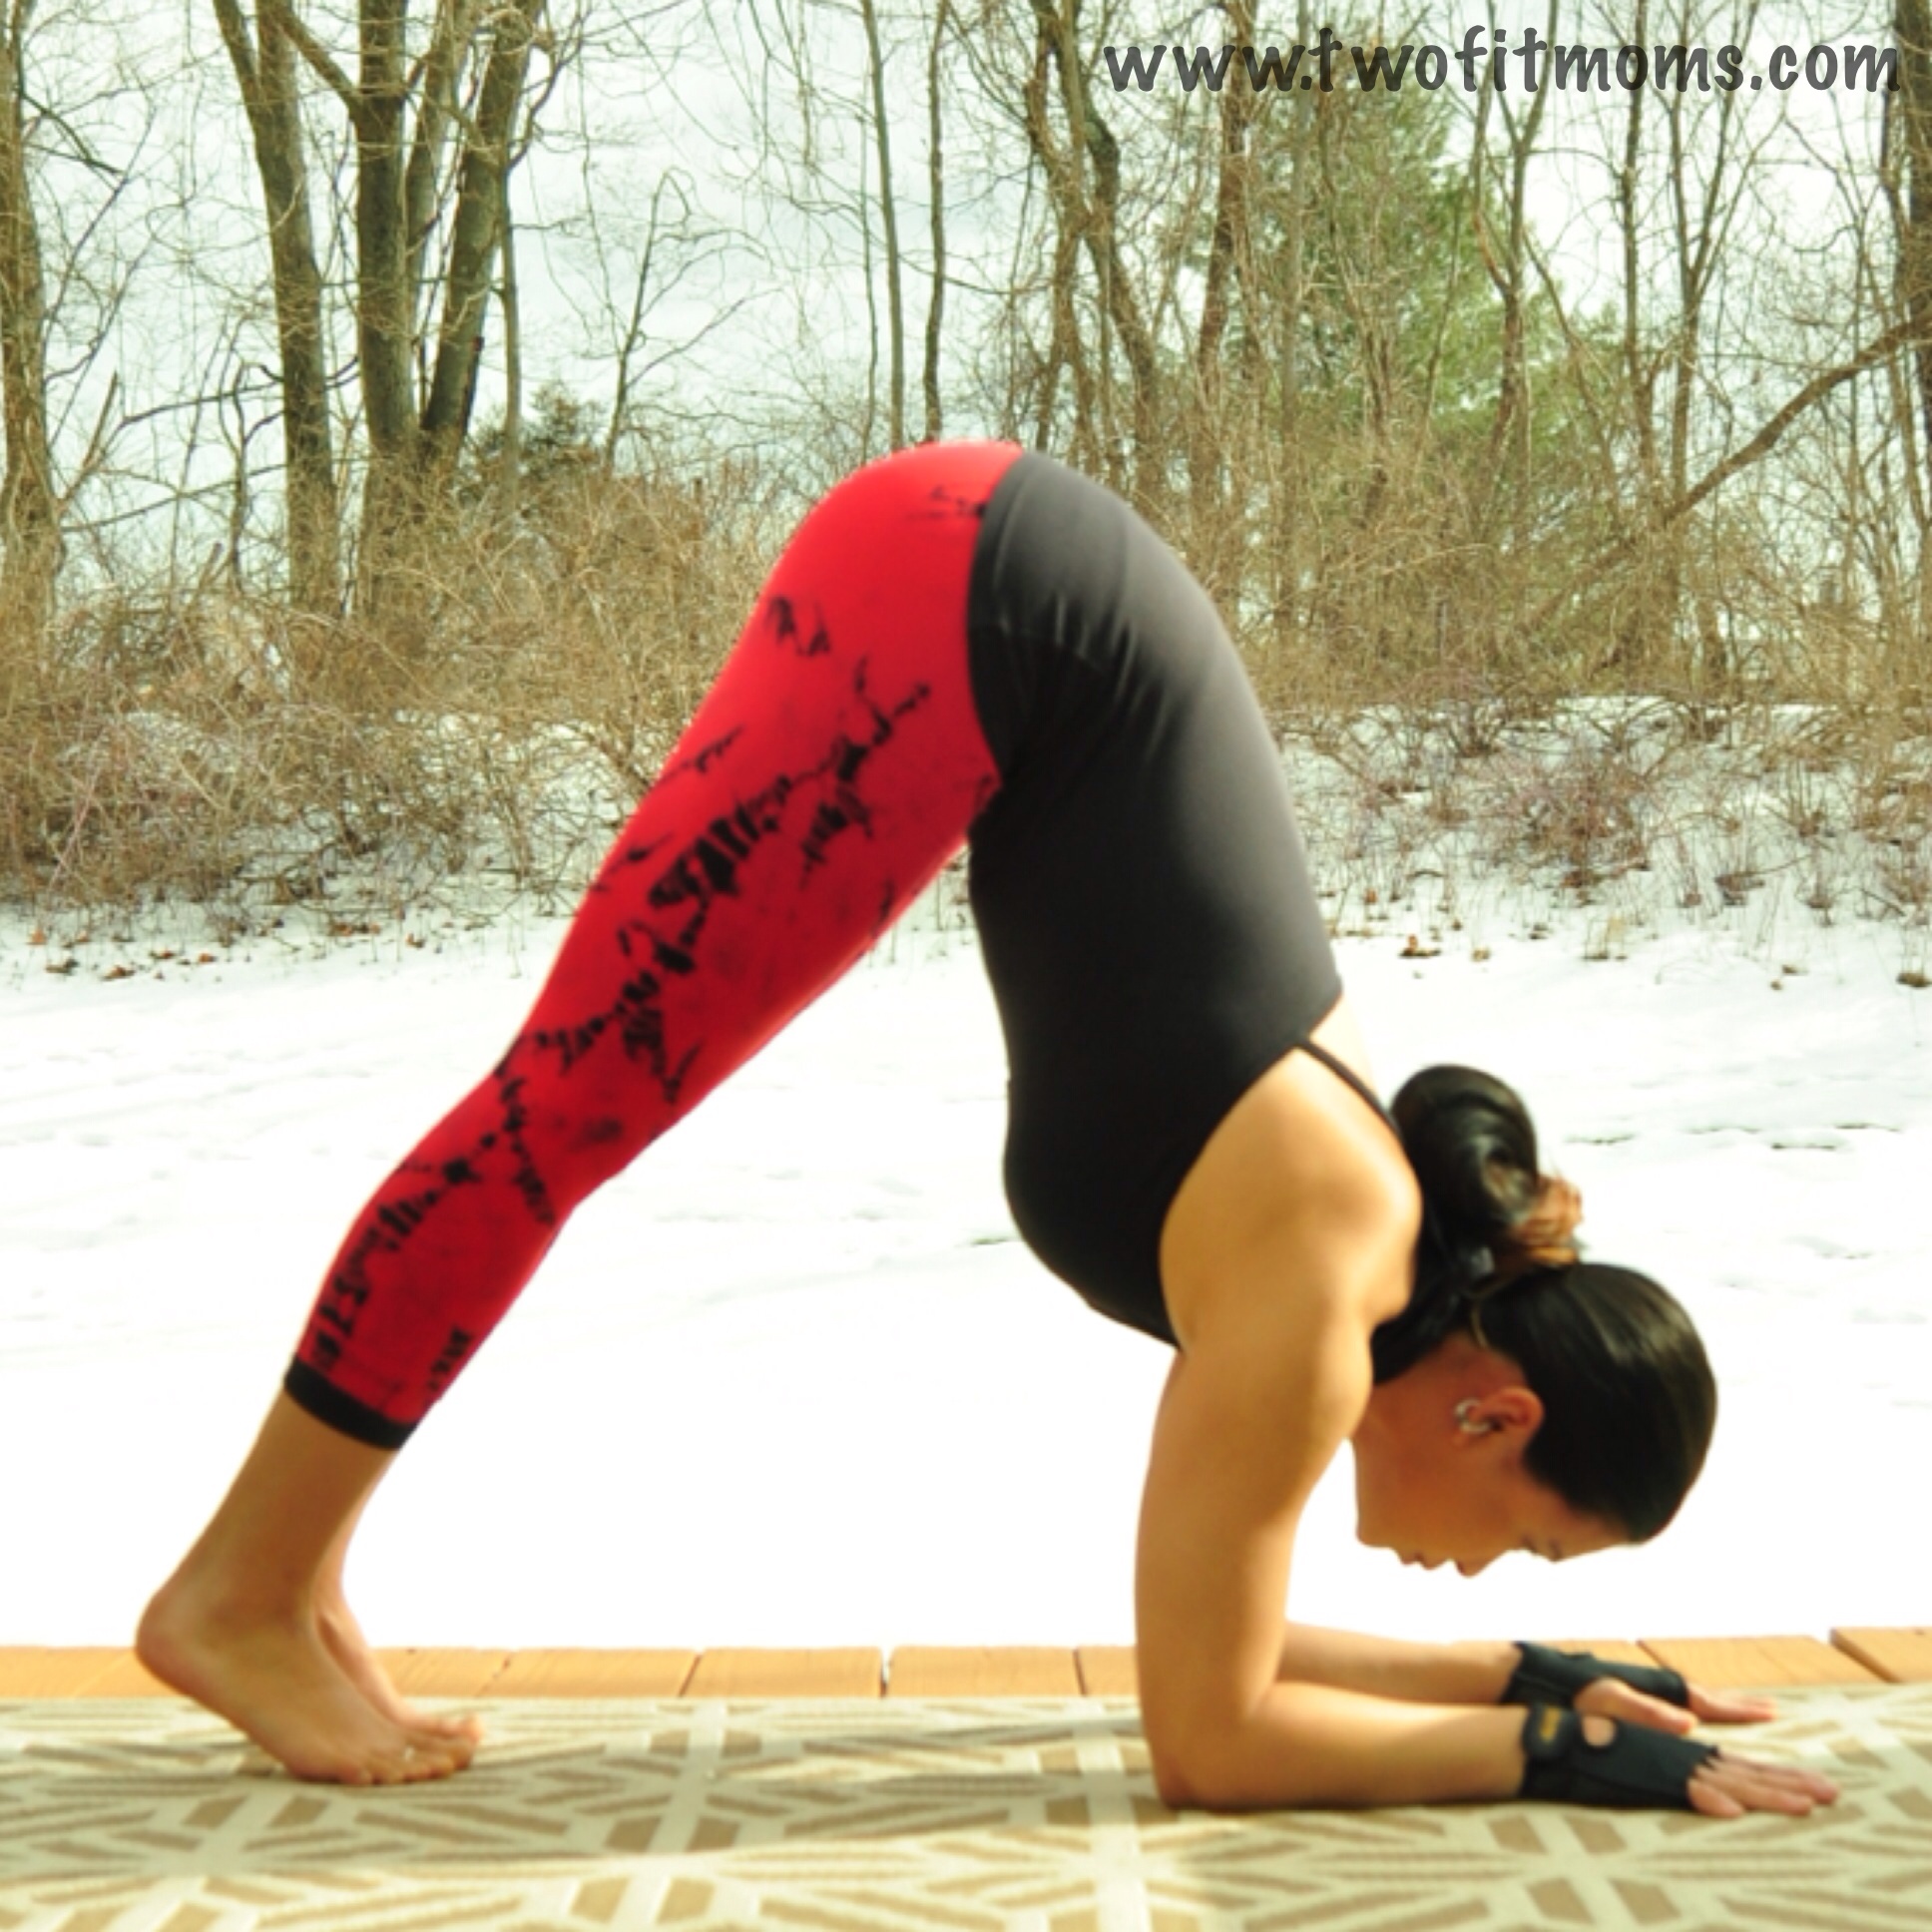
    At this point, I’m ready to start moving and raise the heart rate.  In these five minutes, I am doing multiple rounds of sun salutations.  I find this to be a great way to build heat and to fire up all of the muscles.  The music should reflect the increased pace of movement.  I love doing the sun salutation portion of my practice to “Sadeness, Pt. 1” (Extended Trance Mix) by Enigma.

    15:00-30:00
    Type of Music:  Upbeat, good energy, makes you want to move
    Between minutes 15 and 30, I’m seriously flowing through my practice.  I love having music in the background that makes me want to move.  I don’t find it distracting to play hip hop, R&B, rap music or top 40 hits.  I actually enjoy it!  I like fast-paced fitness yoga, and I choose music that matches that level of energy.  I love Tupac, Jay Z, Gyptian, MC Yogi and many, many others.

    30:00-40:00 min
    Type of Music:  Upbeat, but a little slower for balance series
    Between the 30 and 40-minute mark, I slow the music down just a bit.  I am still standing, but moving through a slower flow, as I practice my standing balance poses (dancer, tree, single-leg balance poses, etc.).  To me, it makes sense to lower the energy of the music just a bit as my heart rate decelerates slightly.  My song choices for this segment of my practice include “One Day” by Matisyahu, “Alone” by Heart, and “Bless the Broken Road” by Rascal Flatts.

    40:00-50:00 min
    Type of Music:  Slower for backbends and inversions
    Slow it down even more!  Remember that you are building a playlist that rises, peaks and then gently falls.  We are in the falling stage here, and you want to pick music that is not distracting.  Backbends and inversions require slow focus, and the music should reflect that mood.  Some of my favorite choices for this part of my practice are “Down to the River to Pray” by Alison Krauss and “Higher Love” by James Vincent McMorrow.

    50:00-55:00 min
    Type of Music:  Peaceful music for seated/reclined stretches
    In the final segment of my practice before savasana, I choose a song that is so peaceful that it could be used during savasana, too.  This is the part of my practice where I might take a gentle supine spinal twist or spend a few breaths in a seated forward fold.  Right now, my playlist includes Sarah McLachlan’s “Possession (Piano Version)”.

    55:00-60:00 min
    Type of Music:  Restful music (possibly instrumental) for savasana
    What we’ve all been waiting for…savasana!  We’ve all been to yoga classes with savasana music that is distracting and actually detracts from the experience.  Fortunately, with your own playlist, you can choose the music that works best for YOU!  Personally, I do not mind music with lyrics.  I am still able to release tension and fall away into my own little world.  If it doesn’t work for you, then find a slow peaceful song that does not distract you.  Try an instrumental piece or even music with lyrics in another language so it is less distracting.  One of my absolute favorite savasana songs is “Fields of Gold” by Eva Cassidy.  This woman’s haunting, beautiful voice guides me right where I need to be.  I have structured this hypothetical class to be 60-minutes, but if you have time, enjoy a longer savasana.

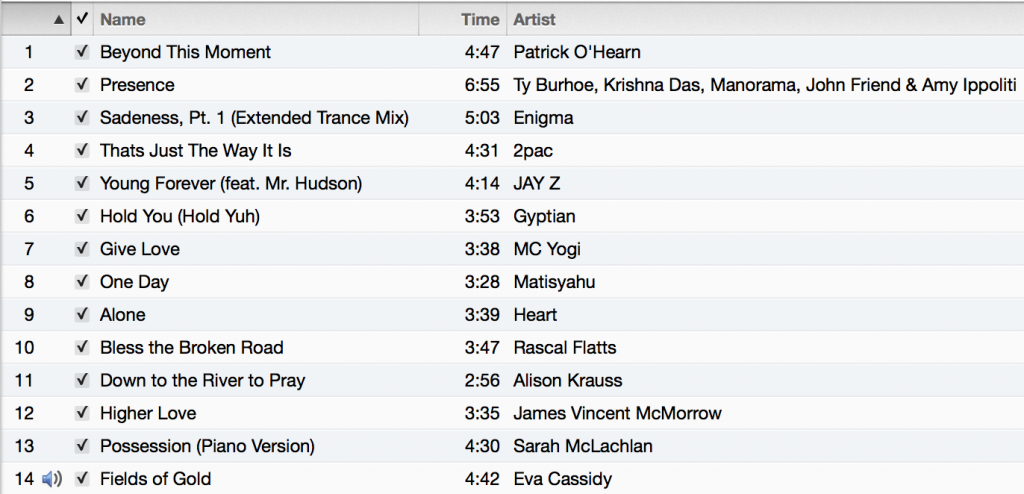
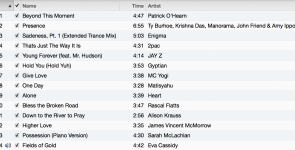
    Finally, let me introduce you to my favorite hour-long playlist.  If you are looking to start your own playlist, feel free to use my songs as a starting point.  Good luck, and happy flowing!

    MY FAVORITE PLAYLIST

    Screen Shot 2014-01-07 at 1.16.21 AM


  • Pincha Mayurasana

    Pincha Mayurasana

    Pincha Mayurasana, or Forearmstand, is probably the scariest of all of the inversions. There is just something about being on the forearms that seems harder. I highly recommend having a block, a yoga strap and a wall nearby to practice.

    Step 1: Downward Facing Dog

    Photo Feb 05, 4 52 42 PM

    Start off in Downward Facing Dog, or Adho Mukha Svanasana.  Hands are shoulder width apart, fingers are spread wide and grip the mat, weight is equally distributed through all four corners of your palms, biceps externally rotate out, upper arm bones plug into their sockets, shoulder blades roll down the back, lower ribs corset in, navel pulls in, core engages and inner thighs rotate in. It’s a long checklist, but a solid down dog will translate to a solid inversion practice. I like to start with my fingers and move down to my feet when mentally adjusting myself.

    Step 2: Dolphin Pose

    Keeping the external rotation in those arms, slowly make your way onto your forearms. Forearms should be shoulder width apart and parallel to each other. Let the head hang neutral. Push firmly into your hands and forearms, and keep the elbows and upper arms squeezing in.  Stay here and breathe.  This is a great preparatory pose, and it will build arm/shoulder strength. You will probably start to feel this about three breaths in.  Try to stay here for five breaths and then take a Child’s Pose before continuing.

    Photo Feb 05, 4 52 56 PM

    When you are ready, come back into Dolphin Pose and walk your feet in as much as your flexibility allows. Look down and focus on the space in between your forearms.

    Photo Feb 05, 4 53 07 PM

    If you are having trouble keeping your elbows in, create a loop in your yoga strap.  Measure the loop so that it is as wide as your shoulders.  Place the strap just above your elbows. Additionally, you can also use a block in between your hands.  The block should be placed longways.   Using the corners of the block, set your hands up so the index fingers squeeze the sides while the thumbs squeeze the bottom.

    Photo Feb 05, 4 53 19 PM

    Photo Feb 05, 4 53 30 PM

    Step 3: Lift a leg

    Slowly lift one leg high into the air.  Keep the hips square by flexing the foot of the lifted leg and pointing the toes down toward your mat. PLAY with lifting both legs up.  Everyone usually has a more dominant side or one that just feels more comfortable.  In the beginning, stay with the dominant leg. Once you get more comfortable, THEN practice using both!

    Photo Feb 05, 4 53 42 PM

    Step 4: Baby kick ups

    Bend the bottom leg and lightly push off of the foot – maybe only an inch or so off of your mat.  Keep the top leg energized and extended toward the sky, while the bottom leg extends out.  Both legs need to be active. Make sure not to let your face sink towards your mat.  Push actively into your forearms and hands, keep the shoulders down and away from your ears. Try to keep the arms at 90 degrees.

    Photo Feb 05, 4 53 53 PM

    Be patient. When you feel ready, you can start kicking up a bit harder to try to get the hips up over the shoulders and maybe gain more hang time.

    Photo Feb 05, 4 54 05 PM

    Step 5: Full expression

    Once you are comfortable kicking up into an “L” shape and holding it, you can start to play with bringing the bottom leg up to the top leg.

    Keep your lower ribs pulled in and your core engaged to avoid banana back.

    Photo Feb 05, 4 54 15 PM

    Don’t be frustrated if this pose does not come easily.

    “Even if you fall on your face, you’re still moving forward.” – Victor Kiam

    XOXO

    Blog Signature

  • Bakasana: Time to Get Your Crow On!

    Bakasana: Time to Get Your Crow On!

    Bakasana, or Crow Pose, is usually the first arm balance you will learn on your yoga journey. Hamstring flexibility and core strength are key elements to any arm balance. Make sure you have a block nearby if you have tight hamstrings and a pillow if this is your first time attempting this pose.

    Step 1: Block or no block…

    Photo Feb 05, 2 50 39 PM

    Start off by standing on your mat with feet and legs together. Slowly bend the legs, come up onto the balls of your feet, and squat down bringing your fingertips onto your mat. Separate your knees and plant your hands flat onto your mat so they are shoulder width apart. Your hands can be directly in front of your knees or knees can be slightly wider to the outside of your arms. Fingers are spread wide, index fingers parallel, biceps are externally rotating so that the elbows squeeze in. If any part of this is difficult for you, try standing on a block. The added height will help get your hands flat and knees up into your armpits.  If this is your first time, you can also set a pillow up in front of your hands in case you fall forward.

    Step 2: Lift the buttasana

    Photo Feb 05, 2 50 52 PM Photo Feb 05, 2 51 01 PM

    Once you plant your hands firmly on your mat, slowly start to lift your bottom as you lean forward. Elbows begin to bend while continuing to hug in toward the midline. Knees also squeeze in…Think Thighmaster! Keep your gaze forward. Begin to round your upper back and engage your abs.

    Step 3: Lift a foot

    Photo Feb 05, 2 51 11 PM

    While continuing to round the upper back, try lifting up one foot. Squeeze the heel toward your bottom, then set it back down, and repeat with the other foot.

    Step 4: Get your crow on!

    Photo Feb 05, 2 51 21 PM

    If you feel ready to continue, lift one foot off your mat. Keep your gaze forward, and slowly try to pick up the second foot to meet the first. Really round the upper back and engage the abs to take some of the weight off of your arms. If you sag down, your body will feel extremely heavy. Your elbows and thighs should continue to squeeze in; pull your heels up toward your buttasana.

    Be mindful of your movement, try not to kick or fling that second foot up. Be patient, and work your way up to being able to hold this for 5-10 breaths.

    Advanced: Now straighten your arms!

    Photo Feb 05, 2 51 31 PM

    If you can solidly hold your crow, you can start to work on straightening your arms. This can put pressure on your wrists, so please be careful and listen to your body.

    From your bent-arm bakasana, slowly start to straighten the arms while simultaneously pulling the knees up even higher into your armpits. Squeeze your elbows and thighs in! Your upper back rounds even more to release some of the weight off of your arms. Your wrists will move past 90 degrees, so be careful!

    Play around, have fun and be mindful!

    XOXO

    Blog Signature