Category: Latest News

  • Daily Practice: 5 Tips to a Better Handstand

    Daily Practice: 5 Tips to a Better Handstand

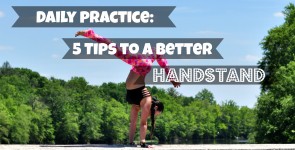
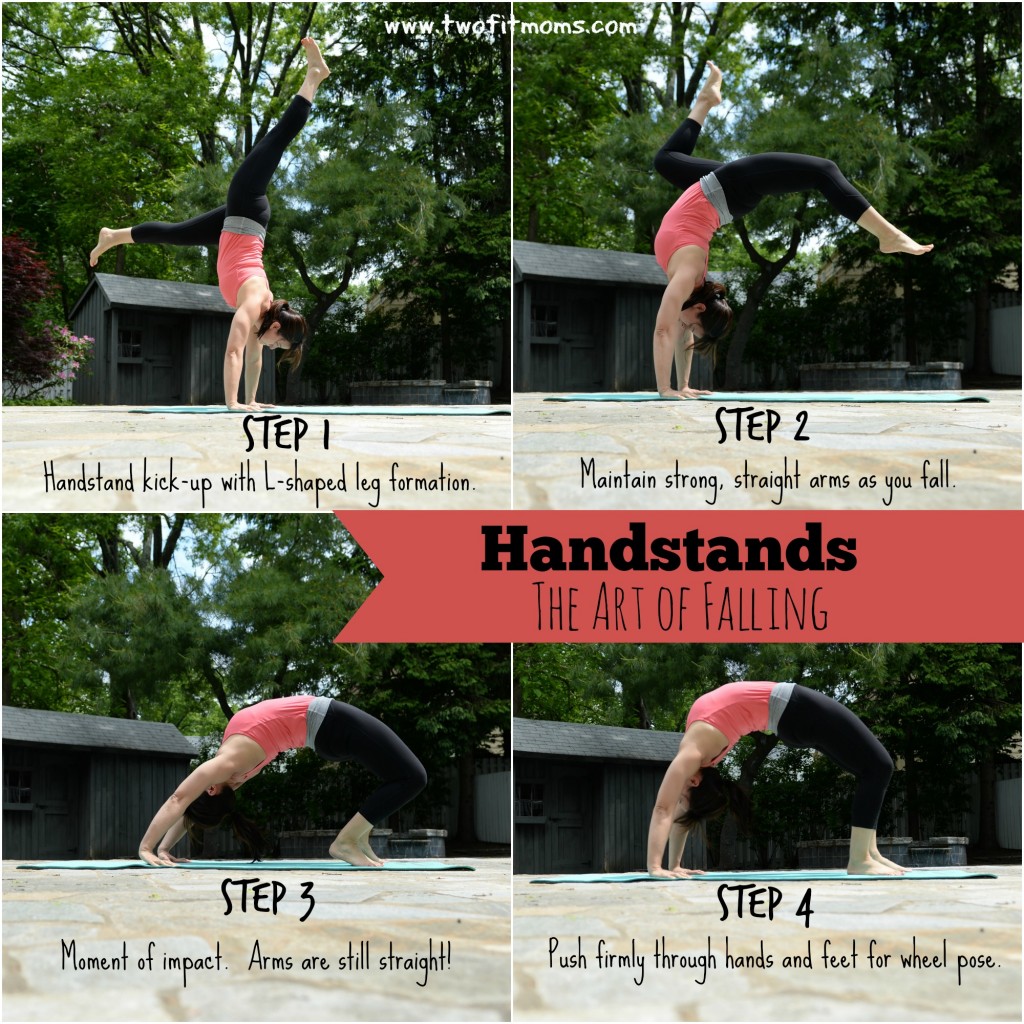
    The most common question I receive is: “How can I improve my handstand?” While understanding basic principles and alignment is key, I do have some tips!

    Here are five ways to help you improve your handstand and get you balancing on your hands.

    New to handstands?  Make sure to check out my Handstands 101 Part 1 and Part 2 articles!
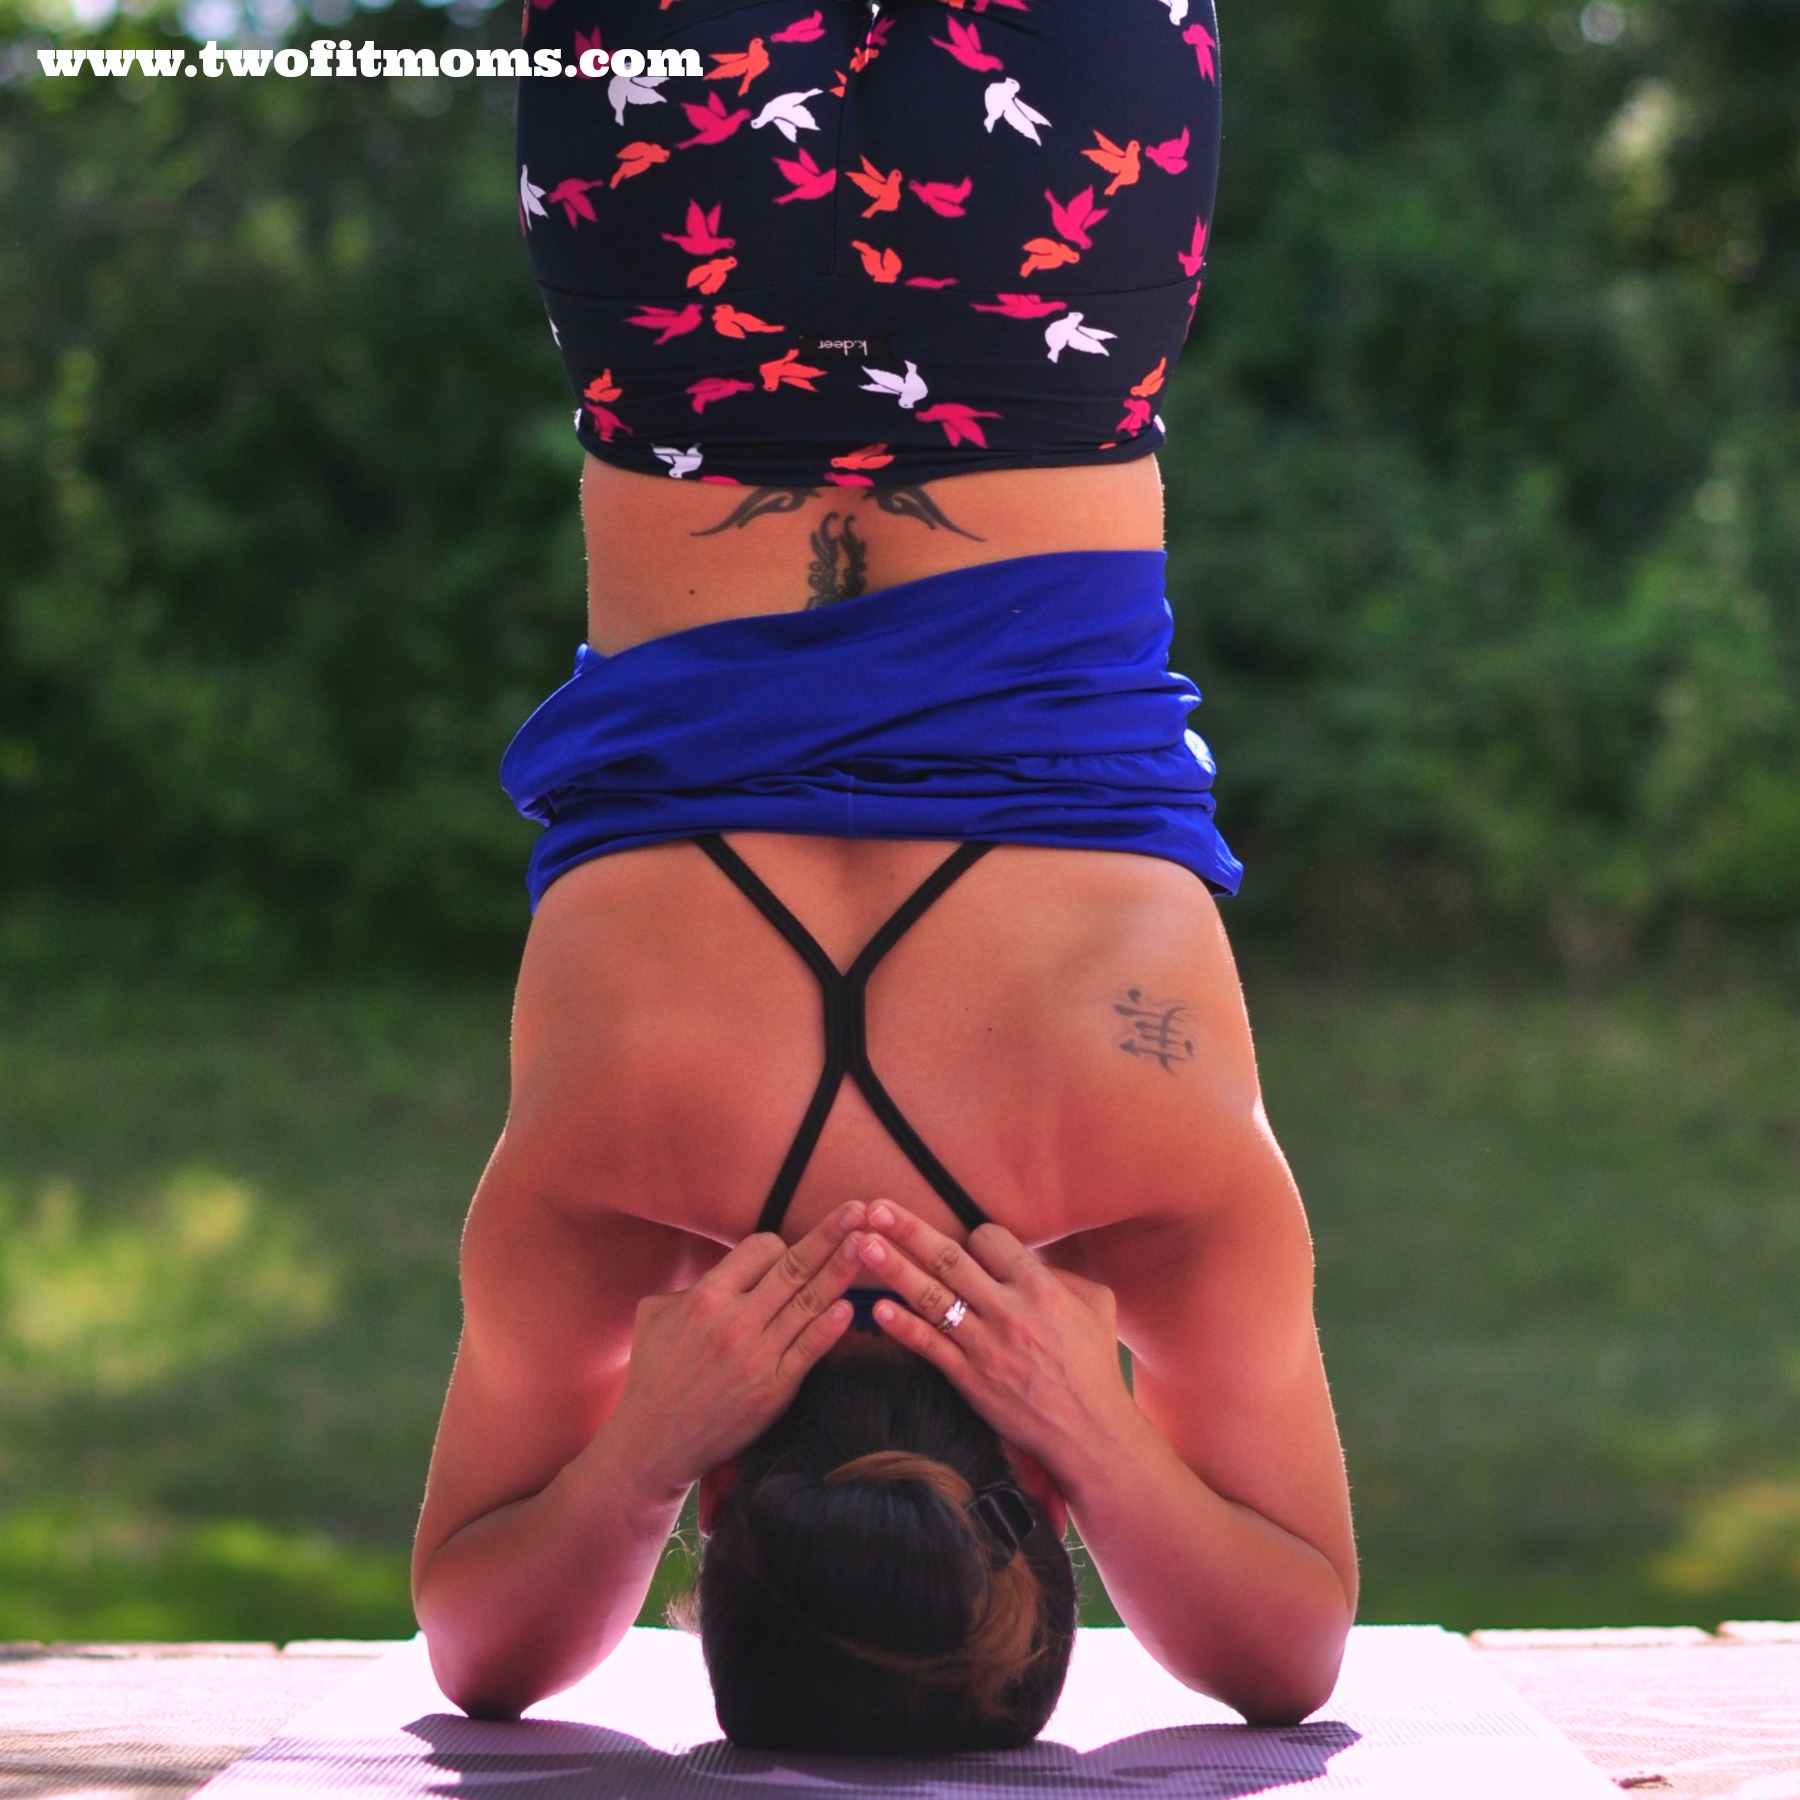
    #1: Grip it!

    HANDSTAND PREP 0

    Your 10 little fingers truly play an important part in your handstand practice. They can help you keep your balance and prevent you from falling over. From the moment your hands touch the earth, spread your fingers and actively grip or claw your mat. Making slight adjustments in your fingers can take your practice to a new level.


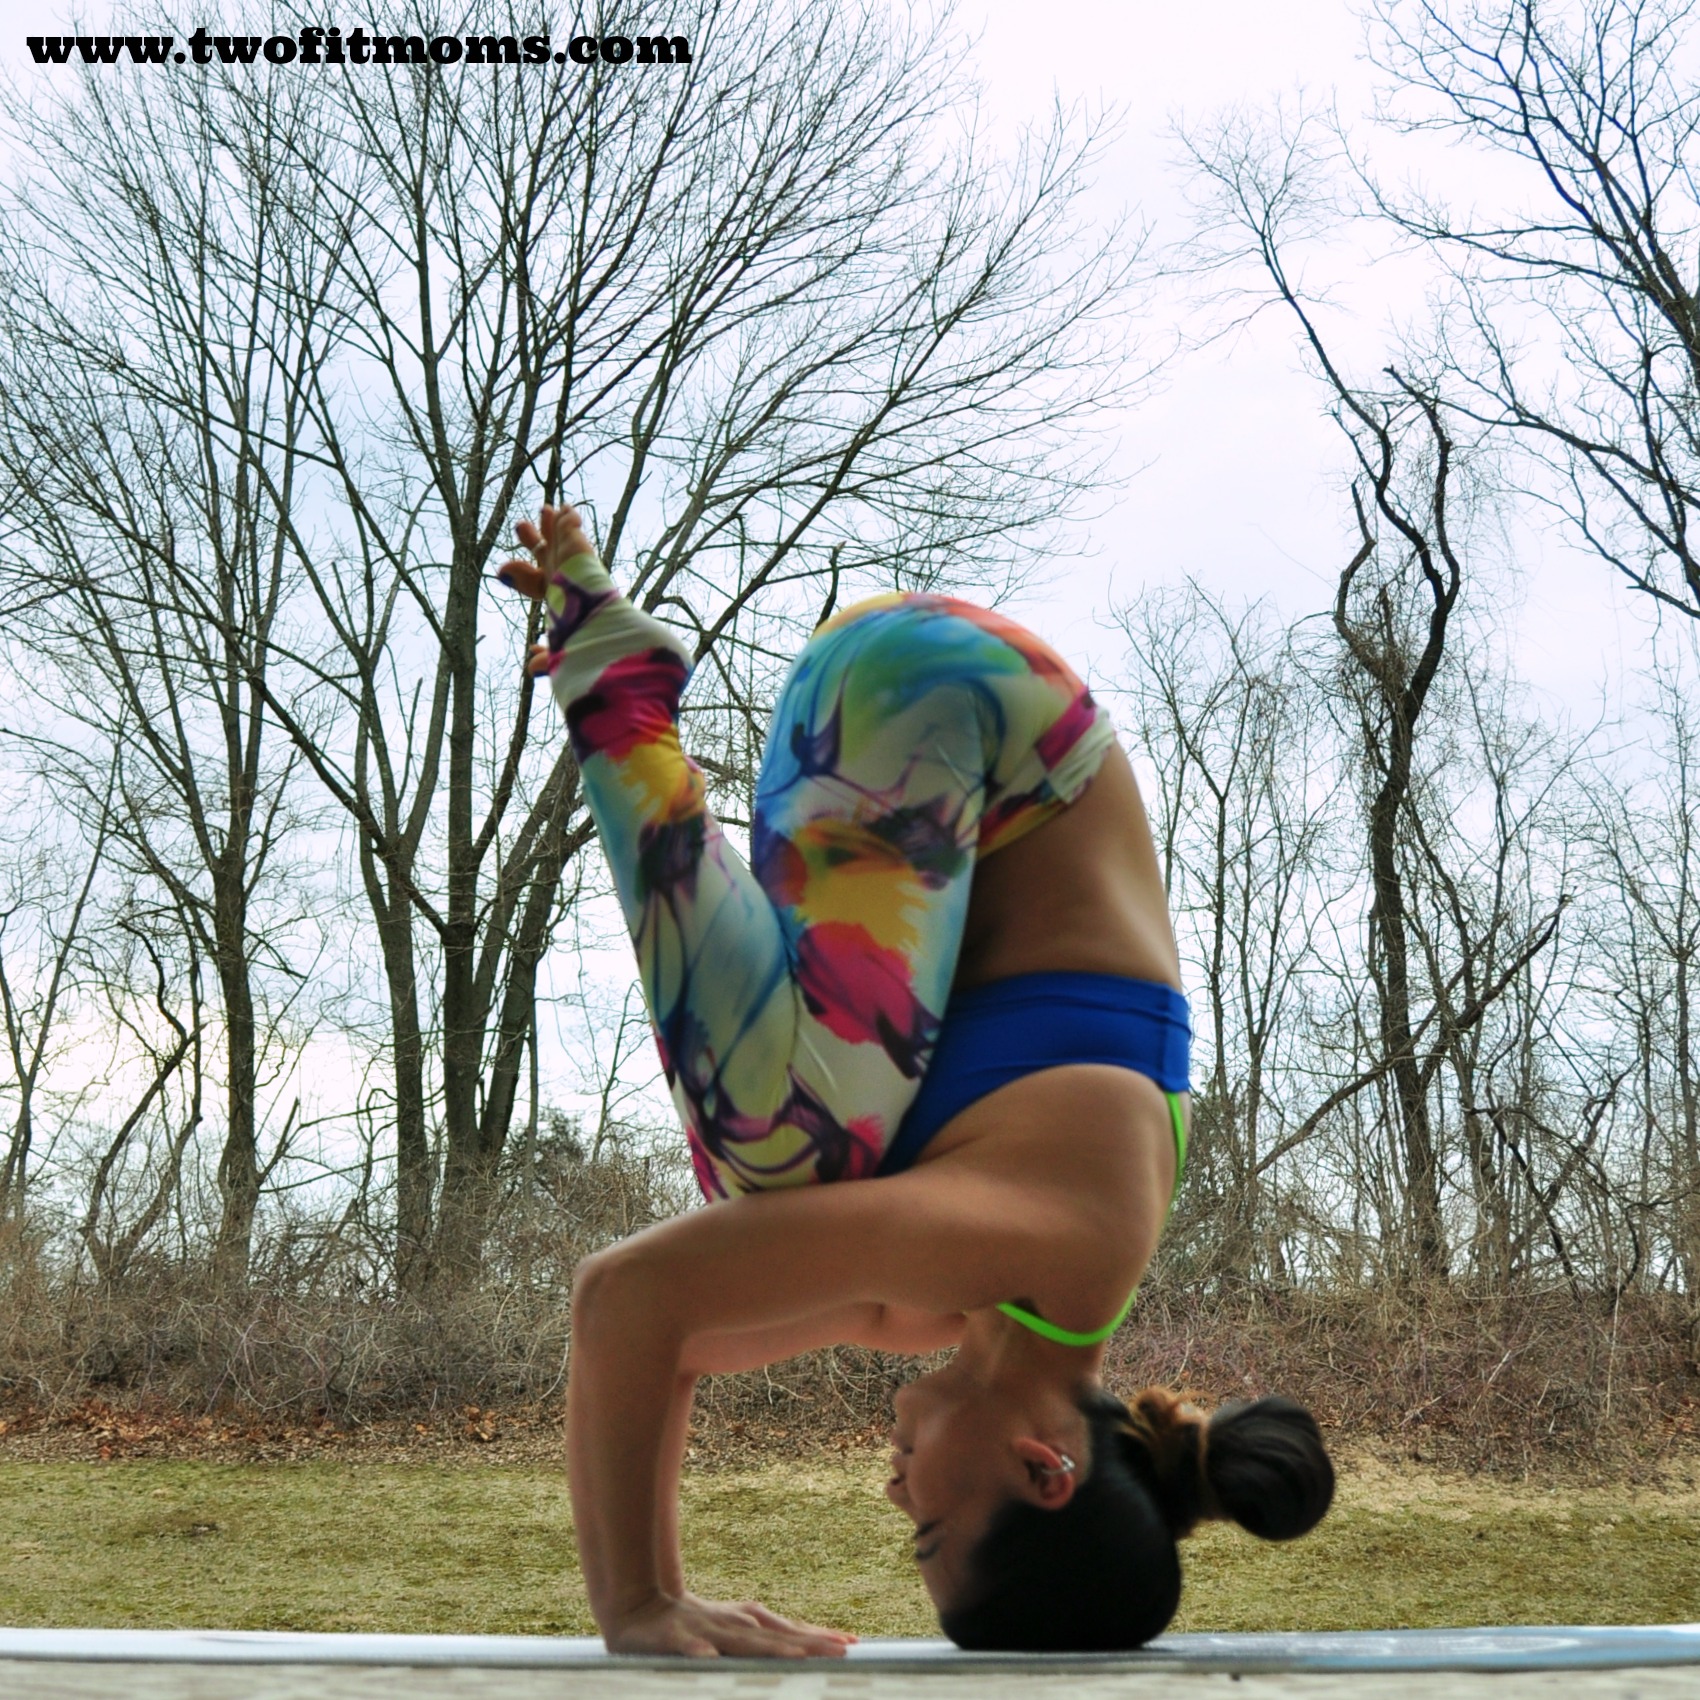
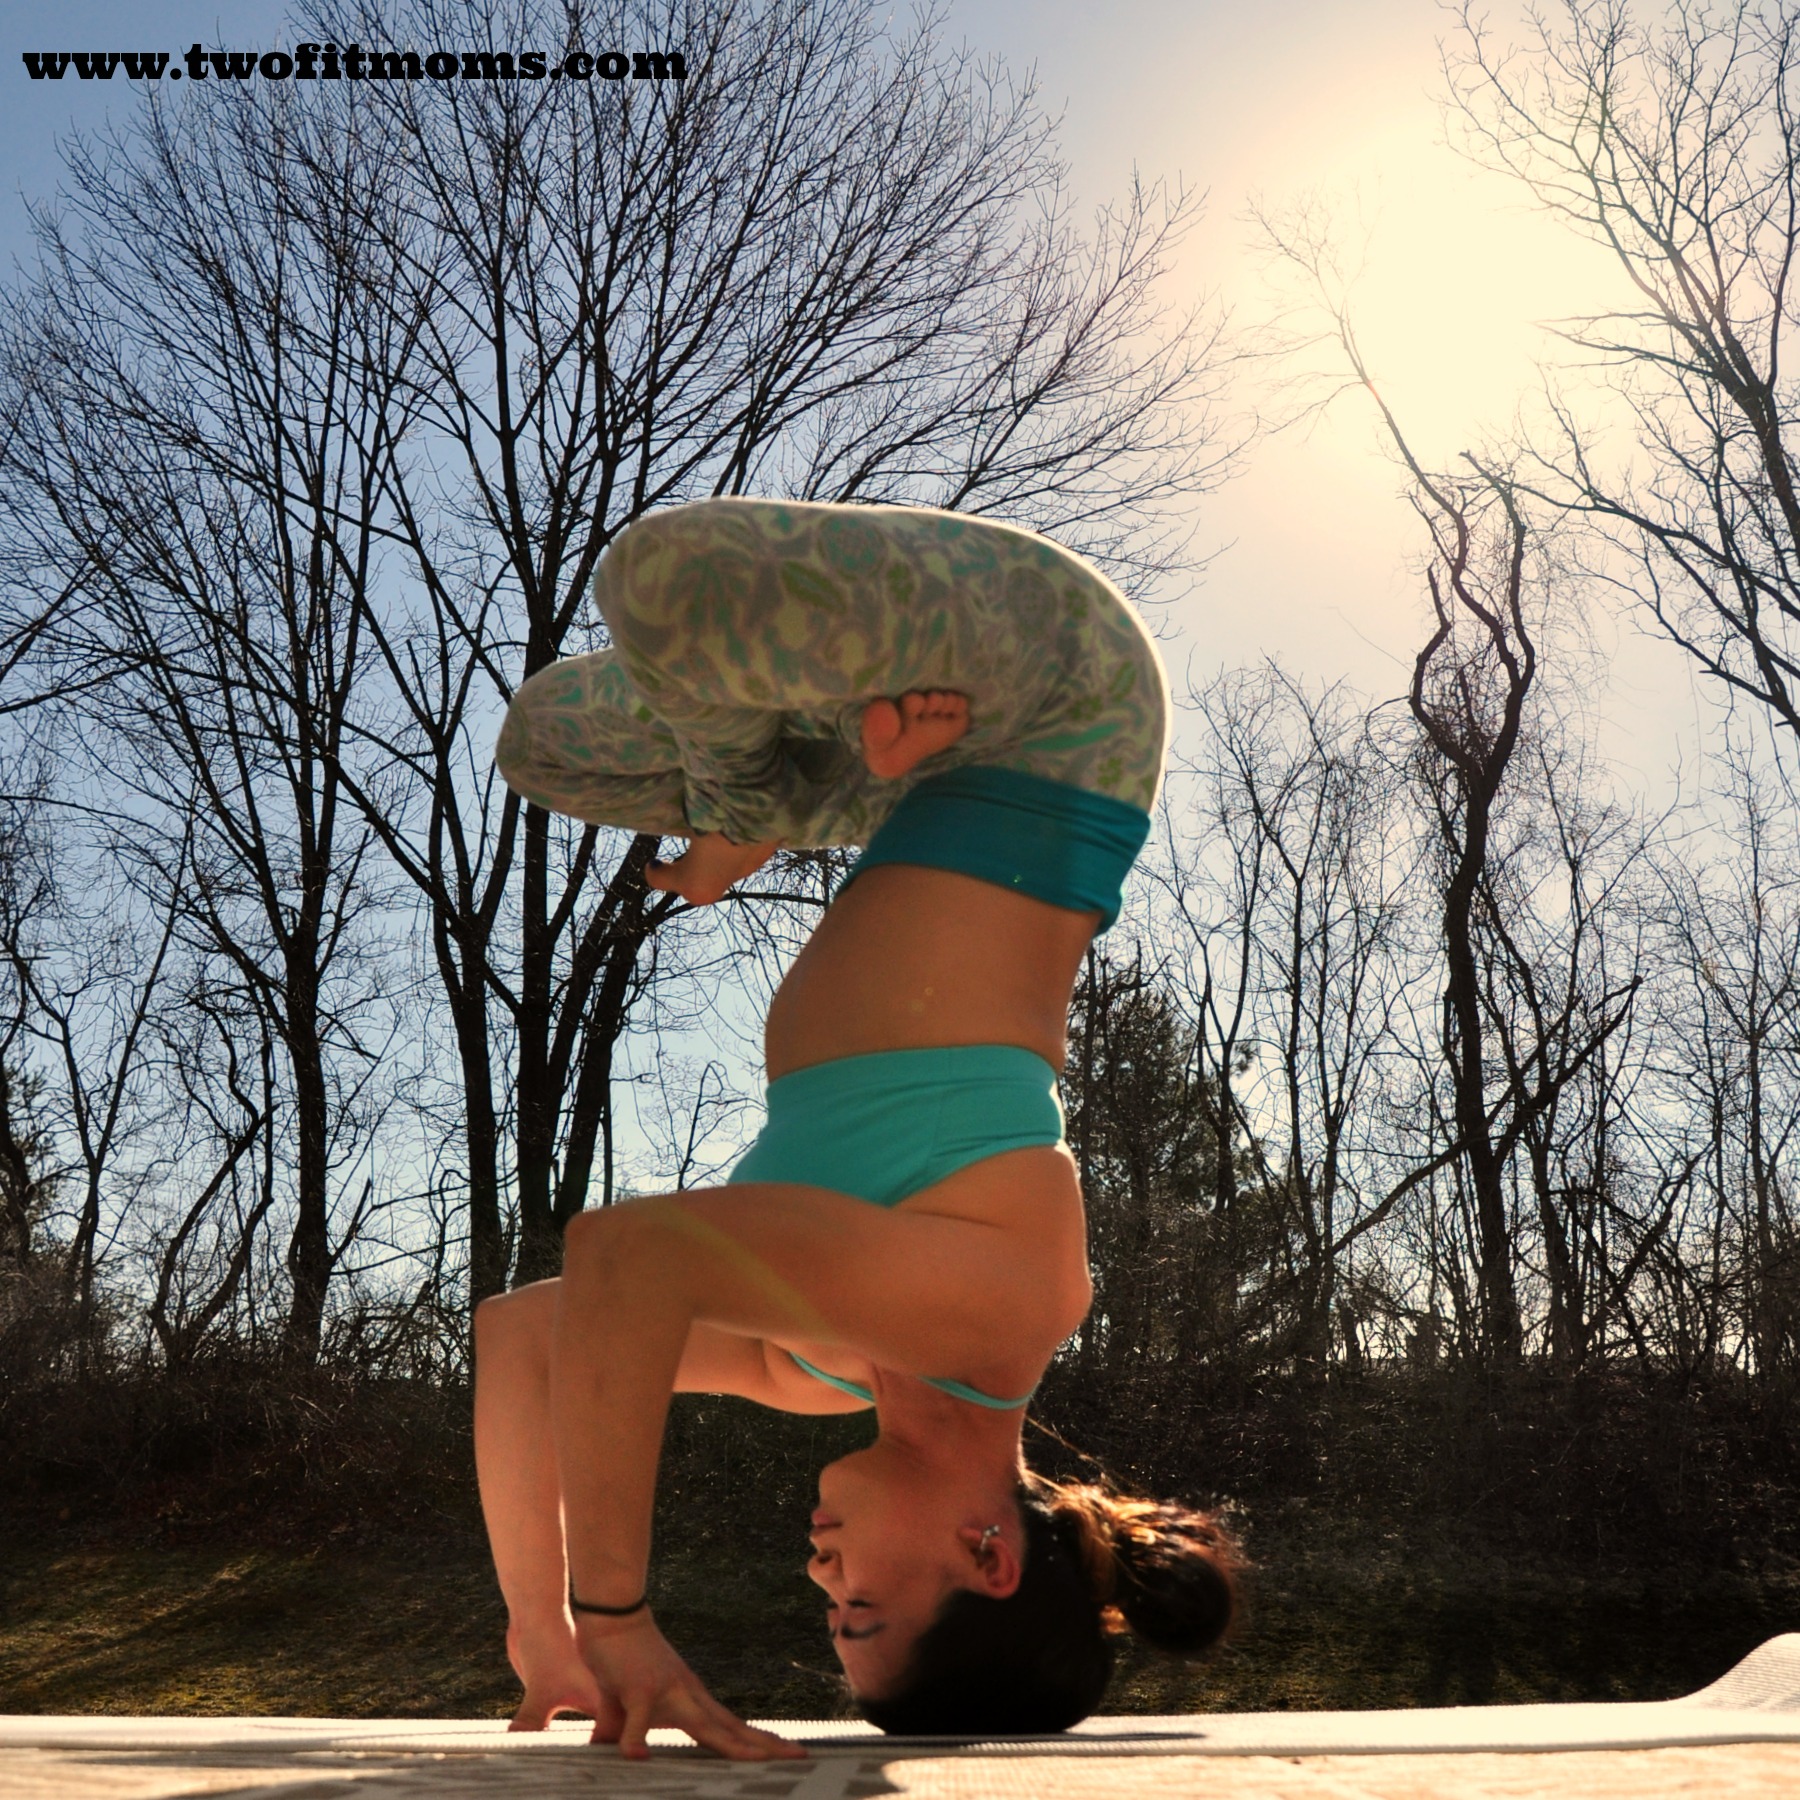
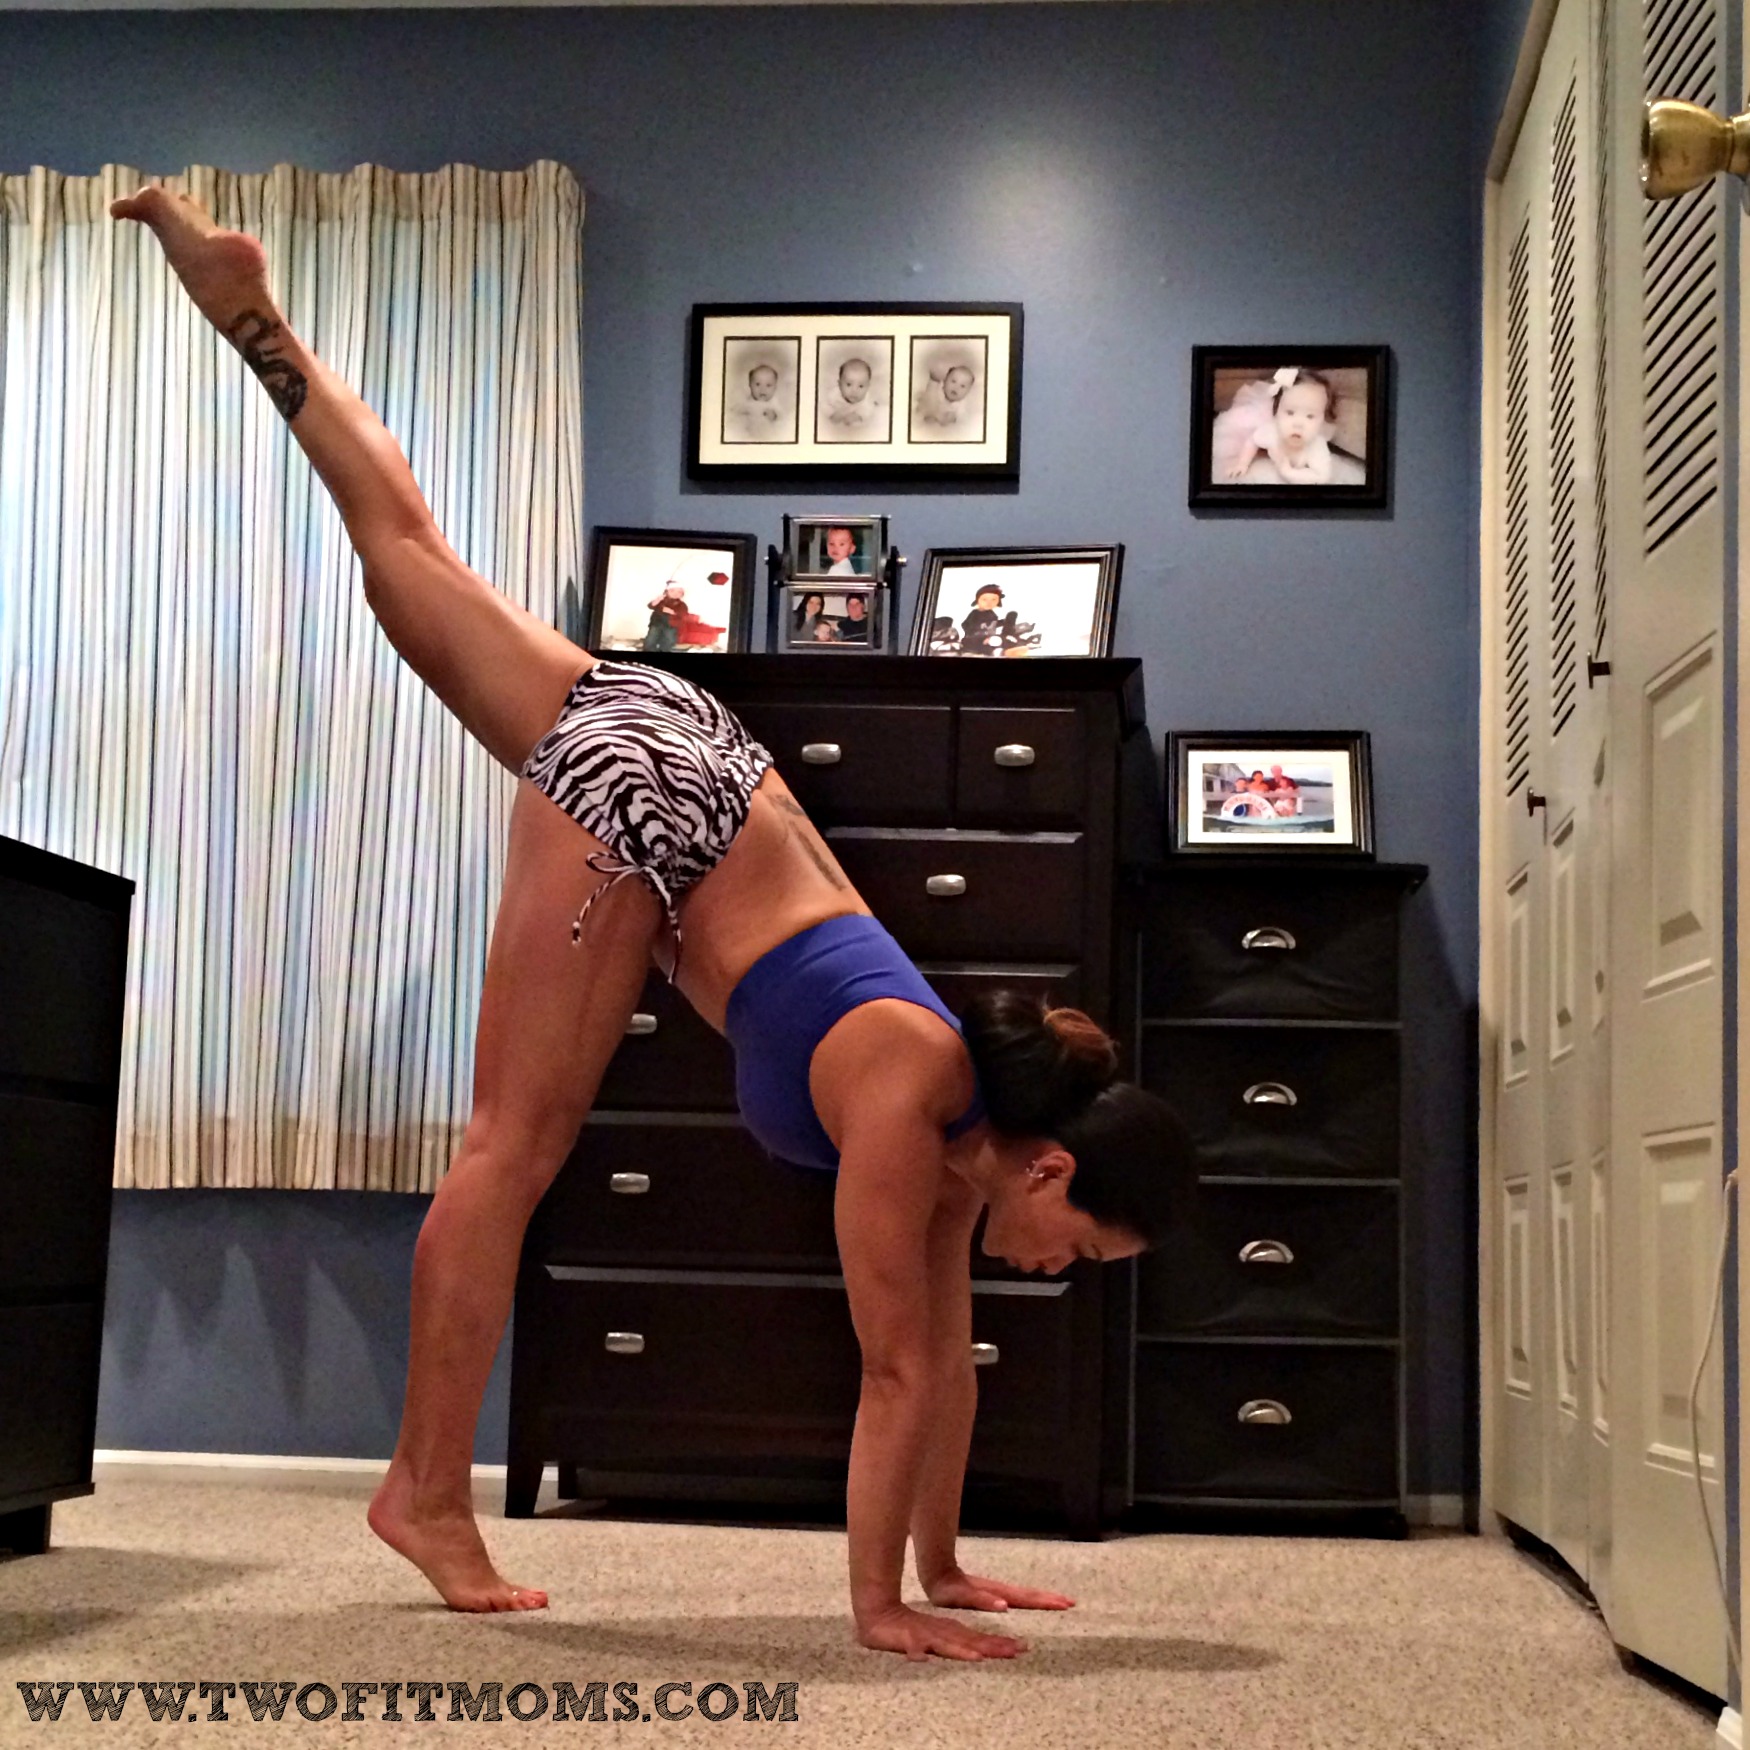
    #2: Square your hips!

    HANDSTAND PREP 2
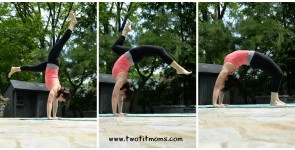
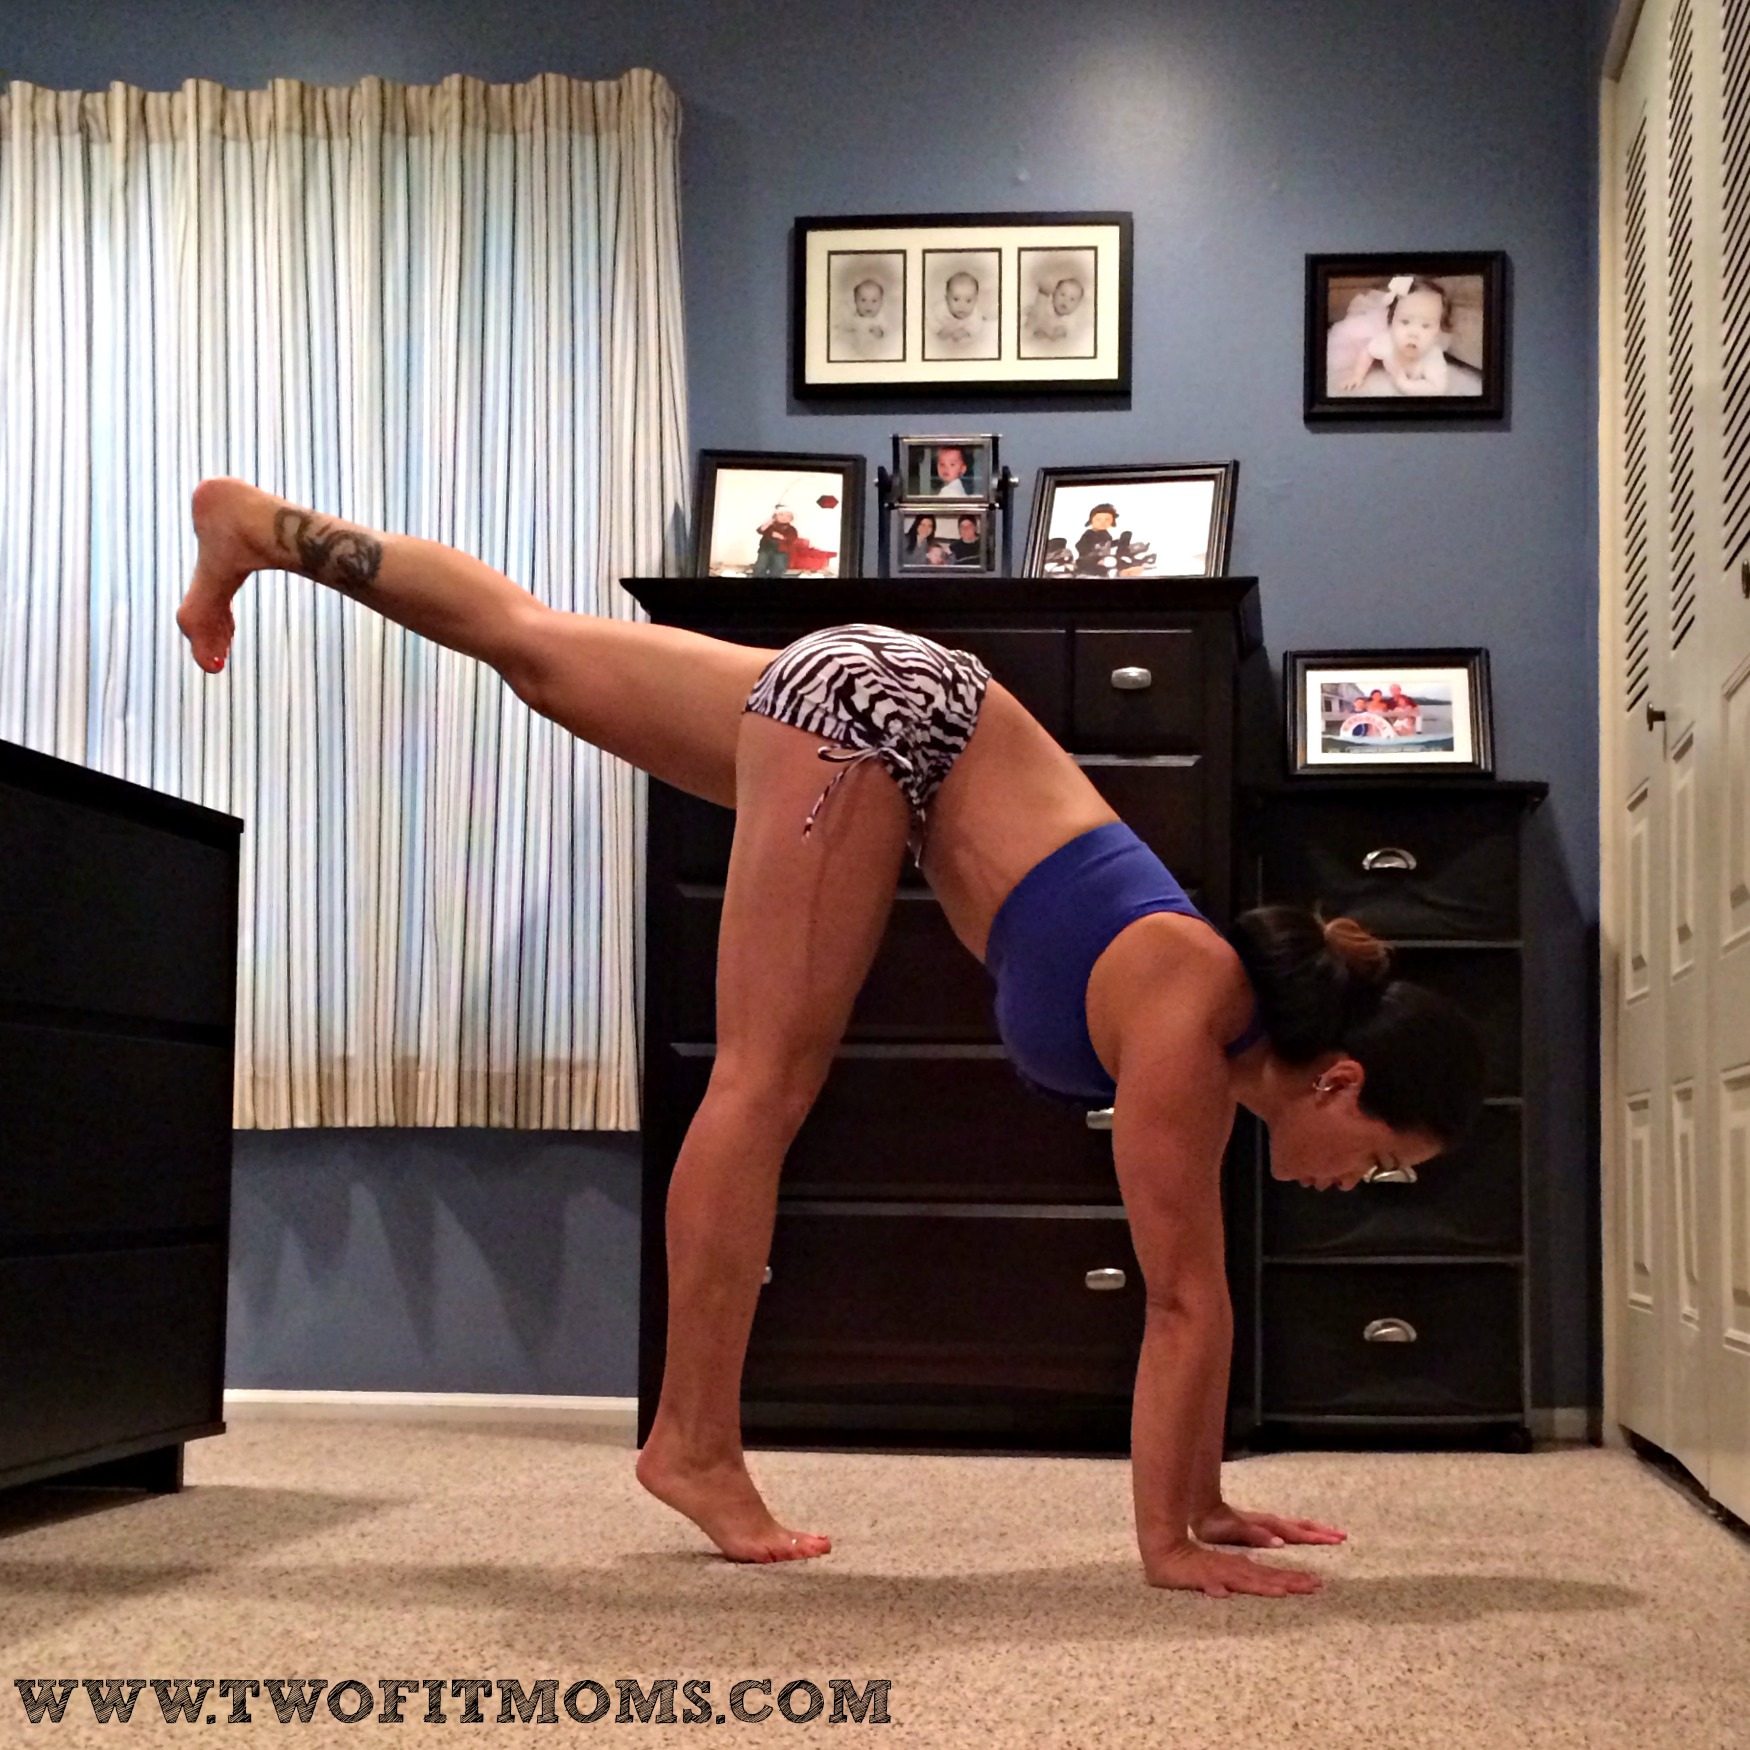
Keeping your hips square while kicking up may be the most important tip of all. When you go to lift your leg to kick up, be mindful of where your toes are pointing. Are they facing the ground or are they off to the side?  If they are off to the side, you are opening up your hip which can cause you to kick up tilted and, ultimately, fall down.

    Once you lift your leg, flex your foot, and internally rotate the inner thigh so your toes face down towards your mat. Another great tip to keep your hips square is to plug the femur bone (or thigh bone) into your hip socket.

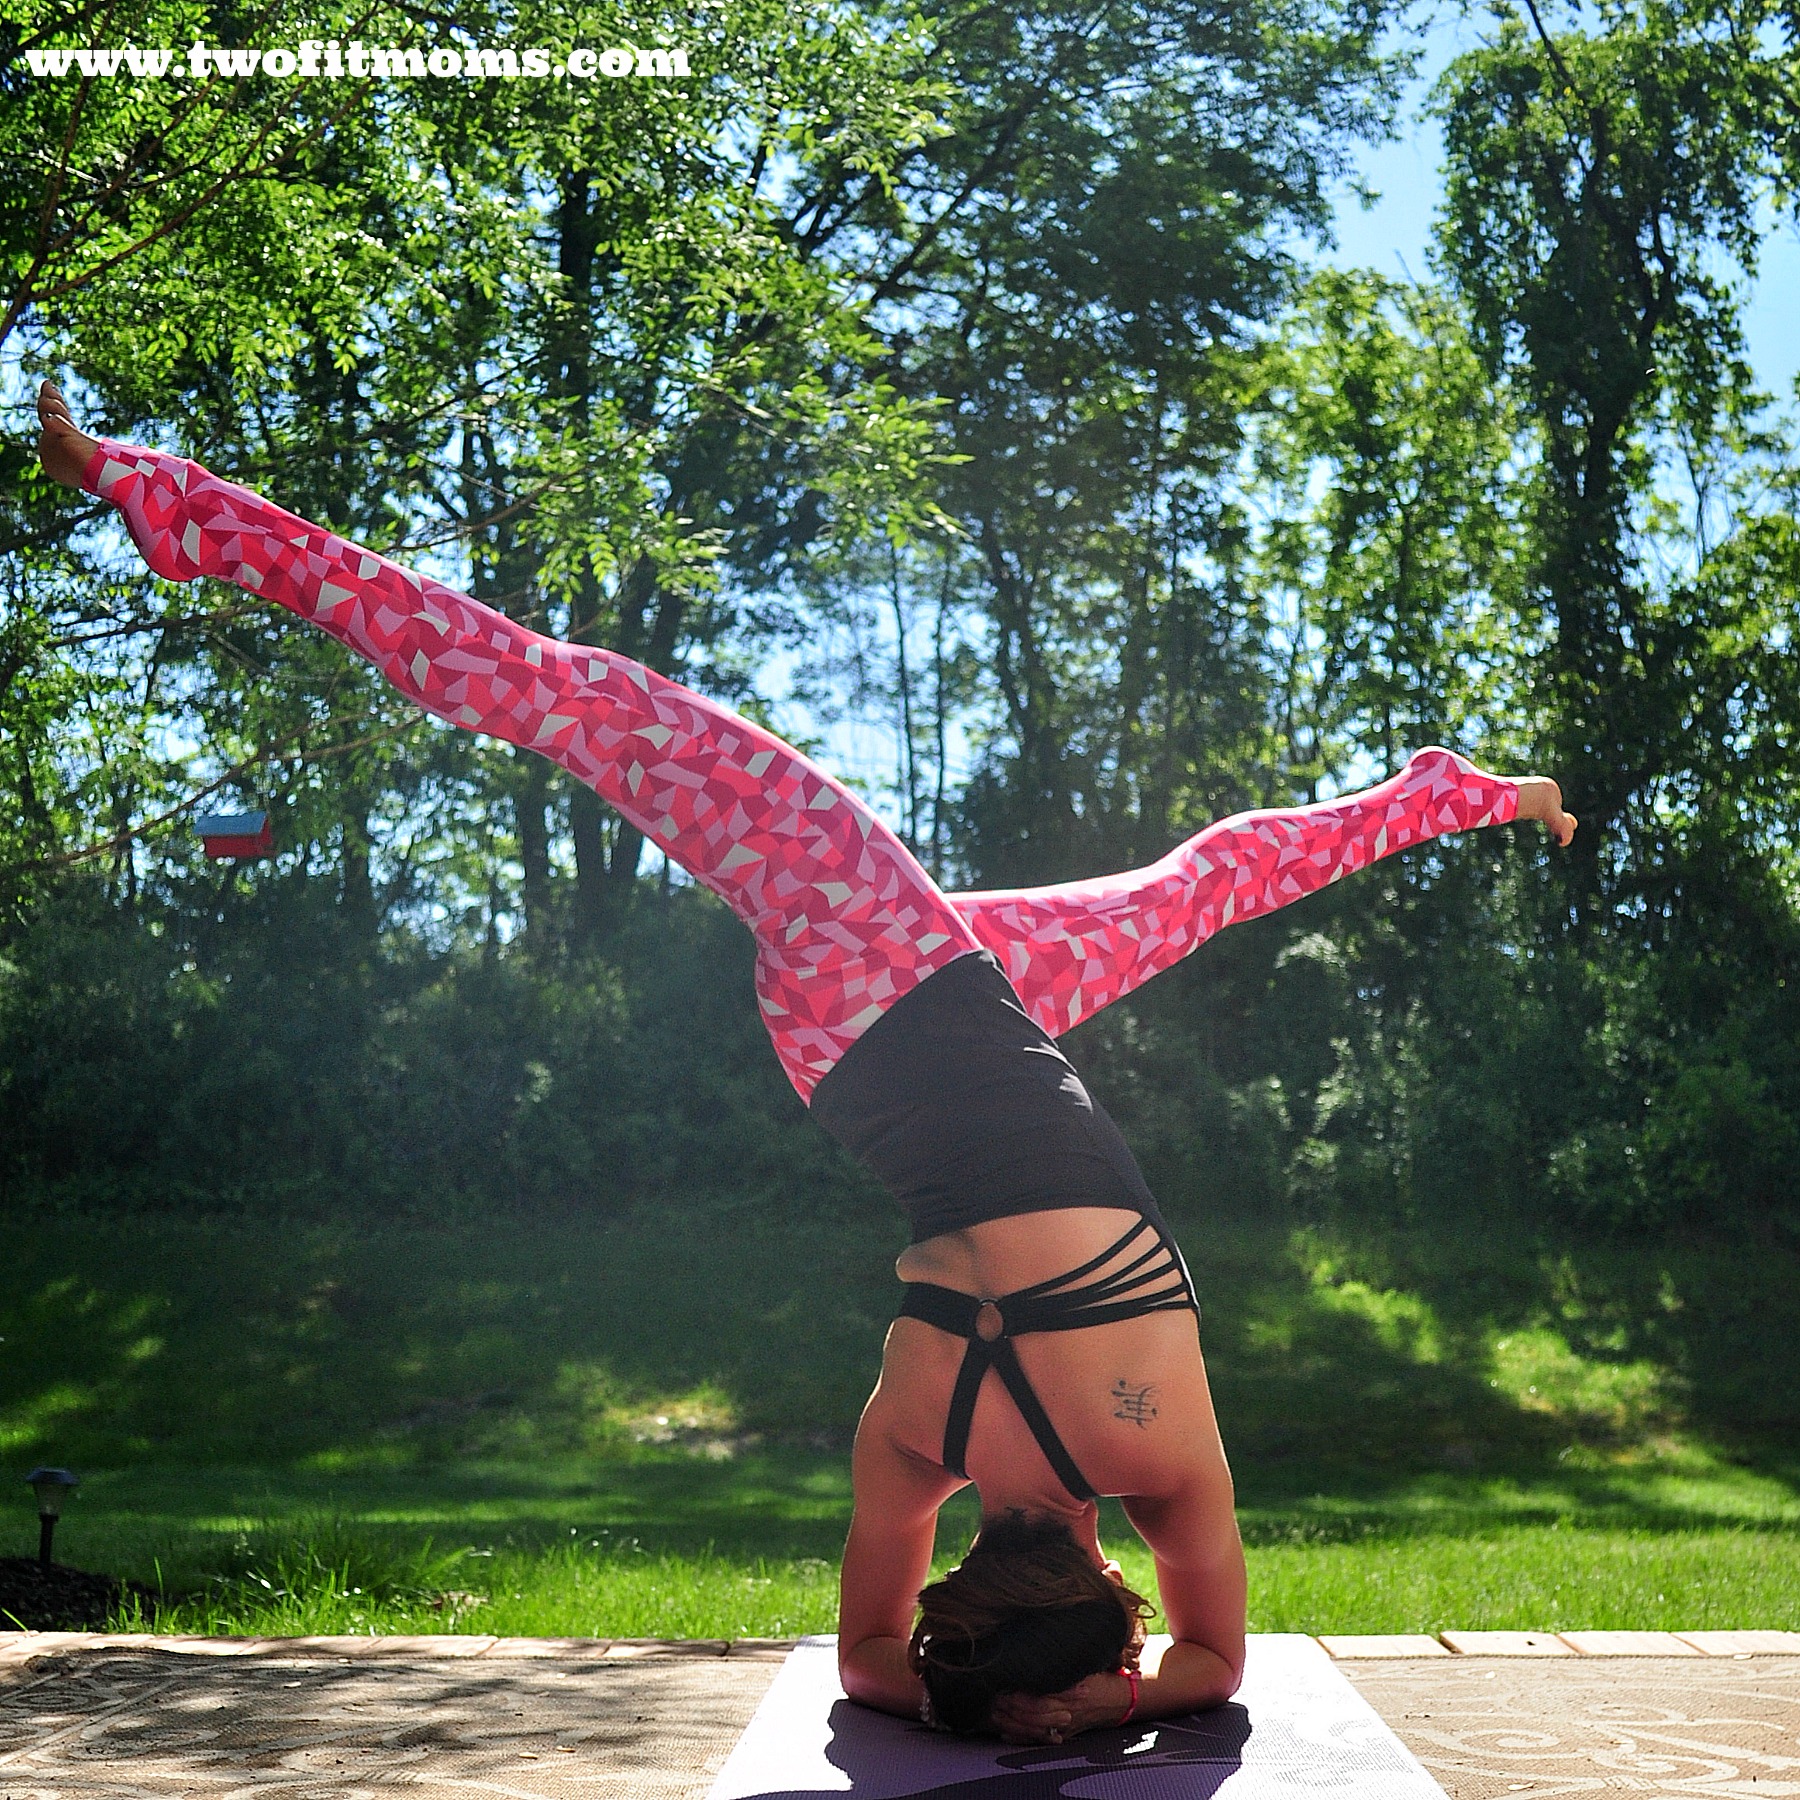
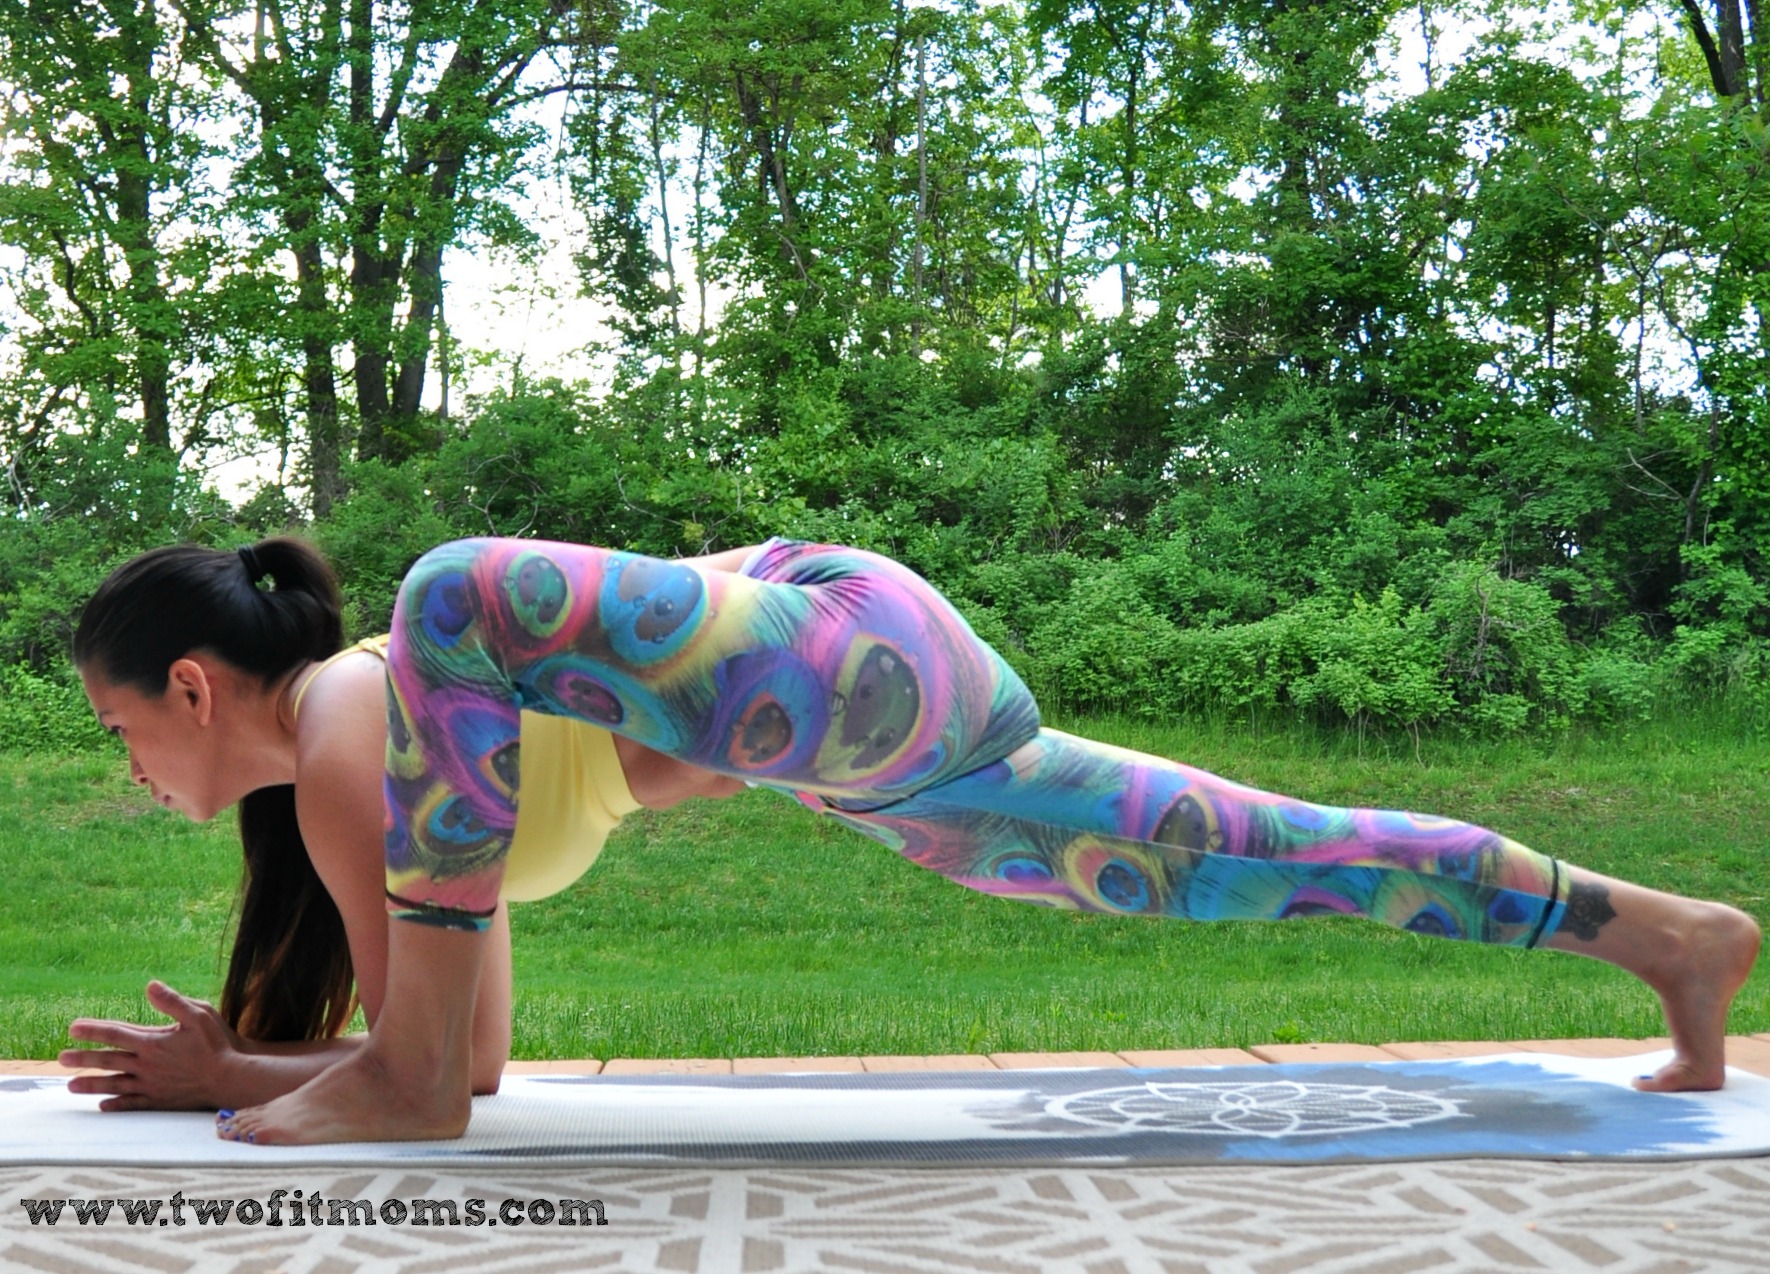
    #3: Move away from the wall!

     HANDSTAND PREP 1

    There is no shame in using the wall when learning to handstand.  In fact, I encourage it.  Unless you know how to gracefully fall into wheel or cartwheel out, having a wall as a safety net is your safest route.  You don’t, however, want to become overly reliant on the wall – at least not if your goal is to handstand without its assistance.  Therefore, I suggest practicing about a leg’s distance away from the wall, only using it when needed. Doing it this way will help you learn to control your kick ups and make it that much easier to handstand in the middle of the room.

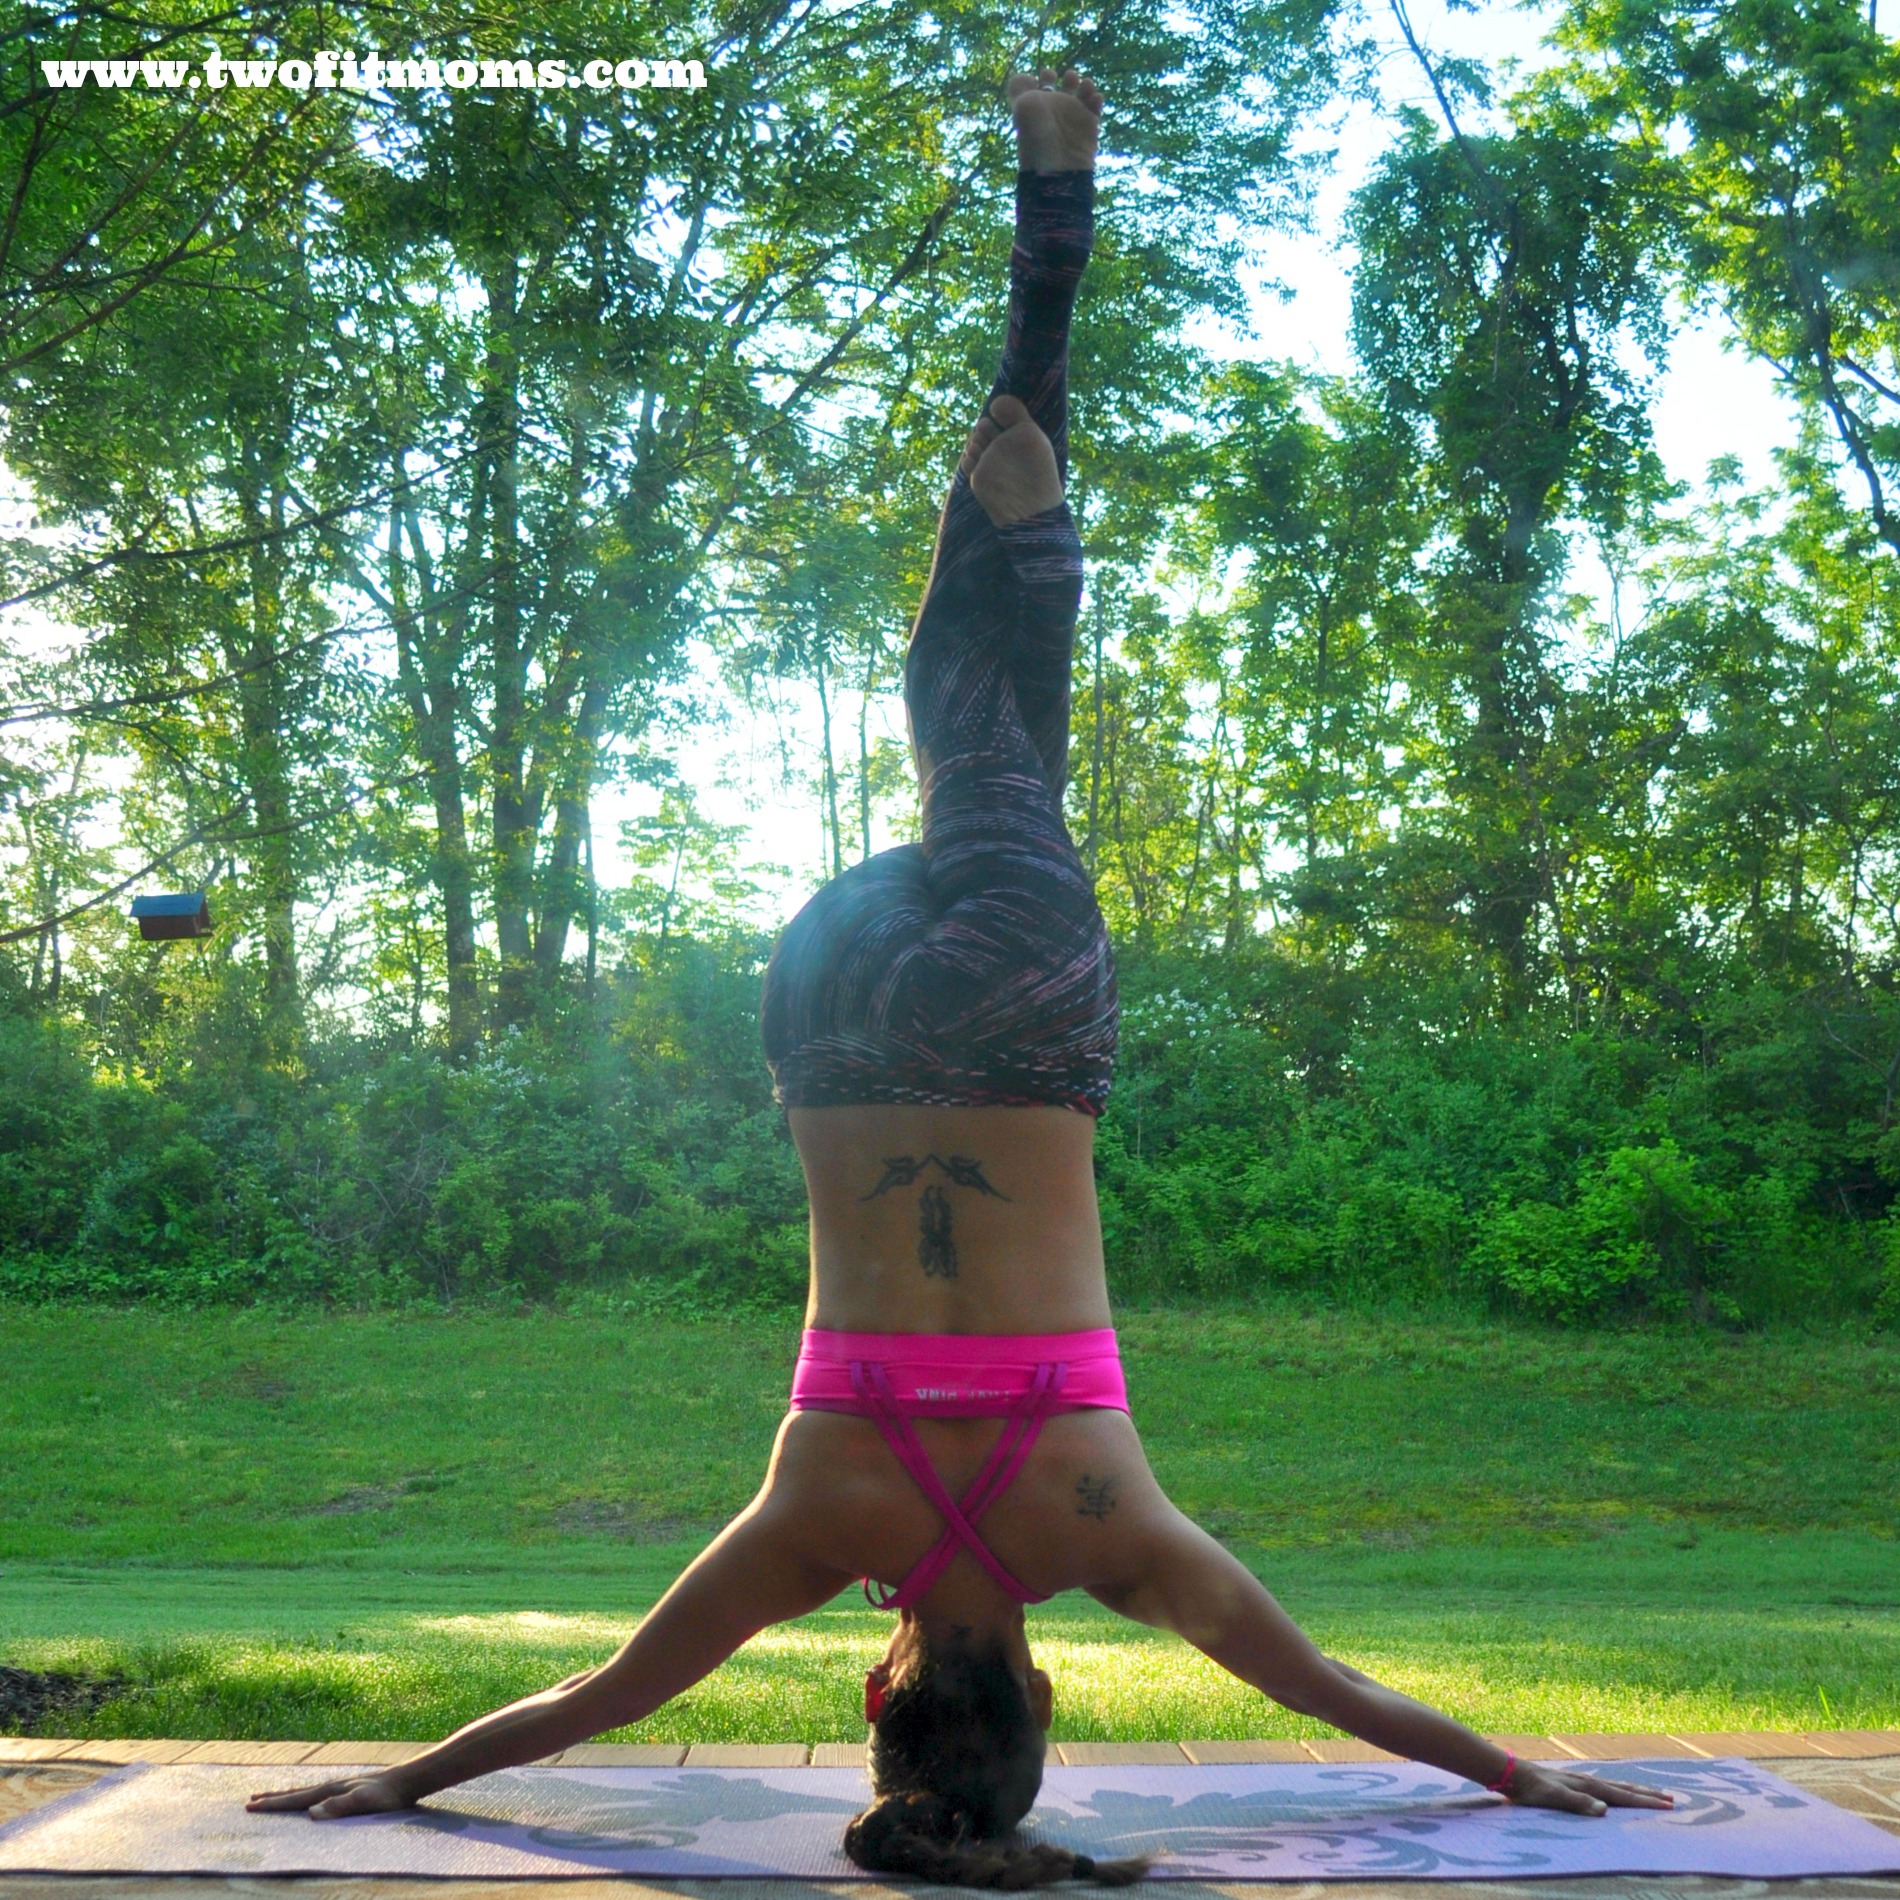
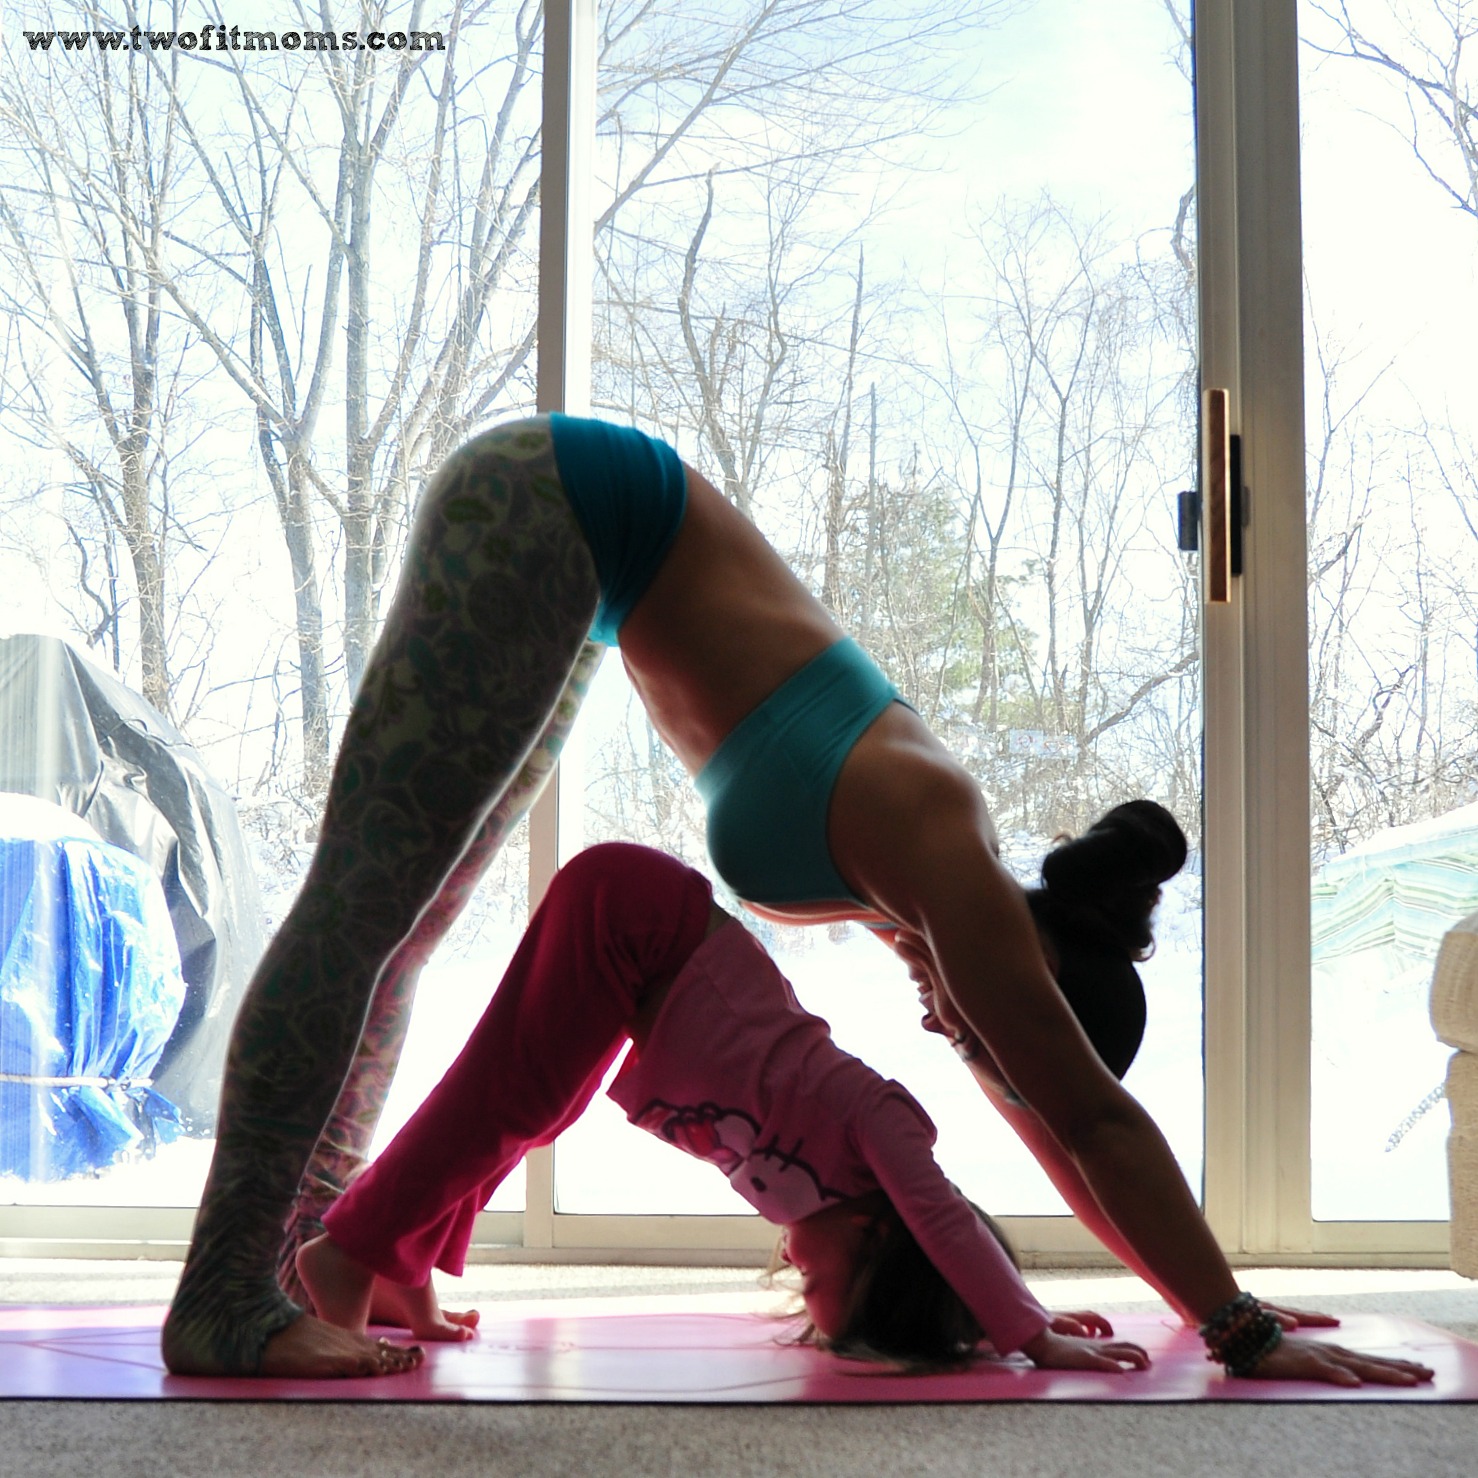
    #4: Learning to Balance

    If you are at the point in your handstand practice where you can gently kick up but cannot find your balance point when you bring your legs together, this exercise is for you!

    Start in tabletop position with your fingertips right at the wall, and notice the placement of your heels and your hands. Move your hands back now so your fingertips are where the heels of your hands were…Essentially you are now a hand’s distance away from the wall. (You may need to play with the distance at first.) Kick gently up to the wall (notice how softly I land), and extend both legs up.

    Press the crown of your head firmly into the wall and notice how my feet float off of the wall. My body comes into complete alignment. From here, you can learn what it feels like to have everything stacked, and you can also start to experiment with taking the crown of your head off of the wall.

    [KGVID poster=”http://www.twofitmoms.com/wp-content/uploads/2014/06/Video-Jun-09-9-51-26-AM_thumb25.jpg” width=”640″ height=”360″]http://www.twofitmoms.com/wp-content/uploads/2014/06/Video-Jun-09-9-51-26-AM.mov[/KGVID]

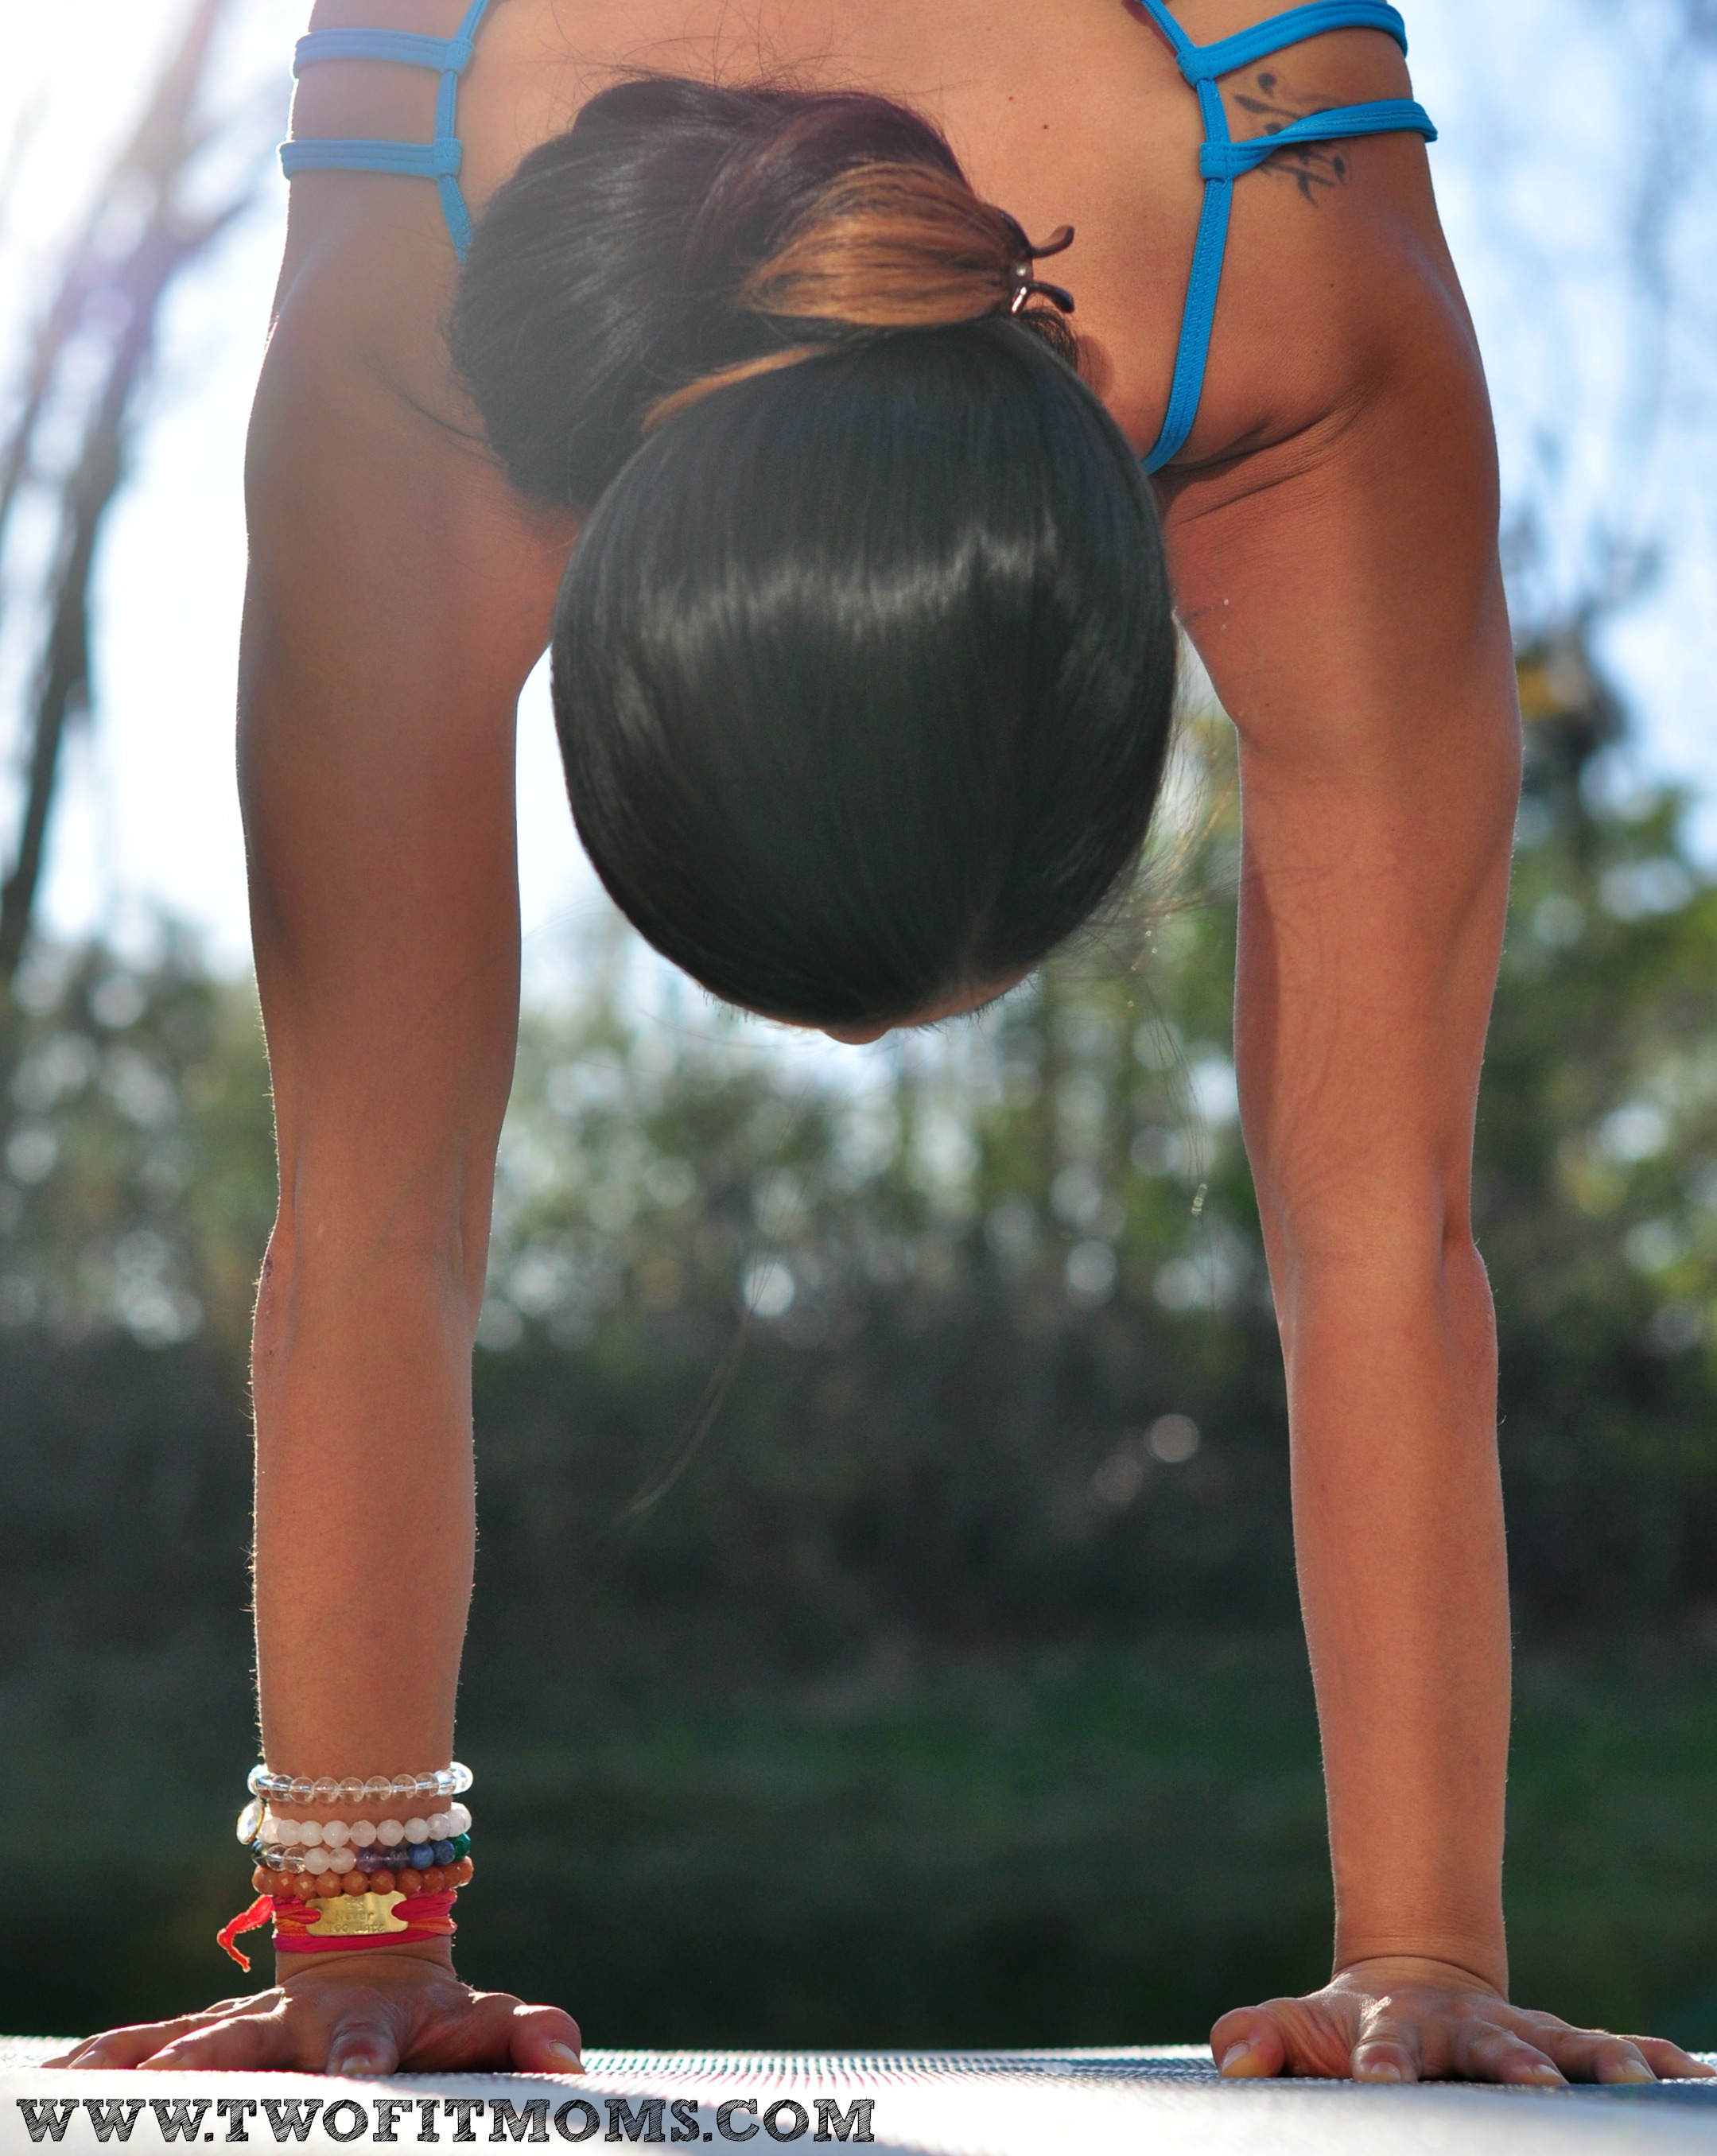
    #5: Slow down and have PATIENCE!

    handstand prep 3

    This last tip is probably the hardest.  First…Slow down!!! Everyone is quick to plant their hands down onto their mat and start kicking up at a frantic pace. Take a moment to set yourself up and check your alignment. Do this before each and every kick up attempt! If you are always rushing, you are decreasing your chances for success.

    Second…have PATIENCE!  Patience with yourself, patience in your practice.  Progress may be slow, you may get frustrated…breathe.  Slowly but surely you will reach your goal!


    XOXO

    Blog Signature

  • Daily Practice: Chaturanga Dandasana

    Daily Practice: Chaturanga Dandasana

    If you have ever taken a yoga class, you should be familiar with the pose, “Chaturanga”.  However, it is very likely you are not familiar with the correct way to get into this pose! Chaturanga Dandasana, or Four-Limbed Staff Pose, is essentially a tricep push-up.  It may look simple, but many yogis have trouble with this pose. Here are my recommendations for correctly getting into Chaturanga.


    Most commonly you will find Chaturanga Dandasana, or Chaturanga, for short, in a vinyasa that consists of Downward Facing Dog, Plank and Upward Facing Dog. Depending on the class you are taking, there could be 10 Chaturangas or 100! And, muscling through Chaturanga with bad form can wear out your shoulders, your elbows and strain muscles in your chest and back. Here are the key steps to safely chaturanga-ing your way through a vinyasa class!

    – From Downward Facing Dog, shift forward into Plank Pose, or the top of a push up. Your arms are perpendicular to your mat. You are a straight line from your head all the way down to your heels, and your shoulders stack directly over your wrists. Draw your shoulders away from your ears and down your back, keep the belly engaged, and try not to let your buttasana sag. Gaze slightly forward.

    – Now, I want you to think of your arms and shoulders as a ferris wheel. Your shoulders are at the top of the wheel and about to make their descent down towards the earth. If you drop them straight down by just bending your elbows, you plummet to the earth.  Not good. Instead… Slowly start to shift forward as seen in the top picture below. It’s a slight movement that brings the shoulders beyond the wrists.

    chaturanga collage 1

    chaturanga collage 2

     – Continue to squeeze the elbows in as you slowly bend them to a 90 degree angle.

    – Shoulders remain broad down your back, the front of your shoulders remain lifted and your belly continues to be engaged. Gaze down or slightly forward, but keep your neck soft.

    If you cannot do the full Chaturanga with proper form, or you are tired, MODIFY and do Caterpillar Pose.

    Caterpillar Pose is a great alternative, and allows you to practice keeping your elbows pinned to your sides and forearms perpendicular to the ground. From Downward Facing Dog, shift slightly forward and lower your knees, chest and chin to the ground. Your elbows hug into your body, your hips and buttasana remain high.  From this position you can slide forward into your Upward Facing Dog.

    Catepillar pose

    As always, be mindful in your practice.  Take a few pictures or even a video to see your form, and make adjustments if necessary.

    XOXO

    Blog Signature


  • Handstands:  The Art of Falling

    Handstands: The Art of Falling

    If you are ready to move your handstand practice away from the safety of a wall, you must embrace the art of falling.  I call it an art because there is actually a bit of technique involved. Once you master the technique, you will not be afraid of practicing in the middle of a room.  You will realize that falling out of any inversion can be a controlled transition from one pose to another.  When you feel your body wavering as you balance on your hands, you will not flail around and then land flat on your back.  You will be armed with a game plan—a real exit strategy.  You will fall (or transition) from handstand into wheel pose.TheArtofFalling

    Practice Wheel Pose
    Before moving your handstands away from the wall, you MUST be very comfortable in wheel pose.  You will be falling into this deep backbend from a height, so you certainly don’t want to fall into this pose if you are uncomfortable or feel any strain at all when you lift into wheel from the floor.  Please review the proper form for wheel pose HERE.

    If you cannot do this pose with ease, continue to practice your handstands with a wall.  Every day, you can continue to work on your backbends and heart/shoulder opening stretches until wheel pose is no longer a struggle.

    At this point, if you are uncomfortable with wheel pose, you may be wondering if there are other alternatives to exiting a handstand.  Yes, there are other options, but I don’t like teaching them.  Falling into a cartwheel, for example, is a very popular exit strategy from handstand, but it doesn’t make sense for beginners.  As a recent beginner myself, I know that once you begin to lose your balance in a handstand, you do not have enough control to do anything but fall straight back.  Attempting to do anything else (like lift one hand to cartwheel to the side) is dangerous and could result in injury.  Trust this process.  If wheel pose is difficult, keep practicing your backbends each day.  Soon enough, you will be practicing handstands in the middle of the room, and you will stay safe because your hands will be rooted in one spot and remain there for the duration of any fall/transition.

    Practice the Transition
    Make sure you are warmed up before practicing this transition.  Kick up into any variation of handstand that feels stable, and when you begin to lose your balance, don’t fight the natural momentum.  The inclination will be to fall straight back, and that is what you will do.

    The most important step in this transition is to maintain straight arms the entire time.  If you bend your elbows during the fall, you might hit your head or land flat on your back.  Just think—strong, straight arms.  Repeat it over and over in your mind.  One way to stay strong is to grip your mat firmly with your fingertips.  By maintaining an engaged feeling in the tips of your fingers, you will be reminded to engage the entire length of your arms by staying strong and straight.

    If You are Scared…
    Kicking up into handstand in the middle of a room and then falling back into wheel requires a huge leap of faith.  You must believe that you have the strength in your arms, the flexibility in your back, and the overall balance necessary to land on your feet in wheel pose.  If you are not convinced of your own ability to do this, don’t be discouraged.  You can practice transitioning into wheel from handstand WITH the safety of a wall.

    To begin, lie down on your back with your knees bent, the soles of your feet flat on the ground, and the tips of your toes against a wall. Review your form before continuing—make sure that your heels are as close to your bottom as possible.  Bend your elbows, and bring your hands alongside your ears, with your fingers pointed toward your body.  You are now set up on the floor as if you were going to lift into wheel pose with your toes against a wall.  Take note of where your hands are relative to the wall.  THIS will be your starting point for your handstand practice.  No need to lift into wheel pose right now.  Go ahead and stand up, and place your hands down onto this starting point that you just determined.  Kick up into handstand, and when you lose your balance, allow your legs to fall against the wall.  Keep your arms strong and straight, and begin to walk your feet down the wall onto the floor into wheel pose.  Repeat this exercise as many times as necessary to become accustomed to the feeling of transitioning from handstand to wheel.  Once you feel confident, go ahead and try the transition in the middle of the room.

    Stay safe, believe in yourself, and enjoy the process.

  • Daily Practice: Opening Up the Hips

    Daily Practice: Opening Up the Hips

    DSC_9761a

    When I became serious about my yoga practice, getting into inverted lotus was one of my goals. However, it was no small feat with naturally tight hips (which became even tighter after two kids!).  The pose seemed nearly impossible. Even seated lotus was hard…my knees would bother me, and my ankles would hurt. Opening up my hips was the obvious answer and only after adding hip openers to my daily practice did I see any progress. Here are the five hip openers that I try to incorporate daily. I recommend having a block nearby if you have tight hips. As always, be mindful of your practice and move at your own pace!

    #1: Reclined Thread the Needle

    DSC_9567aa

    – Start out lying down with your feet planted on your mat.

    – Cross your right ankle over your left thigh, just above the knee. Flex your right foot.

    – Bring the legs into your body. The right hand will go through the triangle in your legs.

    – Grab onto the back of your left thigh or you can grab onto your left shin.

    – Hug the legs into you.

    – For a deeper stretch, push the right elbow into your inner right thigh to open the hip even more.

    – Hold for about 10 breaths, then switch sides.

     #2: Easy Seated Hip Opener

    DSC_9586aa

    – Sit on your mat and extend both legs out in front of you.

    – Bend the left knee and plant the left foot firmly on your mat…not too close to your body at first!

    – Cross the right ankle once again over your left thigh, just above the knee.

    – Bring your hands behind you and sit up tall, bringing your chest towards your right shin.

    – For a deeper stretch, move the left foot closer to your body.

    – Hold for about 10 breaths, then switch sides.

    #3: Warrior II

    DSC_9674a

    This might seem weird, but holding a standing posture like Warrior II builds heat in your hips.

    – From Downward Facing Dog, step your right foot in between your hands and spin the back heel down.

    – Windmill the arms up to shoulder height, straight line from fingertip to fingertip.

    – Right knee stacks directly over the right ankle.

    – Right knee is parallel to your mat.

    – Shoulders stack directly over your hips; shoulders relax away from your ears.

    – Gaze out past your right middle finger.

    – Hold for 10 breaths, then switch sides.

     #4: Lizard PoseDSC_9642a

    DSC_9651aa

    – From Downward Facing Dog, step your right foot to the outside of your right hand and lower your left knee onto your mat.

    -Drop down on your forearms. If this is highly uncomfortable, use a block to bring the ground up to you.

    – Keep your gaze forward; think Upward Facing Dog in your torso.

    – Keep your right knee squeezing in at first. Then if accessible, roll onto the outside edge of your right foot. Keep your right foot flexed.

    – For a deeper stretch, curl your back toes under and lift the back knee up.

    – Hold for 10 breaths, then switch sides.

    #5: Pigeon Prep

    DSC_9617aa

    – From Downward Facing Dog, bring the right knee behind the right wrist and drop the shin down onto your mat. Depending on how open your hips are, the shin may be parallel to the top of your mat or closer in towards your body.

    – Square off your hips. If you are way up off of your mat when you do this, place a block or blanket underneath you.

    – Take a peak behind you and make sure the back leg is going straight back.

    – Sit up tall, then walk your hands forward over your right shin. You can rest your forehead on a block, your hands or the ground.

    – Hold for 10-20 breaths, then switch sides.

    Remember to always be patient with yourself during your practice. Your hips will open up with time and consistent practice.

    XOXO

    Blog Signature

  • Instagram Quick Tip:  Creating Inspirational Posts

    Instagram Quick Tip: Creating Inspirational Posts

    When I first joined Instagram, I found myself taking lots of screenshots of inspirational posts— amazing quotes, yoga photos, running trails, exotic locations, and fitness routines.  As I scrolled back through these captured images on my phone’s camera roll, I realized that most of Inspirationthese posts had one thing in common:  they all had some sort of caption or inspirational quote right on the image itself.  I assumed that these images were all professionally produced until I came across the Over app.  Over will help you create your own inspirational image by quickly adding a quote or your own motivational words to a photo.

    There are many typography apps on the market, but this app is my favorite because of the variety of professional looking fonts that are offered, and the ease of use.  Even if you have very little experience with apps or photo editing, you will find this program to be intuitive and simple to use.  The app gives you complete control over the size, alignment and color of the font, so each photo can be customized to your liking.  If you are looking for a free version of this app, download Overgram instead.  The functionality is the same, but each image will be branded with an Overgram watermark unless you upgrade.

    Go ahead and give the free version of this app a try to see if you like it.  Think of your favorite quotes.  Look through your photos to find your most inspirational images.  Combine the two to create your own inspirational posts for others to enjoy and share on Instagram.  It’s fun, it’s easy, and you never know whose life you may touch with the right words and the right image at the right time.  Enjoy.

  • Daily Practice: Heart & Shoulders

    Daily Practice: Heart & Shoulders

    Getting into King Dancer, Forearm Hollowback or any Wheel variation depends on opening your heart and shoulders.  For the longest time, I was convinced that I couldn’t do overhand grip poses because my back just wasn’t naturally bendy. In reality, it was my chest and shoulders that were too tight to reach back.  So, now, heart openers and shoulder openers are a part of my daily practice.  In fact, you might want to consider incorporating them into yours! I tend to rely on blocks and a strap for these exercises, so make sure to have them handy!

    DSC_3882b

    Here are the top 5 heart and shoulder openers that I practice daily.

    #1: Relaxing Heart Opener

    DSC_8195w

    DSC_8216w

    Blocks are a great way to open up your chest and relax at the beginning of your practice. Depending on your level of flexibility, you can play with the height of the blocks and also the number of blocks that you use. Whatever level you choose, place one block between your shoulder blades as you lie down onto your mat. Use a second block under your head or, if it’s comfortable, your head can rest on your mat. Let your arms fall open to your sides or you can place them overhead. I usually stay here a minimum of two minutes and up to five minutes. Also, feel free to deepen the stretch as your heart opens up.

    #2: Clasp Your Hands

    DSC_8242w

    Clasping your hands behind your back is a great way to open up your upper body!  And the great news is…you can add this to almost any standing posture! As you move through your flow, incorporate this into your Standing Forward Folds, Warrior Poses, Lunges and even Cobras.  Try to keep your palms squeezing together as you straighten your arms and do not forget to change your grip as well!

    #3: Bow Pose

    DSC_8269w

    I love doing about three rounds of Bow Pose at the end of my practice.  Each round I hold for about five deep breaths. The trick here is to let your feet do most of the work! After you grab onto the outside edges of your ankles, kick them into your hands. The strength of your legs will lift up your heart. Don’t fight it, let your arms extend back, let your heart open.

    #4: Overhead Strap Extensions

    DSC_8286w

    Time to grab your trusty yoga strap or belt!  Start out by holding it out in front of you.  Grip the strap much wider than your shoulders to begin and pull it straight. From here, slowly extend it up and over your head…the entire time, keeping the strap taut. Repeat a few times and then move your hands slightly closer and repeat.

    #5: Overhand Grip Prep

    DSC_8318w

    If you are working on your overhand grip, this is the perfect exercise to explore what it feels like. Stand on one end of your strap or belt and step the other foot forward for support. Grab the other end of the strap with one hand and bring it up overhead so you can comfortably grab the strap with the other hand.  With your arms squeezing in, bend your elbows and slowly start to walk your hands down the strap towards the ground. Stop when you feel the stretch and take five to eight breaths. Release, shake it out, and then repeat this two more times.

    Remember to move slowly and mindfully, especially with any shoulder exercises.

    XOXO

    Blog Signature


  • 10 Reasons I Do Instagram Yoga Challenges

    10 Reasons I Do Instagram Yoga Challenges

    Over the past year, Laura and I have been very active in the Instagram yoga community.  We’ve hosted some of the very first yoga challenges offered on Instagram, and we continue to remain active in hosting and participating in challenges today.

    Since our early days of posting very detailed step-by-step picture tutorials, we’ve watched thousands of people connect and grow a virtual Instagram yoga community just by attempting the GrasshopperPrep
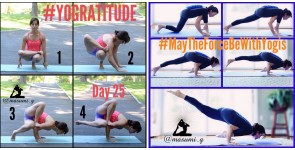
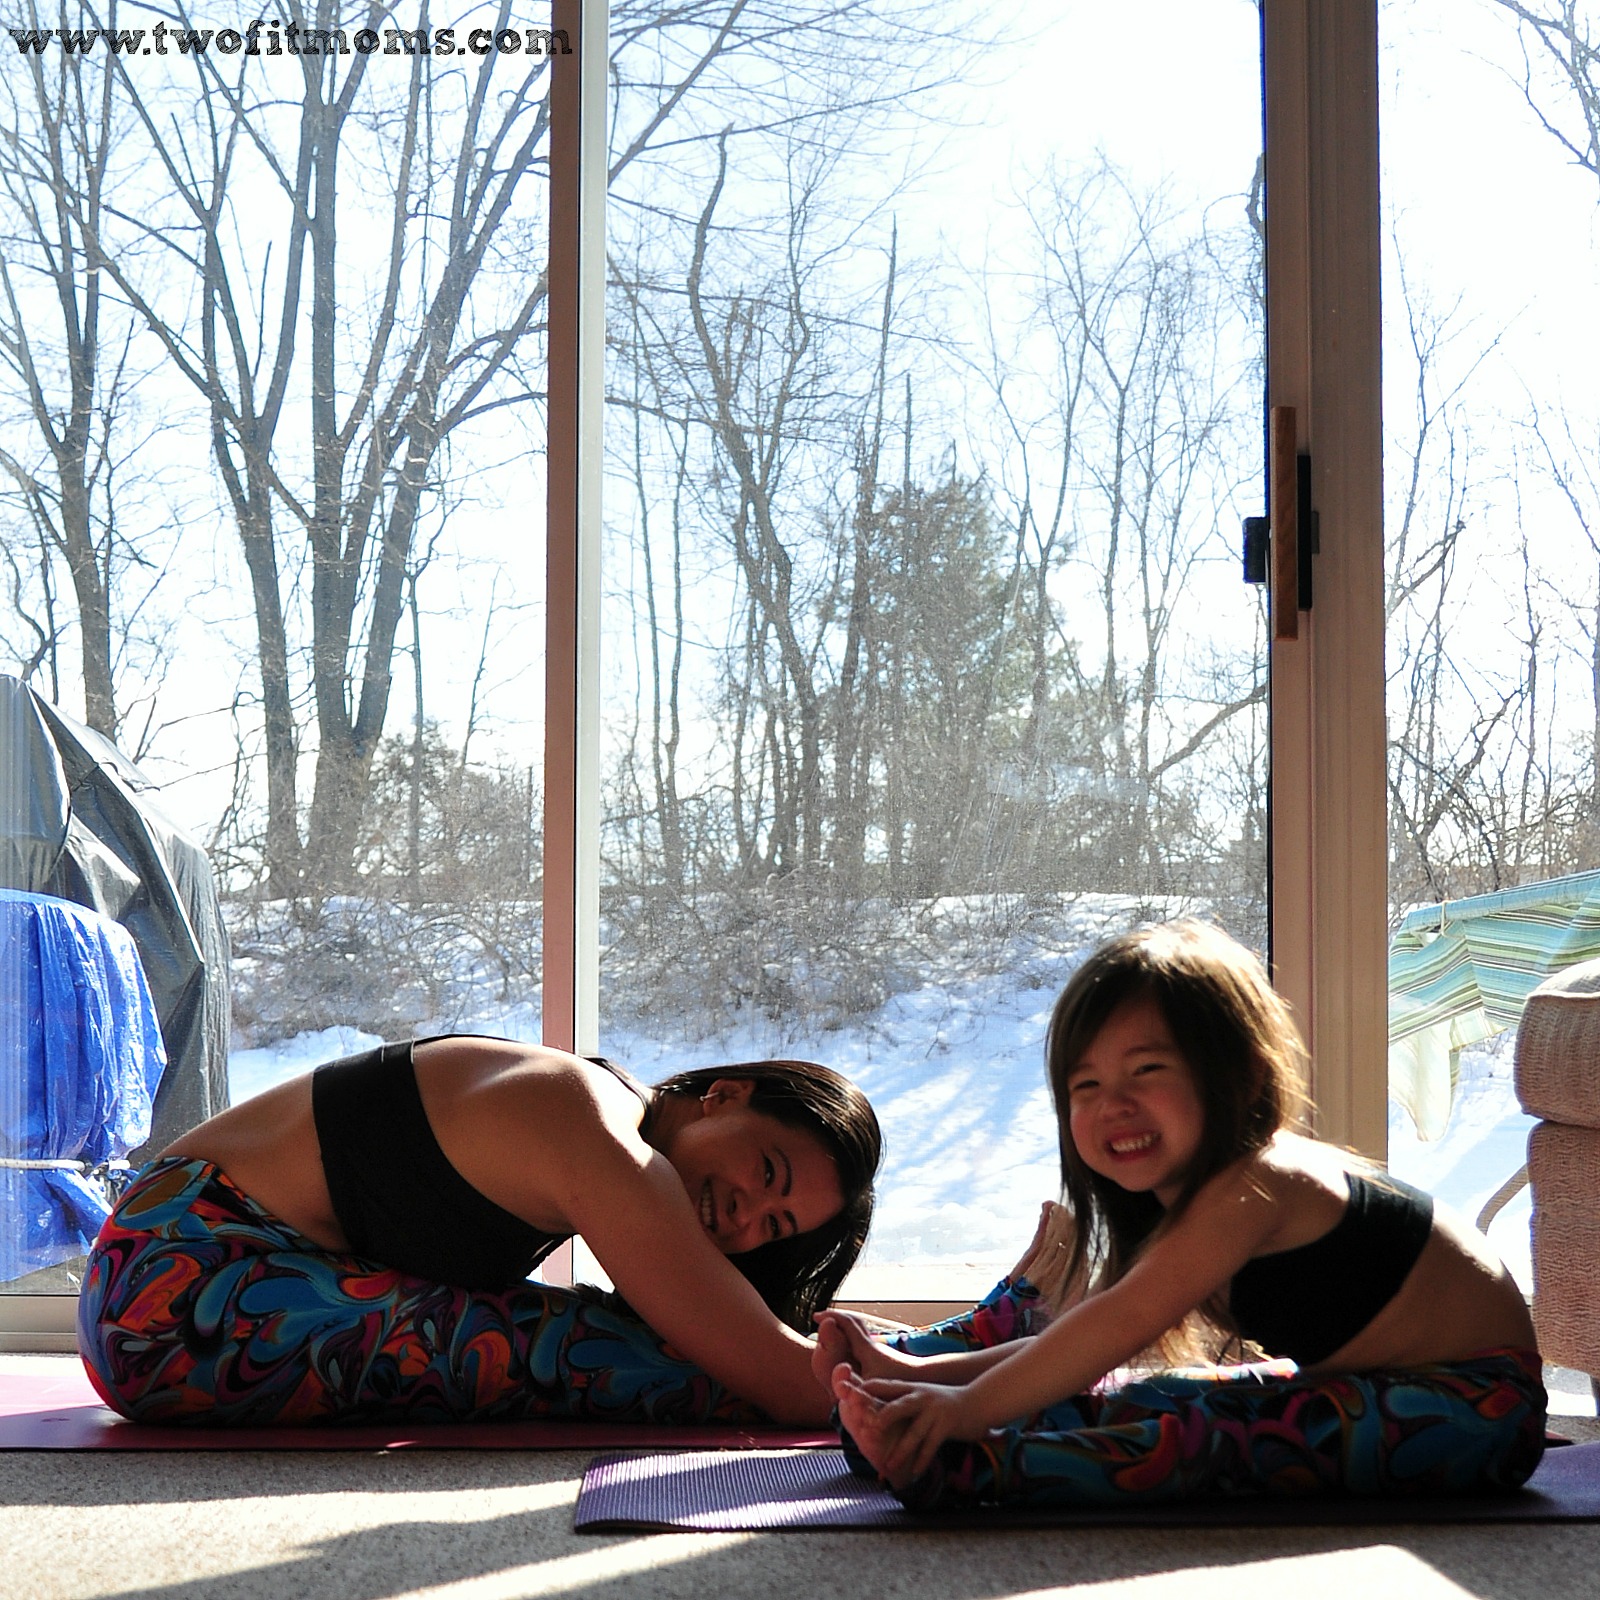
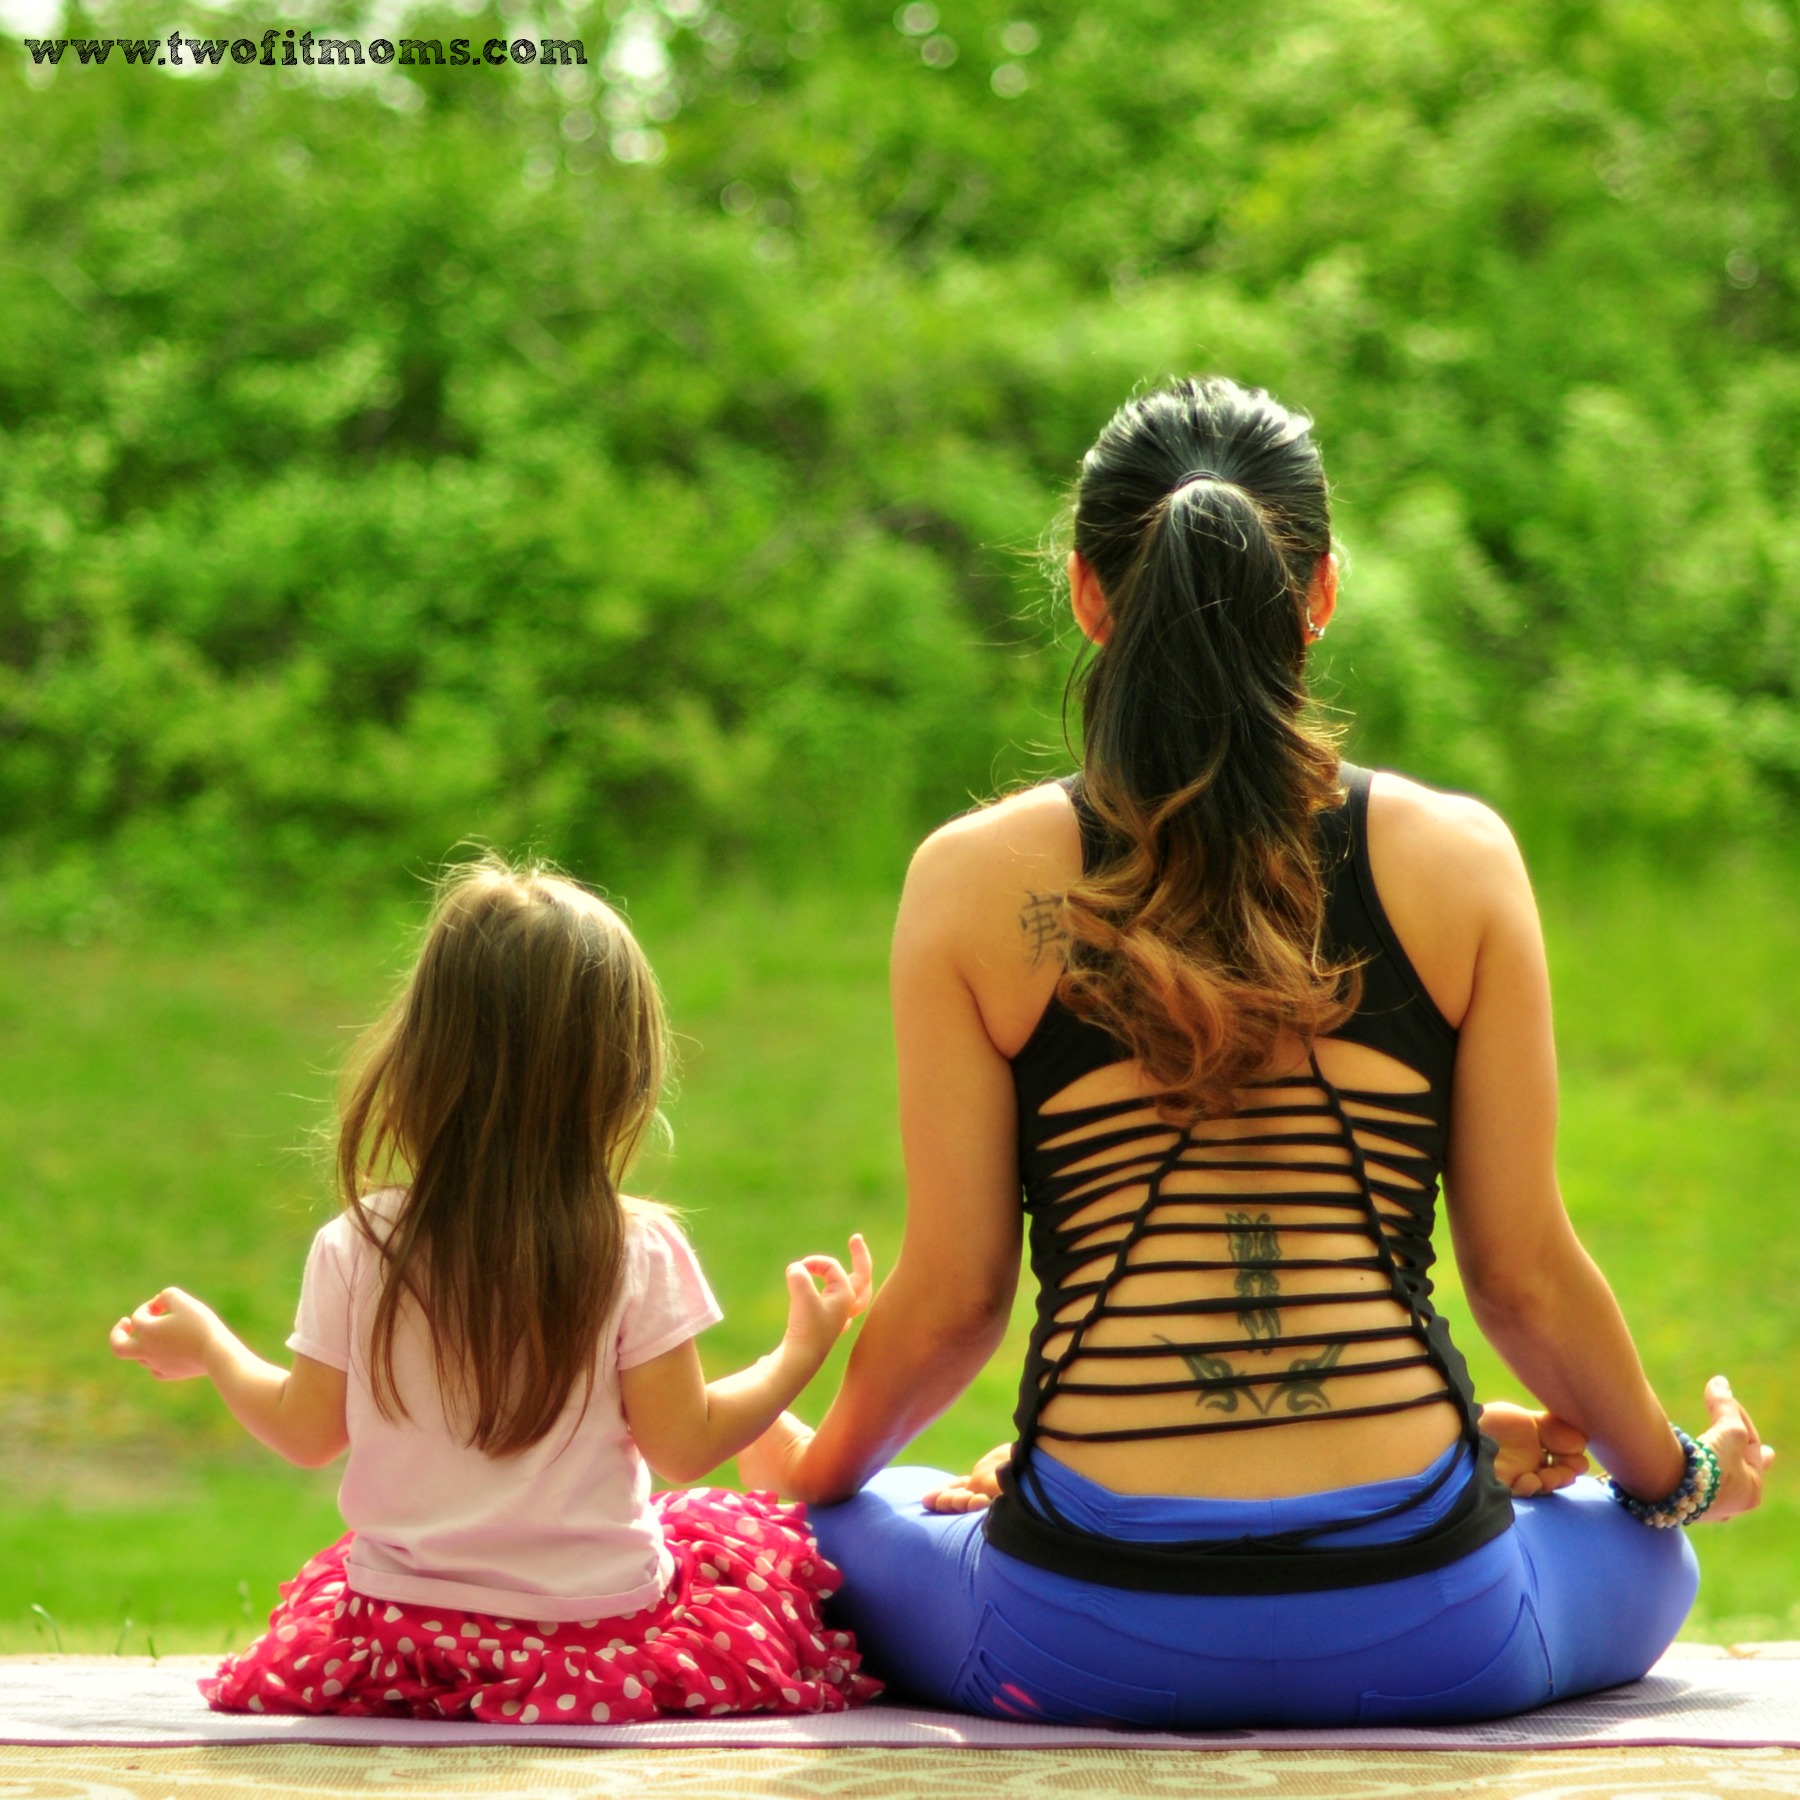
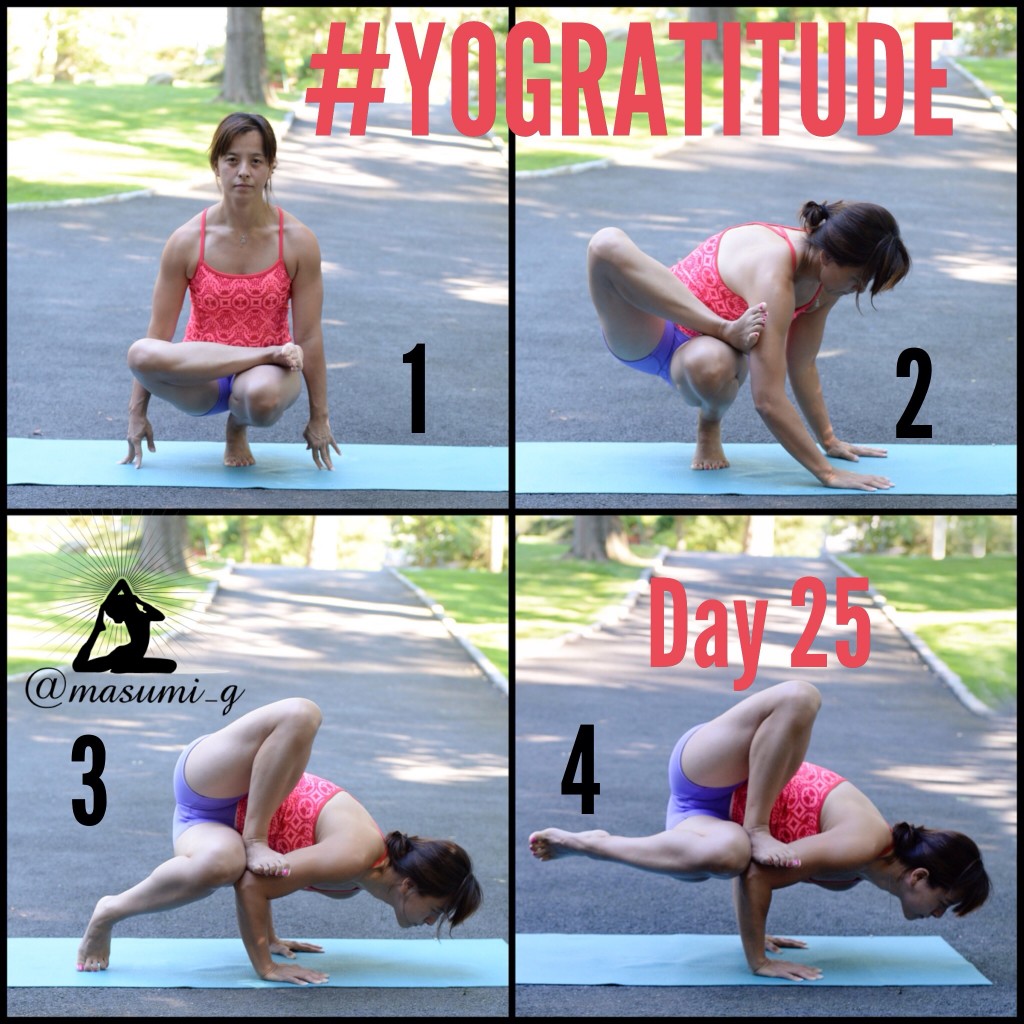
daily pose of the day and posting a photo of their attempt to a designated hashtag.  What an overwhelmingly positive experience to watch Instagram yogis grow, inspire, and BE inspired!
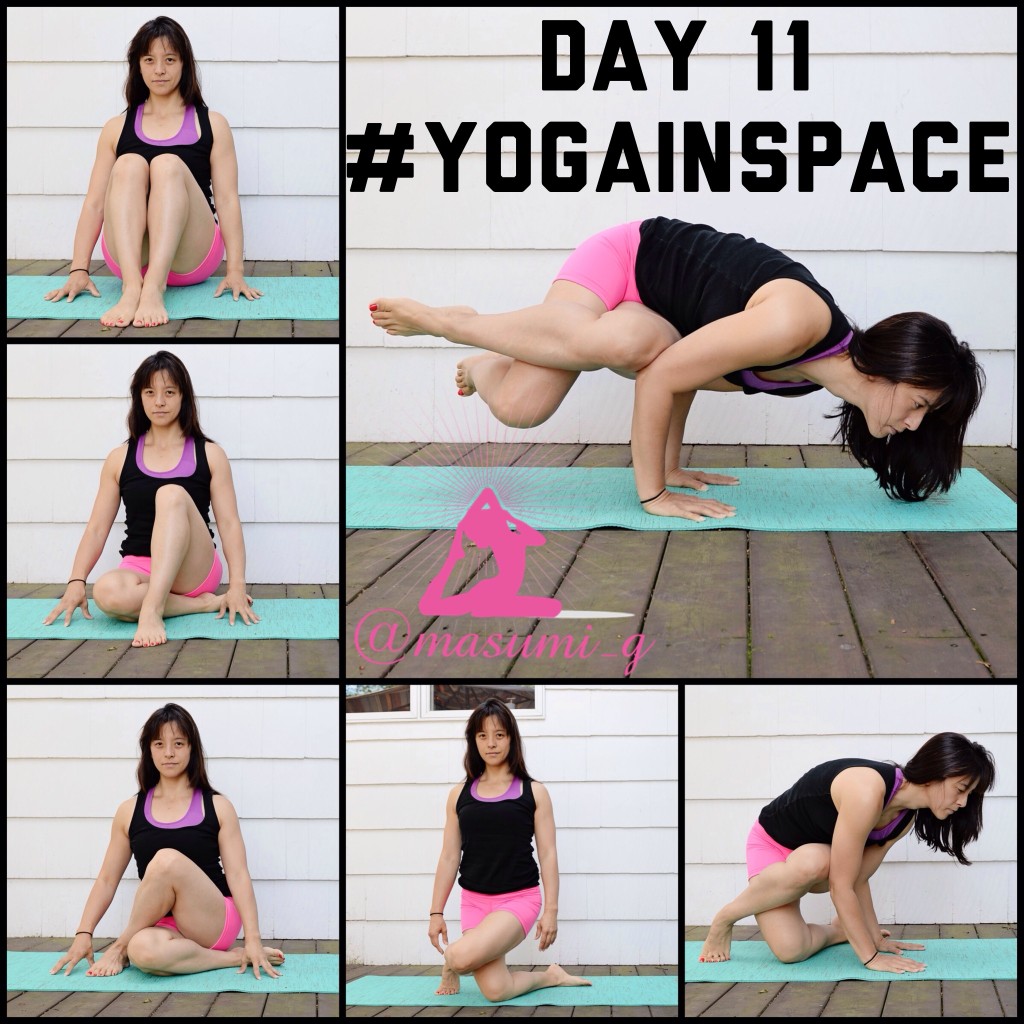
    If you have not yet given a challenge a try, I suggest that you pick one and get involved today.  Here are my top reasons for participating each month.

    It Creates a Daily Habit
    A daily yoga challenge makes you commit to a daily practice.  Let’s be honest—it’s hard to commit to a daily hour-long yoga session.  We are all tired and busy, but, I assure you that it feels much less overwhelming if we believe that we just need to stretch and warm up for one yoga pose.  This is a great way to take baby steps toward a longer more meaningful daily practice.  Get in the habit of rolling out your mat daily by participating in a challenge.

    It’s Fun
    Everyone loves a good challenge.  I still remember the first time I saw a photo of an arm balance pose on Instagram.  It looked incredible.  How was it even possible to balance in that way?!!!  I was fascinated and excited to get on my mat and try.  Perfecting the pose was not the goal.  The goal was to try, and practice, grow and play.  As adults, we rarely play.  Practicing new yoga poses each day awakens our inner child, and it’s just downright FUN.

    It’s Free
    Do I have to say more?  It’s free.  Free instruction, free participation, free fun, and often, you can even score a free prize!  Not everyone has the money to take a yoga class in a studio.  By participating in an Instagram yoga challenge, you can get your yoga fix without shelling out the big bucks.

    SideCrowIt’s Inspiring
    It’s incredibly inspiring to look through a yoga challenge hashtag and see thousands of yogis from all walks of life doing the same pose.  These yogis are different ages, races, sizes and nationalities, but they have all come together to participate and grow in their practice.  Seeing a yogi that is twice your age is inspiring.  Seeing a parent and child together attempting a pose is inspiring.  Seeing yogis that are overcoming sickness and pain by using yoga as a healing tool is inspiring.  All of this inspiration will make you want to come back day after day and practice with the Instagram community.

    It Can Be Done from Home
    Some people don’t have the money to take a yoga class, and others don’t have the time to take a class.  As a mother of young children, it takes a village for me to be able to leave my house to do basic things—like shop for groceries or get a haircut.  Traveling to a yoga studio does not happen often, and it doesn’t happen without planning in advance for babysitters.  By getting involved with Instagram challenges, I can practice at home whenever it’s convenient—even if that means taking photos of poses at midnight.

    It Documents Your Journey
    For better or for worse, if you participate in a daily Instagram yoga challenge, you will have a visual record of each pose that you attempt.  In the beginning, seeing your poor form or lack of flexibility may be discouraging, but as time passes, you will be grateful for these photos.  It amazes me to look back at my old yoga photos and see how far I’ve come in my practice.  My posture, flexibility, strength and form have improved dramatically, and I am aware of the progress that I’ve made over weeks or months.

    It’s a Great Way to Meet Yoga Friends
    The Instagram yoga community is an amazingly supportive group.  Everyone is encouraging and supportive, and that is a great kind of environment to learn and grow in your practice.  When you join an Instagram yoga challenge, you get the feeling that you are a part of something greater than yourself.  As soon as you join a challenge, you are no longer alone.  You have joined a movement, and it feels amazing to get caught up in the positive energy and practice (virtually) alongside your new Instagram yogi friends.

    FlyingLizard
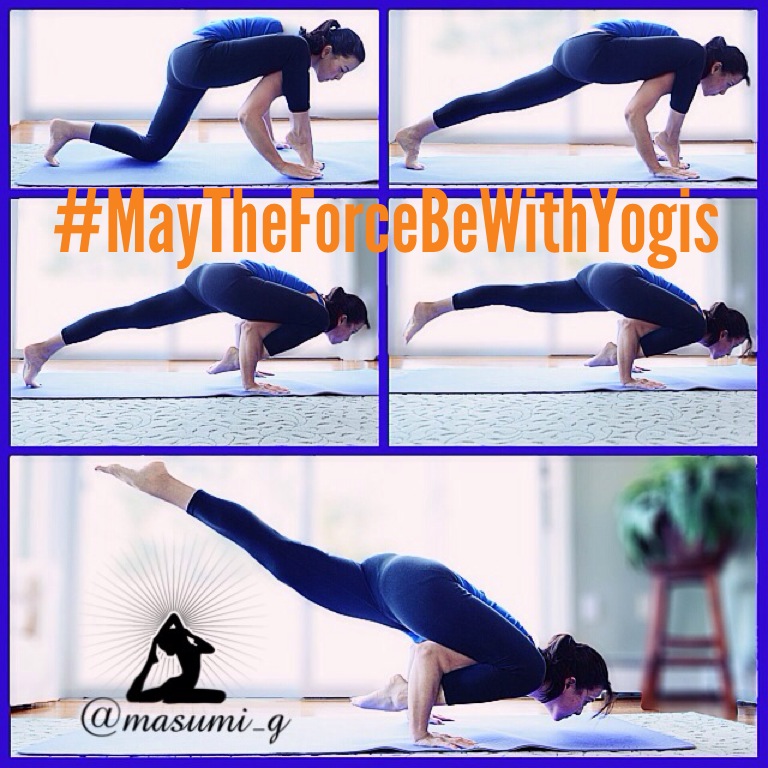
It Creates a Well-Rounded Practice
    We all have our strengths.  We all also have our weaknesses.  I’ve found that when I practice yoga on my own, I have a tendency to work on poses that come easily to me, and I avoid working on the poses that target my weaker/less flexible body parts.  The wonderful thing about Instagram yoga challenges is that the pose of the day forces you to work on body parts that you might otherwise completely avoid.  If the challenge pose is a backbend, you will work on backbends, even if you dislike them.  If the challenge pose is a deep hamstring stretch, you will spend time stretching the backs of your legs.  I’ve found this aspect of the challenges to be very beneficial.  Rather than focusing on just the poses that I enjoy, I also work diligently on the poses that I don’t enjoy so much.  By doing this, I’ve become much more well-rounded in my practice than I otherwise would be.

    It Exposes You to Different Types of Yoga
    I used to think that there was one type of yoga—the kind where you sit with your hands in prayer and maybe do a warrior 1 pose from time to time.  The idea of doing yoga used to bore me to tears.  I had no idea that yoga could be a challenging, sweat-inducing workout.  There is a type of yoga for everyone, and the world of Instagram yoga has opened my eyes to it all.  Who knew that yoga could include inversions like headstands and handstands or arm balances that tested your strength, balance and flexibility?  Take a look through all of the available challenges this month and you will see how much variety yoga has to offer.

    TreeEnjoy the Non-Physical Benefits of Yoga
    If you join an Instagram yoga challenge and you’ve never tried yoga before, you might start out just enjoying the physical benefits of the poses.  That’s definitely the experience I had.  I would stretch, strengthen, sweat, take a photo of the pose of the day, and move on with my life.  Over time, however, I’ve noticed that my body has loosened up to the point where my practice has truly become a moving meditation.  I can find peace in each pose, as the poses become more accessible.    I am now able to focus on the present moment as I’m living it, and THIS is an invaluable skill on and off the mat.

  • Daily Practice: 5 Reasons to Do a Headstand Every Day!

    Daily Practice: 5 Reasons to Do a Headstand Every Day!

    Headstand, or Sirsasana, is often referred to as the “King of all asanas”… and rightfully so. It requires both physical and mental preparation to practice this inversion. Getting upside down can be a scary experience! The fear of falling, the fear of failing, the fear of the unknown, all come into play. Once you get over the initial fear though, the practice of inverting will offer new perspective and many benefits. Here are my top five reasons why I love to flip upside down every day.

    If you’re a newbie to headstands, no worries!  Check out the beginner’s guide to getting into a headstand here.

    DSC_1213s

    #1: Increases Blood Flow to the Head

    Getting upside down reverses the flow of blood from the heart, giving your heart a much needed break.  Blood is able to flow more easily to your brain including the pituitary and hypothalamus glands. These two glands play a vital role in your mental and physical well-being, and regulate all other glands in your body. They also regulate sex hormones, so daily headstands can improve your sex life!

    DSC_8068s

    #2: Fountain of Youth

    Added blood flow to your head also means added blood flow to your scalp and face. These added nutrients can possibly delay the onset of gray hairs and also give you an instant face lift by reversing gravity. Who needs botox and hair dye when you can just invert every day!

    DSC_5624s

    #3: Happy, Happy, Joy, Joy!

    The pituitary gland located at the base of your brain controls the release of endorphins. Endorphins trigger a positive, happy feeling in your body. The extra blood flow to this gland, helps to release more endorphins, thus making you a happier person.  It also helps to relieve stress, anxiety and depression. You cannot help but smile while upside down!

    DSC_9672s

    #4: Tones and Strengthens

    Headstands are a FULL BODY exercise.  You use every single muscle in your body in order to get into a headstand! Doing a headstand every day will strengthen every muscle in your neck, arms, shoulders, back, abdominals and legs.

    DSC_4142s

    #5: Become the Life of the Party!

    Headstands are just plain fun to do and there’s nothing wrong with that! Bust them out at parties or in the park! Your friends and family will be impressed!


    As always though…practice mindfully and honor your body! Have fun and laugh lots!

    XOXO

    Blog Signature


  • 20 Ways to a Perfect Mother’s Day

    20 Ways to a Perfect Mother’s Day

    CelebrateYou
    As mothers, we rarely think about ourselves.  Taking care of everyone else always seems to come first!

    But, there is one day out of the year that should be all about YOU — and that’s Mother’s Day!

    Here are our suggestions for making it a perfect day this year!

    1. Start your day by setting a daily intention.  Declare peace and joy for the day ahead.

    2. Exercise. Don’t you feel better fitting this into your day?

    3. Make yourself pretty. Get dressed up. Put makeup on.

    4. Spend some time by yourself.  Go for a walk. Read a book or magazine. Enjoy a cup of coffee or tea, but do it by yourself.

    5. Pamper yourself. Get your nails done, go for a massage.

    6. Turn off your phone, step away from the iPad and computer.  No working and no social distractions. Devote your attention to yourself and your family.

    7. Take a nap.

    8. Let your family pamper you and serve you — preferably, breakfast, lunch and dinner!

    9. No housework. No cooking, cleaning or worrying about an upside down house.

    10. Let your husband and kids fend for themselves. Let the kids pick out their clothes, let your husband do the laundry.  They will survive.

    11. Enjoy a real meal, sitting down at the table (not at the kitchen counter or with kids hanging off of your body).

    12. Indulge in dessert or wine, or both.

    13. Take a picture of yourself with your kids — it’s funny how few of these we actually have.

    14. Surround yourself with people you love.

    15. Celebrate the other moms in your life:  your mom, your sister, your best friend . . .

    16. Spend time with your children.  Read them a book, fit in a trip to the park, go on a bike ride.  They are the reason you are being celebrated today!

    17. Smile, a lot.

    18. Kiss and hug your children.

    19. Take a long, hot bath.

    20. Recognize you are loved.

    Happy Mother’s Day!

    xoxo

    Laura, Masumi &  Kate


  • Daily Practice: Make It a Family Affair!

    Daily Practice: Make It a Family Affair!

    With Mother’s Day around the corner, spending time with my children is top of mind.  And, I can’t think of anything else I’d want to do more than practice yoga with them! Yoga can be so beneficial to your children’s physical and mental well-being.  Physically, it can improve flexibility, strength, coordination and body awareness.  Mentally, it can alleviate stress and anxiety. You probably remember my post from a few weeks back that offered suggestions on how to get your family involved.  This post elaborates, offering five great poses to get you and your family practicing yoga together!


    Here they are:

     #1: Downward Facing Dog

    DSC_4595f

    This is the first pose both of my kids learned from watching me. For both adults and children, it is a pose that works every muscle of your body…your arms, shoulders, core, back, hips and legs! Try to hold this for 10-15 breaths.  Your child will probably come out sooner, but that’s OKAY! My minis generally use me as a “tunnel”…making it more fun for me to hold!

    #2: Cobra Pose

    DSC_1183f

    Cobra Pose was the first backbend my kids learned. Kids are naturally flexible so they most likely will find this pose super fun…especially if you ask them to try to touch their toes to their head! Cobra Pose is a great way to stretch out the entire front body and strengthen the arms. Once your child has learned Downward Facing Dog, you can start to teach them to transition right into Cobra Pose.

    #3: Child’s Pose

    DSC_6159f

    Who doesn’t love a good Child’s Pose? It releases any tension in the back, shoulders, chest and arms. It also begins to calm the mind and bring the focus back to your breath. If your kids are like mine…they are constantly on the go! This pose can be used as a first step to calm them.

    Once your child learns this, you can start to flow these poses together almost like a dance! Downward Facing Dog to Cobra Pose to Child’s Pose…Repeated a few times is a mini-workout!

    #4: Seated Forward Fold

    DSC_5197f

    Seated Forward Fold is one of the easiest poses to teach children.  Having flexible hamstrings is so important and improves everything we do . . . walking, running, bending, even tying your shoes! This is the perfect pose to help your kids remain flexible as they grow.

    #5: Easy Pose or Criss-Cross Applesauce with Meditation

    DSC_5126f

    At the end of your practice with you family, take a moment to sit and close your eyes. Encourage your children to do the same. Taking a moment to be still and breathe can help relieve stress and relax your mind. For your children, this moment may only last 30 seconds — and that’s OKAY! Eventually, they will learn to sit quietly for longer periods and to use this pose to look within themselves.

    Practicing yoga with your kids will not be perfect, but the key is that you are doing it together.  And, if you are smiling, you are doing it right!

    XOXO

    Blog Signature