Category: Z Featured

Our editors pick the cool stuff for you

  • Yoga Straps:  Hamstring Help

    Yoga Straps: Hamstring Help

    Yoga straps can be used for a variety of exercises and stretches. Whether you are a beginner or an experienced yoga practitioner, a strap can enhance your practice by helping you maintain proper alignment and form as you work different muscle groups.

    In this article, I will show you how to effectively stretch your hamstrings while using your strap. The beauty of this particular stretch is that, unlike most hamstring stretches, it will not put strain on your lower back. According to the American Association of Neurological Surgeons, an estimated 75 to 85 percent of Americans will experience back pain during their lifetime. Even if you have no history of back pain, there’s no time like the present to be mindful of safe stretches that will protect your body.

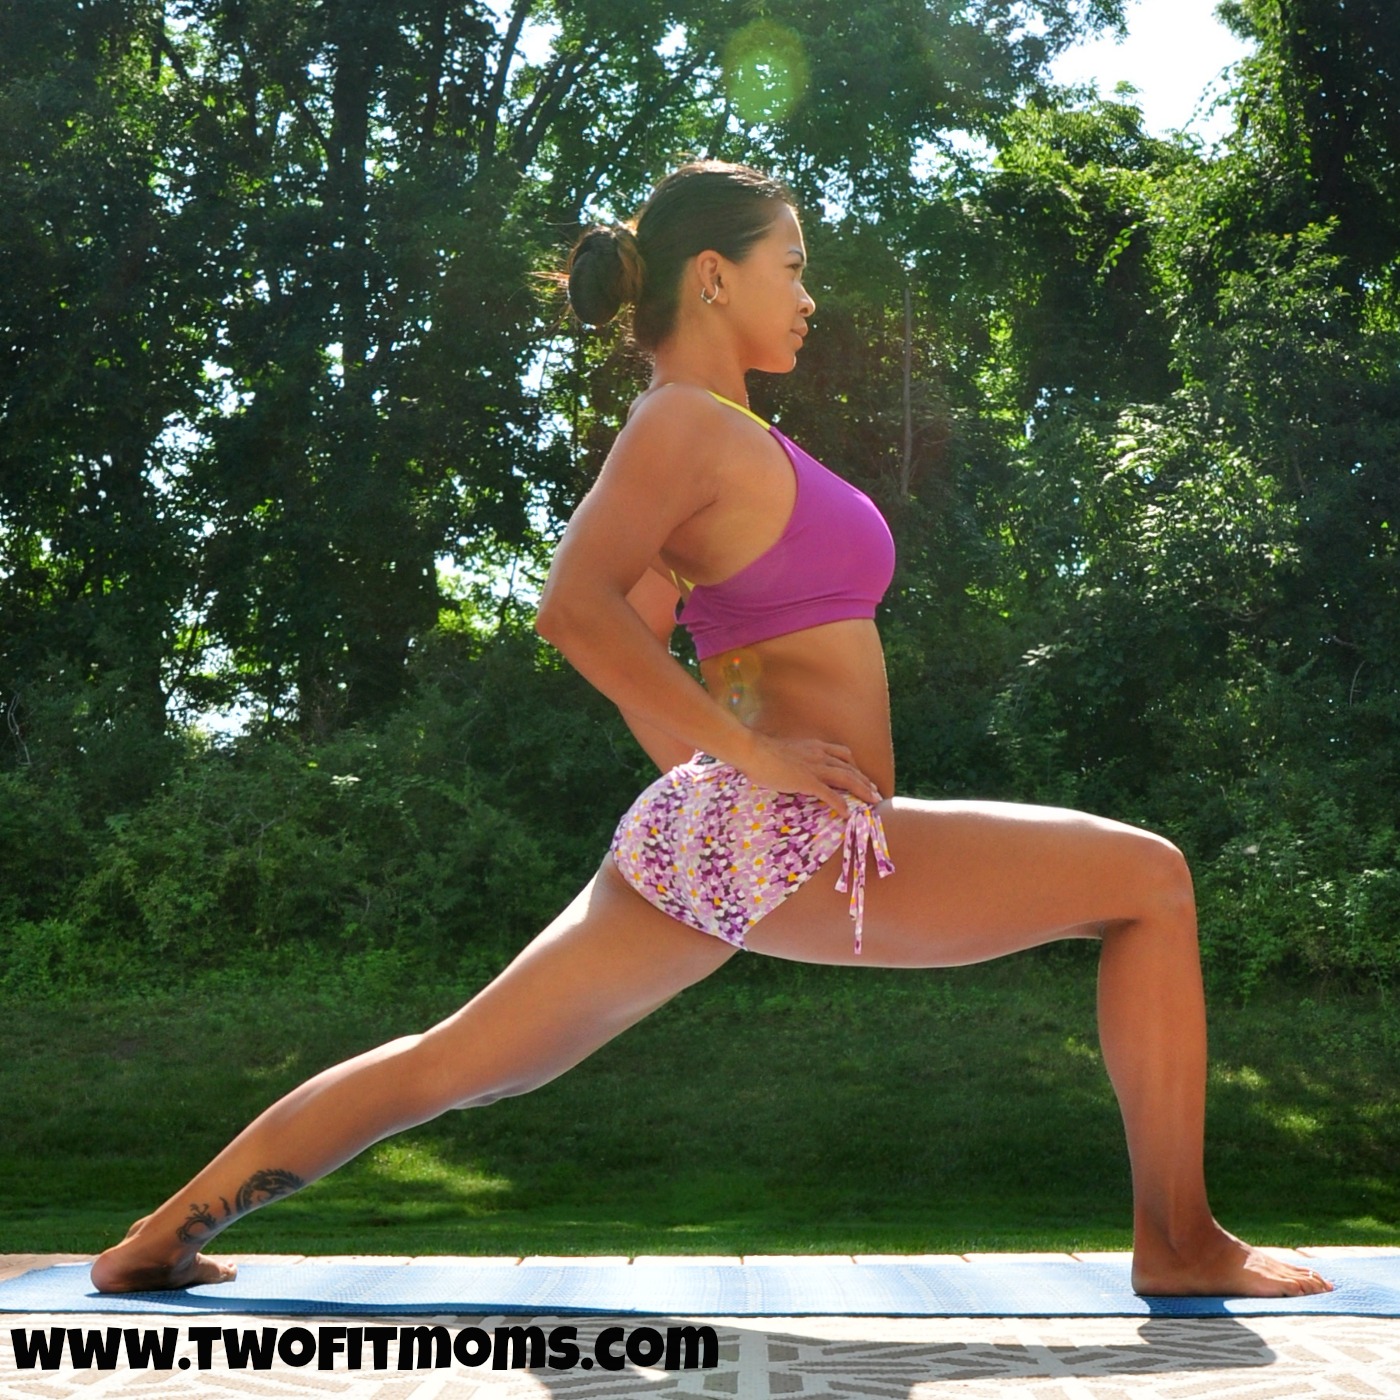
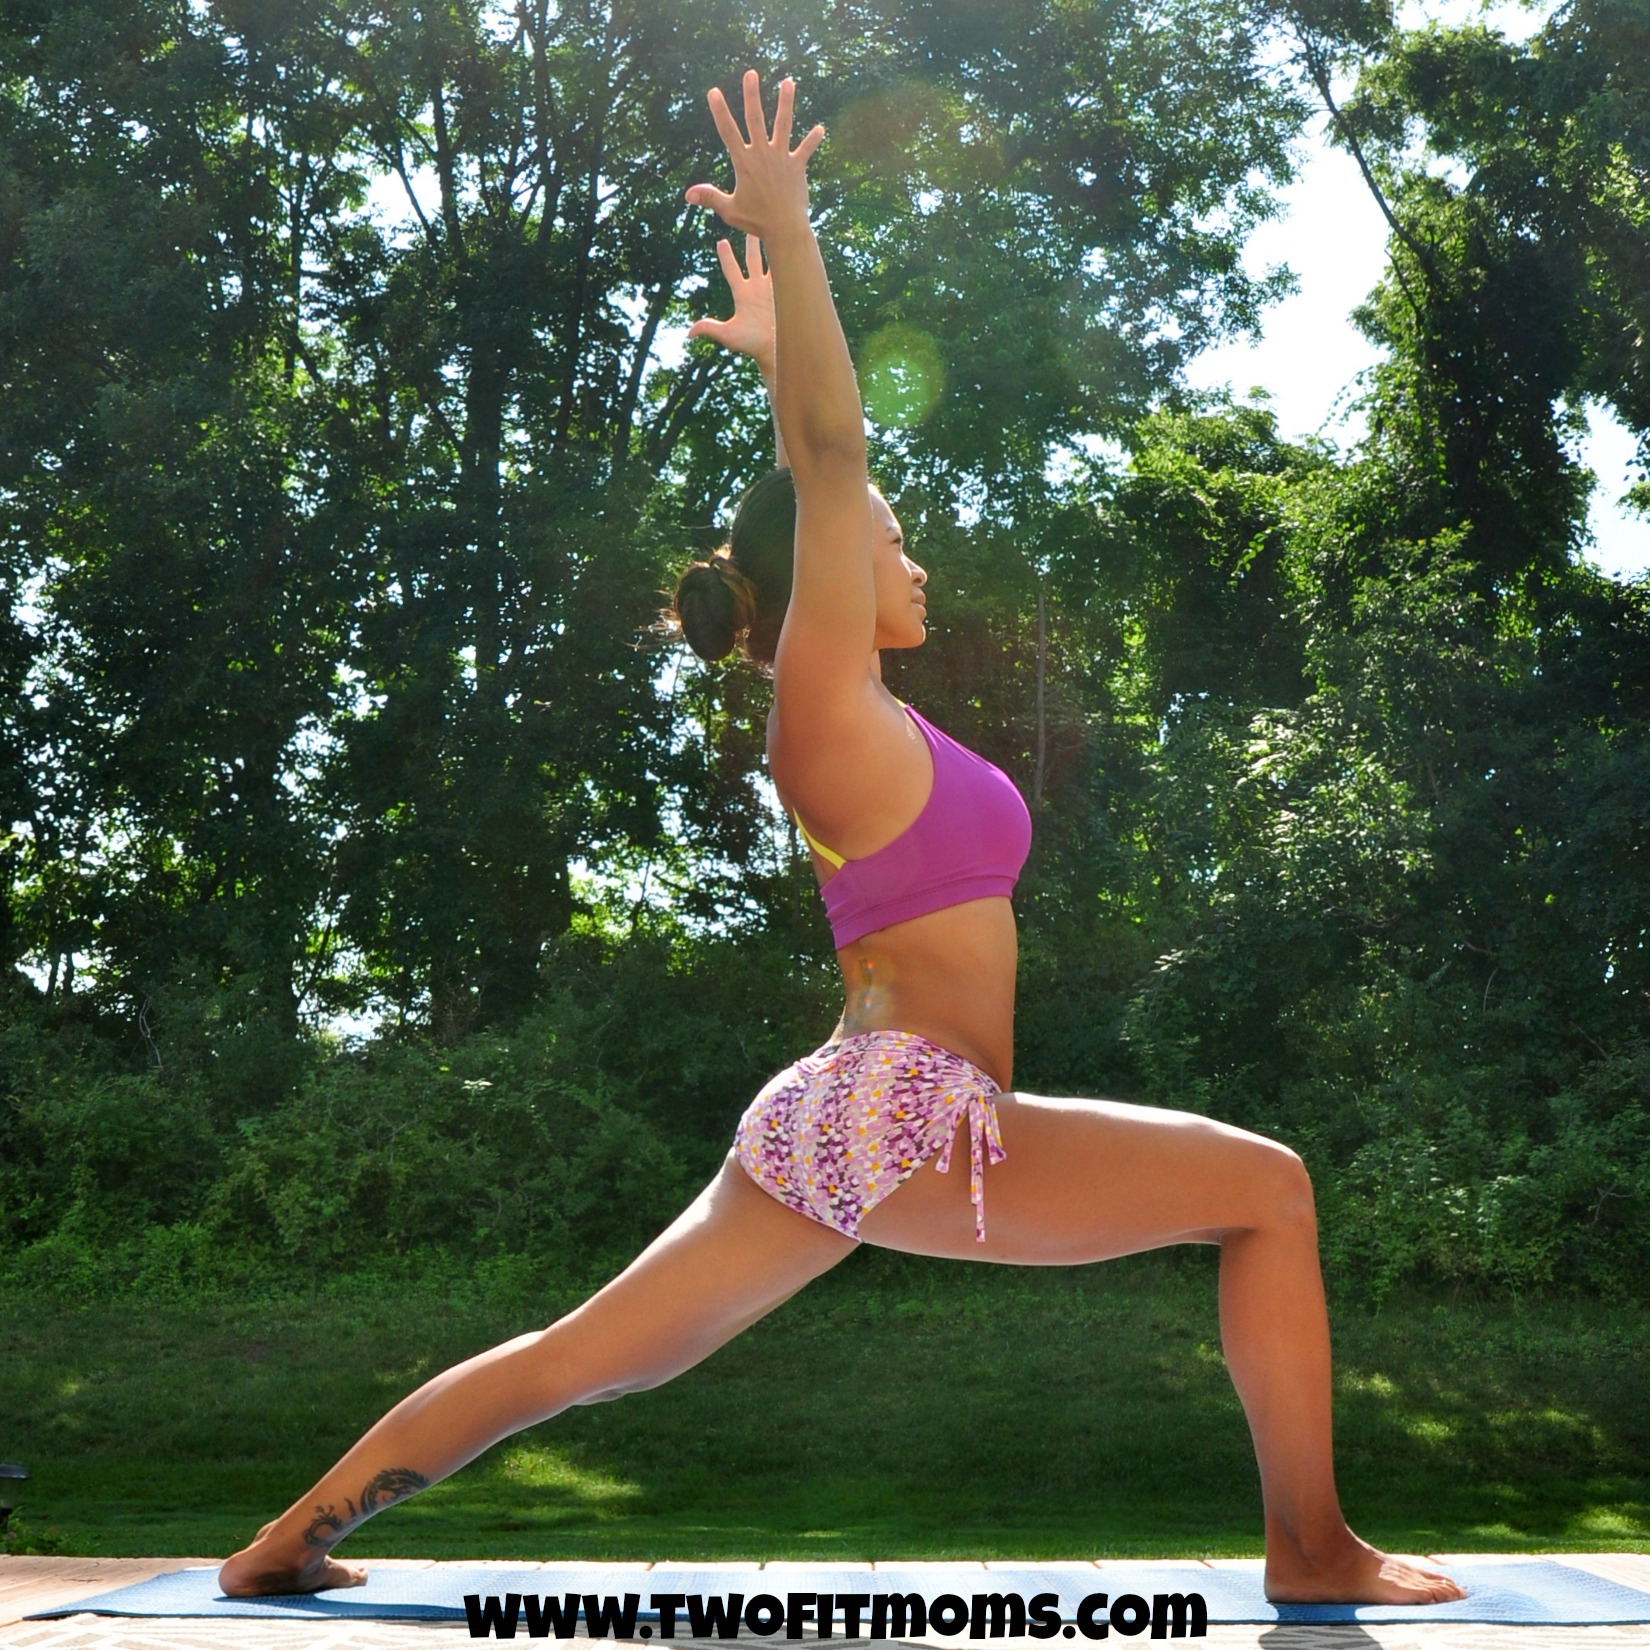
    When my doctor suspected that I had a herniated disc in my lower back, I was told that I could continue stretching and doing my yoga, but I could not bend over, as that would cause further strain. Couldn’t bend over?!! How would I possibly stretch my hamstrings, I wondered. If you think about most hamstring stretches in yoga, you’ll quickly realize that they require bending over. Whether you are in Prasarita Padottanasana (Wide-Legged Standing Forward Bend) or Janu Sirsasana (Head-to-Knee Forward Bend) or Uttanasana (Standing Forward Bend), you are bent over.

    Fortunately, I learned this very effective way of stretching the hamstrings while lying flat on my back. No bending required! Enjoy this amazing stretch, whether you are rehabilitating or in perfect health. It feels amazing.

    Step 1
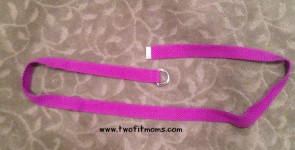
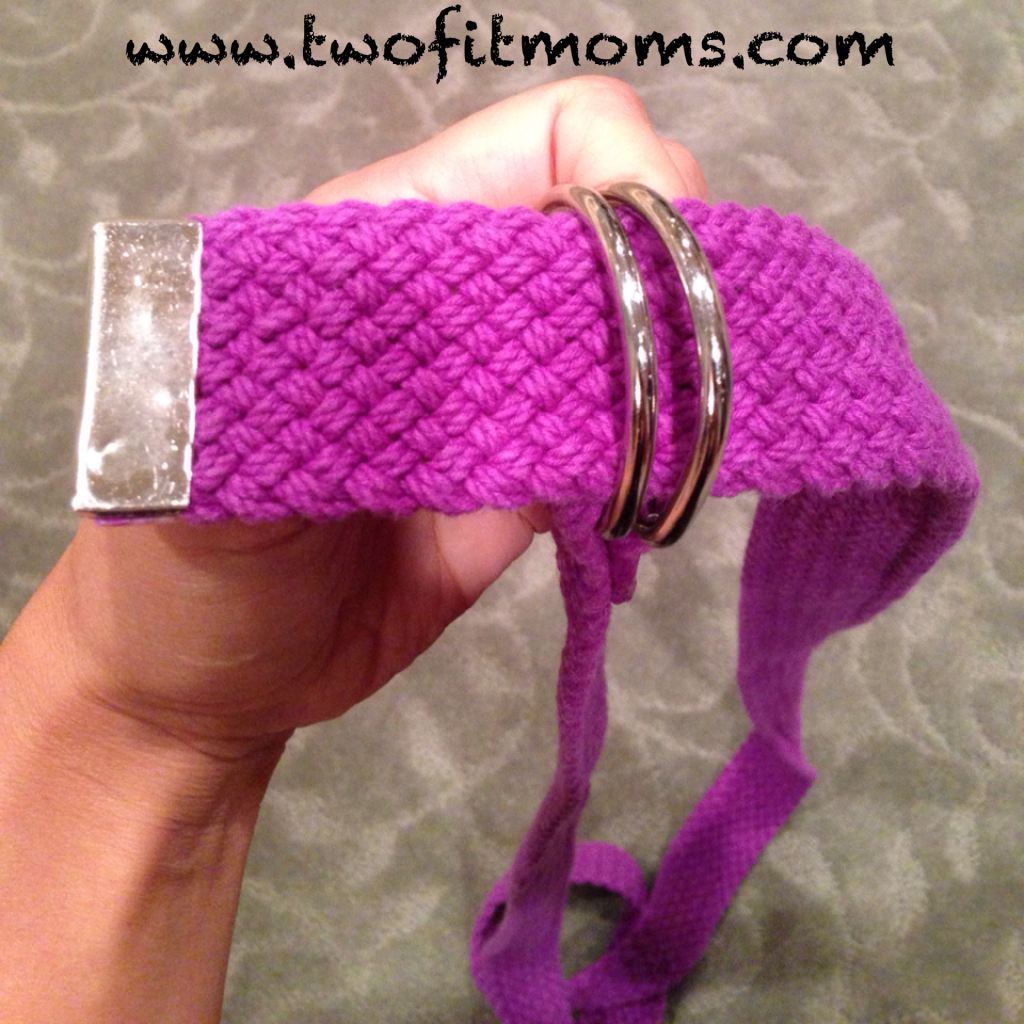
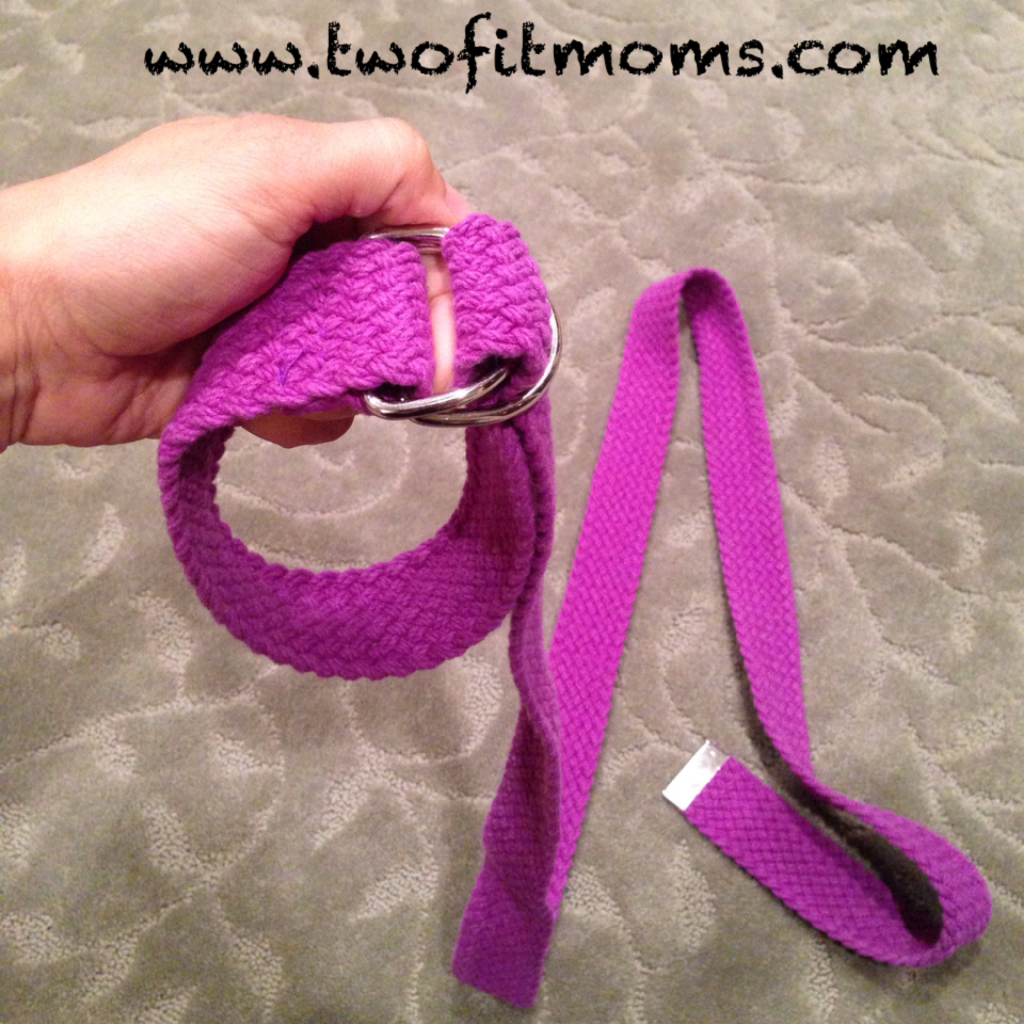
    Create a small loop in your yoga strap that will fit over your foot. If you need a reminder on how to create a loop, please refer to THIS TUTORIAL. Lie on your back with your knees bent and the soles of your feet on the ground. Slip the loop over your foot.
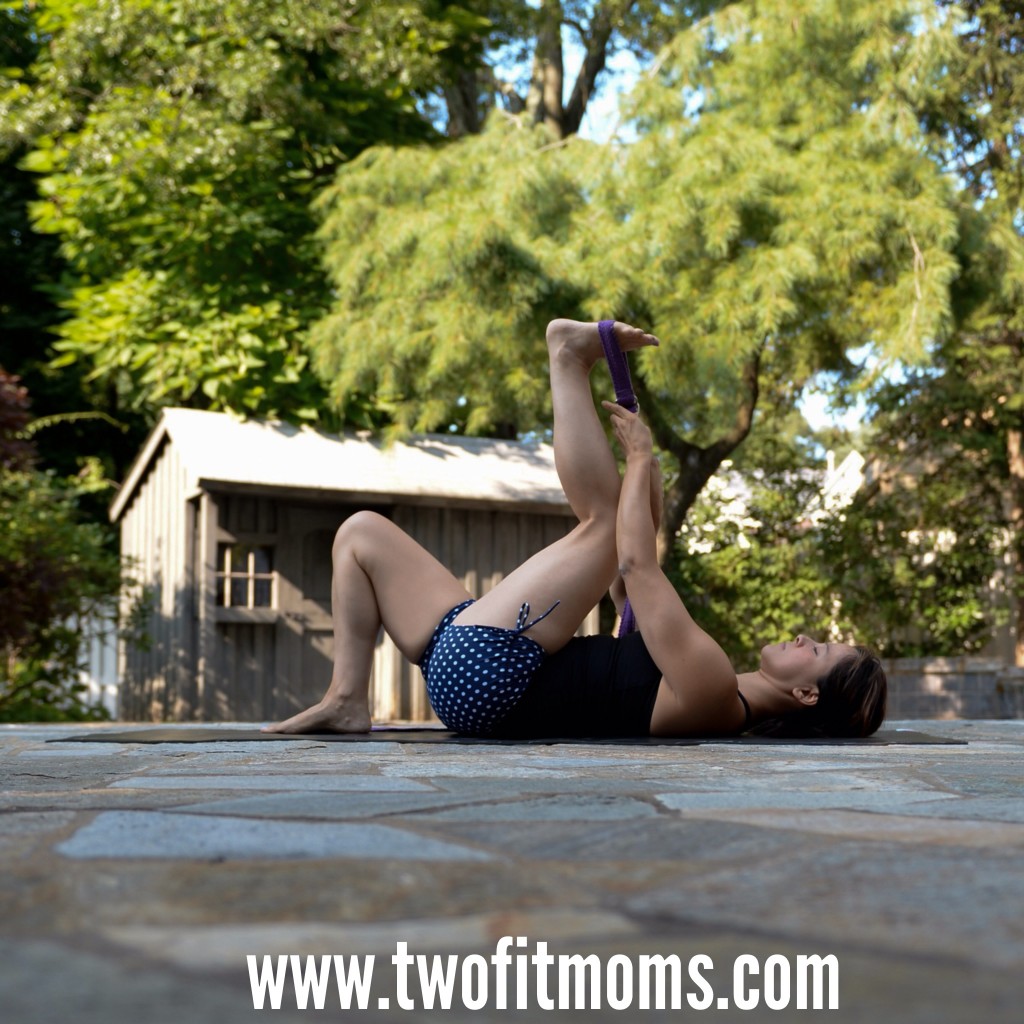
    One
    Step 2
    Slowly extend the leg that is looped with the strap. If you would like a deeper hamstring stretch, begin to pull the strap toward your chest.
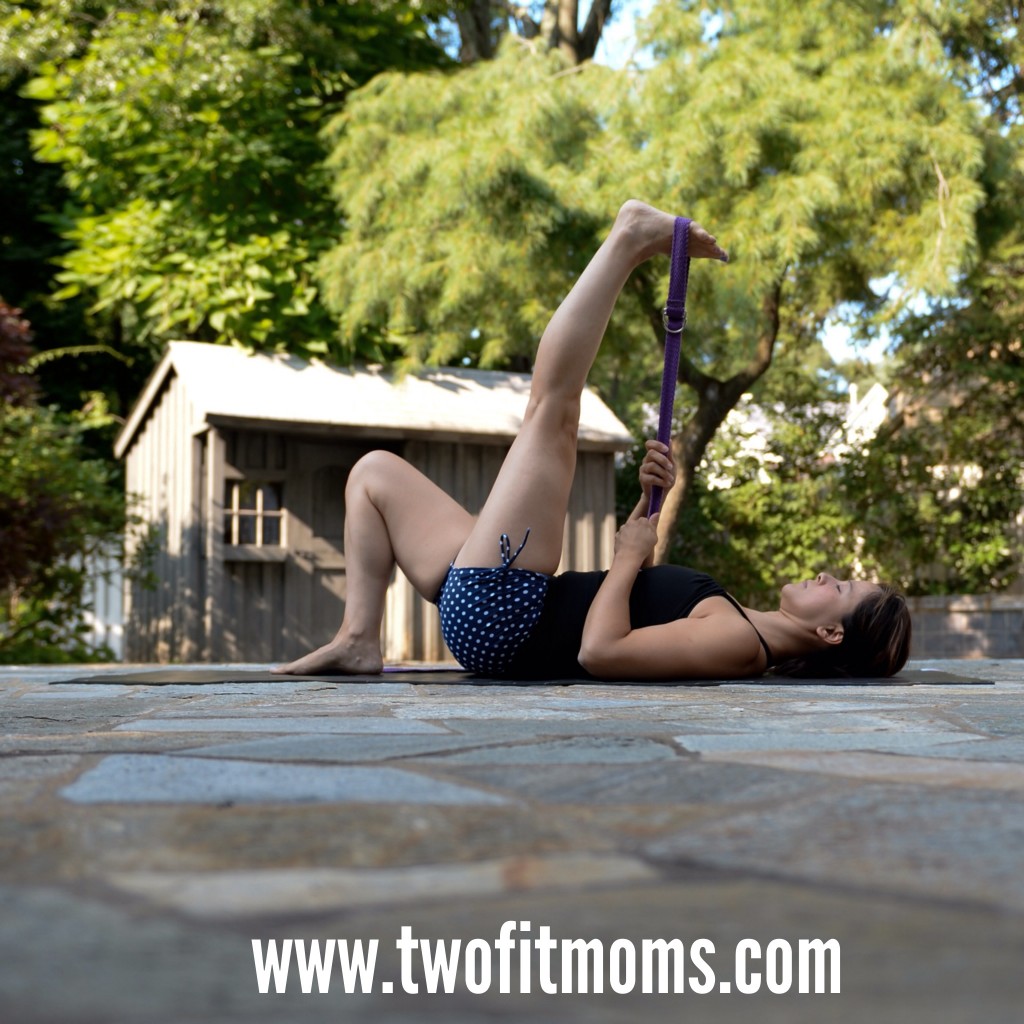
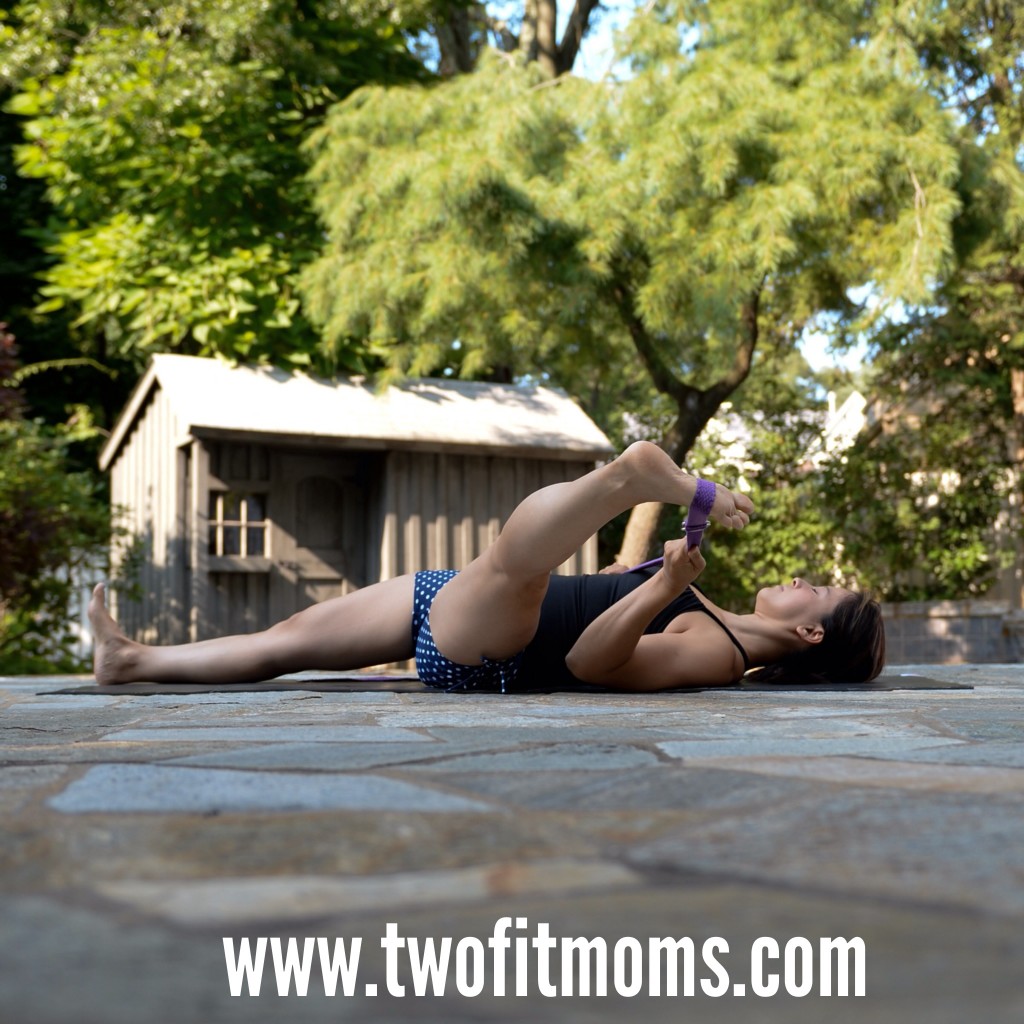
    Two
    Step 3
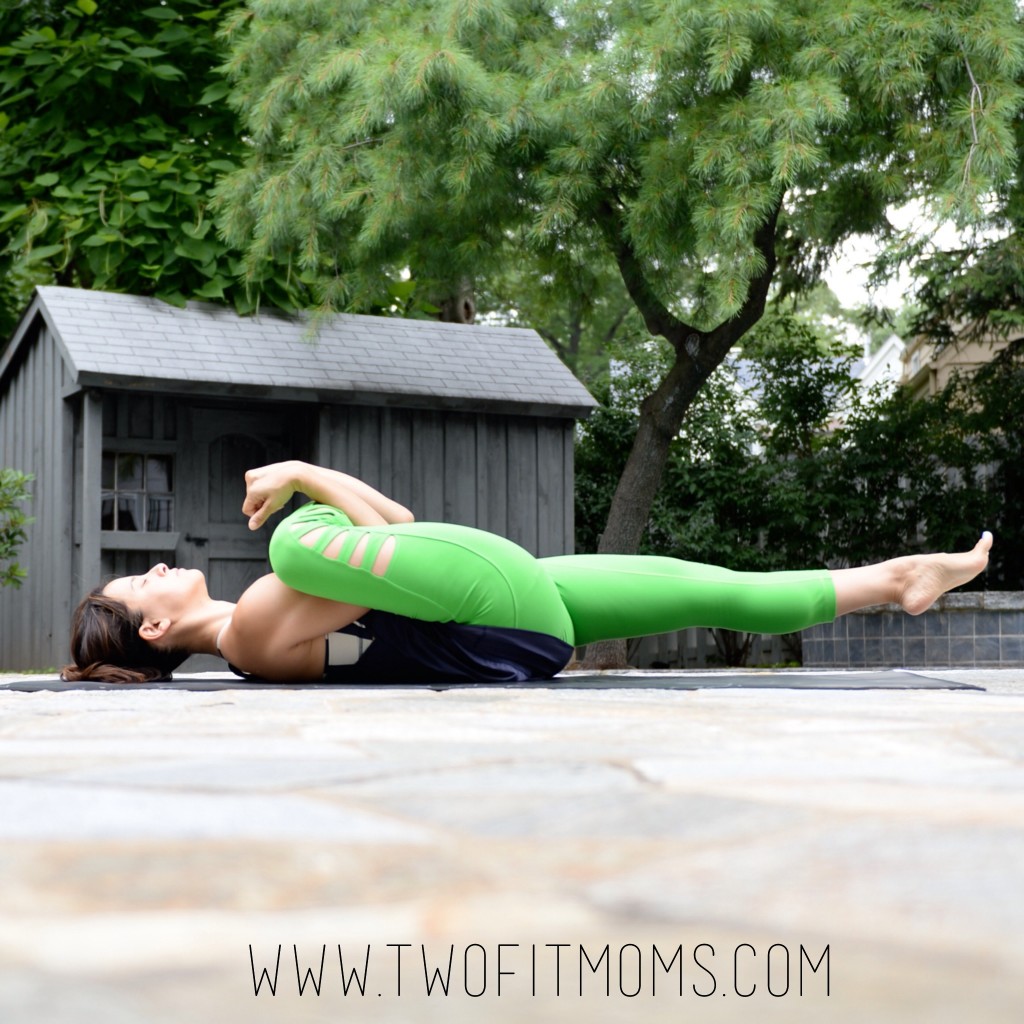
    Slowly extend your other leg to lie flat on the ground. If you feel any strain in your lower back, re-bend the leg, as shown in step 2. Continue to keep tension in your strap, pulling your raised leg toward your chest as much as your flexibility allows.
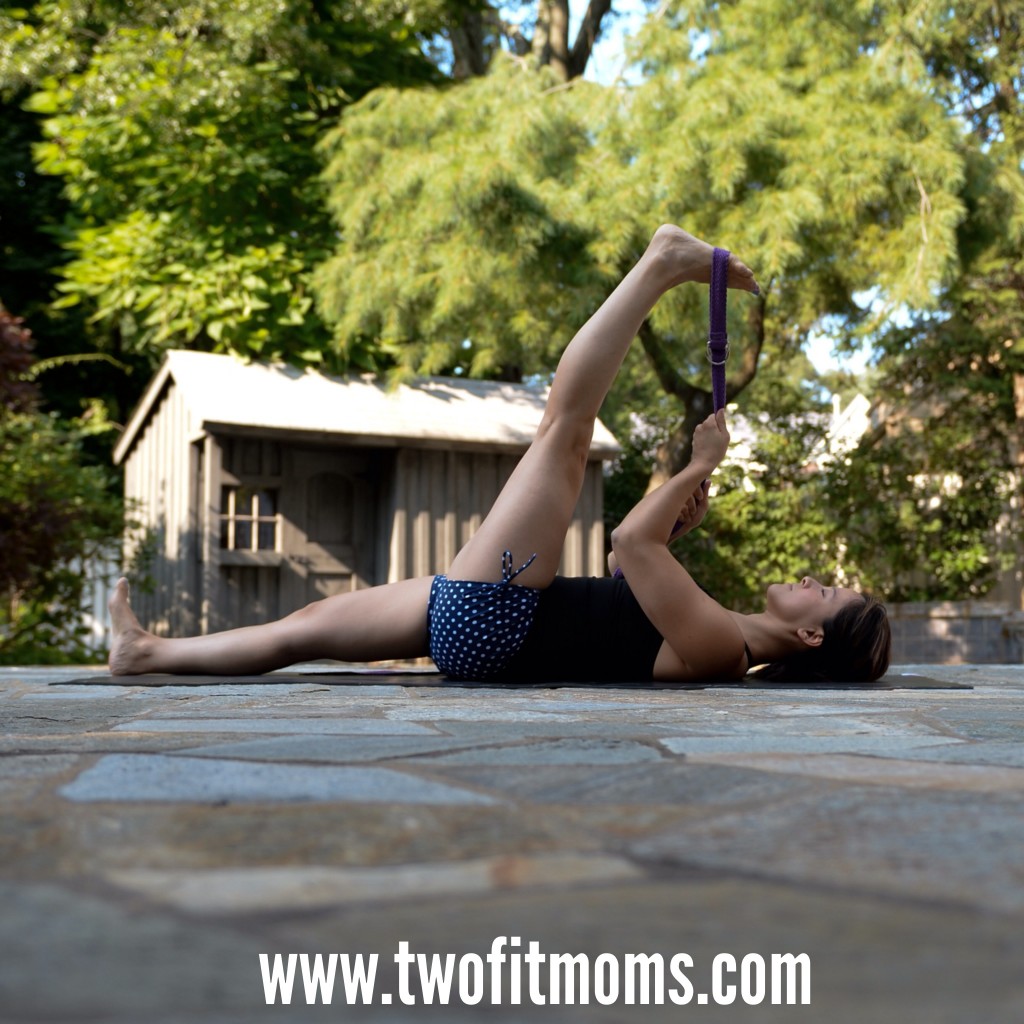
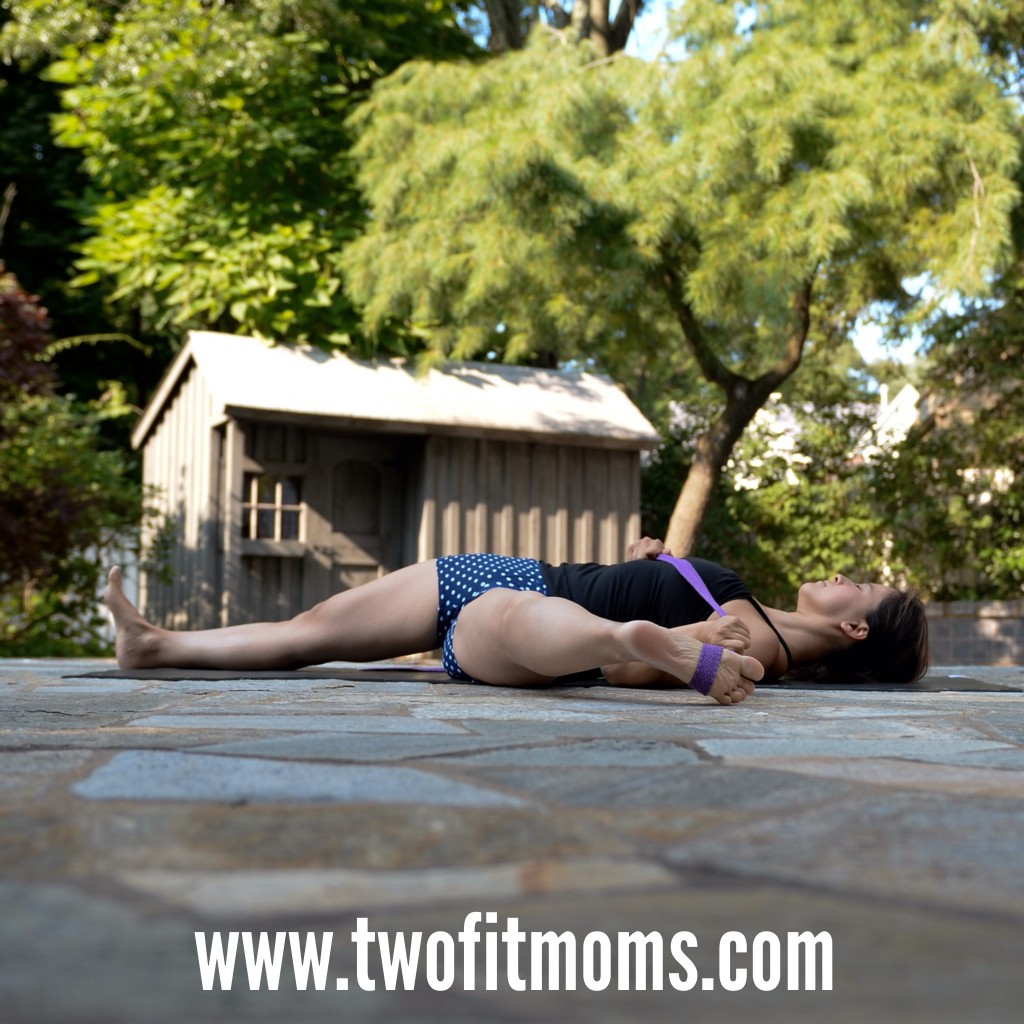
    Three

    Steps 4 and 5
    Slowly begin to lower your raised leg toward the side, maintaining tension in the strap until your leg reaches the ground.

    Four

    Five

    Hold this stretch for five deep breaths and repeat on the other leg.

  • Daily Practice: Reverse Warrior

    Daily Practice: Reverse Warrior

    Reverse Warrior, or Viparita Virabhadrasana, is a variation on Warrior II but with a slight backbend. Just like the other Warrior poses, Reverse Warrior strengthens the legs and stretches the groin and hips. The added benefit to Reverse Warrior is that it also stretches the obliques, chest and shoulders. Warrior I, Warrior II and Reverse Warrior are almost always included in my morning practice.

    reverse warrior 1

    From Downward Facing Dog, step your right foot in between your hands and rise up into Warrior I. Look up and watch your palms touch; then open up into Warrior II. Make sure your right knee is directly over your right ankle and your right thigh is parallel to your mat. On an inhale, rotate your right palm up.  On the exhale, start to lean back…Your left hand will slide down the left leg. Your right arm will extend up and overhead, palm facing down. Your legs should remain the same and your hips should remain open. Actively reach with your right hand. Feel the stretch running down the right side of your torso. Open your heart up towards the sky. Gaze up or gaze down towards the ground…whatever feels good to you.

    On an inhale, rise back up into Warrior II. On the exhale, windmill the hands down and step back into Downward Facing Dog.  Repeat on the left side.

    XOXO

    Blog Signature

  • Grilled Peach Salad With Balsamic Glaze

    Grilled Peach Salad With Balsamic Glaze

    peach saladNow that summer is in full swing, you will notice peaches, plums and other stone fruits aplenty at the market.

    In addition to eating these fruits on their own, there are so many wonderful ways to incorporate them into your cooking.

    Desserts immediately come to mind, but why not use them in a salad?

    I thought grilled peaches would be a great addition to a salad, so I fired up the grill.

    I split the peaches in half, removed the pit, coated them with olive oil, salt and pepper and grilled them! I easily could have gone the dessert route at this point and topped them with ice cream, but I didn’t! I stayed on course and continued to focus on my salad.

    I chose arugula as my salad green — it’s peppery and delicious.  I also wanted to incorporate balsamic vinegar.  I thought it would complement the peaches.  Lastly, I needed a crunch factor, so I topped the salad with crushed pistachios.  The combination of the warm peaches, the crisp greens, the crunchy nuts and the sweet balsamic glaze made this salad soar! It’s quite delicious if I do say so myself.  And, a testament to it’s deliciousness was the empty bowl left at the end of dinner!

    So, here’s my recipe.  I hope you like this recipe as much as my family and I did!

    Grilled Peach Salad with Balsamic Glaze
    Serves 4 people

    Grilled Peaches:
    2 ripe peaches
    olive oil
    salt and pepper to taste

    Balsamic glaze:
    1 cup of balsamic vinegar

    Salad:
    4 cups of arugula
    3 tablespoons olive oil
    salt and pepper to taste
    1/4 cup of chopped pistachios

    Before we get started on the salad, let’s make the balsamic glaze.   Put 1 cup of balsamic vinegar in a small saucepan.  Let it come to a boil over medium-high heat.  Let it simmer until it thickens and reduces in size.  It’s ready when it coats the back of a spoon (or a spatula! see picture below).  This will take roughly 15 minutes.  The balsamic vinegar will cook down to about 1/4 cup of balsamic glaze.  Let the glaze cool and set it aside.
    balsamic

    Now it’s time to grill the peaches. Cut the peaches in half, remove the pit and slather each side with olive oil.  Season with salt and pepper to taste.  Grill the peaches approximately 5 minutes on each side, on a very hot grill (mine was set to high).  The peaches are done when the skin starts to lift.  They should also have some lovely grill marks. Remove the peaches from the grill and set aside.
    peaches

    Add the arugula to a large serving bowl.  Add the 3 tablespoons of olive oil and salt and pepper to taste.  Toss the greens.  Add the peaches to the salad and sprinkle the pistachios pieces on top.  Drizzle 1-2 tablespoons of balsamic glaze over salad.

    Enjoy!

  • Yoga Straps 101

    Yoga Straps 101

    When I first started practicing yoga, I received all sorts of advice. One great suggestion was to go out and buy a yoga strap. A yoga strap, I was told, would assist me greatly in my practice. As a newbie, I was excited to buy all sorts of yoga gear, so I ran out to Target and immediately bought a strap. For months, I used this strap without any guidance. I ignored the fact that the strap had metal ends. I’m not even sure if it crossed my mind that those metal ends had any purpose! I just wrapped the strap around my foot repeatedly until it felt secure. Some days, my foot was so wrapped up, it appeared as if I had a foot injury with a large Ace bandage.

    If this scenario sounds familiar, this article is for you. I know that there must be others out there who are new to yoga and have no idea how to deal with a yoga strap. I will not discuss the many stretches and exercises you can perform with your strap in this article. The purpose here is to just get you accustomed to the idea of creating an adjustable loop with your strap. (This loop would then slide over your foot and be used for a variety of exercises, which we can discuss in future posts.)

    Here is your Yoga Strap Looping Lesson 101:

    Your yoga strap should have metal ends. One end will have two rings, and the other end will have a single flat metal strip. If you are right handed, use your left hand to hold the end of the strap with the two rings. Your right hand will hold the end of the strap with the flat metal strip.

    Step1

    I know this may sound ridiculous, but my yoga teacher taught me how to loop a yoga strap with a choo-choo train analogy. Yes, she actually used the phrase “choo-choo”. It felt juvenile, and I laughed, but she didn’t have to explain it twice. Let me teach you with that same choo-choo train. Pretend that the end of the strap with the single metal strip is a train. The train goes through both tunnels. (That is, put the end of the strap with the flat metal strip through both metal loops.)

    step2

    The train forgot something. It goes back over the first tunnel it sees, and through the second tunnel.

    step3

    It’s as simple as that. Now continue pulling the end of the strap with the flat metal piece until you have a small adjustable loop that can fit over your foot.

    step4

    You are now ready to use your strap! Stay tuned for future tutorials…

  • Daily Practice: Warrior II

    Daily Practice: Warrior II

    No other standing posture makes me fidget as much as Warrior II, or Virabhadrasana II. Within 30 seconds I am already thinking about when I can come out of the stance. Warrior II involves physical and mental strength which is why I include it in my flow EVERY day. Your challenge this week is to hold this posture for as long as you can. Close your eyes and try to clear you mind as you hold this pose.

    Warrior 2

    From Downward Facing Dog, step your right foot in between your hands and rise up into Warrior I. On an inhale, look up and watch your palms touch. On the exhale, toe-heel your right foot towards the center of your mat as you open up your arms and your hips. Your right heel will now line up with the arch of your left foot, and your right hand will extend towards the top of your mat while your left arm extends towards the back.  Make sure the right knee stacks directly over the right ankle.  Bend into the right knee so your thigh is parallel to your mat. Pull your navel in toward your spine as you stand tall. Your arms are parallel to the mat and your shoulders are relaxed down away from your ears. Resist the urge to lean forward, shoulders should stack directly over your hips. Gaze out past your right middle finger. Focus on your breath as you hold this position.  Try to find some peace as you gaze out, or close your eyes.

    When you are ready to come out, windmill your hands down and take a Vinyasa or step back into Downward Facing Dog.  Repeat on the left side!

    XOXO

    Blog Signature

  • Tropical Thai Coconut Smoothie

    Tropical Thai Coconut Smoothie

    coconut smoothiePiña coladas are my summer-time splurge.  I love the combination of coconut and pineapple — it’s just so delicious.  Even if I’m not on a tropical island or on vacation, this drink helps me pretend that I am!

    I thought I’d try my hand at a piña colada-like smoothie — or what I like to call my Tropical Thai Coconut Smoothie!

    I recently discovered young Thai coconuts, and I thought they would be perfect for my concoction.  In addition to the Thai coconut water and pulp, I incorporated frozen pineapple, some honey (for sweetness), vanilla extract (to mimic the flavor of vanilla ice cream) and a hint of lime.   And, voila, my version of a piña colada (a healthier version) was born!

    You can modify the recipe by adding half of a frozen banana or one cup of kale.  You can also add some rum! (which REALLY made it taste like a piña colada).

    We used a Coco Jack opener to help us dismantle our Thai coconut. If you don’t have a Coco Jack opener, you can certainly use coconut water.  In fact our favorite brand of coconut water can be found in our shop!

    Check out the photos below for more details on how we managed to open our Thai coconut.
    open coconut
    Tropical Thai Coconut Smoothie
    Yields between 4 and 5 cups

    2 cups of fresh Thai coconut water (which seems to be the standard yield from a fresh Thai coconut), plus the pulp of one Thai coconut
    1 cup of frozen pineapple
    1 cup of ice
    1/2 lime, juiced
    1 tablespoon of honey
    1/2 teaspoon of vanilla extract

    Some optional ingredients:
    1/2 frozen banana (please note, bananas are very sweet and potent, so use sparingly)
    1 cup of fresh kale

    Add all of the ingredients to the base of a blender (I used a Vitamix) and blend until smooth.  Portion into glasses, or back into the Thai coconut, and enjoy!

  • 4 Poses for Stress Relief

    4 Poses for Stress Relief

    We all have days, weeks or even longer stretches of time when the stress of life is overwhelming and suffocating. The shoulders and neck muscles tighten, the jaw clenches, and the back may even round with grief. Stress causes a wound-up emotional state, and our insides feel twisted and tight. In these difficult periods, be kind to yourself, and try to find even a few minutes to unwind and decompress. Counteract the tightening, gripping power of stress with a few expansive, heart-opening, shoulder-stretching poses. Trust me, you will feel much better.

    Here are four of my favorite stretches for stress relief. Breathe and sink into each of these postures for a minimum of five breaths, and be sure to practice the relevant poses on both sides of the body.

    Puppy Pose
    Start out on hands and knees (tabletop position). Make sure your shoulders are stacked directly over your wrists, and your hips are stacked over your knees. Keep your hips stacked over your knees, and begin to walk your hands forward, sinking your chest toward the floor. Depending on your flexibility, you may rest your forehead, chin or chest on the mat.
    Puppy

    Twisted Monkey Pose
    From downward facing dog, step your right foot forward between your hands. Lower your back knee, and untuck the toes on your back foot. Lift your back foot from the mat. Sweep your right arm back (palm facing up), and grab the pinky-side edge of your left foot. Begin to kick your back foot into your hand. Puff your chest, and roll your shoulders down. Roll onto the outer edge of your right foot, and allow your right knee to fall away from the body. Enjoy this full-body stretch for 30-60 seconds before repeating on the opposite side.TwistedMonkey

    Prasarita Padottanasana
    Step your feet about a leg’s distance apart, and position your feet so that they are parallel to one another. Interlace all ten fingers behind your back, and squeeze your palms together. Roll your shoulders down and away from your ears, and engage your thighs by pulling your quadriceps up and into the body. Inhale deeply, and exhale as you hinge forward from the waist, allowing your clasped hands to fall forward. If possible, allow the crown of your head to rest on the mat.Prasarita

    Supine Pigeon Pose
    Lie on your back with your knees bent and your feet flat on the mat. Cross your right ankle over your left thigh, so that you create a triangle of space between your two legs. Bring your legs toward your chest, and then hook your arms through the triangle of space and cradle your right shin. Pull your shin toward your body as you extend your left leg to hover a few inches above the ground. Hold this hip-opening stretch for 30-60 seconds, and repeat on the other side.SupinePigeon

    Will these four stretches solve your problems and remove the stress from your life? Of course not. Stress is often caused by circumstances that are beyond our control. The goal here is to focus on what we CAN control—our breath, our body, and our response to difficult situations. Good luck in all that you are facing. You are stronger and more resilient than you think!

  • Daily Practice: Warrior I

    Daily Practice: Warrior I

    As much as I love to be upside every day, there isn’t a day that goes by where there is not a Warrior Pose included in my practice. Just like any inversion, these postures work your entire body and build muscle. Over the next few weeks, I will break down all of the different Warrior Poses you can add to your daily flows. Not convinced yoga is a workout? Your challenge this week will be to hold Warrior I, or Virabhadrasana I, for a full minute on each side.

    Warrior 001

    From Downward Facing Dog, step your right foot in between your hands and spin the left heel down. Your right heel should line up with your left heel. Bend deeply into the right knee, making sure your right knee stacks directly over your right ankle. Right thigh becomes parallel to your mat. You should be able to look down and see your right big toe.  If you cannot, make sure your right knee isn’t collapsing in. Take your hands to your hips and try to square your hips off to the top of the mat.

    Warrior 002

    Don’t worry if your hips aren’t completely square…my hips tend to be tight so this posture is always a work in progress for me!  Remember, yoga is a practice.

    Once your hips are as square as you can get them, extend your arms up toward the sky. Activate your fingers as you reach up.  Your upper arm bones will plug into their sockets and your shoulder blades will draw down your back. Engage your abdominal muscles and stand strong! Press actively into the mat, applying equal pressure. Remember to keep bending into that front leg!  No lazy warriors allowed!

    XOXO

    Blog Signature

  • Blueberry Crisp (No White Sugar, No Dairy, No Gluten)

    Blueberry Crisp (No White Sugar, No Dairy, No Gluten)

    blueberry crispI love dessert. I love butter, sugar and cream — and all of the other sinful ingredients that go into a decadent dessert.  However, I’ve been on a quest to lighten up my desserts, to reduce my sugar intake and to substitute more “healthy” ingredients into my recipes.

    I thought I would start with a crisp.  I made a light version of a strawberry rhubarb crisp a few months ago.  It was delicious.  But, now blueberries are in season, so I thought I would try my hand at a healthy blueberry crisp. I swapped out white sugar for maple syrup — a natural sugar.  I included orange juice to add some natural sweetness as well as the zest of orange and lemon which pairs perfectly with the blueberries. Instead of butter, I used safflower oil as the “fat” in the topping.  I added walnuts and oats for texture.

    I’m really pleased with how it turned out.  In fact, my whole family thoroughly enjoyed this crisp — even my mother (who can see right through my healthy dessert recipes) raved about it!

    The beauty of this recipe is that you can swap the blueberries for other berries of your choice.  You can eat it just as it is, or you can top it with ice cream, a dollop of cream or greek yogurt. I bet this would work out great with apples.  I can’t wait for apple season . . . .

    Blueberry Crisp
    Serves 8-10 people

    8 cups of blueberries
    1/4 cup of freshly squeezed orange juice
    1/4 cup of freshly squeezed lemon juice
    zest of one orange
    zest of one lemon
    3/4 cup of maple syrup (grade B)
    1.5 tablespoons of cornstarch

    For the topping:

    3/4 cup of brown rice flour
    3/4 cup of almond meal
    1 cup of quick cooking oats
    1/2 teaspoon of salt
    1/2 cup of safflower oil
    3/4 cup of maple syrup
    1/3 cup of chopped walnuts

    Preheat oven to 350 degrees.

    In a large bowl, combine blueberries orange juice, lemon juice, zest, maple syrup and cornstarch.  Mix to combine.  Pour blueberry mixture into a 9 by 13 inch baker.

    In a separate bowl, add brown rice flour, almond meal, oatmeal, salt, safflower oil, maple syrup and chopped walnuts.  Mix to combine. The topping will be loose. It will not be crumbly like a more traditional crumb topping made with butter. I’ve included a picture below so you can see the consistency.crumb topping

    Spoon topping over blueberry mixture.  Bake for 1 hour at 350 degrees. Crisp is done when berries burst open and bubble.cooked crisp

    Helpful hint: Don’t serve the crisp right from the oven.  Let it sit a bit so that it sets up — it will be easier to dish out.

  • Instagram Quick Tip:  Video Cropping

    Instagram Quick Tip: Video Cropping

    About a year ago, Instagram moved into the realm of video sharing. Now, not only can you share your favorite photos with the world, but you can also share your favorite 15-second video clips. If you are already familiar with Instagram, you know that the format of this photo/video-sharing app allows you to post a square-shaped image. This sounds reasonable enough, until one day, you load an amazing panoramic or vertical video onto Instagram and discover that the automatic square-shaped cropping results in some of your body parts or some of your amazing view being cropped out of sight.AutomaticCropHandstand

    The image on the left is a screenshot of a video that I took on my iphone. Looks great, right? The image on the right is a screenshot of the automatic cropping that occurs as soon as the video is loaded into Instagram. My legs and hands are cut off!!

    No need to panic.  Gone are the days of having to re-shoot your video to adjust your distance from the camera.  Here are two of our favorite video cropping apps to help you navigate the Instagram world of square cropping.

    Video App 1: Squaready for Video App
    Download the free “Squaready for Video” app onto your phone. Upload your video into the app, and it will automatically put your full video into a square shape by adding borders in the color of your choice. This is a great option if the subject of your video occupies a large portion of the frame, as shown in my example. This app allows you to maintain the entire image without any square cropping at all. When you upload your video after using the Squaready app, your video will appear in Instagram as shown below.  As you can see, I’ve chosen white borders to fill in the empty portions of the Instagram square.

    SquarereadyHandstand

    Video App 2: Video Crop & Zoom
    The second video app that we love is the “Video Crop & Zoom” app. This app allows you to zoom in on any portion of a video and crop it into a square shape for Instagram as shown below. By having the capability to zoom in on the subject, you can eliminate unwanted background/foreground.

    CropandZoom

    Although this process is a bit more time consuming than just loading the video directly onto Instagram, I prefer having a video that fills the full square frame.


    Download one or both of these apps!  You may find that both of these apps are helpful in different situations.

    If you would like to see any other Instagram Quick Tip topic covered, please leave us a message!