Category: Z Featured

Our editors pick the cool stuff for you

  • Kate’s No-Bake Granola Chewies

    Kate’s No-Bake Granola Chewies

    If you attended our Yoga & Wellness Retreat in Englewood, NJ earlier this month you would have experienced my first live cooking demonstration — and these delicious No-Bake Granola Chewies!

    I’m always looking for quick, easy and healthy snacks for my kids, so a no-bake granola bar was a no-brainer.  I just had to figure out how to achieve a granola bar consistency without baking.
    granola bar header
    Dates.  Pitted dates are the answer.  I have to tell you, and I shared this with the retreat participants, that I think dry pitted dates look just awful — they are in no way appetizing. HOWEVER, when you break them down in a food processor, they turn into a lovely, delicious paste that you can use to sweeten your baked goods.  They are the glue — or one of the glues — holding these tasty granola bars together.  They not only add sweetness and gooeyness, but they add lots of fiber and are chocked full of lots of good vitamins and minerals including calcium, folate, iron, vitamin A and vitamin K!

    Peanut butter also helped to bind the bars and maple syrup added some additional sweetness.  I personally like mini chocolate chips in mine, but you could certainly substitute the chips for dried fruit or coconut.

    Wrap them up for school lunch or work lunch – or pop them into your gym back for a pre- or post-workout snack.

    Enjoy!

    Kate’s No-Bake Granola Chewies
    Yields one 8×8 pan

    1 cup of pitted dates, pulsed in a food processor
    1/4 cup maple syrup
    1/4 cup peanut butter
    1 1/2 cups of rolled oats (*I prefer toasted)
    1/2 cup brown rice crisp cereal
    1/3 cup almonds, whole or blanched, any kind you like — or another nut if you prefer
    1/3 cup mini chocolate chips (feel free to replace the chocolate chips with dried fruit or unsweetened coconut or anything else you’d like!)

    Directions:

    Line an 8×8 pan with parchment paper or plastic wrap and set aside. You can always spray the bottom and sides of the pan with coconut oil if you find the paper or wrap is not adhering nicely to the pan.

    Add the dates to the bowl of a food processor and pulse for about a minute, until the dates form a paste. I added a drop of water to help the process — but literally only a drop!

    In a separate bowl, add the maple syrup and peanut butter.  Mix to combine.  If you find that your peanut butter is not loose enough, you can pop it into the microwave for 30 seconds.

    Add the dates, oats, rice cereal, almonds and mini chocolate chips and mix until well combined.

    Transfer the mixture to the prepared pan and evenly distribute.  I used a drinking glass to help flatten the mixture.

    Cover the pan with plastic wrap and let them firm up in the refrigerator for 15-20 minutes – or until very firm.  Remove them from the refrigerator and invert the pan onto a cutting board and slice into any size that you like.  I ended up cutting 24 small bars from mine.

    *Helpful Hint: Try toasting your oatmeal for a nuttier flavor! Let them toast in the oven, on a baking sheet, for about 15 minutes at 350 degrees, just until very lightly browned!

  • 5 Steps Towards Making Your Dream a Reality

    5 Steps Towards Making Your Dream a Reality

    Four years ago, we began sharing our love of yoga on Instagram by posting snapshots and picture tutorials of some of our favorite poses. With young kids at home, we rarely made it out to attend classes at yoga studios, but we loved to practice at home. We had a passion for connecting with others and sharing whatever we learned on our mats, so we posted photos often and helped build a virtual yoga community. We hoped to be able to reach a larger audience one day, and seeing that dream come true through our relationship with Gaiam has been a surreal experience.
    TFM-74_IG
    Last month, we realized another one of our dreams as we launched the Two Fit Moms apparel line with Gaiam.

    We want YOU to dream big too! So, in keeping with this theme, here are five things that we believe have helped us, and will help you, as you set on your path towards making your dreams a reality.

    Think Positively: You need to believe it in order to achieve it, so the first thing on your list should be to create a positive affirmation. If you don’t believe in you, no one else will.  Create your own personal mantra that you come back to time and again – especially when your faith in you falters. Consider starting and ending your day with this mantra. “I am strong, I am confident, I can achieve my dreams.”

    Fake It, Until You Make It: You need to walk the walk and talk the talk – even if you don’t believe it at first. If your goal is to run a marathon one day, start playing the part of an athlete! Even if you are out of shape, you can start eating well, drinking water instead of sweetened beverages and committing to a daily walk. You need to believe in your dream, in your ability to achieve it, and you may need to adjust your mind and your actions in order to realize it. Live your mantra.

    Be Resilient: Recognize that your dreams may change, they may take longer to achieve, they may require more work, or a partner or more resources. Being open to change and able to adapt to it will be important. Things don’t always work out the way we would like, so being able to land on your feet is key.

    Ask for Help: Much of achieving a dream rests on you, but don’t be foolish. Ask for help. Look for guidance from others who may have insight or experience that would be helpful and valuable to you.

    Return the Favor: Don’t take your opportunities for granted. Remember where you came from, be modest, be thankful and give back. Be a source of inspiration, and share your experience so that you can encourage others to start on their path to achieving their own dreams.

  • Working for the Dream:  Hanumanasana

    Working for the Dream: Hanumanasana

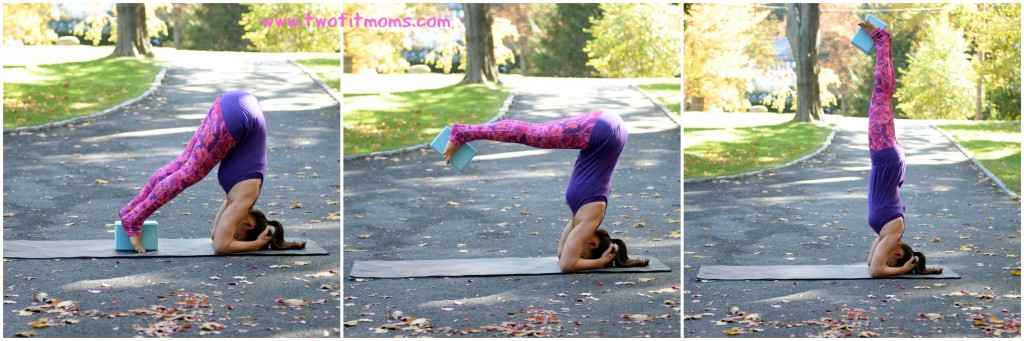
    Even though you know that yoga is never about reaching a final destination, it’s natural to have goals for your practice.  The trick is to be able to set yoga goals without becoming attached to an expectation for any particular outcome.  Go ahead and practice those inversions, but don’t get caught up in negative self-talk if you don’t achieve those goals according to some pre-set schedule.  Go ahead and practice each day with the goal of increasing your flexibility, but don’t get frustrated by the length of time that it’s all taking to see any progress.  Set your intentions, but never forget to enjoy the journey!

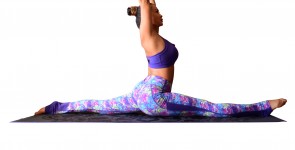
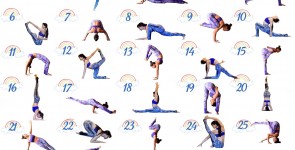
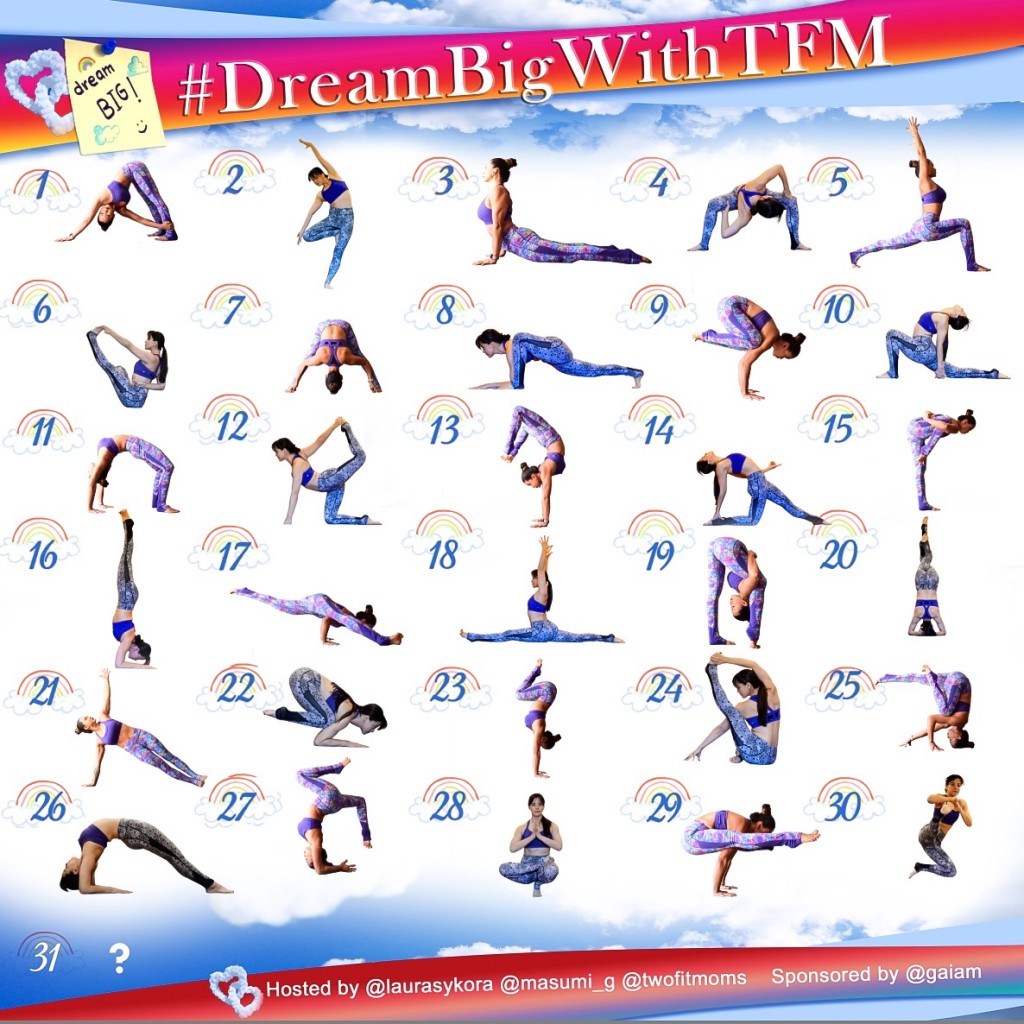
    Monkey Pose (Hanumanasa), where the legs are split from forward to back, is a challenging posture that falls into the category of “Dream Poses” for many yoga practitioners. Not only does this pose require flexibility in the hamstrings (front leg), but it also requires flexibility in the hip flexors (back leg). Whether or not you ever find yourself in the full expression of Hanumanasana, you can still enjoy the journey with these very effective, preparatory poses. Before beginning this sequence, be sure to warm up your body with multiple rounds of sun salutations.

    Head-to-Knee Seated Forward Bend

    JanuSirsasana
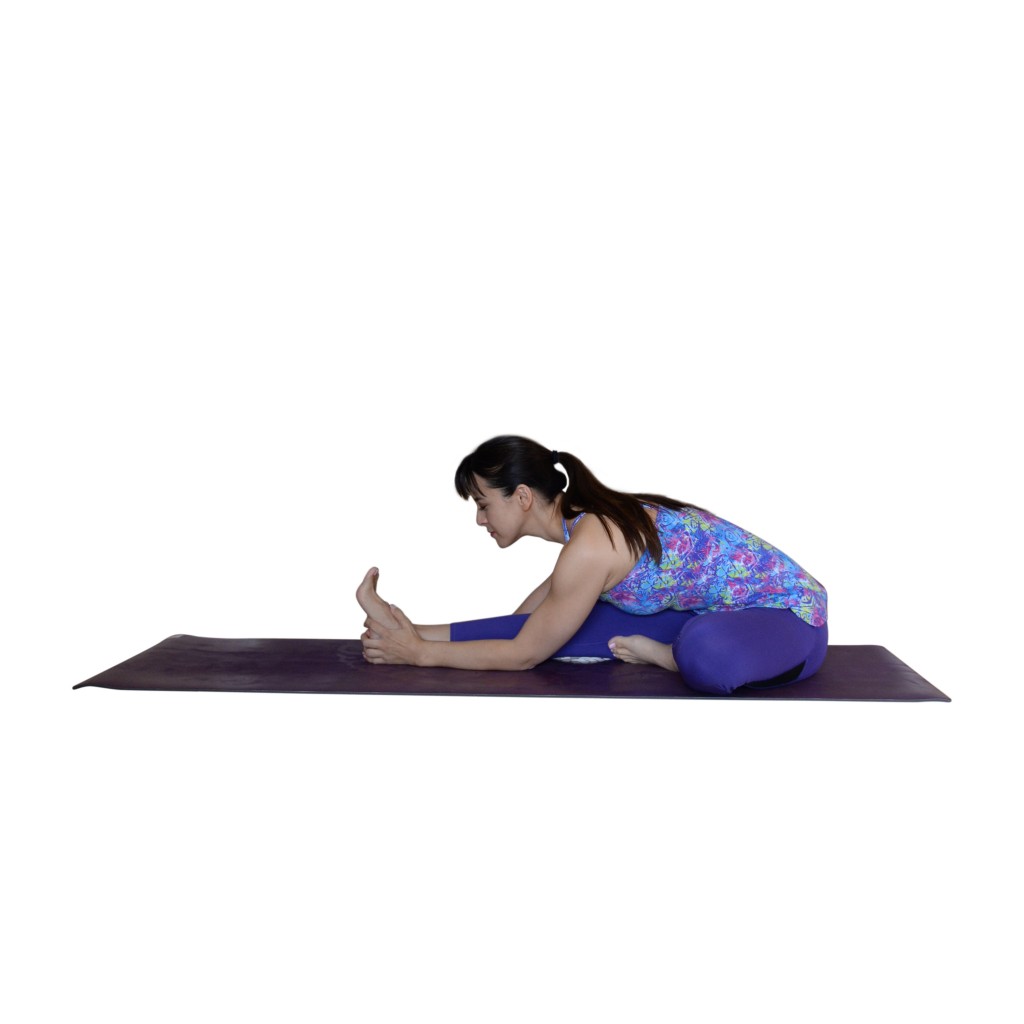
Take a seat on your mat with your legs extended straight in front of you. Bend your left knee and bring the sole of your left foot to the inside of your right thigh. Sit up tall, and flex your right foot to engage the hamstrings. Rotate your torso slightly to the right to align your belly button with the center of your right thigh. If your hamstrings are quite tight, sitting up tall might be enough of a stretch for you. Stay here and take deep breaths. For a deeper stretch, fold over your extended right leg, being mindful to find extension in the spine and avoid rounding the upper back. Hold this pose for 5-10 breaths before releasing the stretch.

    Seated Forward Bend

    ForwardFold

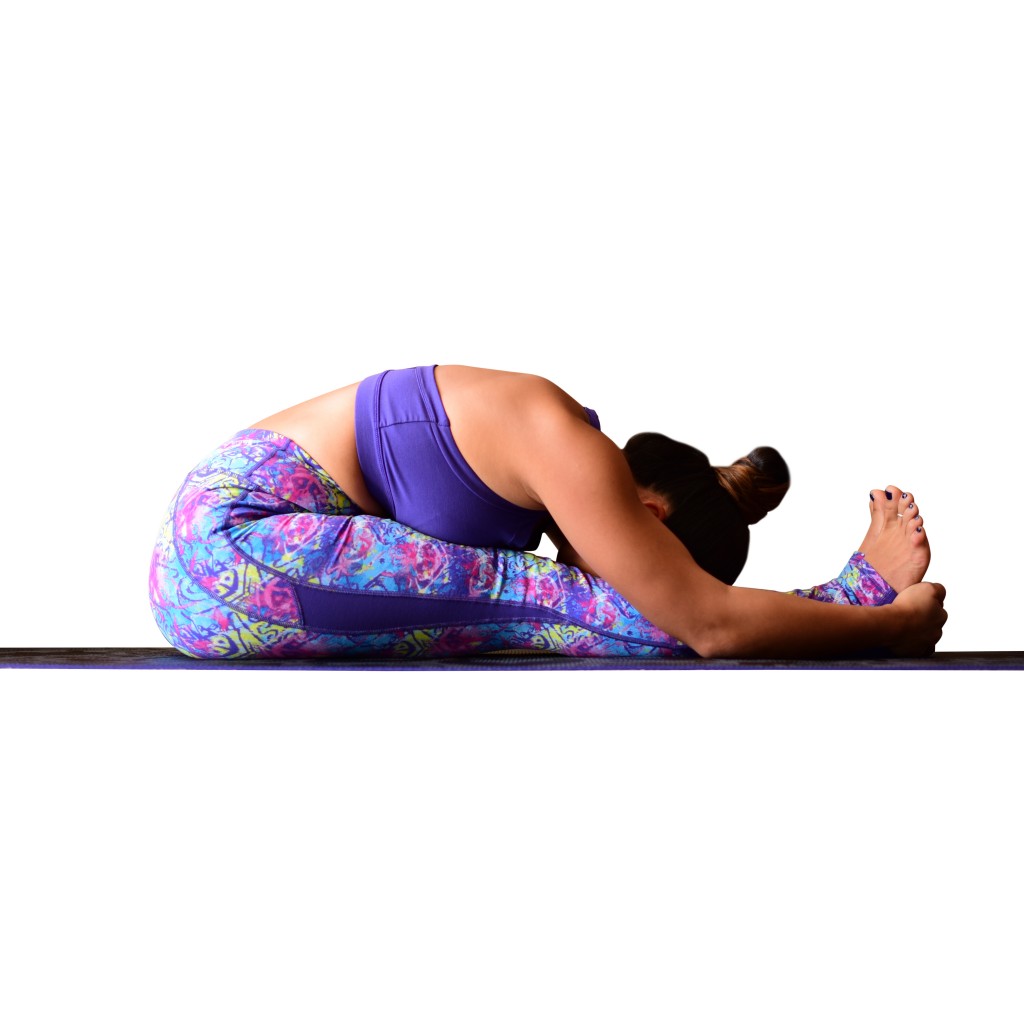
    A seated forward fold is an intense stretch that simultaneously stretches the hamstrings on both legs. Sit on your mat with your legs extended straight in front of you. Flex both feet to energize the legs and to engage the hamstrings. Sweep your arms up over your head, find length in the spine, and hinge forward from the hips as you reach for your feet. Rather than focusing on bringing the forehead to the shins, focus on pulling your chest forward to lengthen the spine. Beginners can use a strap around the soles of the feet and hold the strap with both hands. Hold this pose for 5-10 breaths.

    Low Lunge

    LowLunge copy

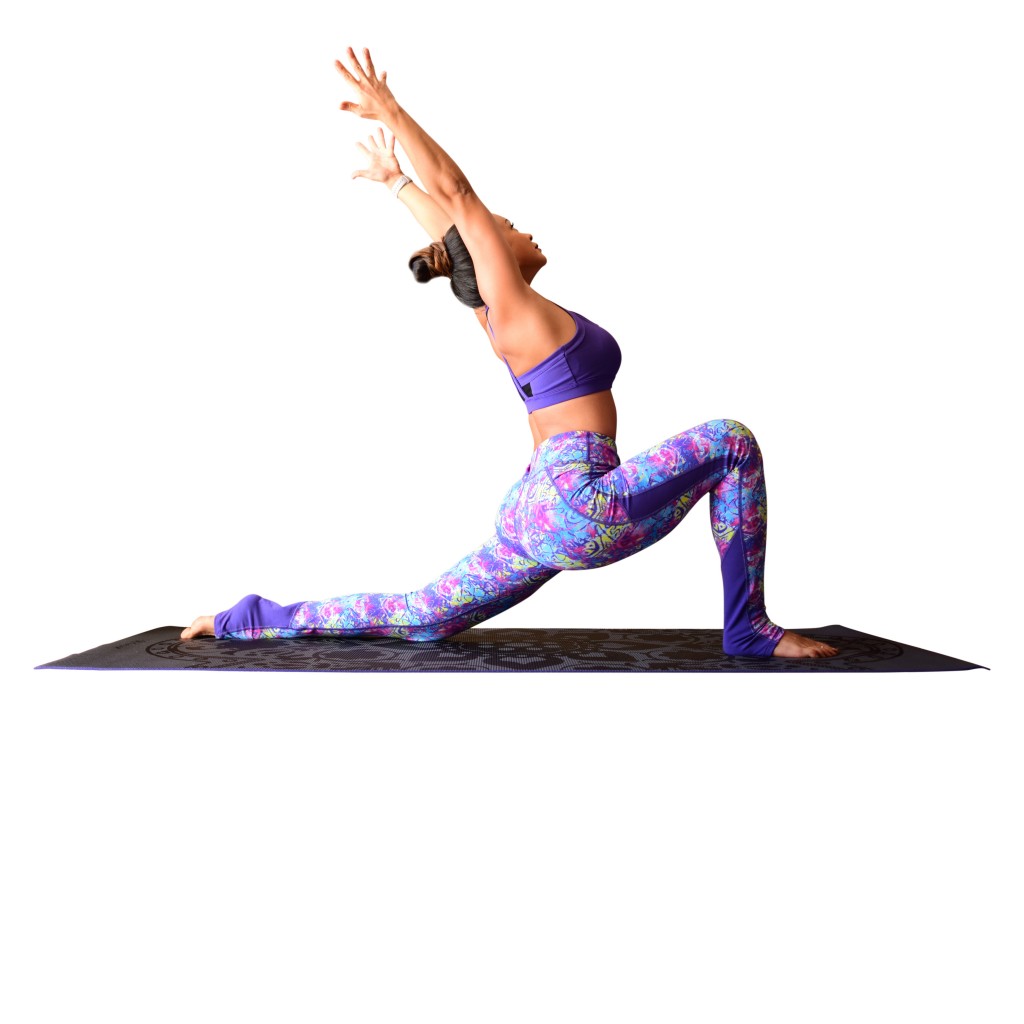
    Low lunge is a great front-body stretch that targets the hip flexors. Begin in Downward Facing Dog and step your right foot in between your hands. Lower your back knee to the ground, and untuck the toes. Bring both hands to the top of your right thigh, and begin to bend deeply into the front leg. Be sure to keep the torso upright to get the most effective stretch in the hip flexors. Feel free to keep your hands on your front thigh for support, or extend your arms and lift your chest toward the sky for a backbend. Take 5 deep breaths before releasing the stretch.

    Twisted Monkey

    TwistedMonkey copy

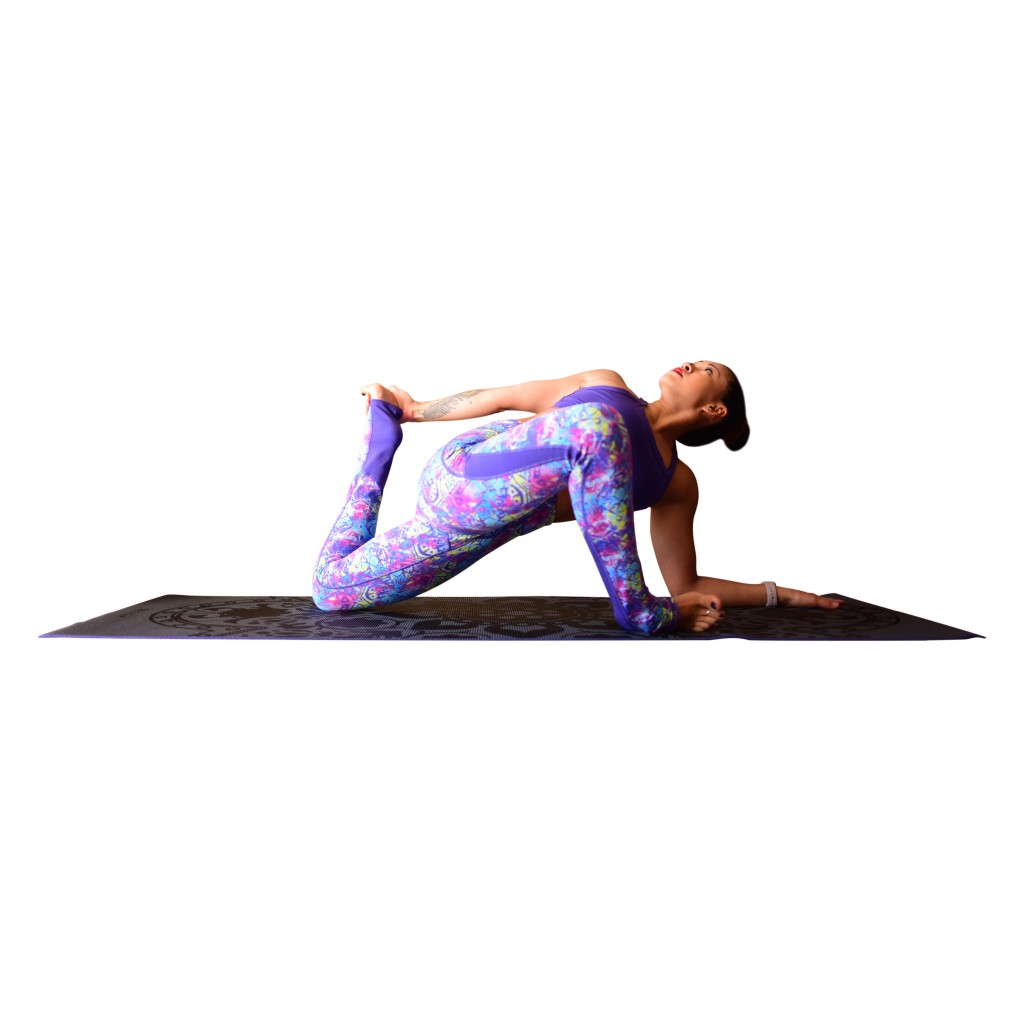
    From Downward Facing Dog, step the right foot to the outside of the right hand, lower the back knee to the ground, and lift the back foot up so that the toes point up toward the sky. Sweep your right arm back, and grab the outside edge of the lifted foot. Begin to pull the foot in toward the body to stretch the quadriceps. If you are unable to reach your foot with your hand, feel free to use a strap around your foot to make the stretch accessible. Next, begin to roll onto the outside edge of the front foot and allow the right knee to fall to the side for a hip stretch. Hold this pose for 5 full breaths before slowly releasing your back foot and rolling back down onto the sole of your front foot.

    Pigeon (upright)

    Pigeon

    Pigeon pose is an effective hip opener that not only stretches the outer hip of the front leg, but it also stretches the hip flexors with the extension of the back leg. To come into the pose, begin on hands and knees in Tabletop position. Bring your right knee onto the mat behind your right wrist. Tuck the toes on your left foot, and begin to extend the left leg straight back. Sink the pelvis toward the floor. If you find that you are rolling to the right, place a block under right hip. Rather than folding forward over your bent leg, walk your fingertips back and practice sitting upright to effectively stretch the hip flexors. Hold this pose for 10 breaths before moving on to the next pose.

    Half Split

    HalfSplit

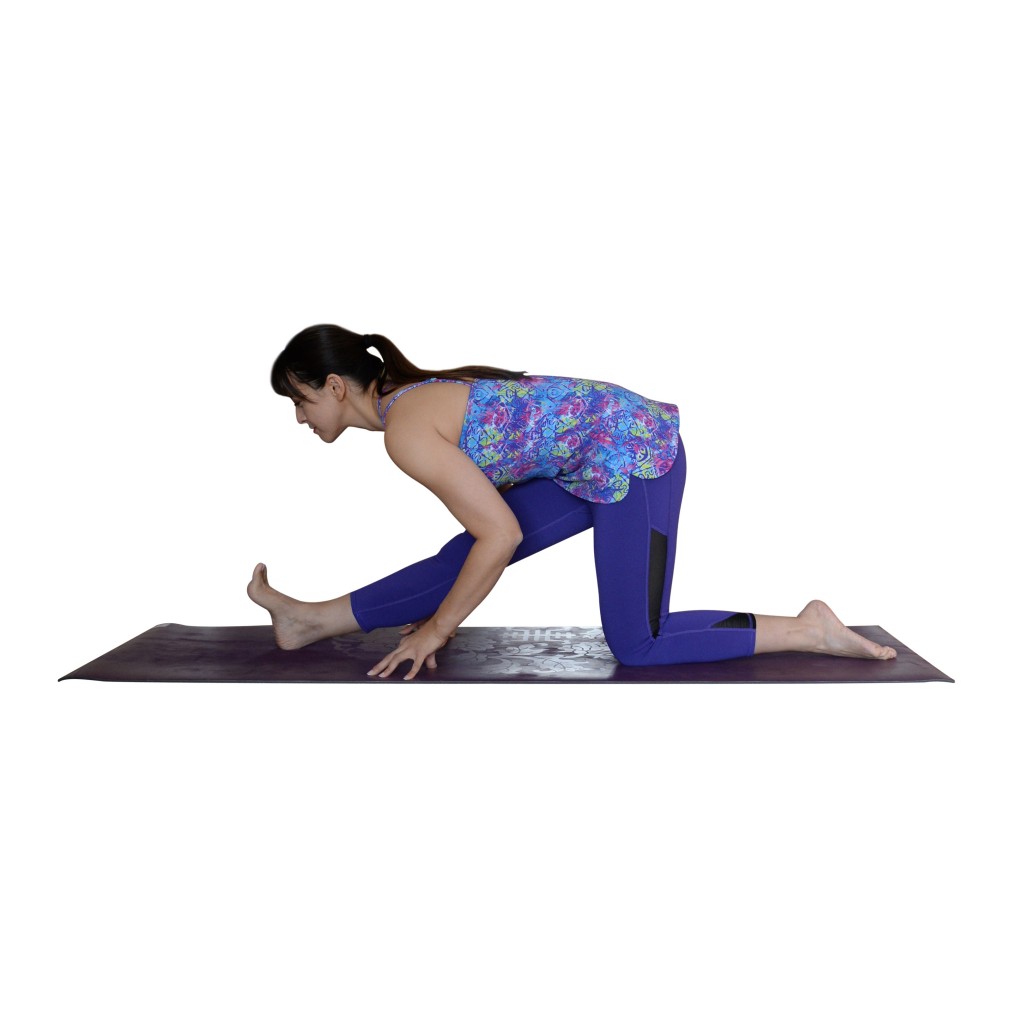
    From Downward Facing Dog, step your right foot in between your hands. Lower your back knee to the ground, and rise onto your fingertips. Draw both hips back in space while straightening the right leg, until the left hip is aligned directly over the left knee. Flex the right foot to energize throughout the length of the extended leg. Begin to walk the fingertips forward. Fold over the straightened leg, while maintaining length in the spine. Focus on pulling the chest forward, rather than bringing your forehead to your shin. Hold this pose for 5-10 deep breaths before moving on.

    Split with blocks

    SplitBlocks

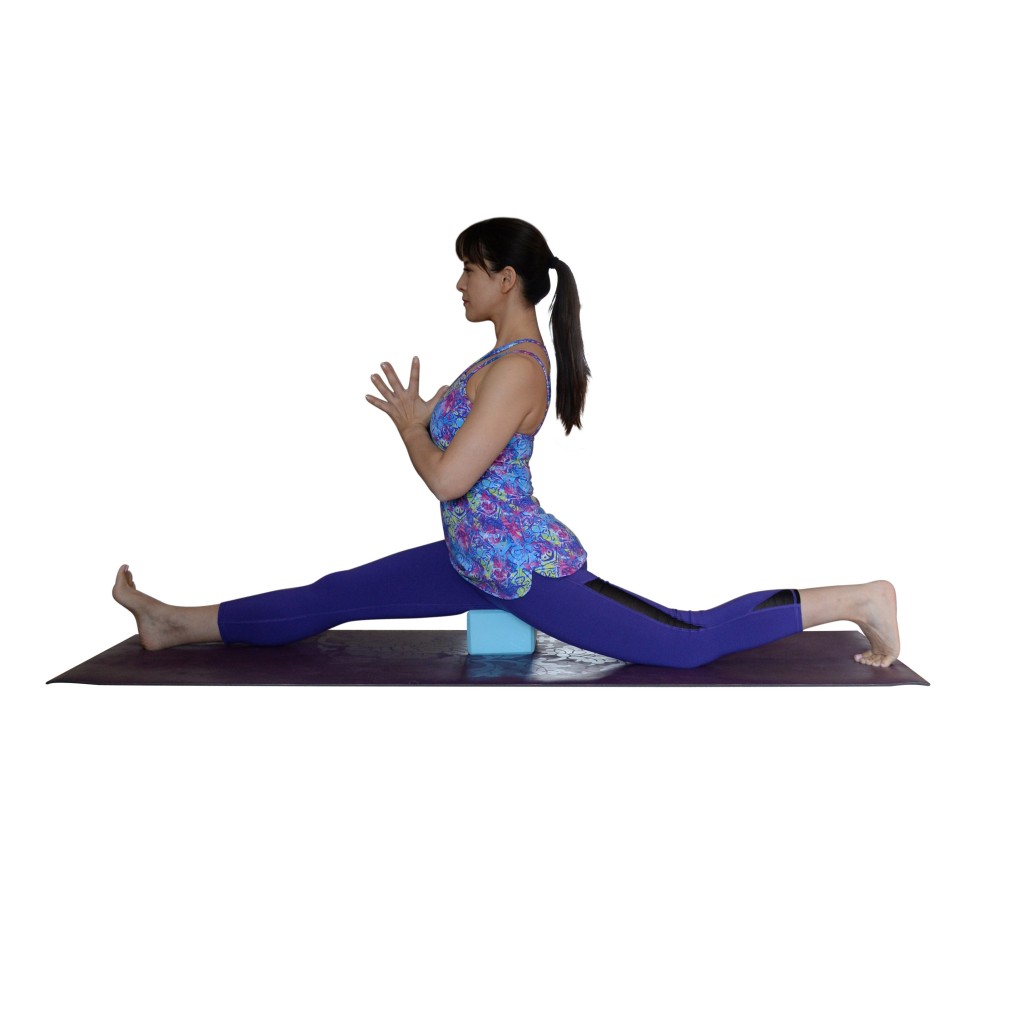
    Begin in a half split, and slowly extend your back leg by pressing into the floor with your hands while scooting back on your knee a few inches at a time. Use a block (or two) under the hip of the front leg to support the body.  The extra height from the block effectively lifts the floor by several inches and allows you to practice the full expression of the pose at any stage of flexibility.  Sit up tall to get the most effective stretch in the hip flexors, and keep the toes of your back foot tucked to help keep both hips equidistant to the top of the mat. Breathe deeply, and hold this posture for 5-10 breaths. If your body feels ready, and you happen to be using two blocks under your front hip, try removing one of the blocks and holding the posture for another 5-10 breaths.


    Split (full expression of the pose)

    Split

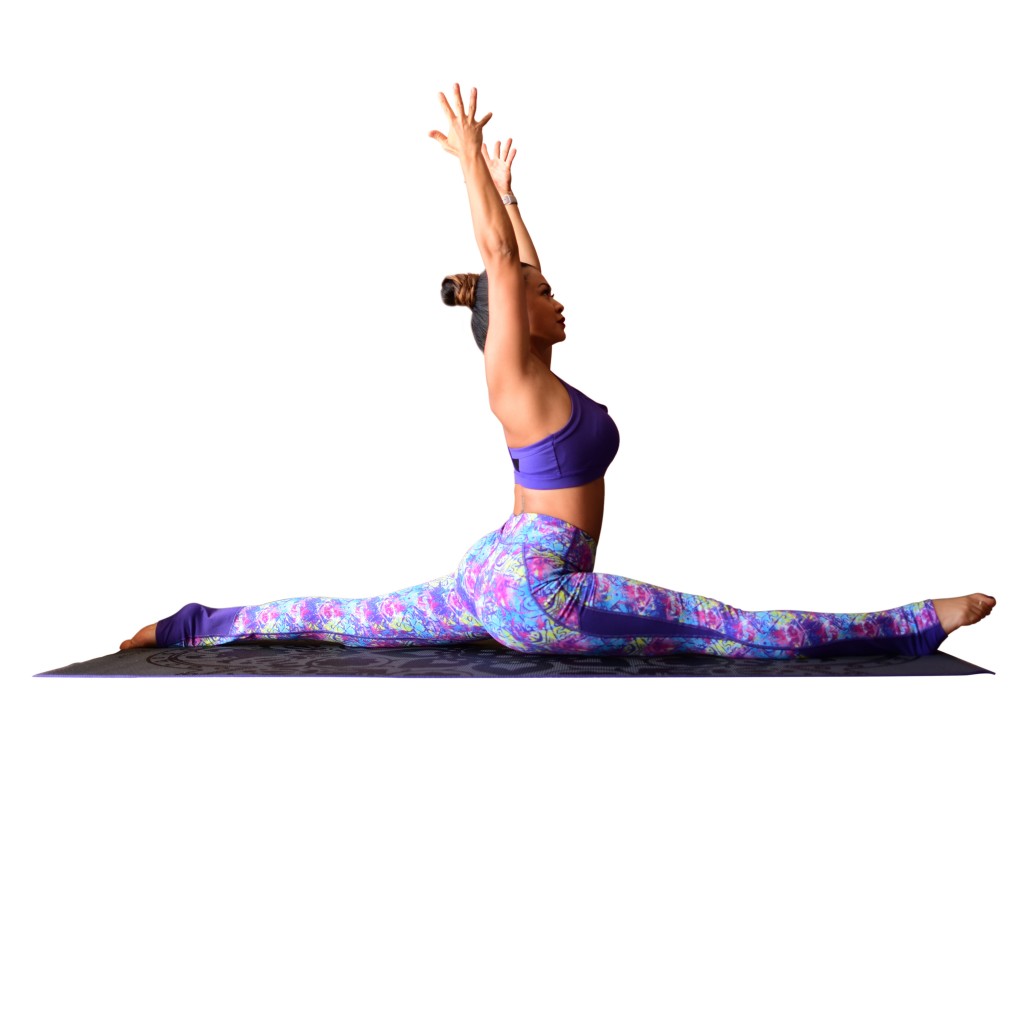
    If and when your body is ready, you will find that the full expression of Monkey Pose is a natural extension of practicing with the support of blocks. Remove the block from under the right hip. Keep your legs active by hugging the inner thighs in toward each other and flexing your right foot so that the toes point upward. You have the option of keeping the toes of your back foot tucked to help keep your hips aligned properly. Leave your fingertips on the floor for support or for a deeper variation, bring your palms together in front of your heart or extend your arms toward the sky. Hold this pose for 5 full breaths before releasing the stretch and repeating the entire sequence on the opposite side of your body.

  • Dream Big in March!

    Dream Big in March!

    Hello to our online community!

    Tonight, we kick off our March yoga challenge on Instagram by posting instructions for the first pose.  The theme this month is “Dream Big”.  We are gearing up for the launch of our new clothing line with Gaiam in April, and honestly, it wouldn’t be happening if we didn’t start with a dream.  DreamBigWithTFM

    We want you to DREAM BIG, too, and develop a yoga practice that you love.  The goal of the challenge is to commit to your practice and to participate in some way, every day.  Can’t do all of the poses shown?  No problem.  Show us what you CAN do.  Modify. Get creative.  Have fun, and realize that you can be your own source of inspiration!

    For complete details about this challenge, follow @twofitmoms on Instagram, and find the full list of instructions for the challenge.

  • Chocolate “Ice Cream” with Dark Chocolate Shavings

    Chocolate “Ice Cream” with Dark Chocolate Shavings

    Chocolate is decadent. It’s romantic. It’s indulgent. It’s perfect for Valentine’s Day and, as far as I’m concerned, perfect every day of the year!

    DSC_0950I love chocolate.  I also love ice cream. If you are like me, you are going to love this mock chocolate ice cream. It’s so good. It’s unbelievable actually. You’d never know it was healthy and dairy free!

    It’s made with frozen bananas, cocoa powder, a hint of maple syrup, and, in this case, dark chocolate shavings (but you can add anything to your ice cream, e.g., nuts, fruit, etc.).  This dessert is dairy free so it works for so many of you who are lactose intolerant or for those who have omitted dairy from your diet for other reasons.

    To be honest, I’m still amazed that frozen bananas can yield a frozen dessert so close to a dairy-laden ice cream. All you need is a food processor.

    So, here’s my new favorite chocolate ice cream recipe! I hope you enjoy it — you may even want to make it for your valentine this year.


    Chocolate Ice Cream with Dark Chocolate Shavings
    Serves 4 

    4 bananas, sliced and frozen
    1/4 cup of cocoa powder
    2-3 tablespoons maple syrup (grade B)
    1 tablespoon coconut oil
    1/3 cup of shaved dark chocolate (or anything else you’d like to mix into your ice cream)

    In the bowl of a food processor add the frozen bananas, cocoa powder, maple syrup and pulse until the bananas break down into a smooth, ice cream-y texture.  Add the dark chocolate shavings (or your favorite candy, fruit, nuts) and mix until incorporated (depending on what you add, you can either pulse in the food processor, or transfer the ice cream into a bowl and mix the ingredients). Pour the mixture into a loaf pan and pop into the freezer until it hardens.  The mixture, right out of the food processor, will likely be too loose to serve. One the ice cream sets, scoop and serve!


  • Shaved Brussel Sprout Salad with Toasted Walnuts and Parmigiano-Reggiano

    Shaved Brussel Sprout Salad with Toasted Walnuts and Parmigiano-Reggiano

    Many years ago (probably a decade), before we had kids and could go trek into New York City for an amazing meal, we happened to dine at Mario Batali’s restaurant Lupa. We had the most delicious raw brussel sprout salad — which I think had pecorino cheese in it . . . It was the first time I had even had raw brussel sprouts.  And, they were delicious.  Not only did I love them, but I totally preferred them over cooked brussel sprouts.

    Of course, I had to try to re-create the recipe, or some version of it.  Mine is actually a little bit different from the original raw brussel sprout salad I feasted on many years ago.  It includes toasted walnuts and lemon juice — but overall, it’s a really delicious, light and simple recipe!

    shavedbrusselheaderIf you are wondering where you can find shaved brussel sprouts, you can actually purchase them at Trader Joe’s which offers a pre-packaged option. If you don’t have a Trader Joe’s in your neck of the woods I suggest that you throw the brussel sprouts into the food processor to replicate the texture — or you could use a mandolin, but I would fear for your fingers.

    This salad is great because, 1. it’s seasonal; 2. it’s delicious; 3. unlike a dressed green salad, it can sit in the refrigerator and not get soggy.  In fact, the salad is better once it’s marinated overnight. It’s also the perfect salad to serve at a holiday meal.

    Shaved Brussel Sprout Salad with Toasted Walnuts and Parmigiano-Reggiano

    Serves 4

    10 ounces shaved/shredded brussel sprouts
    1/3 cup of olive oil
    4 tablespoons lemon juice
    1/4 teaspoon salt
    pepper to taste
    1/2 cup parmigiano-reggiano, shaved
    3/4 cup of toasted chopped walnuts

    In a small bowl, whisk the olive oil, lemon juice, salt and pepper.  Place the brussel sprouts in a large bowl.  Add the dressing, toasted walnuts and cheese and toss to combine. Serve immediately or refrigerate overnight.

  • 4 Ways to Challenge & Enhance Your Practice with Yoga Blocks

    4 Ways to Challenge & Enhance Your Practice with Yoga Blocks

    If you think yoga blocks are just for beginners that can’t touch their toes or for injured yoga practitioners that can’t sit between their heels in hero pose, think again. There are plenty of ways to get creative and use your blocks to deepen your practice in a challenging, fun way. Here are four suggestions:

    Twist & Tap
    Fire up your core in boat pose by holding a yoga block. Slowly twist from the lower belly to the right, tap the block on the ground to the right, and untwist your torso, coming back to center. Begin to twist to the left, tap the block on the ground to the left, and come back to center. Consider that to be one repetition. Keep your core engaged, your chest lifted, and avoid collapsing into your belly and rounding the back. The shins can remain parallel to the ground throughout the exercise, or you can extend your legs straight for a more intense variation. Work up to 12-15 repetitions.TwistAndTap

    Chest & Tricep Opener
    Place two yoga blocks on the ground, shoulder width apart. Kneel on the mat, and rest your elbows and triceps on the blocks. Keep your hips stacked over the knees, and begin to sink your chest toward the ground as you bring your hands together in prayer over your head. This pose is very much like puppy pose with the added benefit of a deep tricep stretch. Hold this pose for 5 to 10 breaths, sinking your chest lower with each breath.ChestTricepOpener

    Squeeze a Block in Inversions
    If your eyes glaze over when you hear your yoga teacher talking about internally rotating the thighs and hips while performing inversions, no need to worry. This exercise will solidify the concept in your mind, and you won’t forget anytime soon. By squeezing a yoga block between your feet as you slowly lift into an inversion, not only will you train your core muscles, but you will also automatically create a slight internal rotation in your legs that will help you stabilize and build strength. Go ahead and try this exercise with any inversion of your choice.HeadstandCollage

    Relaxing, Deep Backbend
    In my own personal practice, I’ve found this to be the single most effective stretch for the upper back and chest. If you are looking to deepen your backbend practice, it’s so important to stretch in various ways to help create an even backbend through your lower, middle and upper back. Place a block underneath your shoulder blades as you lie on the ground. If you tend to be very tight across the chest and back, start out by placing the block on shortest height. Breathe for 5-10 breaths before turning the block so that it’s resting in its next tallest orientation. Again, breathe for 5-10 breaths, and allow the chest and back to open up bit by bit. Finally, if your flexibility allows, turn the block to its highest orientation, and lie across the block for another 5-10 breaths. Try placing a second block under your head like a pillow for more support.UpperBackOpener

  • STOCKED: Hearty Lentil Soup

    STOCKED: Hearty Lentil Soup

    I’m a big fan of stockpiling — food, specifically.  I have a pantry in my basement where I stock all sorts of foods — canned tomatoes, olive oil, beans, pasta, nuts, etc.  I feel very stressed when my supply is depleted, so I keep a mindful eye on my pantry to make sure it’s always well stocked.

    If you are like me, you may feel similarly. There’s a sense of comfort in knowing that you have a lot of healthy food staples in your house. And, there’s an even greater sense of comfort knowing that you have a stock pile of healthy meals at your finger tips — or at least in your freezer!
    Lentilsoupheaderupdate
    Today we offer you the first recipe in a series we are calling STOCKED. This recipe is for a delicious, healthy and hearty lentil soup. It yields a huge batch that you can divide into containers and freeze for another day.  It’s a simple recipe, and I bet you probably have all of the ingredients in your pantry right now. (However, if you need help creating a well-stocked, healthy pantry, check out this article).

    Here’s what you need: onions, carrots, celery, garlic, lentils, fresh baby spinach (or another green of your choice), canned tomatoes, olive oil, chicken or vegetable broth, water, bay leaf, salt, pepper.

    It’s a very basic and heart warming soup.  The greens, in this case spinach, add a nice touch (courtesy of my friend Michele who inspired this recipe).  It’s also an extremely economical meal.  And, like I said, you will get a tremendous vat of soup out of this recipe. Enough to feed a small army. . . for days.

    Enjoy!

    Hearty Lentil Soup

    Yields a lot. 

    1 1/2 cups diced onion
    1 1/2 cups diced carrots
    1 1/2 cups diced celery
    1 large clove of garlic, crushed
    2-3 tablespoons olive oil
    1 28-ounce can of tomatoes (chopped, crushed, pureed – whatever you have on hand)
    16 ounces dried lentils (I used green lentils — don’t forget to rinse them!)
    6 cups of chicken or vegetable stock
    4 cups of water
    1 large dried bay leaf
    salt and pepper to taste

    In a large stock pot, warm the olive oil and add the onion, carrots, celery, garlic.  Cook until soft, about 10 minutes.  Add the lentils, can of tomatoes, chicken/vegetable stock, water, bay leaf, salt and pepper.  Bring the soup to a boil and reduce heat.  Let the soup simmer for about 25 minutes — or until the lentils are soft.  I just left my on the stove and let it simmer away.

    Helpful hint: When re-heating the soup, you may need to add more stock/water. Don’t stress. The lentils absorb a lot of the liquid. 


  • Maple Oatmeal Pumpkin Bread

    Maple Oatmeal Pumpkin Bread

    Pumpkin. Who doesn’t love pumpkin something? I recently walked into a grocery store and was overwhelmed with the amount of pumpkin infused items. I felt like Forrest Gump.  Pumpkin coffee. . . pumpkin tea . . . pumpkin creamer . . . pumpkin cream cheese . . . pumpkin ice cream . . . pumpkin pasta . . . pumpkin cookies . . . pumpkin pancakes — and the list goes on and on.
    Pumpkinbreadheader

    All of this pumpkin is a little overwhelming, but I still love it, and I know you do too! However, I prefer the more traditional pumpkin dessert recipes with natural ingredients, rather than artificial flavors. So, here is my healthy take on a fall classic— pumpkin bread.

    I’ve been experimenting with oatmeal a lot lately.  In this recipe, I decided to add some oatmeal to my bread, along with brown rice flour (which now makes the bread gluten free) and my usual white sugar substitute — maple syrup. I also added Greek yogurt to moisten the batter. Everything else is pretty standard — eggs, oil, vanilla, etc.

    However, I jazzed it up with a sweet/salty/crunchy topping — which also happens to be completely optional — but I do think it adds a nice texture. It’s just a simple mixture of rolled oats, pumpkin seeds, maple syrup and cinnamon — which is a perfect addition since it gives you a hint as to what is inside this delicious bread. Plus, the topping makes a nice presentation — don’t you think?

    I hope you enjoy this healthy twist on a classic recipe!

    Maple Oatmeal Pumpkin Bread
    Yields one loaf

    1 cup of pumpkin puree
    1/3 cup oil
    3/4 cup maple syrup, grade B
    1/3 cup plain Greek yogurt
    1/3 cup milk
    2 eggs
    1 teaspoon vanilla extract
    1 1/2 cups brown rice flour
    1/2 cup of rolled oats (ground into a flour)
    2 teaspoons baking powder
    1/2 teaspoon cinnamon
    pinch salt

    Topping (optional)
    1/4 cup toasted/salted pumpkin seeds
    1/4 cup rolled oats
    1/8 teaspoon cinnamon
    1 tablespoon maple syrup

    Preheat the oven to 350 degrees. Grease a 9 inch loaf pan and set aside.

    In a large bowl, combine the wet ingredients (pumpkin puree, oil, maple syrup, yogurt, milk, eggs, vanilla). When incorporated, add the dry ingredients (flour, oatmeal, baking powder, cinnamon, salt). Mix until incorporated. Pour into the greased loaf pan.

    To make the topping, add the pumpkin seeds, oats, cinnamon and maple syrup and toss to combine.

    Sprinkle the top of the loaf with the pumpkin seed/oat mixture. Bake for approximately 1 hour or until a tester inserted in the middle of the loaf comes out clean.

    Helpful Hint: Put your rolled oats into the food processor — the fine texture will make this loaf more cake-like.

  • Cinnamon Apple Rings

    Cinnamon Apple Rings

    If your family is like ours, you’ve probably recently gone apple picking — or you plan to at some point this Fall.
    CinnamonAppleRing
    There are many things you can do with an apple — pie, crisp, baked, etc. — but we wanted to offer you a healthy recipe that is not only delicious but easy to make. So, we created these Cinnamon Apple Rings which are pan-seared apple deliciousness. You can eat them for breakfast or dessert – they are actually an amazing after school snack! All you need is an apple (or two), an egg, flour (we used brown rice flour), cinnamon and oil (we prefer coconut, but whatever you have on hand is perfect). In five simple steps you will be feasting on these Cinnamon Apple Rings.

    You can drizzle honey on top for added sweetness, or add a dollop of Greek yogurt and walnuts. You can top them with ice cream or dip them in nut butter. They are versatile and can be jazzed up anyway you’d like them. But, honestly, they are delicious right out of the pan with nothing on them at all!
    AppleCollagePinterest

    Cinnamon Apple Rings
    Serving depends on size of apple, but we used one large apple

    1 large apple (we used Cortland)
    1 egg, beaten
    1/4 cup brown rice flour
    1/2 teaspoon cinnamon
    1 tablespoon coconut oil

    Directions:

    Slice the apple into 1/4 inch rounds, remove the core. (You can slice them in circles or in half moons, whatever suits you is fine).

    Beat an egg and add a tablespoon of water. In a separate bowl, add the flour and cinnamon, mix to combine. Dredge an apple slice in the egg mixture and then coat with the flour/cinnamon mixture. Shake off excess flour mixture.

    Heat the coconut oil in a pan. The oil will come to temperature quickly, so keep the heat at medium, but you may need to adjust depending on the size of your burner.

    Cook about a minute on each side — until the apples are nicely browned and crispy. Drain on paper towels. Serve warm and enjoy!

    Enjoy!