Category: Z Featured

Our editors pick the cool stuff for you

  • Entertaining 101: Planning Makes Perfect (well, almost)

    Entertaining 101: Planning Makes Perfect (well, almost)

    I love entertaining, but it’s a lot of work.  Creating the menu, buying the food, cleaning the house, setting the table, slaving over a stove . . . . all while managing kids and work and possibly wrapping and decorating too! This doesn’t sound like fun at all.  In fact, entertaining can be really stressful.
    Closeup of christmas placecard holders with plates and intencils
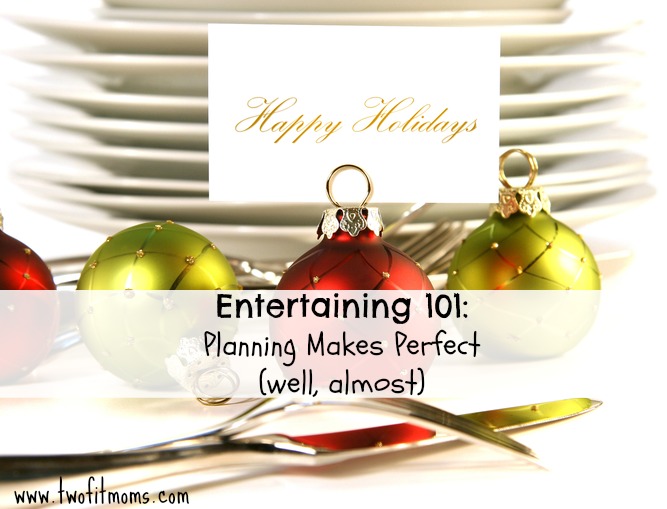
    So as the holidays get closer, consider these tips that are sure to make entertaining more manageable this year, especially if you are planning for a crowd.

    1. Plan Your Menu in Advance. In fact, write down your menu. While you are at it, make your grocery list too! We love lists, and this is definitely time to pull one or two together.  Try to avoid any guessing.  Even with a list, you may forget an item or two, but not having a list will be a disaster.

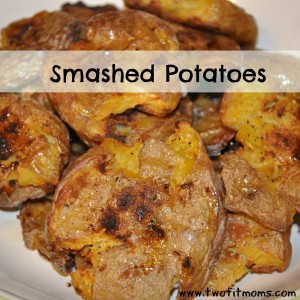
    2.Keep it Simple. There’s no need for 10 appetizers and 12 desserts.  Limit your menu to a few really good, quality dishes. And, while you are at it, don’t use the holidays to test a new recipe.  Stick to familiar favorites — and ones that are easy to prepare.

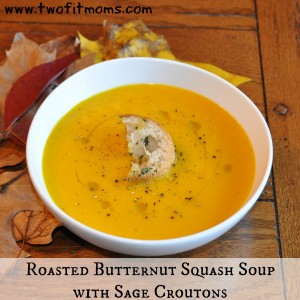
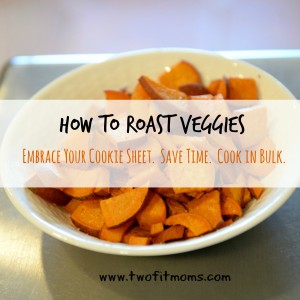
    3. Start Cooking Ahead of Time.  Make as much of your meal, as far in advance as possible.  Soups, sauces, appetizers are all things you can generally prepare ahead of time.  I make my Marinara Sauce a day or two in advance of serving it — the same with my Roasted Butternut Squash Soup.  We like to make our White Bean Dip in advance (in fact, it tastes better once it’s flavors have had a chance to meld.) You can also wash and cut veggies a day in advance of cooking them.  Don’t forget that prepping a recipe in advance saves time too!

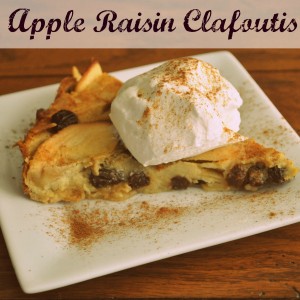
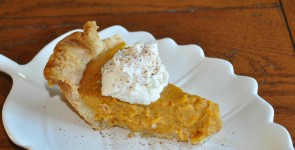
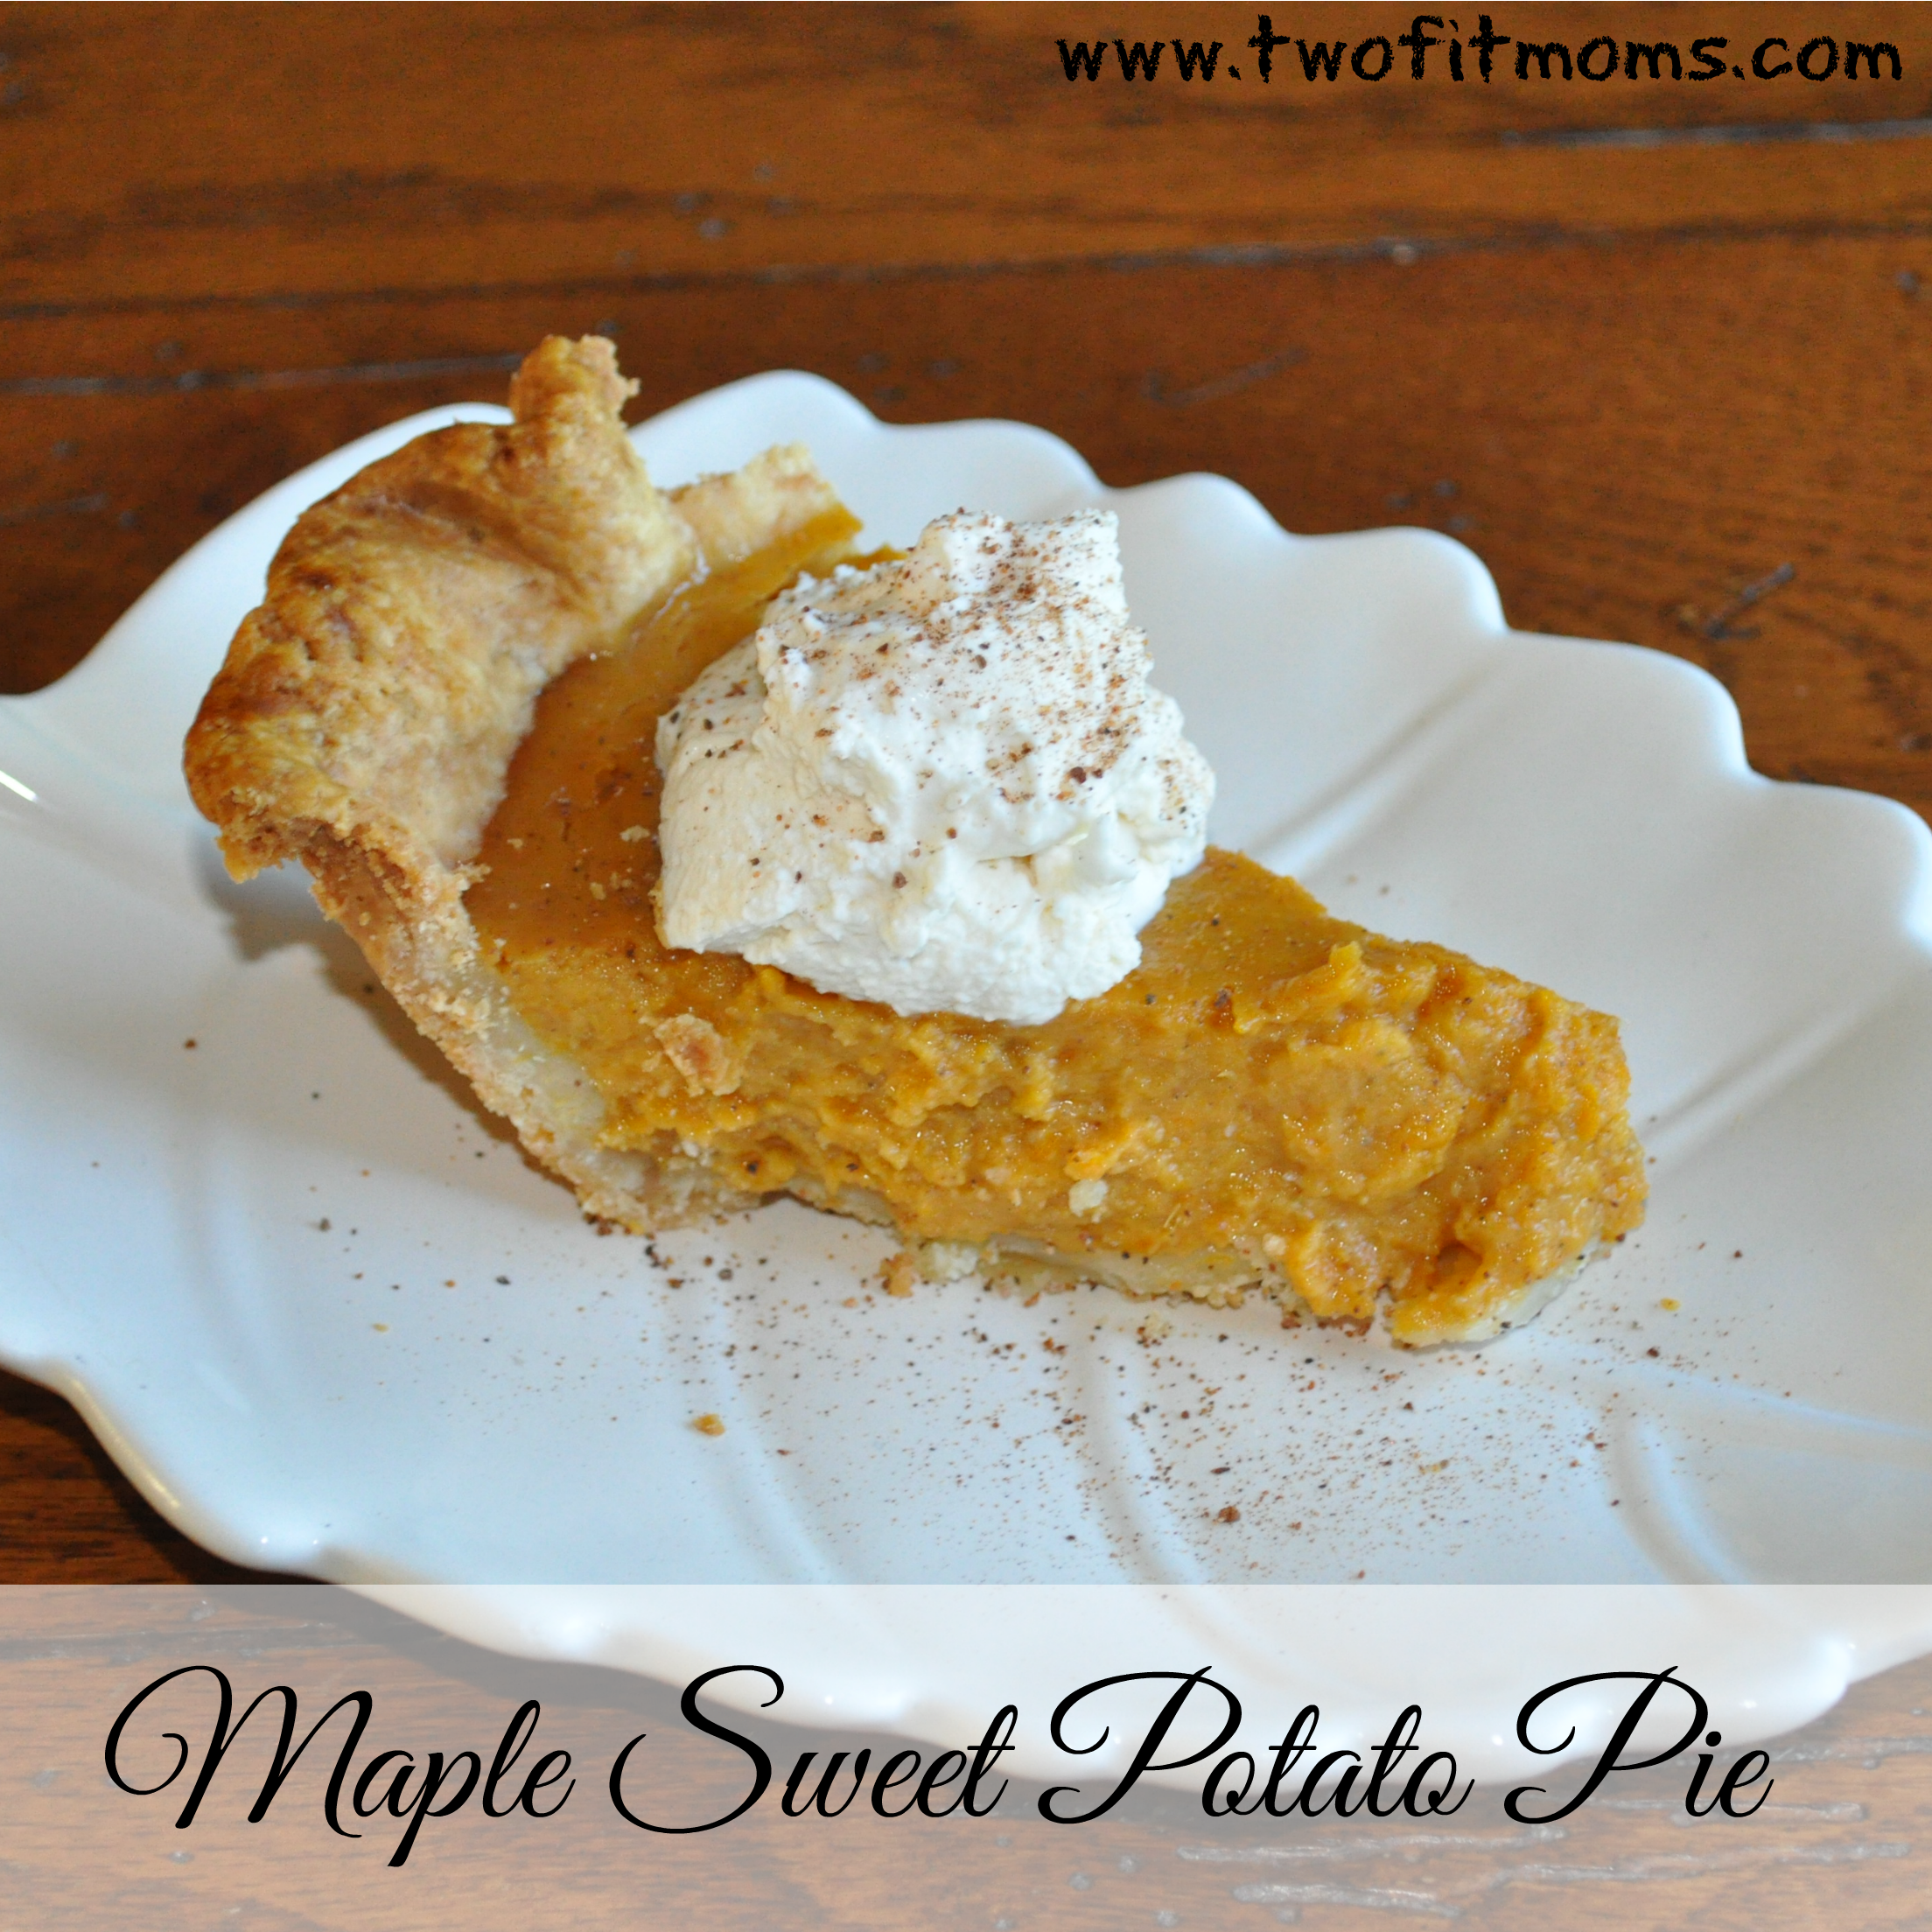
    I always make my pies the day before I serve them.  Our Maple Sweet Potato Pie is the perfect example of a make-ahead dessert.  Crisps and cakes can also, usually, be made a day ahead of time too. This is true for our Blueberry Crisp (try it with apples this season) and our Apple Raisin Clafoutis.

    Ultimately, the key is to get as much cooking and prepping done before the actual event to avoid slaving over a stove while your guests have already arrived.

    4. Set Your Table the Night Before.  Iron your table linens, pull out your dinnerware and cups and cutlery and decorative accents ahead of time.  If you can set your table a few days in advance all the better — if not, the night before is perfect.  No one needs to worry about ironing a tablecloth the day of the event.

    5. Make a Buffet. A sit down dinner is all nice and good, but it’s much harder to pull off! Create a more casual vibe by arranging your food family style.  If you have a counter or island in your dining area, arrange the dishes on it so that people can get up and help themselves. You can use chafing dishes to keep things warm.  Crock pots are also great. They not only keep food hot, but you can serve from them too.

    A buffet offers a much more relaxed environment — and it works out well for families (especially those with young children) and in homes where seating is an issue.

    As you can see, all of these tips largely center around planning in some way, shape or form.  We guarantee that if you plan in advance, and spread the work over a few days, you will successfully entertain this season.  In fact, you may even enjoy yourself!

    Now, if you need some ideas on the types of dishes that work best when entertaining large groups, check out our next article . . .


  • Yoga Lifestyle:  Pre-Holiday Toy Decluttering

    Yoga Lifestyle: Pre-Holiday Toy Decluttering

    Let’s continue on our quest to create a yoga lifestyle—a life where peace and stillness are not limited to the confines of our yoga mats.  Let’s build a life where clarity and stillness extend to all other areas of our lives.

    A couple of weeks ago, we began the process of removing mental clutter by developing the habit of creating a nightly to-do list.  By creating a to-do list, we made the conscious decision to commit our jumble of thoughts and obligations to paper and set an intention to live the next day with purpose.Wooden alphabet blocks. Baby Blocks

    This week, let’s focus on an area that is the cause of anxiety for so many parents—toy clutter.  Toy clutter is overwhelming because there is just so much of it. Toys can easily overtake bedrooms, play rooms and family rooms.  Trust me, I’ve seen it happen in my own house.

    With the gift-giving season right around the corner, the likelihood of more toys entering your home is very high.  Now is the time to tackle this project of paring down and organizing.

    Your ultimate goal is to declutter your toy collection and organize your play space so that your children are left with items that they enjoy and can easily find.  In the process, you will find that you feel lighter and happier with less.

    Before you begin tackling the clutter, take a moment to consider why the clutter exists in the first place.  Without taking this important step to stop and consider why the clutter exists, the root cause of the problem will not be addressed.  Dealing with physical clutter is only a temporary solution unless you become honest with yourself and do a little bit of soul searching to put an end to the mess.

    Ask yourself the following questions: 

    -Why do my children have so many toys?

    -Am I contributing to the excess by purchasing more?

    -If so, why do I buy more?

    -Do other family members contribute to the glut of toys in the house?

    -If so, can I have a discussion with them to stop the influx of toys?

    -Do I throw an extra toy into the shopping cart just because it’s inexpensive?

    -Do I buy toys throughout the year, even if it’s not a major holiday or a birthday?

    -Do I keep all toys, even if they are not age appropriate?

    -Do I keep toys, even if my children do not play with them?

    This is not an exhaustive list of the questions that you may ask yourself, but it is a place to start.  Once you are done reflecting, it’s time to begin managing the clutter.

    If this is your first time decluttering, I highly recommend distributing the work across multiple days.  Doing it all at once is very overwhelming.

    Start with one large box and one large garbage bag.  The large box will hold all toys that will be donated.  The large garbage bag will hold trash—Not all toys are in good enough condition to pass down to another child.DSC_7182

    When your box and bag are filled, STOP!  Assess your energy level.  Can you tackle another full box and bag today, or are you tired?

    Do not continue if you’ve lost steam.  Your play area/kids’ bedrooms/family room did not become cluttered in one day, so give yourself some time to return your home to working order.  You can do it, one box and one bag at a time.

    Here are some helpful guidelines to consider while you are decluttering:

    -Keep items that can be classified as art supplies:  stencil kits, beading kits, sewing supplies, markers, crayons, glue, tape, paper, paint, stickers, etc.  They foster creativity and will ultimately be used (even if only for homework and school projects).

    -If your child regularly plays with the toy, keep it.  If your child does not play with it, find it a new home.

    -Try to overcome your own feelings of guilt.  Do not keep a toy just because it was a gift or an expensive purchase.  Avoid hoarding, and find a child that will truly enjoy the item.

    -If the toy has significant sentimental value, keep it.  You don’t need to keep 50 stuffed animals, but if your child had a favorite doll or teddy bear as a baby, save it.  There is nothing wrong with maintaining a few mementos of times gone by.

    -If the toy/game is broken or has missing pieces, throw it away.

    -Donate toys that are in good condition and intended for a much younger child.  There is no point in cluttering your home with toys that are not age appropriate.


  • The Backbend Flow to De-Stress

    The Backbend Flow to De-Stress

    After a long day hunched over a computer, the body craves movement – particularly, expansive movement to counteract the back-rounding posture that is so commonly seen in office parks around the world. Paperwork, computer work, web surfing and, even texting on mobile phones, are all culprits in creating tightness in the chest, shoulders and back.

    A backbend practice is a great way to relieve everyday stress and loosen up a tight upper body.

    2014-10-28 11.56.32


    The biggest misconception about backbends is that you need a flexible back in order to do poses such as Full Wheel or Camel, or asanas involving an over-hand grip such as One-Legged King Pigeon or King Dancer. Yes, you do need some mobility in your back, but in reality, it is the entire front body and shoulders that can make or break a backbend.   With consistent practice, you will find that your backbends will be deeper and easier to perform.


    As with any asana, take your backbend practice slowly, and never force your body into postures.  Start off your practice with a few rounds of Sun Salutations, then use our Backbends Practice to fire up your entire front body and shoulders.  Make sure to keep your abdominals engaged in your backbends and more importantly, make sure to breathe!


    Extended Puppy Pose (Uttana Shishosana)
    5

    This is one of our favorite poses for stretching the upper back and shoulders. Beginners should consider modifying the pose by placing their forehead on the mat. This will help relieve any potential strain in the neck. Start off in tabletop position and slowly walk the hands forward dropping your chest onto the mat. Keep your hands actively pressing into the mat and arms hugging in towards one another.

    High Lunge or Crescent Lunge Variation
    7

    While in high lunge, open your chest and shoulders by bending your elbows to create 90 degree angles with your arms (think goal-post arms!)  A more traditional version of this pose is with arms extended straight overhead.  Regardless, be sure to keep your head aligned between your arms.  Do not allow the head to fall back which will cause strain to your neck. Remember to engage the back quadricep and sink your hips toward the floor to activate your hip flexor and psoas muscles.

    Low Lunge or Anjaneyasana Variation
    2

    Clasp your hands behind your back, drawing your shoulder blades together to open up the front of your shoulders and your chest. Keep your core engaged as you take a mini-backbend moving your clasped hands towards your mat.

    Reclined Half Hero or Ardha Supta Virasana
    4

    Try a gentler modification of this pose. Rather than lying down completely, begin by leaning back onto your forearms.  This will produce a nice stretch in the front of the thigh.  For a more intense stretch, lie back further.  You should not experience any discomfort in your knee.

    Bridge Pose or Setu Bandha Sarvangasana
    6

    This is a great backbend for beginners. Use a block or blanket to relieve stress from your lower back or neck. Your feet should be parallel to each other and your knees should stack directly over your heels.  When you begin to lift up, keep your thighs hugging into the midline. Press actively into the mat with your arms and shoulders. Keep the neck long. You can lift one leg up for a deeper posture.

    Camel Pose or Ustrasana
    1

    There are many variations of this pose – from keeping your hands on your low back for support to tucking your toes under so that the backbend is not as deep to the full posture shown here. Find the one that works for you! Just remember to keep your hips pushing forward so the thighs remain perpendicular to your mat.

    Upward Bow or Urdhva Dhanurasana
    3

    Make sure your front body and shoulder are warmed up before trying this pose. Keep your feet parallel, hug your knees and thighs in – and don’t forget to breathe!

  • 6 Poses to Reduce Bloating

    6 Poses to Reduce Bloating

    After a long weekend of overindulgence and rich foods, you may be feeling sluggish and bloated.  Let us help you re-energize and reduce that bloated feeling with these six twisty yoga poses that will gently squeeze and massage your digestive organs.

    As with all twists, be mindful to lift and lengthen on each inhale, and twist deeper with each exhale.  Hold each pose for a minimum of five breaths, and remember to practice the poses on both sides of your body.6Poses

    Revolved Downward Facing Dog
    From Downward Facing Dog, begin to shift your weight into your left hand.  Twist your torso to the left as your reach for the outside of your left thigh, calf or ankle with your right hand.  Gaze up under your left armpit.

    RevolvedDD

    Revolved Side Angle Pose
    From Downward Facing Dog, step your left foot forward between your hands as you lift onto the ball of your right foot.  Bring your hands together in prayer in front of your heart, and twist your torso to the left.  Hook your right elbow on the outside of your left thigh.  Press the back of your right arm firmly into your left thigh as you twist deeper with each breath.
    RevolvedSA

    Half Lord of the Fishes Pose
    Sit on your mat with your legs extended straight in front of you.  Bend your right knee so that the sole of your right foot is flat against the floor.  Step your right foot over your left thigh.  Bend your left knee and slide your leg to the right so that your left foot rests next to your right hip.  Place your right hand on the floor behind you.  Hook your left elbow on the outside of the right thigh, and twist to the right.HalfLordofFishes

    Revolved Chair Pose
    Stand tall with your feet together and your arms extended overhead.  Bend your knees, bringing your thighs parallel to the floor.  Roll your shoulders down and away from your ears.  Sink your weight back onto your heels—try lifting your toes from the mat to confirm that your weight is shifted properly.  You are now in Chair pose.  In order to revolve the pose, lower your arms and bring your hands to prayer in front of your heart.  Twist your torso to the left, and hook your right elbow on the outside of the left thigh.  Press into your hands for extra leverage to twist further.  Glance down at your knees.  If your right knee is protruding forward more than your left knee, make an effort to pull the right hip back in space.RevolvedChair

    Revolved Wide-Legged Forward Fold
    Place your hands on your hips, and step your feet apart about four feet.  Turn your feet so that your second toes are parallel to one another. (You may feel slightly pigeon-toed in this stance.)  Hinge forward from the hips, as you keep your torso long and extended.  Lightly place your fingertips onto the mat.  Place your right hand on the ground, equidistant from your feet.  Twist your torso to the left, and extend your left arm toward the sky.  Try to make a straight line from fingertip to fingertip.RevForwardFold

    Supine Spinal Twist
    Lie on your back, and draw your knees into your chest.  Extend your arms out to either side.  Shift your hips to the left by two to three inches, and gently drop your knees to the right.  Keep both shoulders flat on the mat as you twist, and feel free to place your right hand on top of your thighs to intensify the stretch.SpinalTwist

  • November Yoga Challenge Winner!

    November Yoga Challenge Winner!

    We are excited to announce the winner of our November Two Fit Moms yoga challenge on Instagram!

    Congratulations to @frenchie63 for successfully completing all ten days of the challenge. Please contact kate@twofitmoms.com to claim your Gaiam Sol prize package that includes: a DryGrip Mat, two blocks, a yoga strap and a free download, from the Gaiam.com website, of our Yoga Rising series!

    Thank you all for participating, and for a sneak peak of the December challenge poses, click HERE.

    November Challenge Winner

  • #YogaWithTFM December Challenge!

    #YogaWithTFM December Challenge!

    Our December yoga challenge has not yet been announced on Instagram, but you know we like to give our @TwoFitMoms followers a sneak peak of what’s to come next month. Here are the 10 poses we will be covering starting on December 1.

    December Yoga Challenge

    Welcome to our #YogaWithTFM December Challenge, sponsored by Gaiam! This month’s focus will be on balance. As always, this challenge will be open to all levels, and modifications will be given each day on our website.


    Be sure to follow @TwoFitMoms, @laurasykora, @masumi_g and @gaiam on Instagram, and remember to always use the #YogaWithTFM hashtag when posting challenge photos.


    Need help preparing for this challenge?  Check out our Balance practice available for purchase here.

  • Thanksgiving Starters, Sides & Desserts

    Thanksgiving Starters, Sides & Desserts

    Thanksgiving is one week away. Is your Thanksgiving dinner menu planned? If you are still searching for starters, sides and desserts, we have some great recipes for you.  In fact, they are not only delicious dishes, but they are healthy alternatives to traditional Thanksgiving favorites.

    Check out some of our favorite recipes below:

    A wonderful, light and delicious appetizer is our White Bean Dip with Seasoned Pita Chips.

    white bean dip

    And, what better way to start your dinner than with a savory Roasted Butternut Squash Soup with Sage Croutons?

    butternut squash with header

    Looking for a festive salad? Try our Harvest Salad with Arugula, Roasted Butternut Squash and Quinoa.

    harvest salad square

    We have some great sides to accompany your turkey or veggie loaf, including our Balsamic Brussel Sprouts.

    BrusselSproutsPicRoasted Sweet Potatoes.

    HowToRoastVeggies

    And, our Smashed Potatoes.

    smashed pot banner

    For dessert, we try our Apple Raisin Clafoutis.

    apple cake slice square

    And, our Maple Sweet Potato Pie!

    sweet potato pie

    We hope some of our delicious starters, sides and desserts make it onto your table this holiday season!

  • 8 Poses to Energize Your Morning

    8 Poses to Energize Your Morning

    You may be wondering how to develop a morning yoga practice if you aren’t a morning person.  We’ve mentioned it in the past, and we will say it again—baby steps are the answer!  Rather than setting your alarm clock 90 minutes earlier than usual, start by taking baby steps.  Set yourself up for success by setting attainable goals.  Perhaps a 5:30 am wake-up time will never fit your lifestyle, but a 6:30 am wake-up time may be palatable and sustainable.  Even thirty minutes is enough time to set a daily intention, take a few deep breaths, stretch the body, raise the heart rate, and start each morning feeling peaceful and accomplished.8PosestoEnergize

    A few rounds of sun salutations, a series of core-strengthening exercises, and a number of warrior poses that fire up the leg muscles are a great way to stretch the body and break a sweat in a short period of time.  Try each of the strengthening poses below, and once you are familiar with each of the poses and can hold each pose for five full breaths, repeat the sequence at a faster pace.  Remember to practice the sequence on both sides of the body.

    Down dog
    Although it’s often called a “resting pose”, the entire body remains active in downward facing dog—Fingers grip the mat, biceps roll forward, shoulder blades move down the back, quadriceps pull up and away from the knees, and the core is engaged.5110-Full-Flat-Sharpened

    3-legged dog
    For the most effective hamstring stretch, flex your top foot, and make an effort to keep all five toes of your lifted leg pointing down toward the ground.  If you find your toes pointing to the side, lower your raised leg, and focus on keeping both hips equidistant from the mat.5124-Full-Flat-Sharpened

    Core Exercise
    This effective exercise will strengthen the core without the need for a single sit-up or crunch.  From 3-legged dog, bring the right knee to the right tricep, and round the upper back.  Return to 3-legged dog.  Repeat this exercise by bringing the knee to the nose, back up to 3-legged dog, and then across the body to the left tricep.  Complete the core sequence by ending in 3-legged dog.5126-Full-Flat-Sharpened

    Warrior 1
    From 3-legged dog, step your right foot forward between your hands.  Rise up to Warrior 1.  This fundamental yoga pose is accessible to yogis of all levels.  Adjust the level of difficulty to suit your needs.  Build up the strength to be able to hold this pose with a 90-degree angle in the front leg.  And build up the flexibility so that both hip points are turned to face the front of the mat.5141-Full-Flat-Sharpened

    Warrior 2
    With the hips facing the side of the yoga mat (rather than the front), most students find the alignment of Warrior 2 to be a bit easier than Warrior 1.  Remember to breathe deeply, keep the core engaged, and resist the urge to lean toward the front of the mat.  Keep your shoulders stacked right over the hips.5171-Full-Flat-Sharpened

    Reverse Warrior
    Continue to strengthen your legs in a warrior pose, but add a side stretch to loosen up the intercostal muscles that run between the ribs.5236-Full-Flat-Sharpened

    Modified Side Angle Pose
    Enjoy the benefits of a feel-good side stretch in this modified version of side angle pose.  While the full expression of the pose bring the fingertips to the floor, this less intense modification allows the forearm to rest on the front thigh.5193-Full-Flat-Sharpened

    Triangle Pose
    Triangle pose will feel like a welcome relief after holding so many poses that require a 90-degree angle in the front leg.  Enjoy the stretch.5252-Full-Flat-Sharpened


    If you would like to practice with us and try our full 20-minute Good Morning Flow, CLICK HERE!

  • Maple Sweet Potato Pie

    Maple Sweet Potato Pie

    Thanksgiving is one of my favorite holidays because the focus isn’t on gifts, but on family — and food! And, not just any food — familiar and traditional food.

    In fact, I bet your family is expecting a decadent pecan pie, sugared yams and your famous stuffing. I think the one thing to keep in mind is that it’s a special day — a day to splurge — a day to delight in familiar traditions and recipes, but you might want to consider adding a new recipe or two!  This particular recipe is a great alternative to heavier pies made with white sugar and cream.  Everyone will love this version of sweet potato pie that lightens up the ingredients but does not compromise flavor. sweet potato pie

    I used a traditional recipe, but swapped out the white sugar for grade B maple syrup.  I generally substitute maple syrup for white sugar — 1:1.  However, I used half the amount of maple syrup this time, and it was perfect. You would never know the recipe was altered. I promise!

    The key to this recipe is roasting your sweet potatoes.  DO NOT use canned sweet potato puree.  As a busy mom, I tried a short cut.  It didn’t work.  Take the time to roast your own sweet potatoes .  . . it will set up perfectly and have a delicious, dense texture.

    You can use any pie crust that works for you.  I tend to use pre-made pie crust.  There are some really good ones on the market — I like Trader Joe’s frozen pie crust.  It saves time, which is important, especially around the holidays.

    You can make one 9-inch deep dish pie with this recipe — or two shallow 9 inch pies.

    If you are considering a new Thanksgiving dessert, I hope you try our Maple Sweet Potato Pie.  It’s so good, you may even consider it a replacement for your traditional pumpkin pie!

    Maple Sweet Potato Pie
    Yields 8 slices

    2 cups of roasted sweet potato puree (I roasted 3 medium sized sweet potatoes in their skin, in foil, at 400 degrees, until they were fork tender. I peeled them and mashed them in a bowl)
    2 eggs, beaten
    1 cup of milk (I used 2% milk, but feel free to substitute)
    3/4 cup of grade B maple syrup
    1 teaspoon, vanilla extract
    1/2 teaspoon of ground cinnamon
    1/4 teaspoon of ground ginger
    1/8 teaspoon of salt
    1, 9-inch prepared deep dish pie crust or 2, 9-inch prepared shallow pie crusts (like the ones you find in the freezer case of your supermarket!)

    Preheat oven to 400 degrees.

    In a large bowl, add the mashed sweet potatoes, eggs, milk, maple syrup, cinnamon, ground ginger, salt and vanilla extract to a large bowl and beat with a hand mixer until combined.

    Pour sweet potato mixture into a prepared pie shell (or two depending on whether you use one deep dish or two shallow pie crusts).  Bake for 10 minutes at 400 degrees and then lower the temperature to 350 degrees and bake for an additional 30-40 minutes for the two shallow pies and an additional 40-50 minutes for the deep dish pie.  The pie will be done when the center is set and not jiggly.

    Let the pie cool and serve at room temperature — or cold — and top with whipped cream — or nothing — it’s delicious either way!!

    Helpful Hint: If your sweet potatoes are too stringy, you can press them through a potato ricer.

  • Day 10: Scorpion Pose or Vrschikasana

    Day 10: Scorpion Pose or Vrschikasana

    Welcome to Day 10 of the November #YogaWithTFM 10-Day  Challenge!  Today’s pose is Scorpion or Vrschikasana. Day-10 IG

    See the video below for a tutorial on how to get into Scorpion Pose, and keep in mind these three tips:

    1. Do not force yourself deeper by dumping into your low back.  Keep your abdominals engaged and move slowly.

    2. As you curl your legs to scorpion, start to drop your chest as a counterweight.

    3. Always think about bringing your head up to your feet, not your feet down to your head!

    Please remember to warm up before participating in any challenge.  If you would like to practice with us, download our 24-minute Backbends Practice class here.

    [KGVID poster=”http://www.twofitmoms.com/wp-content/uploads/2014/11/Video-Nov-09-2-16-44-PM_thumb19.jpg” width=”640″ height=”360″]http://www.twofitmoms.com/wp-content/uploads/2014/10/Video-Nov-09-2-16-44-PM.mov[/KGVID]