Category: Instagram Quick Tips

  • Instagram Quick Tip:  Video Cropping

    Instagram Quick Tip: Video Cropping

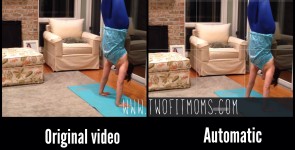
    About a year ago, Instagram moved into the realm of video sharing. Now, not only can you share your favorite photos with the world, but you can also share your favorite 15-second video clips. If you are already familiar with Instagram, you know that the format of this photo/video-sharing app allows you to post a square-shaped image. This sounds reasonable enough, until one day, you load an amazing panoramic or vertical video onto Instagram and discover that the automatic square-shaped cropping results in some of your body parts or some of your amazing view being cropped out of sight.AutomaticCropHandstand

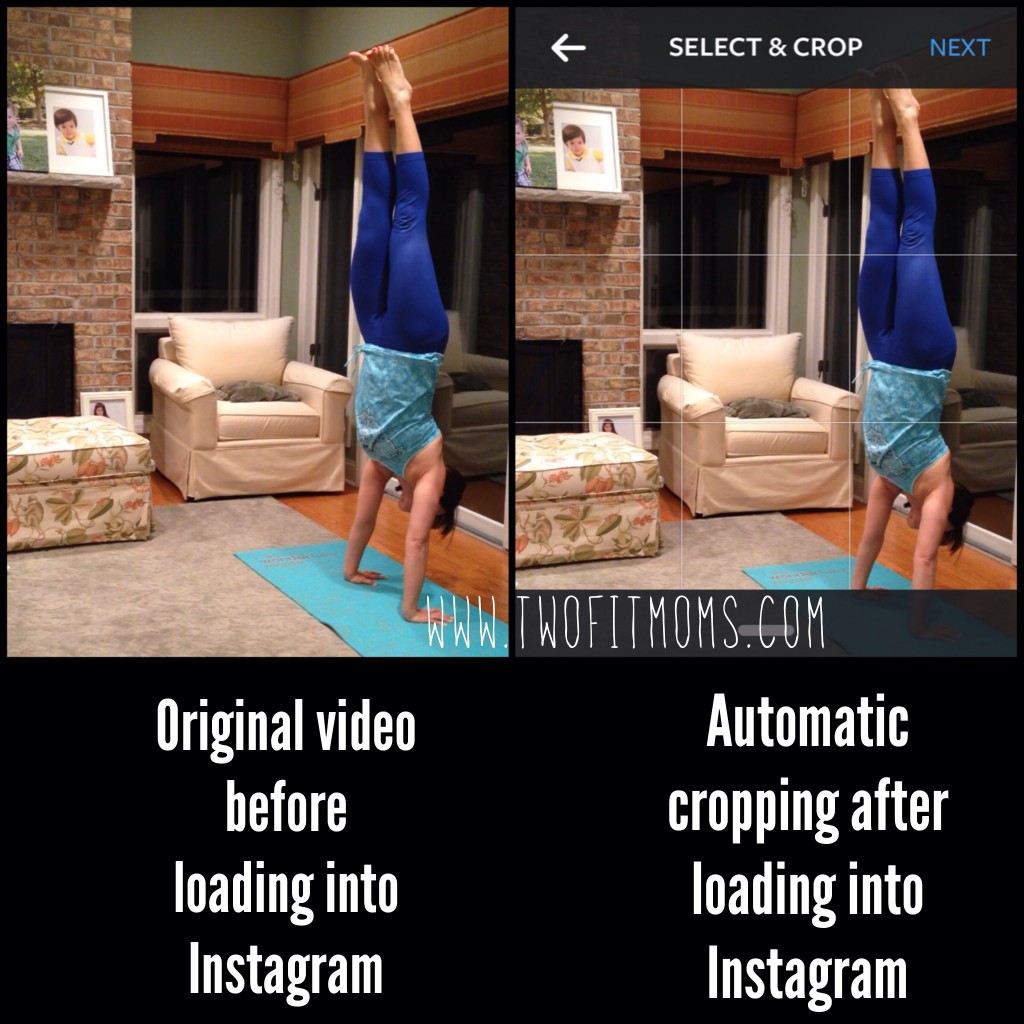
    The image on the left is a screenshot of a video that I took on my iphone. Looks great, right? The image on the right is a screenshot of the automatic cropping that occurs as soon as the video is loaded into Instagram. My legs and hands are cut off!!

    No need to panic.  Gone are the days of having to re-shoot your video to adjust your distance from the camera.  Here are two of our favorite video cropping apps to help you navigate the Instagram world of square cropping.

    Video App 1: Squaready for Video App
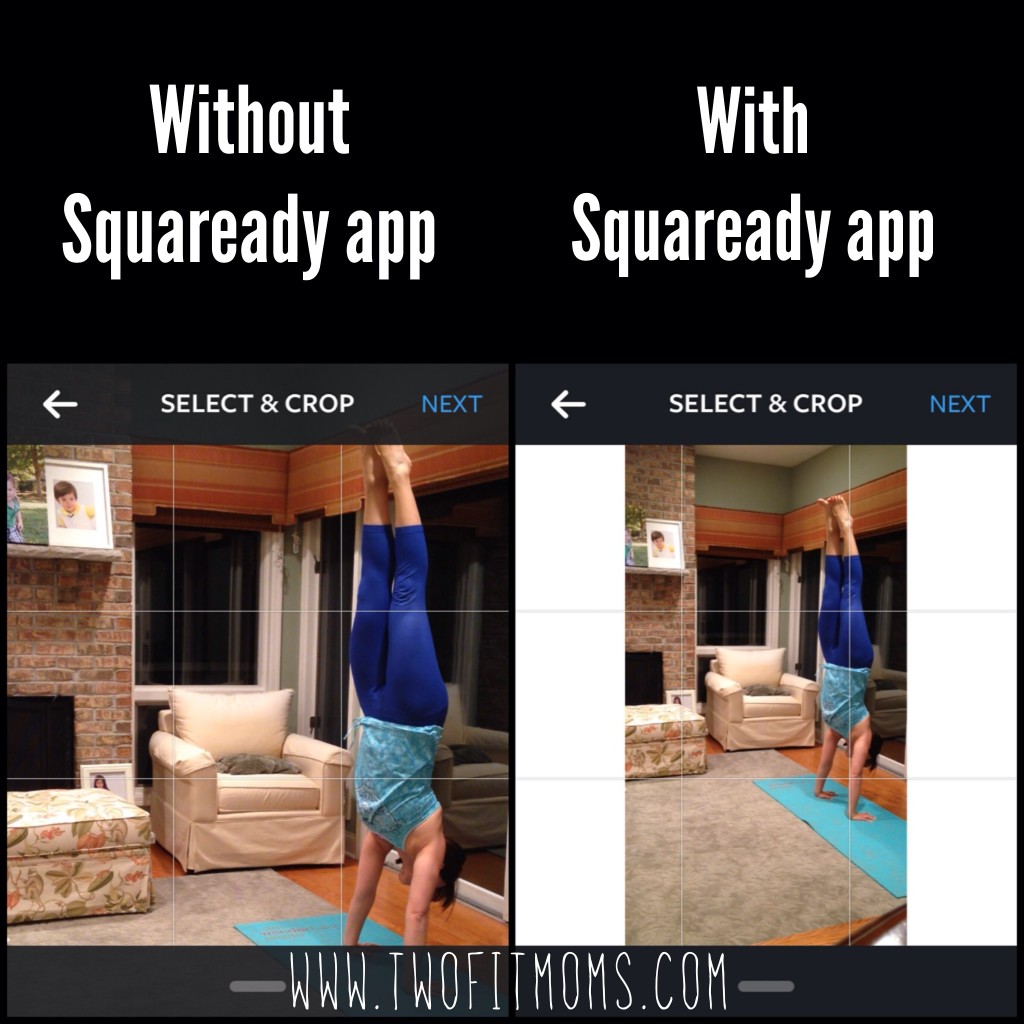
    Download the free “Squaready for Video” app onto your phone. Upload your video into the app, and it will automatically put your full video into a square shape by adding borders in the color of your choice. This is a great option if the subject of your video occupies a large portion of the frame, as shown in my example. This app allows you to maintain the entire image without any square cropping at all. When you upload your video after using the Squaready app, your video will appear in Instagram as shown below.  As you can see, I’ve chosen white borders to fill in the empty portions of the Instagram square.

    SquarereadyHandstand

    Video App 2: Video Crop & Zoom
    The second video app that we love is the “Video Crop & Zoom” app. This app allows you to zoom in on any portion of a video and crop it into a square shape for Instagram as shown below. By having the capability to zoom in on the subject, you can eliminate unwanted background/foreground.

    CropandZoom

    Although this process is a bit more time consuming than just loading the video directly onto Instagram, I prefer having a video that fills the full square frame.


    Download one or both of these apps!  You may find that both of these apps are helpful in different situations.

    If you would like to see any other Instagram Quick Tip topic covered, please leave us a message!

  • Instagram Quick Tip:  Creating Inspirational Posts

    Instagram Quick Tip: Creating Inspirational Posts

    When I first joined Instagram, I found myself taking lots of screenshots of inspirational posts— amazing quotes, yoga photos, running trails, exotic locations, and fitness routines.  As I scrolled back through these captured images on my phone’s camera roll, I realized that most of Inspirationthese posts had one thing in common:  they all had some sort of caption or inspirational quote right on the image itself.  I assumed that these images were all professionally produced until I came across the Over app.  Over will help you create your own inspirational image by quickly adding a quote or your own motivational words to a photo.

    There are many typography apps on the market, but this app is my favorite because of the variety of professional looking fonts that are offered, and the ease of use.  Even if you have very little experience with apps or photo editing, you will find this program to be intuitive and simple to use.  The app gives you complete control over the size, alignment and color of the font, so each photo can be customized to your liking.  If you are looking for a free version of this app, download Overgram instead.  The functionality is the same, but each image will be branded with an Overgram watermark unless you upgrade.

    Go ahead and give the free version of this app a try to see if you like it.  Think of your favorite quotes.  Look through your photos to find your most inspirational images.  Combine the two to create your own inspirational posts for others to enjoy and share on Instagram.  It’s fun, it’s easy, and you never know whose life you may touch with the right words and the right image at the right time.  Enjoy.

  • Instagram Quick Tip:  Color Splash

    Instagram Quick Tip: Color Splash

    Here’s another fun and simple app that I like to use from time to time:  Color Splash.  This app converts your color photo into a black and white photo, and then allows you to manually add splashes of color back into your image.ColorSplash

    When would you use such an app?  I find it most effective in two cases.  First, your image contains a bright pop of color that you want to accentuate.  Second, the bright pop of color in the full color version of your photograph is getting lost amongst many other colors in the photo.
    Original
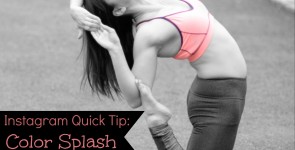
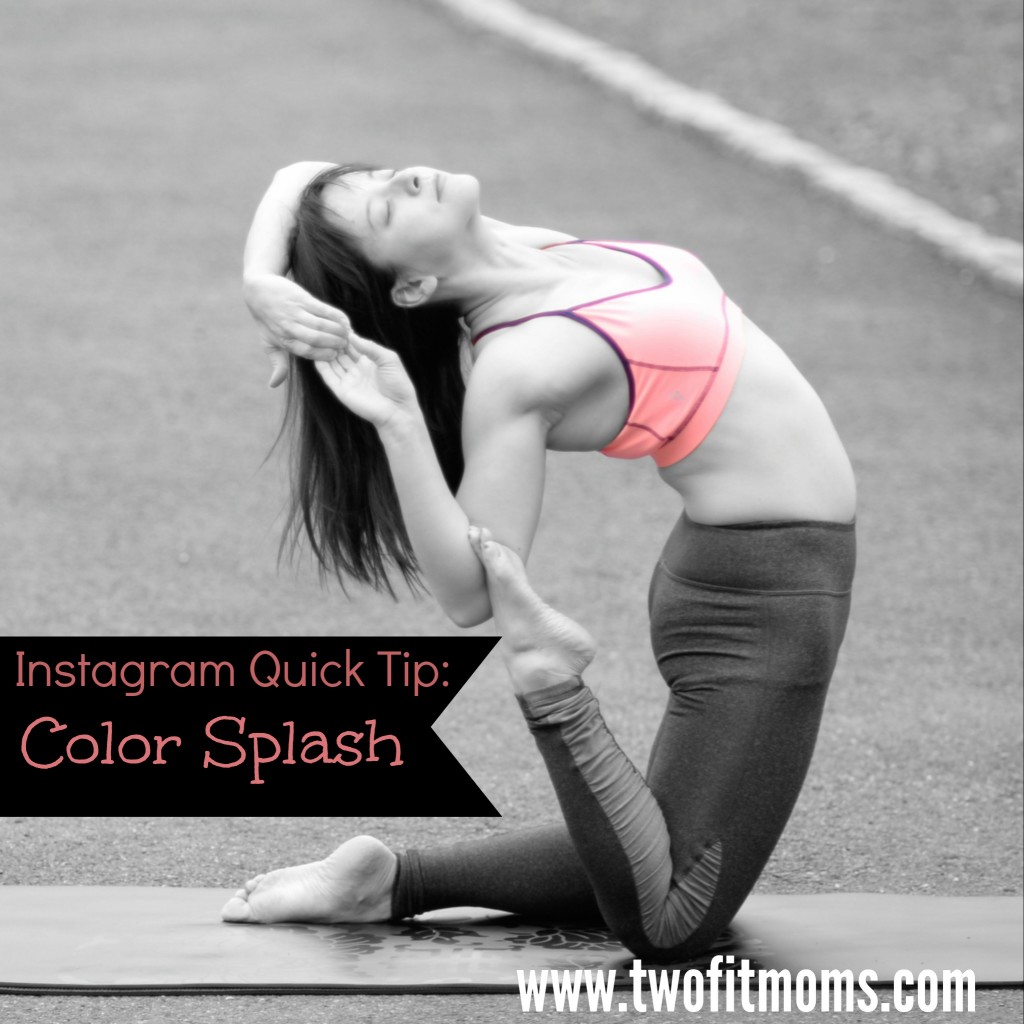
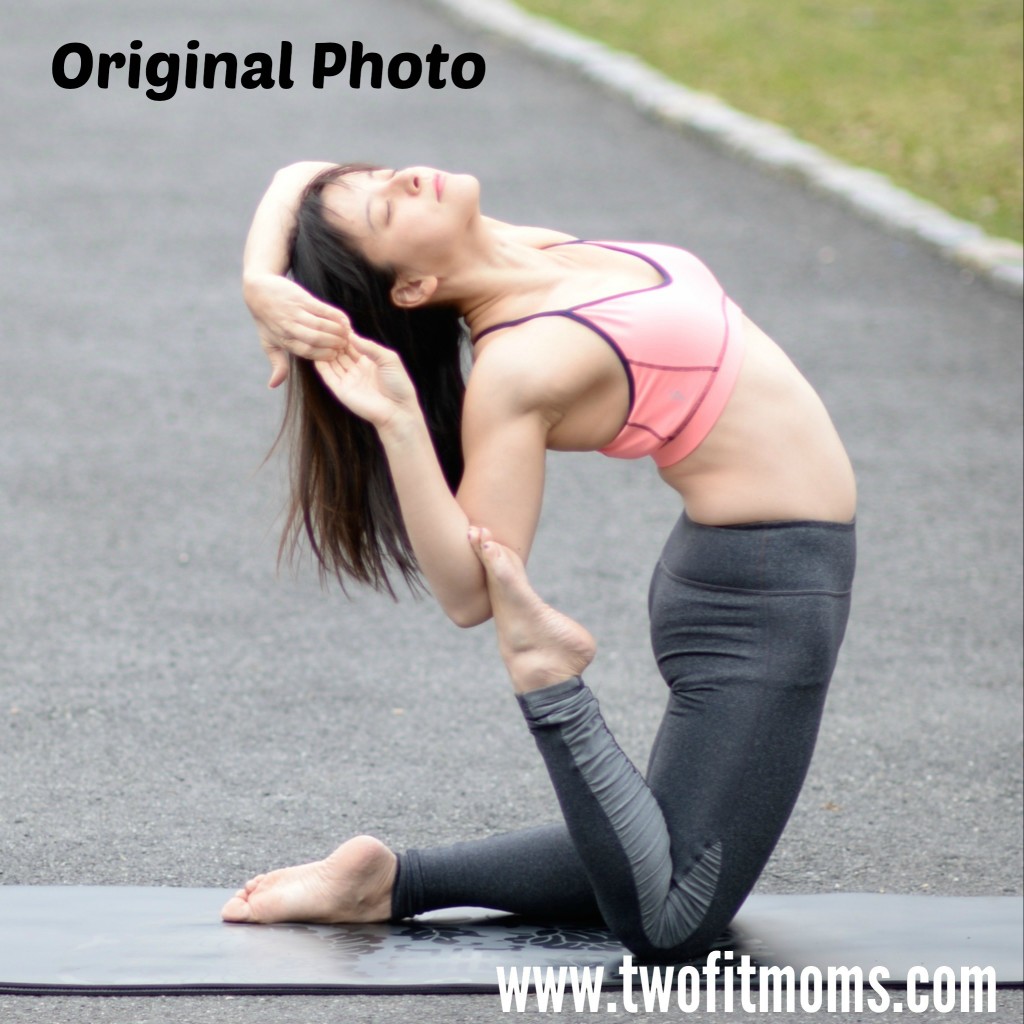
Take a look at my original photo.  It’s fine as is, but the bright pink color of my top is competing with the green grass in the background.  By converting the entire image to black and white, I can remove the background noise and focus on my clothing.

    The app itself is quite easy to use.  Once your photo is loaded into the program, it automatically becomes a black and white image.  Click on the “color” button, as shown on the bottom of each photo below.  Enlarge the image and begin adding color to the photo with swipes of your finger.  If you make a mistake, click on the “gray” button to erase the misplaced color.  The final effect is a dramatic image with a bright splash of color exactly where you want it.

    photo 1

  • Instagram Quick Tip:  Self-Timers for Everyone!

    Instagram Quick Tip: Self-Timers for Everyone!

    When I wrote my first Instagram Quick Tip article, I assumed that everyone was taking their own yoga photos with a self-timer. It has come to my attention that my assumption was incorrect, and it’s probably worthwhile to start at the beginning for any newcomers to Instagram.

    SelfTimerPic
    If you are wondering who takes my yoga photos, the answer is me.

    I take the vast majority of my photos using the interval timer function on my Nikon DSLR camera. I set my timer to automatically take a photograph every one to two seconds while I get into various poses on my mat. While it is wonderful to have a Nikon with a self-timer, it is unnecessary! Even if the only camera you own is the one that is part of your smart phone, you can take your own yoga self-portraits with an interval timer that you can download from the App Store.

    On my iPhone, I use a free app called “Camera Timer”. I’m sure there are multiple interval timer apps available for either iPhone or android, so if you cannot find the specific app called “Camera Timer”, don’t panic.

    Once you download the Camera Timer app, you will see that you have a single shot option or a multi shot option. I use the multi shot option every time. Why would you ever take one photo when you can take five?

    2014-04-04 13.45.44
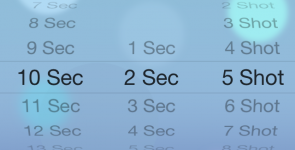
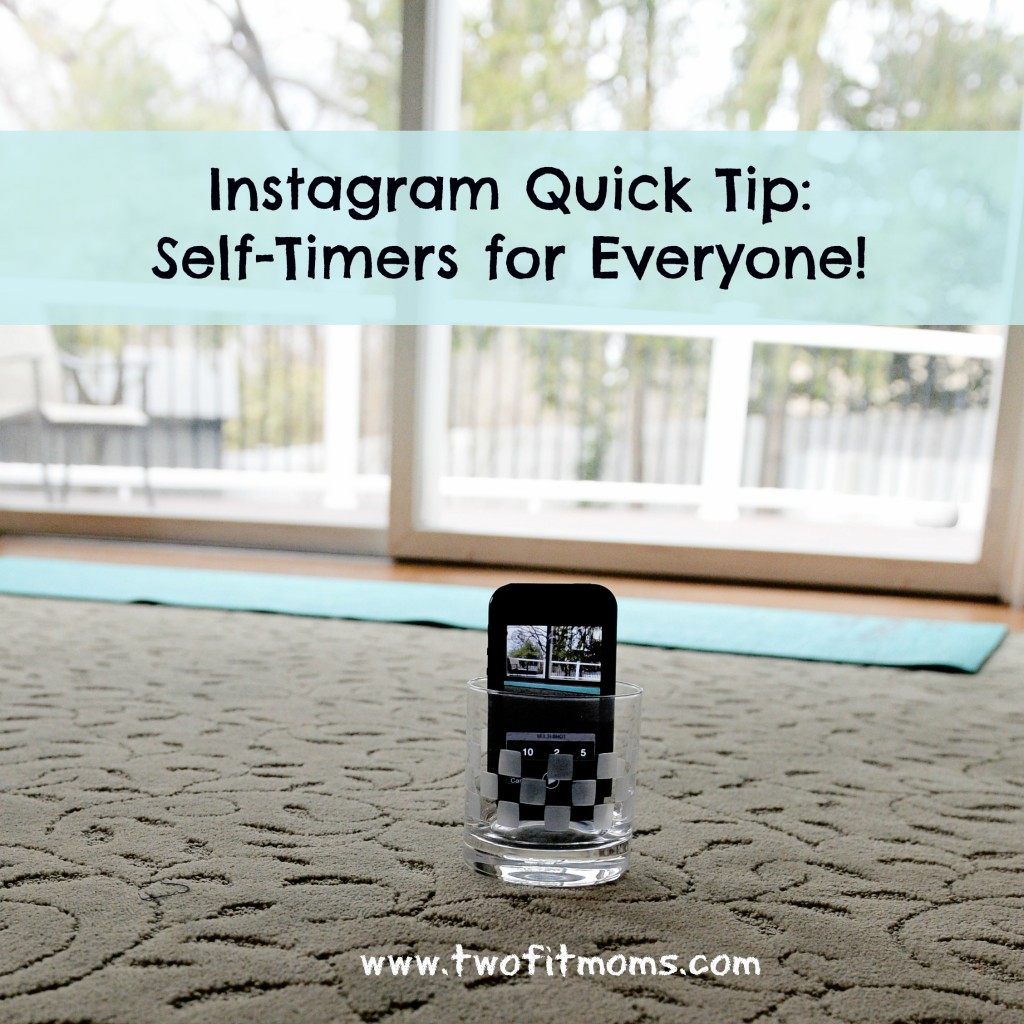
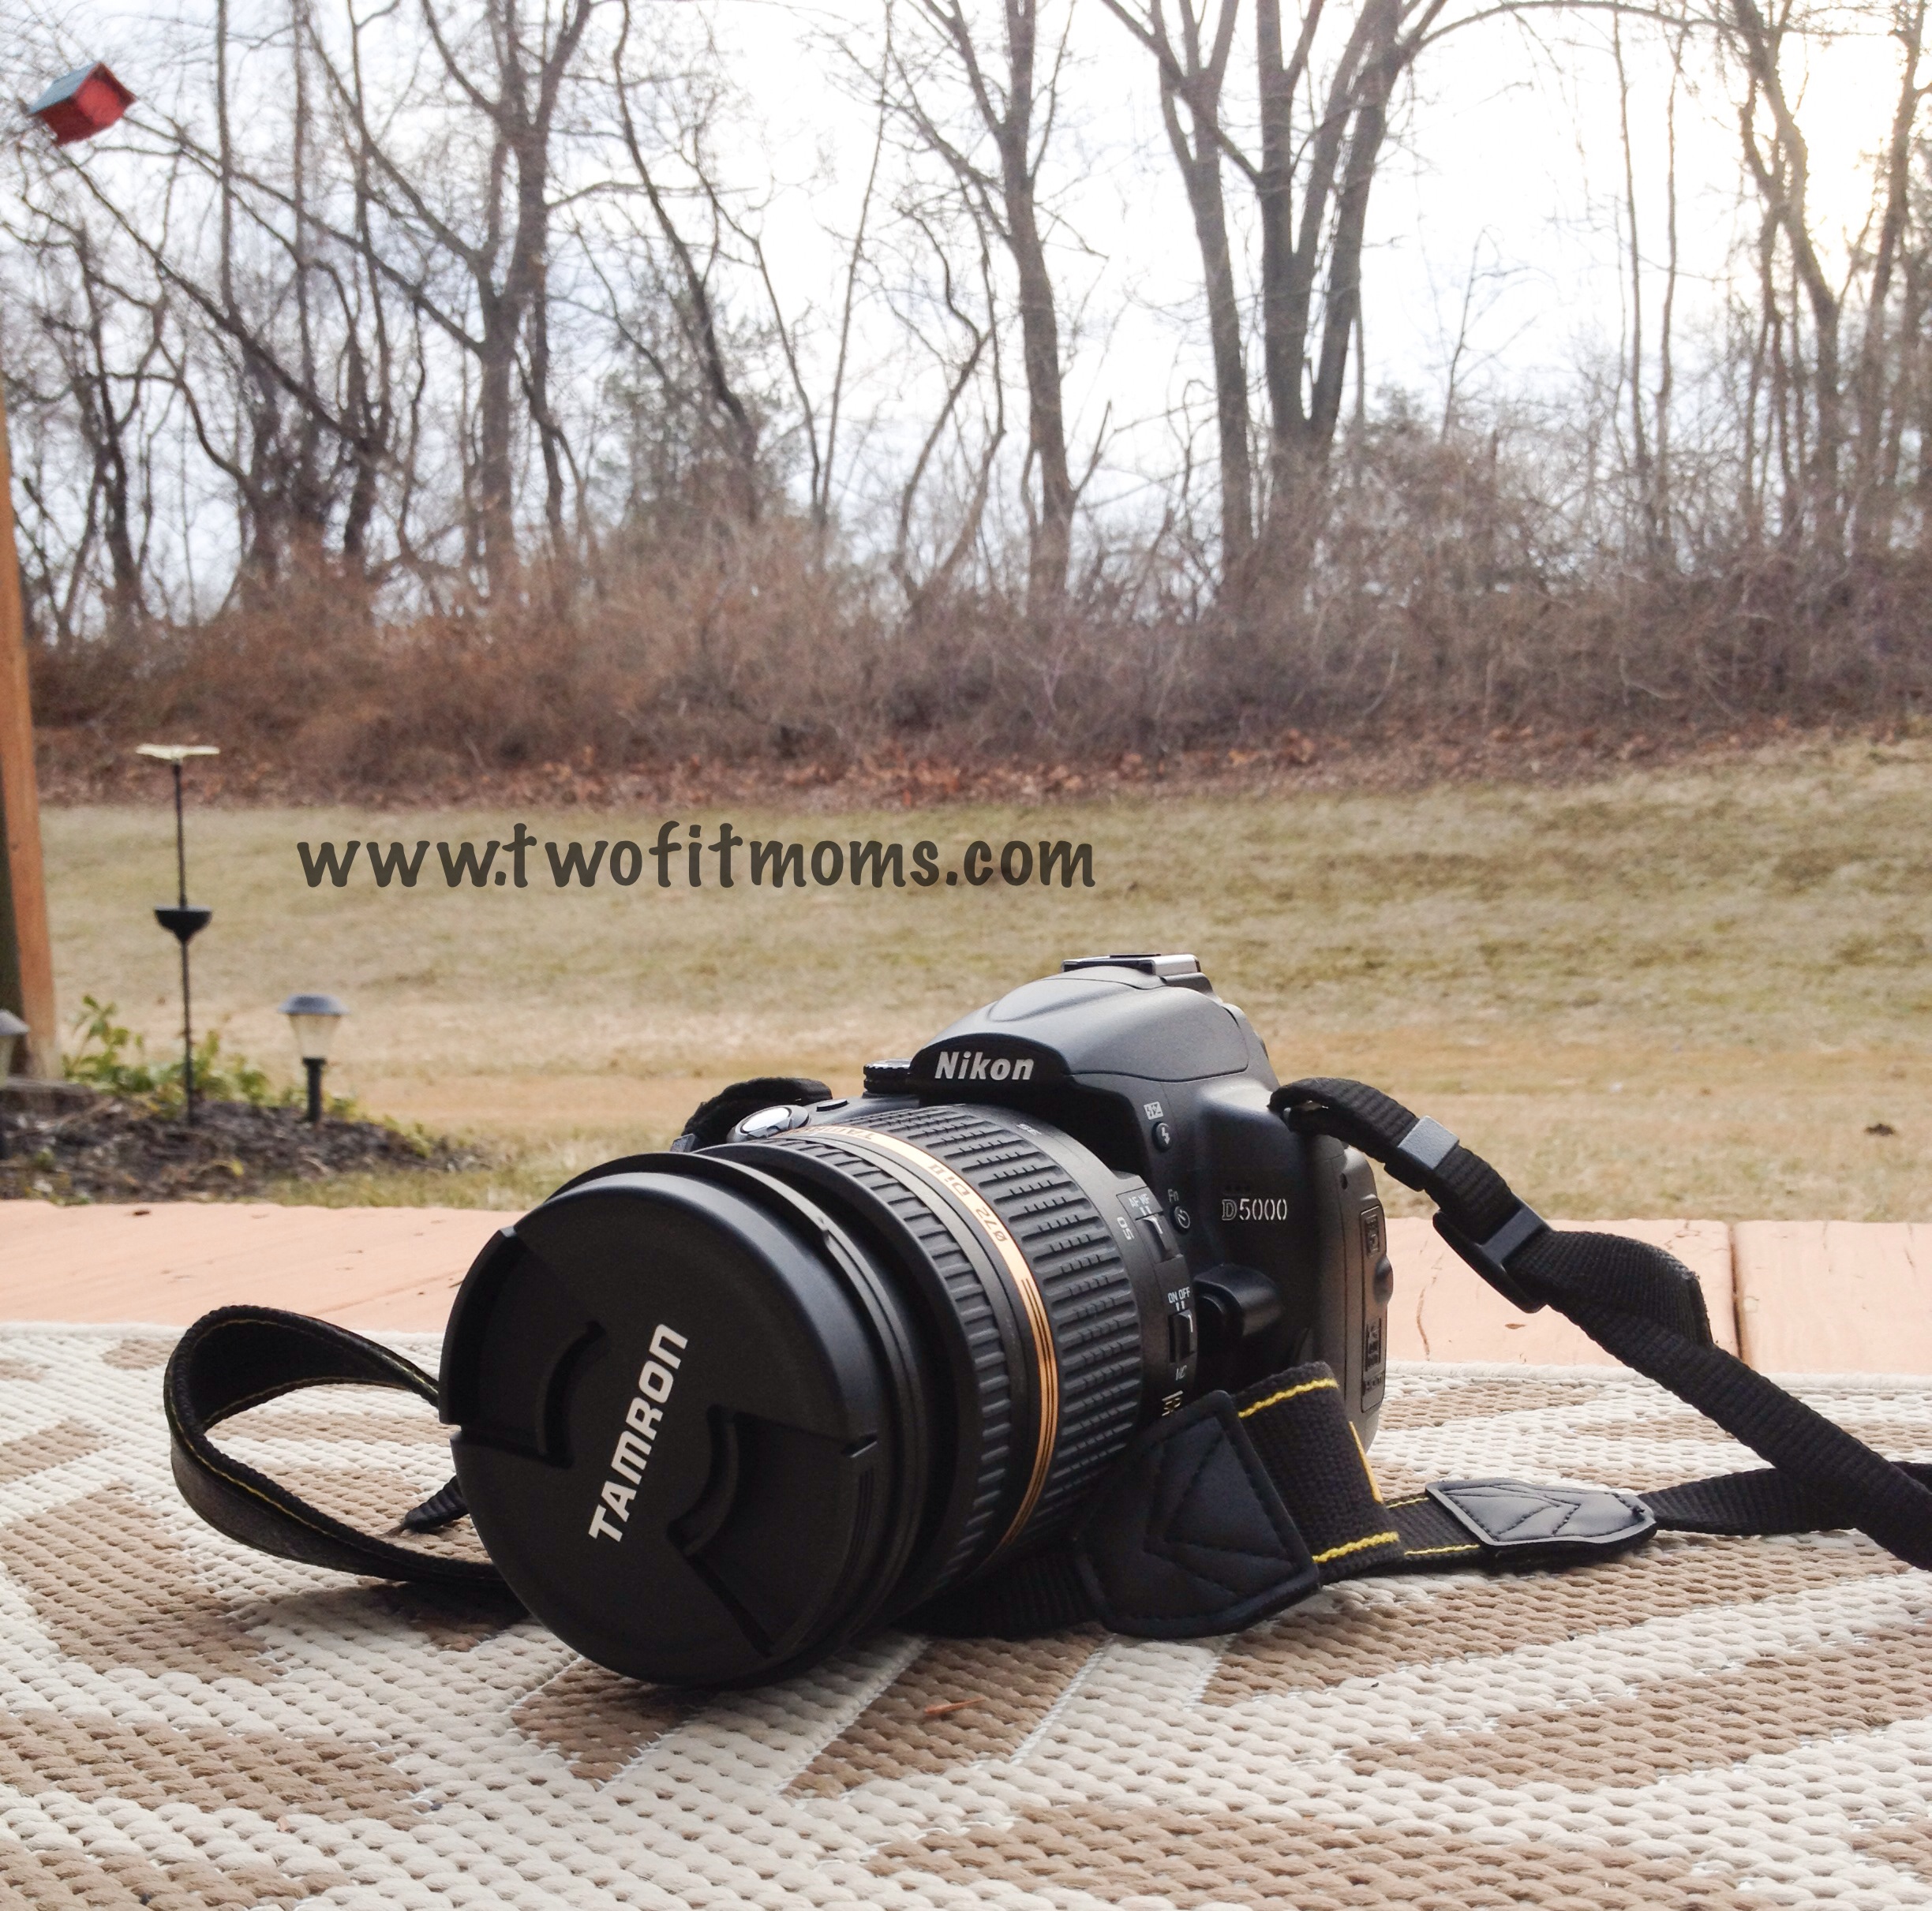
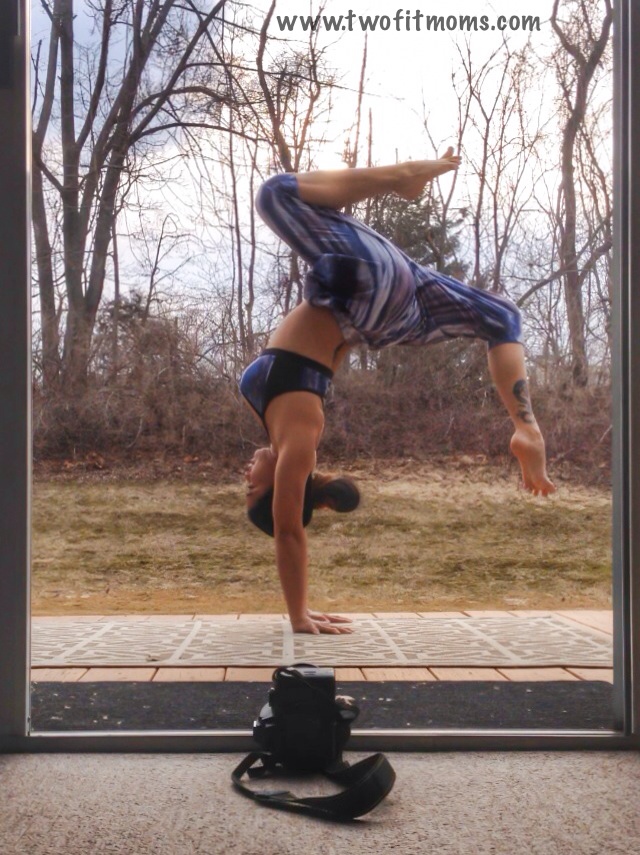
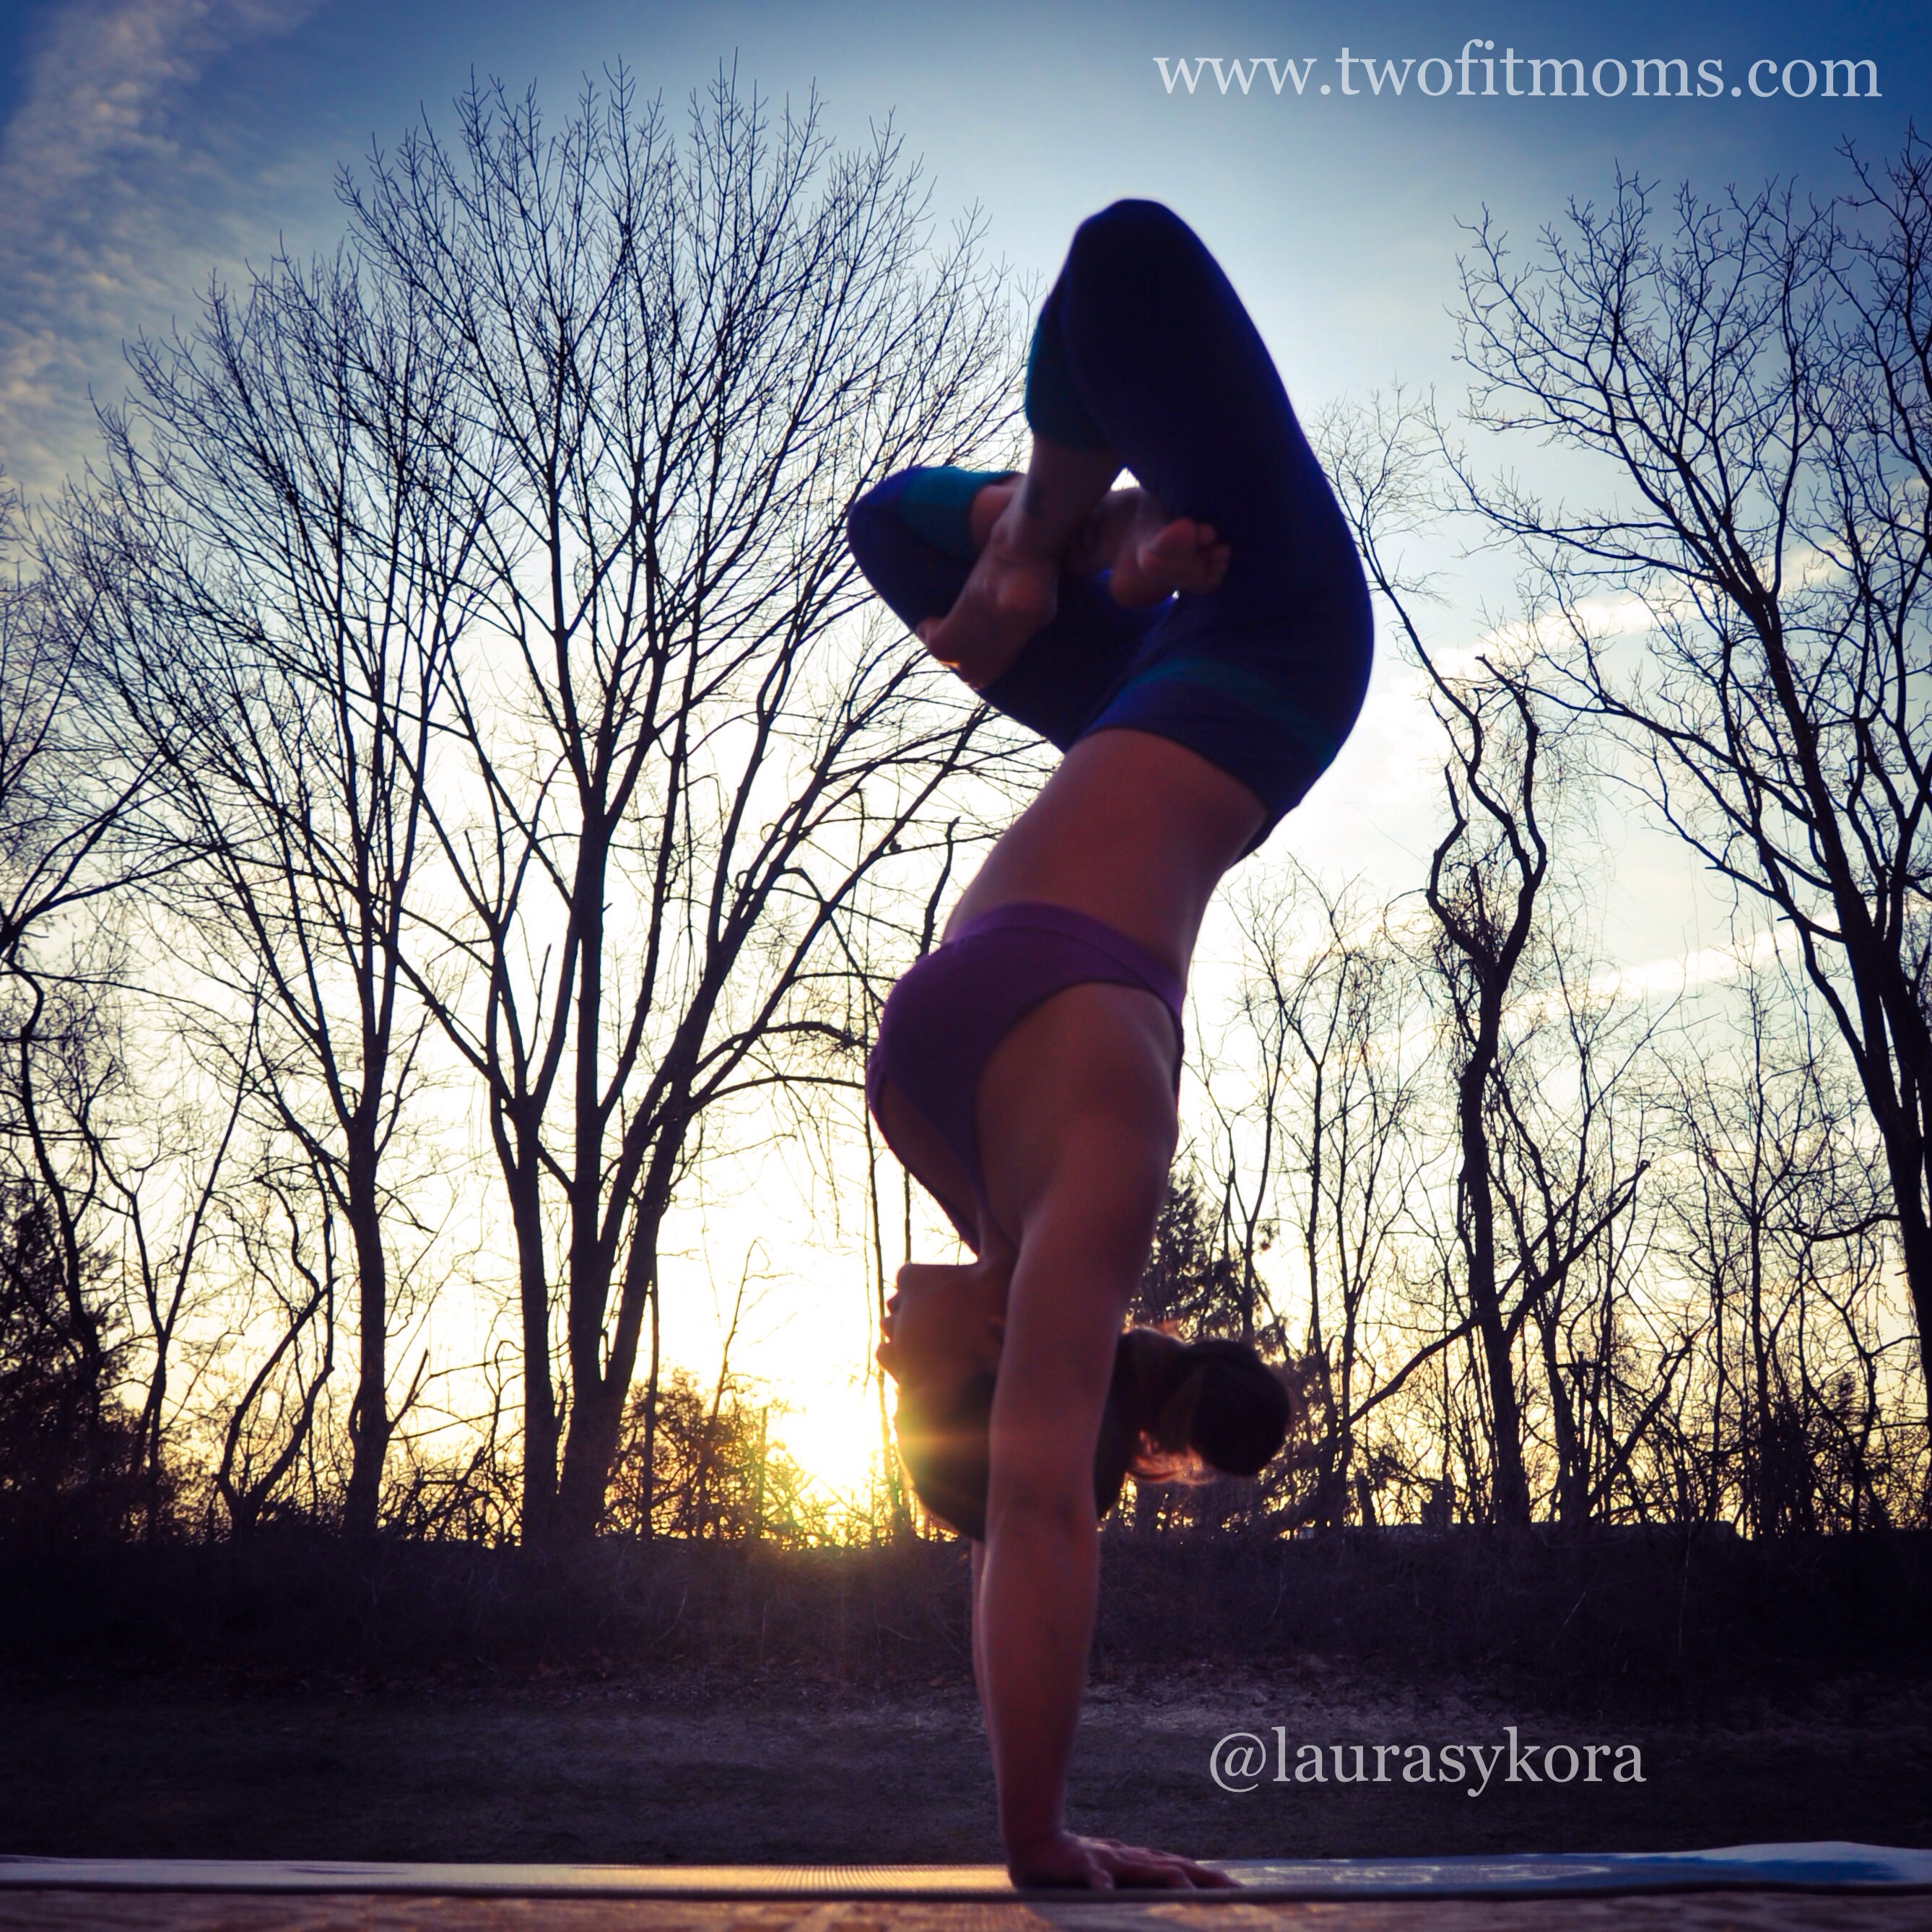
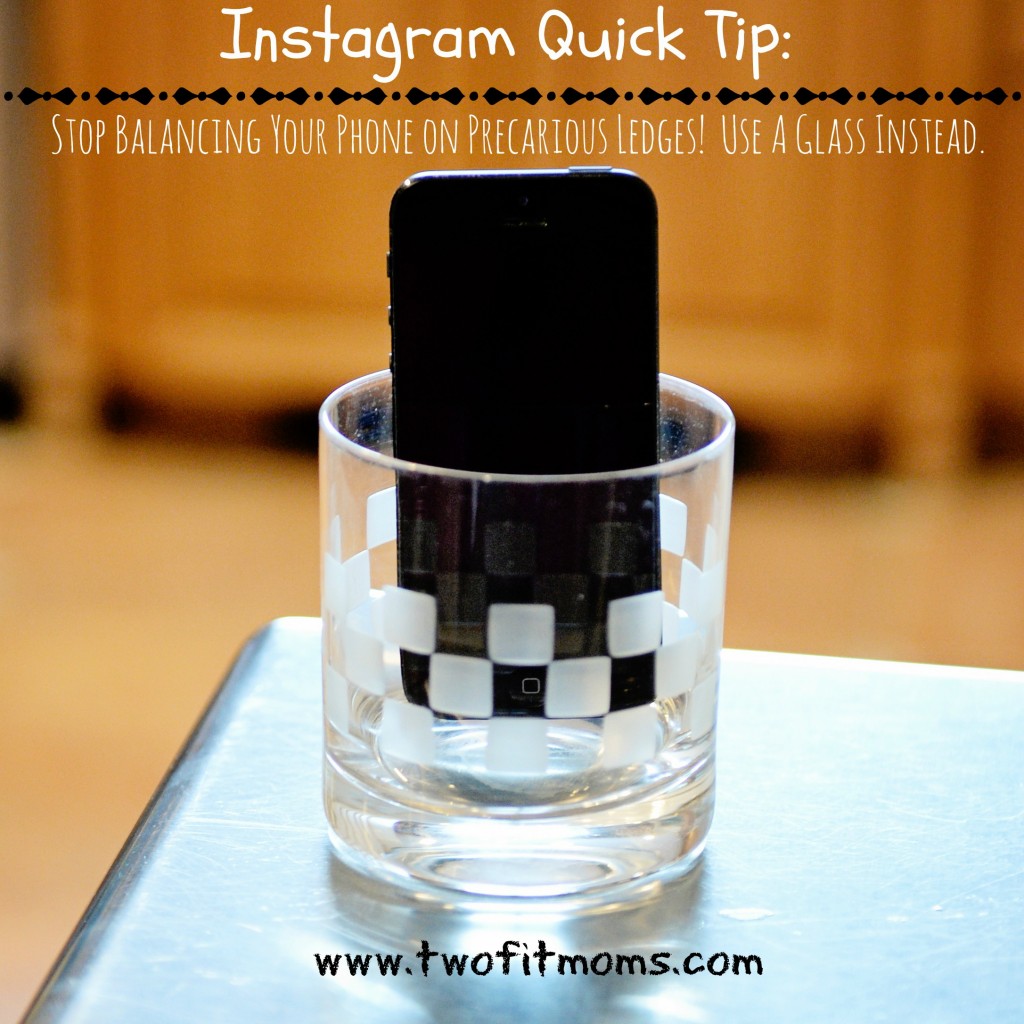
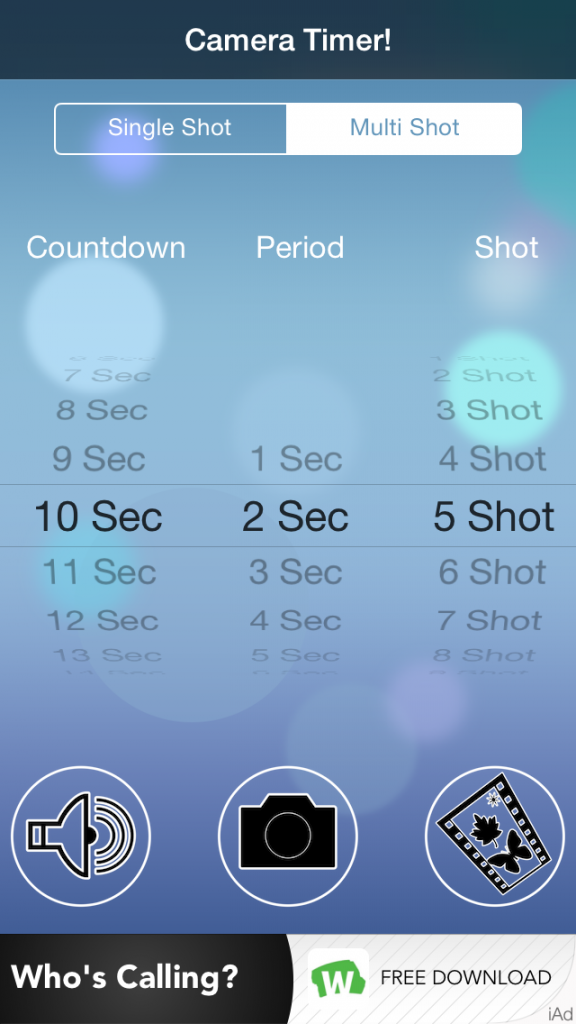
First, set your “countdown”, which is the amount of time that you think you need to get from your phone to your yoga mat and get into your first pose. You might need anywhere between 10 and 20 seconds. Play around with this number. You can also set your “period”, which is the length of time between photos. I prefer two seconds between shots. Finally, you can decide on how many photos you’d like the camera to take. Five photos always seems like a good number to me. Once you set your “countdown”, “period” and “shot”, you are ready to go. Place your phone into a short glass (as explained in my first Instagram Quick Tip article) , and start your timer!

  • Instagram Quick Tip: Photography 101

    Instagram Quick Tip: Photography 101

    I am extremely passionate about my yoga.  What you may not know is that I am equally passionate about  photography. Combining these two art forms came naturally to me when I started my Instagram. As my yoga progressed over these past two years, so has my photography. I’ve learned to really USE my camera through a lot of trial, error and practice. Without getting too technical, here are a few tips I’ve learned and put into practice every single day.

    Photo Mar 26, 8 05 14 AM

    Camera vs. Phone

    The cameras on our phones these days are incredible. When I’m out and about, it’s a no brainer to whip out my phone if I want to snap a picture. With the abundance of self timer apps available and baby phone tripods, you really don’t need anything else to shoot basic pictures.

    During my Junior year in high school, I took my first ever photography class…and fell in love. Digital cameras were not around yet, so we used film. There was no “deleting” pictures and “reshooting”…It was you, your camera and about 24-36 chances per roll. You learned very quickly how to make good use of your shots. Although shooting today is much easier, I learned a lot from that class that I still put into practice to this day…exposure, set up, lighting…just to name a few.

    When I decided to purchase a digital single-lens reflex camera (DSLR), I knew I had to look at it as an investment.  They do not come cheap — they are also a lot bulkier than a camera phone — but they yield beautiful results! If photography is something that really interests you, regardless of whether or not you are using it for yoga, you need a decent camera to shoot. Being able to set your own shutter speed and depth of field can take a great shot and make it amazing.

    Here are a few of my favorite tips to help you take beautiful yoga pictures!

    Tip #1: Shoot Low

    Photo Mar 27, 10 29 58 AM

    I am constantly growing and learning in my yoga practice.  The same is true for my photography practice. In October, I had the privilege of shooting with Robert Sturman,  a renowned photographer who specializes in yoga photography. One of the most important tricks I learned from collaborating with him is to SHOOT LOW. I mean…on the ground low. Whether you or someone else is taking the picture — get LOW.  This one simple technique will offer new perspective and make all the difference in your pictures.

    This picture was taken last summer.  My camera was about three feet off of the ground shooting straight at me.

    Photo Aug 16, 7 52 15 AM


    This picture was taken last month.  My camera was on the ground and propped up to shoot up.  See the difference?

    Photo Mar 04, 9 07 37 AM

     Tip #2: Use Natural Lighting

    I’m not a fan of flash photography. Nine times out of ten, the subject ends up looking washed out. Look for locations with  lots of natural light! Usually the best light is during sunrise and sunset…or on cloudy days! If it’s possible, try to have the subtle light from the sunrise/sunset facing you so your face is not in shadow. The light during full sun can overexpose a picture, cause you to squint or create too many shadows.  Lastly, avoid shooting directly into the sun UNLESS you are going for silhouettes. Any back lighting will make you appear dark as in my example below.

    Photo Mar 25, 7 51 39 AM

     Tip #3: Have a Plan

    Contrary to what many people believe, I do not spend hours on end taking pictures of myself everyday. After my real yoga practice, which is usually before sunrise, I have about 10-15 minutes to snap some pictures for the day. I make those 10-15 minutes count by having a plan. Each night, I decide what I am going to work on for the next day, and I write down three to four things I want to capture. Some days I end up with more shots, some days I end up with one shot.

    Photo Mar 27, 1 43 22 PM

    Tip #4: Think Outside the Box

    I’m a huge fan of thinking outside the box when it comes to taking my yoga pictures.  I look for opportunities to take pictures at different angles in order to offer new perspective. Turning ever so slightly towards the camera or away from the camera can make a shot look completely different. Also, zooming into just a portion of the pose can offer amazing effect. I don’t suggest cutting limbs out of pictures for the sake of it, but I do suggest focusing on certain aspects of the pose and purposely cutting parts out. There is a big difference between the two.

    Photo Mar 27, 1 45 27 PM

    I hope these tips offer you some perspective on how I take my pictures! Look out for some more photography tips coming your way soon!

    XOXO

    Blog Signature

    If you are seriously interested in buying a phone tripod or a new camera, here are some of my favorite cameras and photography products. My camera is a few years old, so I have listed the two newer models. (I shoot with a Nikon D5000!)


  • Instagram Quick Tip:  AfterFocus App

    Instagram Quick Tip: AfterFocus App

    One of my yoga students recently asked me if I had an app that would clean her house.  I laughed, but then I realized that for Instagram purposes, I had an app that virtually accomplished the same thing.  Do you find that many of your Instagram yoga poses are plagued by cluttered backgrounds or distracting details?  If so, look no further.  I have the perfect app for you:  AfterFocus.

    With a few swipes of your finger, you can keep the subject of your photo in perfect focus while blurring the background.  This is a great app for removing the focus from other people or objects that happen to make it into the frame of your photo and detract from your fabulous yoga pose.

    AfterFocus
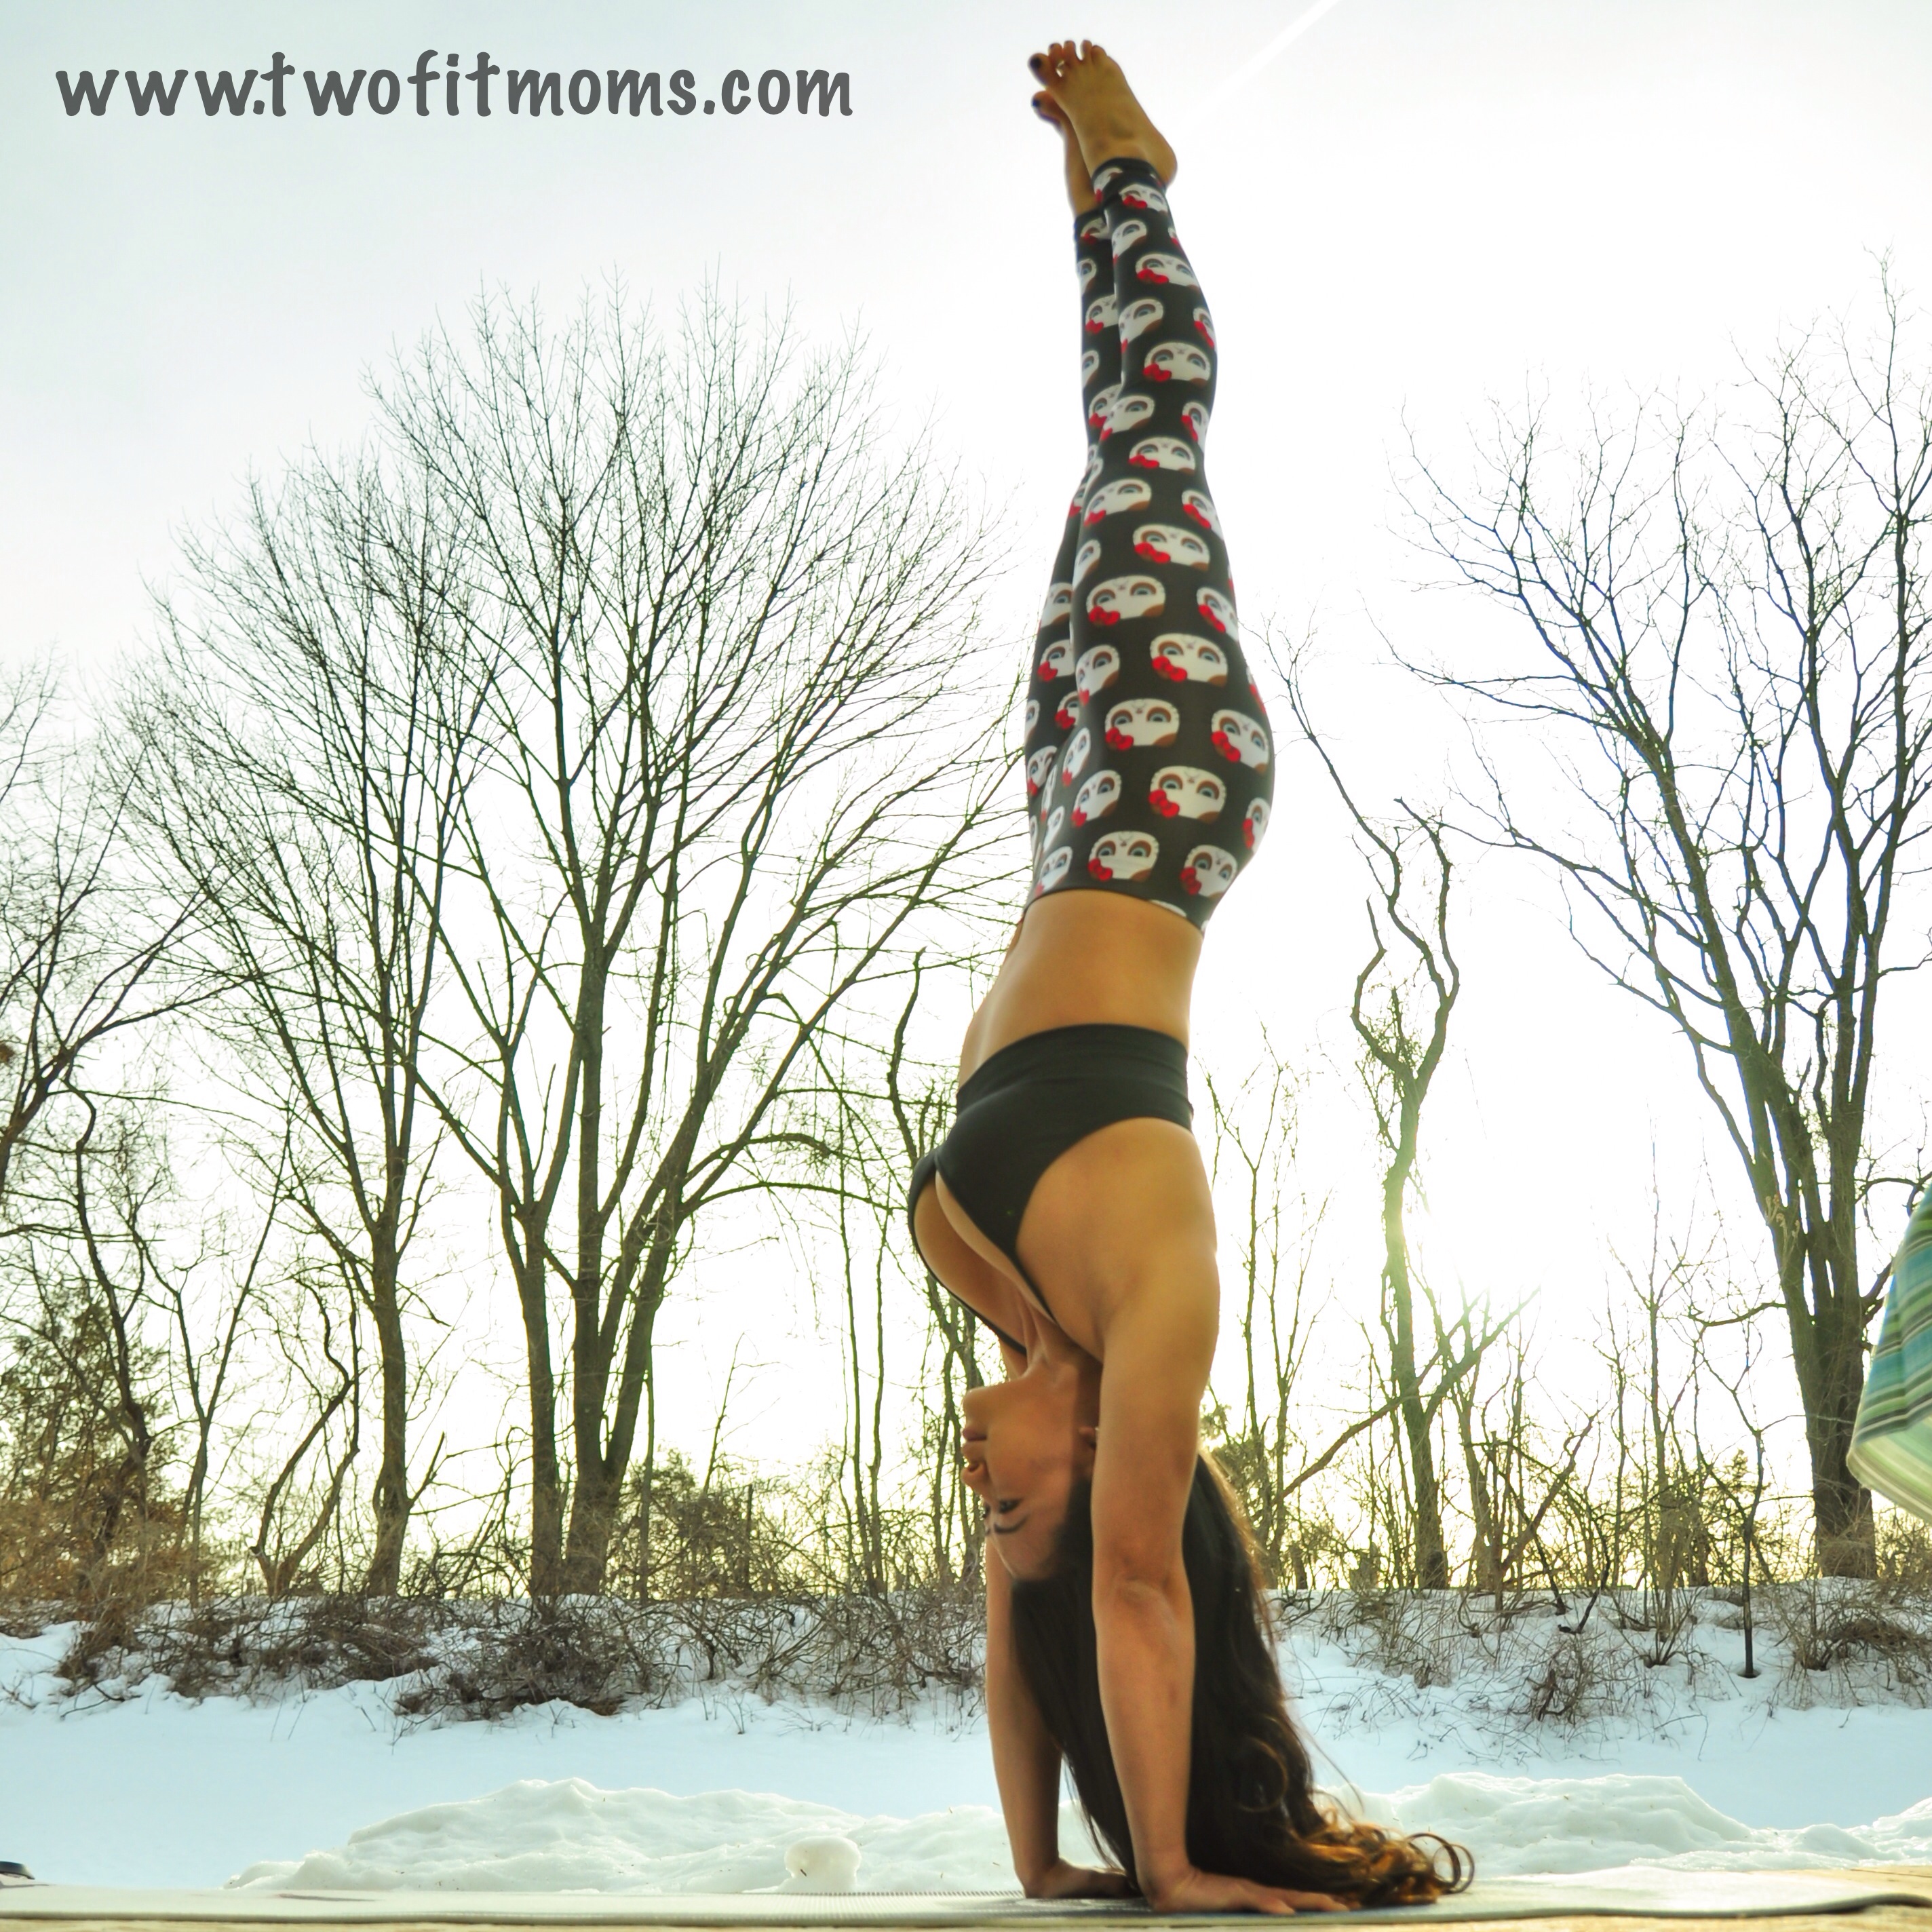
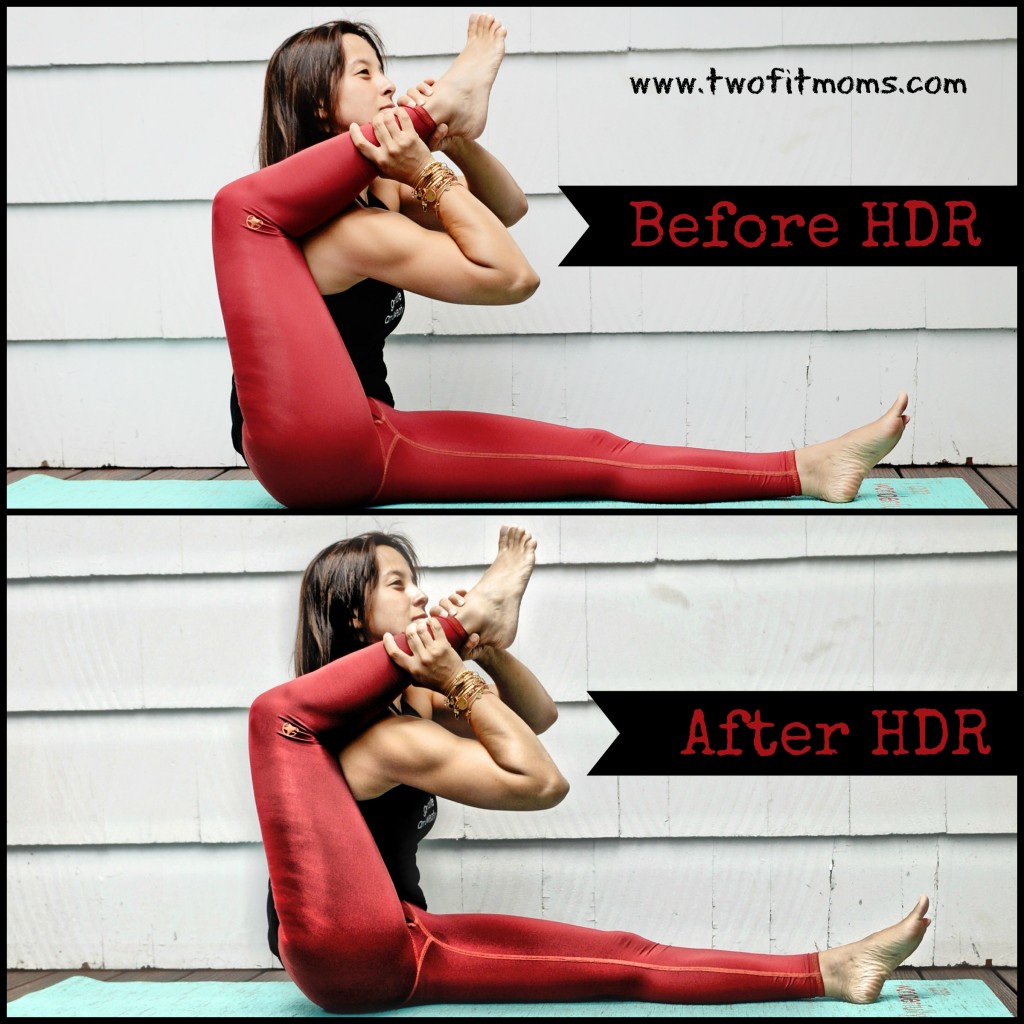
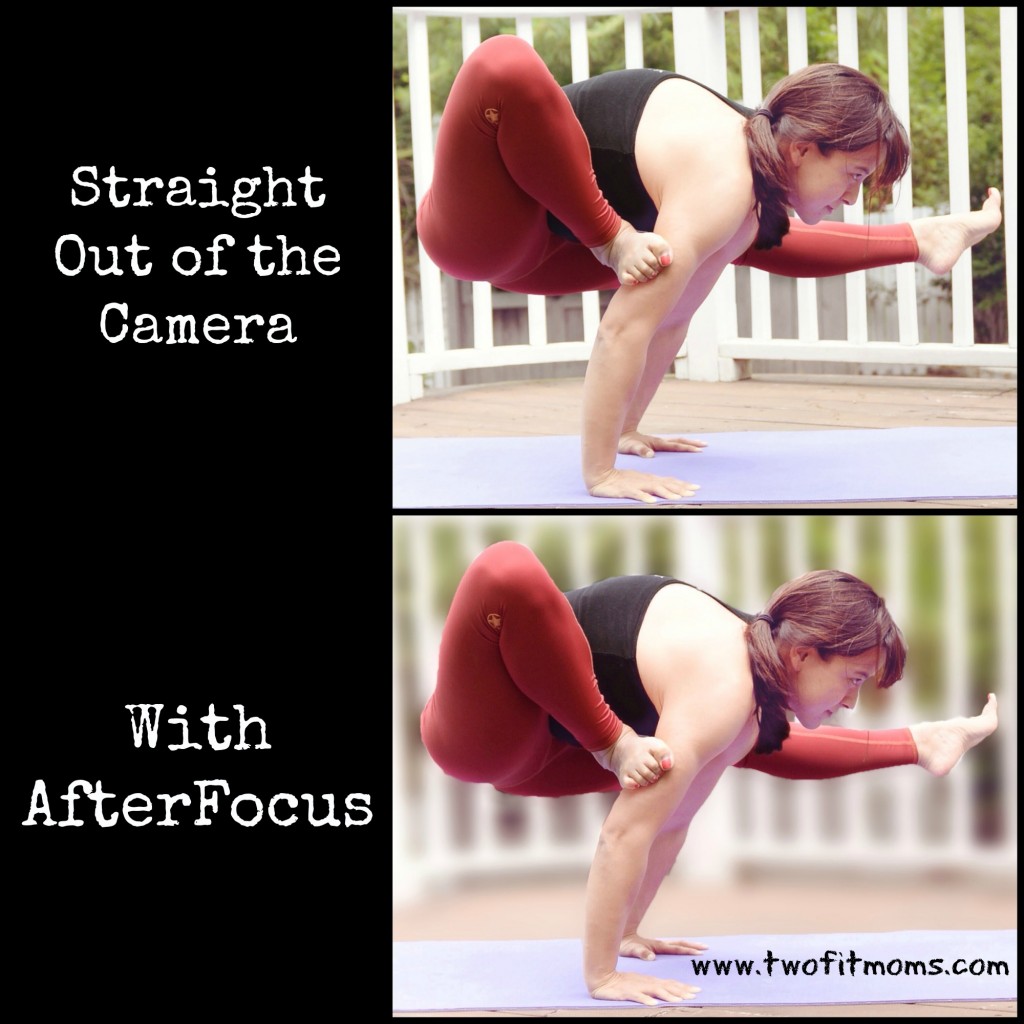
Take a look at my two photos.  In the top picture, the white fence in the background isn’t an eyesore, but it is receiving the same amount of attention as the yoga pose.  By running the photo through the AfterFocus app, I can blur the fence into the background. This app will automatically recognize your focus object and blur the background, just by drawing a few lines with your finger inside the object of focus.

    Give this app a try, and allow some of the visual clutter and distractions to blend away into a soft haze. Enjoy this Instagram quick tip, and please let us know if there are specific topics that you would like to see addressed in this series!

  • Instagram Quick Tip:  Accentuate Muscle Tone

    Instagram Quick Tip: Accentuate Muscle Tone

    Navigating the world of photo-editing apps is tedious, especially if you are new to photography and new to Instagram. Rather than wasting money on apps that you may not like or use, let me introduce you to my favorite tips and programs for creating visually appealing photos.

    “Simply HDR” is one of my favorite apps for adjusting shadow, light, grain and contrast. The result of using such an app? Greater detail and more dramatic photos. Do you want to accentuate your existing muscle tone? If so, this is the app for you.
    HDRBeforeAfter
    Take a look at the two images of me lifting my leg over my shoulder. The top photo is straight out of the camera with no editing at all. The bottom photo is the same image with about 10 seconds of editing in “Simply HDR.” As you can see, the app doesn’t create muscles where there are none, but it certainly accentuates what currently exists!

    Photo editing is a fun and creative way to express yourself. Create beautiful and dramatic images by adding depth and shadow. Please keep in mind that I just focused on one aspect of this app. Obviously it can be used in many ways, not just to define one’s physique. Accentuating bodies is clearly not the purpose of this program, but it’s one application of it. Take a look at this app, and research some others on your own. Have fun!

  • Instagram Quick Tip:  Use Your Glassware!

    Instagram Quick Tip: Use Your Glassware!

    Over the past year and a half, we have received numerous questions about our Instagram photos.  These questions have ranged from, “Who takes your photos?” to “What app did you use to create that effect?”

    In order to help you navigate the fun world of Instagram, we will be writing short posts to bring you Instagram quick tips!  We will share our ideas for creating fun and interesting content for your own Instagram pages, and we will share our favorite apps for editing photos and videos.

    Today’s Quick Tip
    Stop putting your phone at risk each time you take an Instagram photo!  Many of you who use a self-timer to take your own yoga portraits are leaning your phones on precarious ledges around the house in order to find the perfect photo angle.  If you haven’t cracked your phone screen as a result of it tipping over onto a hard surface, InstagramQuickTipconsider yourself lucky.

    Here’s our solution to taking photos and videos with your phone safely.  Place your phone into a heavy, short glass.

    Carry the glass around the house with you and place the glass, rather than the phone itself, onto ledges, bookshelves, counters, etc.  If necessary, stuff a washcloth in front of (or behind) the phone to get the desired photo angle.  Get the perfect shot every time using this method without the fear of cracking your phone screen!