I always find myself googling zucchini recipes this time of year when I have lots of it growing in my garden, but I always come back to the same-old, tried and true recipes, which include Zucchini Bread. I like Zucchini Bread because it’s a good way to get my kids to ingest zucchini which they would otherwise turn their noses up at (unless it was in quiche or frittata form! — but that’s another article . . . . ). I also like it because I love cake, and in my book, this sweetened bread falls into the cake category – similar to my Banana Bread.
And, in my forever quest to lighten up my traditional recipes, I decided to make some healthy substitutions including replacing white sugar with maple syrup, cutting the oil (which is generally 1 cup!) and substituting whole wheat flour. I also added mashed bananas for additional sweetness and included applesauce to not only moisten the cake, but to compensate for the reduced amount of oil.
I had my reservations, however. My main concern was that the batter would be way too dense. I feared the two loaves this recipe yields would be massive dry bricks, but to my surprise they ended up moist and delicious. Hooray!
Given my success, I can share my recipe with you, and you can share the recipe with your friends and delight in knowing that it’s a healthy bread. Not only does it contain zucchini, but it cuts out a lot of unnecessary processed ingredients. It also happens to be sweet enough to eat for breakfast or dessert — but not so sweet that you couldn’t serve it alongside lunch or dinner — so it’s versatile.
I hope you enjoy it!
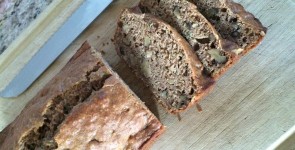
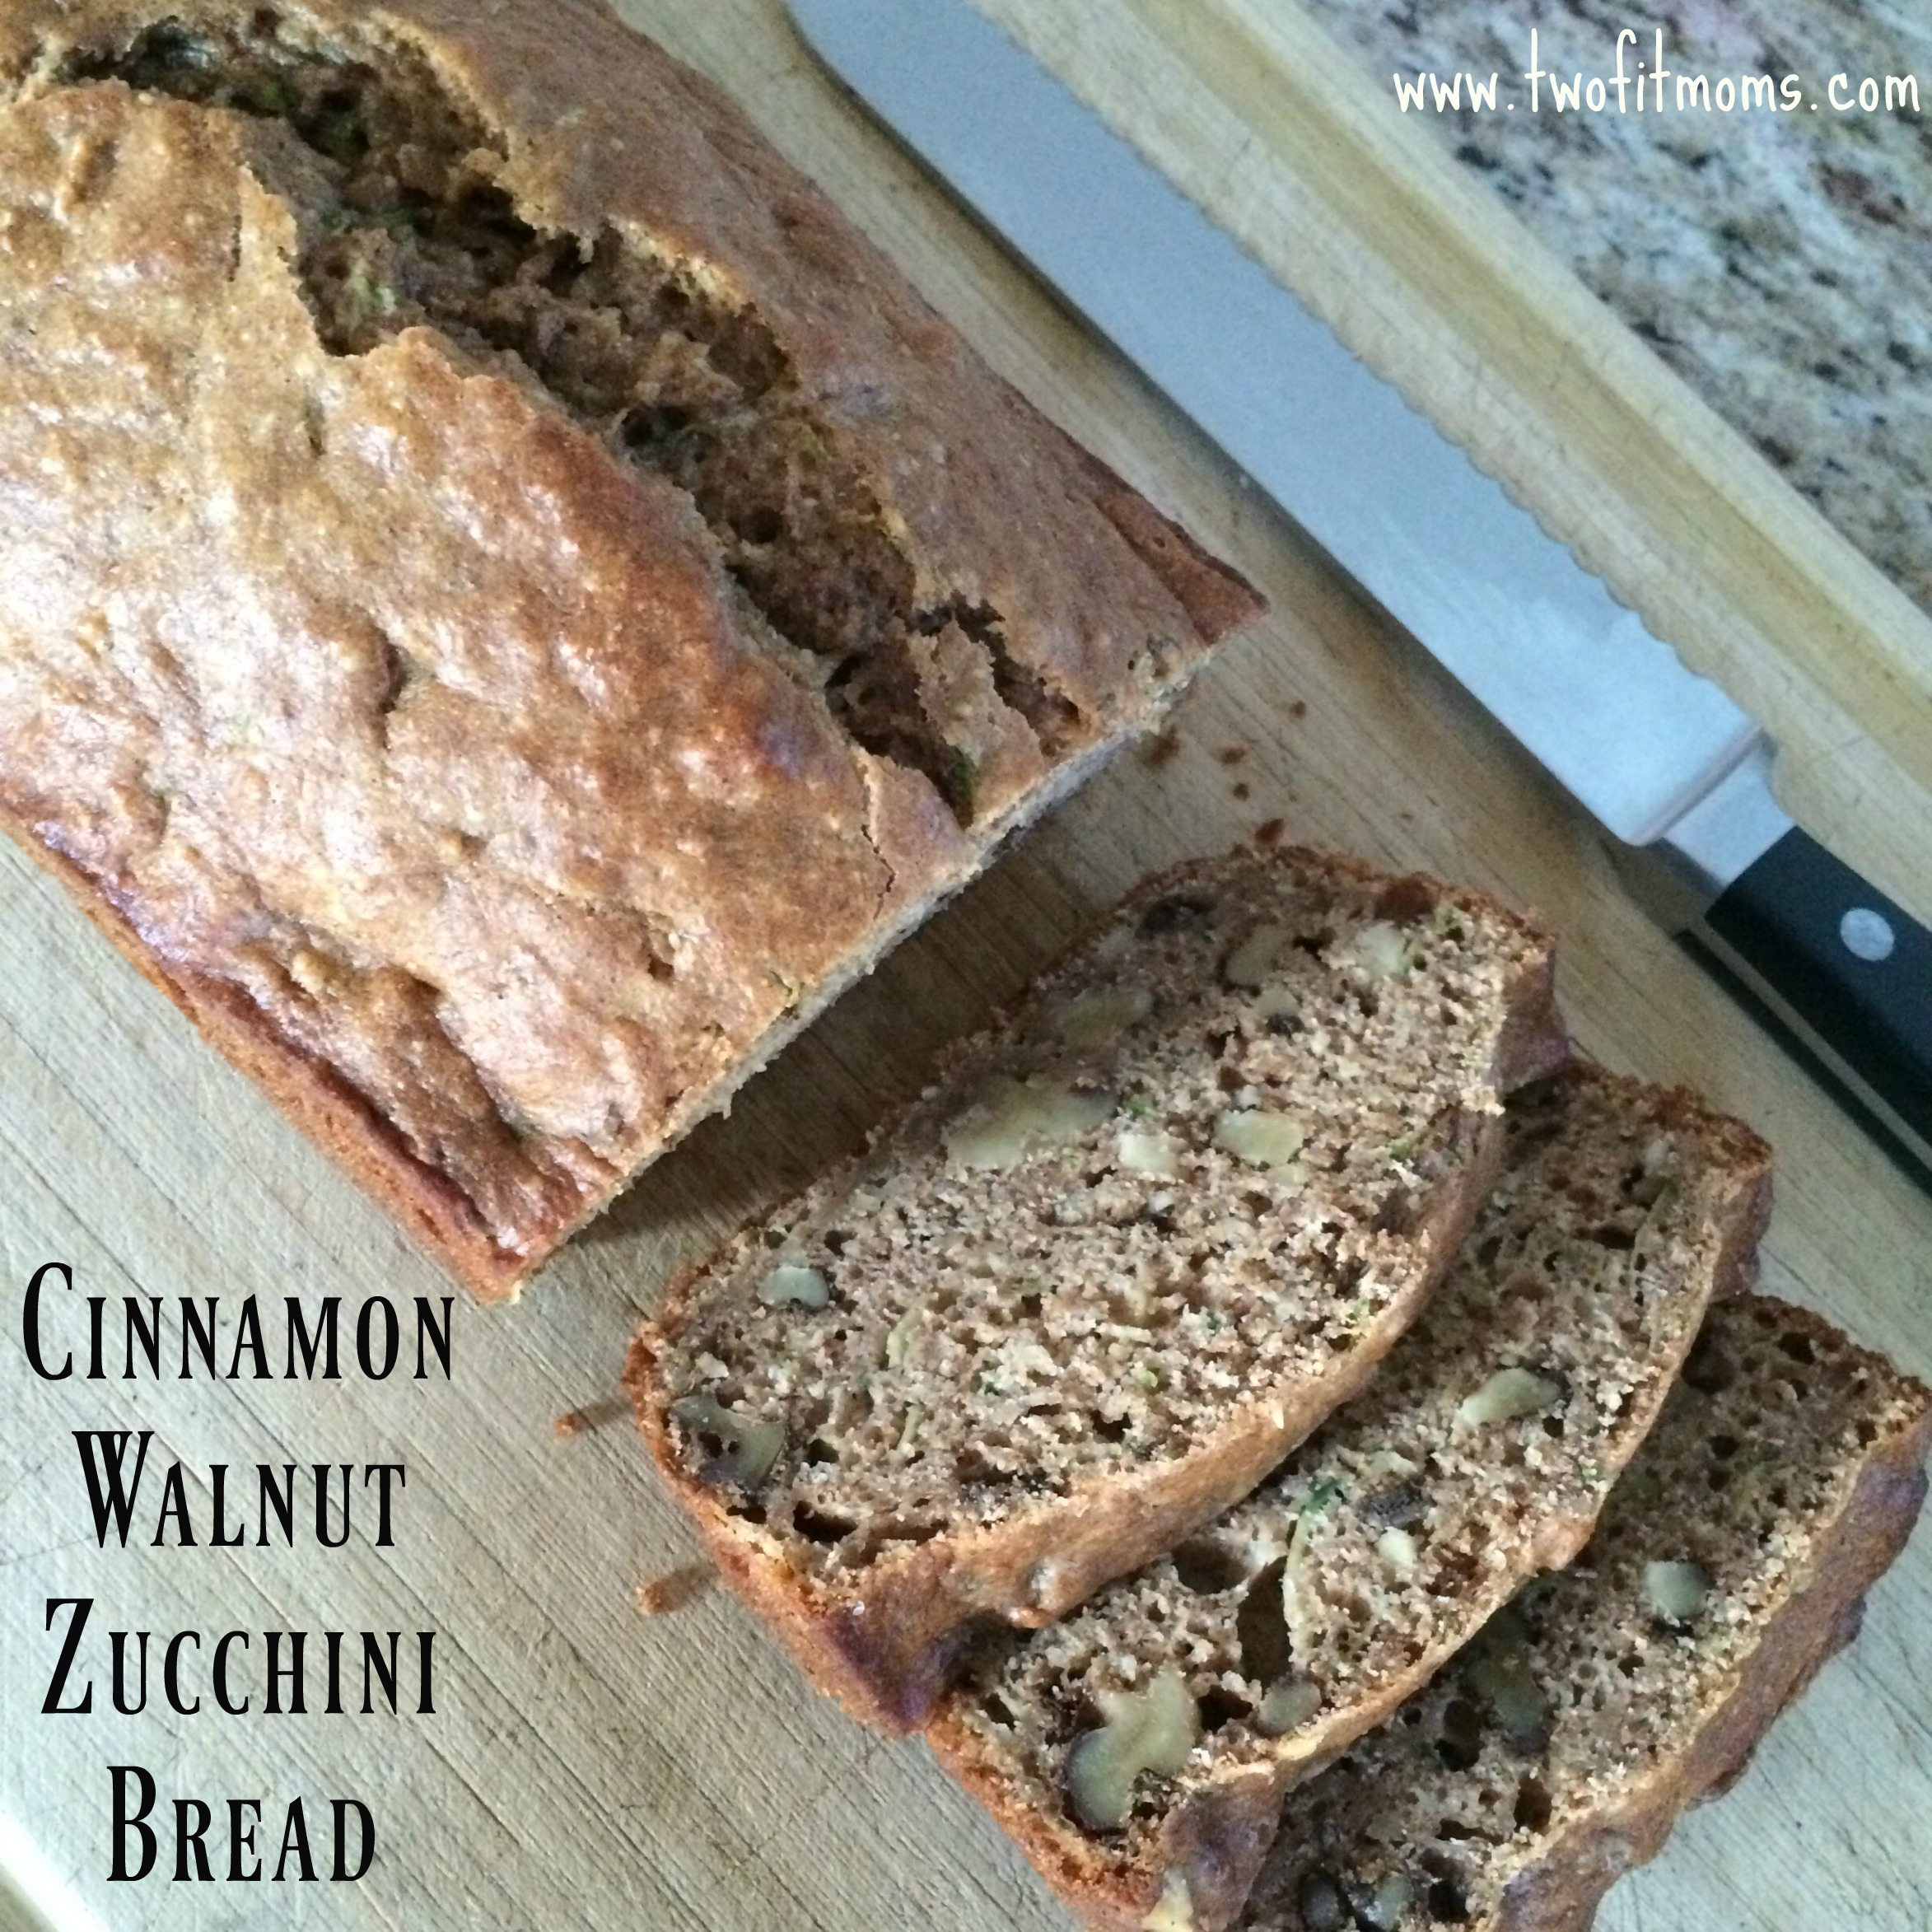
Cinnamon Walnut Zucchini Bread
Yield: Two loaves
2 cups zucchini (shredded and drained)
3 eggs
3/4 cup maple syrup
1/2 cup applesauce
1/2 cup oil (I used grapeseed, but you can use safflower or any other light oil)
2 over-ripe bananas, mashed (approximately 1 cup)
2 teaspoons vanilla extract
2 1/2 cups whole wheat flour
1/2 cup almond meal
1 teaspoon baking powder
1 teaspoon baking soda
2 teaspoons cinnamon
1/2 teaspoon salt
1 cup walnuts, chopped (optional)
Directions:
Preheat the oven to 350 degrees.
Grease two loaf pans and set aside.
Grate zucchini and drain the excess water out of it with a paper towel or a clean dish towel. Set the zucchini aside.
In a large bowl, combine the wet ingredients (eggs, maple syrup, applesauce, oil, bananas and vanilla extract). Mix to combine. Add the dry ingredients (whole wheat flour, almond meal, baking powder, baking soda, cinnamon and salt) and, once incorporated, add the zucchini and walnuts (which are optional). Stir until all of the ingredients come together nicely. Remember, the batter is quite thick, so don’t panic.
Divide the batter evenly amongst the two loaf pans. Bake, on the middle rack for 40-50 minutes, until a toothpick inserted into the center of the cake, comes out clean (no residual batter). Let cool and serve.
Helpful Hint: If you don’t like walnuts, add another nut of choice, or skip the nuts altogether and add semi-sweet chocolate chips!


