Tag: hip opener

  • Flying Lizard:  A Step-By-Step Tutorial

    Flying Lizard: A Step-By-Step Tutorial

    Have I mentioned lately how much I love arm balancing? Arm balances are what first attracted me to the practice of yoga. Until a few years ago, I thought yoga was just a collection of standing and seated poses. I had never seen anything quite like fallen angel or crow pose before, and when I saw these incredible postures, I was intrigued. I wasn’t quite ready for the challenge of inverting because I was so frightened of breaking my neck, but I was ready and willing to test my strength and balance while staying close to the ground in an arm balance.

    If you are dabbling in the world of arm balances, or if you are considering getting started, let me introduce you to a pose called Flying Lizard.FlyingLizard

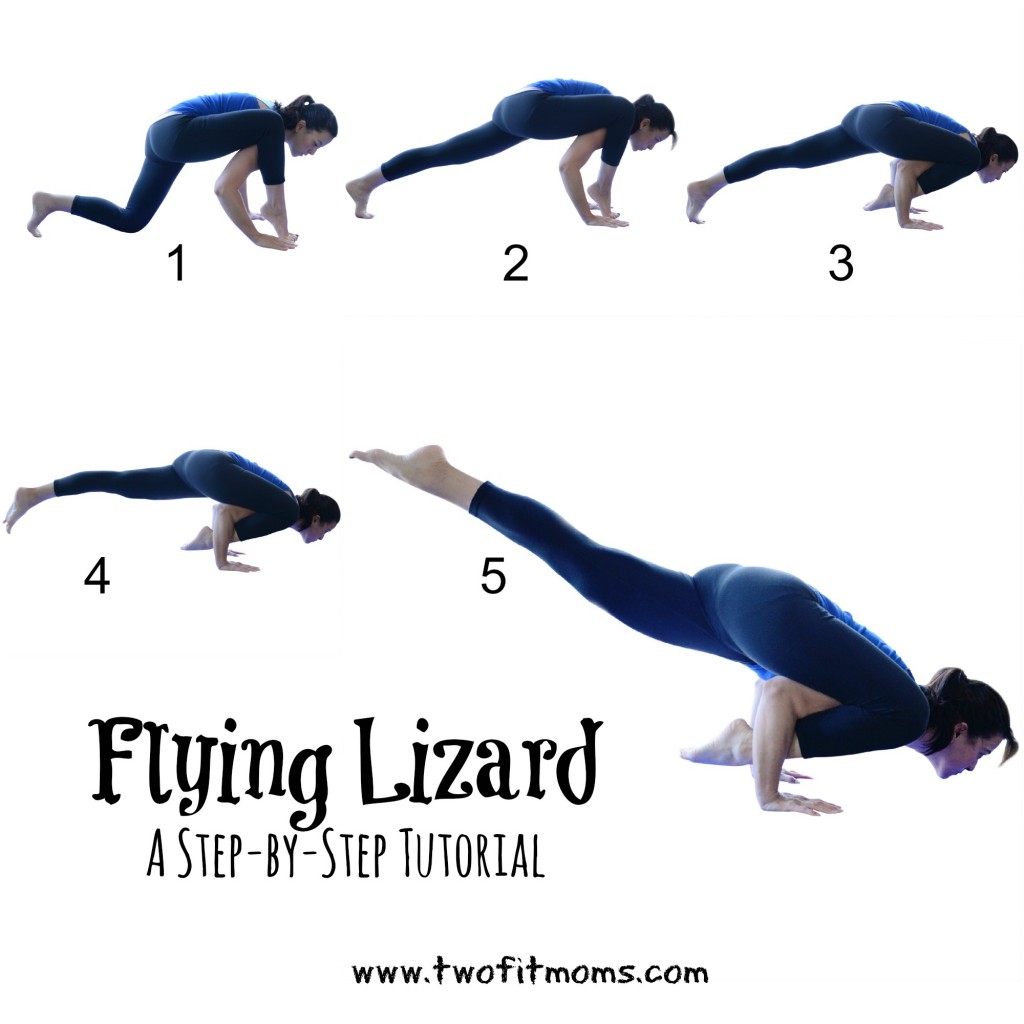
    You may be looking at the full expression of the pose in step 5 and thinking to yourself, “No way. Not happening.” Guess what? That’s okay! The reason why I want to introduce you to this particular arm balance is because EVERY step along the way is beneficial—even if you never fly your lizard.

    Step 1 on its own is a hip opener that is worth practicing. Step 2 intensifies the stretch. Step 3 provides the stability of 3 points of contact with the floor while adding an element of difficulty (lifting the front foot from the ground). Step 4 gives you the practice of arm balancing, and step 5 offers the challenge of flying the back leg high into the air.

    Give this entire tutorial a try, or feel free to just practice the steps that feel comfortable to you at your current level of fitness/flexibility. If you would like some additional hip stretches, click HERE.
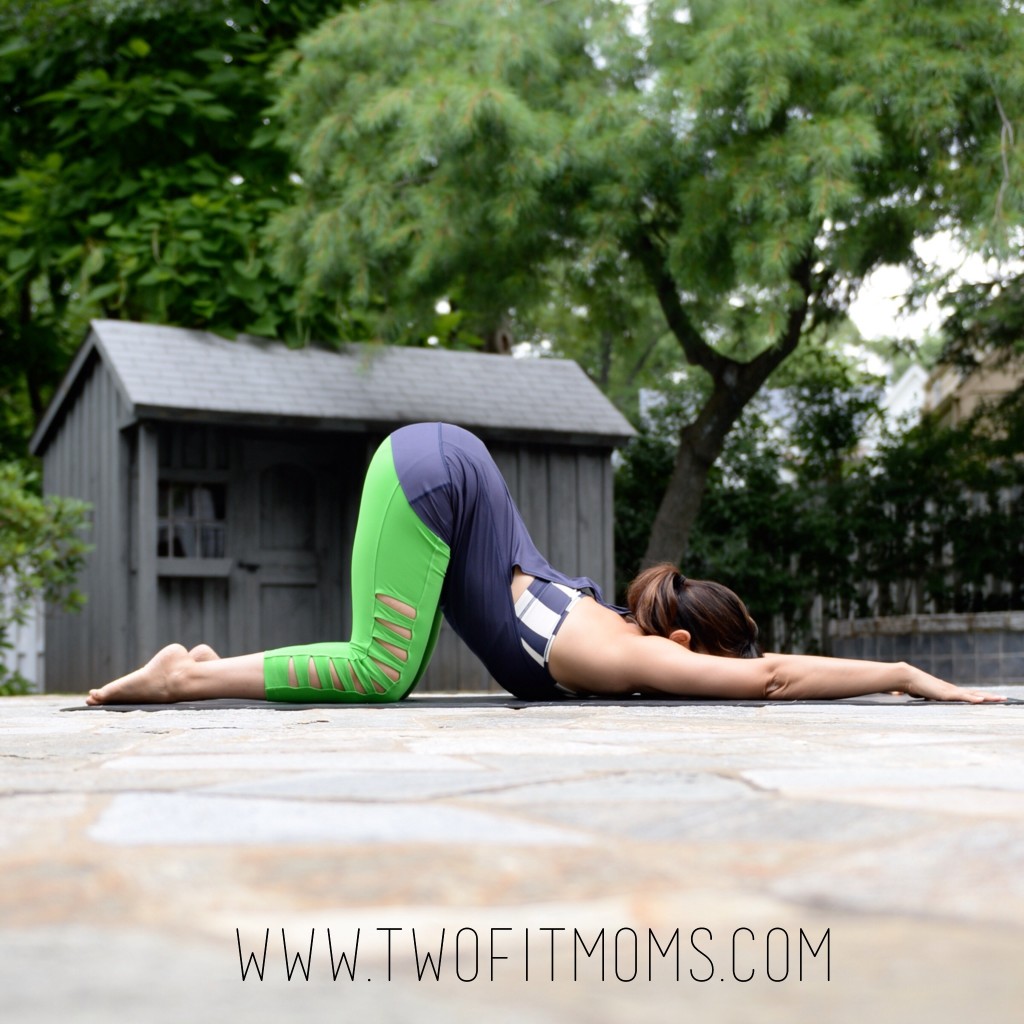
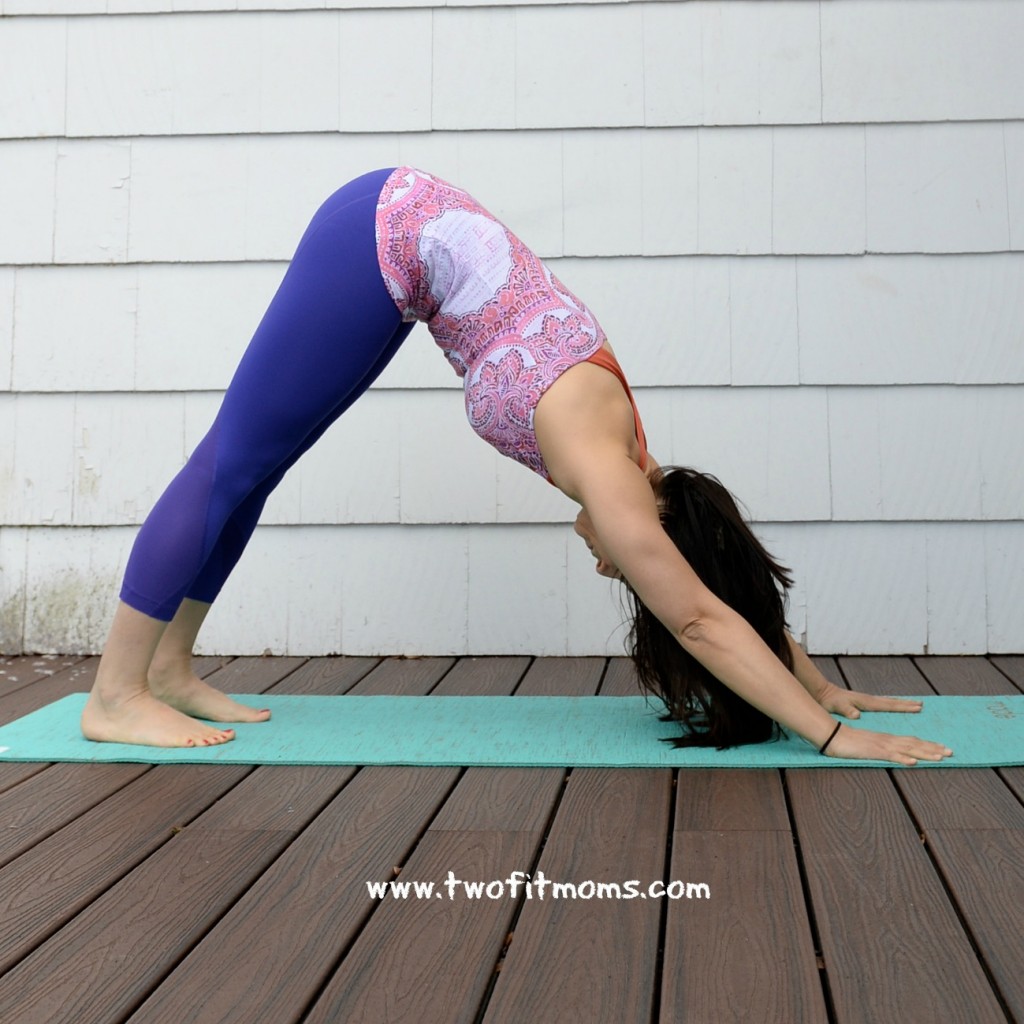
    Step 1
    Come onto your hands and knees for Tabletop position. Your shoulders will stack directly above your wrists, and your hips will stack above your knees. Step your right foot to the outside of your right hand. Lift onto the ball of your right foot, and make an effort to wiggle your right shoulder underneath your right knee.
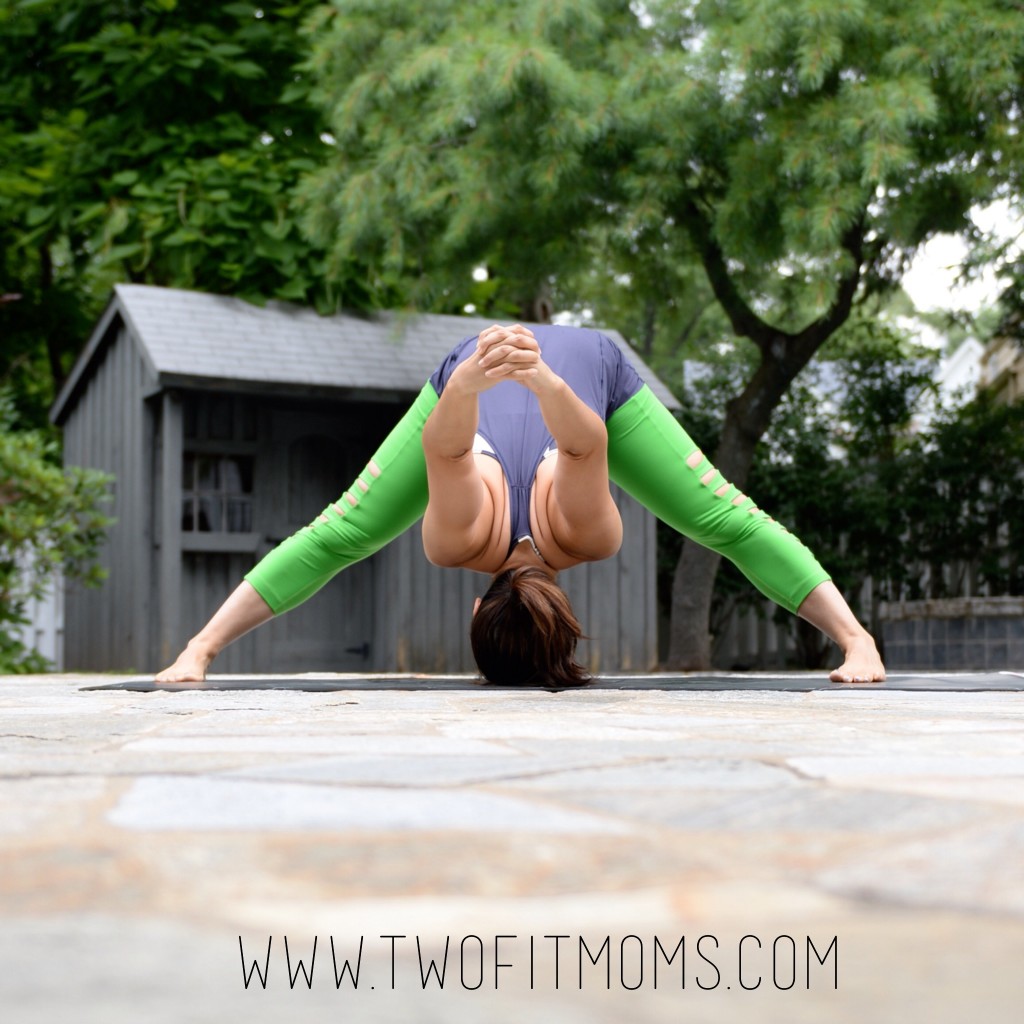
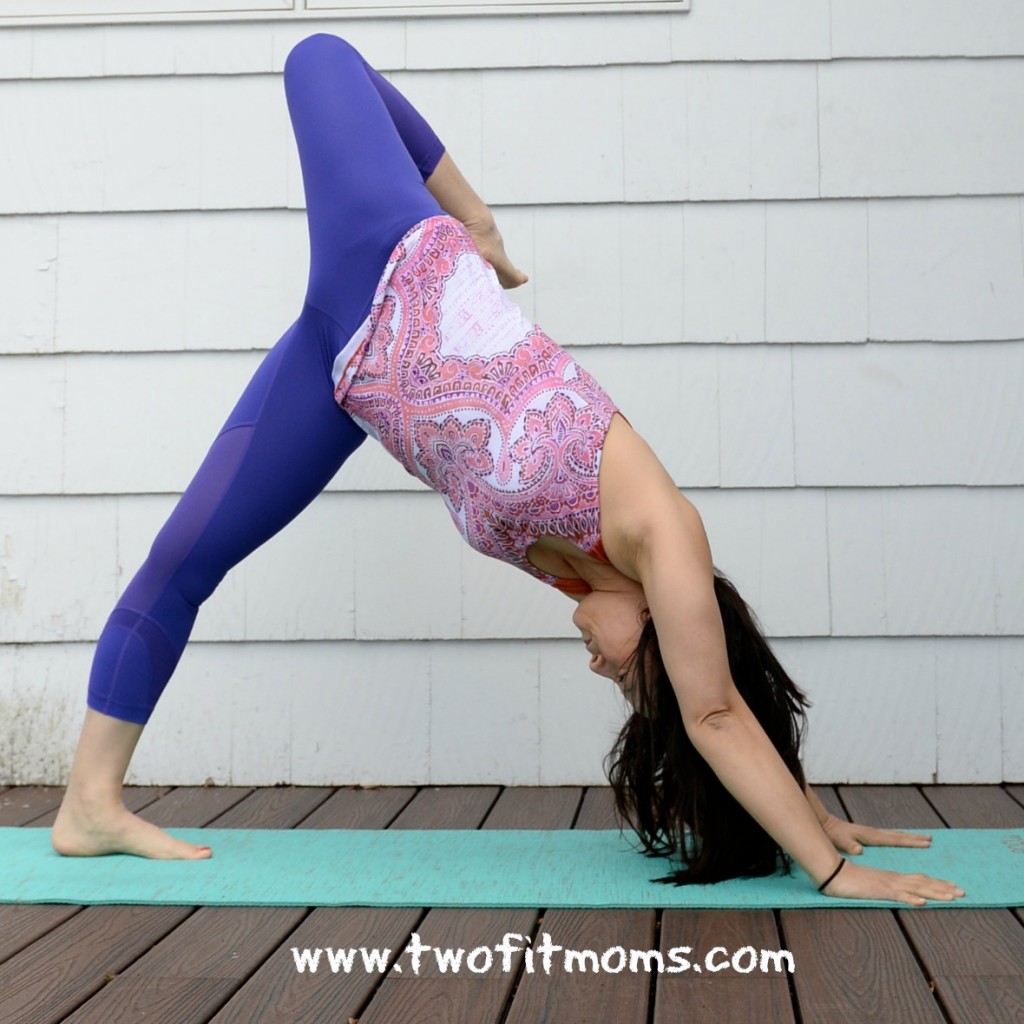
    Step 2
    Lift your back knee from the ground.
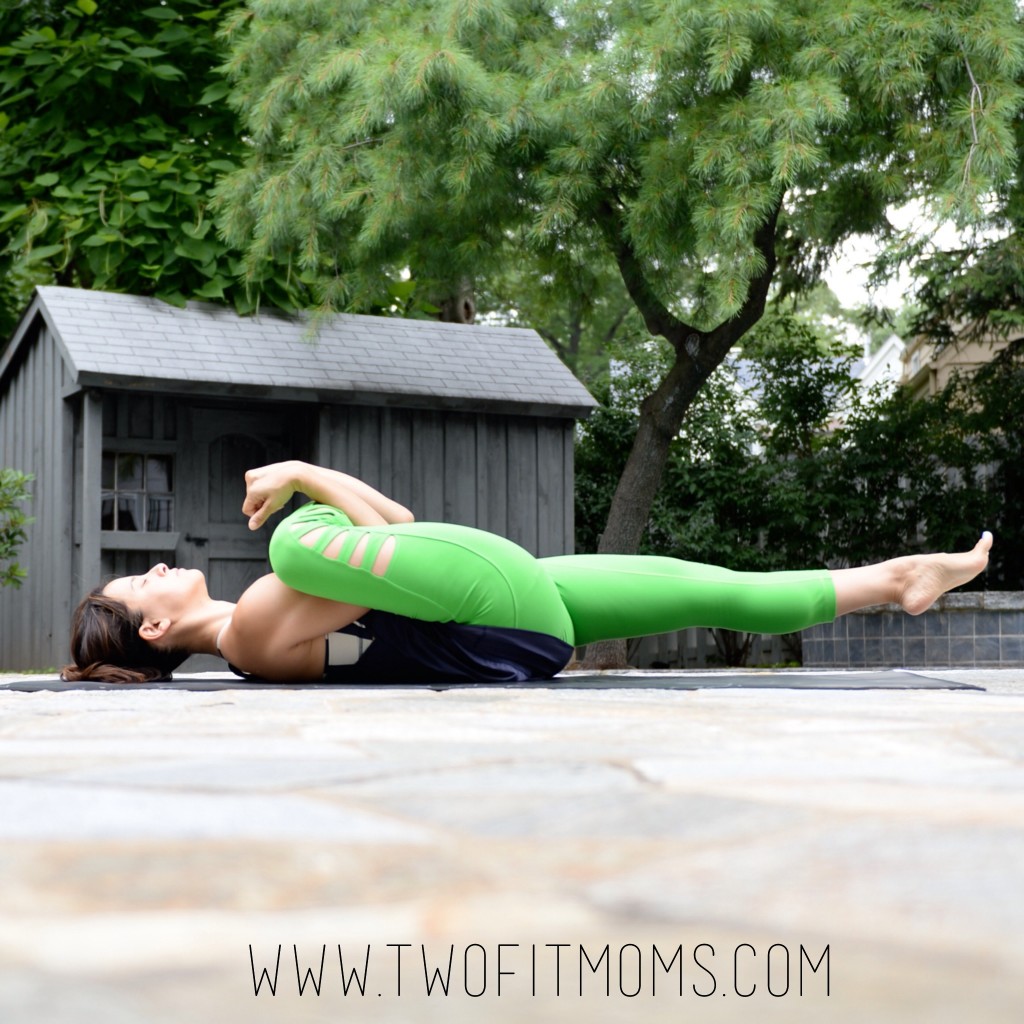
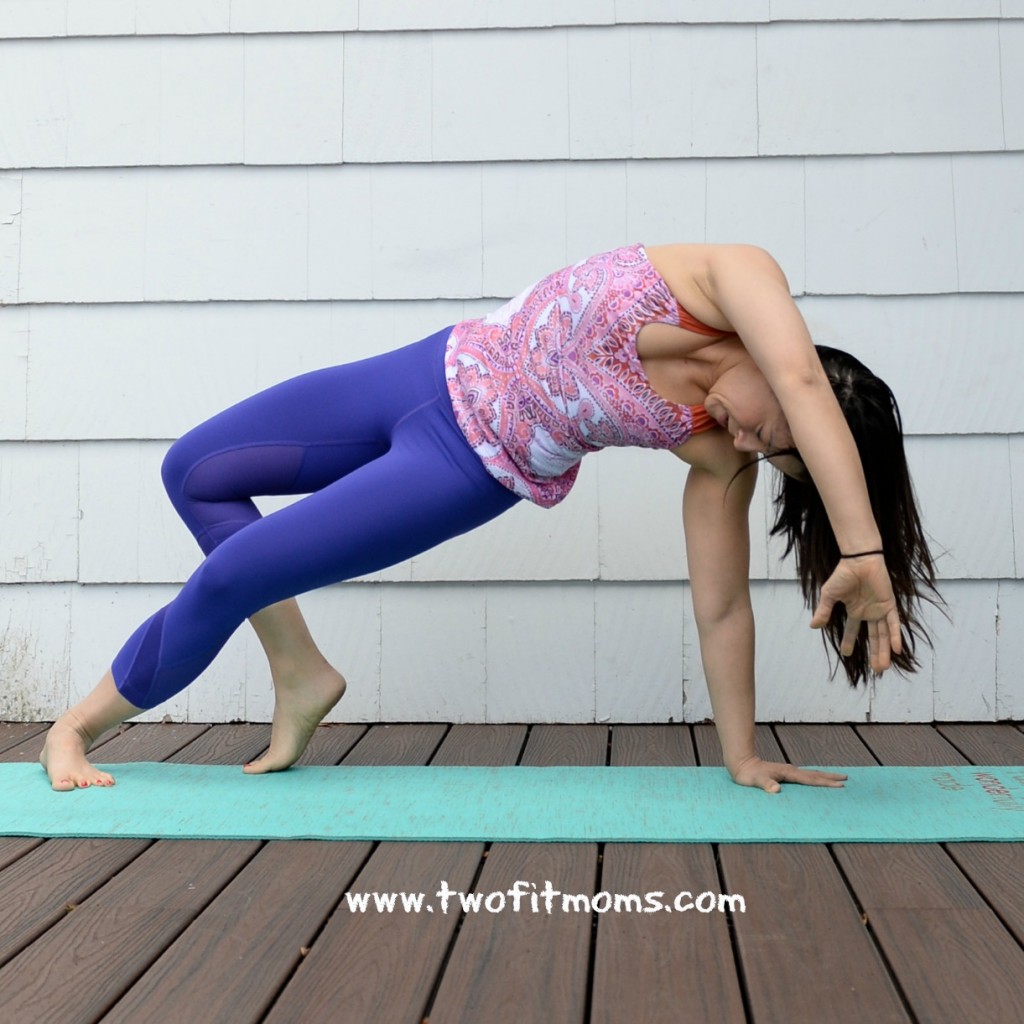
    Step 3
    Engage your core, shift weight into your hands, and lift your right foot from the ground, drawing it into your body.

    Steps 4 & 5
    Gaze forward, not straight down. Continue to shift weight forward into your hands as you lift your back foot from the ground. As you gain strength and find your balance, practice extending your back foot toward the sky. Remember to energize the lifted leg by engaging all of your muscles and even your feet!

  • 4 Poses for Stress Relief

    4 Poses for Stress Relief

    We all have days, weeks or even longer stretches of time when the stress of life is overwhelming and suffocating. The shoulders and neck muscles tighten, the jaw clenches, and the back may even round with grief. Stress causes a wound-up emotional state, and our insides feel twisted and tight. In these difficult periods, be kind to yourself, and try to find even a few minutes to unwind and decompress. Counteract the tightening, gripping power of stress with a few expansive, heart-opening, shoulder-stretching poses. Trust me, you will feel much better.

    Here are four of my favorite stretches for stress relief. Breathe and sink into each of these postures for a minimum of five breaths, and be sure to practice the relevant poses on both sides of the body.

    Puppy Pose
    Start out on hands and knees (tabletop position). Make sure your shoulders are stacked directly over your wrists, and your hips are stacked over your knees. Keep your hips stacked over your knees, and begin to walk your hands forward, sinking your chest toward the floor. Depending on your flexibility, you may rest your forehead, chin or chest on the mat.
    Puppy

    Twisted Monkey Pose
    From downward facing dog, step your right foot forward between your hands. Lower your back knee, and untuck the toes on your back foot. Lift your back foot from the mat. Sweep your right arm back (palm facing up), and grab the pinky-side edge of your left foot. Begin to kick your back foot into your hand. Puff your chest, and roll your shoulders down. Roll onto the outer edge of your right foot, and allow your right knee to fall away from the body. Enjoy this full-body stretch for 30-60 seconds before repeating on the opposite side.TwistedMonkey

    Prasarita Padottanasana
    Step your feet about a leg’s distance apart, and position your feet so that they are parallel to one another. Interlace all ten fingers behind your back, and squeeze your palms together. Roll your shoulders down and away from your ears, and engage your thighs by pulling your quadriceps up and into the body. Inhale deeply, and exhale as you hinge forward from the waist, allowing your clasped hands to fall forward. If possible, allow the crown of your head to rest on the mat.Prasarita

    Supine Pigeon Pose
    Lie on your back with your knees bent and your feet flat on the mat. Cross your right ankle over your left thigh, so that you create a triangle of space between your two legs. Bring your legs toward your chest, and then hook your arms through the triangle of space and cradle your right shin. Pull your shin toward your body as you extend your left leg to hover a few inches above the ground. Hold this hip-opening stretch for 30-60 seconds, and repeat on the other side.SupinePigeon

    Will these four stretches solve your problems and remove the stress from your life? Of course not. Stress is often caused by circumstances that are beyond our control. The goal here is to focus on what we CAN control—our breath, our body, and our response to difficult situations. Good luck in all that you are facing. You are stronger and more resilient than you think!

  • Transition into Wild Thing

    Transition into Wild Thing

    One of my favorite backbending poses in yoga is Wild Thing, or Camatkarasana. The reason why I love it so much is that in order to get into the pose, you transition through a couple of my favorite stretches: downward facing dog and three-legged dog with an open hip. Not only do you reap the benefits of stretching out the entire front body with the backbend, but you also get a great hamstring stretch and hip-opener on your way into wild thing.

    Step 1
    Begin in downward facing dog. If you are unsure about the placement of your hands and feet for downward facing dog, start out in plank pose (top of a push-up). Make sure that your hands are directly stacked under your shoulders, and your feet are about hip width apart. The term “hip-width” refers to the distance between your two hip bones, and NOT the distance between the outer edges of your hips. From plank pose, lift your hips back and up into the air so that your body looks like an upside down V. Take 3 to 5 deep breaths in this pose, enjoying the stretch in your hamstrings, chest and shoulders.
    Step1

    Step 2
    Raise your right leg high into the air, stack your right hip over your left hip, and bend your right knee. Be mindful to keep an even amount of weight in both hands, and do not allow your weight to collapse into your left shoulder. Shoulders should be even. Take 3 to 5 deep breaths in this pose, and enjoy the hip stretch.
    Step2

    Step 3
    Slowly lower the ball of your right foot to the ground behind your left leg. Your right hand will simultaneously begin to lift from the mat.
    Step3

    Step 4
    Push firmly into the mat with both feet, as you lift your hips toward the sky and reach back behind you with your right hand. Keep your chest and hips lifted, and remember to breathe evenly through your nose. Hold this pose for 5 breaths (about 30 seconds), and repeat on the other side.
    Step4