Tag: grilling

  • Grilled Pizza with Fresh Tomato, Mozzarella and Basil

    Grilled Pizza with Fresh Tomato, Mozzarella and Basil

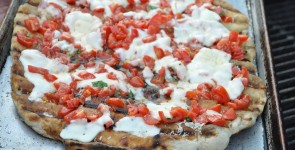
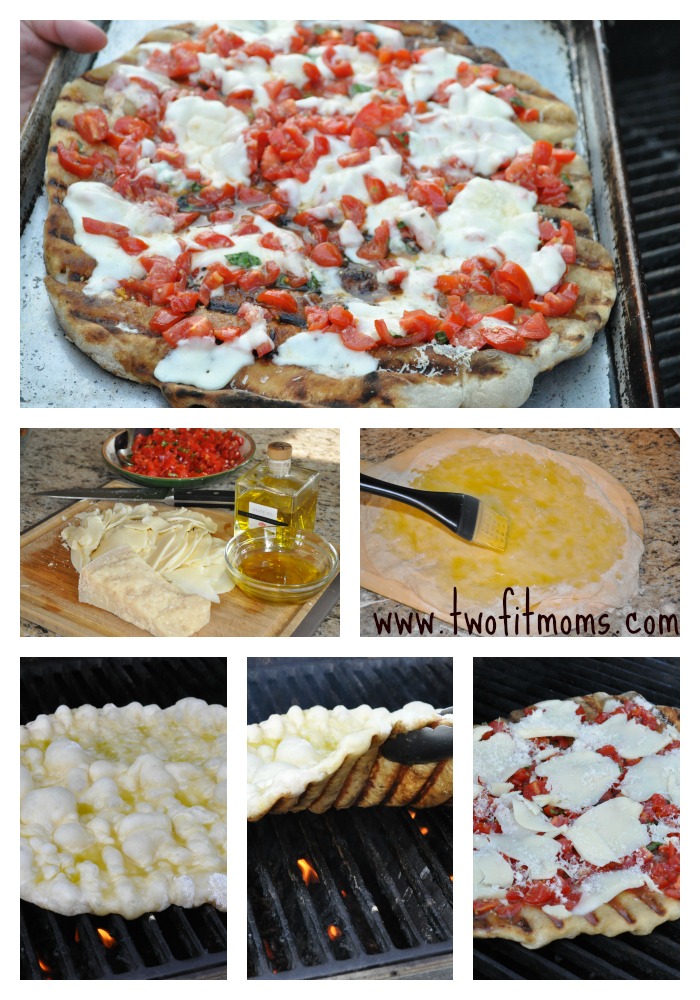
    Who doesn’t love pizza?  It happens to be a mainstay at our house, especially on those busy nights, but store bought pizza has nothing on a delicious homemade grilled pizza.  All you need is a grill and a few fresh ingredients.
    grilledpizzacollagetitle
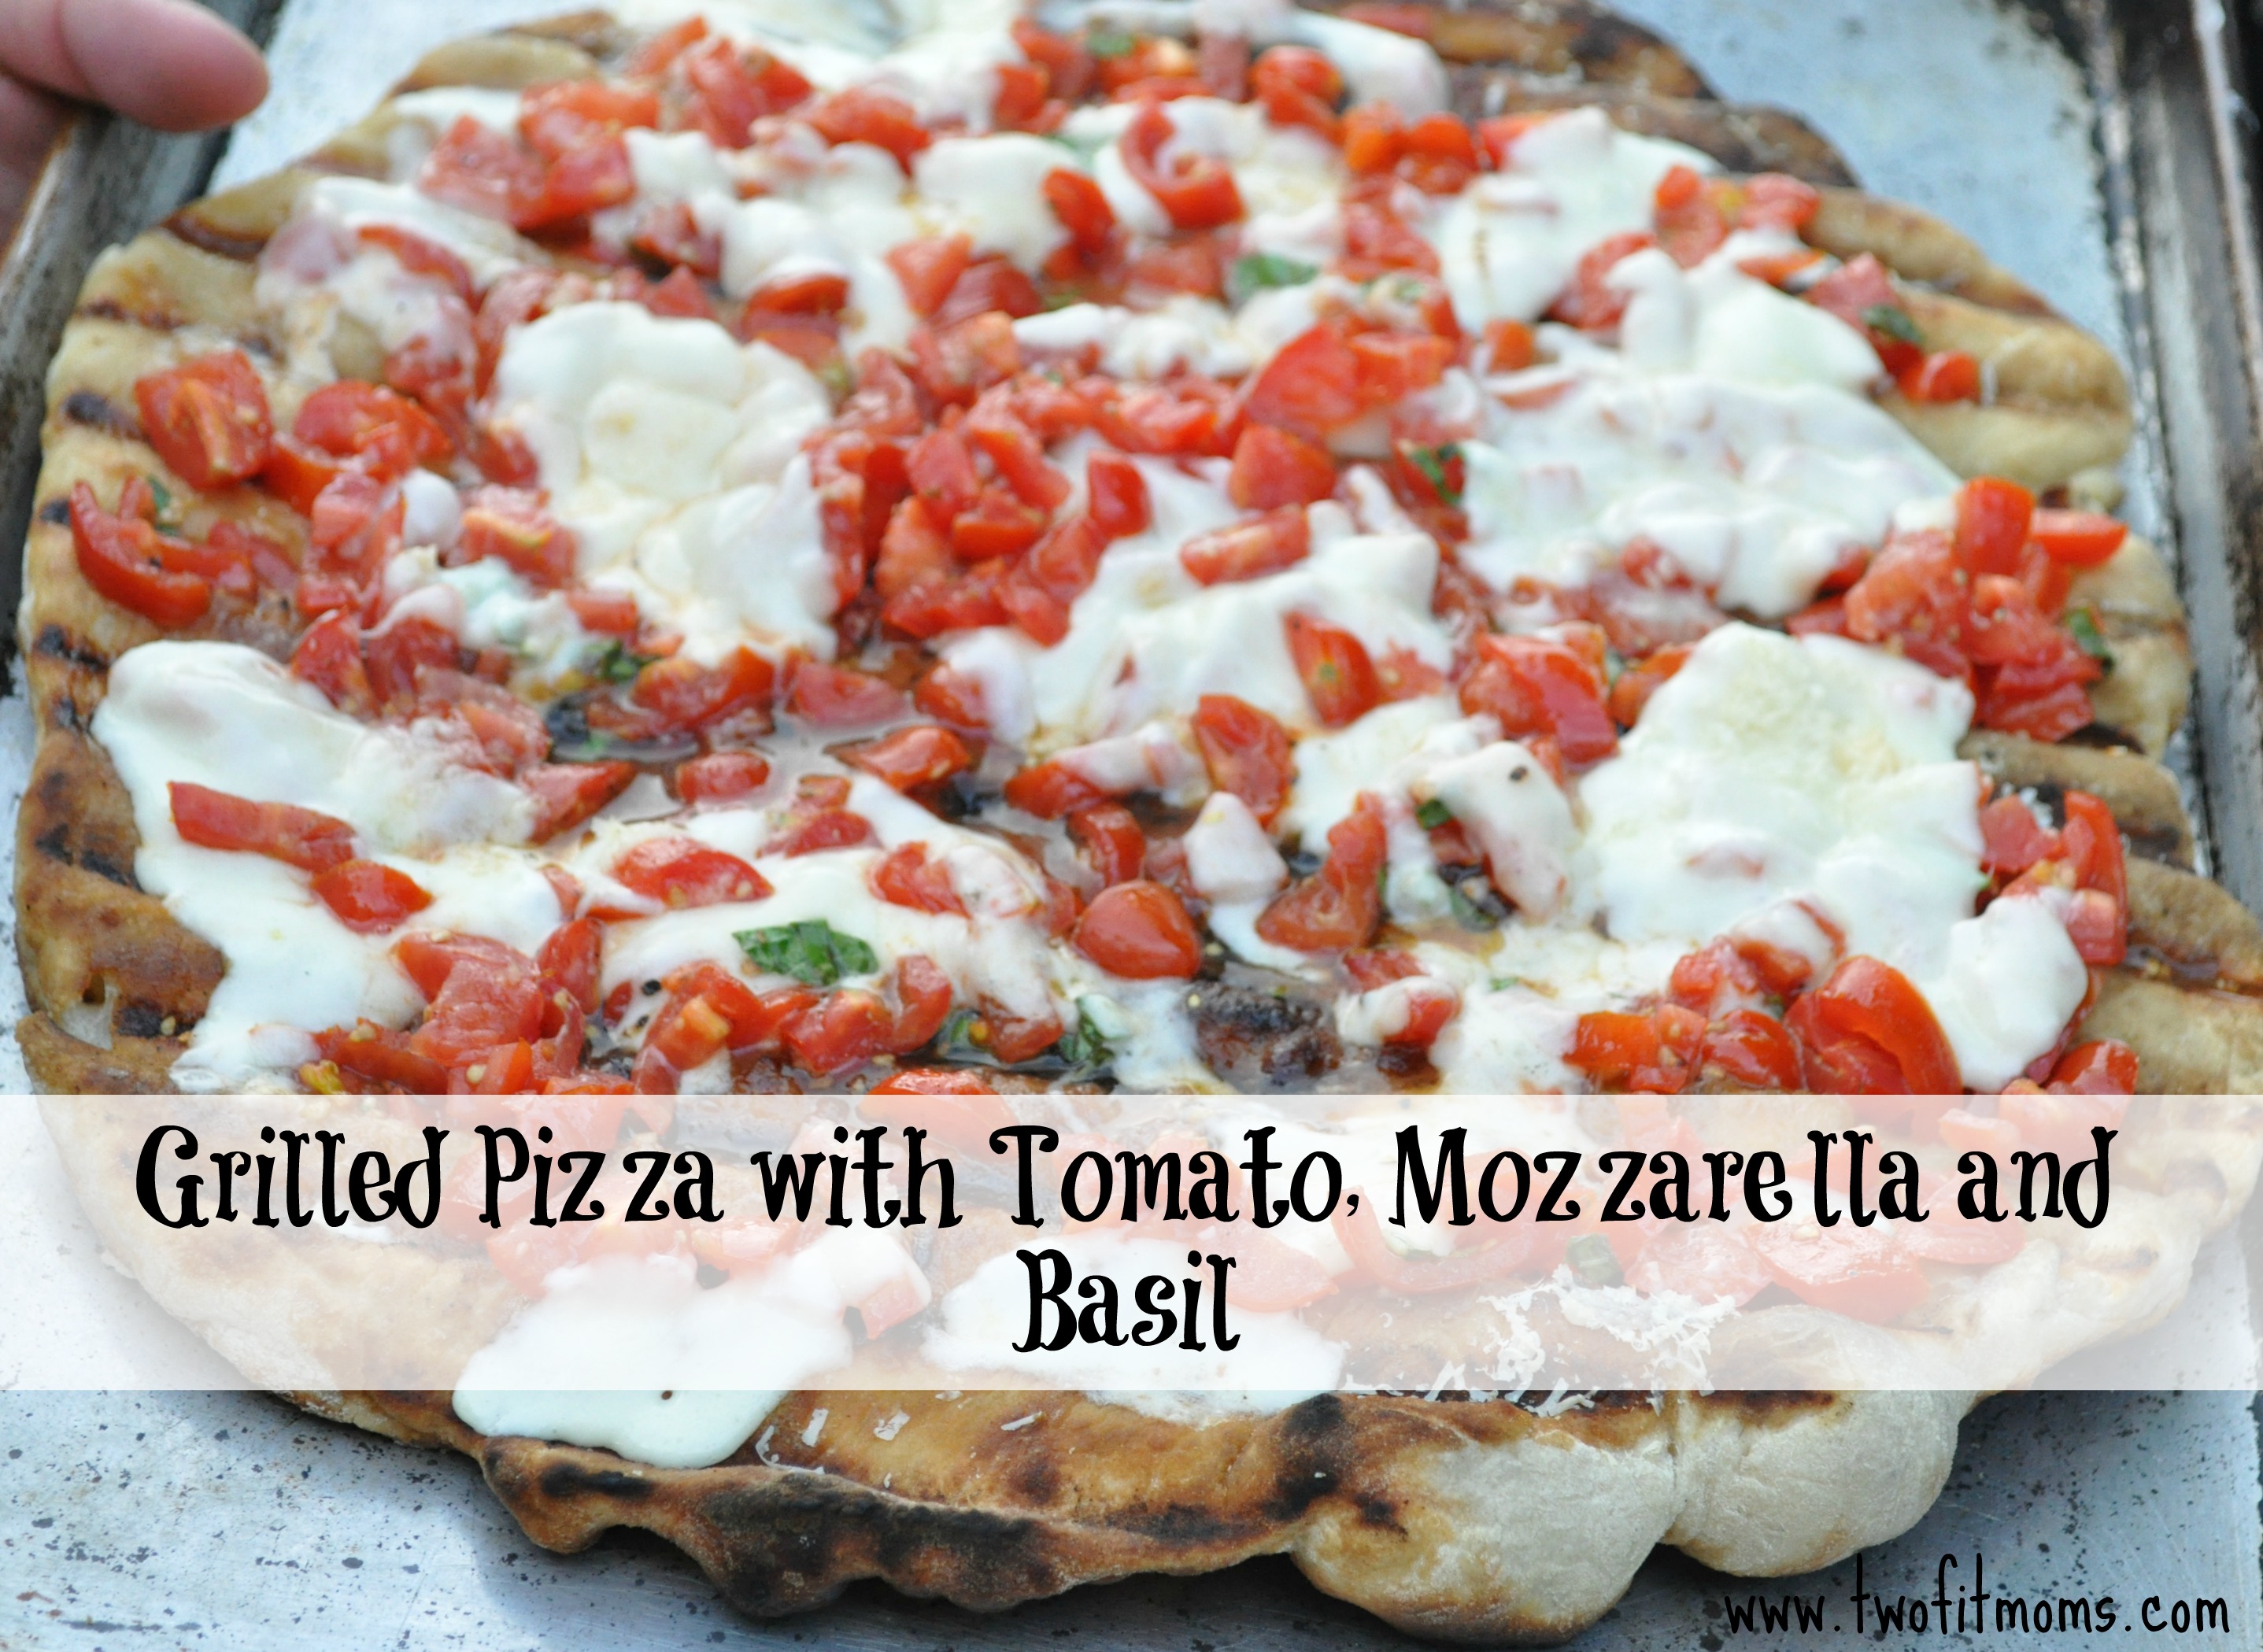
    We started grilling pizza a few years ago.  We couldn’t believe how amazing it turns out — and we’ve been making this delicious treat ever since.  I can guarantee you will never find a better tasting pie.  It’s great for a family meal or for entertaining.  You can dress it up any way that you’d like.  You can make it with pre-made pizza sauce and your favorite toppings. But, today, I’m offering you one of my family’s favorite preparations which happens to include only seven fresh ingredients – tomatoes, garlic, olive oil, basil, mozzarella cheese, Parmigiano-Reggiano cheese and pizza dough.  It’s perfect for those lazy summers when turning on the stove is the last thing on your mind — and it happens to be an excellent recipe for the multitude of summer tomatoes in your garden.  This pizza is like a grilled bruschetta — topped with melted cheese — but so much better than you would ever imagine.   Mmmmmm, my mouth is watering just thinking about it.

    In order to make the recipe more manageable, I purchase the pizza dough. You can buy it from your local pizzeria or supermarket.  I like to get mine at Trader Joe’s (which also happens to offer a whole wheat dough and an herbed dough option).  However, for this pizza, I recommend an original dough — nothing fancy.  Just enjoy the simplicity of the fresh ingredients.

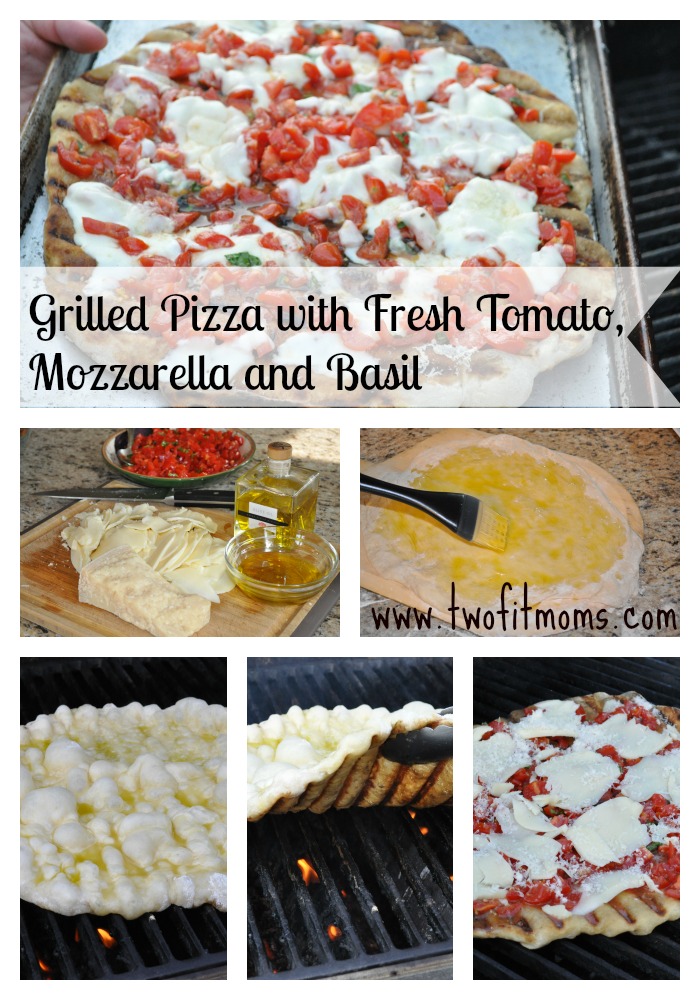
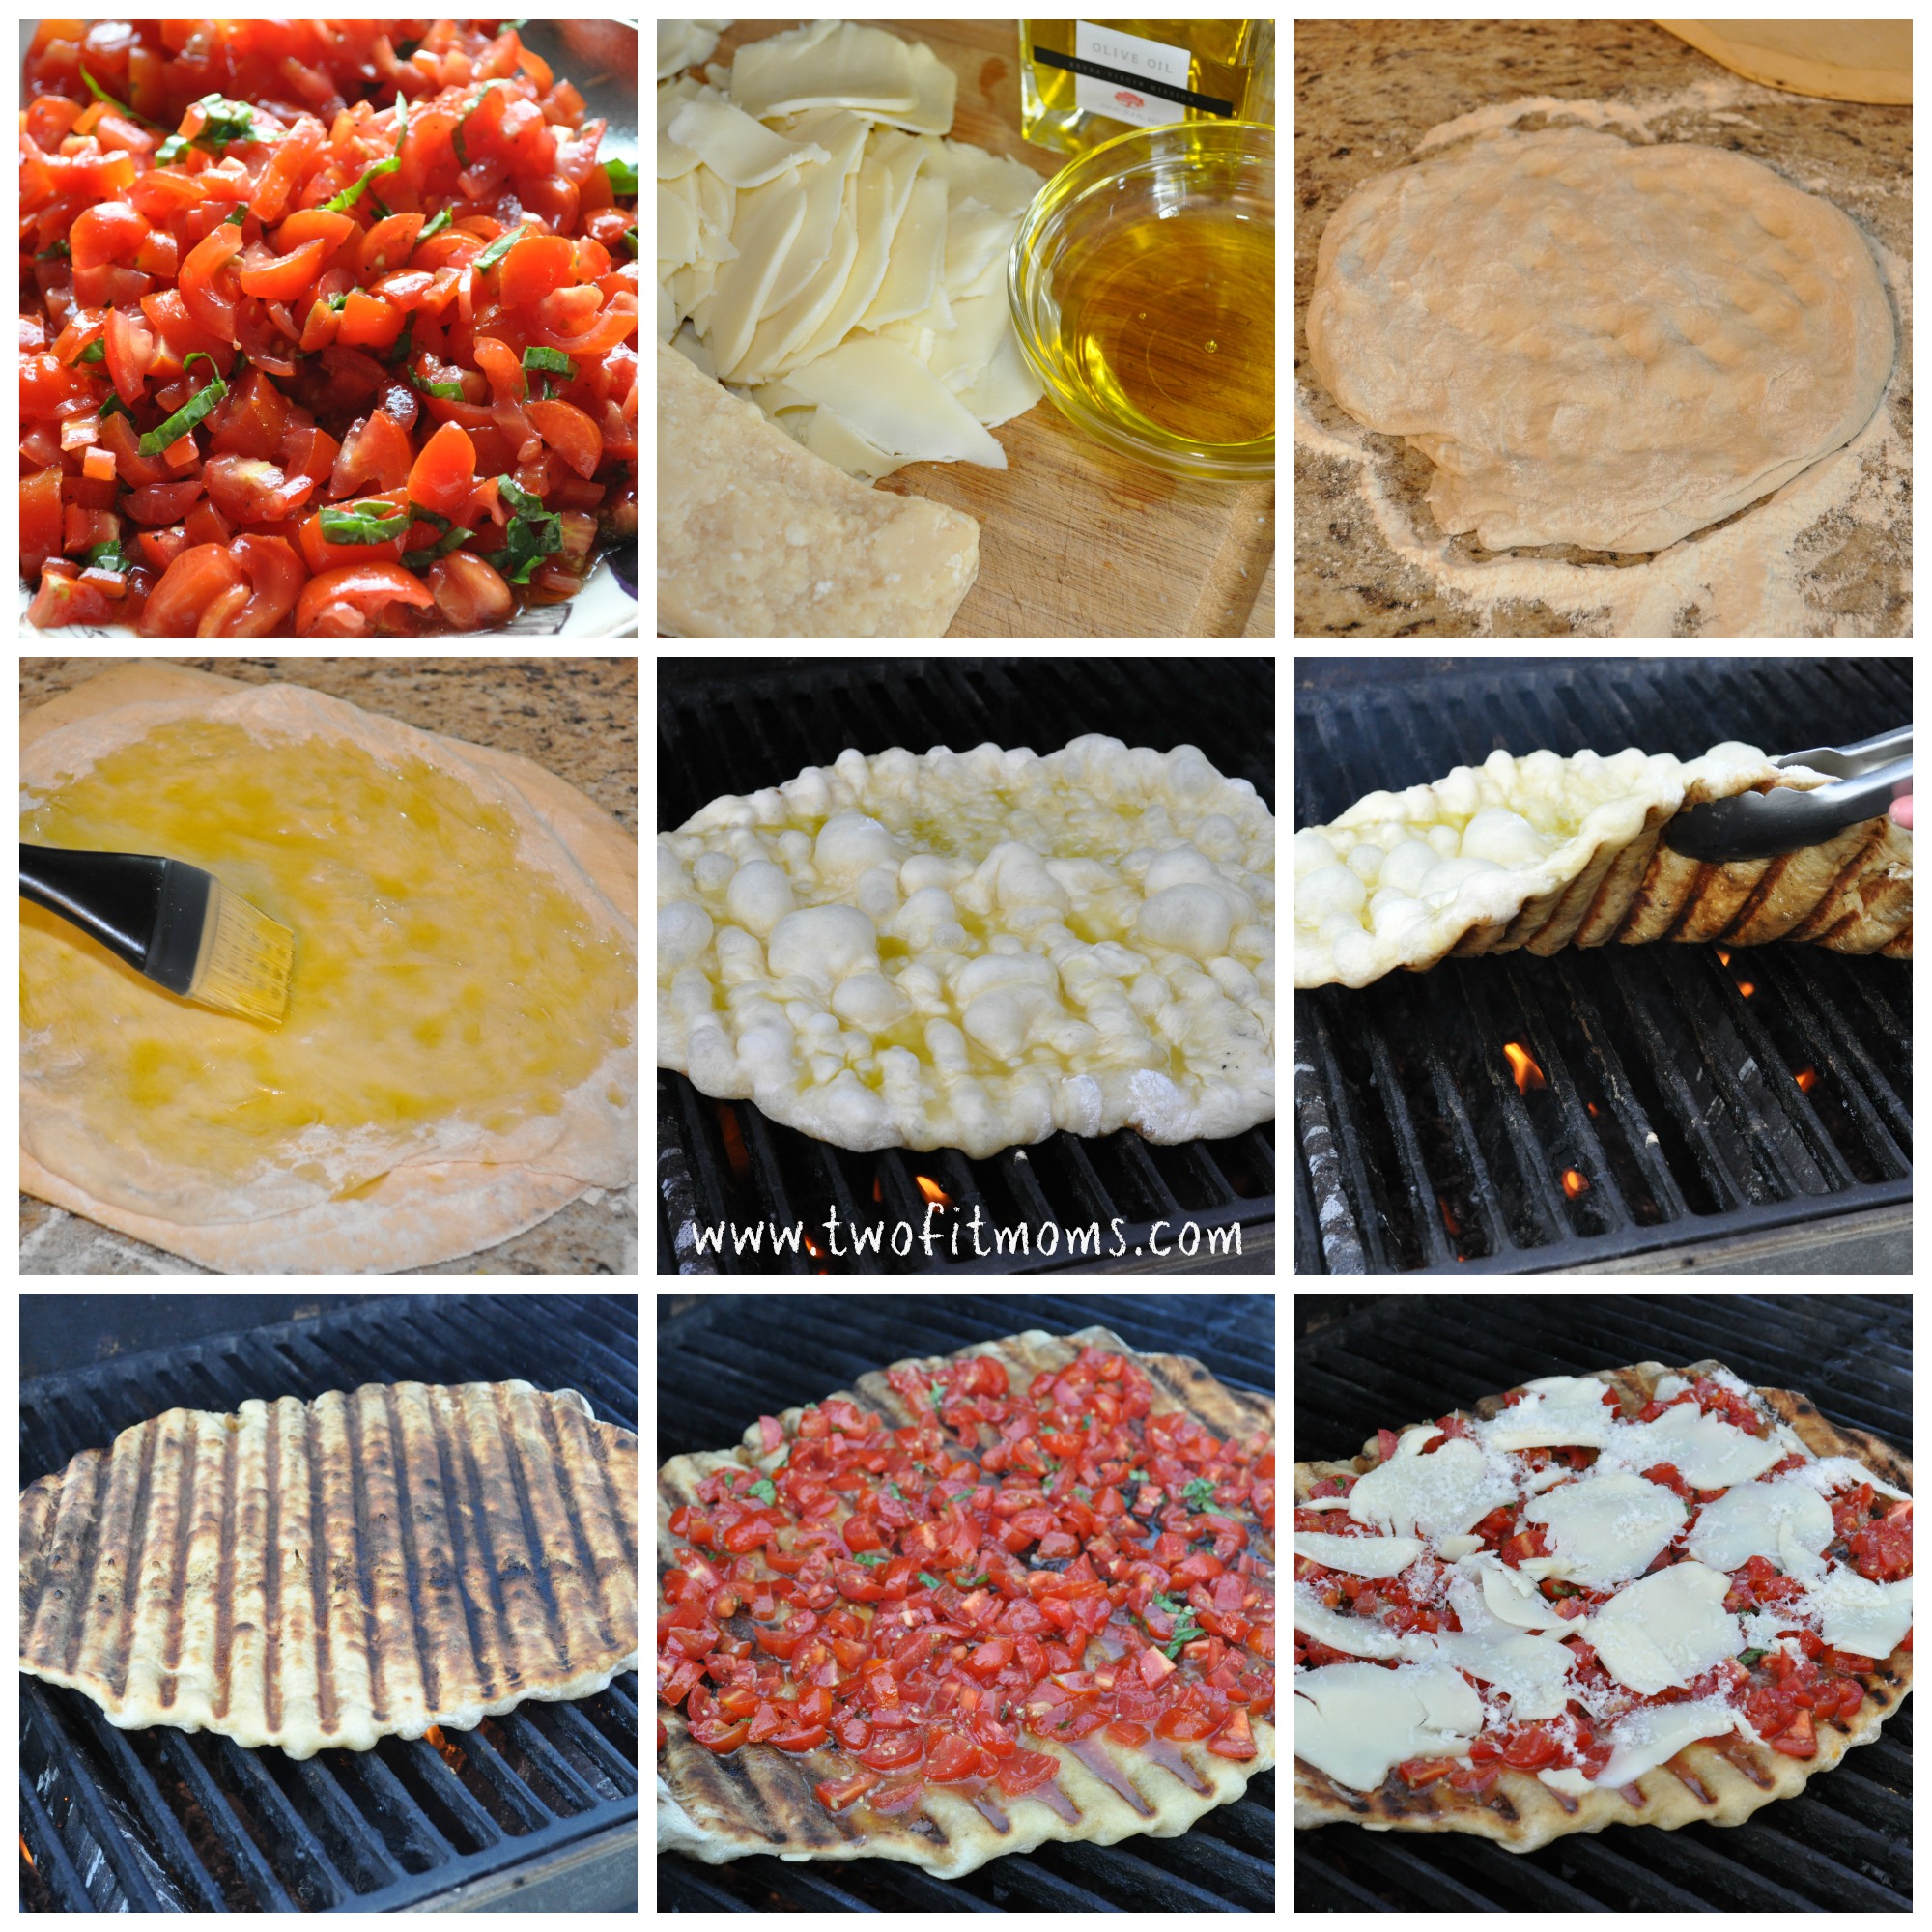
    The process is not complicated, it just involves a few steps.  I’ve included some pictures below to help explain the process.  Before you get started make sure you have the following tools on hand:

    • BBQ grill
    • Pastry brush for the olive oil
    • Pizza peel or flat cutting boards for transferring dough to grill
    • Tongs
    • 2 large baking sheets

    And, here is a visual breakdown of the steps — which I detail in the directions:
    pizzaprocess

    Grilled Pizza with Fresh Tomato, Mozzarella and Basil
    Yields 2 pizzas

    For the sauce:
    20 ounces of tomatoes, chopped (grape tomatoes, plum tomatoes, any kind you like)
    1-2 cloves of garlic, crushed
    3 tablespoons olive oil
    1 teaspoon salt
    fresh ground pepper to taste
    1 tablespoon of fresh basil, chopped

    2 packages of store bought pizza dough (I used 16 ounce dough from Trader Joes)
    12 ounces of mozzarella cheese (I use low moisture mozzarella cheese since the sauce is so loose, you don’t want extra water)
    1/2 cup of grated Parmigiano-Reggiano cheese
    salt and pepper to taste
    olive oil for the grill

    Directions:

    Preheat grill on high; coat grill grates with olive oil.

    Assemble tomato sauce, combining chopped tomatoes, garlic, olive oil, basil, salt and pepper.

    Slice mozzarella cheese and grate parmigiano-reggiano cheese.

    Roll dough out on a floured surface.  Transfer dough to pizza peel (or a flat cutting board). Coat top of dough with olive oil.

    Flip dough onto hot grill.  Let it cook until bubbles form on top of dough — timing really all depends on width of dough — but 5 minutes is a good estimate.  I usually close the grill for this part — but, if this is your first time making grilled pizza, keep an eye on the dough and the grill flame.  You don’t want to burn the dough.

    Once bubbles form, and the underside of dough is browned (with grill marks), flip the dough with tongs.

    Top dough with tomatoes, cheeses — and salt and pepper if you’d like.  Close grill lid and cook until the cheese melts and the bottom of the pizza is nice and brown and branded with grill marks — you are looking at another 3-5 minutes depending on the thickness of the dough.

    Serve immediately.

    Helpful hint: Make the pizza with a friend — or your partner. It helps to have an extra set of hands – especially if you plan on making more than one pizza. 
    pizzapinterest

  • Herb Marinated Grilled Vegetables

    Herb Marinated Grilled Vegetables

    grilled veg bannerGrilled veggies are a mainstay summer side dish at our house, and the recipe that I’m sharing with you is not just any grilled vegetable recipe — it’s the best grilled vegetable recipe!

    It’s based on Giada De Laurentiis’ recipe which I’ve modified.  To be honest, the marinade is what really sets it apart.  It’s an olive oil and balsamic vinegar dressing infused with garlic, rosemary, basil and parsley.  The dressing brings your grilled veggies to a whole new level!

    Cutting the vegetables is a little time intensive, but I promise you will not regret the effort you put into making these veggies.  In fact, you will likely get more than one meal out of them — and the longer they marinate, the better they taste.

    I generally serve these veggies as a side dish, but they are delicious on a sandwich (with hummus or goat cheese). You can also chop up the leftover veggies and serve over salad greens or mix them into quinoa or farro.

    You can modify the recipe based on the veggies you have on hand (e.g., substituting summer squash for zucchini), and you can adjust the quantity of marinade depending on whether you want to make more or less veggies.

    Herb Marinated Grilled Vegetables

    3 zucchini
    3 Japanese eggplant
    3 red, yellow or orange bell peppers
    12 baby portobello mushrooms (e.g., cremini or baby bella mushrooms)
    1 bunch of asparagus
    2-3 bunches of scallions
    Olive oil (approximately 6-8 tablespoons — but don’t be afraid to use more, if necessary)
    Salt and pepper to taste

    For the marinade:

    1/2 cup of olive oil
    4 tablespoons balsamic vinegar
    2 cloves of garlic, crushed
    1 tablespoon fresh basil, chopped
    1 tablespoon fresh parsley, chopped
    1 tsp fresh rosemary, chopped

    Turn on your grill, and set it to high.  In the meantime, prep your veggies.  You want thick cuts in order to survive the grilling process.  Cut zucchini and eggplant in 1/4 inch thick slices (long ways).  Seed the bell peppers and cut into quarters (the larger slices will be easier to grill vs. smaller strips).  Trim the asparagus (check out our article on how to properly prep asparagus!), and wash and remove the bottom stems of the mushrooms.  Trim bottoms and tops of scallions.

    Arrange cut and prepped veggies on a large baking sheet.  Drizzle with a few tablespoons of olive oil — not a thick coating, but a light coating on all the veggies so that they don’t stick to the grill.  Season with salt and pepper to taste.

    While grill is heating, make the marinade.

    In a small bowl, add olive oil, balsamic vinegar, garlic and chopped herbs. Whisk until incorporated.  Set aside.

    When the grill comes to temperature, arrange vegetables and cook until they are tender and have grill marks.  You will likely need to grill the veggies in batches.  Once they are cooked, place them on a large cookie sheet and keep adding to the pan as additional veggies are ready.
    veggie collage

    While the grilled vegetables are warm, pour the marinade over them.  Seal the pan with foil and let them sit until they come to room temperature.  You can serve the veggies at room temperature or you can place them in the refrigerator for use at a later date.  The longer they marinate, the better they taste!

    Helpful tips: Make sure your grill is very hot and the grates are clean.  Grilled veggies don’t taste good with leftover charred bits on them! Additionally, if you don’t use all of the marinade, use the extra to dress your salad!


  • Lemon-Dijon Herbed Salmon

    Lemon-Dijon Herbed Salmon

    lemon dijon salmon with bannerI’m going to be very honest with you. . . . I’ve never liked salmon.

    In fact, I’m the only one in my family who would not eat it.  Even my 2-year old likes it.  Since I’m the odd man out, so to speak, I decided I needed to make a more concerted effort to try salmon.  Plus, it’s healthy and good for your complexion (I’ve heard), so I decided to give it a try.

    I chose wild salmon versus farm-raised salmon at the suggestion of a friend who believes wild salmon has a milder flavor. Plus, wild salmon is supposed to be the healthier option, albeit pricey (a bit of a splurge, and not something we eat every day).

    I went to my local fish monger (luckily I have an amazing one in town), and I bought fresh, wild salmon. Then, I needed to find a good recipe because I think the key to good fish is good preparation.  I can assure you that just throwing some lemon on top would not be appealing to me.

    So, I searched the Internet looking for recipes, and cobbled together a marinade from what I had on hand in my refrigerator – lemon, garlic, dijon mustard, and parsley.  Voila!

    To my surprise, I really liked it.  The whole family liked it!  I’m not sure why — I guess it was just the right combination of flavors between the fresh lemon and parsley, the tangy mustard and spicy garlic.  It was also cooked just right — not overdone, but moist.

    Needless to say, I actually enjoyed the wild salmon.  It was sort of a miracle!  So, I figured, if I like it, you will too.

    Here’s my recipe for Lemon-Dijon Herbed Salmon! Consider serving it with our Shaved Fennel Salad or Lemon-Garlic Scented Roasted Asparagus!

    salmon squareLemon-Dijon Herbed Salmon
    serves 4-6 people

    2 lbs of wild salmon, cut into steaks
    1/4 cup of olive oil
    2 cloves of garlic, crushed
    1/4 cup of parsley, chopped
    1 tablespoon dijon mustard
    1 lemon, juiced and zested
    salt and pepper to taste

    Preheat oven to 400 degrees.

    In a bowl, combine olive oil, crushed garlic, chopped parsley, mustard, juice and zest of one lemon, salt and pepper.

    Place wild salmon in a baking pan, lined with tin foil.

    Evenly distribute marinade over each portion of fish.

    Bake wild salmon for approximately 15 minutes, until firm, but moist.  Serve immediately!

    Helpful hint: Try making this recipe on the grill! You will still want to cook the wild salmon on tin foil.  Try to keep the temperature of the grill at a constant 400 degrees.  I noticed mine cooked a little sooner on the grill, closer to 10-12 minutes.  Keep in mind, cooking times will vary depending on size and thickness of your wild salmon steak.