Tag: fall

  • Roasted Butternut Squash Soup with Sage Croutons

    Roasted Butternut Squash Soup with Sage Croutons

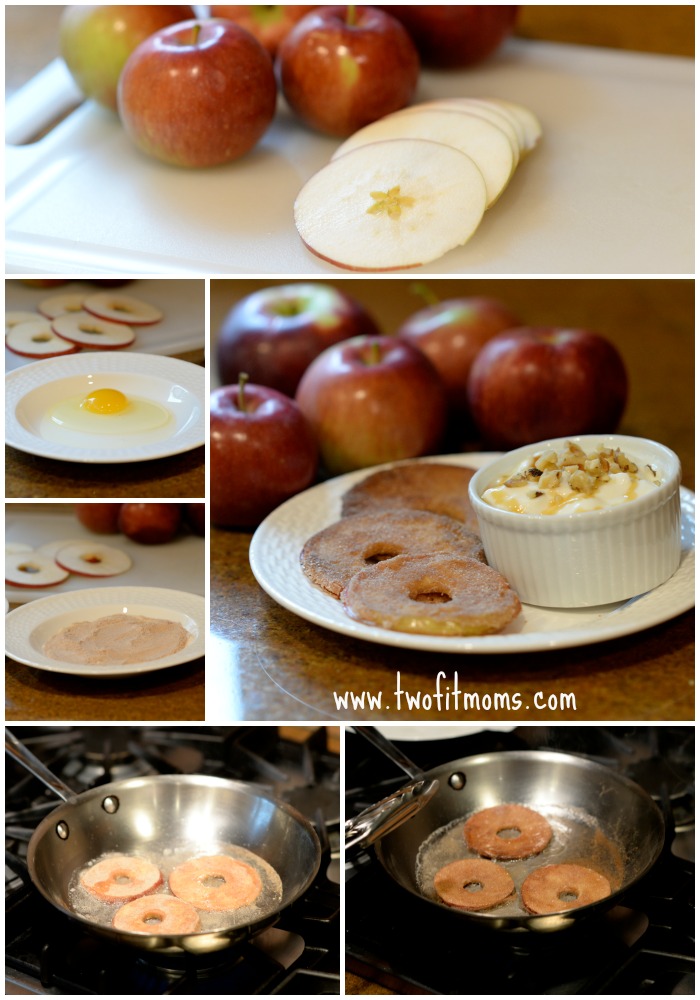
    When I think of fall cooking, I think of pumpkins and apples and butternut squash! In the past few weeks, I’ve given you a pumpkin and an apple recipe, so I owe you a butternut squash one.

    butternut squash with header
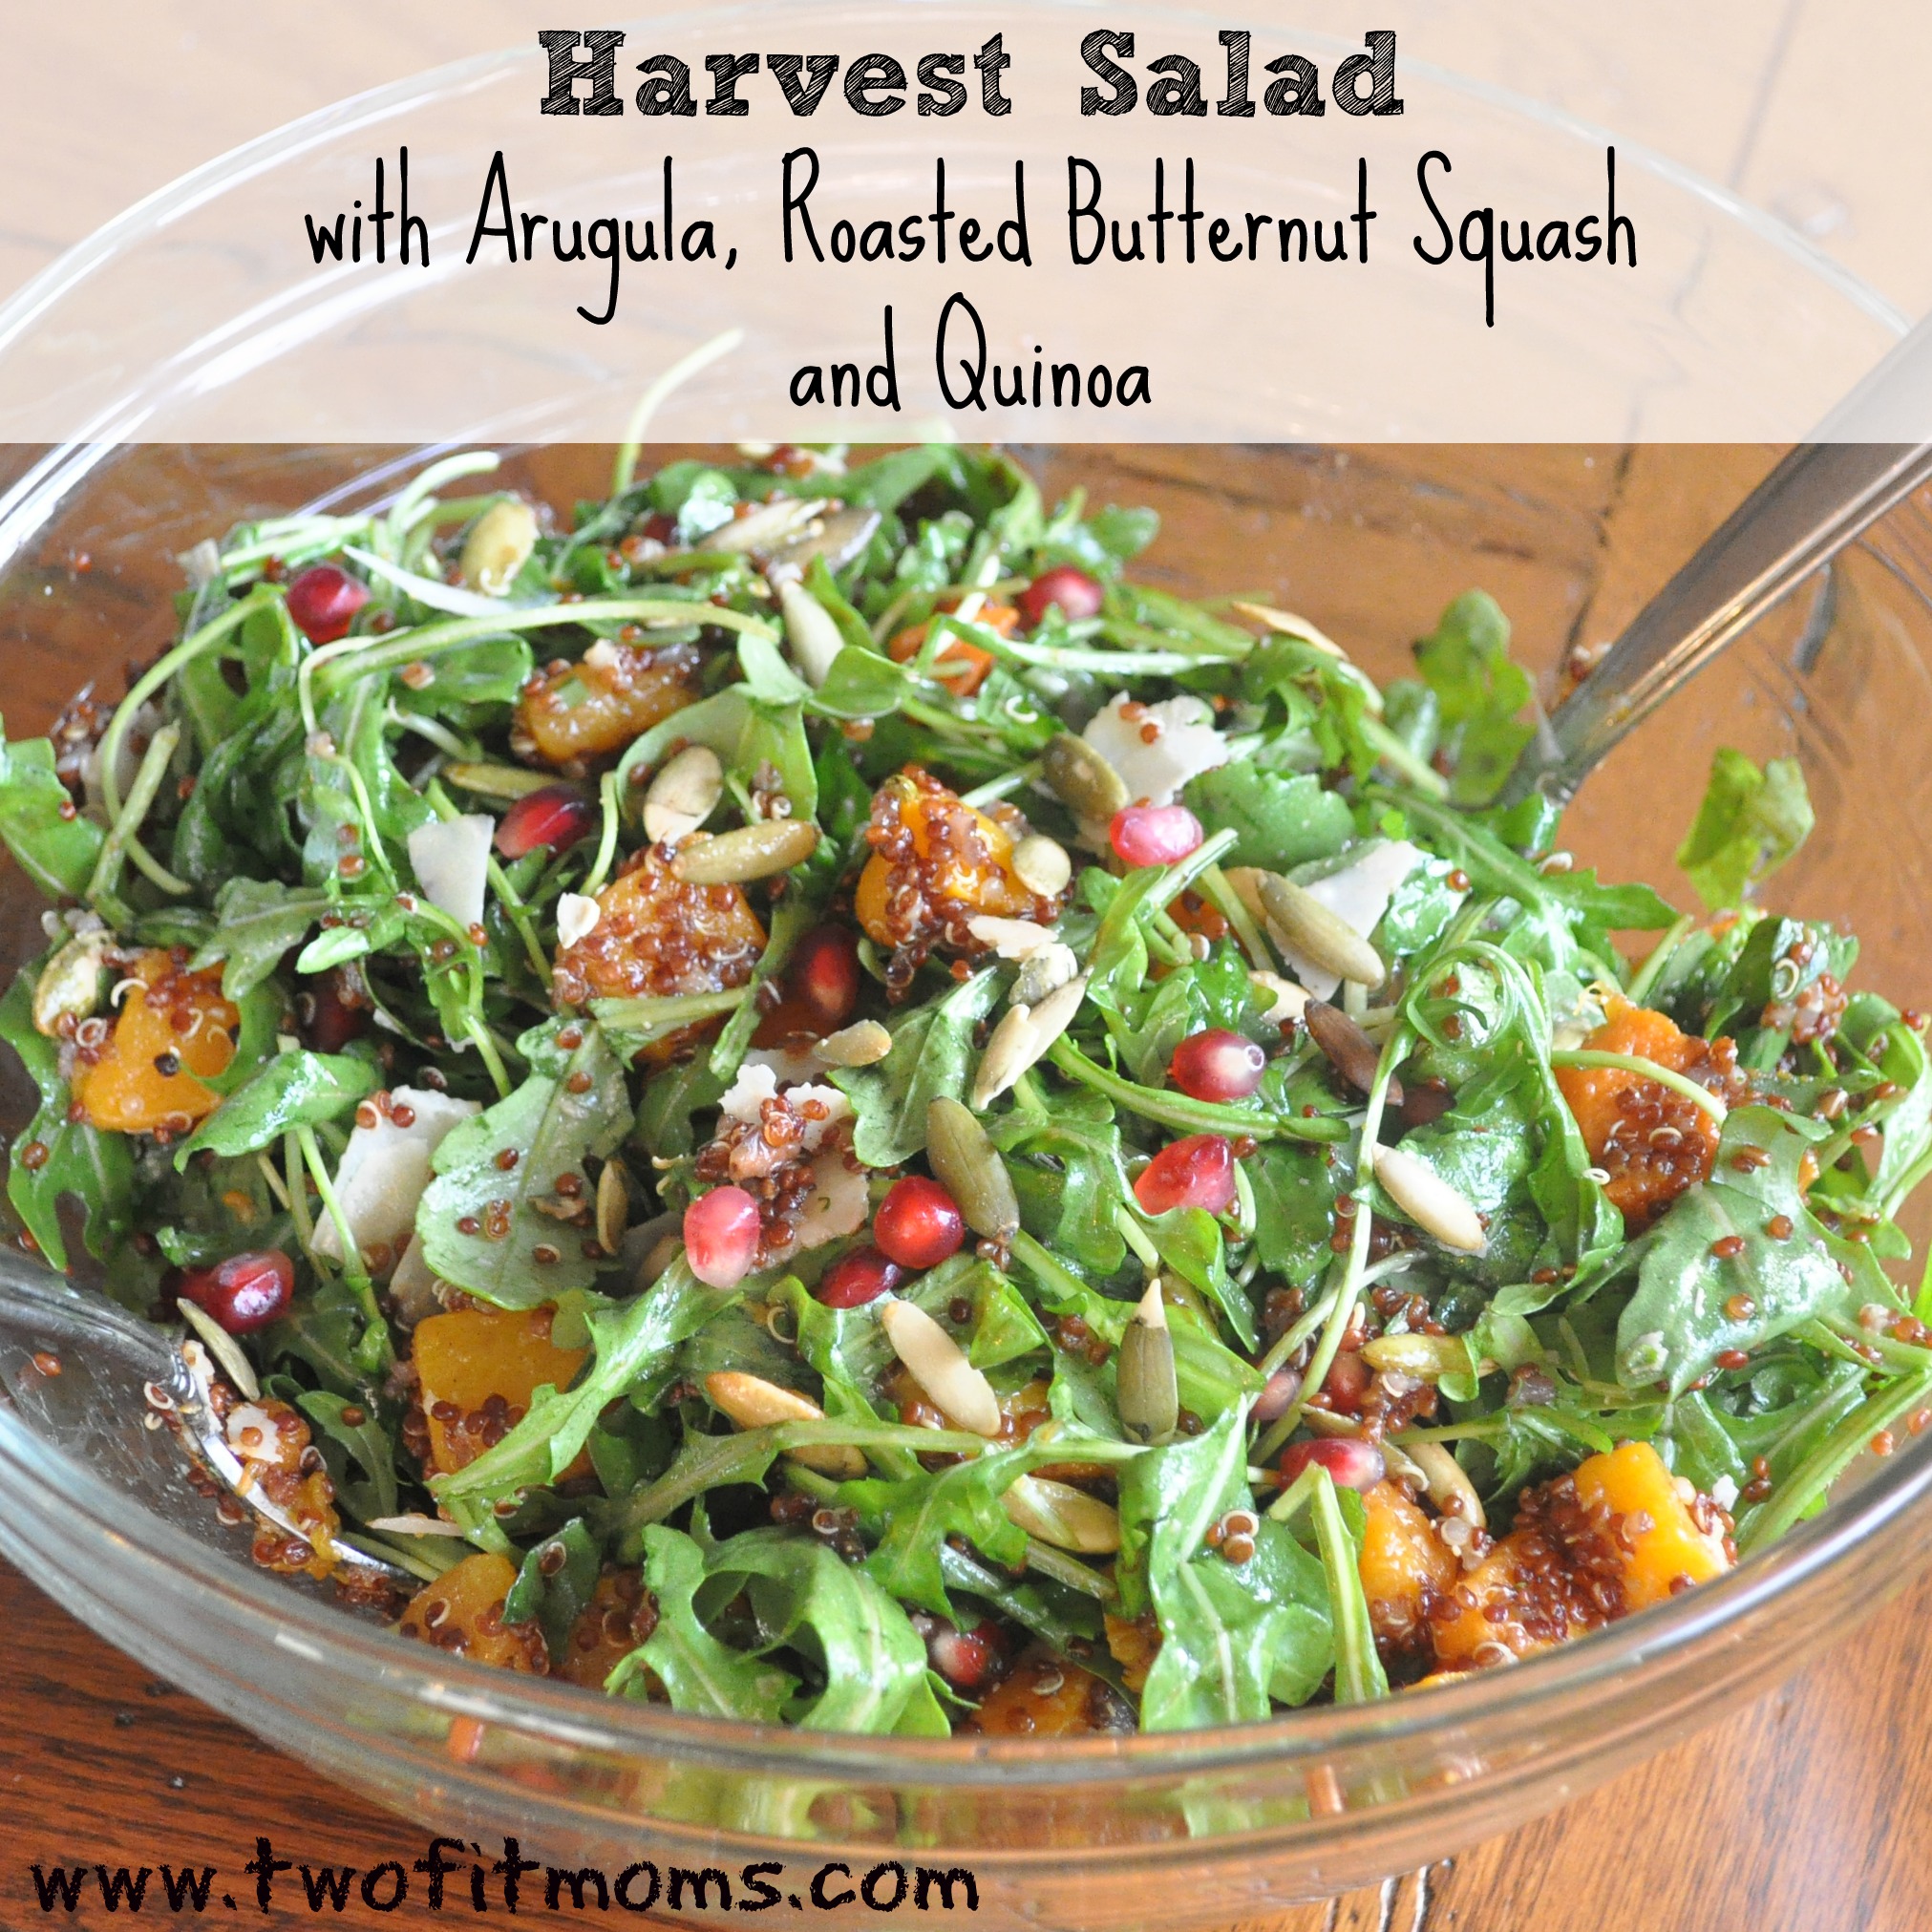
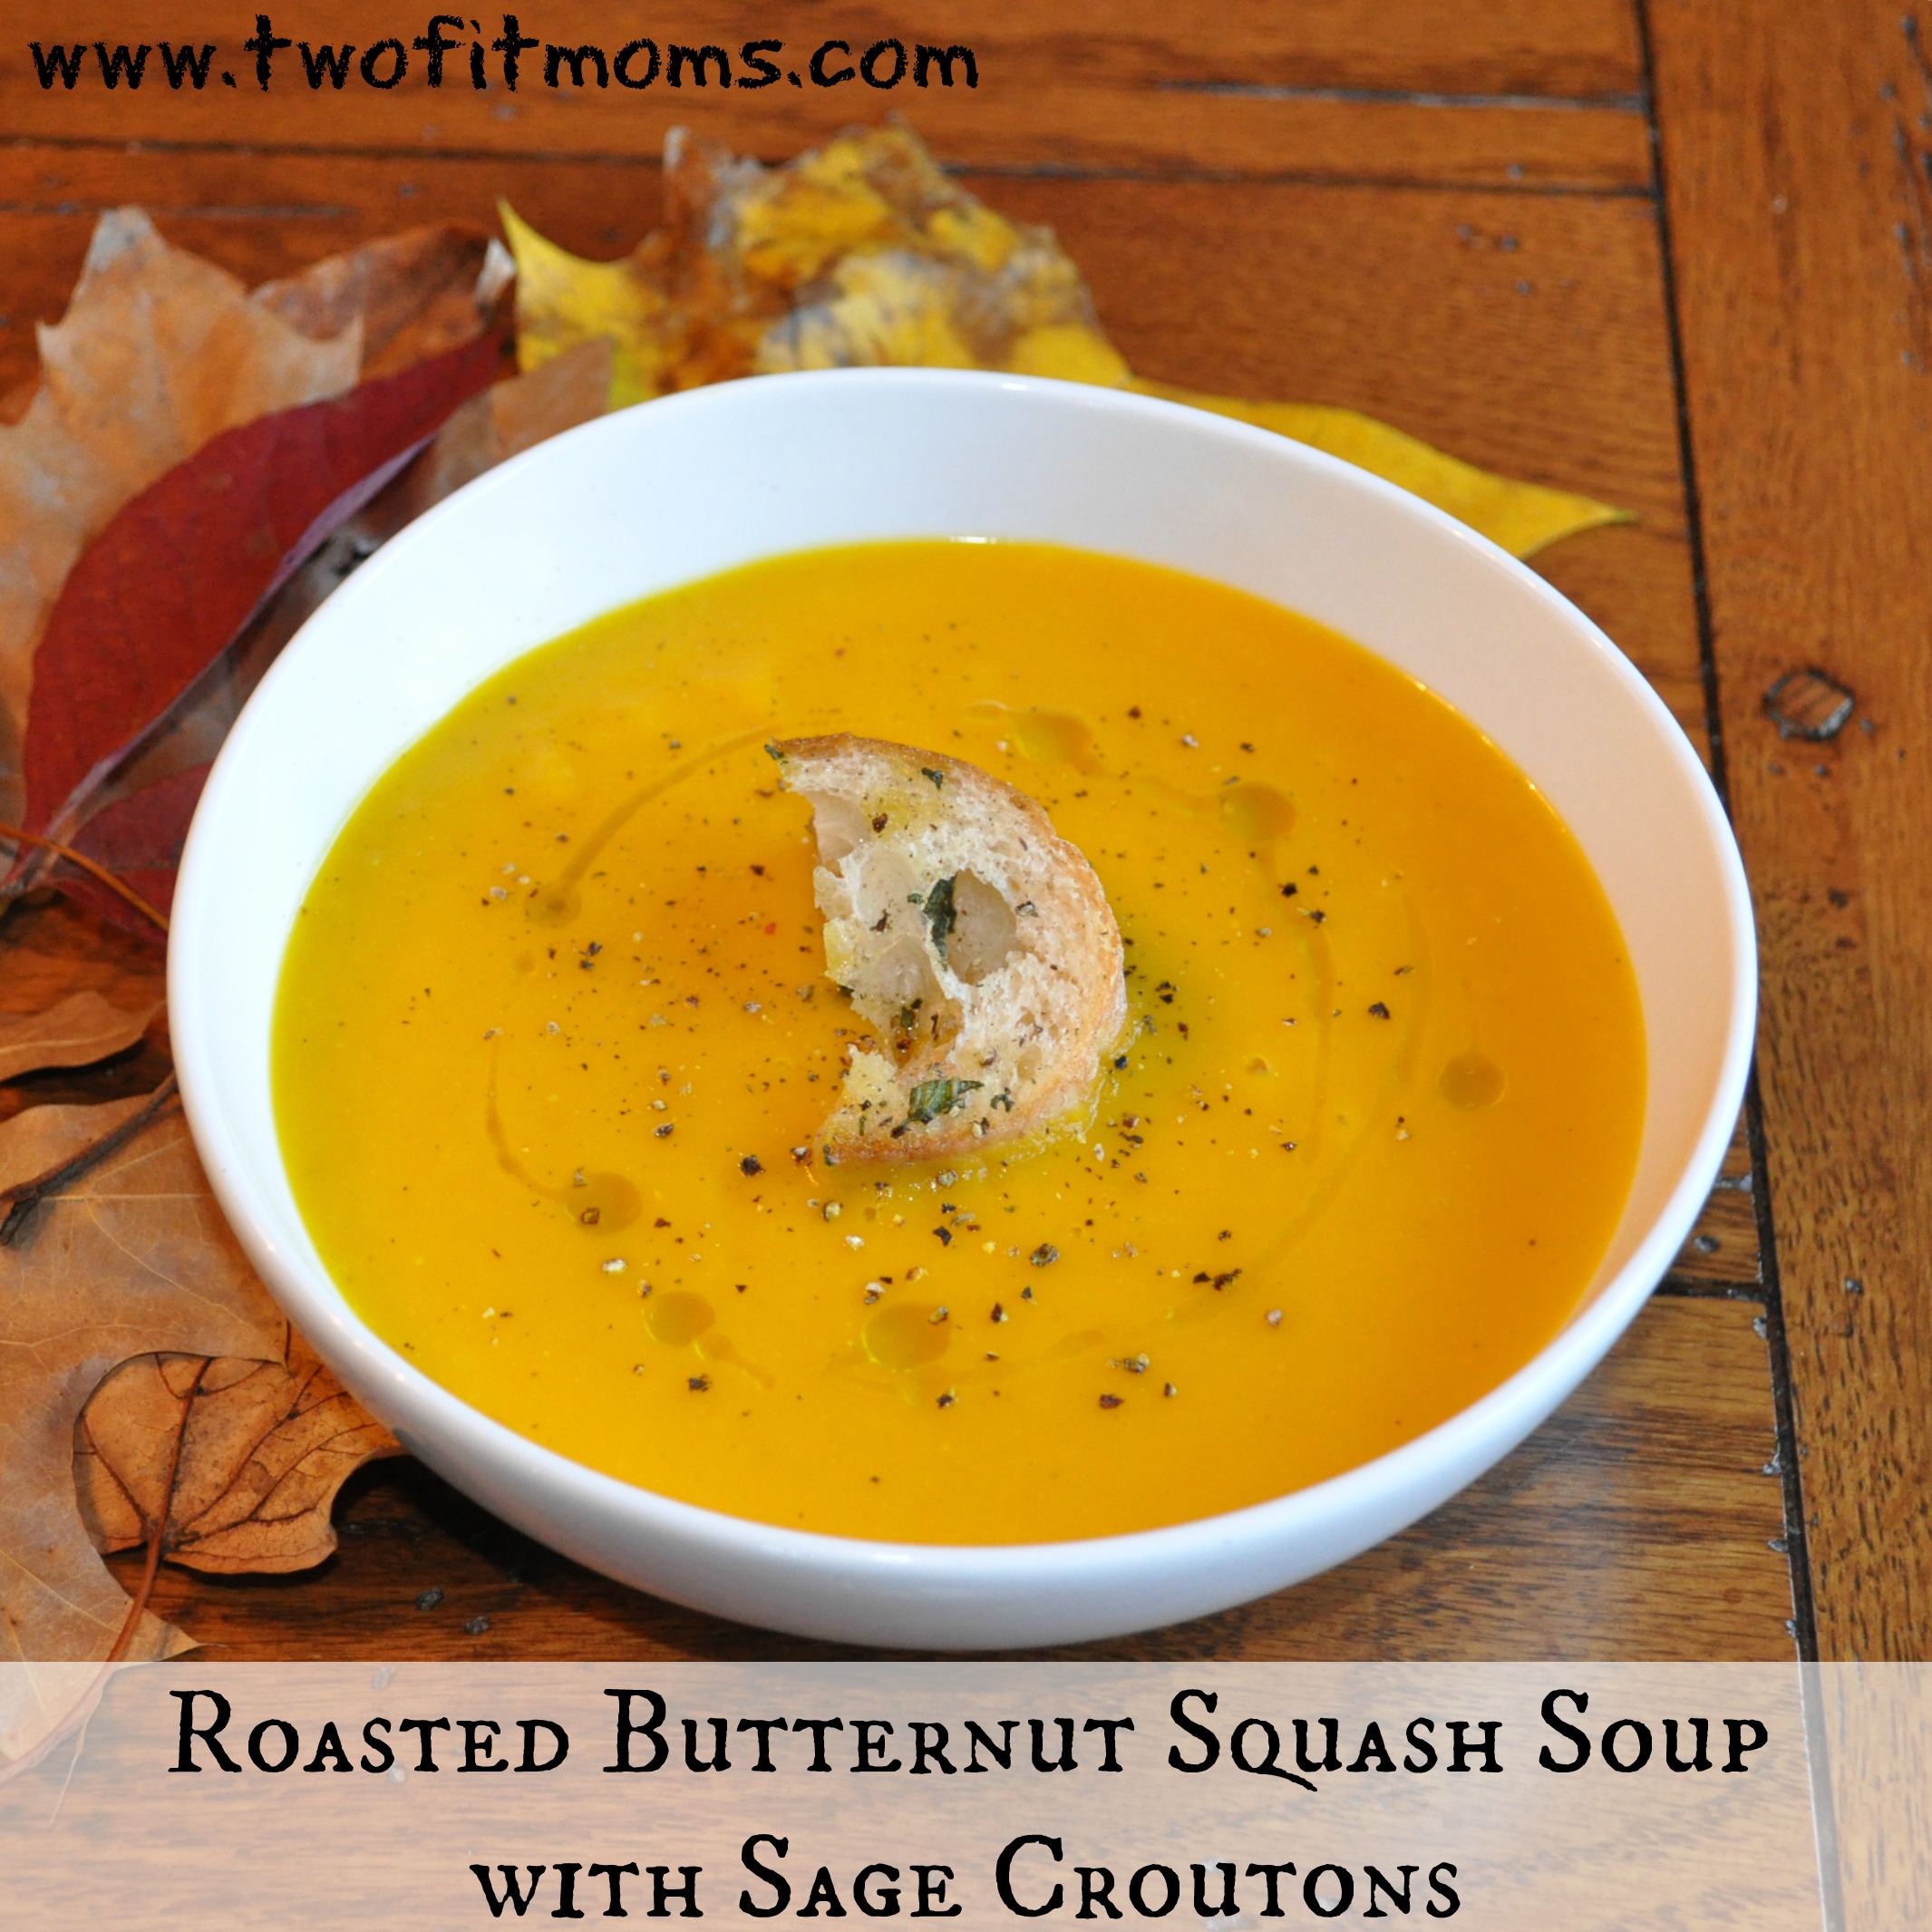
This recipe is particularly easy and especially delicious.  It’s for Roasted Butternut Squash soup! It’s also hearty and perfect for the crisp weather.  It can be eaten alone — a meal in and of itself — or you can enjoy it alongside a sandwich or a salad.  Actually, it’s a perfect starter for your Thanksgiving dinner!

    It requires only a handful of ingredients which you likely have on hand — with the exception of the fresh sage . . . And, the fresh sage is really what sets it apart.

    I think sage is particularly comforting. Or maybe it’s just that the smell reminds me of the holidays, specifically Thanksgiving.  In fact, sage makes an appearance in many traditional Thanksgiving dishes — from the seasoning on the turkey to the gravy to the stuffing (or dressing, depending on where you are from!).  In the instance of this soup, the sage really complements the roasted, caramelized squash.  It also tastes great infused in some croutons.

    Speaking of croutons . . . this soups begs for a few.  So, I included a recipe for those too!

    Enjoy!

    Roasted Butternut Squash Soup
    Yields 6 cups, enough for a family of four

    1, 3lb butternut squash, cut into 1 inch cubes
    5 tablespoons olive oil
    1 onion, chopped
    2 stalks of celery, chopped
    8-10 fresh sage leaves, chopped (approximately 1 tablespoon)
    6 cups of chicken stock (or non-tomato based vegetable stock)
    salt and pepper to taste

    Preheat the oven to 400 degrees. In the meantime, arrange the butternut squash cubes on a large baking sheet, drizzle with approximately 3 tablespoons of olive oil. Season with salt and pepper and roast in the oven until caramelized, approximately 20-30 minutes. Please keep in mind that the squash will not be fork tender when you remove it from the oven.

    In a large pot over medium to low heat, add the remaining olive oil. Once the oil comes to temperature, add the chopped onion and celery and cook until translucent, approximately 5-7 minutes. Then add the chopped sage, salt and pepper to taste.  Let the sage cook with the onions and celery for a few minutes so it infuses the vegetables.  Then, add the roasted butternut squash and the chicken stock. Bring the pot to a boil, then reduce the heat and let the vegetables simmer on low until everything is fork tender, approximately 20 minutes. Then, in two batches, add the soup mixture to the base of a blender and blend until smooth. Serve hot or refrigerate for a later date. Croutons make an excellent accompaniment. See the recipe below!

    Homemade Sage Croutons

    2-3 cups of day old bread (I used leftover ciabatta bread)
    2-3 tablespoons of olive oil
    salt and pepper to taste
    4-5 fresh sage leaves, chopped

    Preheat the oven to 400 degrees.  Add bread, olive oil, salt, pepper and fresh sage to a baking sheet.  Toss the bread so that it’s lightly coated with olive oil.  Toast in the oven until the bread browns lightly, approximately 10 minutes.

    Helpful Hint: If your soup is too thick, add a little extra stock to thin it out.  This may happen if you boil the soup longer than you should and too much of the stock evaporates.  It’s an easy fix provided you have some extra stock on hand — and worse case, you can always add some water.


  • Cinnamon Apple Rings

    Cinnamon Apple Rings

    If your family is like ours, you’ve probably recently gone apple picking — or you plan to at some point this Fall.
    CinnamonAppleRing
    There are many things you can do with an apple — pie, crisp, baked, etc. — but we wanted to offer you a healthy recipe that is not only delicious but easy to make. So, we created these Cinnamon Apple Rings which are pan-seared apple deliciousness. You can eat them for breakfast or dessert – they are actually an amazing after school snack! All you need is an apple (or two), an egg, flour (we used brown rice flour), cinnamon and oil (we prefer coconut, but whatever you have on hand is perfect). In five simple steps you will be feasting on these Cinnamon Apple Rings.

    You can drizzle honey on top for added sweetness, or add a dollop of Greek yogurt and walnuts. You can top them with ice cream or dip them in nut butter. They are versatile and can be jazzed up anyway you’d like them. But, honestly, they are delicious right out of the pan with nothing on them at all!
    AppleCollagePinterest

    Cinnamon Apple Rings
    Serving depends on size of apple, but we used one large apple

    1 large apple (we used Cortland)
    1 egg, beaten
    1/4 cup brown rice flour
    1/2 teaspoon cinnamon
    1 tablespoon coconut oil

    Directions:

    Slice the apple into 1/4 inch rounds, remove the core. (You can slice them in circles or in half moons, whatever suits you is fine).

    Beat an egg and add a tablespoon of water. In a separate bowl, add the flour and cinnamon, mix to combine. Dredge an apple slice in the egg mixture and then coat with the flour/cinnamon mixture. Shake off excess flour mixture.

    Heat the coconut oil in a pan. The oil will come to temperature quickly, so keep the heat at medium, but you may need to adjust depending on the size of your burner.

    Cook about a minute on each side — until the apples are nicely browned and crispy. Drain on paper towels. Serve warm and enjoy!

    Enjoy!

  • Harvest Salad with Arugula, Roasted Butternut Squash and Quinoa

    Harvest Salad with Arugula, Roasted Butternut Squash and Quinoa

    I like to mix grains and seeds into my salads. They offer an interesting texture and help fill me up. In fact, recently I attended an event where they featured a green salad and a quinoa salad, and I wondered why they didn’t just combine the two. harvest salad square So, I decided to make one beautiful salad with greens and quinoa — along with the addition of some nice seasonal ingredients.

    This salad includes a blend of peppery arugula juxtaposed by sweet roasted butternut squash. I added cooked red quinoa, roasted pumpkin seeds for crunch and pomegranate seeds for some added texture and color! I also topped mine with some nutty shaved parmigiano-reggiano cheese, but that’s completely optional.

    It’s a beautiful salad — perfect for the fall — and, I think, perfect for a holiday table.

    Harvest Salad with Arugula, Roasted Butternut Squash and Quinoa
    Serves 4

    5 ounces of arugula greens (I used half of a bag of pre-washed arugula)
    1 cup of cooked red quinoa
    2 cups of roasted butternut squash (which was salted, peppered and olive oiled)
    1/3 cup of pomegranate seeds
    1/3 cup of roasted pumpkin seeds (mine were salted)
    1/4 cup of balsamic vinaigrette
    1/4 cup of shaved parmigiano-reggiano cheese

    In a large bowl, add the arugula greens, quinoa, butternut squash, pomegranate seeds, pumpkin seeds, balsamic vinaigrette (recipe follows) and toss to combine. Top with shaved parmigiano-reggiano cheese.

    Simple Balsamic Vinaigrette
    Yields 1 cup

    3/4 cup of olive oil
    1/4 cup of balsamic vinegar
    2 teaspoons of brown sugar
    1 clove of garlic, crushed
    salt and pepper to taste

    Add, to a mason jar or lidded container, olive oil, balsamic vinegar, brown sugar, crushed garlic, salt and pepper to taste — shake until combined.  Vinaigrette will keep in the refrigerator for at least one week.

  • Apple Raisin Clafoutis

    Apple Raisin Clafoutis

    One of my favorite fall activities is apple picking.  Not only do our kids love apple picking, but so do my husband and I.  Needless to say, we end up leaving with tons of apples.

    Apple pie, baked apples, applesauce and apple crisp are usually the first recipes that come to mind, but I like to use the apples to make a really delicious, light — and not too sweet —  cake called Apple Raisin Clafoutis.

    apple cake sliceClafoutis is a french baked dessert that involves fruit and a custard-like filling.  Traditionally, cherries are incorporated, but my version is made with apples, raisins and topped with sliced almonds.

    Generally, the cake is made with butter, white sugar and white flour.  I’ve modified the recipe, replacing the white flour with brown rice flour, the butter with safflower oil and the white sugar with natural maple syrup.  And, to be honest, you would never know the difference!!

    The beauty of this cake is that it doesn’t require a lot of effort — not much more than peeling and slicing four apples and making a quick batter in the blender.  It’s a no-fuss cake that’s perfect for any day of the week – but it’s also elegant enough for a dinner party or holiday gathering.

    I like to serve the cake with whipped cream — or ice cream.  If you are limiting your dairy, try cashew cream, or our Banana Maple Walnut Ice Cream! However, you can totally forgo a topping since the cake itself is so delicious!

    Apple Raisin Clafoutis

    Serves eight

    4 apples peeled, cored and thinly sliced
    2 tablespoons of safflower oil
    1/2 cup of raisins
    1/4 teaspoon of nutmeg
    1/2 cup of maple syrup (*I prefer Grade B for baking)
    1/2 cup of milk
    4 eggs
    1 tablespoon vanilla extract
    2/3 cup of brown rice flour
    1/4 cup of sliced almonds

    Preheat the oven to 350 degrees. Grease an 8-cup shallow baking dish or a 12-inch pie or tart pan.

    Add the safflower oil to a large skillet on medium/low heat.  Add sliced apples and cook until lightly browned and tender. Add the raisins, 1/4 teaspoon of nutmeg and 1/4 cup of maple syrup.  Mix to incorporate; turn off the heat and reserve.

    In the base of a blender add the eggs, milk, 1/4 cup of maple syrup, brown rice flour and vanilla extract. Blend on high for one minute.  If you are using a Vitamix or other high performance blender you might want to reduce the blending time.  At the end of the day, all of the ingredients should be well incorporated.

    Spread the apple/raisin mixture in the greased baking dish/pan and pour the batter over the apples.  Sprinkle sliced almonds on top of the cake. Bake one hour and serve warm.

  • Handstands:  The Art of Falling

    Handstands: The Art of Falling

    If you are ready to move your handstand practice away from the safety of a wall, you must embrace the art of falling.  I call it an art because there is actually a bit of technique involved. Once you master the technique, you will not be afraid of practicing in the middle of a room.  You will realize that falling out of any inversion can be a controlled transition from one pose to another.  When you feel your body wavering as you balance on your hands, you will not flail around and then land flat on your back.  You will be armed with a game plan—a real exit strategy.  You will fall (or transition) from handstand into wheel pose.TheArtofFalling

    Practice Wheel Pose
    Before moving your handstands away from the wall, you MUST be very comfortable in wheel pose.  You will be falling into this deep backbend from a height, so you certainly don’t want to fall into this pose if you are uncomfortable or feel any strain at all when you lift into wheel from the floor.  Please review the proper form for wheel pose HERE.

    If you cannot do this pose with ease, continue to practice your handstands with a wall.  Every day, you can continue to work on your backbends and heart/shoulder opening stretches until wheel pose is no longer a struggle.

    At this point, if you are uncomfortable with wheel pose, you may be wondering if there are other alternatives to exiting a handstand.  Yes, there are other options, but I don’t like teaching them.  Falling into a cartwheel, for example, is a very popular exit strategy from handstand, but it doesn’t make sense for beginners.  As a recent beginner myself, I know that once you begin to lose your balance in a handstand, you do not have enough control to do anything but fall straight back.  Attempting to do anything else (like lift one hand to cartwheel to the side) is dangerous and could result in injury.  Trust this process.  If wheel pose is difficult, keep practicing your backbends each day.  Soon enough, you will be practicing handstands in the middle of the room, and you will stay safe because your hands will be rooted in one spot and remain there for the duration of any fall/transition.

    Practice the Transition
    Make sure you are warmed up before practicing this transition.  Kick up into any variation of handstand that feels stable, and when you begin to lose your balance, don’t fight the natural momentum.  The inclination will be to fall straight back, and that is what you will do.

    The most important step in this transition is to maintain straight arms the entire time.  If you bend your elbows during the fall, you might hit your head or land flat on your back.  Just think—strong, straight arms.  Repeat it over and over in your mind.  One way to stay strong is to grip your mat firmly with your fingertips.  By maintaining an engaged feeling in the tips of your fingers, you will be reminded to engage the entire length of your arms by staying strong and straight.

    If You are Scared…
    Kicking up into handstand in the middle of a room and then falling back into wheel requires a huge leap of faith.  You must believe that you have the strength in your arms, the flexibility in your back, and the overall balance necessary to land on your feet in wheel pose.  If you are not convinced of your own ability to do this, don’t be discouraged.  You can practice transitioning into wheel from handstand WITH the safety of a wall.

    To begin, lie down on your back with your knees bent, the soles of your feet flat on the ground, and the tips of your toes against a wall. Review your form before continuing—make sure that your heels are as close to your bottom as possible.  Bend your elbows, and bring your hands alongside your ears, with your fingers pointed toward your body.  You are now set up on the floor as if you were going to lift into wheel pose with your toes against a wall.  Take note of where your hands are relative to the wall.  THIS will be your starting point for your handstand practice.  No need to lift into wheel pose right now.  Go ahead and stand up, and place your hands down onto this starting point that you just determined.  Kick up into handstand, and when you lose your balance, allow your legs to fall against the wall.  Keep your arms strong and straight, and begin to walk your feet down the wall onto the floor into wheel pose.  Repeat this exercise as many times as necessary to become accustomed to the feeling of transitioning from handstand to wheel.  Once you feel confident, go ahead and try the transition in the middle of the room.

    Stay safe, believe in yourself, and enjoy the process.