Category: Handstand

  • Day 10: Adho Mukha Vrksasana or Handstand

    Day 10: Adho Mukha Vrksasana or Handstand

    Welcome to Day 10 of the #YogawithTFM 10-Day Challenge! You made it! Today’s pose is Adho Mukha Vrksasana or Handstand!

    Check out this article for a full tutorial on Handstand.

    If you are new to Inversions and are looking for more help, download our Inversions Tutorial on iTunes.

    You can also view the video below for a live tutorial and variations.

    [KGVID poster=”http://www.twofitmoms.com/wp-content/uploads/2014/10/Video-Oct-09-6-05-43-PM_thumb11.jpg” width=”640″ height=”360″]http://www.twofitmoms.com/wp-content/uploads/2014/10/Video-Oct-09-6-05-43-PM.mov[/KGVID]

    Don’t forget to keep these three things in mind when getting into the pose:

    – Use your fingers to help you find balance!  Think CREEPY FINGERS as you grip your mat.

    – Corset your low ribs together to help eliminate dumping into the lower back. It’s the same feeling you get when you catch a football!

    – It’s all about the stack!  Shoulders over the heels of the hands, hips over the shoulders, feet over the hips.


  • Day 7: Adho Mukha Vrksasana Prep or “L” Handstand

    Day 7: Adho Mukha Vrksasana Prep or “L” Handstand

    Welcome to Day 7 of the #YogawithTFM 10-Day Challenge! Today’s pose is Adho Mukha Vrksasana Prep or “L” Handstand.

    If you are new to Handstands, you must check out our article, “Handstands 101: Building Your Foundation.” You might also want to check out our Inversions Tutorial available on iTunes!

    If you are more experienced view the video below:

    [KGVID poster=”http://www.twofitmoms.com/wp-content/uploads/2014/10/Video-Oct-06-3-44-01-PM_thumb10.jpg” width=”640″ height=”360″]http://www.twofitmoms.com/wp-content/uploads/2014/10/Video-Oct-06-3-44-01-PM.mov[/KGVID]

    Remember to take a few gentle kick ups to get the feel of being on your hands! Actively engage that top leg and send energy all the way up through your toes!

  • Yoga Straps 101

    Yoga Straps 101

    When I first started practicing yoga, I received all sorts of advice. One great suggestion was to go out and buy a yoga strap. A yoga strap, I was told, would assist me greatly in my practice. As a newbie, I was excited to buy all sorts of yoga gear, so I ran out to Target and immediately bought a strap. For months, I used this strap without any guidance. I ignored the fact that the strap had metal ends. I’m not even sure if it crossed my mind that those metal ends had any purpose! I just wrapped the strap around my foot repeatedly until it felt secure. Some days, my foot was so wrapped up, it appeared as if I had a foot injury with a large Ace bandage.

    If this scenario sounds familiar, this article is for you. I know that there must be others out there who are new to yoga and have no idea how to deal with a yoga strap. I will not discuss the many stretches and exercises you can perform with your strap in this article. The purpose here is to just get you accustomed to the idea of creating an adjustable loop with your strap. (This loop would then slide over your foot and be used for a variety of exercises, which we can discuss in future posts.)

    Here is your Yoga Strap Looping Lesson 101:

    Your yoga strap should have metal ends. One end will have two rings, and the other end will have a single flat metal strip. If you are right handed, use your left hand to hold the end of the strap with the two rings. Your right hand will hold the end of the strap with the flat metal strip.

    Step1

    I know this may sound ridiculous, but my yoga teacher taught me how to loop a yoga strap with a choo-choo train analogy. Yes, she actually used the phrase “choo-choo”. It felt juvenile, and I laughed, but she didn’t have to explain it twice. Let me teach you with that same choo-choo train. Pretend that the end of the strap with the single metal strip is a train. The train goes through both tunnels. (That is, put the end of the strap with the flat metal strip through both metal loops.)

    step2

    The train forgot something. It goes back over the first tunnel it sees, and through the second tunnel.

    step3

    It’s as simple as that. Now continue pulling the end of the strap with the flat metal piece until you have a small adjustable loop that can fit over your foot.

    step4

    You are now ready to use your strap! Stay tuned for future tutorials…

  • Quest for the Press 101: Toe Taps

    Quest for the Press 101: Toe Taps

    My quest to press into a handstand probably started around eight months ago. “Pressing” is when you can place your hands onto the ground and float your legs up into a handstand…No kicking required! There is no science to pressing into a handstand, and everyone’s experience is unique. I am going to show you how I learned — hopefully it will help you!

    The only prerequisite is that you MUST have a solid Bakasana practice. You can view my tutorial for this particular asana here.

    Step 1: Start in Bakasana

    Key points to remember in Bakasana…Fingers should be spread wide to help grip the mat. Hands are shoulder width apart. Elbows and knees squeeze in toward the midline.  Upper back rounds to avoid “dumping” into your arms and making the pose feel heavy. Navel pulls in toward your spine to activate the core.

    Photo Feb 27, 8 56 45 AM

    Step 2: Flex the feet

    Flex both feet so your toes point down towards your mat.  Using your core to keep the knees on your arms, slowly start to shift forward slightly as you bring your toes toward your wrists. You may only get an inch or two down before you fall… That’s Okay! Try again!

    As you move your feet down, concentrate on rounding the upper back and squeezing your arms in. If your arms begin to open out, try using a strap.  Measure the loop shoulder width in length and place the strap just above your elbows.

    Photo Feb 27, 8 56 47 AM

    Step 3: The toes have landed!

    Eventually, your toes will touch your wrists! Once you get to this point, try to hold them there for as long as possible.  Not only will this build arm strength, but it will build your core strength as well!  You will begin to feel your deep ab muscles engage. These are the ones that will eventually help lift you up.

    Photo Feb 27, 8 56 49 AM

    Step 4: Lift up!

    Once you can hold your toes to your wrists for a few breaths, you can try lifting your bottom up towards the sky and taking the knees off of your arms to hover. To do so, actively push your toes into your wrists and engage your core (Uddiyana Bandha). Press actively into your mat using your fingers for grip. Start out by trying to lift your butt higher! If that goes well, then try to straighten the legs. Proceed slowly and with patience.

    Photo Feb 27, 8 56 53 AM

    As always… Have FUN and be SAFE!

    XOXO

    Blog Signature

  • Floating Down

    Floating Down

    Slowly floating the legs down from any inversion can be challenging. It takes time, patience and practice to develop the strength and body awareness to successfully lower down. It also requires being able to engage deep abdominal muscles.  Despite popular belief, you don’t need a six-pack to float down!  And, once you float down, floating up will likely follow — it did for me!

    DSC_1228a

    What muscles do we need to engage?

    There are a total of six abdominal muscles in your body; from deepest to superficial they are the the transversus abdominis, the internal obliques, the external obliques and the rectus abdominis. The deeper the muscles, the more impact they will have on your posture and maintaining a healthy spine. Here is a brief description of each:

    Transversus Abdominis: It is the deepest of your abdominal muscles, and it wraps around your torso. You cannot feel this muscle from the outside. The best description I’ve read for this muscle is that it is like a back support belt but for the front of your body.

    Internal Obliques: These are a pair of muscles that run alongside your torso that help your spine twist and move laterally.

    External Obliques: These are another pair of muscles that also run alongside your torso and help your spine twist and move laterally.

    Rectus Abdominis: These are the most superficial muscles of the group and the ones that make up the “six-pack” abs.

    Do I need six-pack abs to do this?

    Quite simply… No, you do not. In fact, a six-pack will help you the LEAST when working with floating down or pressing up for that matter. It is the ability to engage the transverse abdominal muscle that will have the most impact on your inversion practice.

    Engage those bandhas?

    Before going through my yoga teacher training, I’d always hear teachers say “engage your bandhas”! If you haven’t been practicing long, more than likely your first reaction is “what the heck does that mean??!! Simply put… a “bandha” is a lock in the body that helps seal in the energy and engages the muscles.

    The two bandhas that most teachers will reference during inversions are the Mula Bandha and the Uddiyana Bandha. In very simple terms, the Mula Bandha occurs in the pelvic area and low belly while the Uddiyana Bandha occurs in the upper abdominals. The best way to describe the Mula Bandha is the feeling you get when you have to go to the bathroom and are holding it. The Uddiyana Bandha can be felt when you draw your navel up toward your heart while wrapping your lower ribs in towards one another.  I learned how to do this by placing my hands on my lower ribs, fingers facing in towards each other, and by making believe my hands were a corset.  As I exhaled and drew my navel up and in, I closed my hands towards one another.

    Start the float down from Tripod Headstand

    If you are new to this, start off by attempting this from your Tripod Headstand. Working the float down from here will also help you gain strength within your core!

    Slowly come into your Tripod Headstand. Start by flexing your feet to activate your entire lower body… and also to prepare your feet for the landing! Take a deep breath in. On the exhale, engage those bandhas and try to lower your legs down a few inches. Inhale. On the exhale, lower them down a little more.  Make a mental note where your legs come down if you cannot float them gently onto the ground.

    Come back into your Tripod Headstand again.  This time, float them down to your “breaking” point or slightly above that… On the inhale, try to lift them back up again. Try to do this three to five times. This small action will help strengthen your core over time. Keep working this as low as you can go… eventually coming all the way down onto the ground gently and maybe back up!


    [KGVID poster=”http://www.twofitmoms.com/wp-content/uploads/2014/02/IMG_3117_thumb5.jpg” width=”640″ height=”360″]http://www.twofitmoms.com/wp-content/uploads/2014/02/IMG_3117.mov[/KGVID]

    Ready to move on?

    Once you can comfortably float down and up in Tripod Headstand, you can start to work on your float down from Handstand. Feel free to use a wall if you have trouble balancing and you can even press the crown of the head into the wall to help slow your descent. You may feel this in your wrists, so take it slow! Remember the foundations of a handstand and press firmly into the ground with your hands. Engage your core and slowly start to float down.  If you are having serious trouble with this, you can also try straddling your legs to float down! Play with it…but most importantly, have patience!

    [KGVID poster=”http://www.twofitmoms.com/wp-content/uploads/2014/02/Video-Feb-21-1-14-35-PM_thumb19.jpg” width=”1920″ height=”1080″]http://www.twofitmoms.com/wp-content/uploads/2014/02/Video-Feb-21-1-14-35-PM.mov[/KGVID]

    XOXO

    Blog Signature

  • Handstands 101: Part 2… The Kick Up

    Handstands 101: Part 2… The Kick Up

    If you are comfortable walking your feet up the wall and being on your hands, you are ready for the next move (if not, check back to my last post  here for a refresher).  The next step on your journey to handstand is the “kick up.”  As the name implies, it involves kicking your legs up into the air and placing all of your weight onto your hands.  I highly encourage you to have a person, and a wall, nearby  if this is your first time!

    Let’s get started!

    Step 1: For my newbies

    If you are completely new to the handstand and nervous, please ask a friend, partner, spouse or family member to spot you.  Sometimes just having someone there as an added safety measure reduces the fear.  Also, I recommend positioning yourself  8″-12″ inches from the wall.  This time, fingers will face the wall so that you are kicking up towards it.

    Step 2: Get set in downward facing dog

    Photo Feb 02, 2 21 03 PM

    Considered a mild inversion itself, Downward Facing Dog, or Adho Mukha Svanasana, offers the perfect starting position for your handstand practice.  Many of the alignment cues for handstand should also be applied in this pose.  Here is a quick rundown of what I discussed in my previous post.

    – Fingers are spread wide and grip the mat
    – Weight should be equally distributed through all 4 corners of your palms
    – Biceps externally rotate out
    – Arms remain straight!
    – Upper arm bones plug into their sockets
    – Shoulder blades roll down the back
    – Lower ribs corset in
    – Navel pulls in, core engages
    – Inner thighs rotate in
    – BREATHE, BREATHE, BREATHE!

    Step 3: Stack the shoulders over your wrists

    Photo Feb 02, 2 21 18 PM

    From Downward Facing Dog, slowly walk the feet in towards the hands so that the shoulders stack directly over your wrists and you come onto the balls of your feet.  Keep your gaze down. I usually gaze slightly past my fingertips.  Make a mental note – even though you have shifted slightly forward and put more weight into your hands, the above key alignment points have not changed.

    Step 4: Lift a leg

    Photo Feb 02, 2 21 33 PM

    Slowly lift one leg high into the air.  The key is to avoid opening up your hip.  A good way to keep the hips square is to flex the lifted foot and keep the toes pointing down toward the mat.  PLAY with lifting both legs up.  Everyone usually has a more dominant side or one that just feels more comfortable.  In the beginning, stay with that leg. Once you get more comfortable, THEN practice using both!


    Step 5: Get ready to spring!

    Photo Feb 02, 2 21 51 PM

    Keeping the hips square, bend the bottom leg.  DO NOT lower the top leg down towards the ground!  Keep the lifted leg extending up towards the sky.


    Step 6: Take flight!

    Photo Feb 02, 2 22 30 PM

    Pushing off of the bottom leg, GENTLY… I repeat.. GENTLY kick off of the ground.  The first few times you try, you may only get a few inches off of the ground.  THAT IS TOTALLY FINE!  You are building confidence and trust in yourself!  Take your time and set yourself up in between attempts.  Remember that checklist in the beginning of this tutorial?  Keep going through it in your mind.

    Remember, handstands are a full body posture… so claw your mat, engage your core, floint or point those feet!

    Once you kick up, the bottom leg can extend out straight which is usually called an “L” handstand or you can bend it in towards your body (shown below).  When learning, I preferred the “L” better for gaining hangtime but please try both.  Everyone is different!


    Photo Feb 02, 2 22 12 PM

    Whatever method you choose, ALWAYS remember to breathe.  The traditional way is to inhale while kicking up.  I like to exhale on the way up. I know, it’s weird. ..but I feel more connection to my core this way.  When you are learning and trying to remember what to do, I think it’s more important to just REMEMBER to breathe.  So play around with it, and try it both ways.


    HAVE FUN and BE SAFE!

    XOXO

    Blog Signature


  • Handstands 101: Building Your Foundation

    Handstands 101: Building Your Foundation

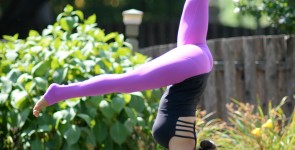
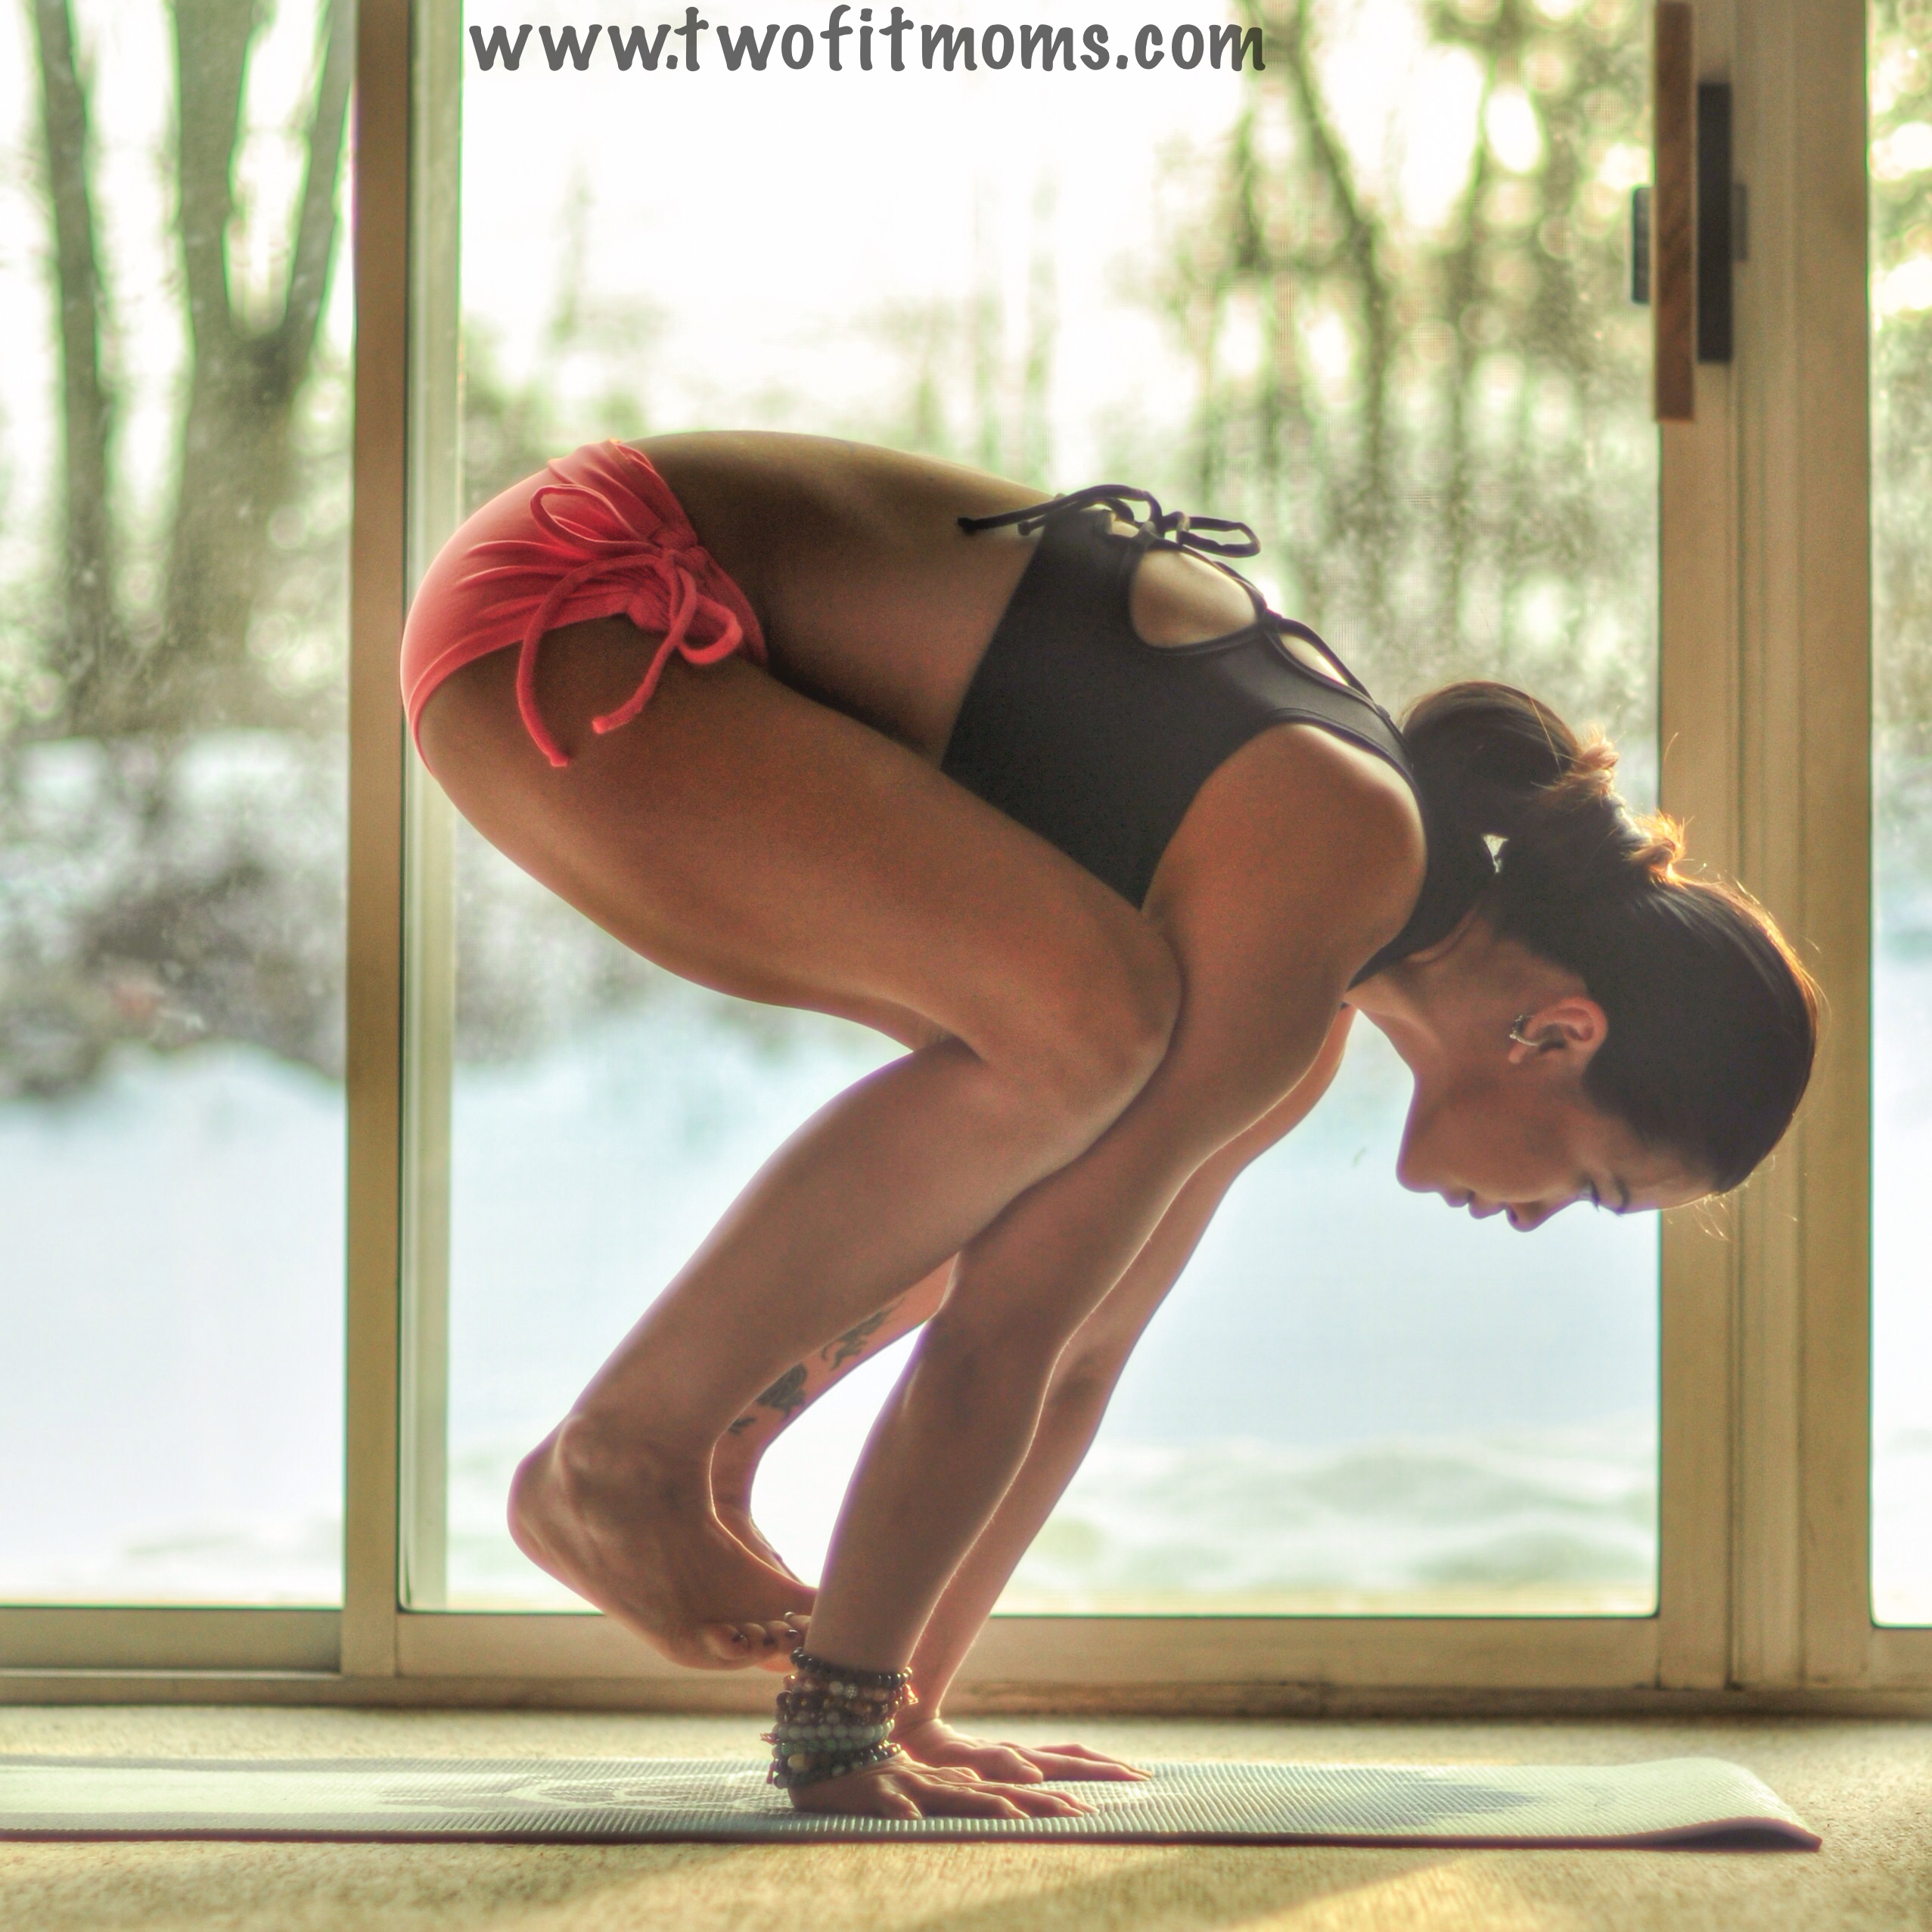
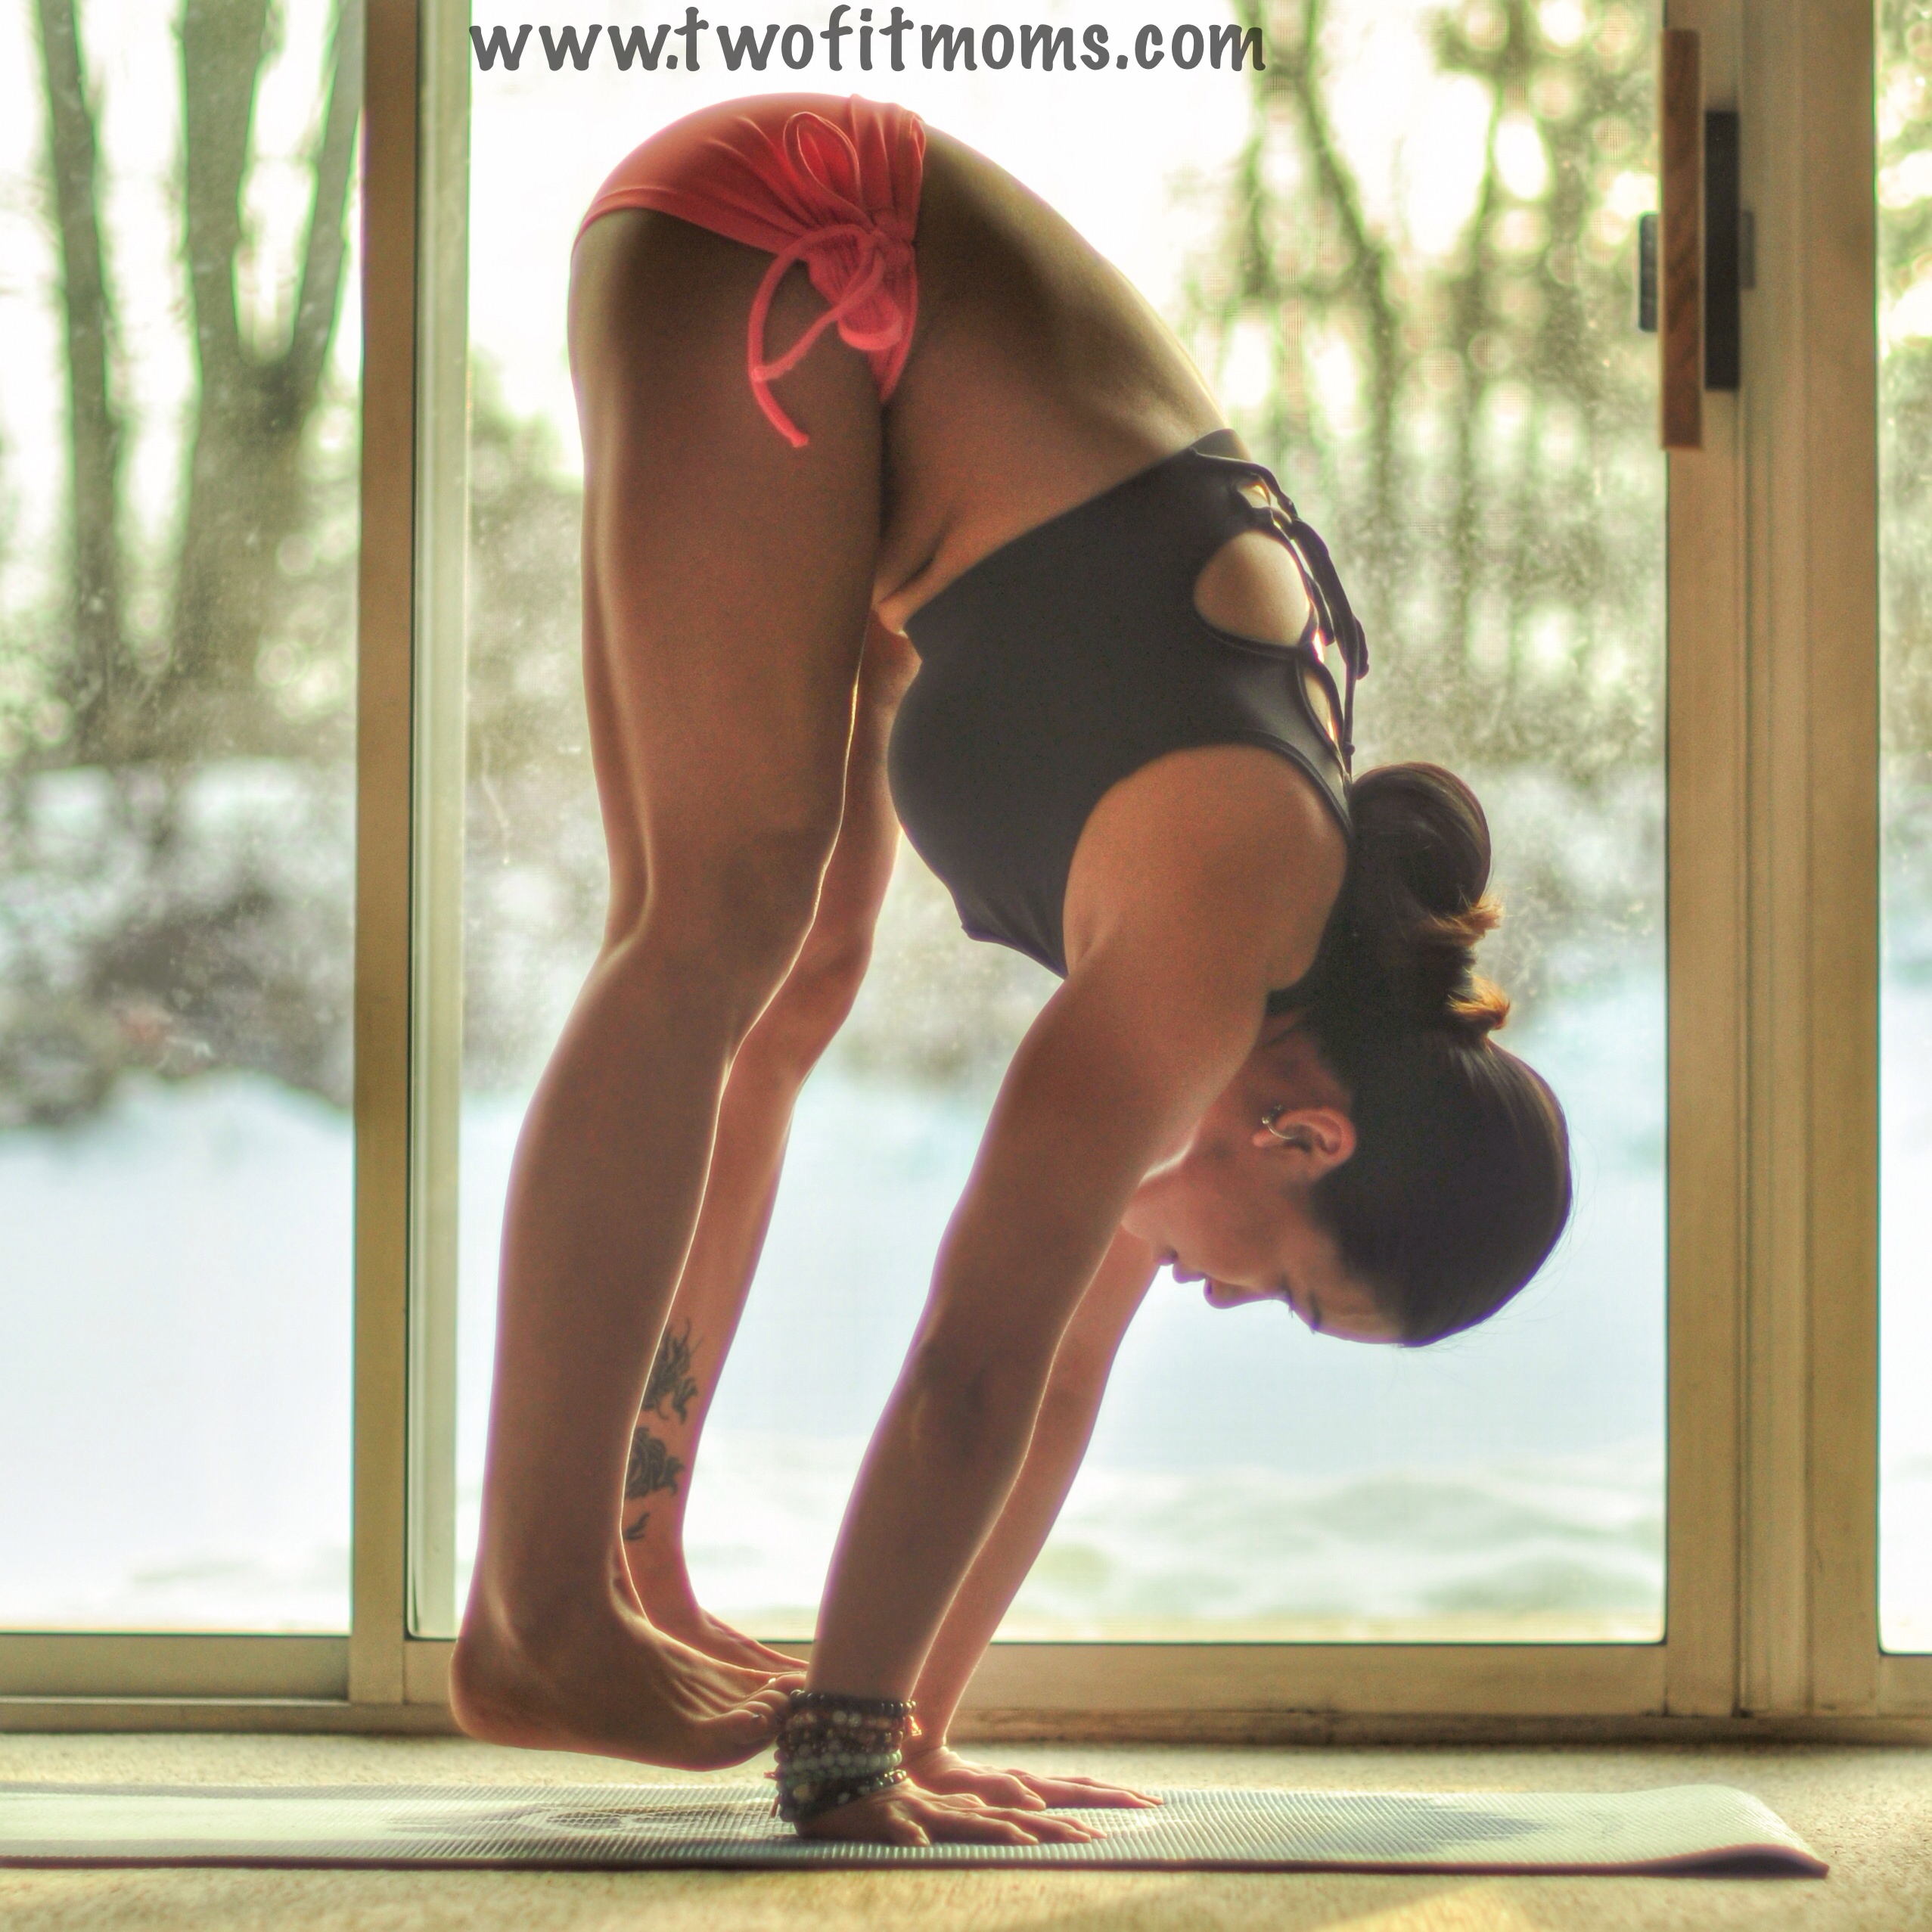
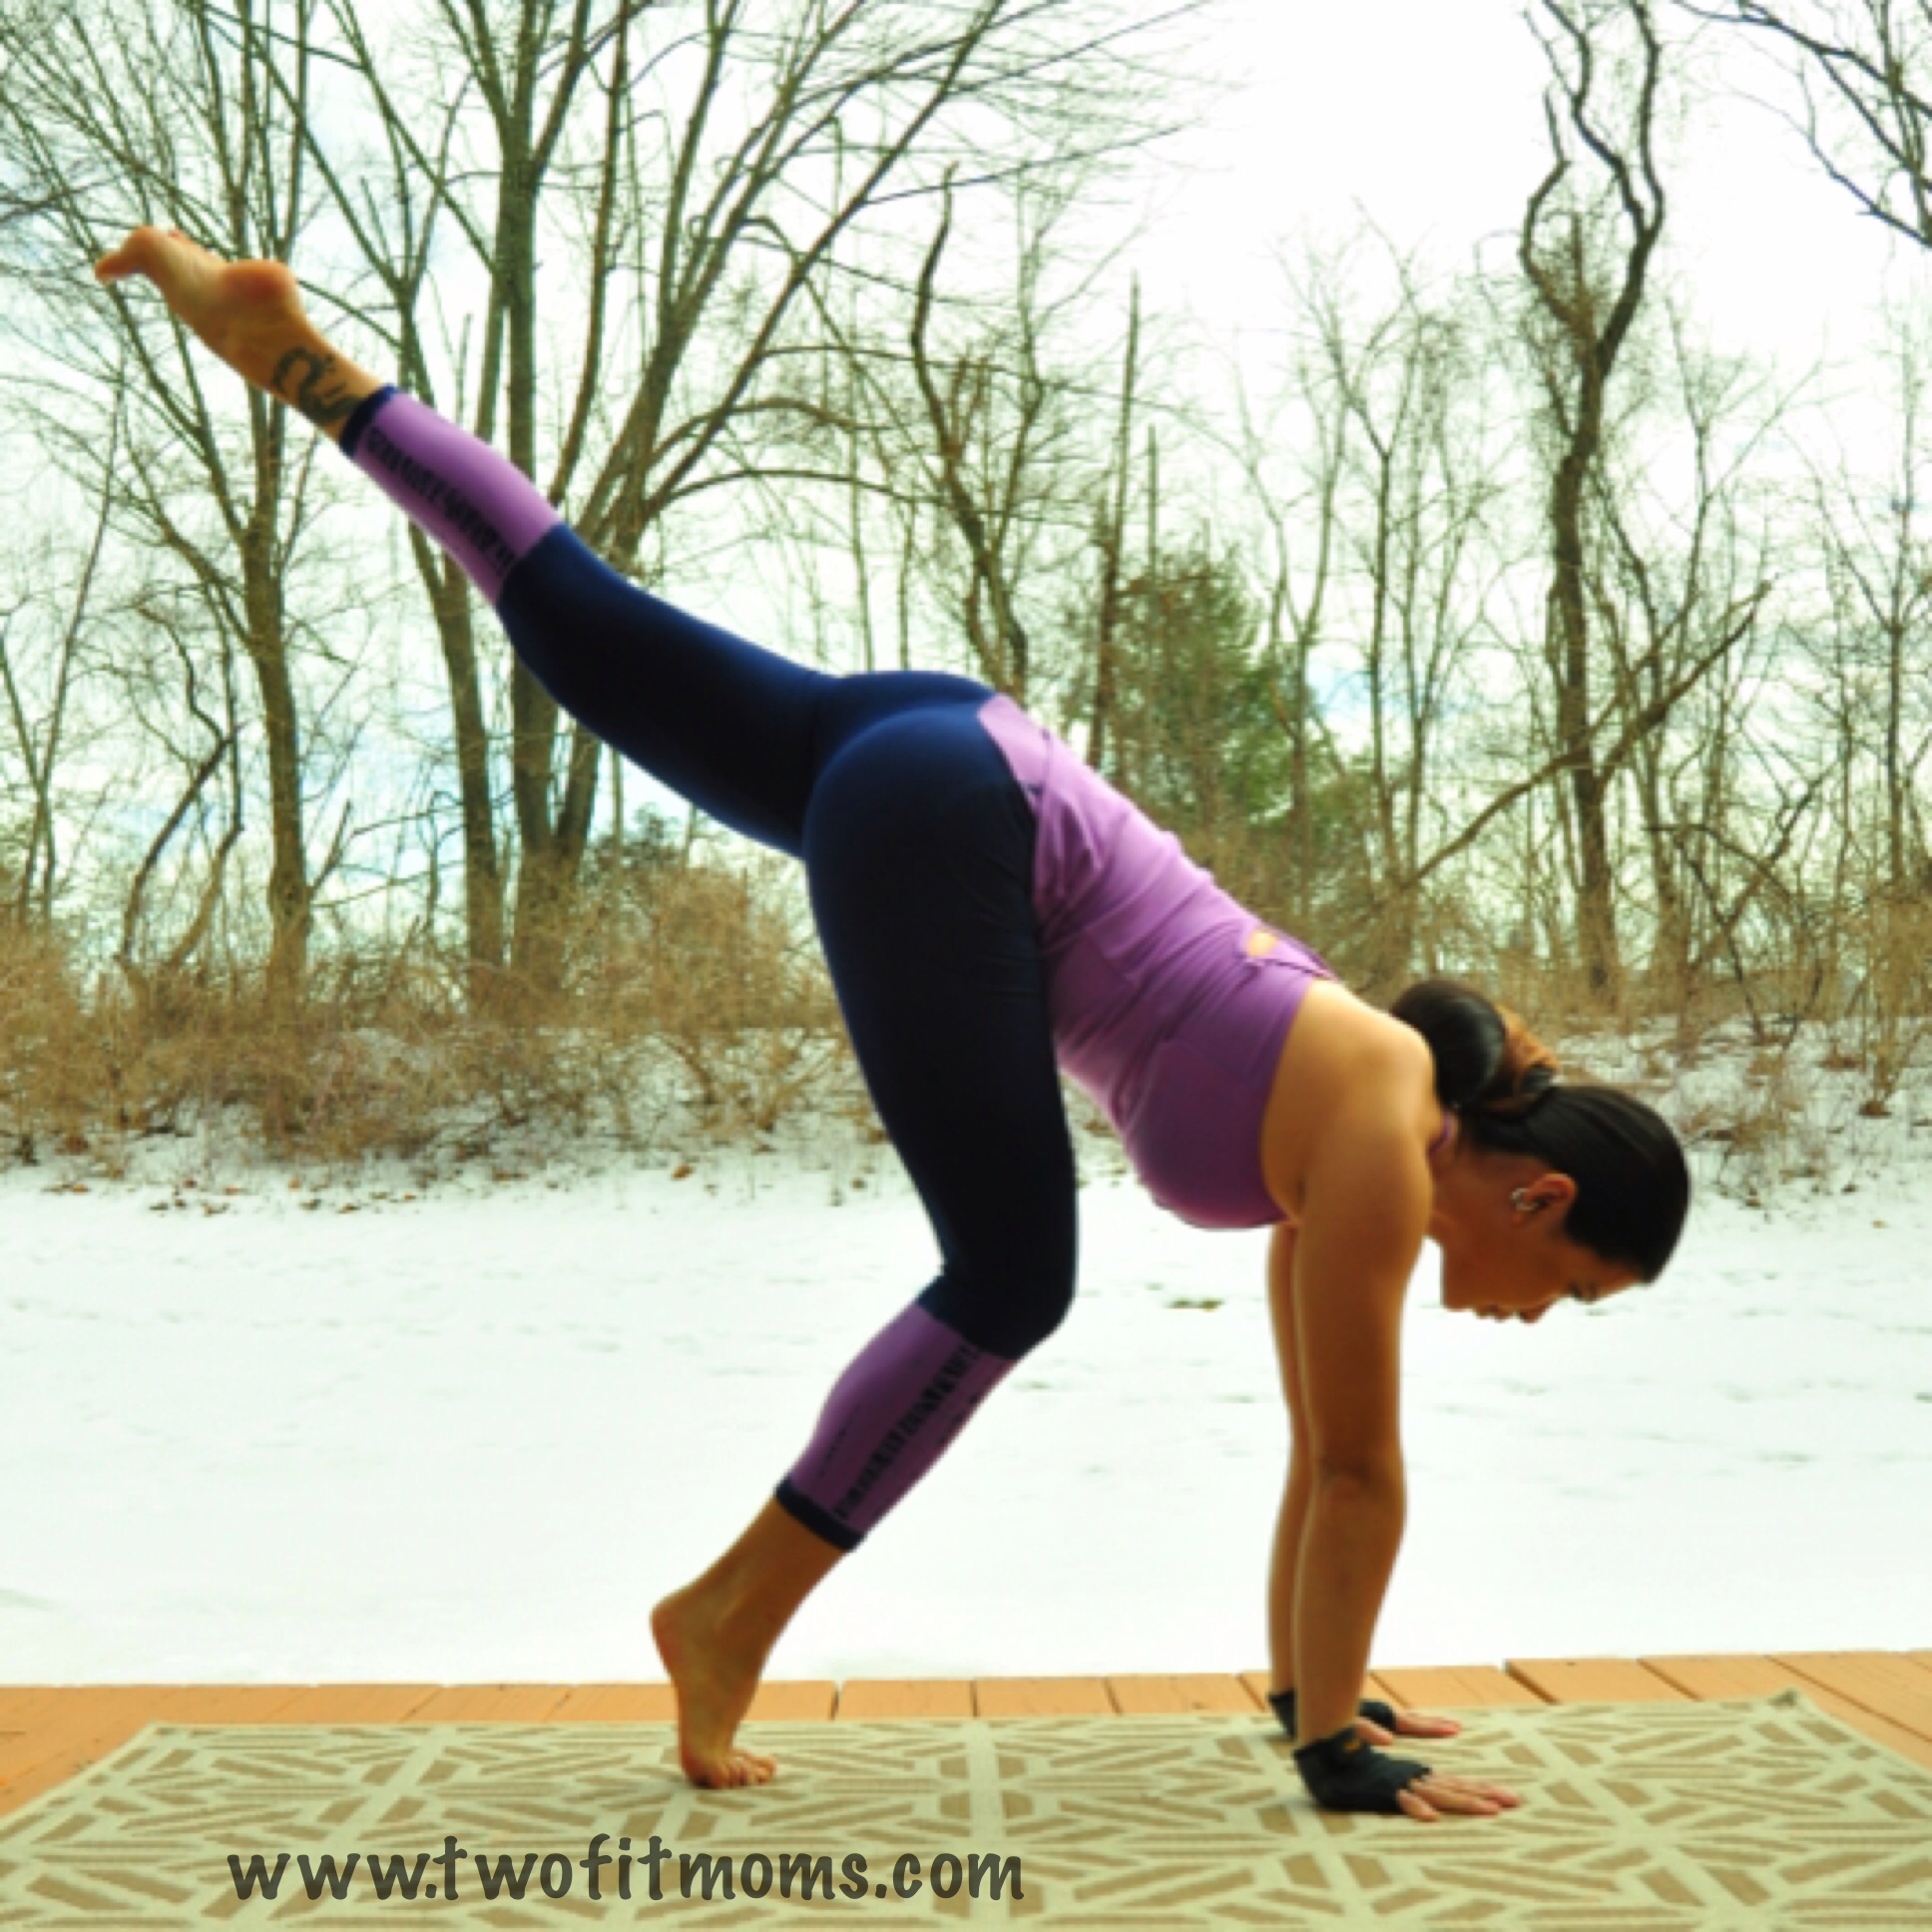
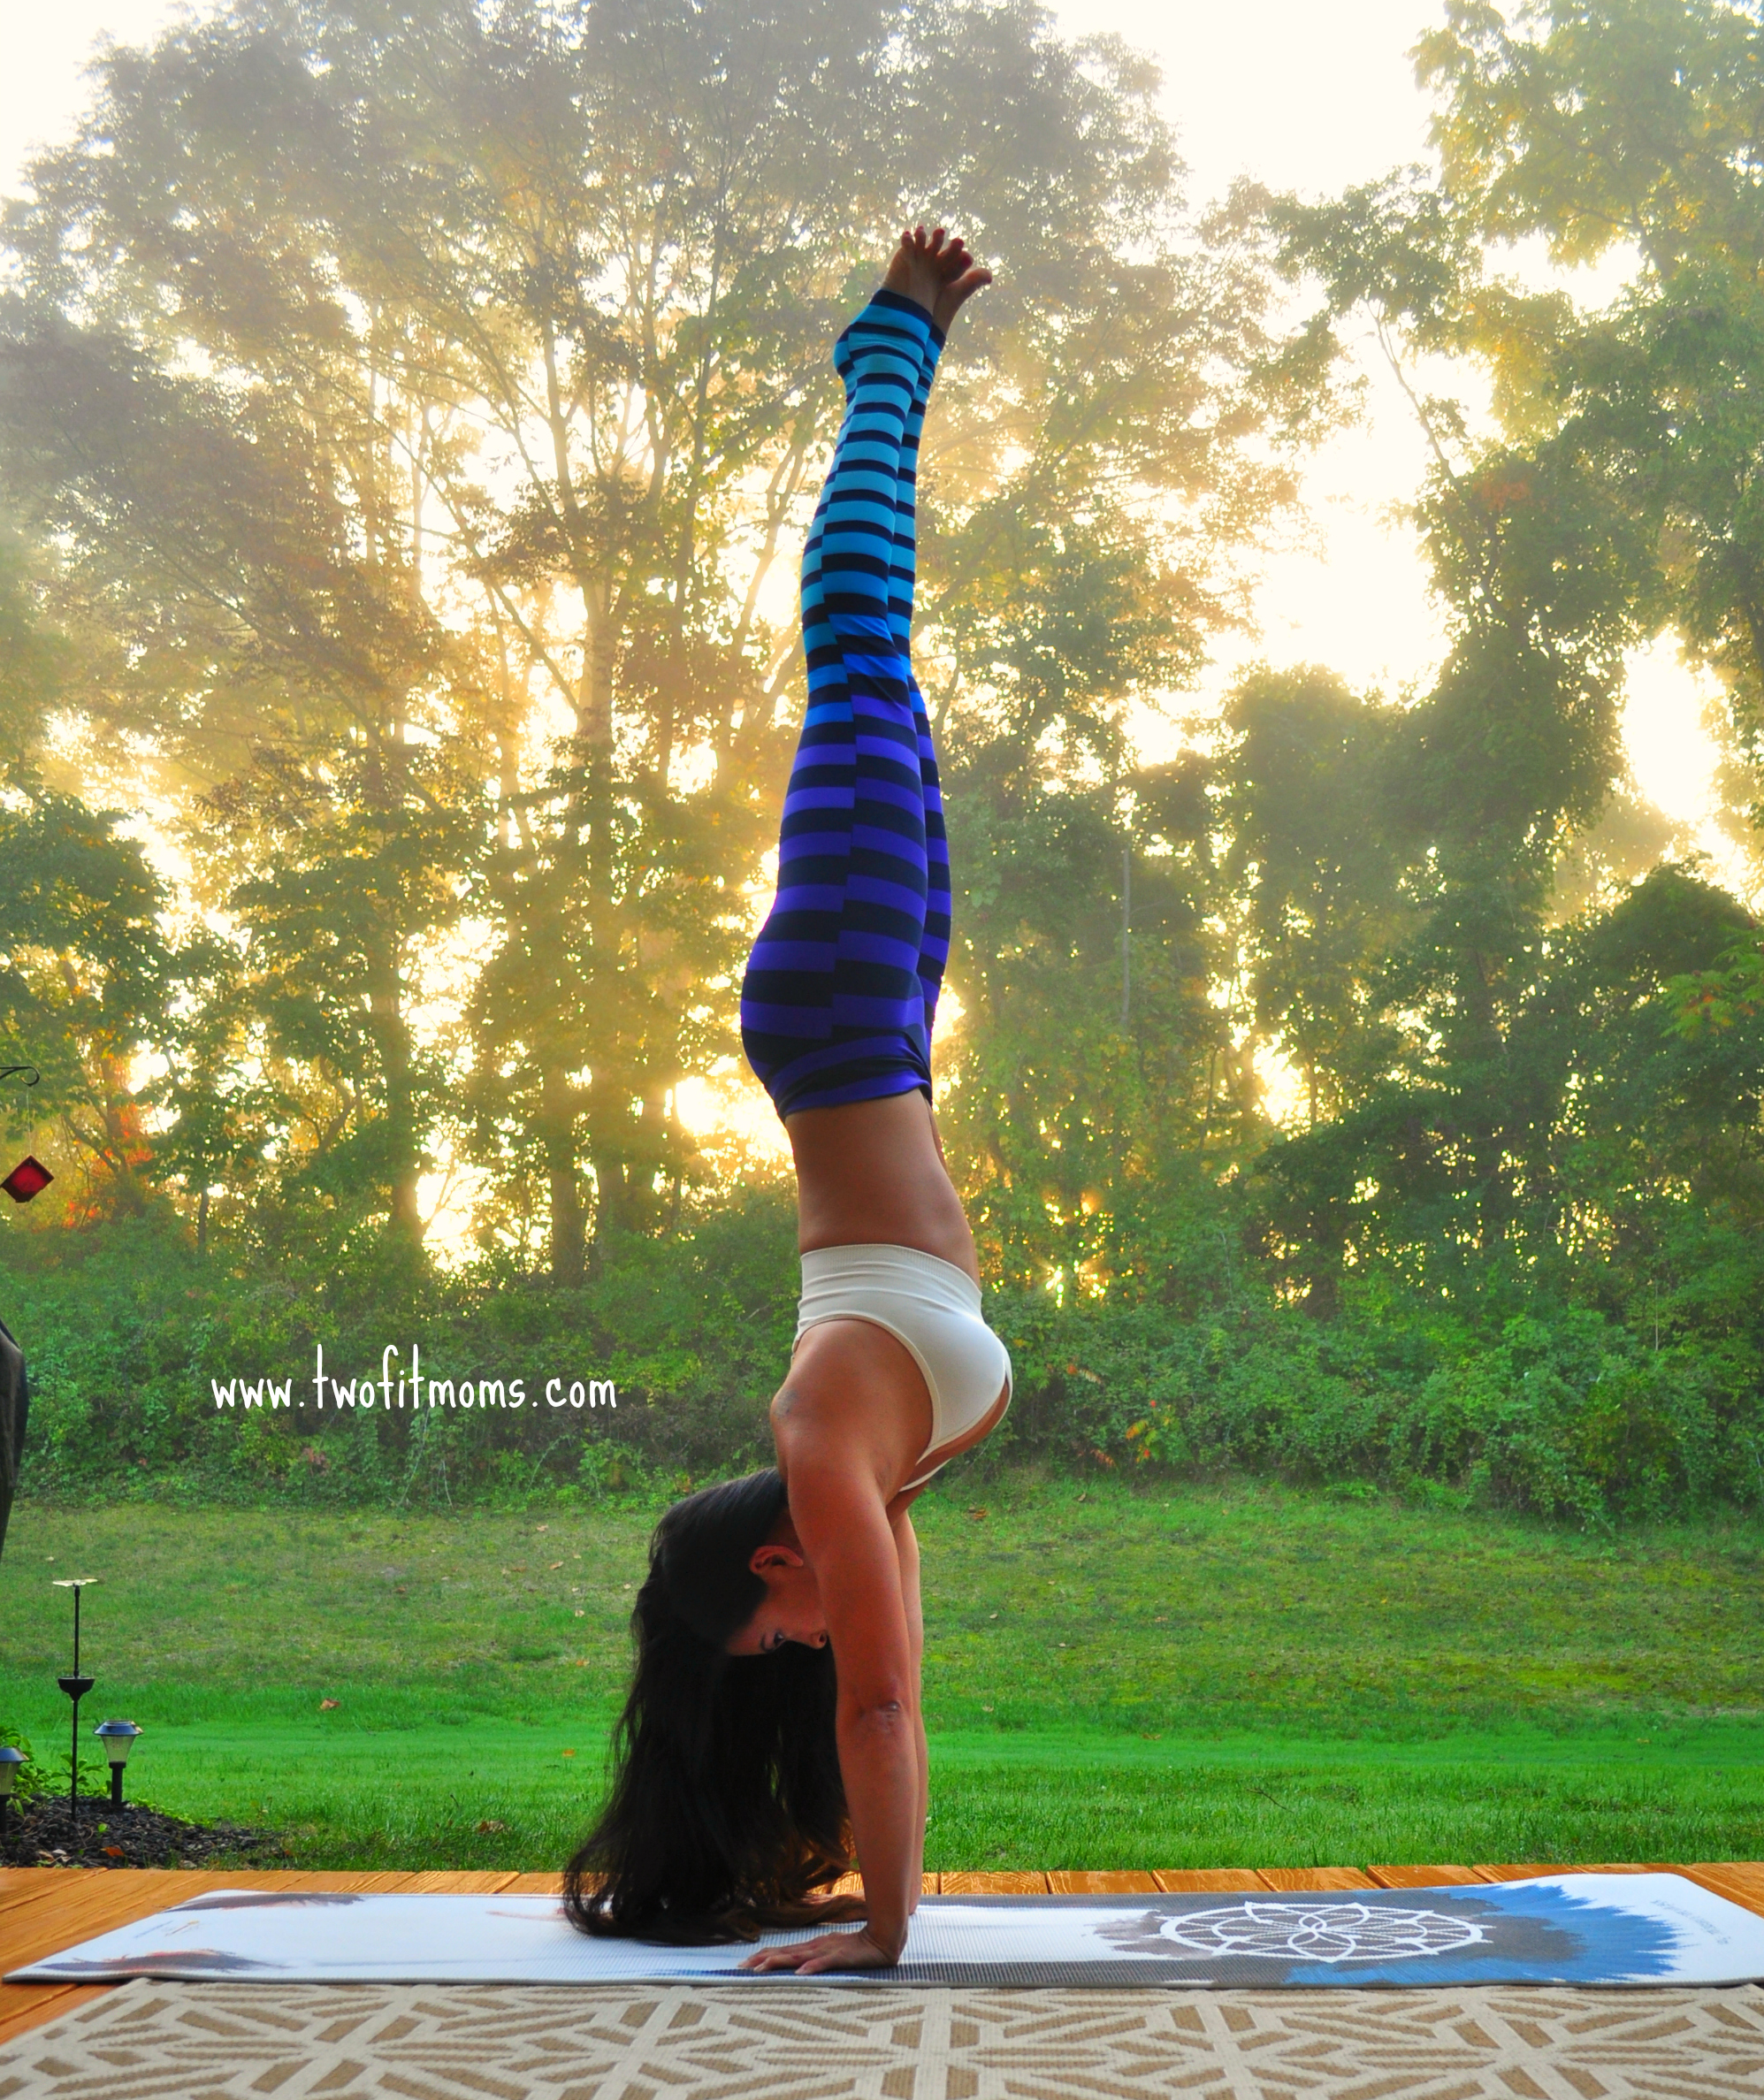
    Handstands have become an integral part of my practice.  They can be fun and exhilarating, and can take your practice to a whole new level.  For beginners, they can be scary and seem impossible.  Here is how you can comfortably start a handstand practice. 

    DSC_6079

    Step 1: Get out of your head!

    The phrase “I can’t” can no longer be in your vocabulary. Although the journey to a free-standing handstand may seem impossible for you, it isn’t!  Handstands are not built in a single day… for most people it takes time, practice and patience.  If you cannot do something today, that does not mean you will never do it.  All of us START some where, and all of us were BEGINNERS at some point.  So get it out of your head that you can’t do a handstand and get it into your head that you WILL!

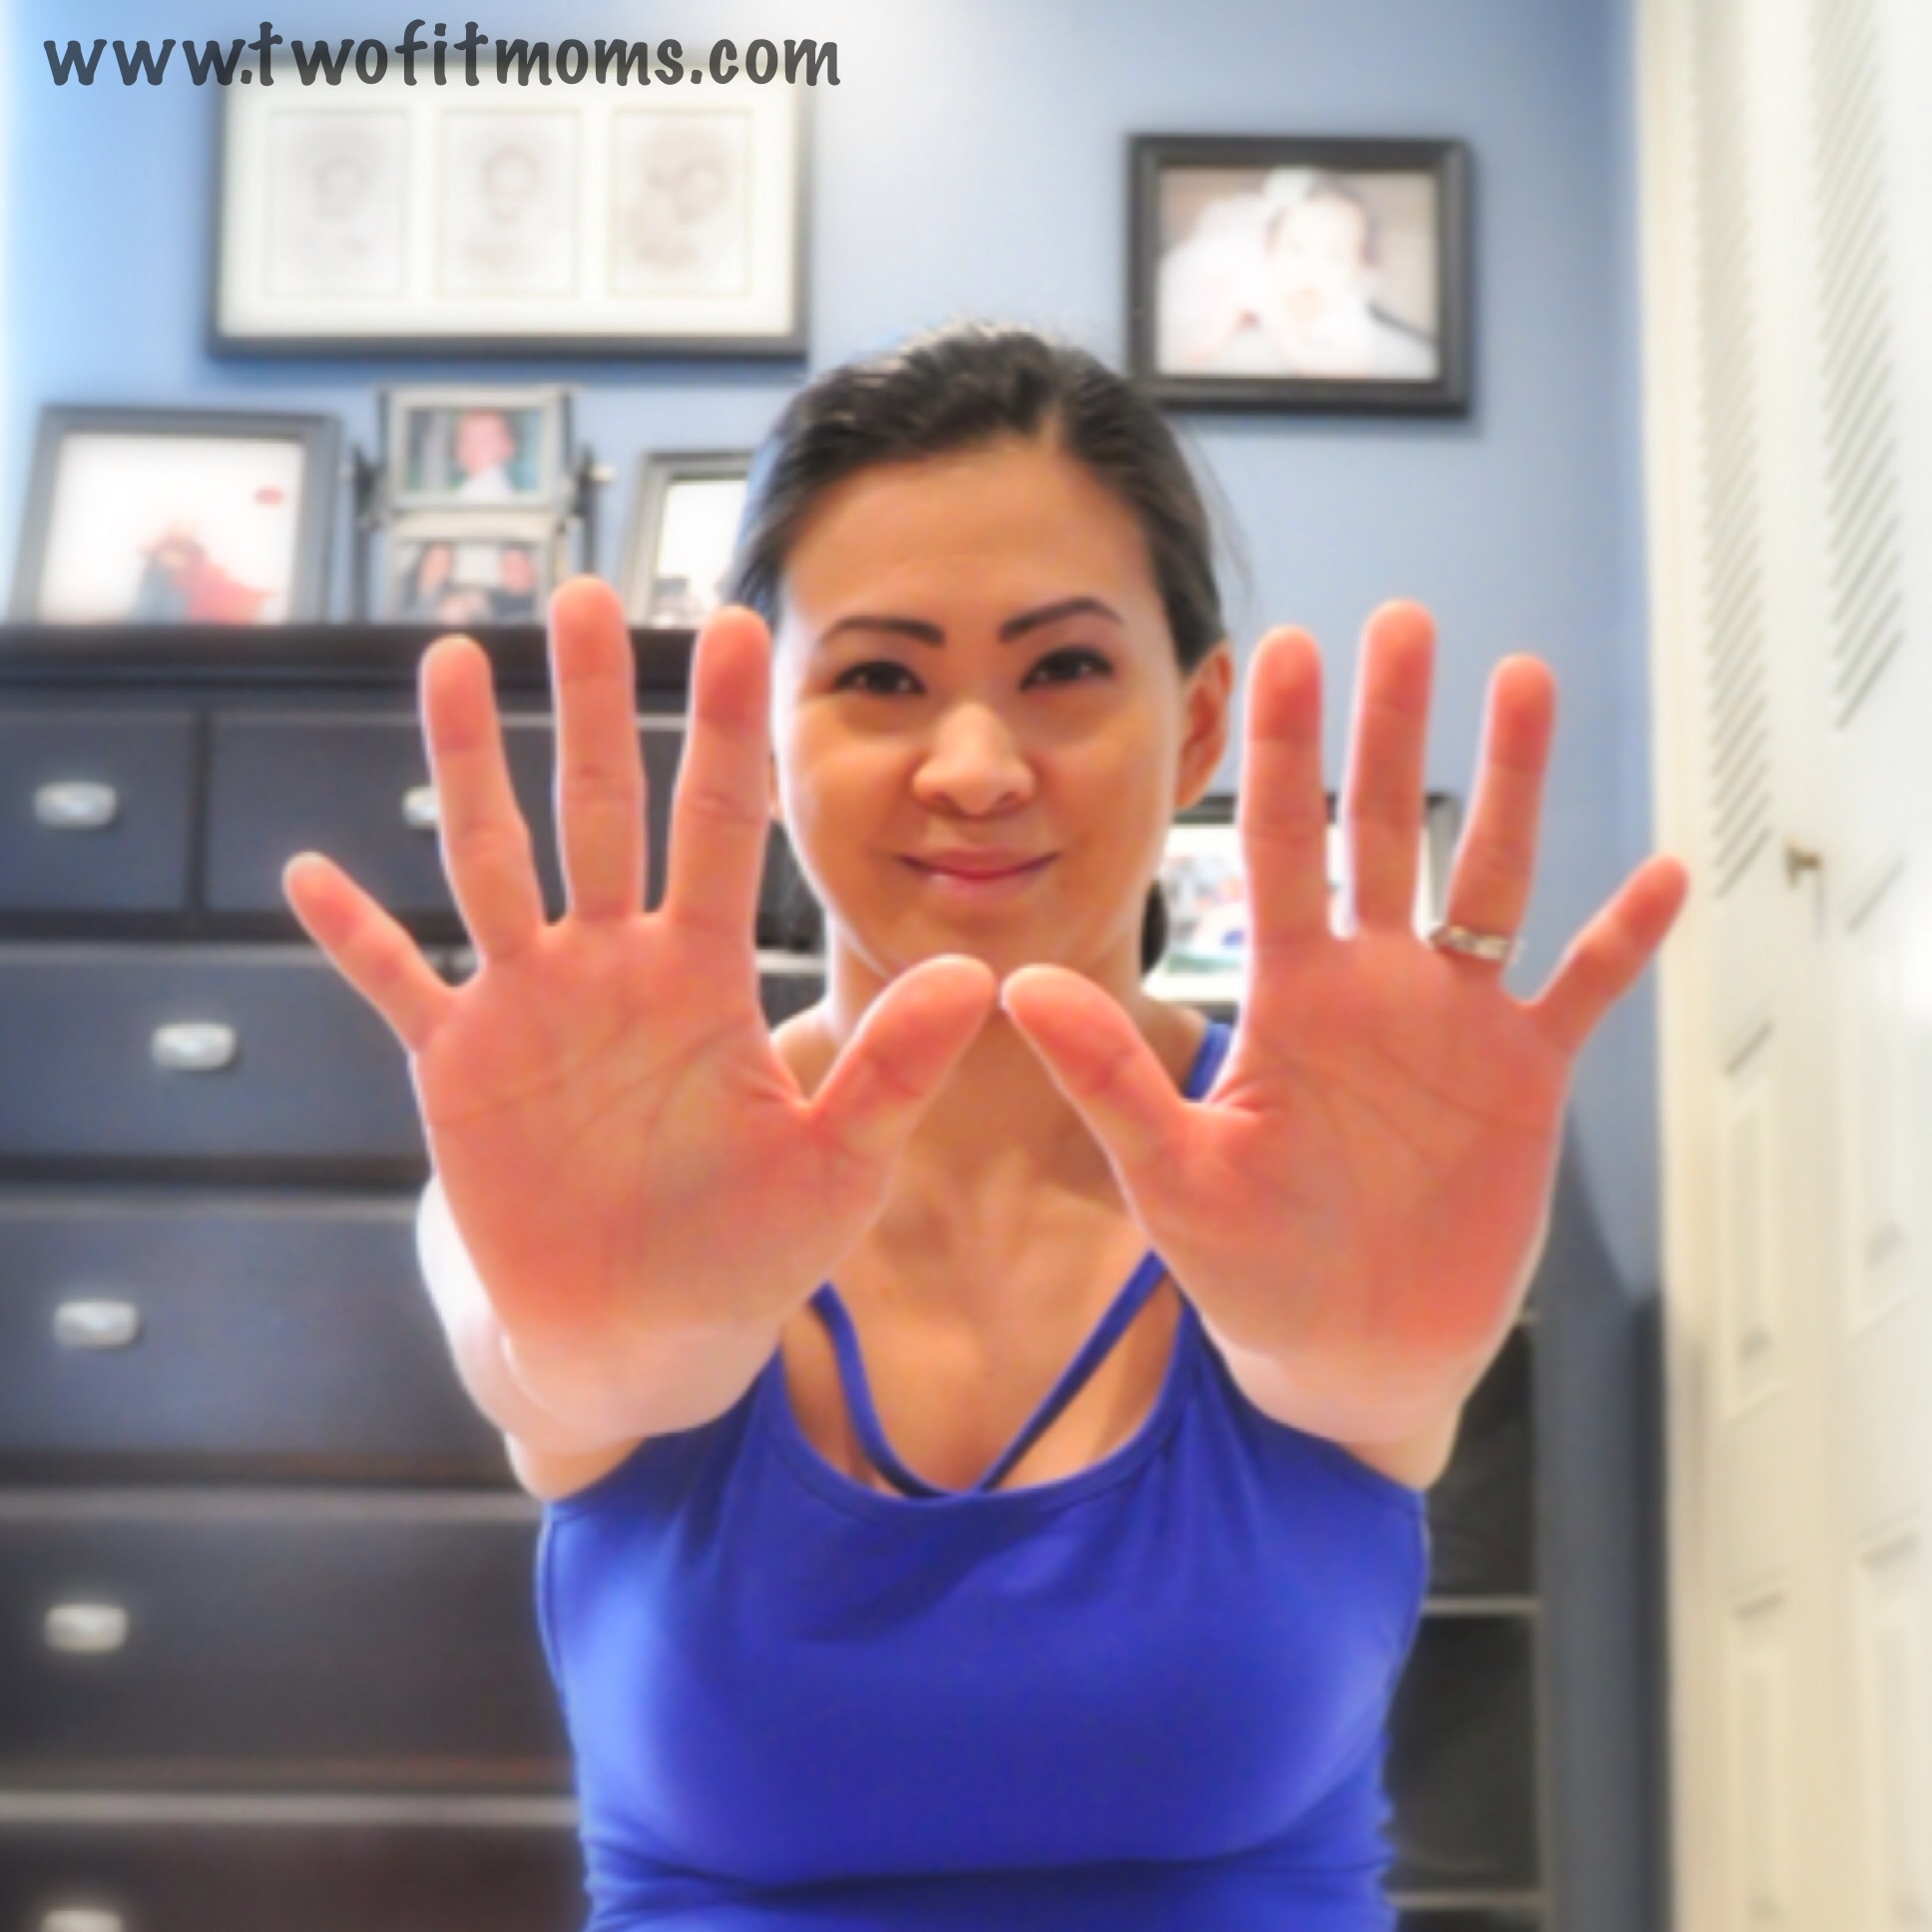
    Step 2: Your phalanges are your best-friend

    Photo Jan 31, 8 04 34 AM

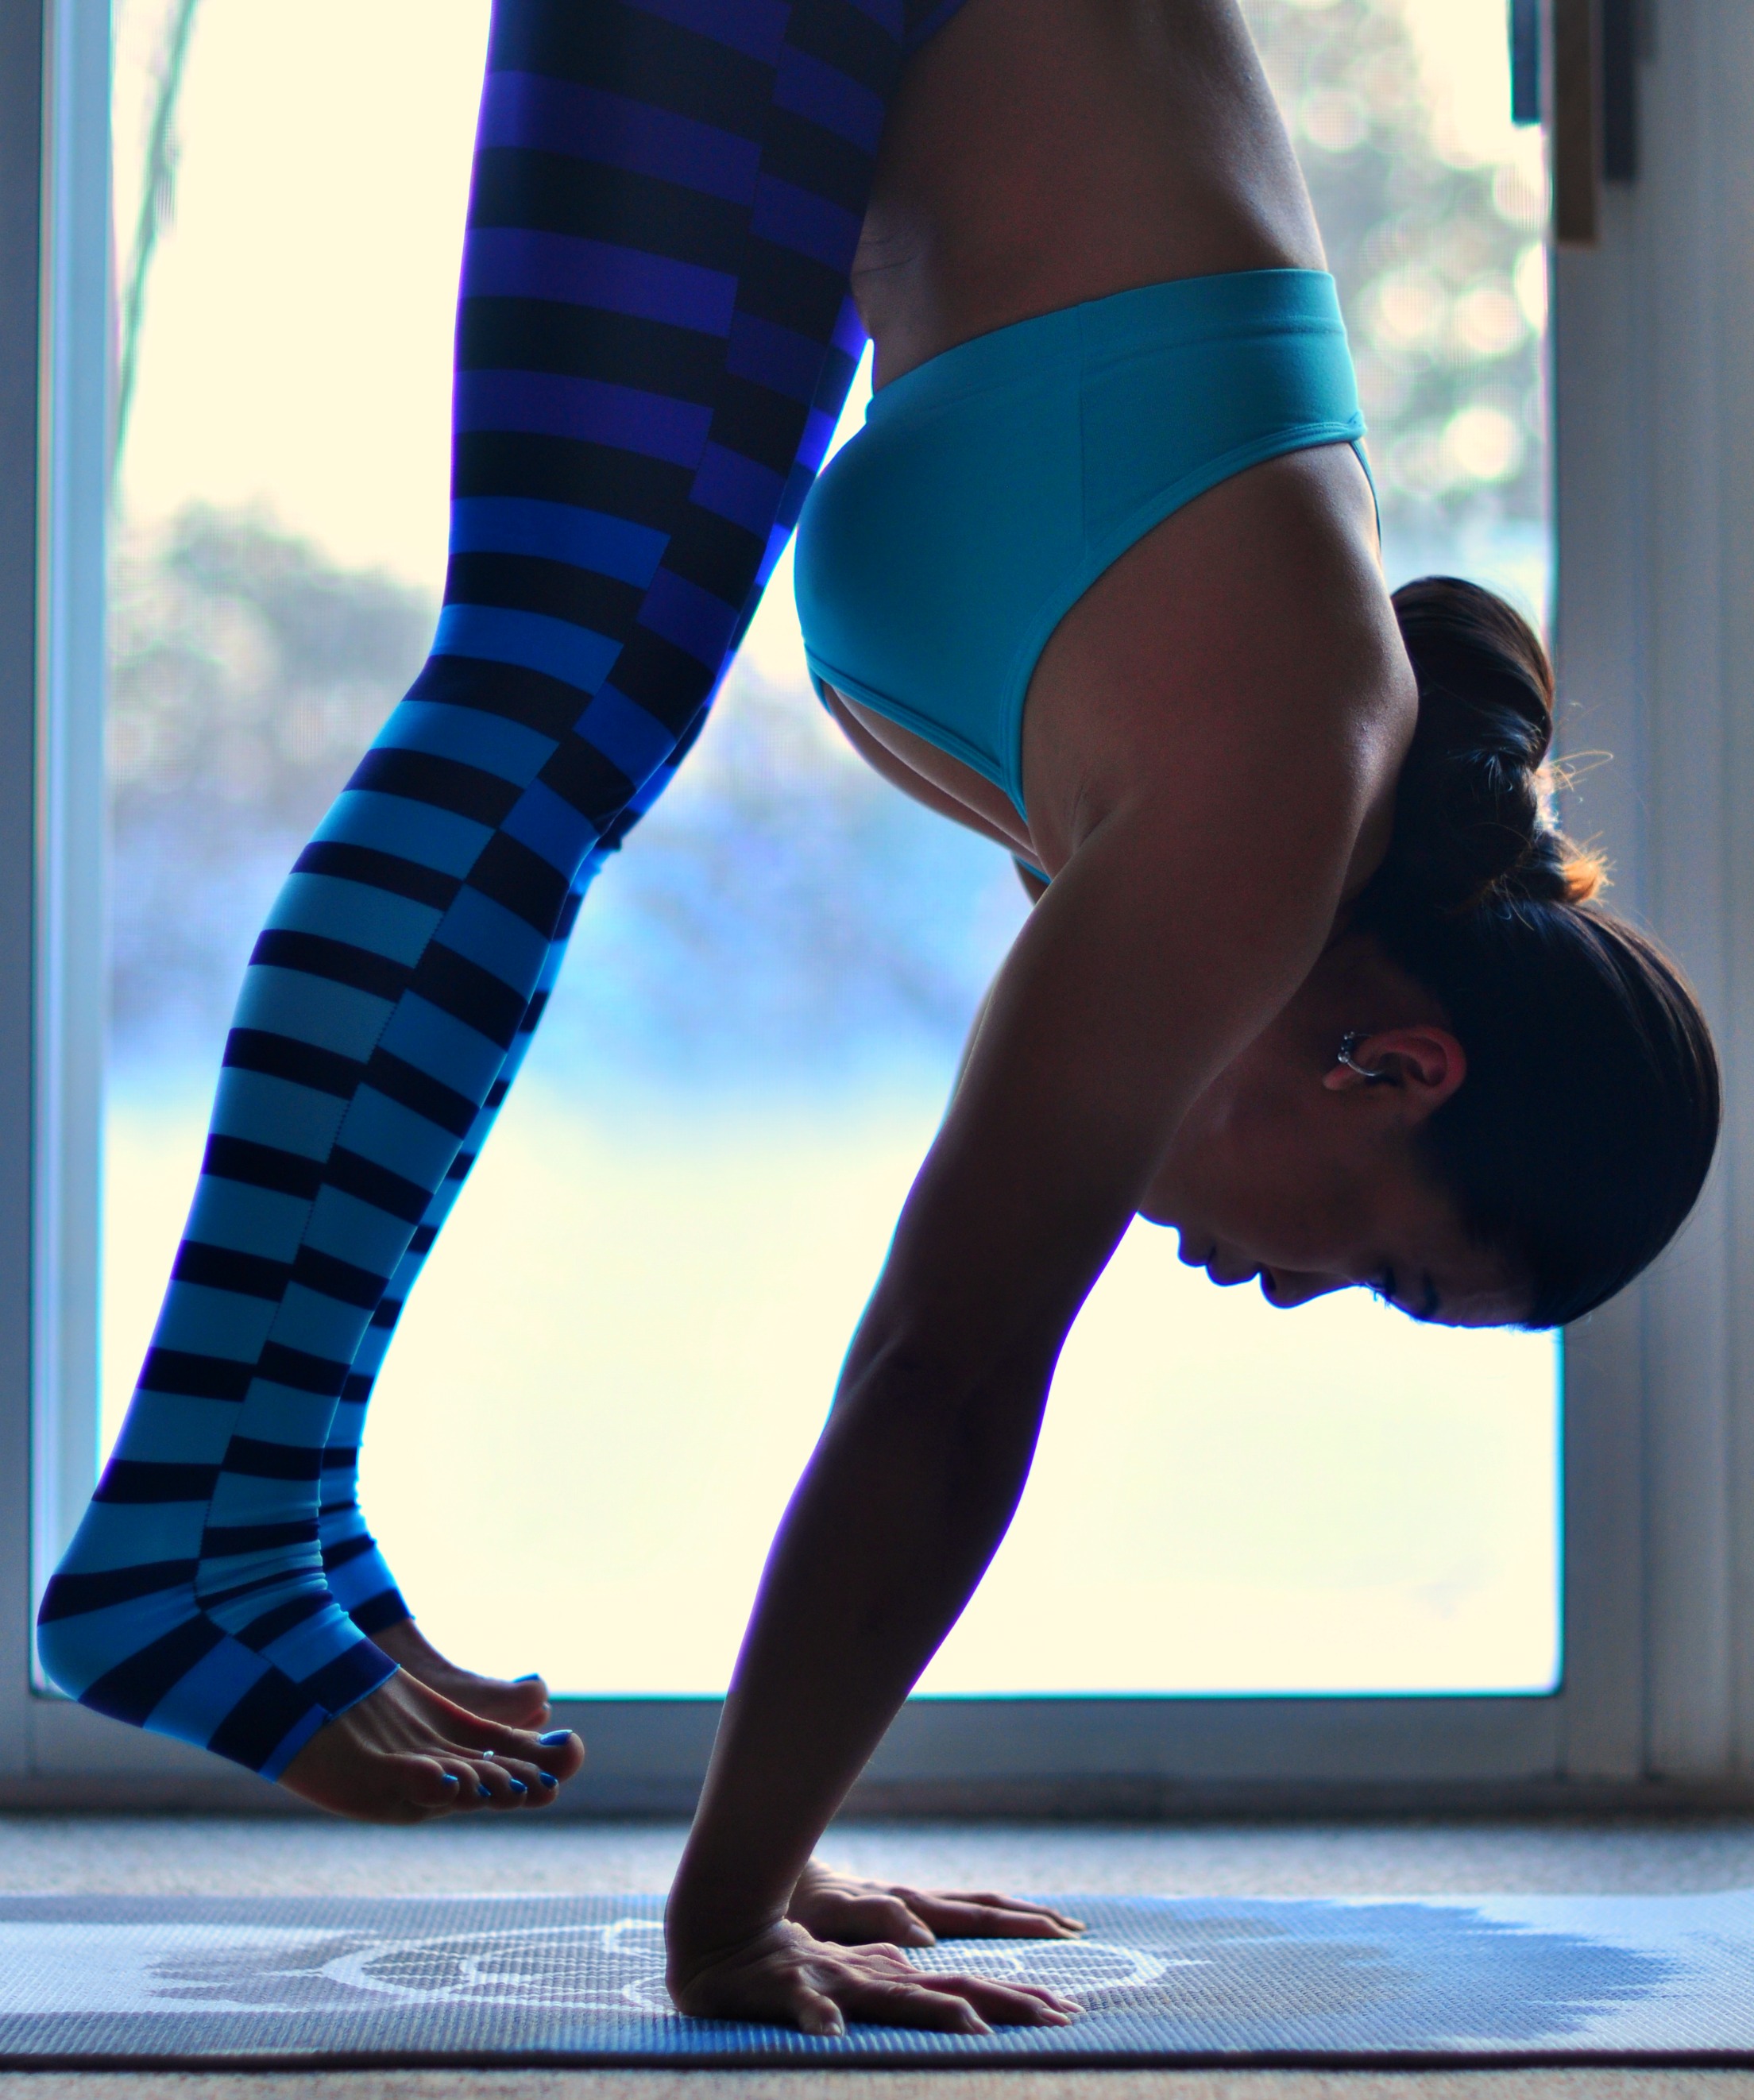
    Just as the name implies, the goal is to be able to balance on your HANDS.  Your ten little fingers are the key to helping you balance and connect with the earth.  The weight of your body should be equally distributed through all four corners of your palms.  Too far toward the heel of your hand, you will come down immediately… too far toward your fingers, you will fall the other way and hurt your fingers.

    GRIP your mat with your fingers!  Keep your fingers active by clawing your mat.  Those ten little digits can make or break your handstand.  By actively using them, it will keep your weight centered and help you stay balanced.

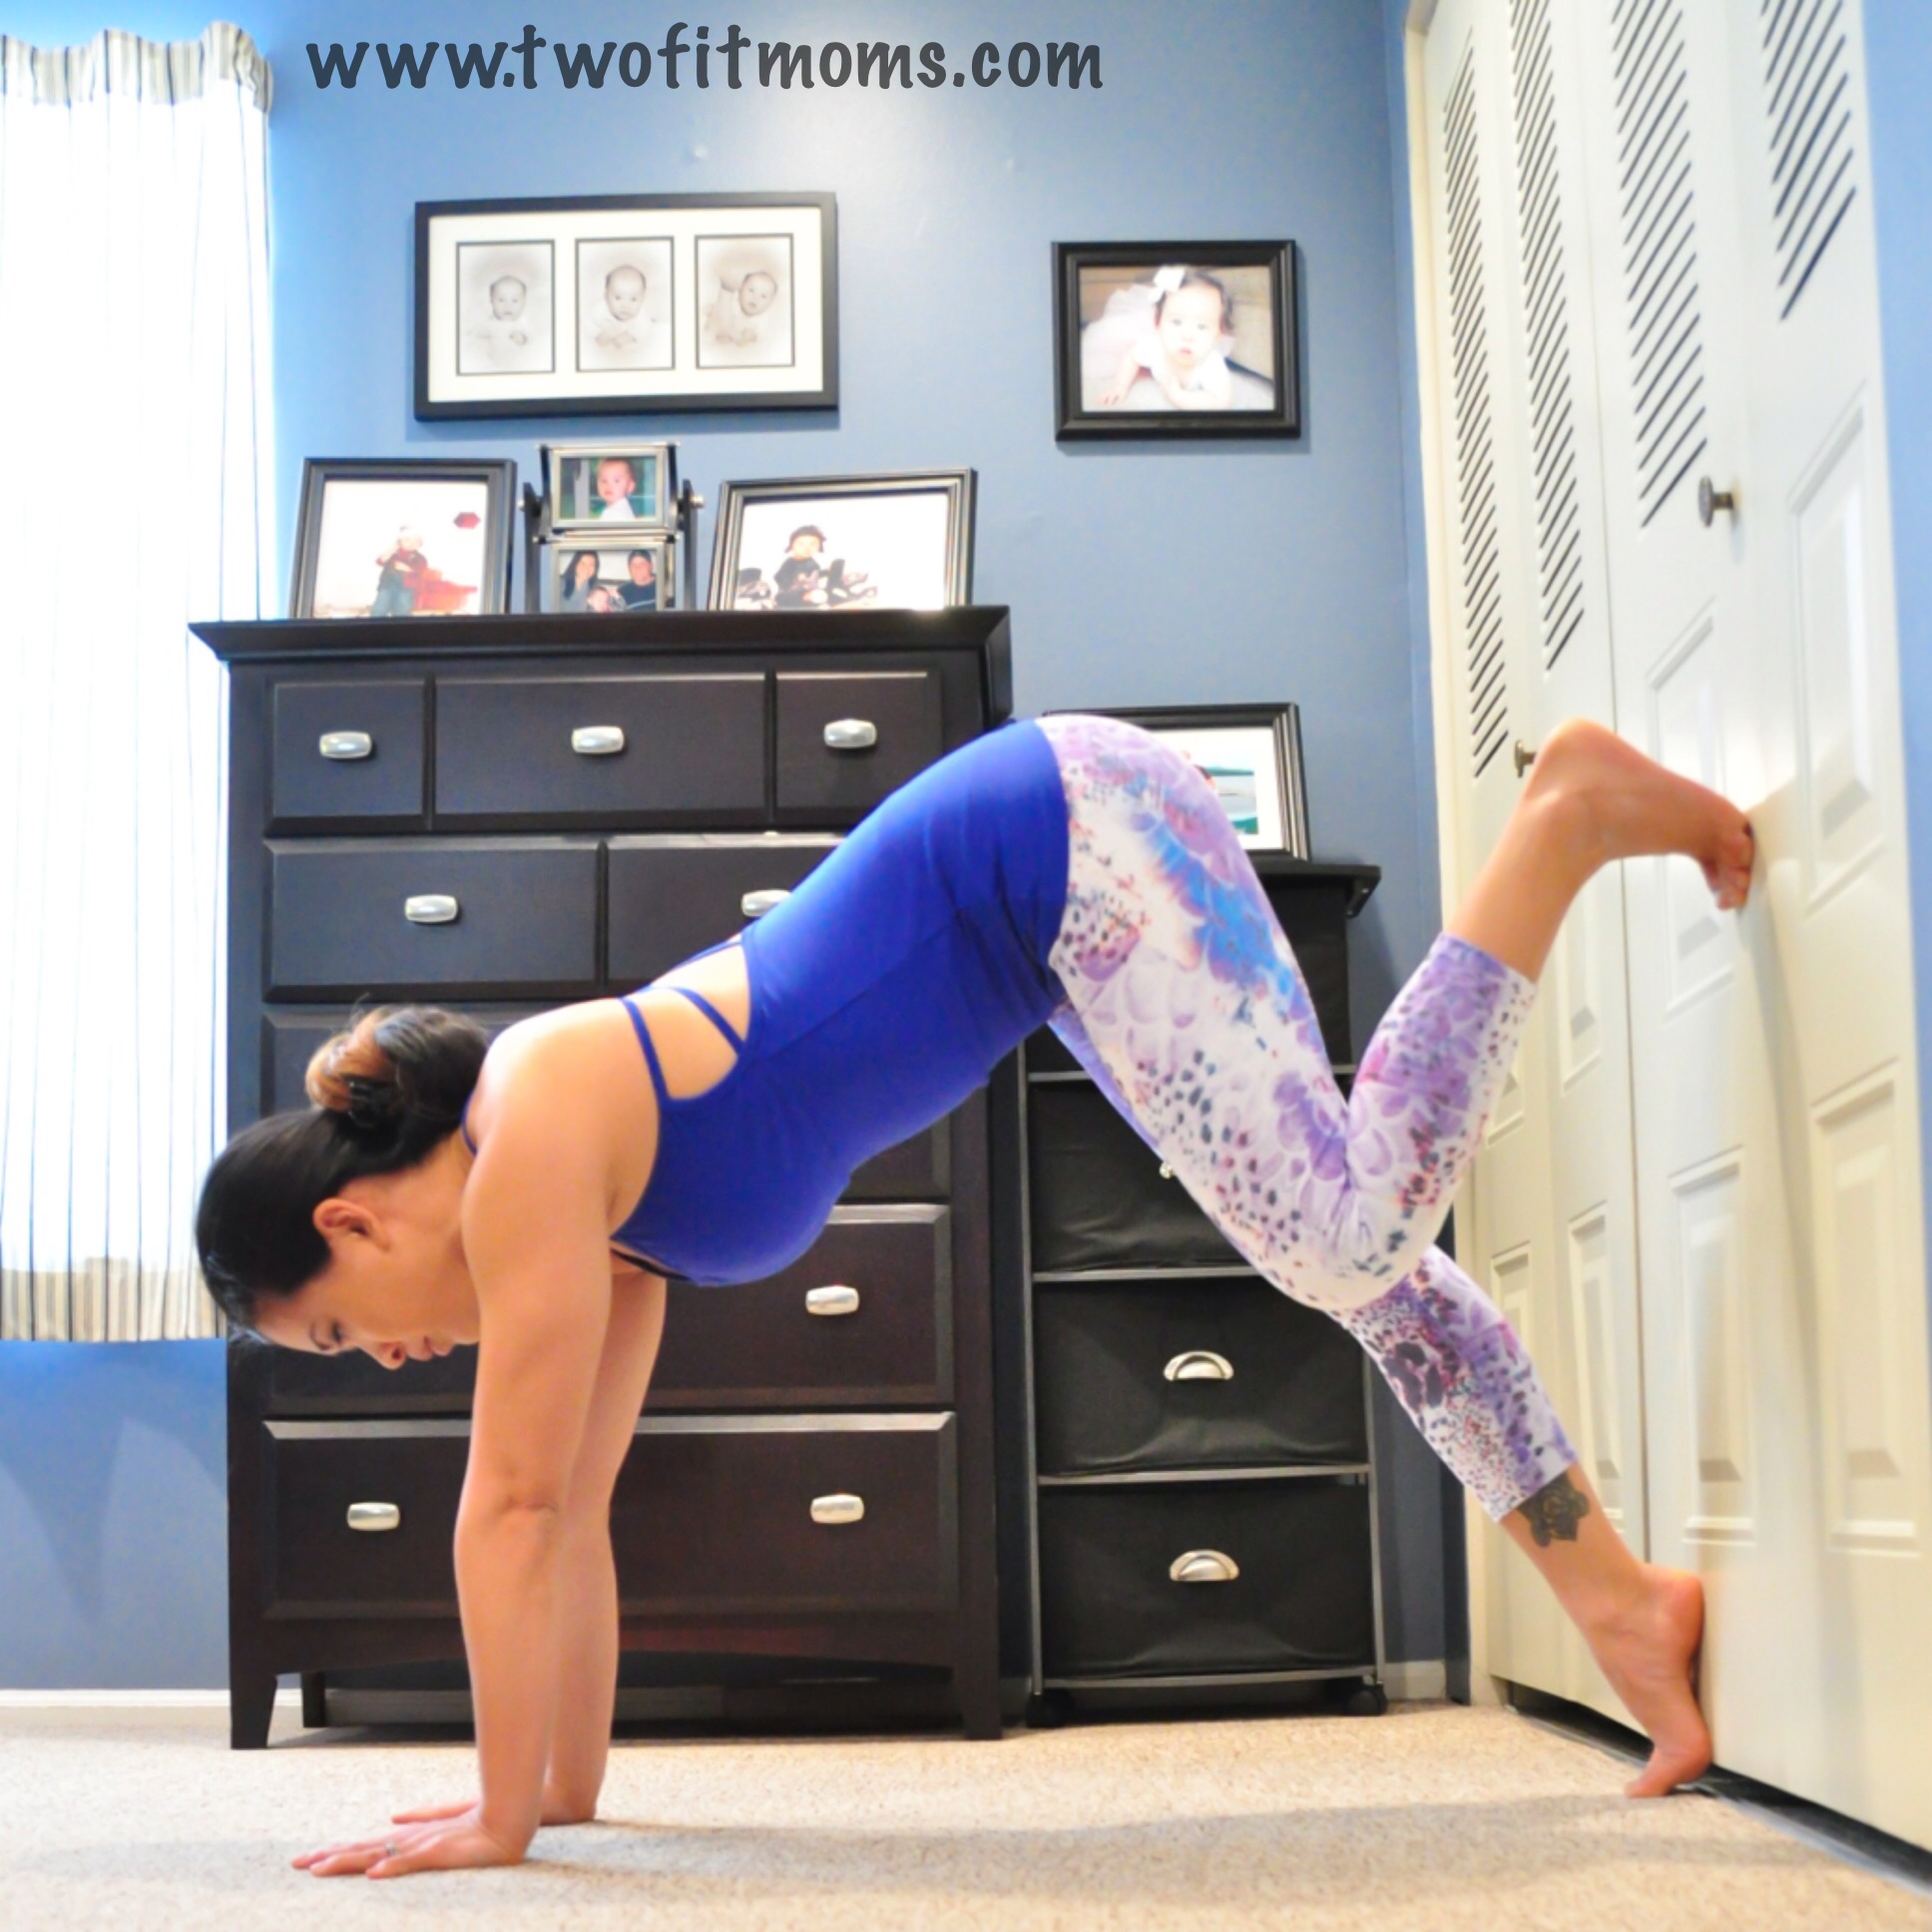
    Step 3: Building your foundation

    Photo Jan 31, 8 04 50 AM

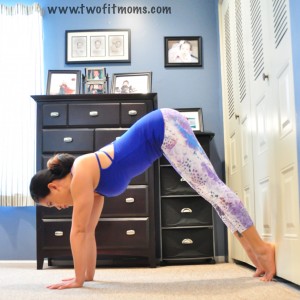
    Time to find a wall space!  Begin at the wall and make your way into tabletop position with your heels going up the wall.  Set yourself up so that your shoulders are directly over your wrists and your hips are over your knees.  Hands are shoulder width distance apart.  Remember what we just talked about?  Spread your fingers wide, index fingers will be parallel to one another or close to that.  Everyone is different, so play with this!

    Roll the biceps out!  You will hear this often and may think… What the hell does that mean?  What this implies is an external rotation of your arms.  Still lost?  Try this little exercise… Sit up tall and extend both arms out in front of you so that hands are shoulder width apart, hands are flexed and index fingers are parallel to one another.  Slowly rotate the hands so that the index fingers start to point towards one another… Feel the upper arm bones pull out of their socket and feel your upper back round? This is NOT what we want.  Now, slowly start to rotate the hands back out and bring the index fingers back to parallel… Feel the arm bones plug back in, the upper back straighten and shoulder blades roll down the back.  Bingo!  You can exaggerate this feeling by actively rolling the shoulders away from your ears.

    Now take that external rotation into your tabletop position against the wall!

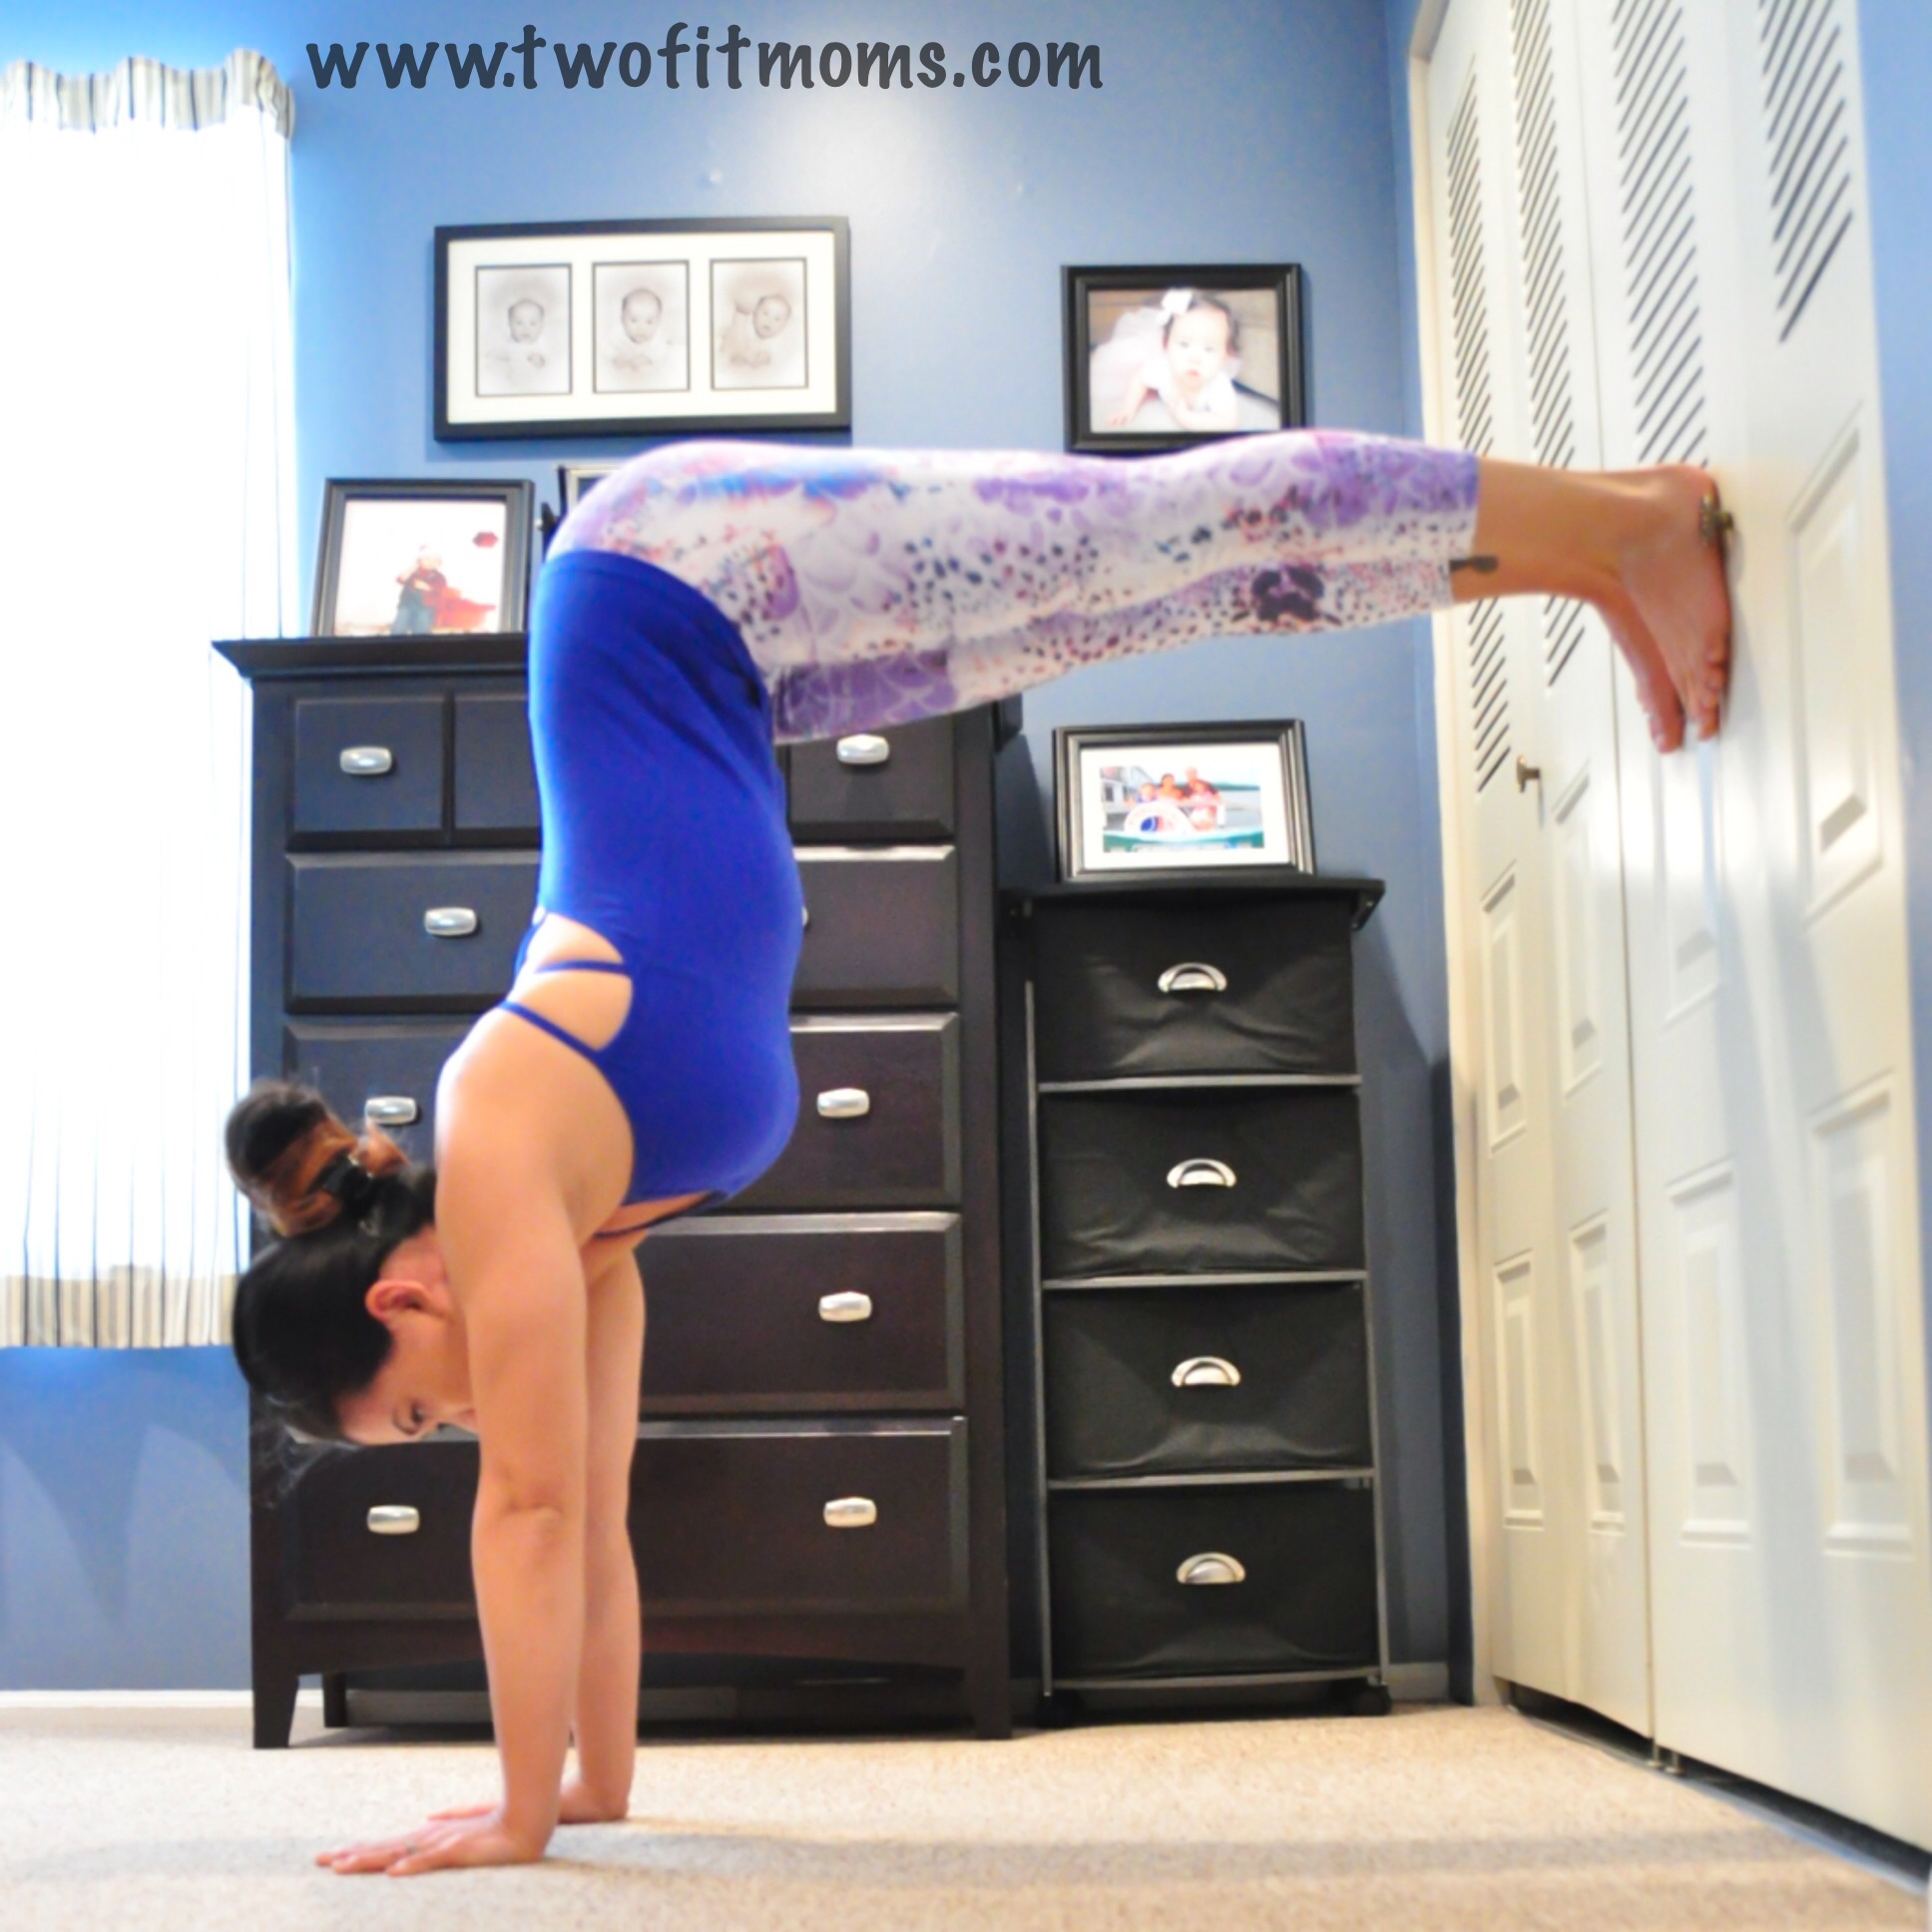
    Step 4: Lift those hips!

    Photo Jan 31, 8 05 06 AM

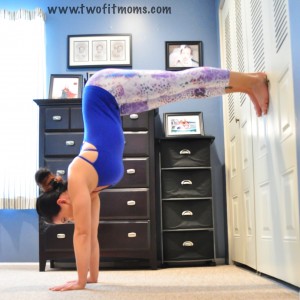
    Time to add some more weight onto those hands and arms! From tabletop position, push into your hands and lift your hips up into a shortened downward facing dog.  Your feet will press into the wall.  Keeping your hands and arms exactly as is, slightly shift forward so that the shoulders line up directly over the wrists again.  Keep your gaze focused on the ground and slightly beyond your fingers.  Feel the weight distribute equally through your palms, feel your fingers claw at the earth.

    Take a few breaths and come down if you need to rest!

    Step 5: Walk the feet up the wall

    Photo Jan 31, 8 05 21 AM

    Slowly bend one knee and bring the foot higher onto the wall.  Push into the wall with that foot so the bent leg straightens and you can slowly bring the second foot up to meet the first.


    Step 6: Congratulations on your first handstand!

    Photo Jan 31, 8 05 36 AM

    When you straighten both legs, your hips will stack over your shoulders which should already be over your wrists. Suck your bottom ribs in by not dumping into your chest.  This will help prevent the “banana back” or curve in your spine.  Engage your core and bring your navel in.  Masumi described it best… It’s similar to the feeling you get when someone throws a football to you to catch.  Your ribs pull in, your core engages to prepare for the impact.  Keep your legs engaged, feet pushing into the wall!

    Congratulations!  You’ve done your first handstand!  Stay here and breath.  Try to work your way up to ten deep, slow breaths in and out through your nose.  Not only will this get you comfortable on your hands, this exercise will also start to build strength in your wrists, arms, shoulders, core and legs.

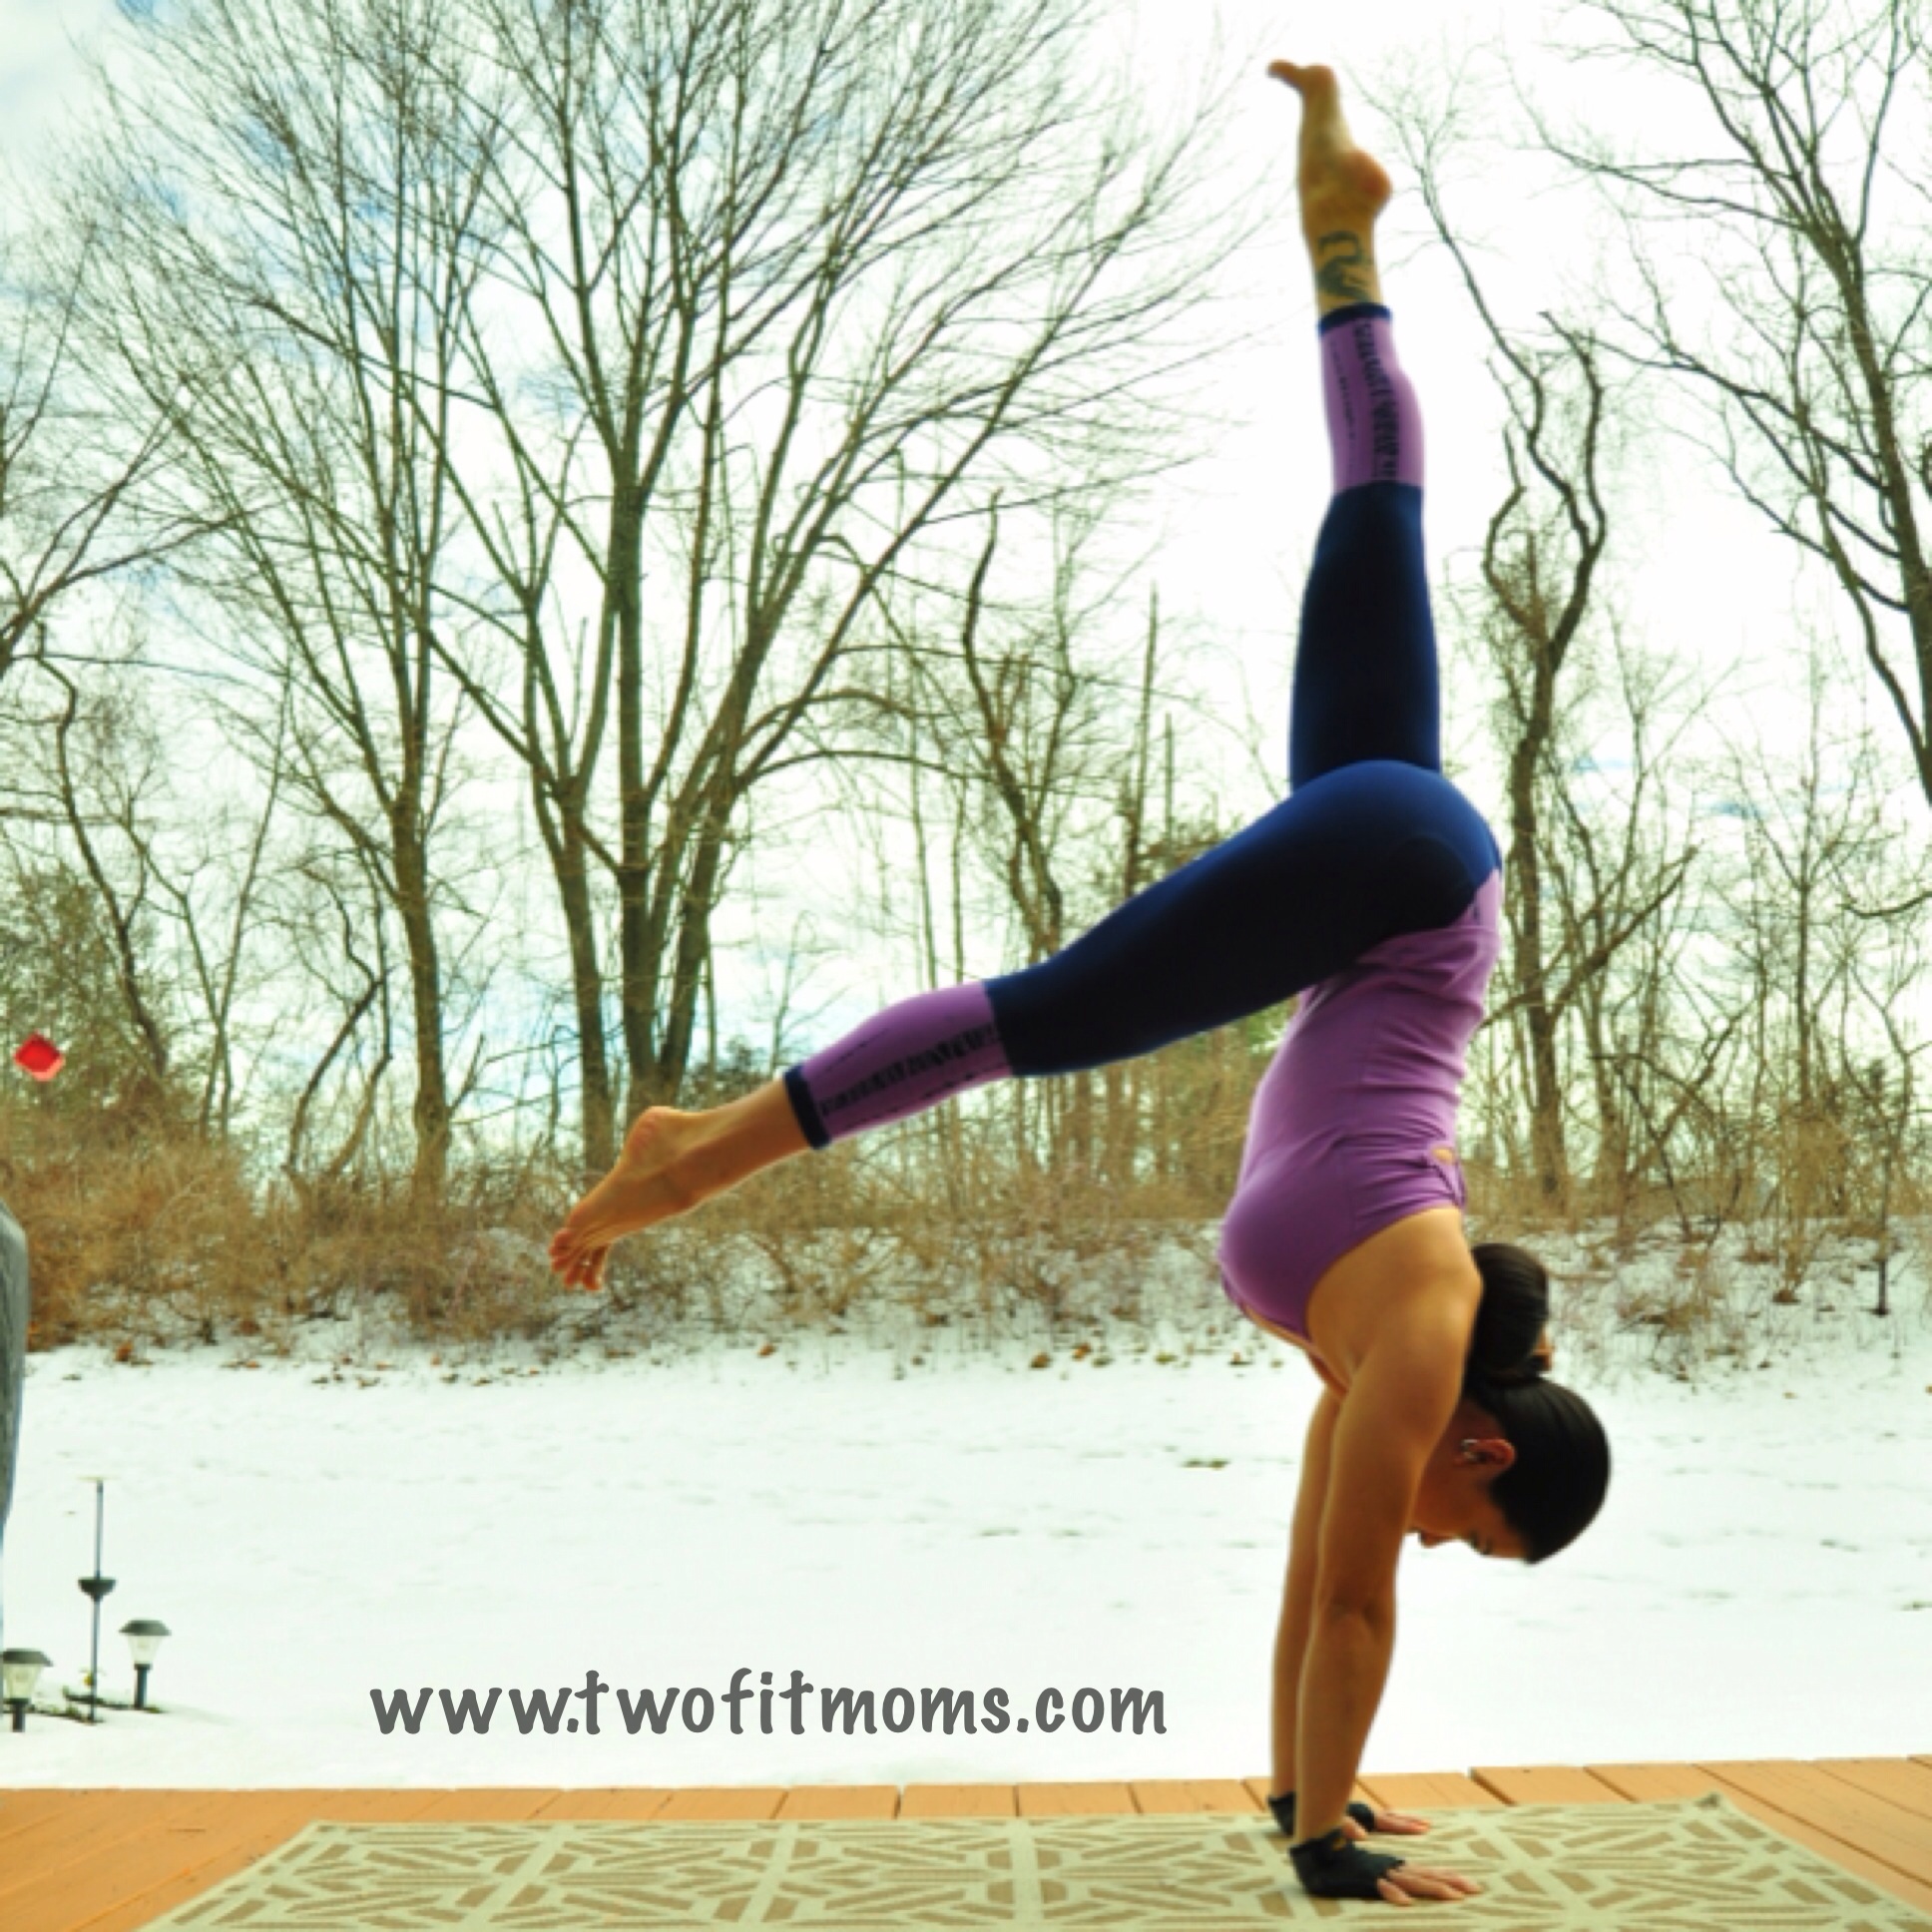
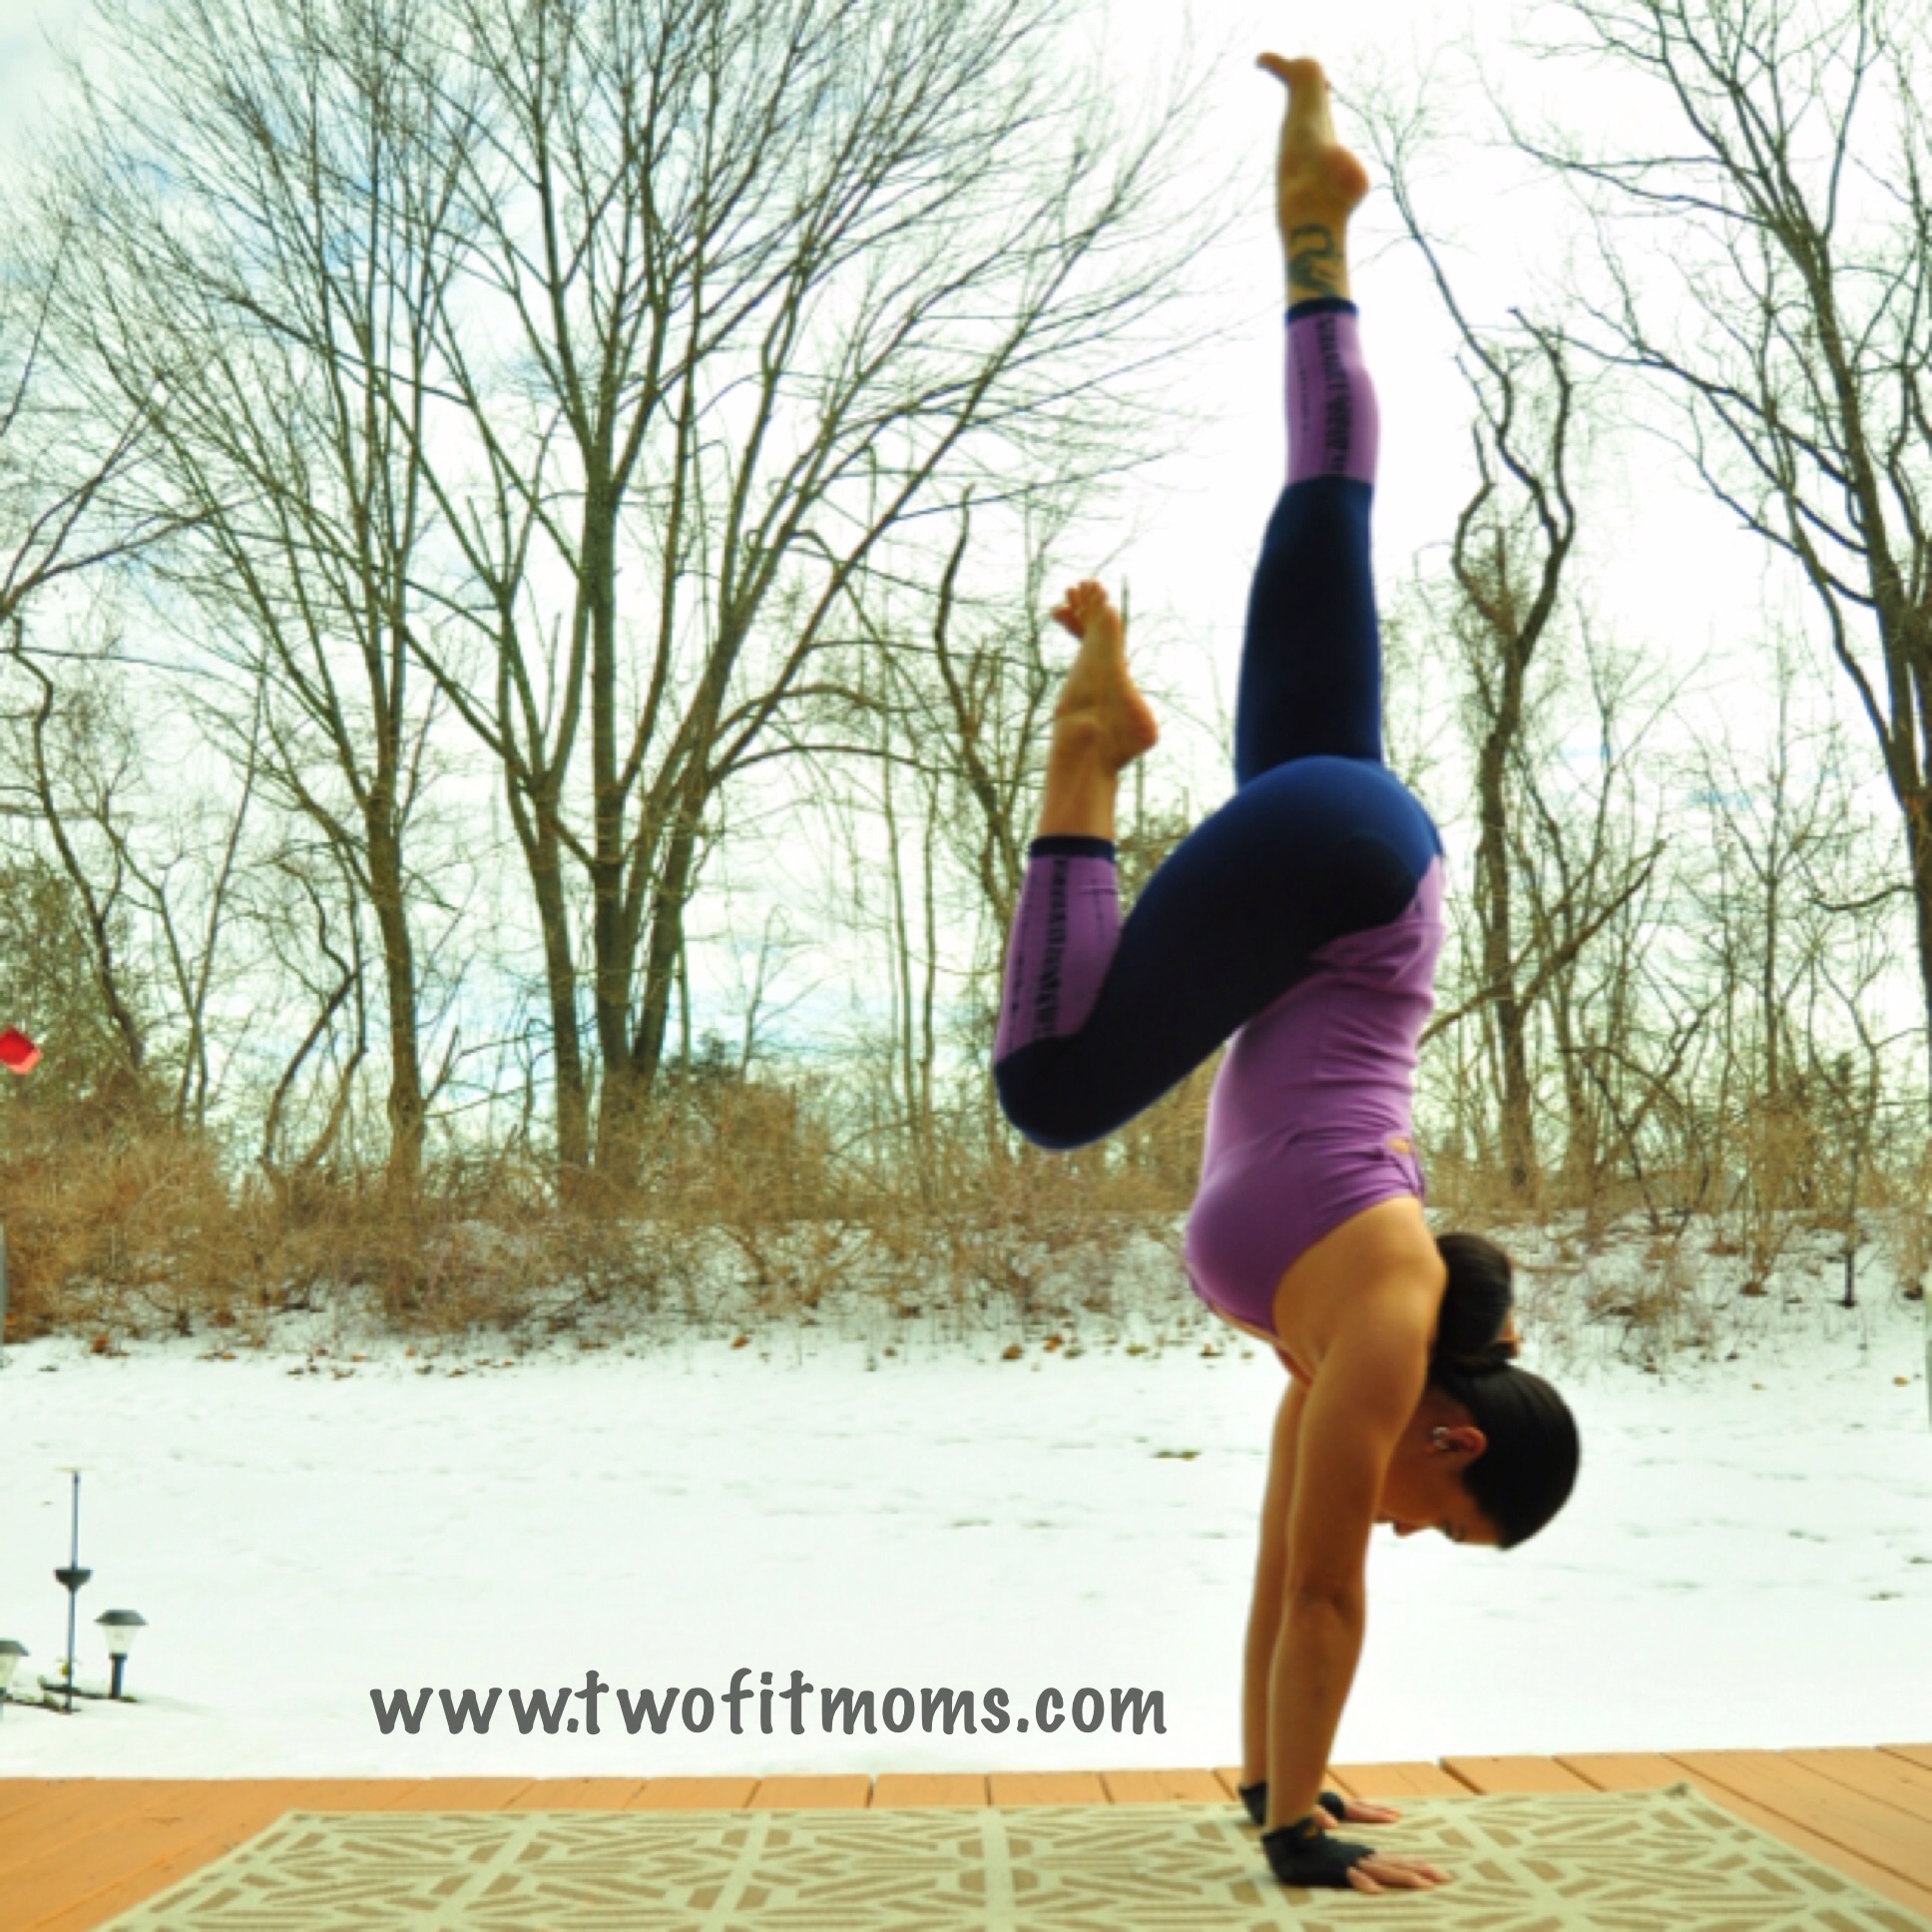
    Step 7: Take it up a notch!

    Photo Jan 31, 8 05 58 AM

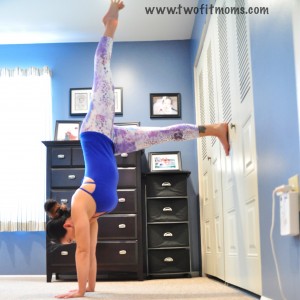
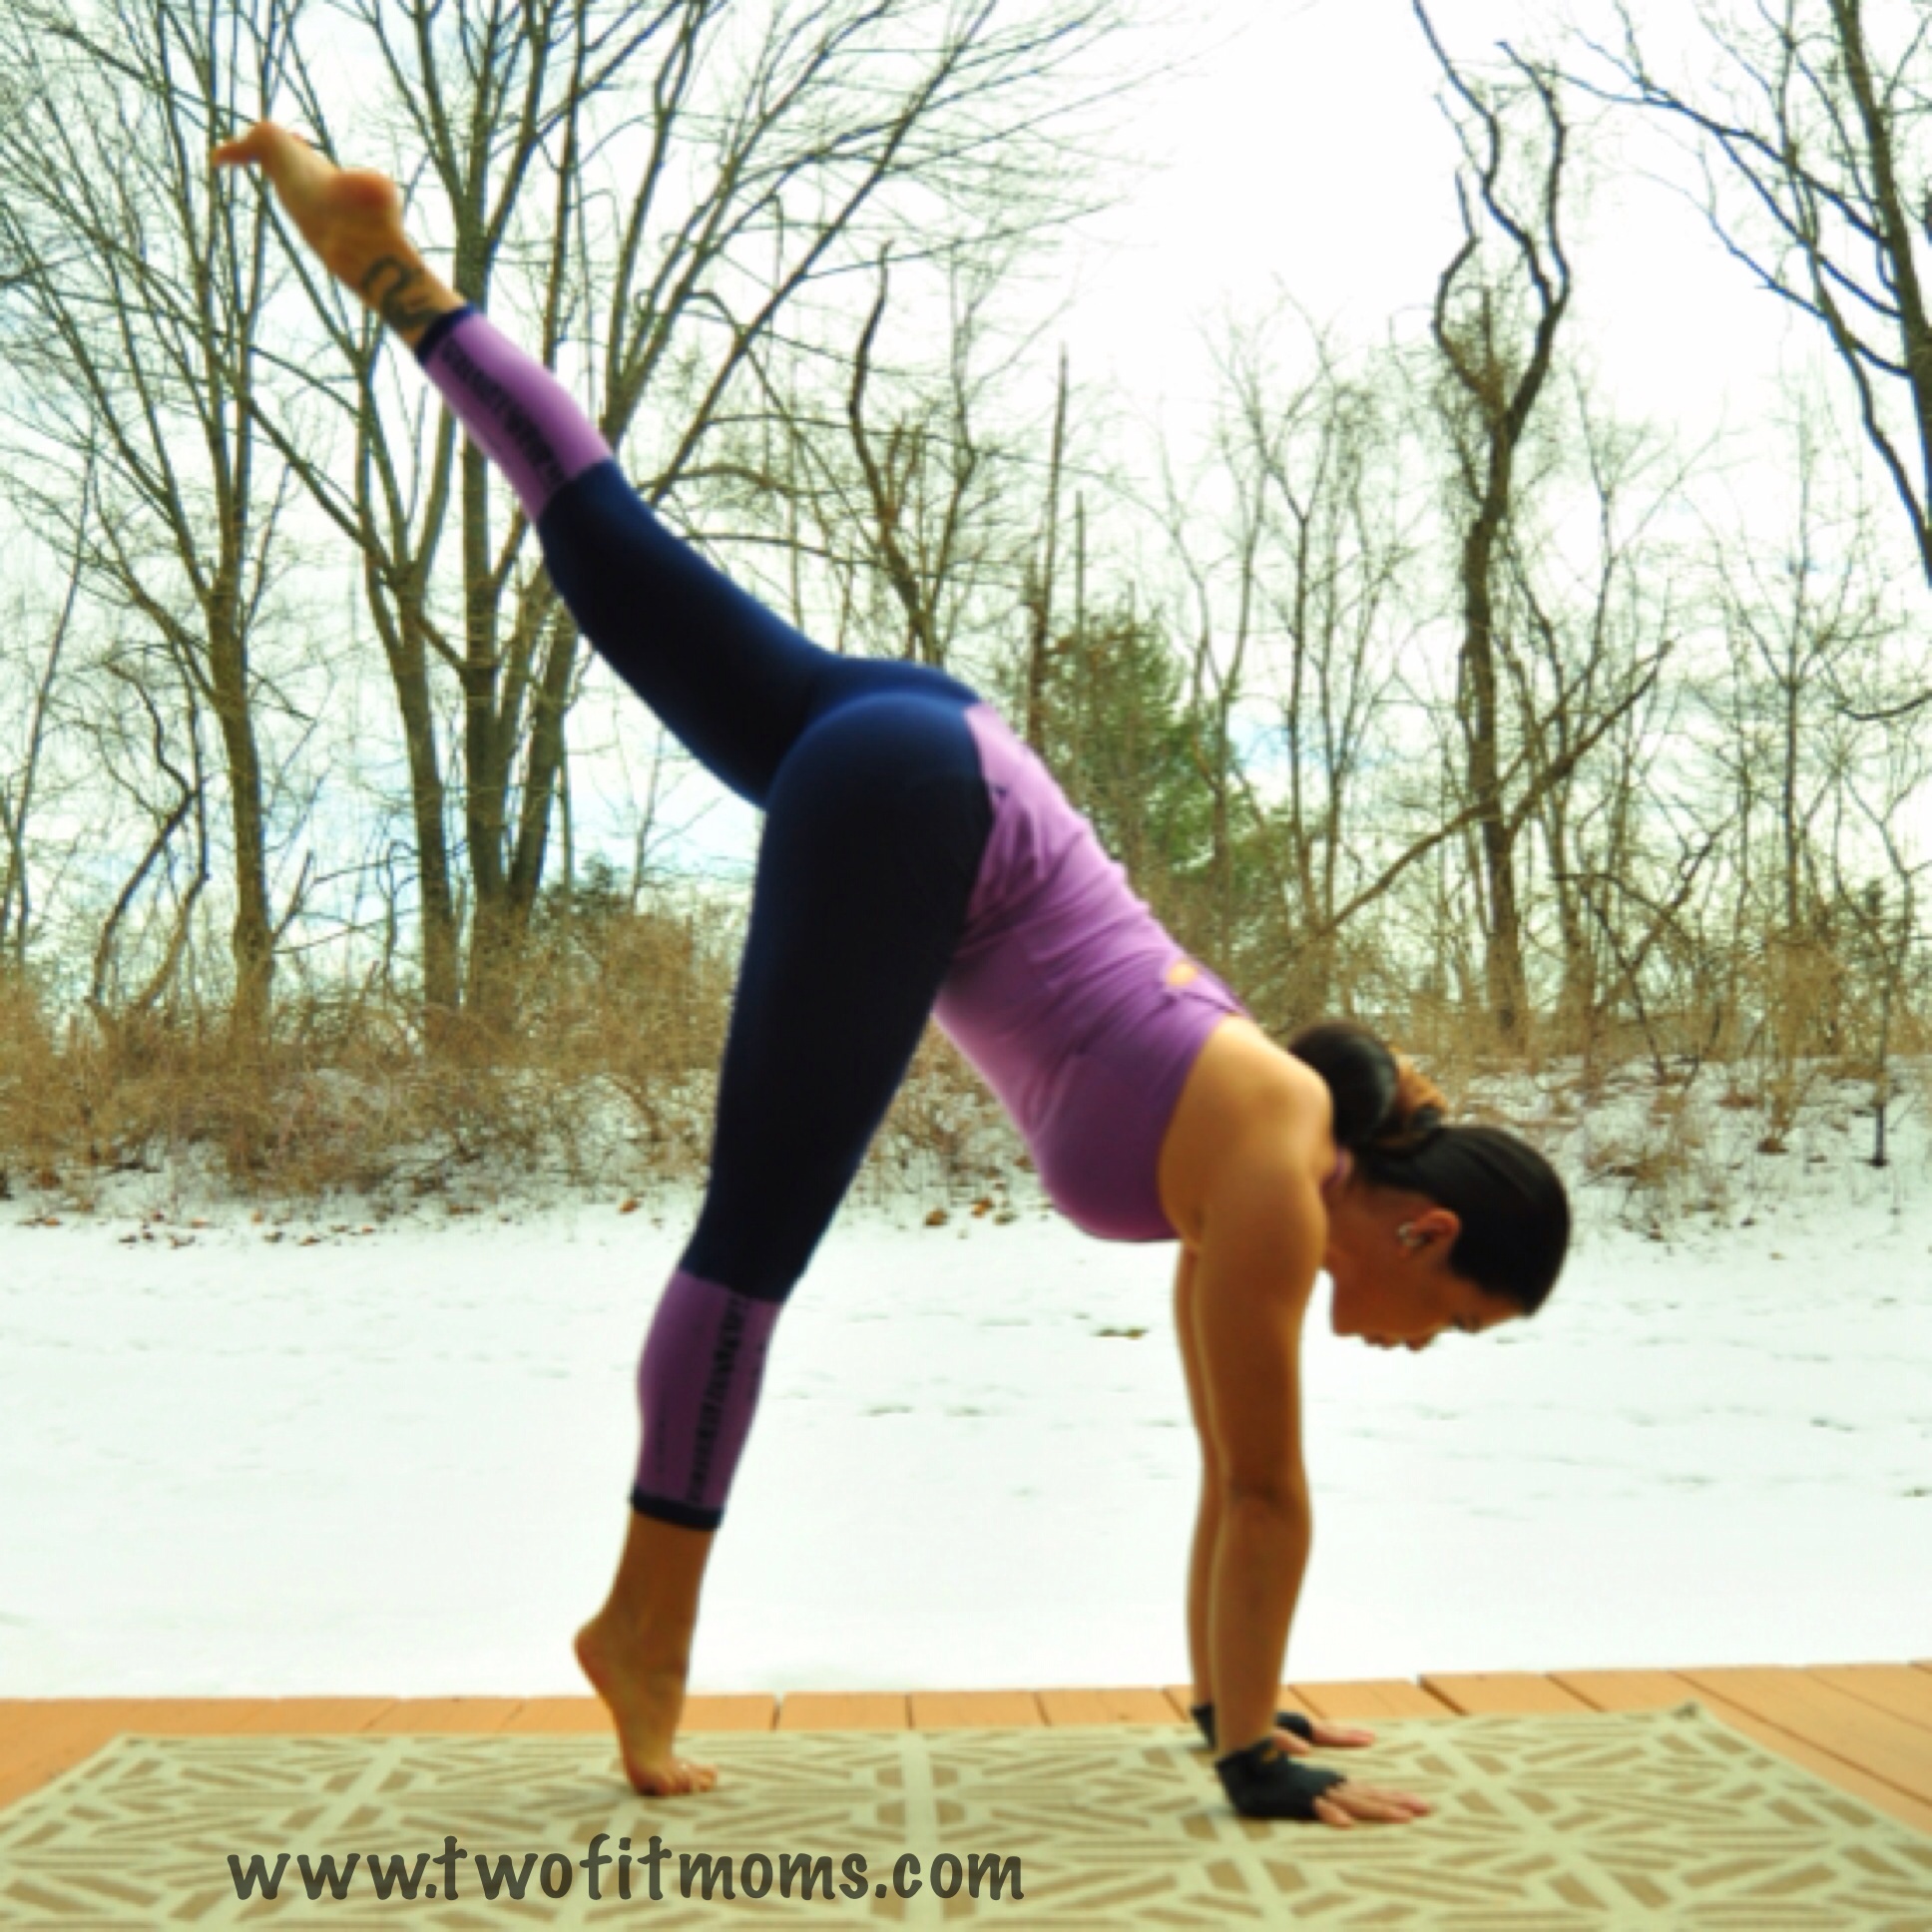
    Only when you are ready, you can start to play with lifting one leg actively into the air. Keep the hips square towards the wall and the inner thigh rolling in.  A great way to practice this is by keeping the lifted foot flexed.  Are your toes still pointing toward the wall?  Always keep one foot solidly pressing into the wall.


    Step 8: Relax and do a happy dance!

    Congratulations! You did it! Remember… everyone’s practice is unique and progresses at a different pace. Do not compare yourself to others.  Your practice is YOUR own.

    XOXO

    Blog Signature