
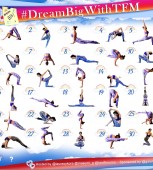
 I still remember the first time I saw a photo of standing mermaid pose. I was scrolling through my Instagram feed, and I paused to look at this interesting posture. It appeared to be some kind of dancer pose variation, but I had never seen anything like it before. I had to try it!
If only I had a video of what followed. What a disaster. Without any instruction, I had absolutely no idea how to get my foot lifted into the air and into the inner elbow crease of my arm. I tied a strap around my foot and did all sorts of crazy moves to see if I could raise my foot into the proper position. Ultimately, I gave up on my strap and realized that it was a much simpler process than I thought. In order to save you some time and aggravation, I will walk you through each step of getting into standing mermaid pose.
Please keep in mind that mermaid poses of any kind are binding poses. The fingertips of both hands clasp (or bind) together, resulting in a deeper stretch than if the hands remained apart. The purpose of a bind is to intensify a stretch and deepen a posture. In a mermaid bind, your chest, back and shoulders will feel the intensity of the stretch. If you do not have a strong backbend practice, you should consider modifying your mermaid pose by skipping the bind altogether and focusing on keeping the top of your foot pressed into the crook of your arm. Once you improve your flexibility and notice some progression in your backbends, you can re-visit the bind.
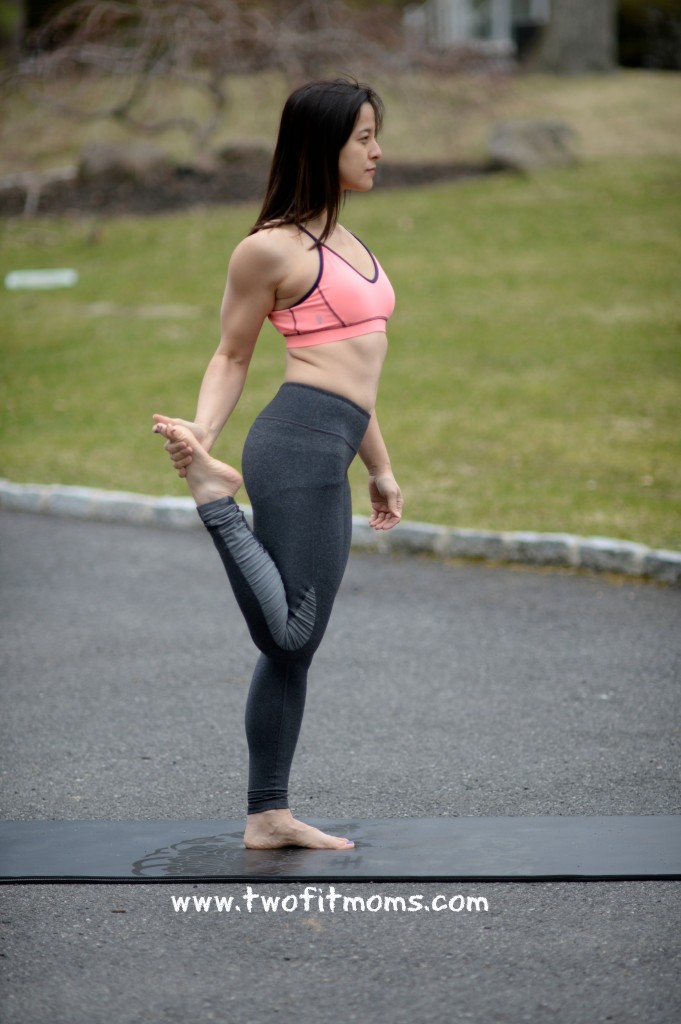
Step 1
Begin to shift your weight into your left foot. Bend your right knee, and reach back with your right hand, palm facing up. Place the top of your foot into the palm of your hand.
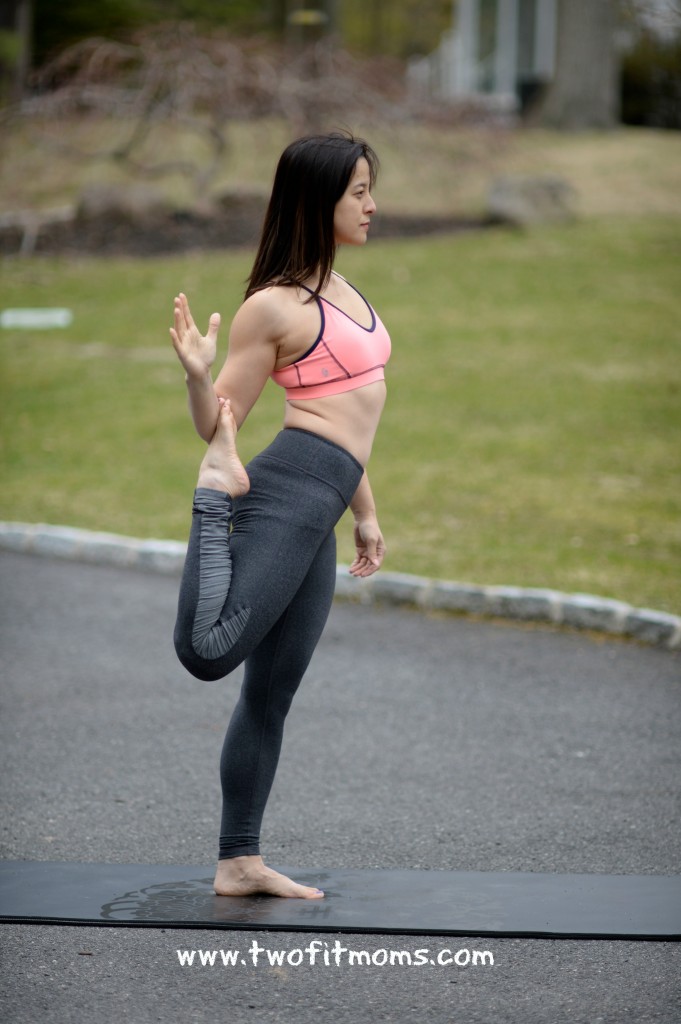
Step 2
Begin to slide the top of your foot down the length of your forearm until the top of your foot is sitting in the inner elbow crease of your arm.
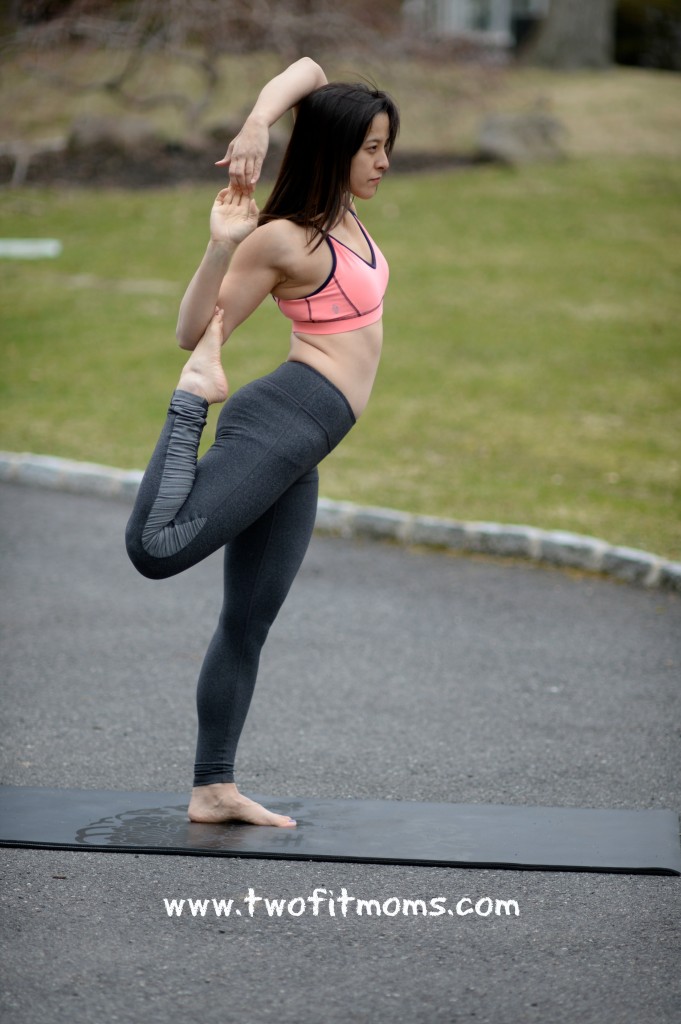
Step 3
Extend your left arm up toward the sky, bend your elbow, and see if your fingertips can clasp. If you feel any discomfort in your back, stop at this point.
Step 4
Begin to press the top of your foot into the crease of your arm and lift your leg higher as you lean your torso forward to maintain your balance.


Thank you so much for your detailed instruction. I am new to yoga but excited to learn all I can. I am really excited to try this pose and to work toward perfecting it. Thank you again for all you do.
I hope you found success in your attempt to do this pose!
Hi. I just want to ask if you can give me advice on how to do king pigeon pose and how to practice back bend. My goal this year is to be able to touch my feet with my head. Thank you. I hope to hear from you.
The trick is to not just work on back flexibility but to also focus on opening up the entire front body—lots of stretches for the chest, shoulders, psoas, hip flexors and quadriceps!
Love it. Thanks!!
Thank you so much for the step wise instruction but I cant seem to achieve the second step at all my foot does not slide at all.Any suggestions ?
Rather than sliding your foot, can you gently place the foot into the crook of your arm?